When you click on links to various merchants on this site and make a purchase, this can result in this site earning a commission. Affiliate programs and affiliations include, but are not limited to, the eBay Partner Network.
i'm not sure if it's been covered in depth with pics of internals so here it goes..
After some research on the exterior door handle issue where over time a film builds up on the switch, i took both of mine apart and thought enough to take a few pics to show DIY'ers that it's something anyone with 10 (maybe less lol) fingers can do and save a few bucks.. As well as tackle on a day when they get the human urge to repair something on their c6 lol
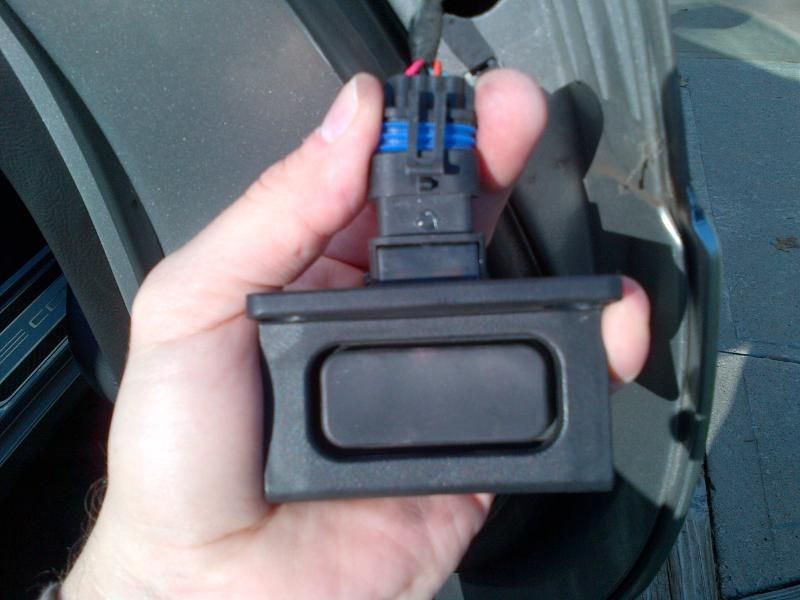
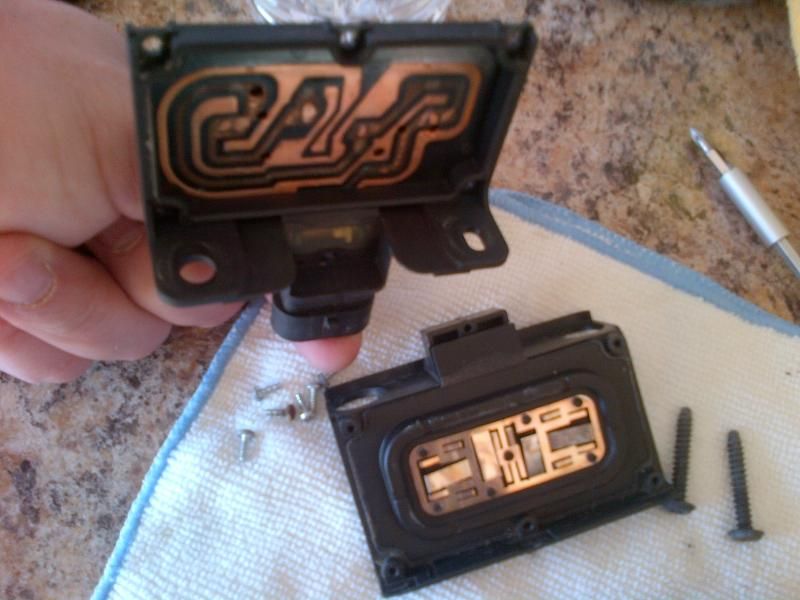
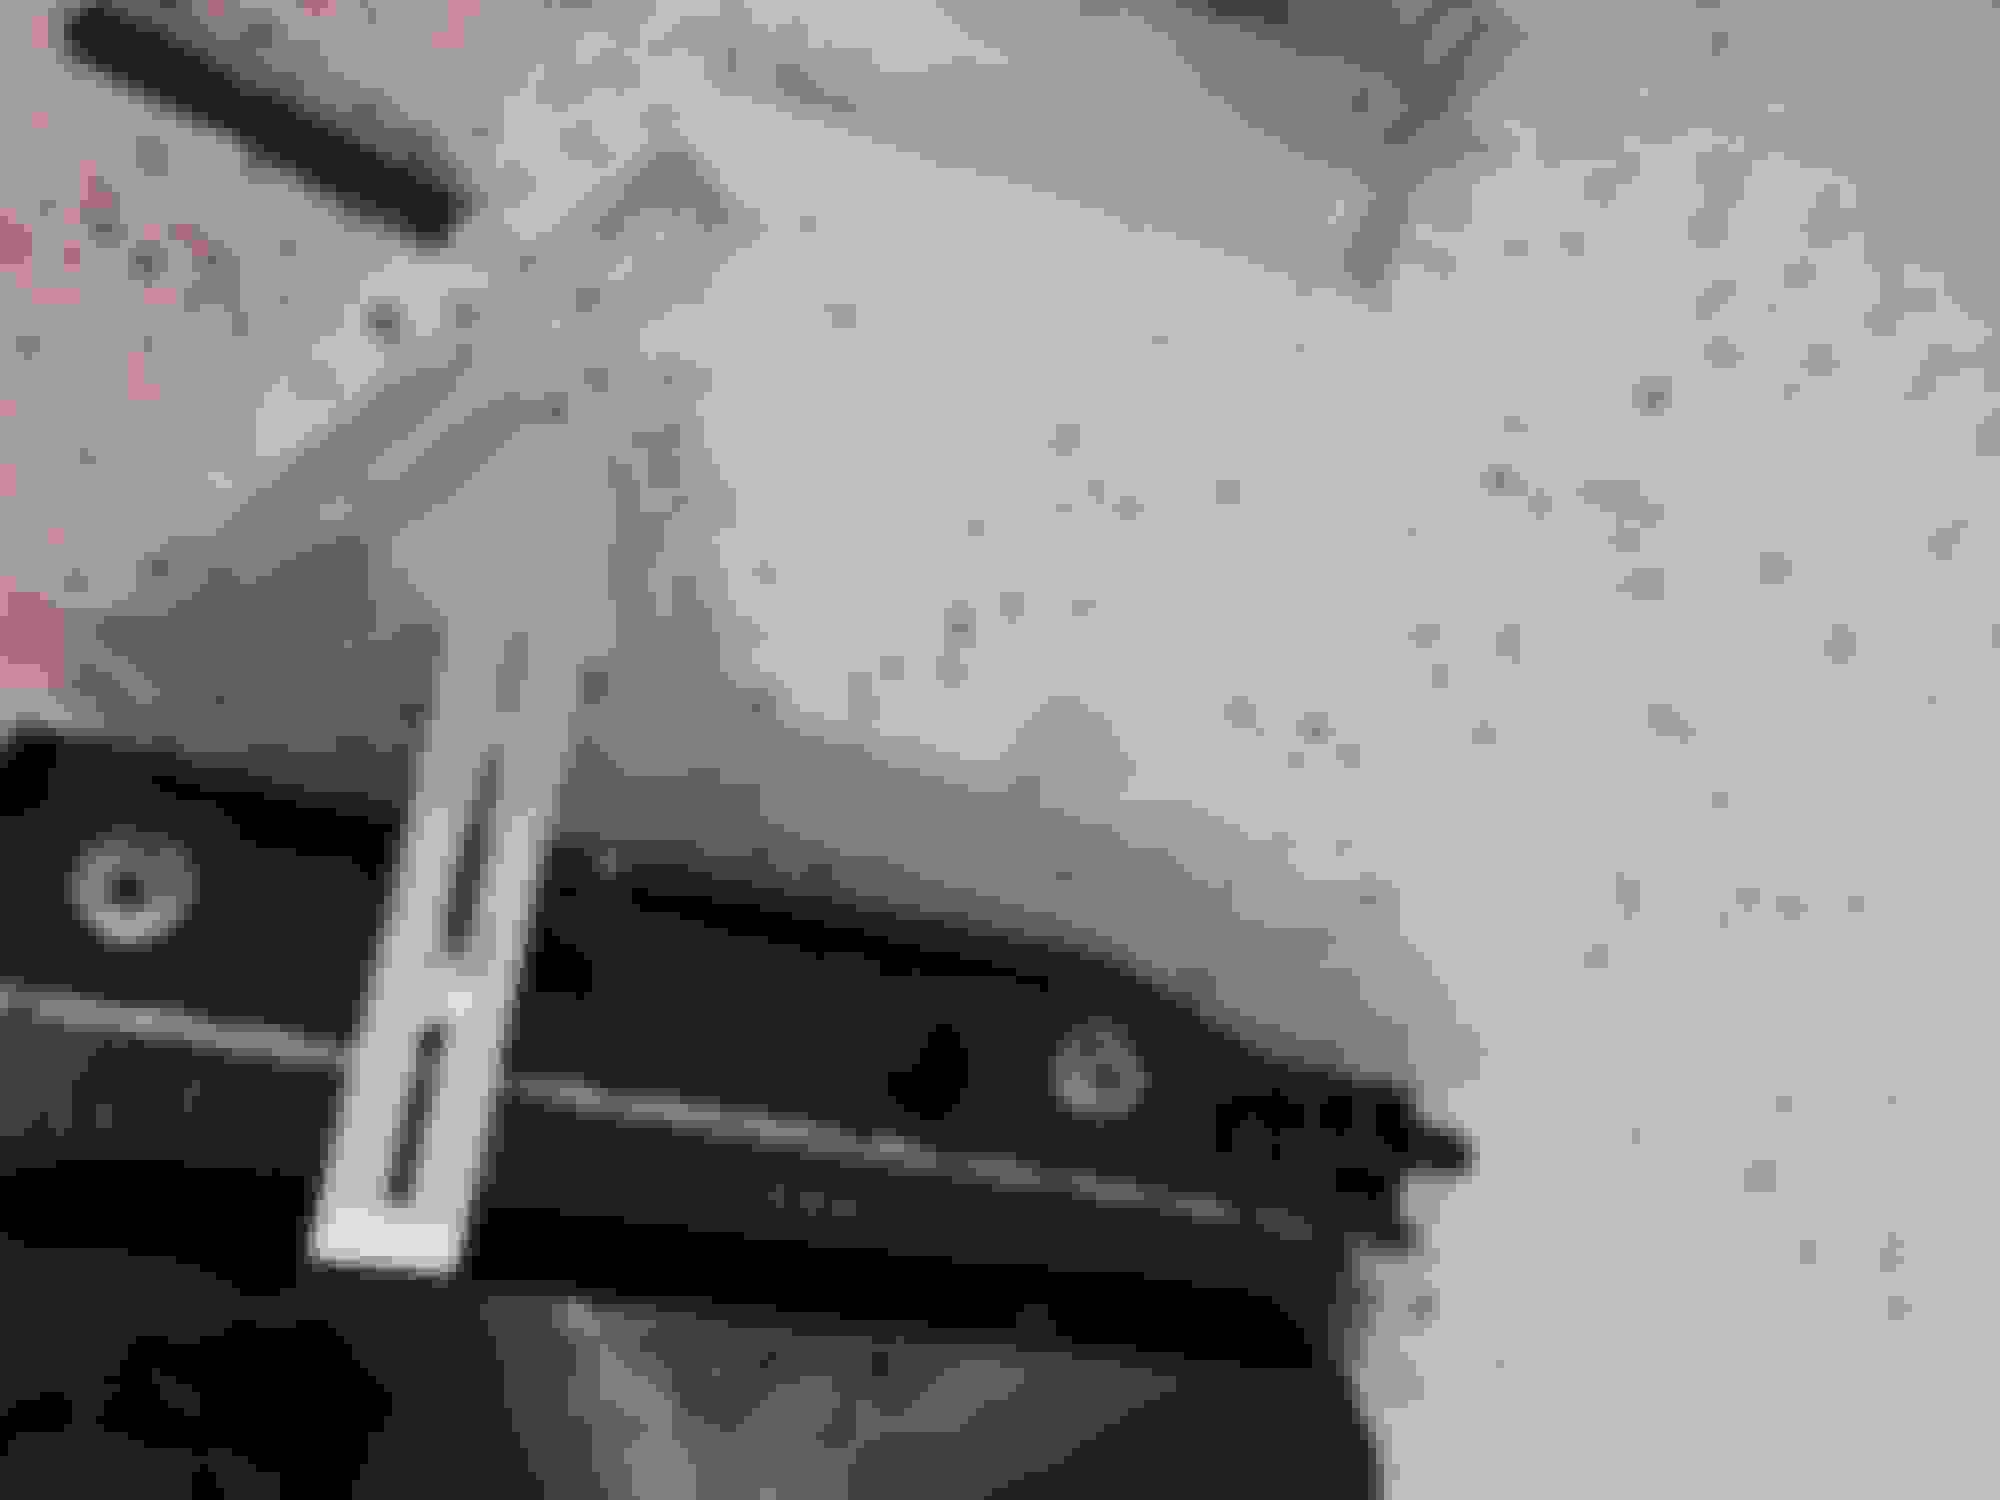
when you pull the two black screws from the handle this is what you will have.. so once the screws are out just carefully slide the handle/switch assembly off.
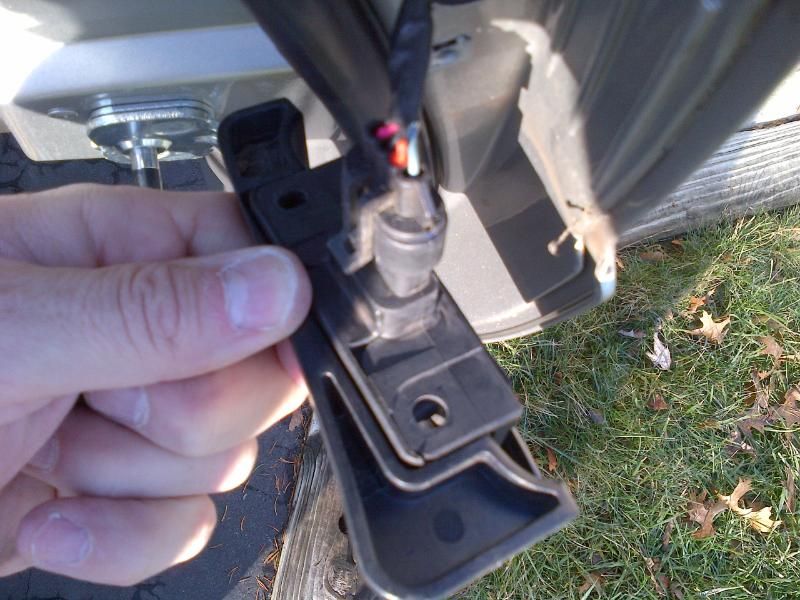
broken down on the bench in the garage.. simple so far...
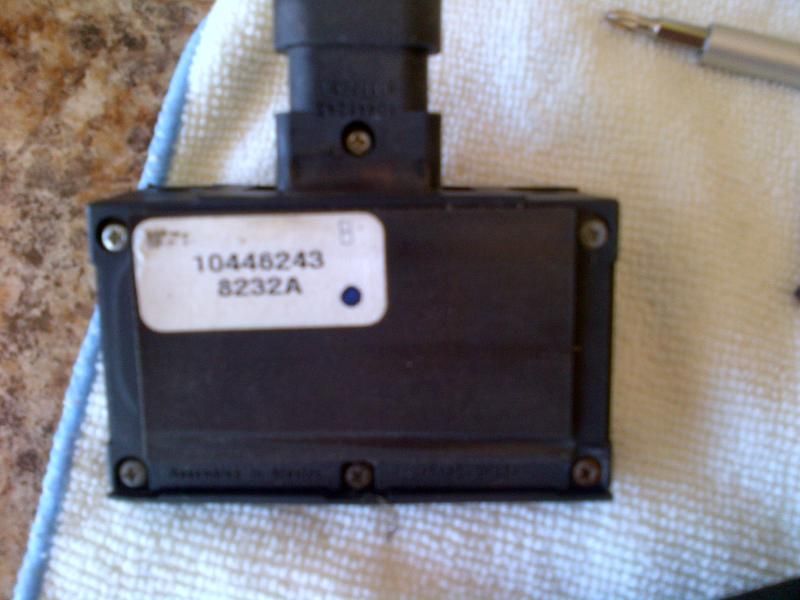
back of the switch itself. you have to use a precision screwdriver and remove all the screws.. very simple.
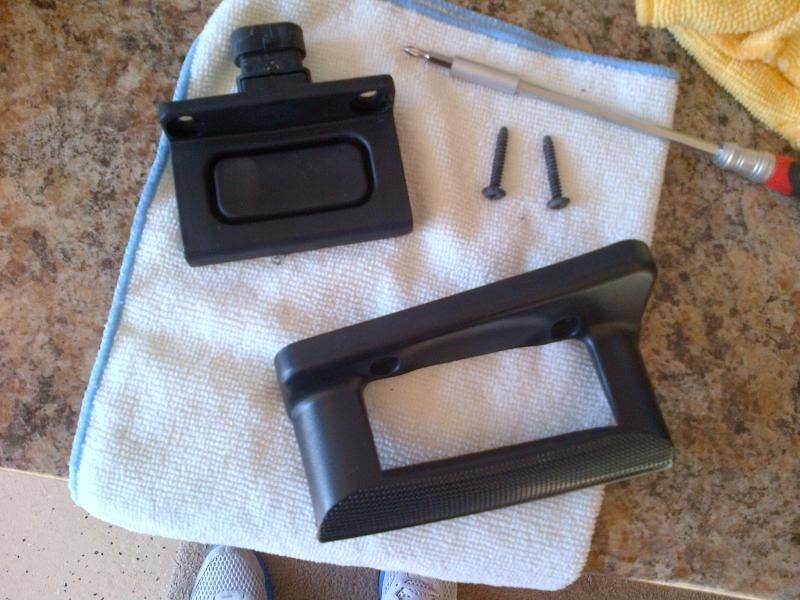
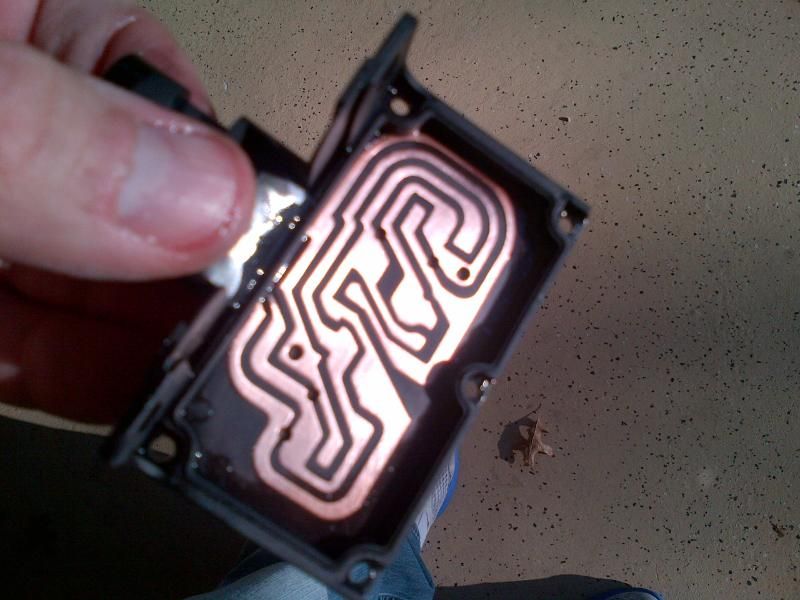
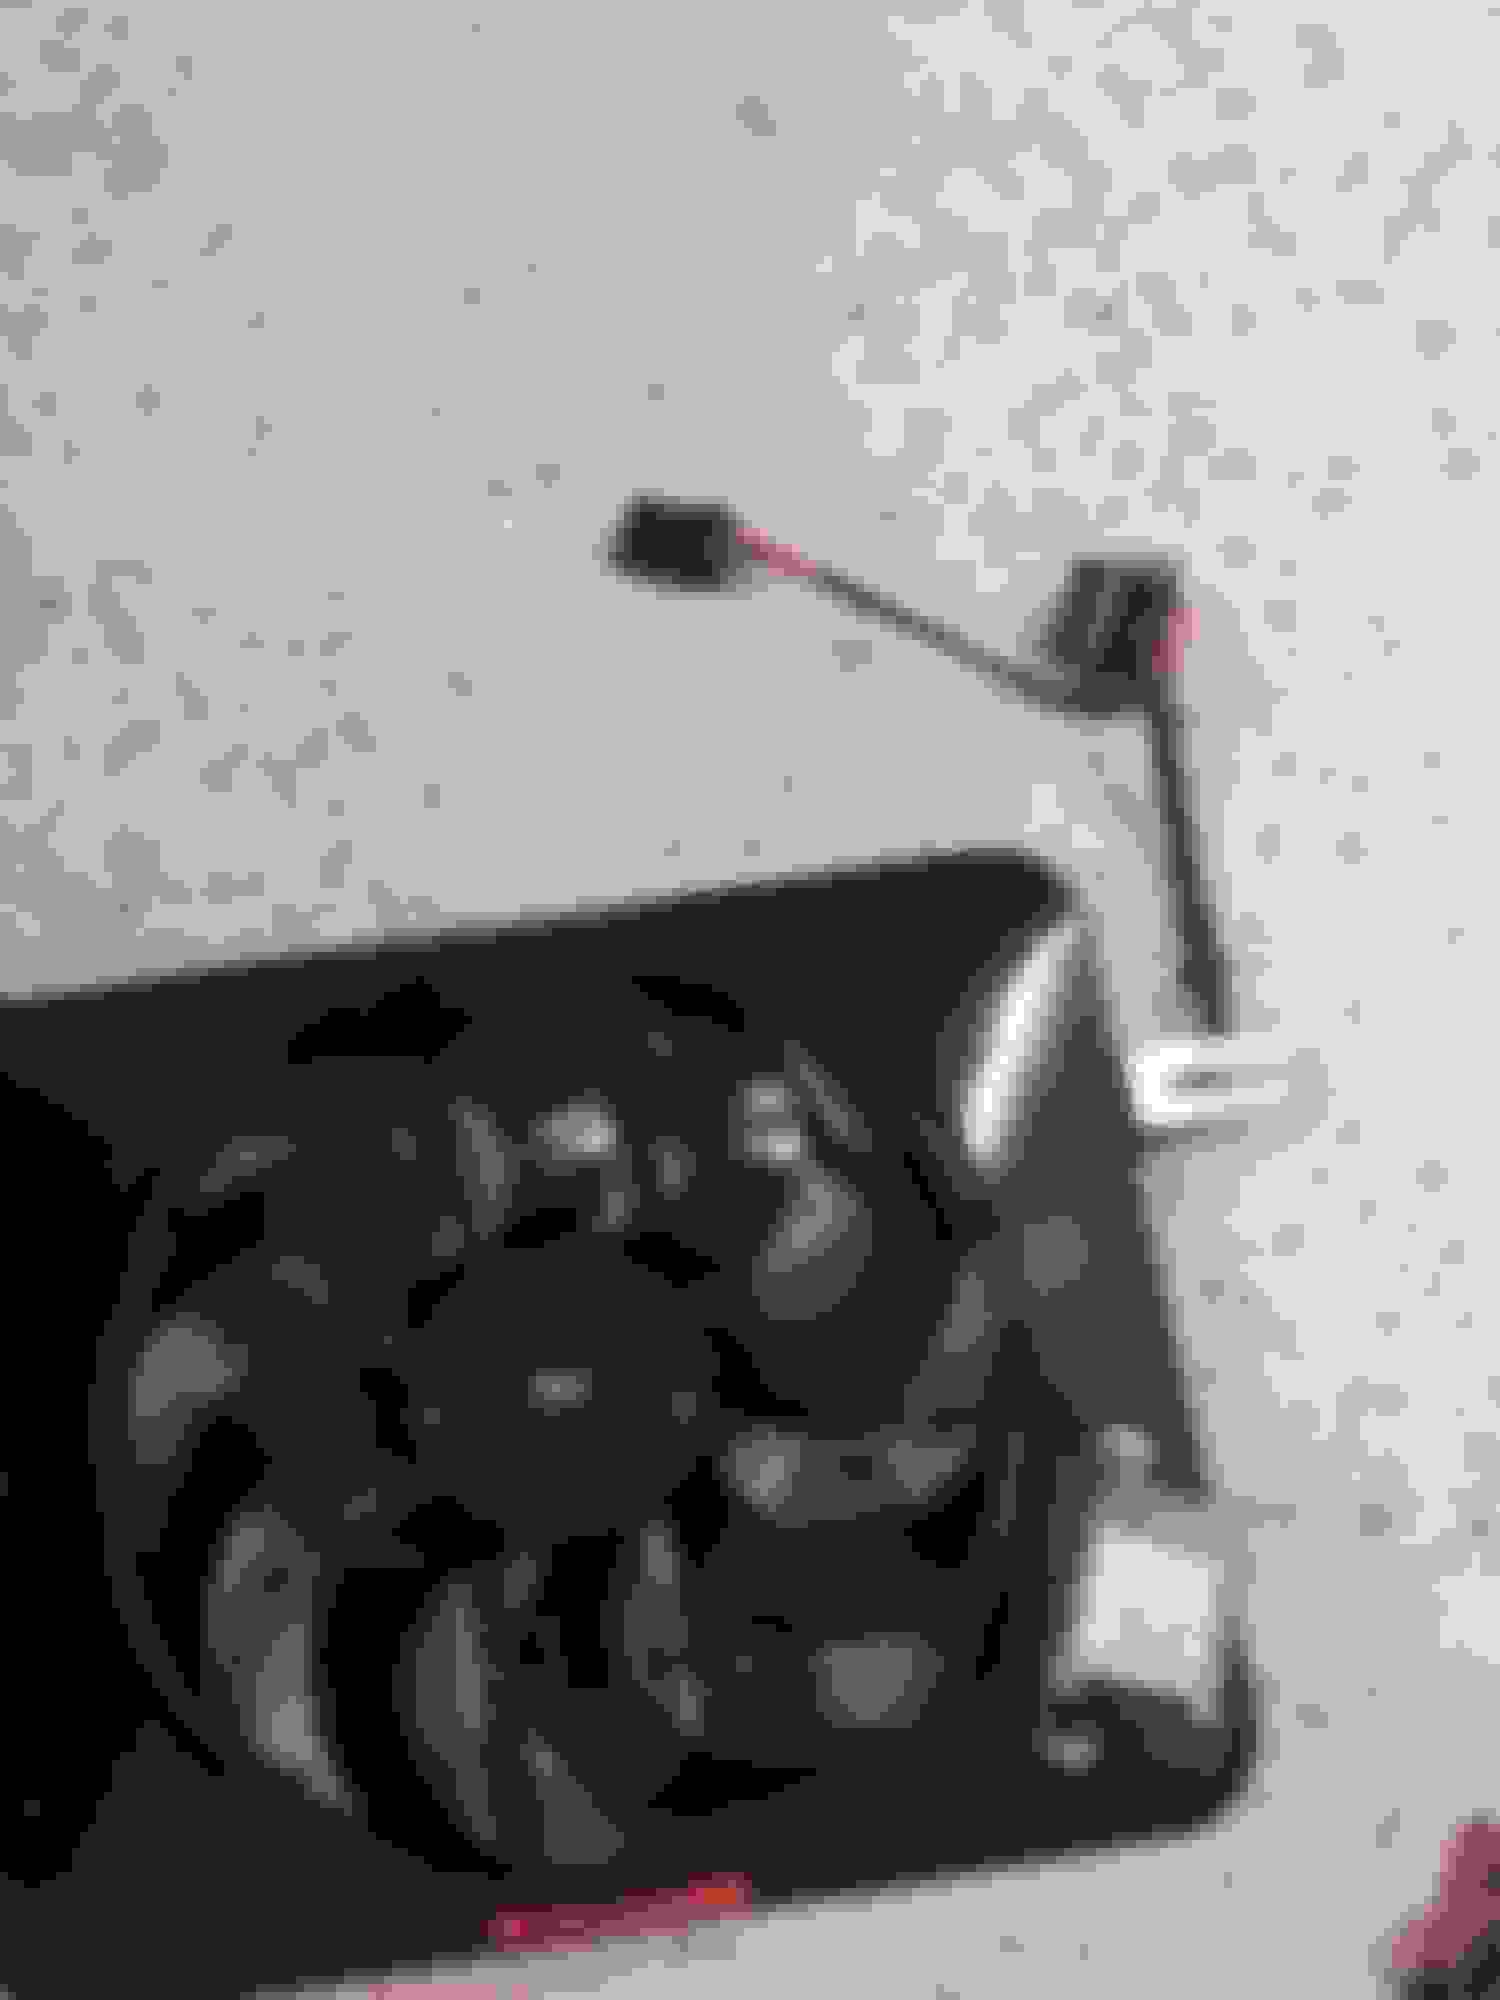
this is the switch apart. when you pull the screws out it just comes right apart..
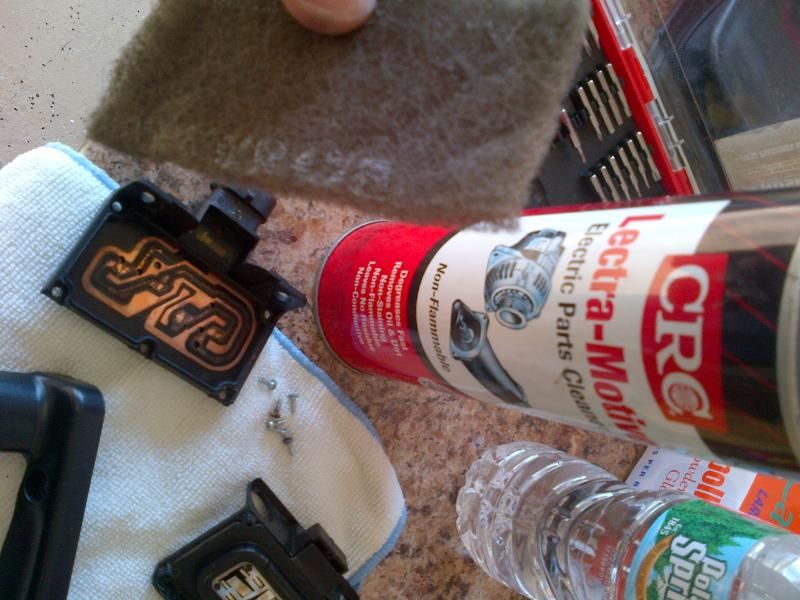
here's what i used... electric parts cleaner and a 000 steel wool pad.
scrubbing the ends of the bent out metal tabs with a little electric parts cleaner and the steel wool took all of 30 seconds and they were perfectly clean
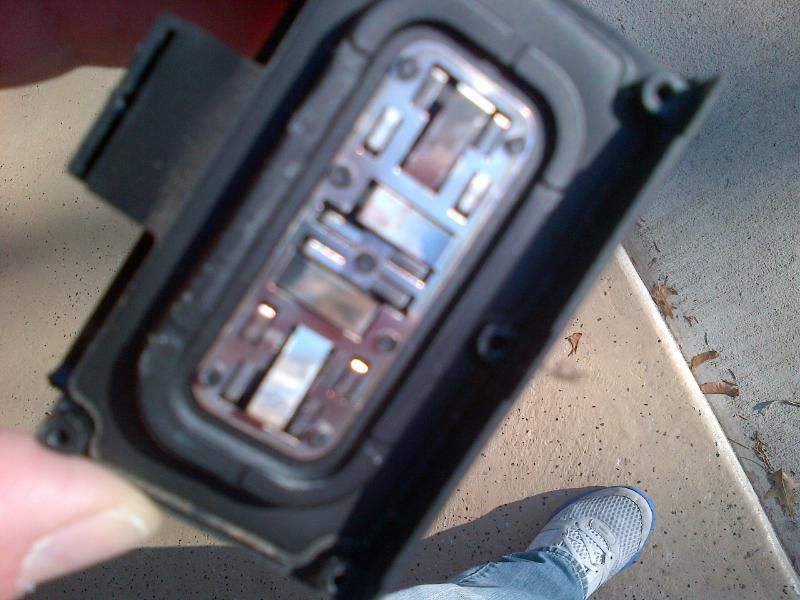
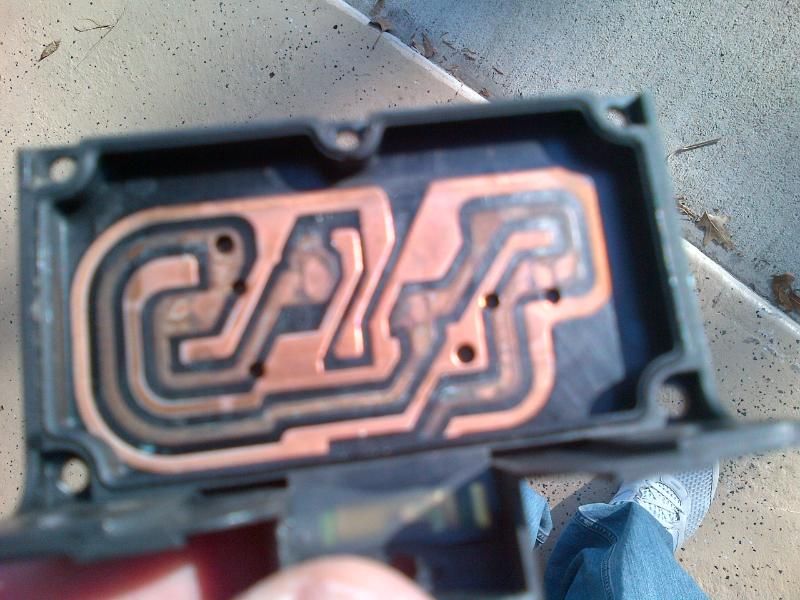
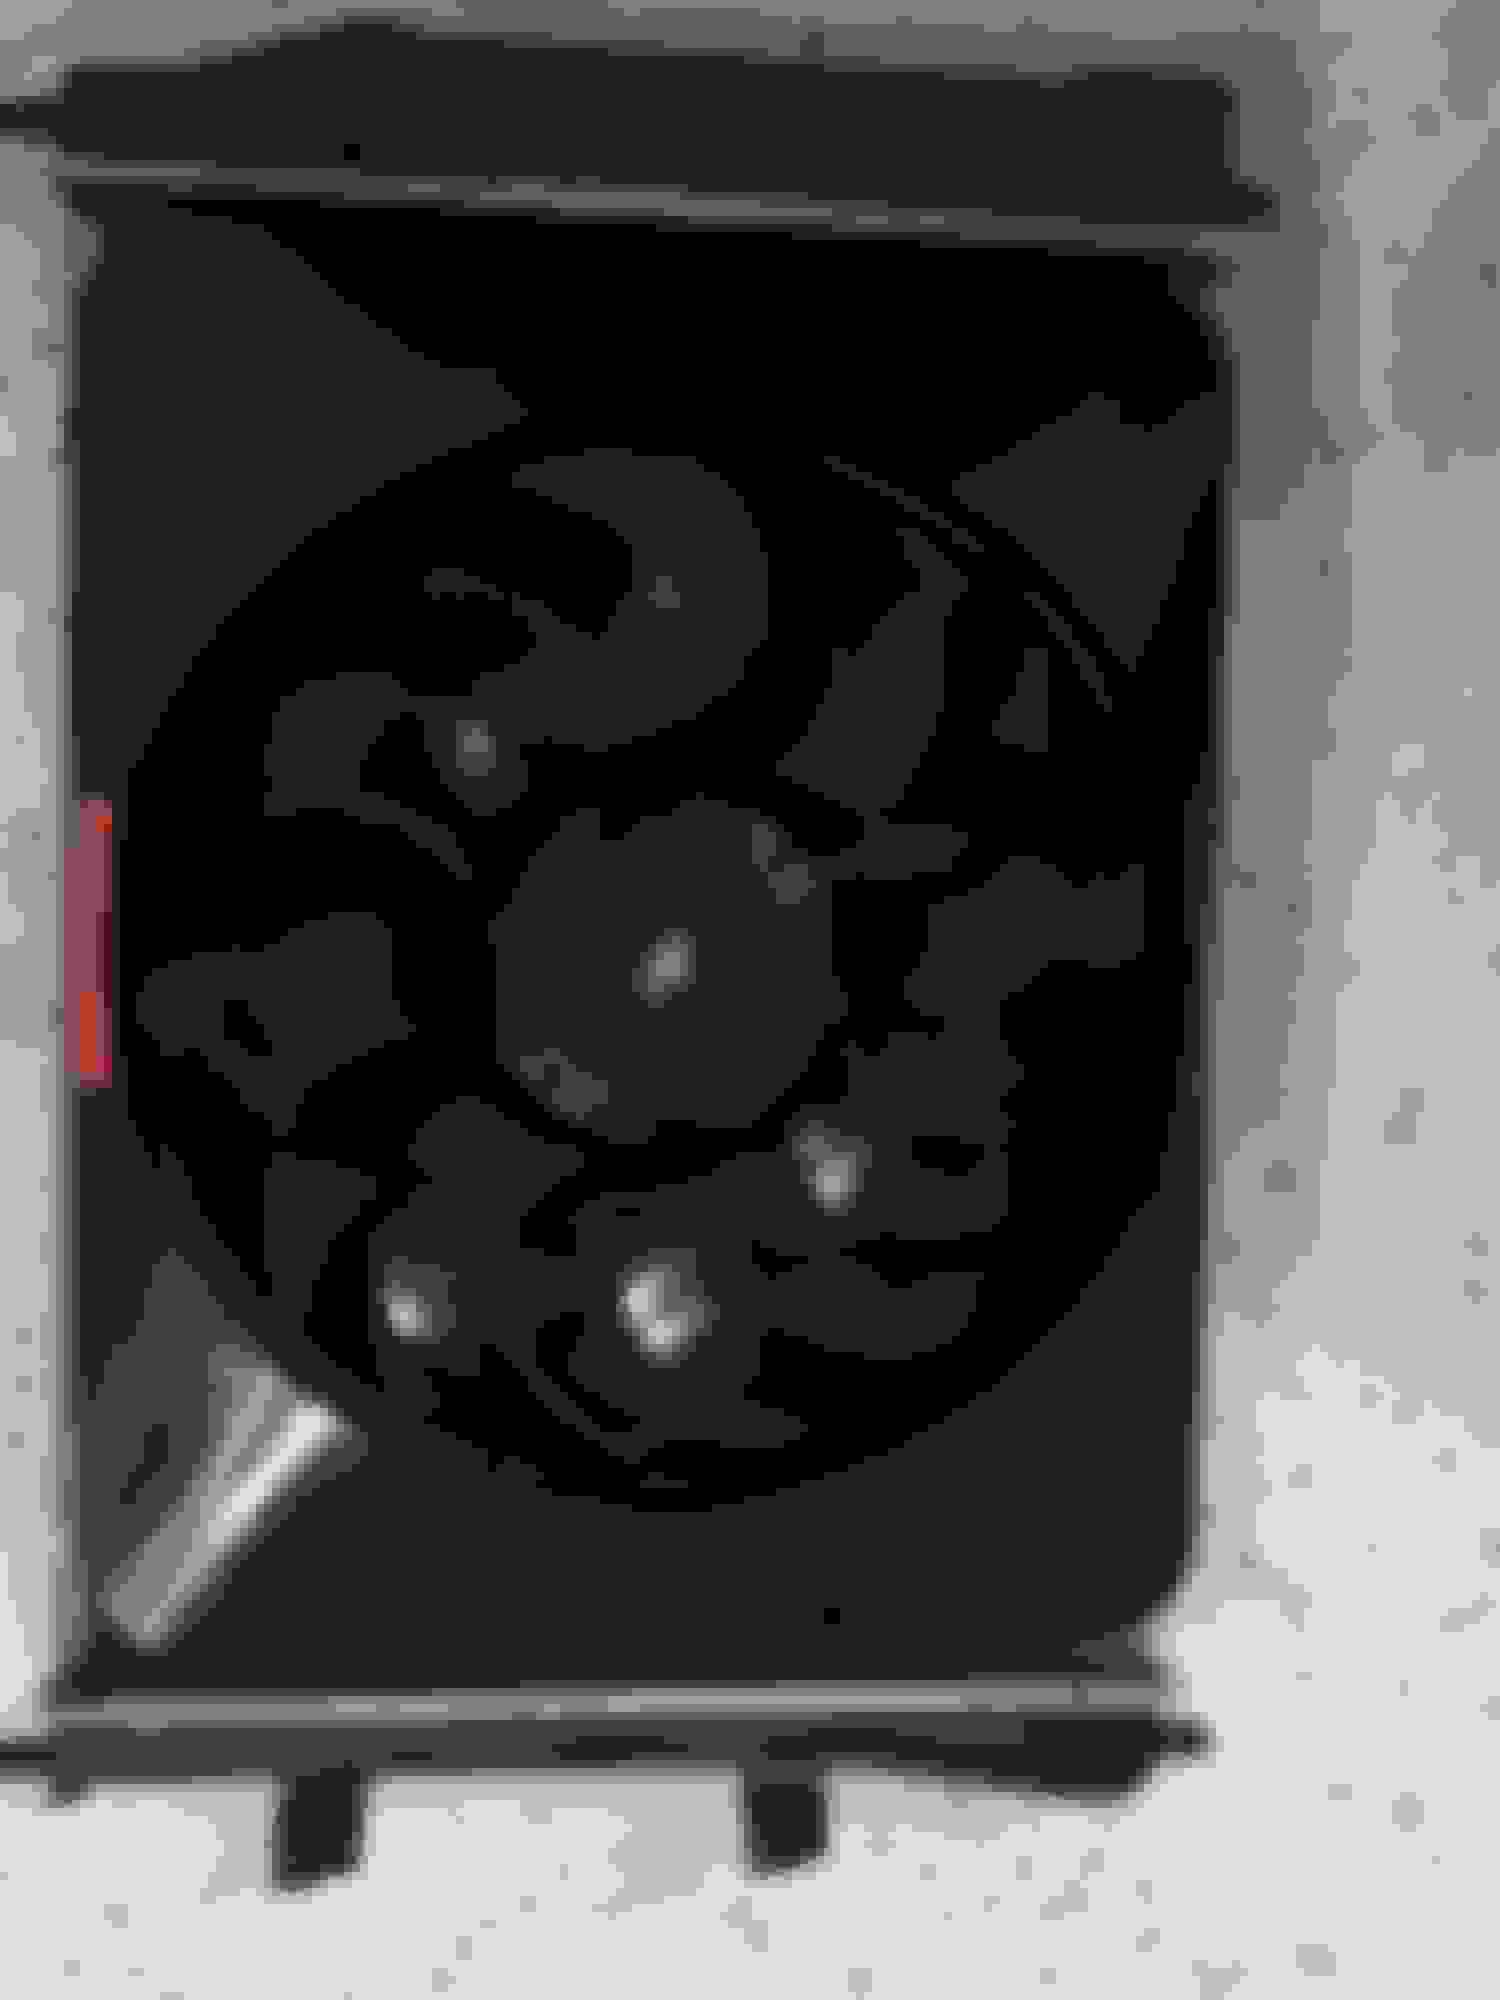
here is what the switch board looks like... man was it old looking and tarnished..
scrub scrub scrub.. with the 000 steel wool you can scrub away without fear of tearing through the board.. just removed the buildup and left me with this
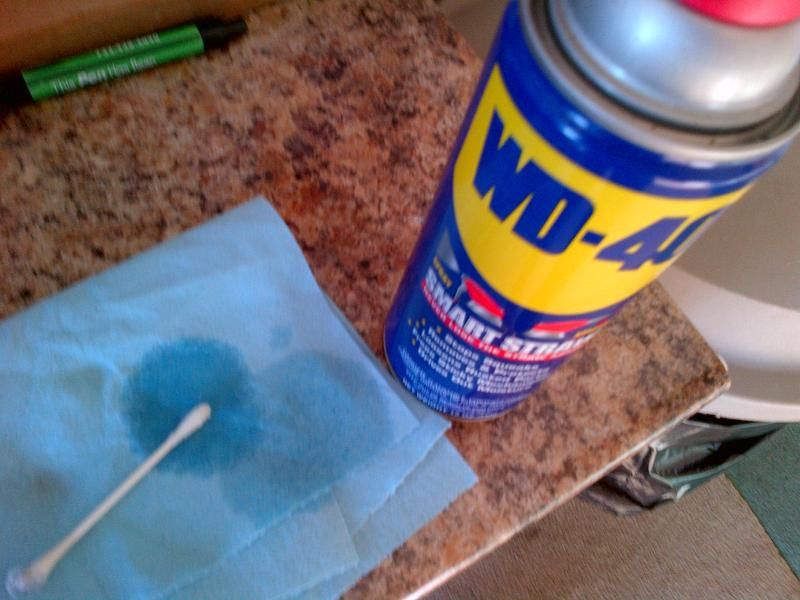
i also used a q-tip and some wd40 to coat the board and switch to prevent future corrosion.. optional for all (or you can use some of that electric grease they sell)
back in the car and you're good to go.. this is my first corvette.. i hope to contribute to the board as i have to replace a bunch of things to bring this car up to my standards.. whatever i do not see on here i will try to take pics as i go.. love this car.
GROAN!!!! I have been enjoying my 09 Cyber Z way too much to keep up with the DIY threads. Who has the quick in and outs of getting rid of the gravel and sand boulders now stuck behind my rocker panels, AND not letting them get there again? I vaguely remember something a couple of years ago... a couple of loose bolts, some house hold door insulation.
No special tools: 1/4 drive, 3/8 drive. 9/16 socket, 3 inch ext, 6 inch ext, 8mm allen key, 8mm allen key socket, 4mm allen key, and i think a 5/8 wrench for the lower compressor tensioner to push it up
Car must be jacked at least 4 notches on stands.
First had to remove blower belt, everyone knows that one tho, 9/16 on tensioner bolt then 1/4 slide it upward motion to relieve all tension.
Then go under car and flip off blower belt u must use HE-MAN strength from under if you are like me and done have a huge 3/8 drive to move that tensioner.
Once thats done you must go to ps/alt side and remove that belt. Thats where u use 8mm on the big silver tensioner just enough to loosen it so the long tension bolt can move it up and down. From there u take the 4mm (dont quote me i think it was 4mm) allen key and loosen tensioner fully.
Go back under car and loosen belt off ribs and remove it from bottom pulley.
Now for getting to ac compressor u need to remove the OEM tensioner first with 9/16 socket and beast it off. Then remove top bolt off OD bracket of Flip that has a spacer which runs below top of belt. Once u got that bolt off u simply slide off spacer and bam you can change out the compressor belt. Lol
From there its all in reverse and u just need to make sure u rib the ac to back 4 ribs (closest to engine) on OD pulley toward the ps side.
NOTE: It would be great if u had a helper especially when putting back on blower but with Army Strong strength ull be ok. Ill try to provide better pictorials later but i think this write up is easy enough to understand.
I posted this DIY as hoping to help someone tackle this in the future. I didnt have any instructions and didnt see any here on forum.
If your 4 rib belt looks like the below(weak link on system IMO). Ur fkd.. Lol hard labor must commence..
Here is PS/Alt pulley side where you need the 8mm to loosen tensioner, the top bolt is what pushes tensioner down so u loosen this bolt fully. You remove both other 8mm allen bolts that hold bracket to alt if changing belt. If not changing belt it isnt necessary to remove bracket.
Here is what it looks like underneath car when viewing from below notice it may look big in the pic but there is NO space for arms just a WARNING.
This is what i did to remove blower belt; from below fully extend GM tensioner upward then slowly remove belt if it isnt damaged. My blower belt was damaged a little so i replaced it.
This is part number from ecs flip kit ac 4 rib belt but do NOT use this same part # because it is way too tight and prob why mine snapped.
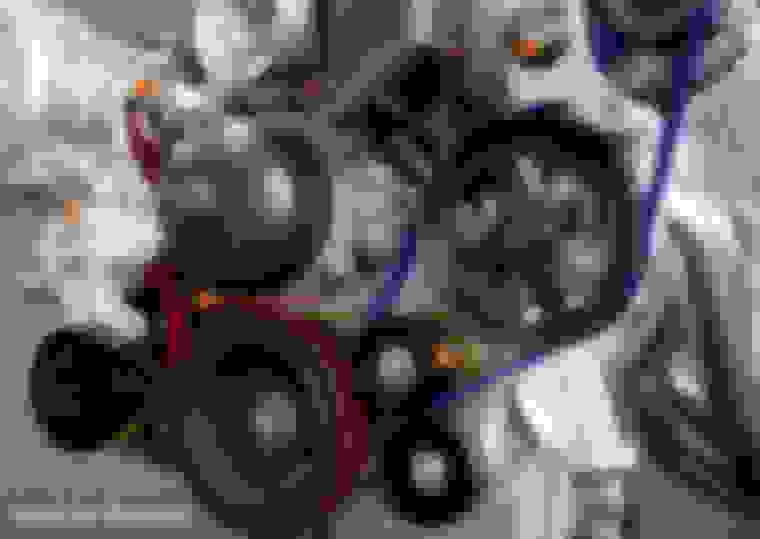
Bottom pulley is ac compressor, middle is tensioner, top is crank. Do not mind the belt routing there because thats how it looked snapped. However you can see the GM tensioner to the left of ac comp tensioner that MUST be removed and spacer is right above black middle tensioner there.
GM tensioner u must remove in pic. This is same tensioner u need to pry up in the end to put belt back on blower.
This is what it should look like once removed GM tensioner.
This is FLIP pulley which i recommend as the last pulley to push on the 4 rib when routing it because its easiest to get to. You will need to FULLY extend ac tensioner up in order to get the belt over that pulley at all. *if not on a lift use a pry bar on tensioner or 5/8 in your shoulder like you would place the butt of an M16 in your arm or Shotgun. Trust me all hands on deck fully engaged if your alone. I literally pryed up tensioner max then placed in my shoulder holding it while i tried to route belt. Was prob 2 most PITA. If u have a buddy can use the 5/8 to extend while u put on.
This is what you need to do by prying up while trying to flip belt on ribs, this vid is on a lift by FSP
NOTE: not as easy while under car prying and extending belt over ribs alone.
This is what ps/alt side looks like when u remove the tension and pull off the flip pulley part of belt. U can see how belt is routed here and all thats left is popping it over the lower flip pulley on the outer 6 ribs toward bumper. U can see here its VERY tight if trying to remove belt u need a special 8mm allen key thats very short, maybe 1/4 inch length on one end so it doesnt hit those hard lines there.
This is when i got the GM tensioner and the od spacer OFF, above the ac compressor tensioner. The top bolt is off of that spacer and bottom bolt with huge washer is off the GM tensioner.
NOTE: once again DO NOT route the belt to the forward 4 ribs toward the bumper but slide to the back 4 toward ENGINE side. It looks aligned when ur face is only 6 inches from the belt but it is wrong and not aligned. Use back 4 ribs towards engine pls. U DO NOT wanna do this again it aint fun. Lol
I asked Matt to draw this amazing pictorial for me because my belt was already broken off pulleys and didnt know how it was routed lol
That was ac compressor 4 rib routing on flip car only. The other 2 belts i had memorized. Blower belt wraps pulley tensioner goes underneath then it wraps around GM tensioner and crank. Ps side wraps Alt and belt under tensioner fully extended down 4mm allen tension bar. And around ps pulley and flip pulley which has 6 ribs both sides for alt/ps & compressor
Once done enjoy new belts..
The pic here is NOT of an ECS system this is a procharger but the only diff is the ECS doesnt have the lower crank/ac tensioner pulley on lower right (next to bracket that says Hormilla) under the ac condenser/ps pulley. The second difference is the most upper left (marked by orange dot) tensioner is not what we have on ECS kit (only procharger has attached that huge tensioner to the blower). Youll have the GM tensioner as pictured above.
i'm not sure if it's been covered in depth with pics of internals so here it goes..
After some research on the exterior door handle issue where over time a film builds up on the switch, i took both of mine apart and thought enough to take a few pics to show DIY'ers that it's something anyone with 10 (maybe less lol) fingers can do and save a few bucks.. As well as tackle on a day when they get the human urge to repair something on their c6 lol
when you pull the two black screws from the handle this is what you will have.. so once the screws are out just carefully slide the handle/switch assembly off.
broken down on the bench in the garage.. simple so far...
back of the switch itself. you have to use a precision screwdriver and remove all the screws.. very simple.
this is the switch apart. when you pull the screws out it just comes right apart..
here's what i used... electric parts cleaner and a 000 steel wool pad.
scrubbing the ends of the bent out metal tabs with a little electric parts cleaner and the steel wool took all of 30 seconds and they were perfectly clean
here is what the switch board looks like... man was it old looking and tarnished..
scrub scrub scrub.. with the 000 steel wool you can scrub away without fear of tearing through the board.. just removed the buildup and left me with this
i also used a q-tip and some wd40 to coat the board and switch to prevent future corrosion.. optional for all (or you can use some of that electric grease they sell)
back in the car and you're good to go.. this is my first corvette.. i hope to contribute to the board as i have to replace a bunch of things to bring this car up to my standards.. whatever i do not see on here i will try to take pics as i go.. love this car.
I did this today EASY PEASY now I don't have to search for the sweet spot that opens the door This is on a Florida car never a problem with corrosion here with my other SW cars in the desert
Does anyone have a diy write up on a cam install for an ls3 Grandsport with dry sump.
I was wondering the same thing. (Just out of curiosity though) I'll leave it to a professional that also has a dyno w/extensive tuning & valvetrain knowledge.
Great thread. Would love to see a good thread posted on this.
I am currently removing my passenger side mirror on my 2007 c6 z06. There is a wire loom and a small (looks like single wire) that connect into the mirror housing and do not disconnect there, (unfortunate) I did find the wire loom disconnection points and have dealt with that. I have been unable to find the disconnect for the small wire. It goes through the door and I am unable to find where the door to car channel ends up. I tried removing the sill plate, as I believe that is where the wire is on the driver side (have not gotten there yet).But, with no luck, I did not find the wire and am unable to see the door to car channel. Can anyone post a picture or give a detailed description of where/how to disconnect the small wire? Its the only thing hold the mirror in place now. I have seen several mirror disconnect threads, but have yet to find anyone that addresses this wire. PS, I am not too great with wire diagrams. So if you post one, please explain. Thanks in advance to anyone who can help.

 01-12-2014, 04:19 PM


 I was wondering the same thing. (Just out of curiosity though) I'll leave it to a professional that also has a dyno w/extensive tuning & valvetrain knowledge.


