

 03-11-2015, 01:39 PM
Last edit by: IB Advertising
See related guides and technical advice from our community experts:
Browse all: Exterior How-Tos
- How to Replace Convertible Top
Step by step instructions for do-it-yourselfers.
Browse all: Exterior How-Tos

C6 HOW-TO INSTALL a convertible top. It's easy. Pics
01-15-2012, 04:41 PM
#1
Burning Brakes

Thread Starter

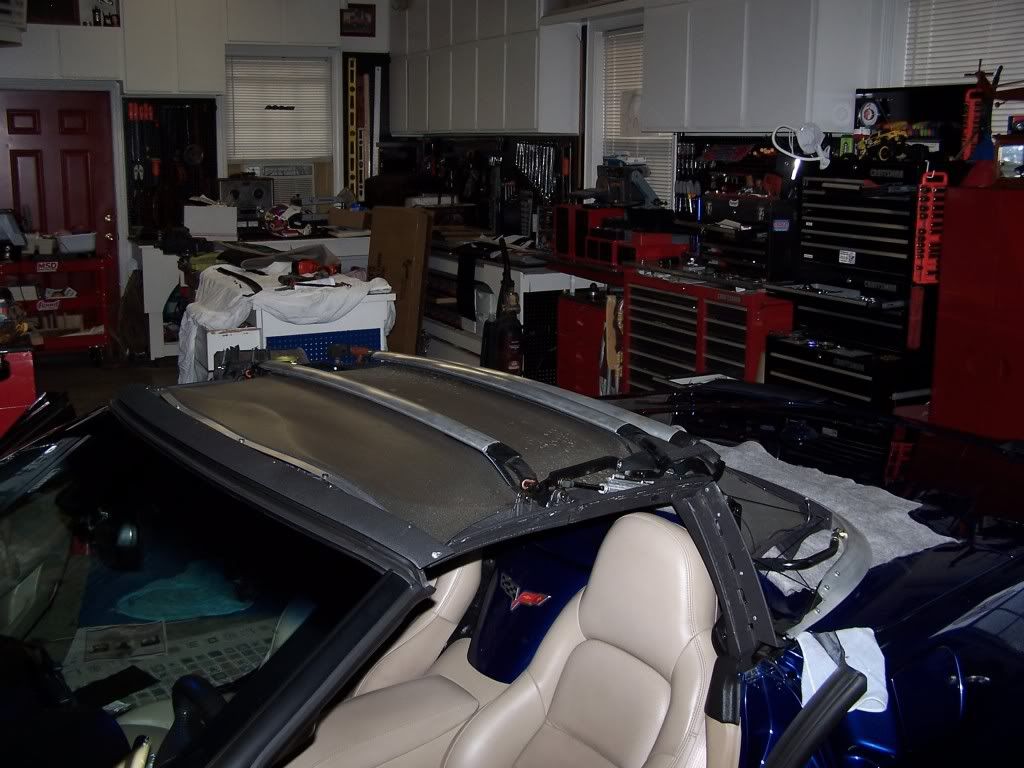
I changed my 2005 C6 convertible top and took a lot of pictures. Here is a HOW-TO INSTALL. It's easy.
THANKS RAYZZZ MY CORVETTE LIKES MY MONEY
This was the Tan top that was on my car but it was to dirty to get the stains out. So I replaced it.
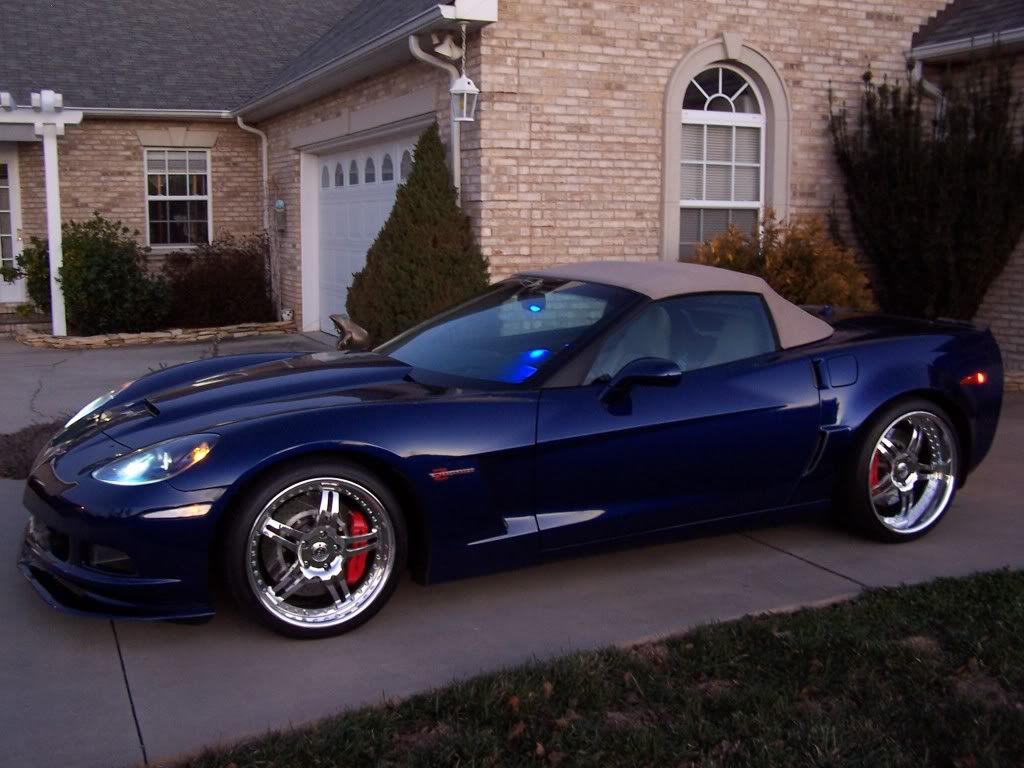
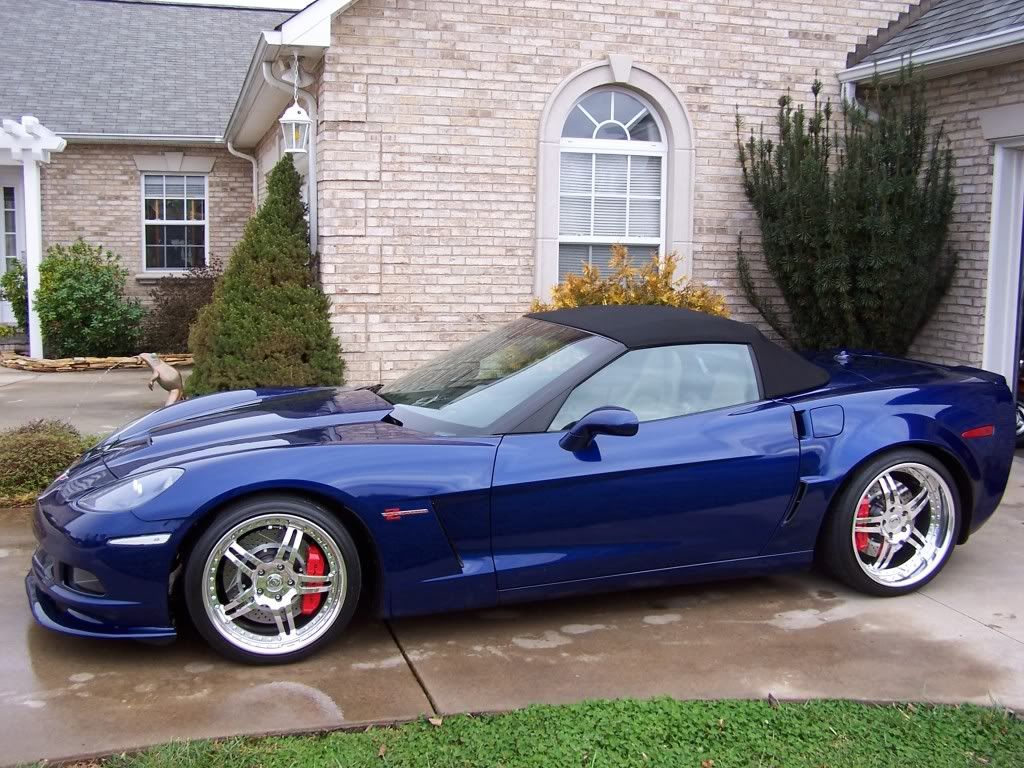
The Black one that I installed.
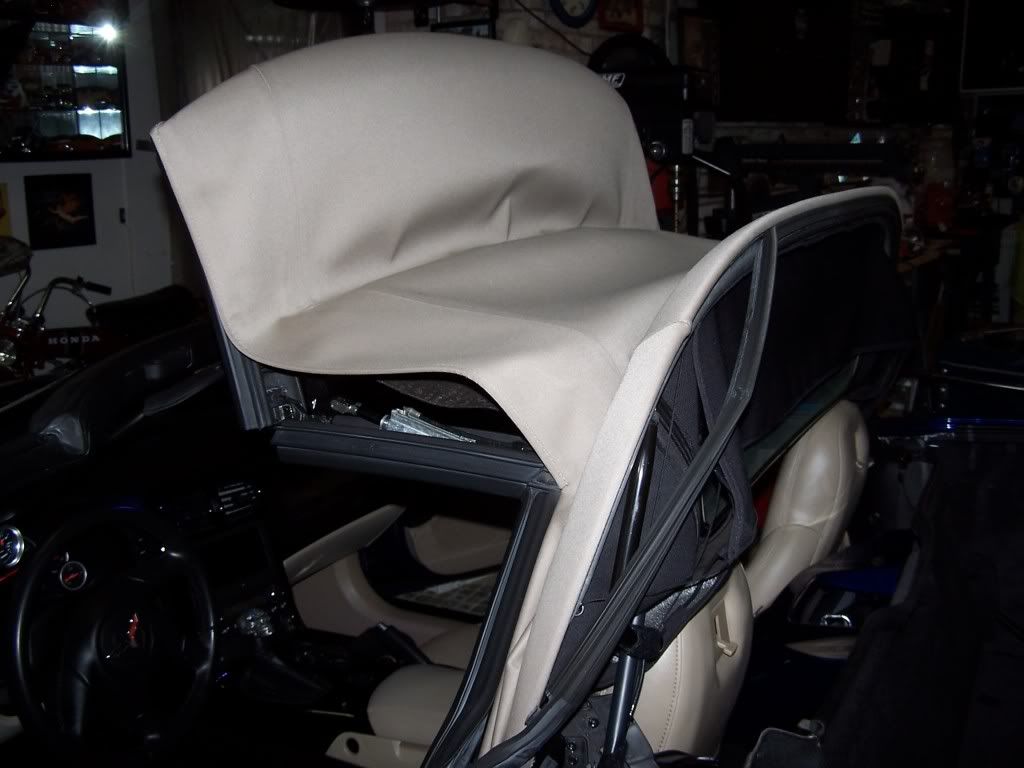
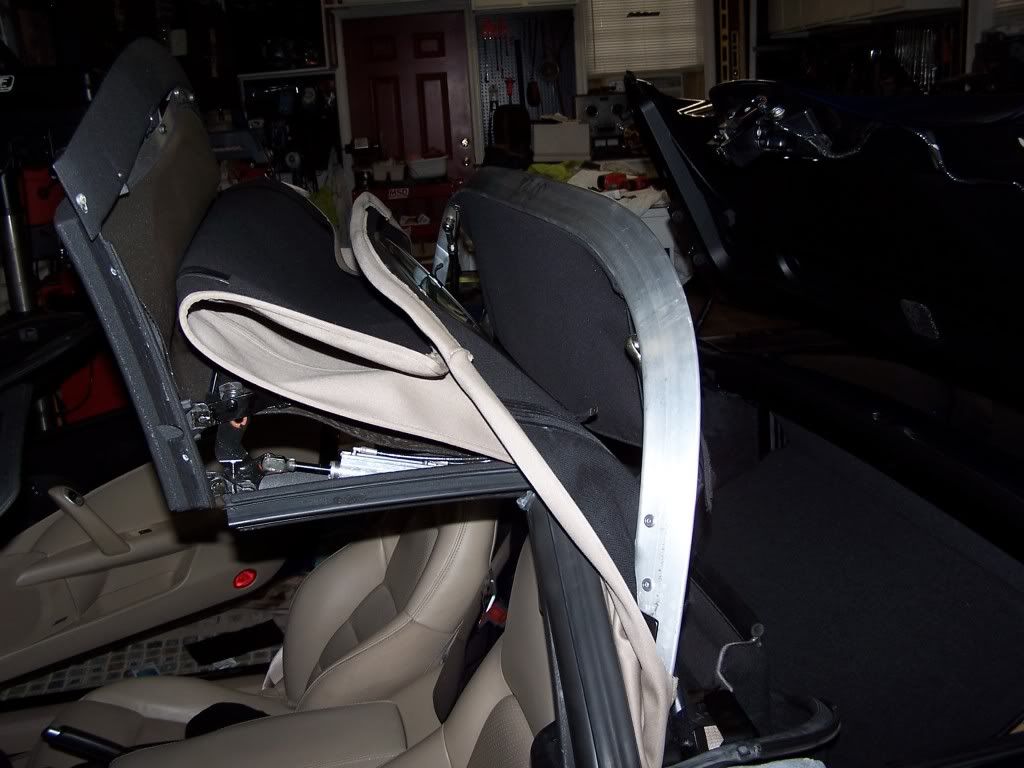
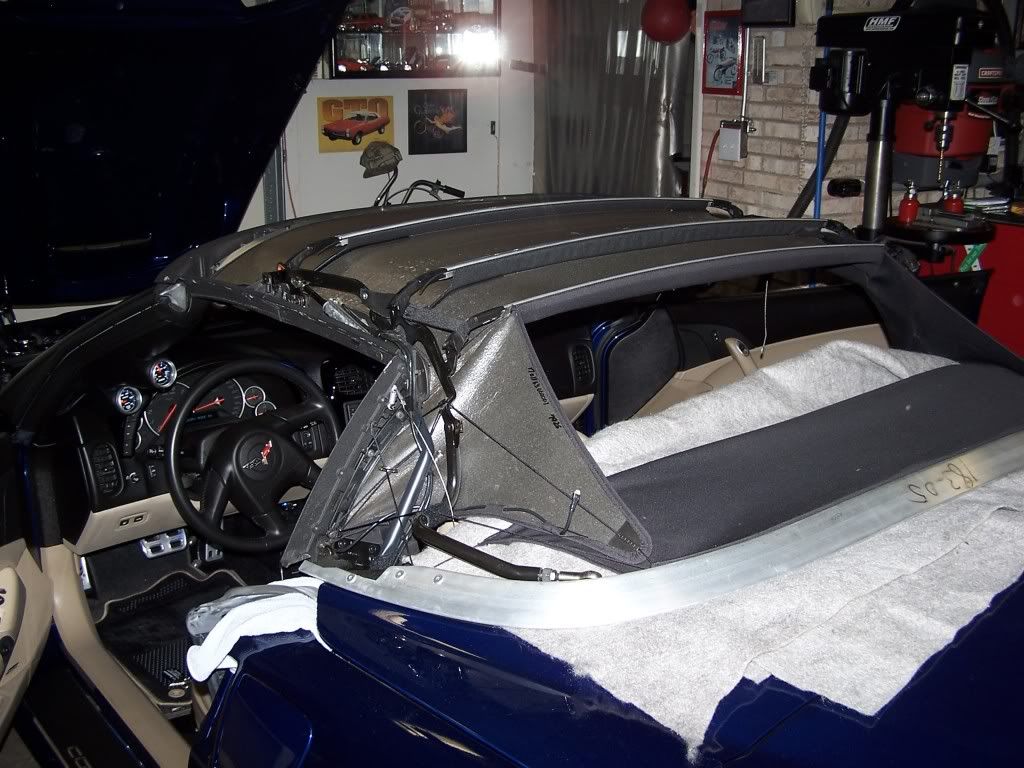
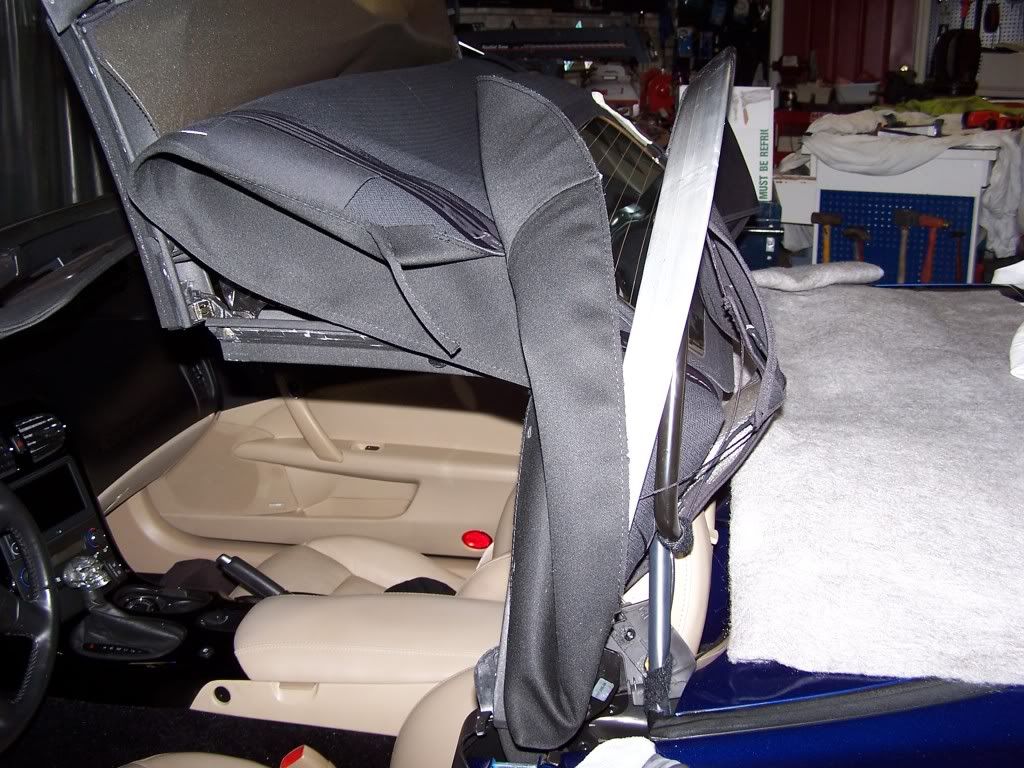
Now for the install. I'm post pics and details for the drivers side of car, so just do the same for the passenger side as you go. Put the top up like this. Bow 1 and 5 up.
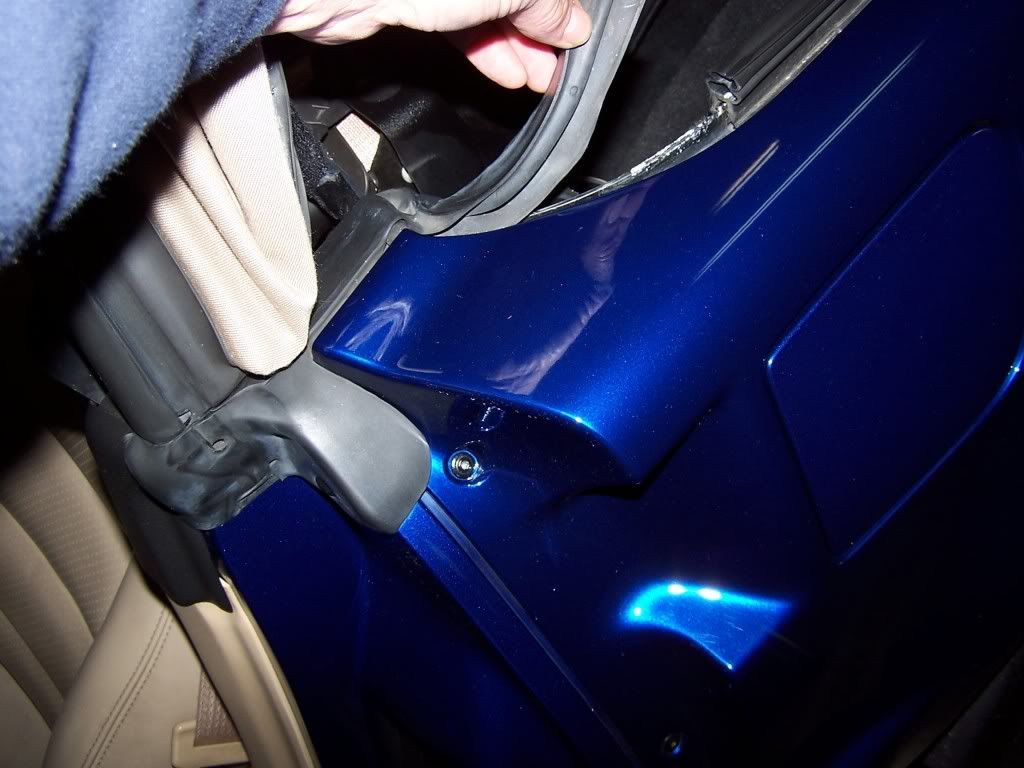
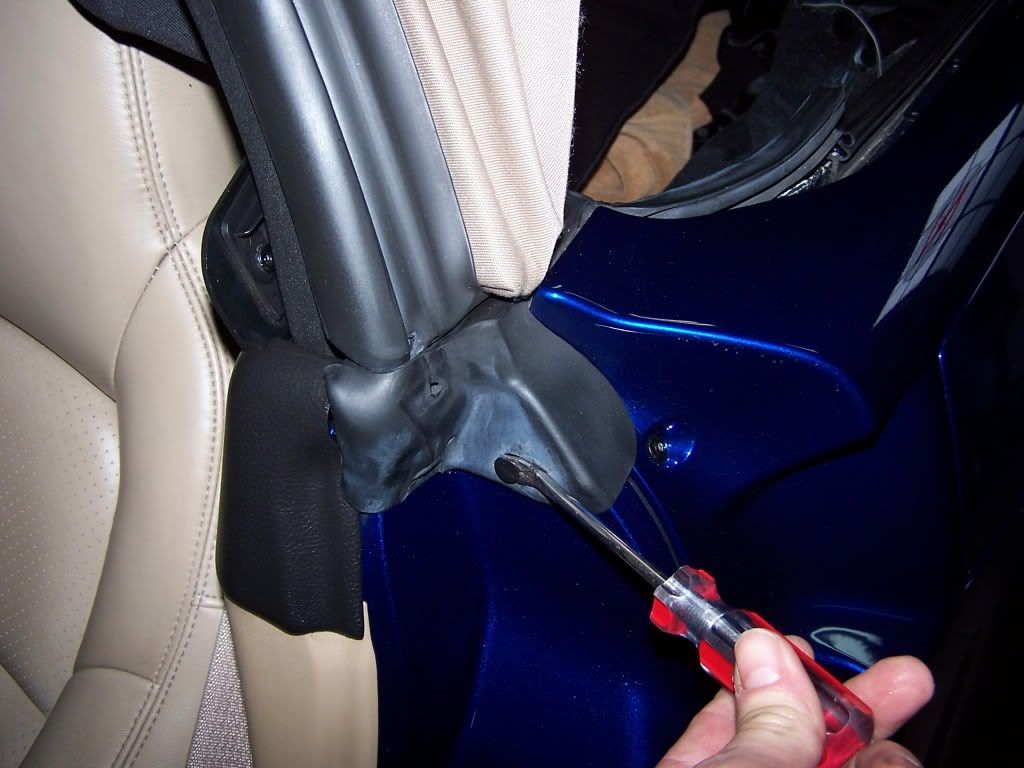
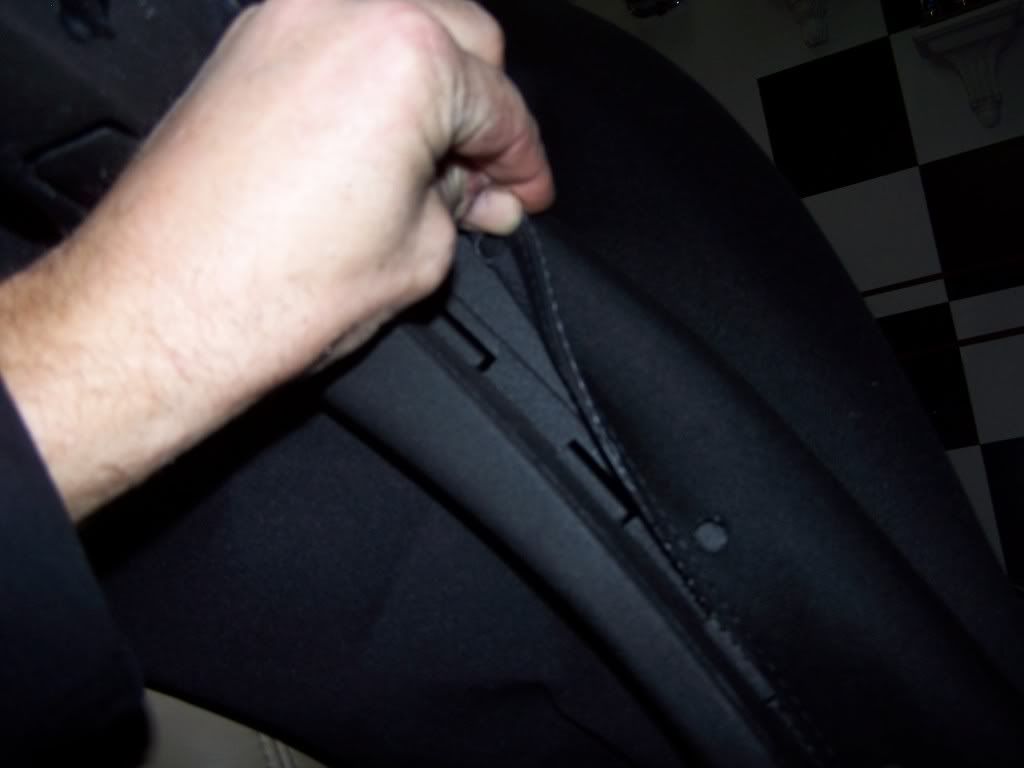
Remove the rubber piece thats at front top of the quarter panel. It splits apart. It also has 2 push in pugs in the front in door jam. Pull them out and remove rubber.
1
1
MORE TO COME
THANKS RAYZZZ MY CORVETTE LIKES MY MONEY
This was the Tan top that was on my car but it was to dirty to get the stains out. So I replaced it.
The Black one that I installed.
Now for the install. I'm post pics and details for the drivers side of car, so just do the same for the passenger side as you go. Put the top up like this. Bow 1 and 5 up.
Remove the rubber piece thats at front top of the quarter panel. It splits apart. It also has 2 push in pugs in the front in door jam. Pull them out and remove rubber.
1
1
MORE TO COME
 01-15-2012, 04:51 PM
#2
Burning Brakes
Thread Starter
Next
Put the top all the way down but the top lid open. Now remove the 5 Torx screws that holds the front of the top to the top frame and remove metal strip that hold down. Sorry but this pic is from pass side.
1
1
Raise the top back to bow 1 and 5 up. Pull the rubber out of the bottom side of bow 5. it just pulls out easy. Later on you'll see that the rubber here holds the back of top in place.
1

MORE TO COME
Put the top all the way down but the top lid open. Now remove the 5 Torx screws that holds the front of the top to the top frame and remove metal strip that hold down. Sorry but this pic is from pass side.
1
1
Raise the top back to bow 1 and 5 up. Pull the rubber out of the bottom side of bow 5. it just pulls out easy. Later on you'll see that the rubber here holds the back of top in place.
1
MORE TO COME
01-15-2012, 05:03 PM
#3
Burning Brakes
Thread Starter
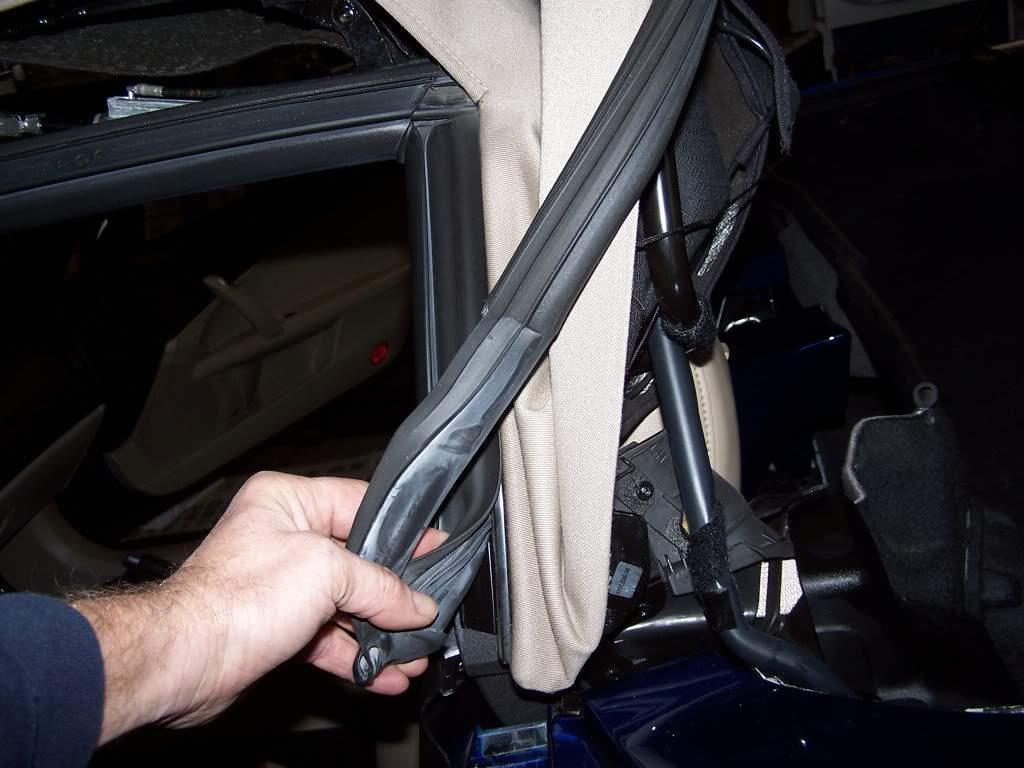
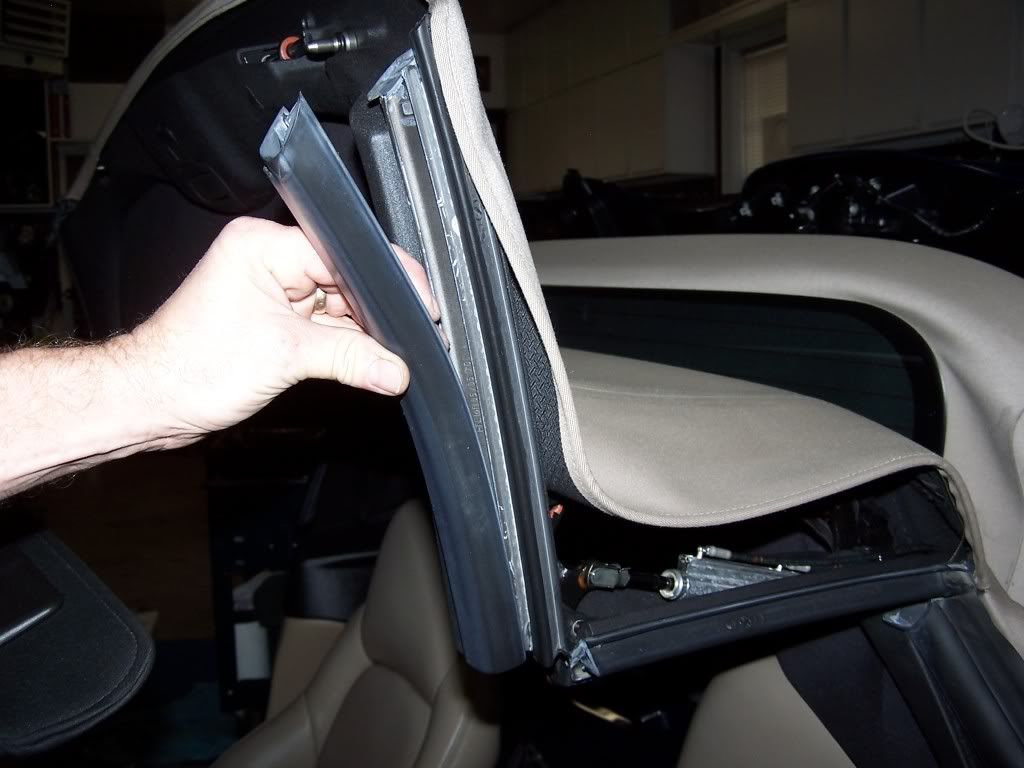
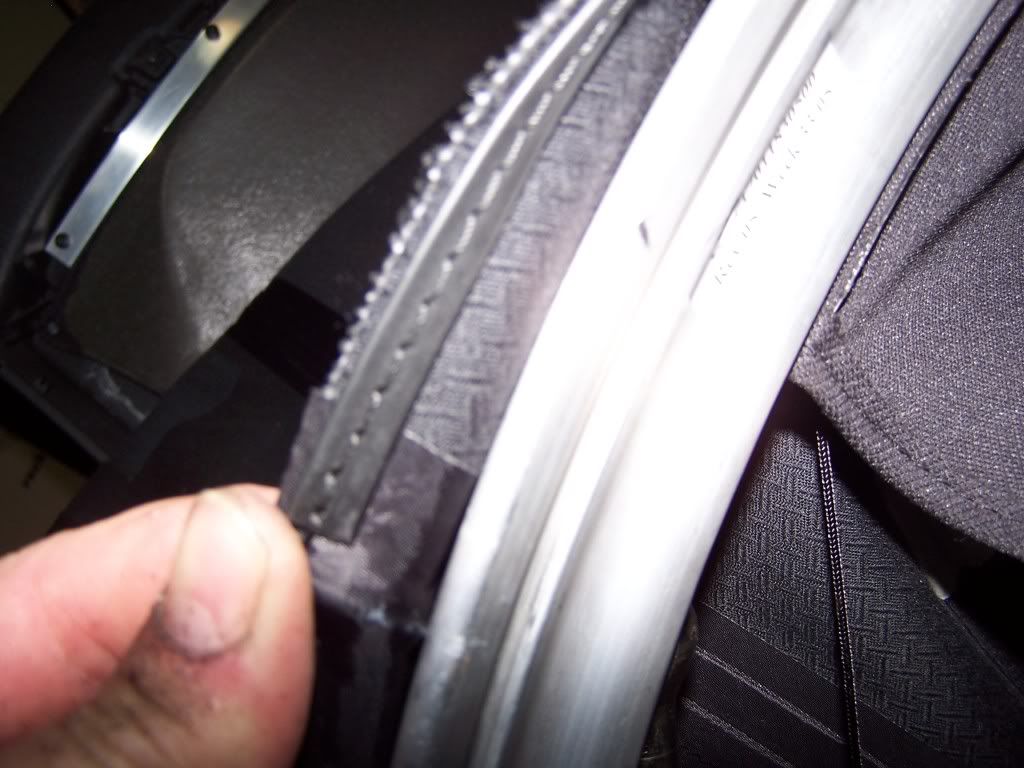
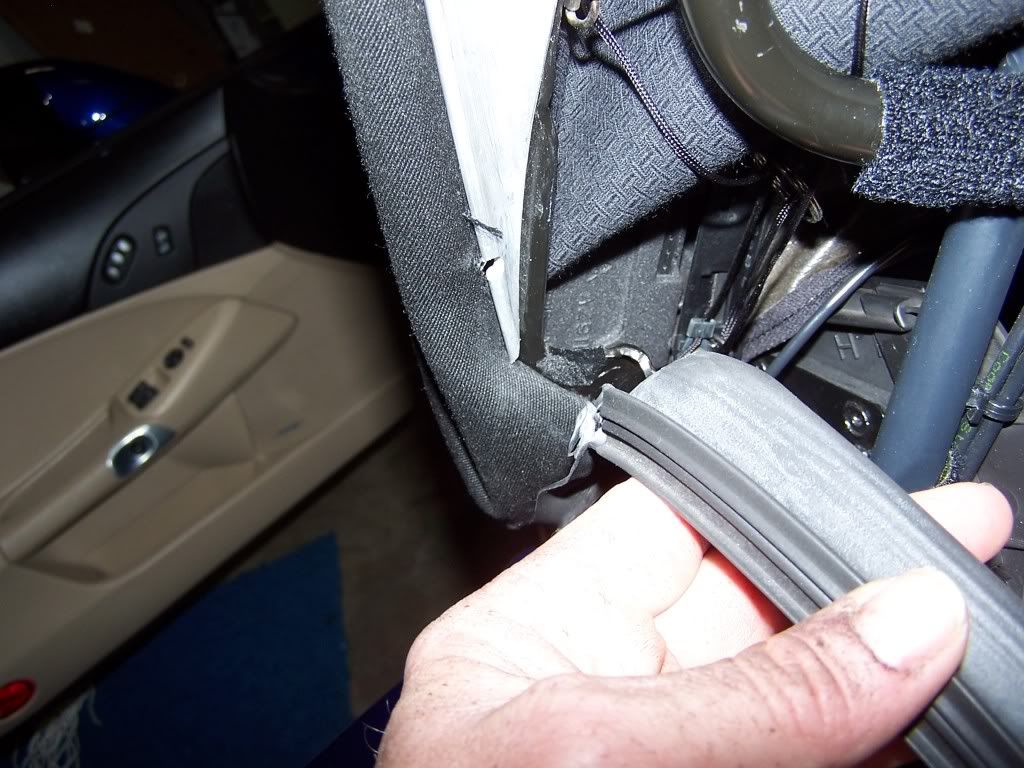
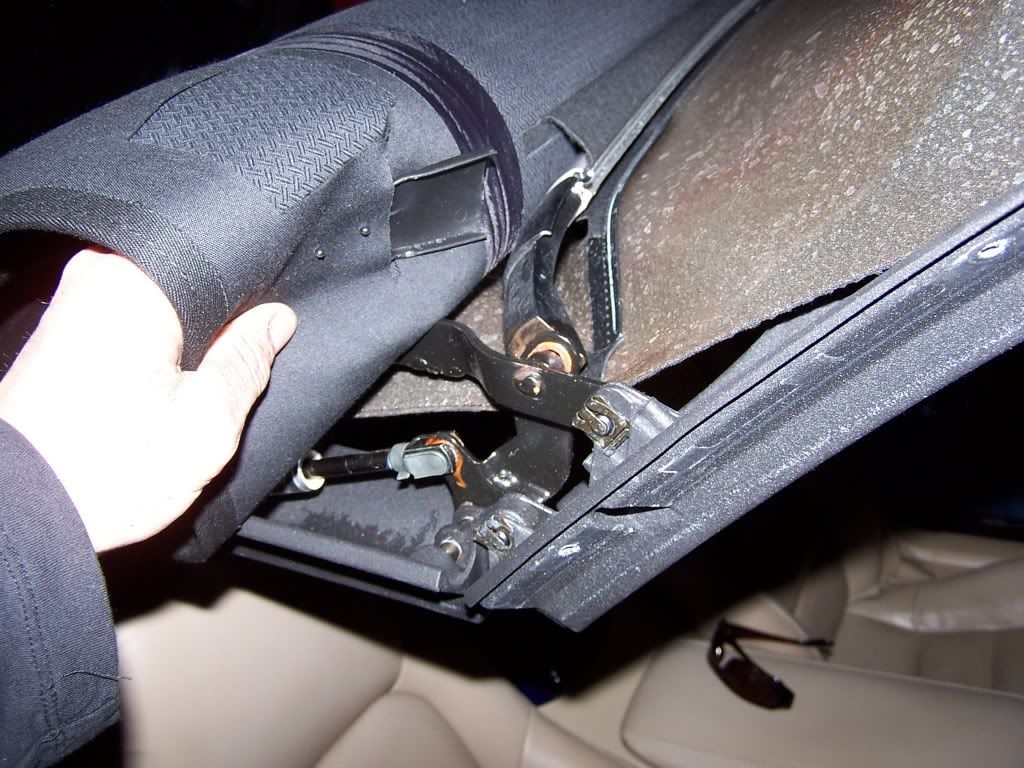
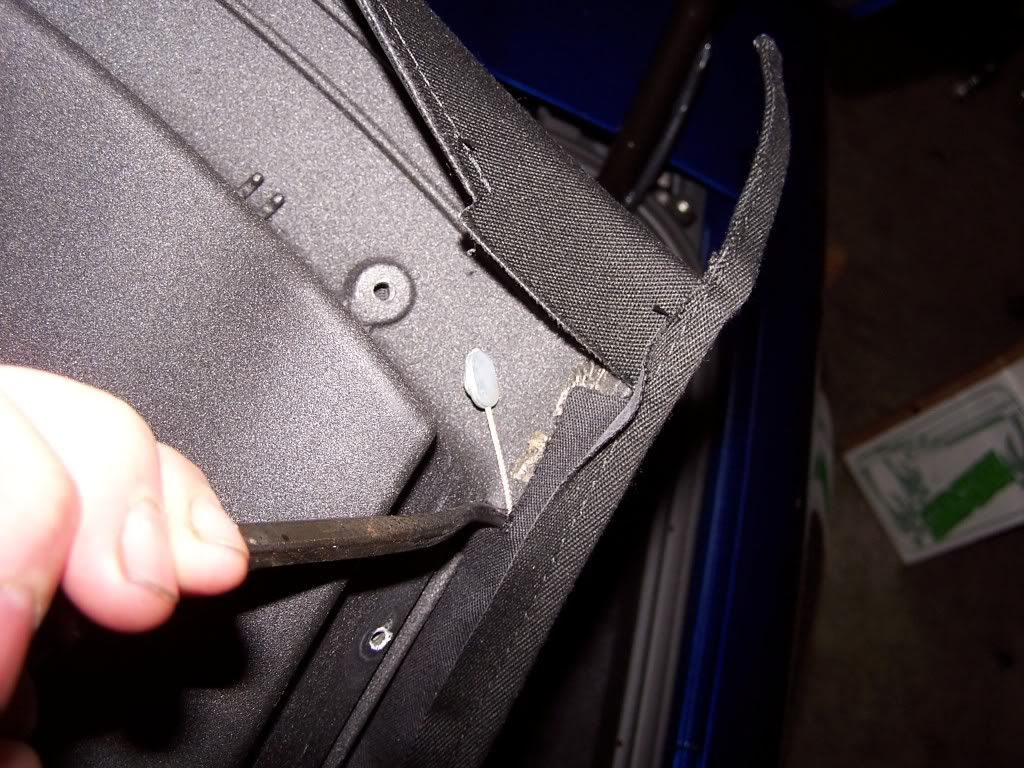
The rubber that was pulled out of bow 5 wraps around the the bottom of the top. Nothing is holding it to the bottom of top now but it connects to the vertical piece of rubber that runs up the back edge of the door glass.
1
Now remove the piece of rubber that bumps up against the the vertical piece of rubber. It'll just pulls out.
MORE TO COME
1
Now remove the piece of rubber that bumps up against the the vertical piece of rubber. It'll just pulls out.
MORE TO COME
Last edited by Rayzzz; 01-15-2012 at 06:10 PM.
01-15-2012, 05:04 PM
#4
Burning Brakes
Member Since: Dec 2004
Location: North Royalton Ohio
Posts: 802
Likes: 0
Received 2 Likes
on
2 Posts

Thanks for taking the time and effort to post this for us. If you own a Vert there is always that dread when you leave it unattended some as* might damage it. Got this part bookmarked.
01-15-2012, 05:10 PM
#5
Burning Brakes
Thread Starter
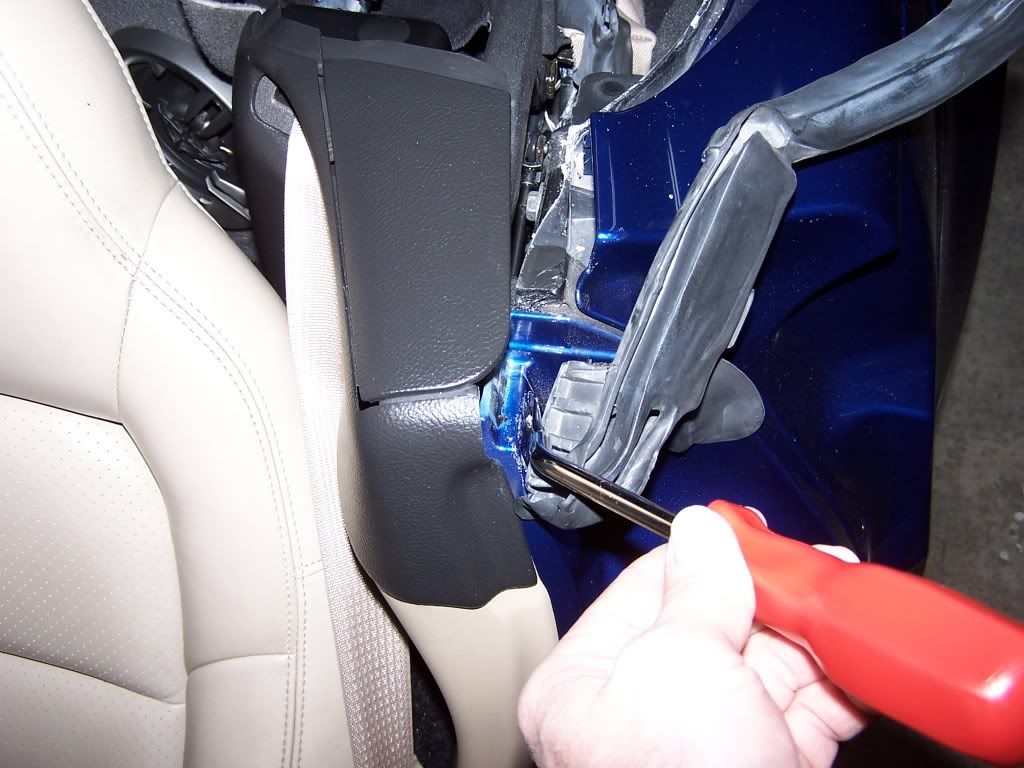
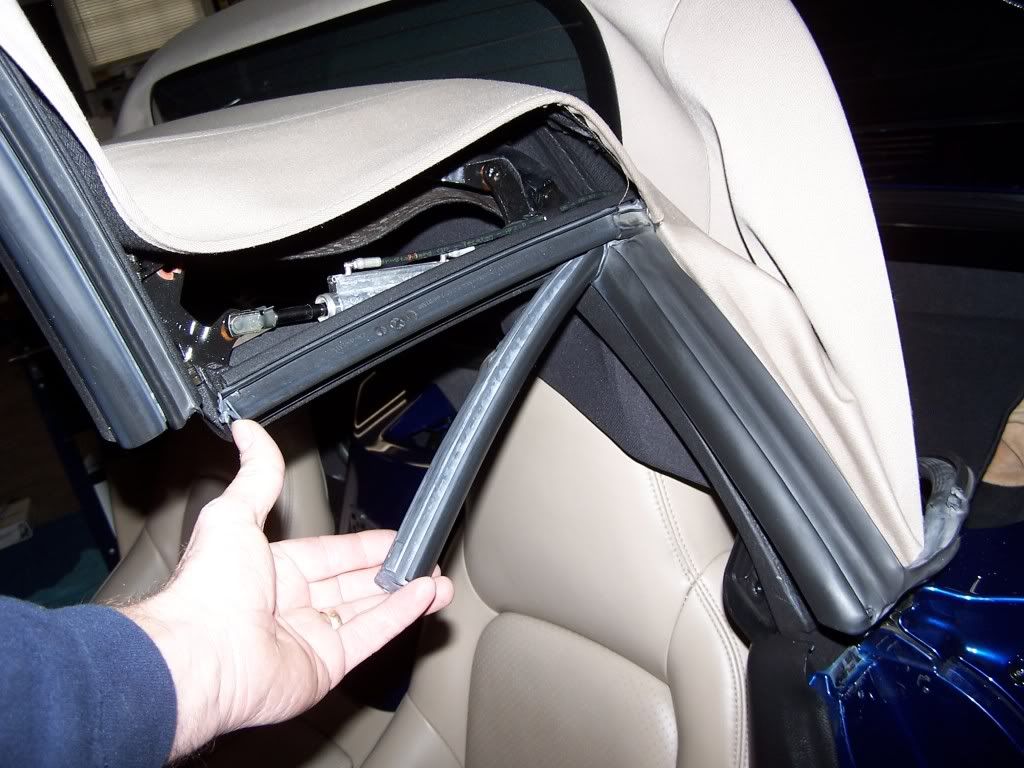
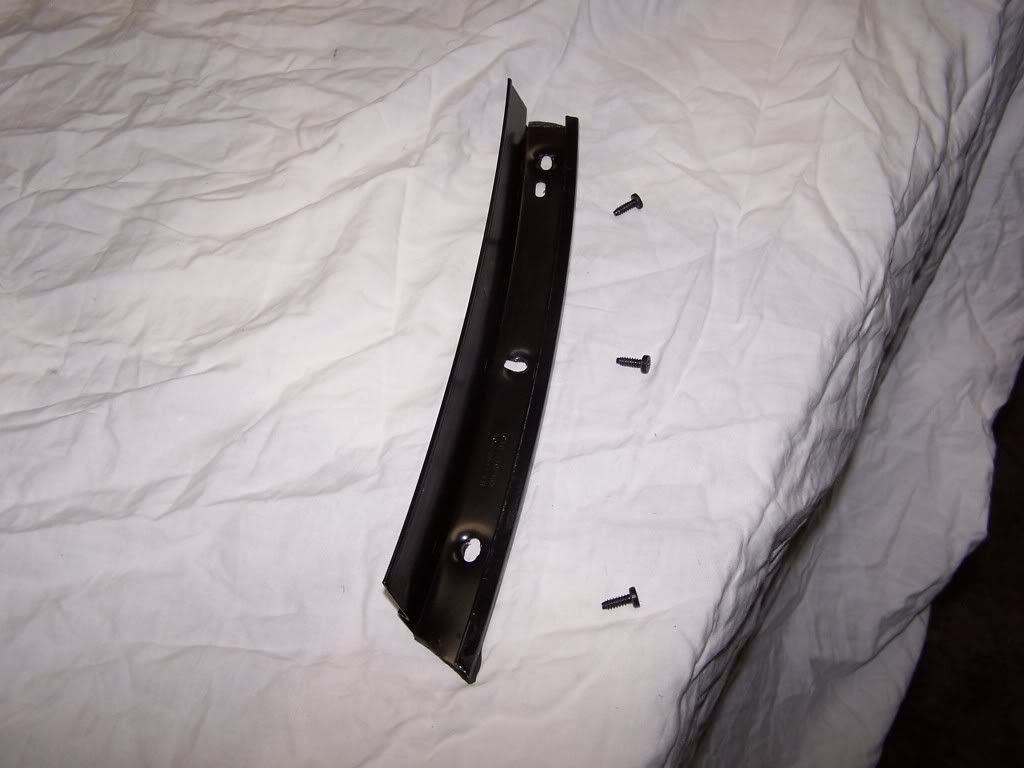
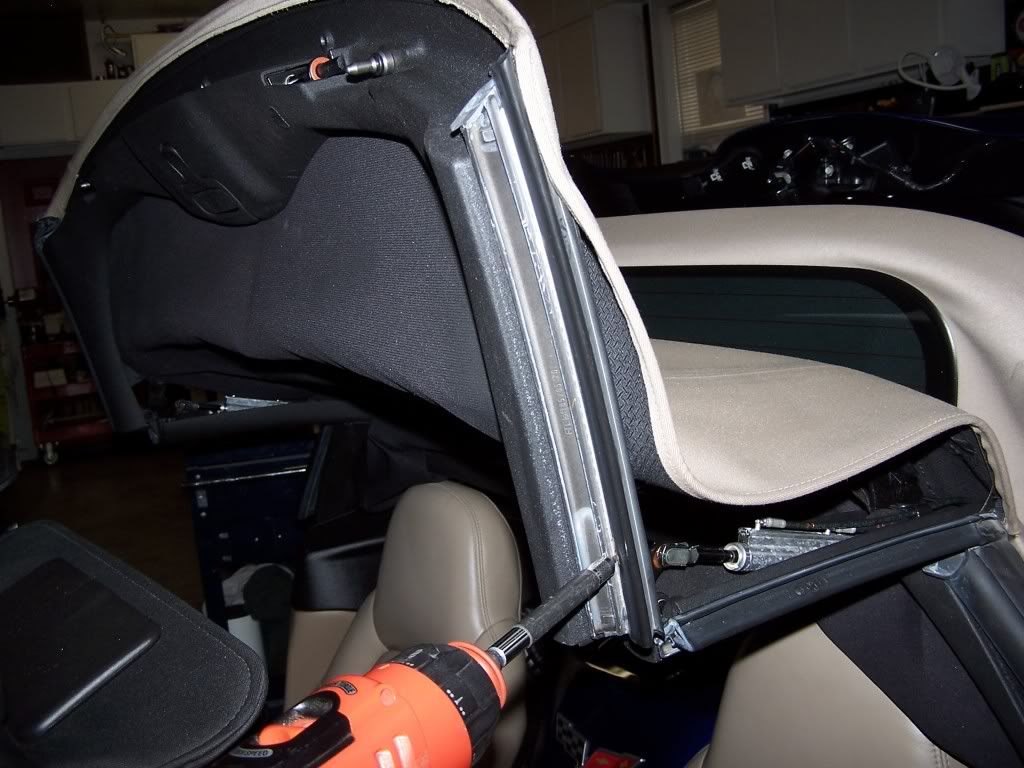
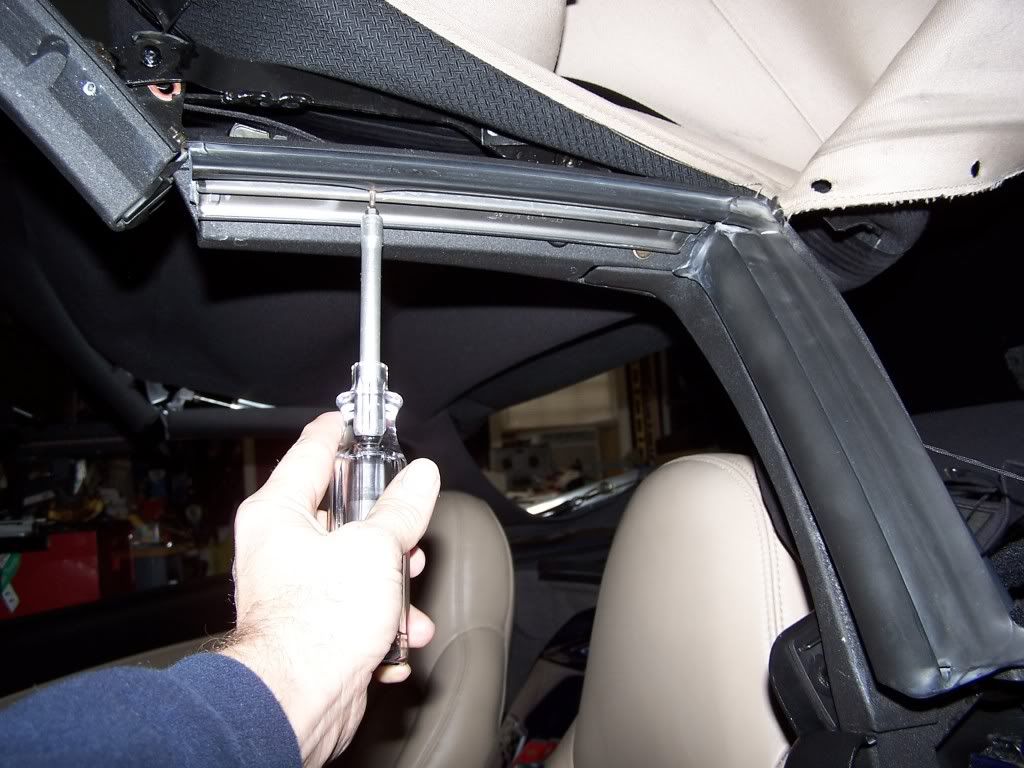
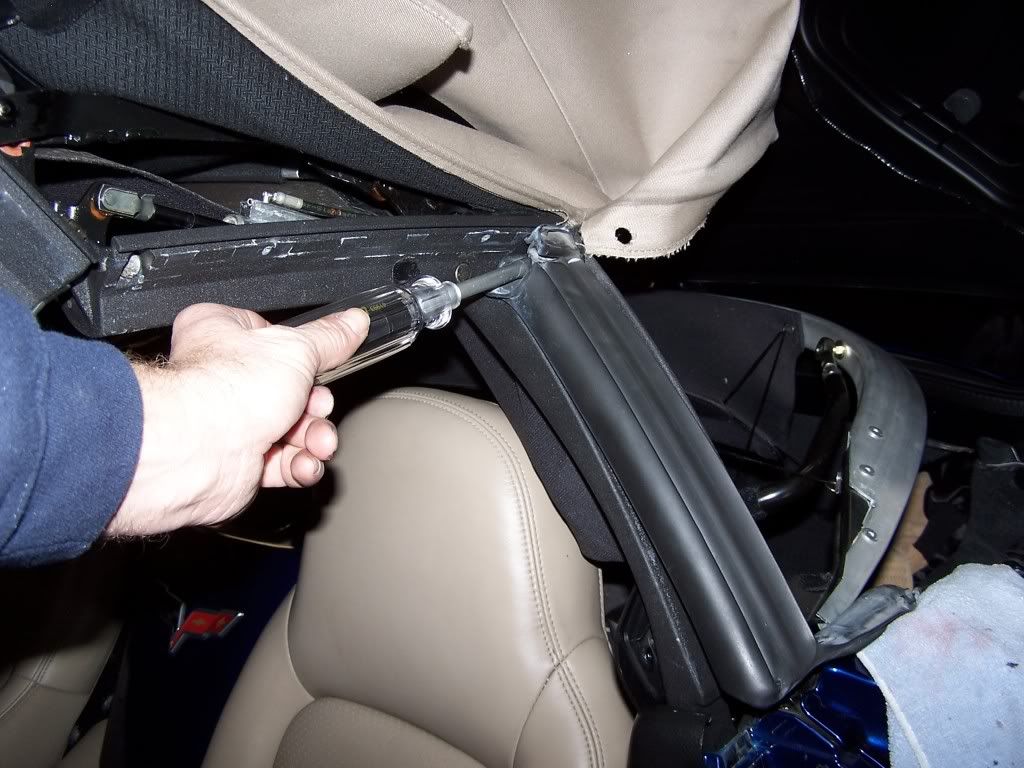
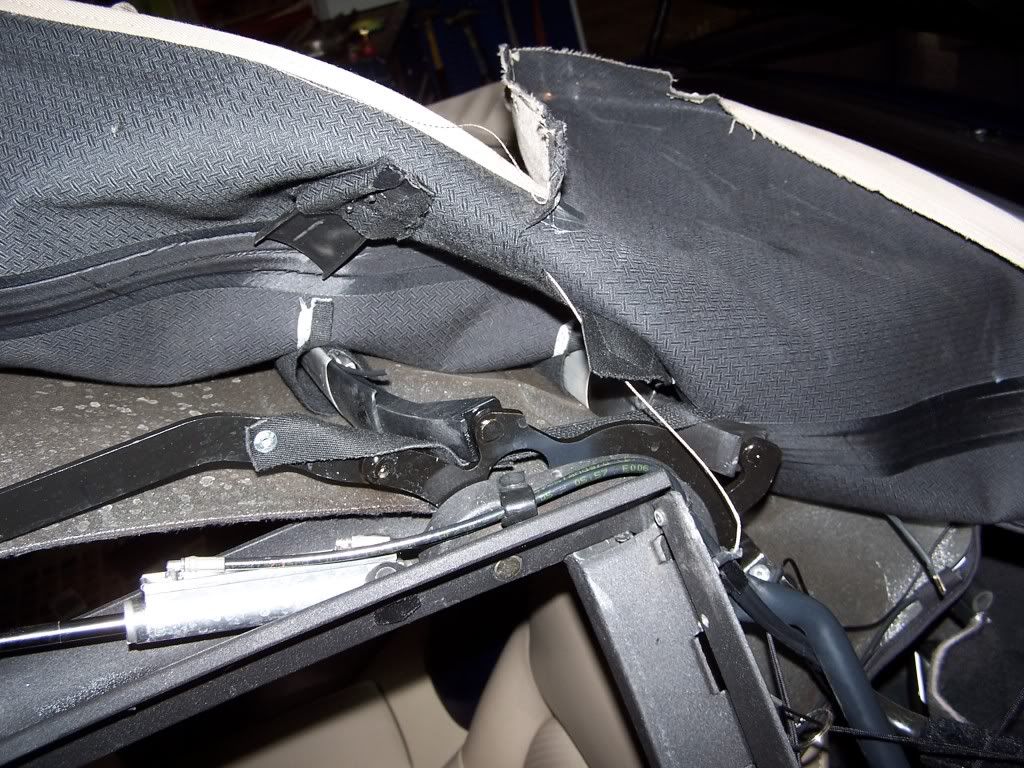
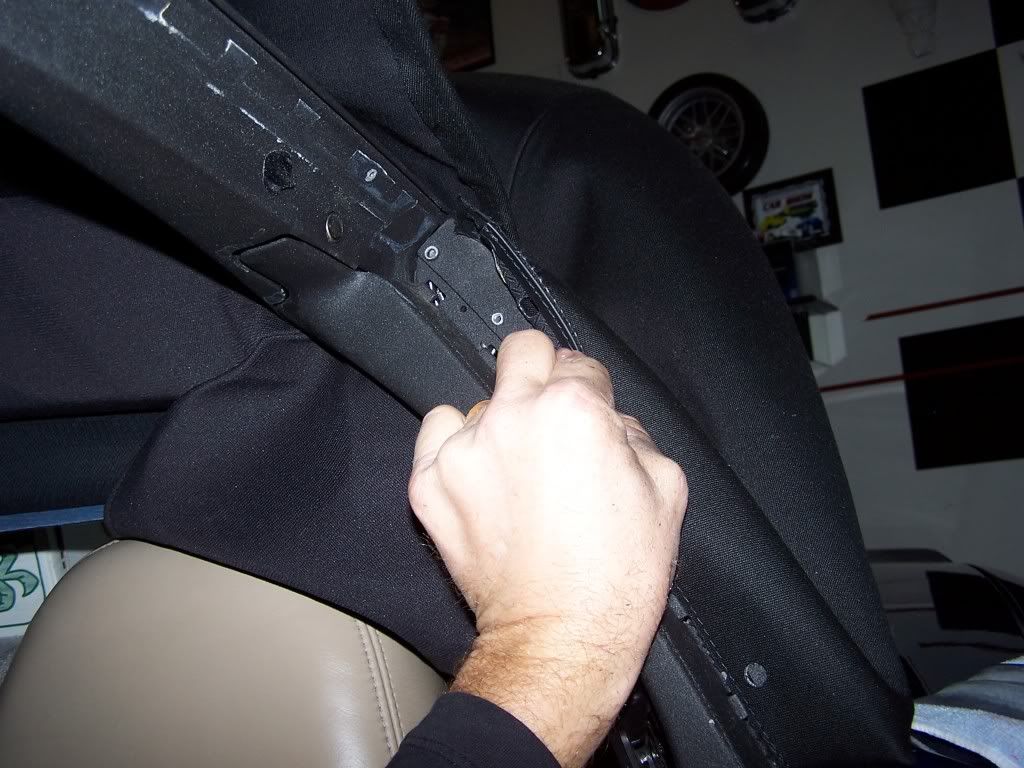
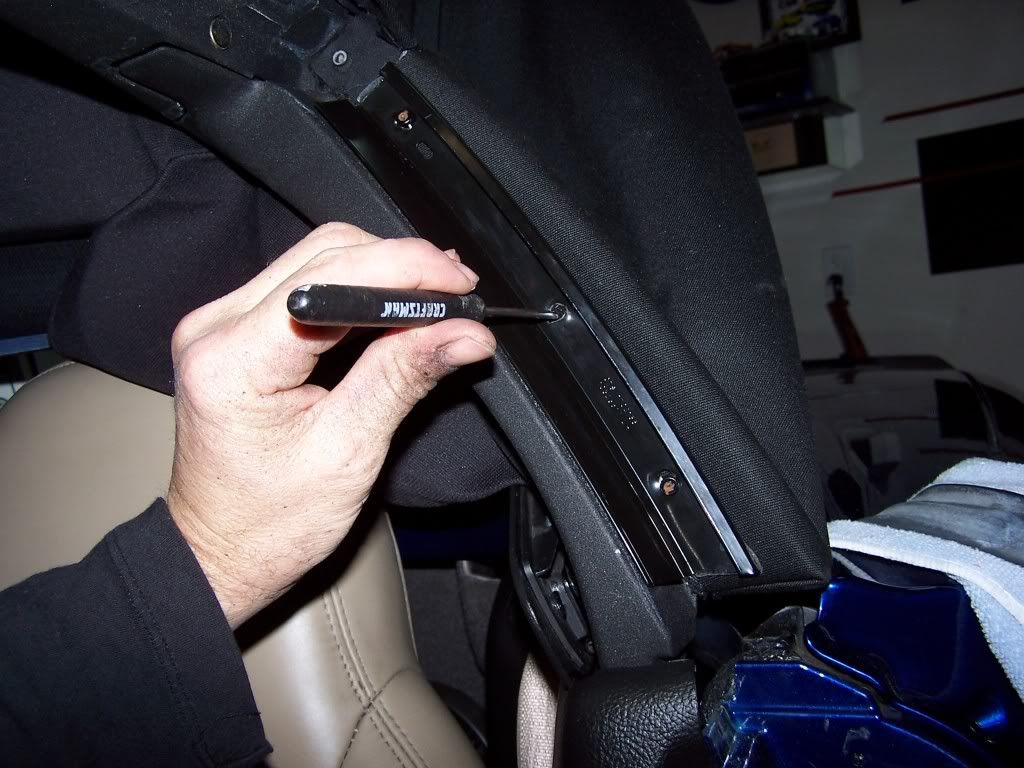
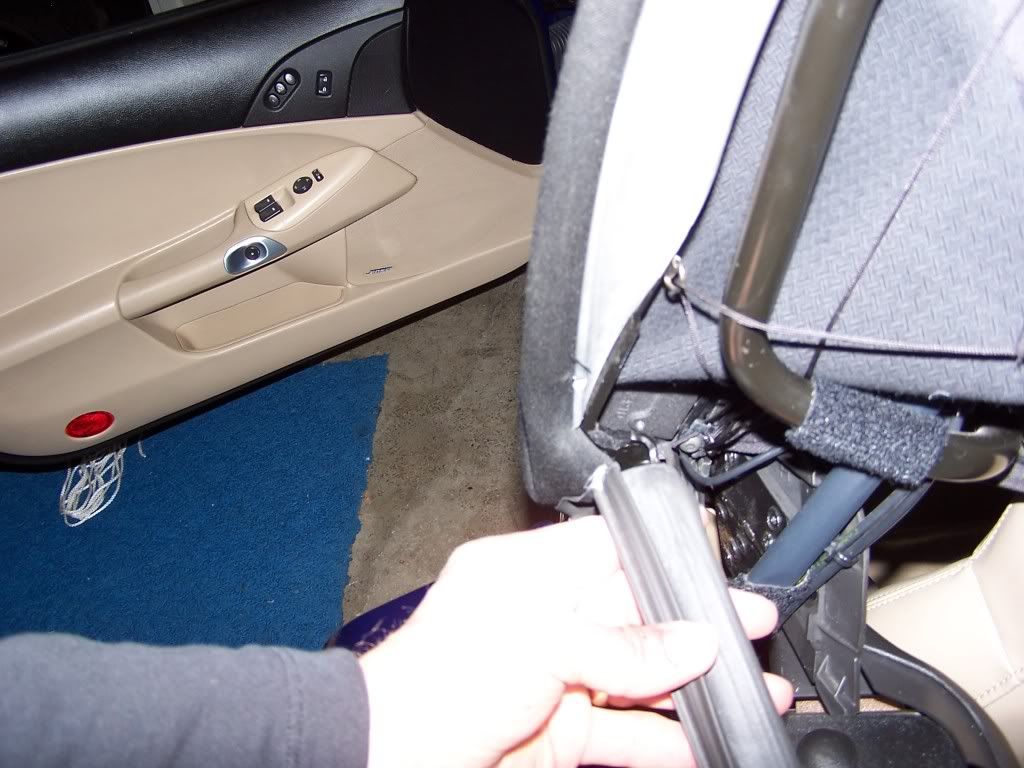
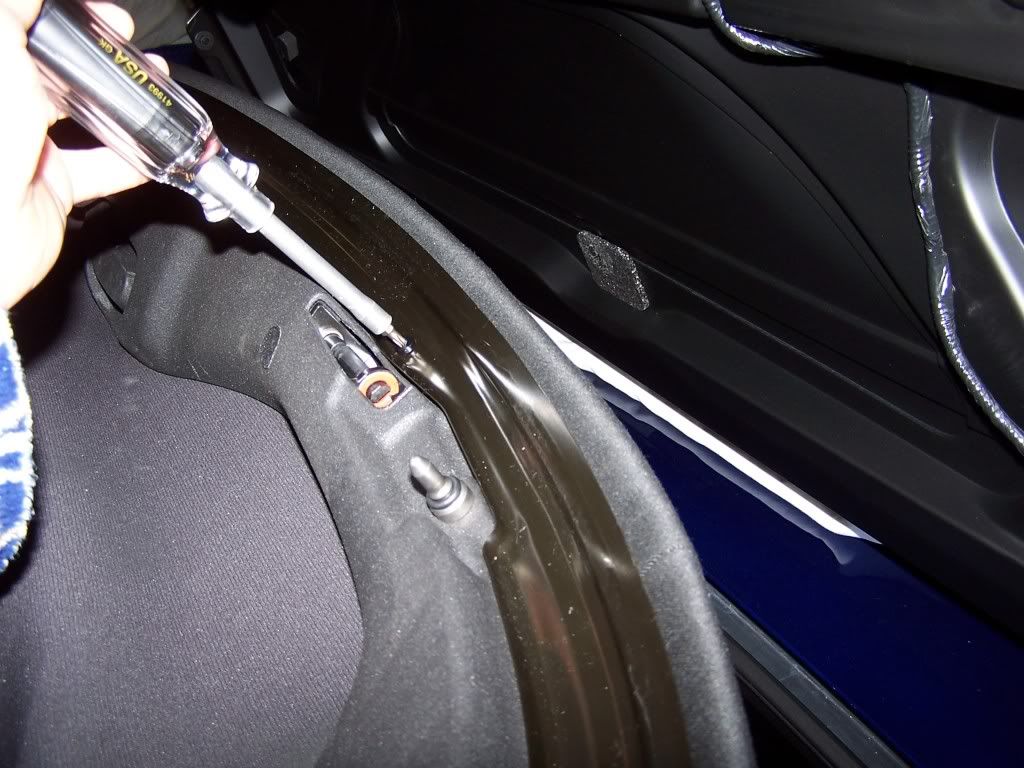
Now remove the Torx screws that holds the metal vertical rubber retainer. I think there is 3 Torx screws.
1

1
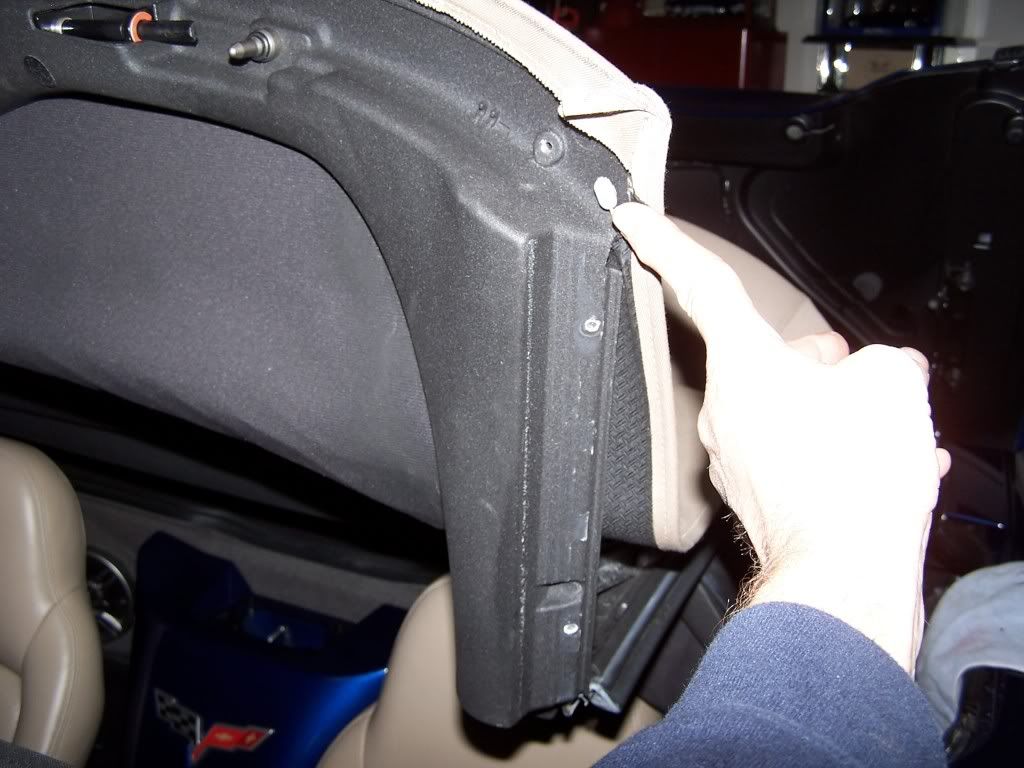
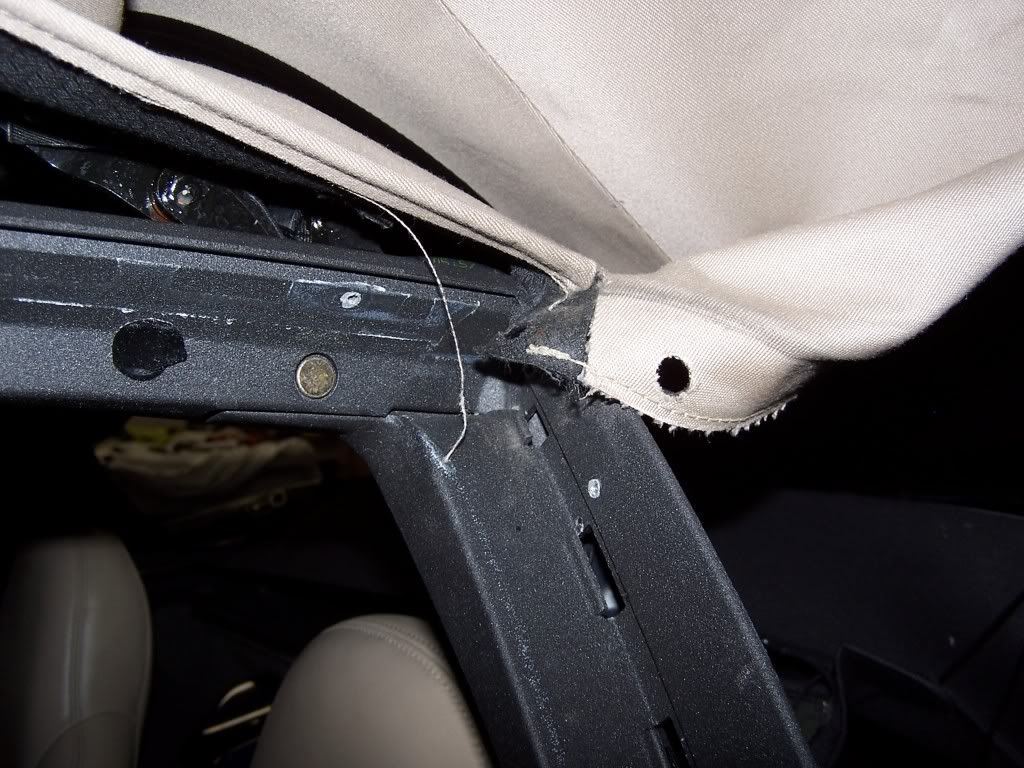
This is the removed piece.
1
Top with piece removed.
1
1
This is the removed piece.
1
Top with piece removed.
01-15-2012, 05:18 PM
#6
Burning Brakes
Thread Starter
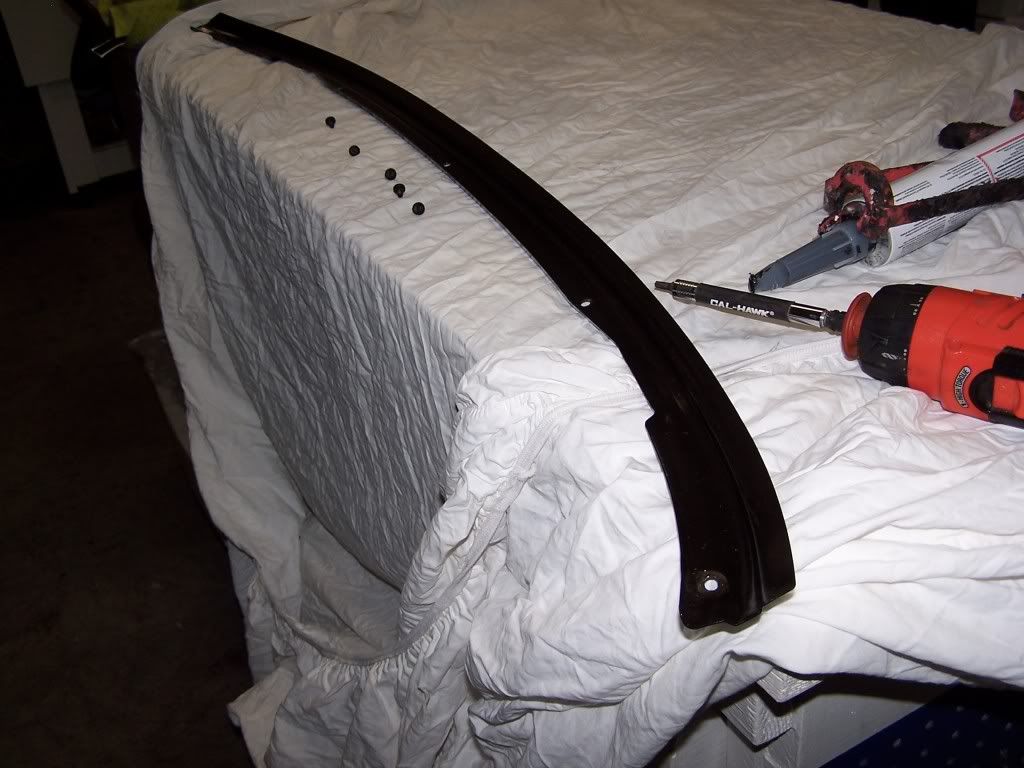
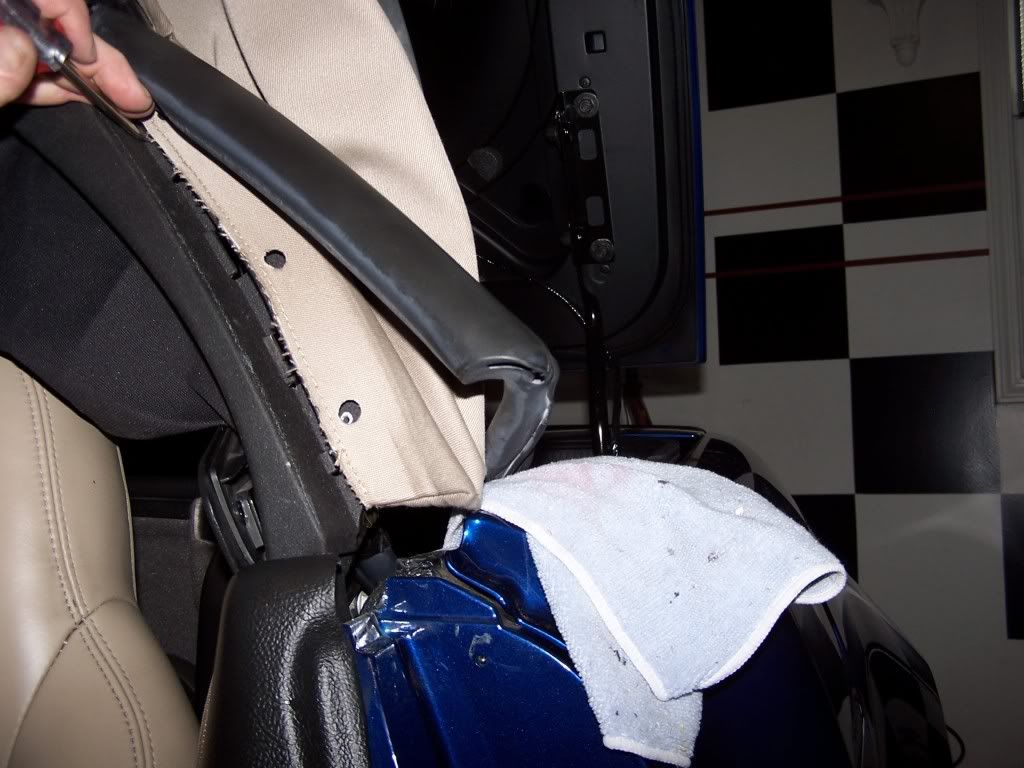
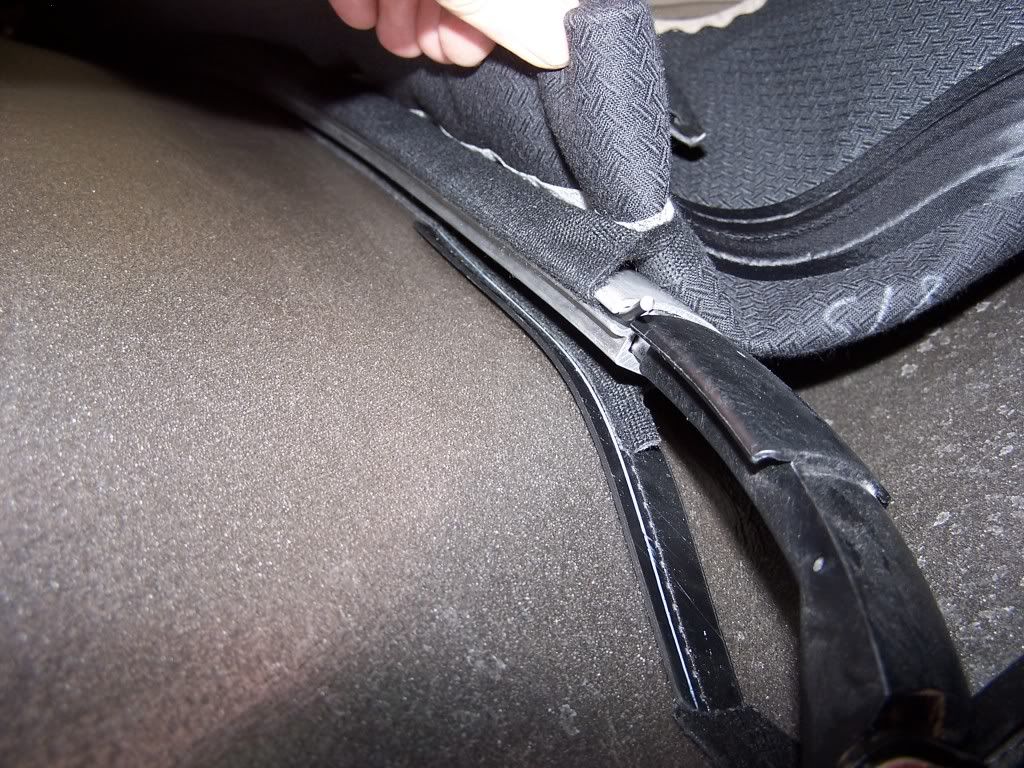
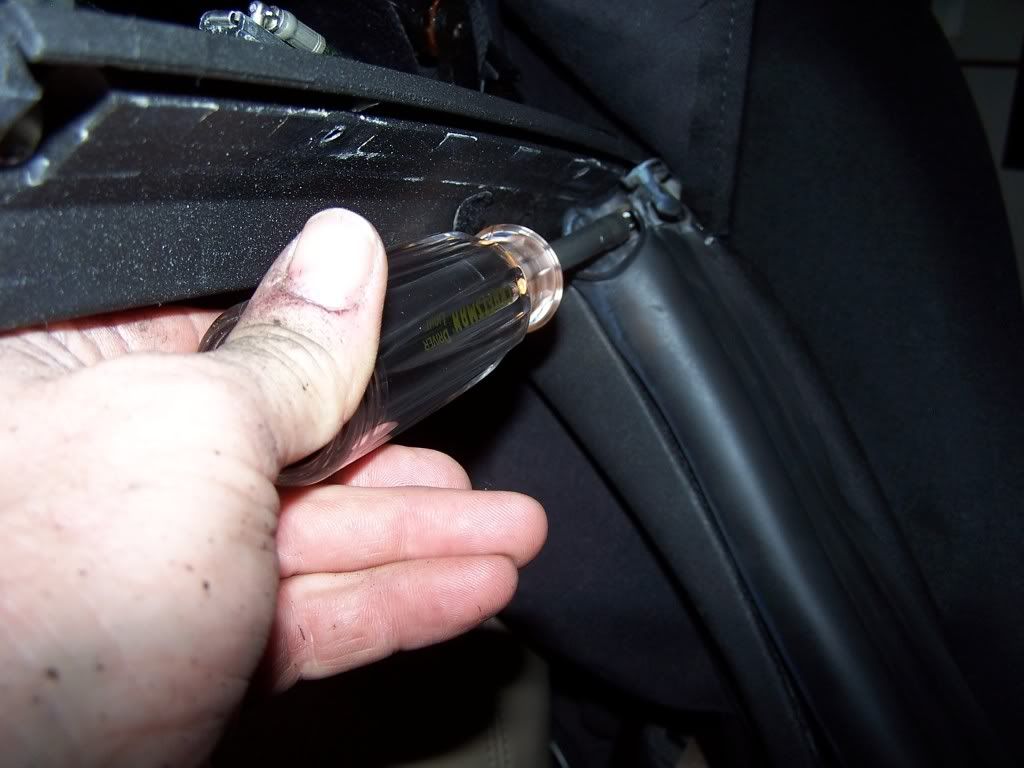
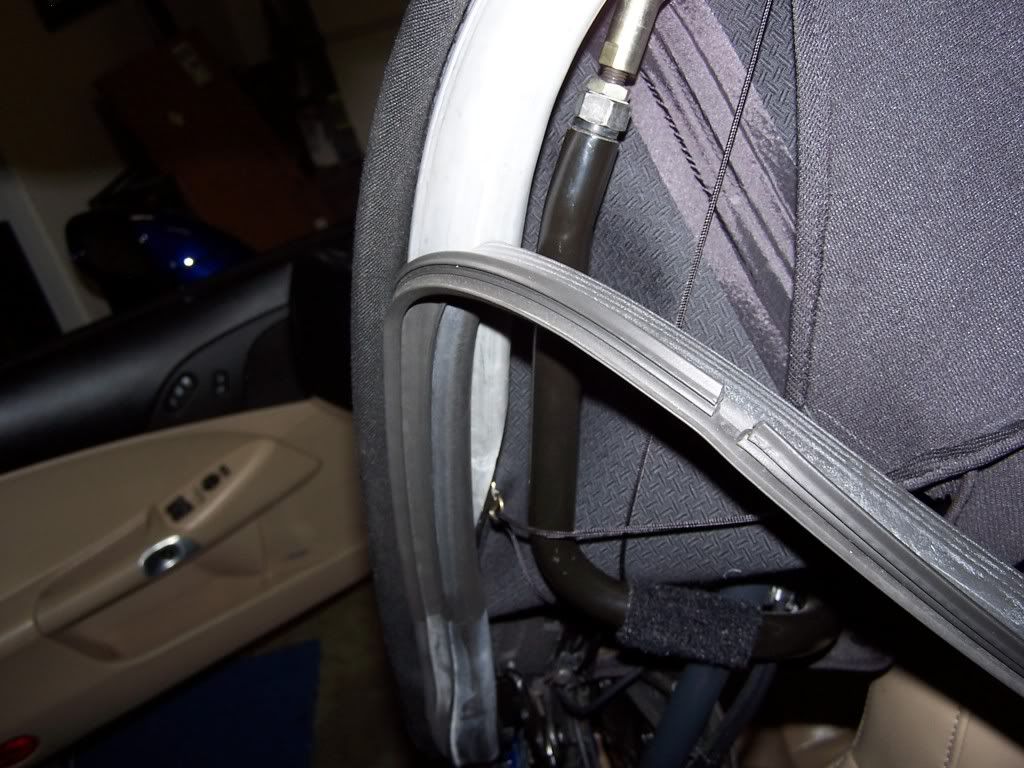
Now remove the rubber that is at front most side of the top. It just pulls out. Then remove the 3 Torx screws that holds the metal rubber retainer on to the top.
1
Metal front most side rubber retainer removed.
MORE TO COME
1
Metal front most side rubber retainer removed.
MORE TO COME
 01-15-2012, 05:53 PM
#8
Burning Brakes
Thread Starter
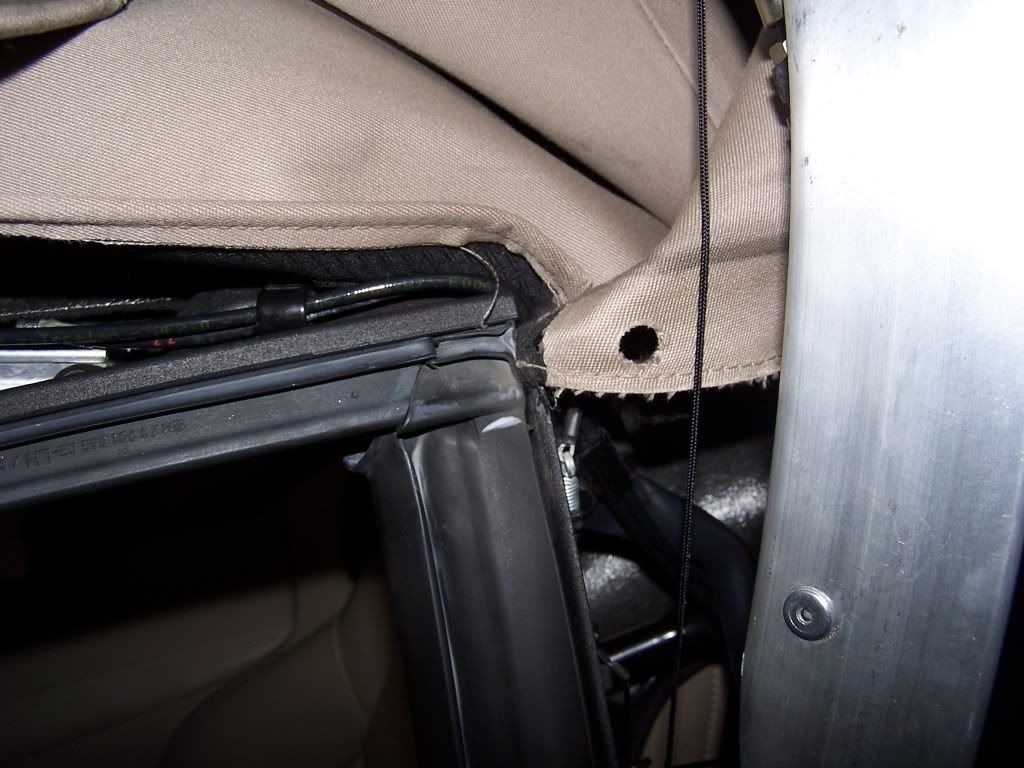
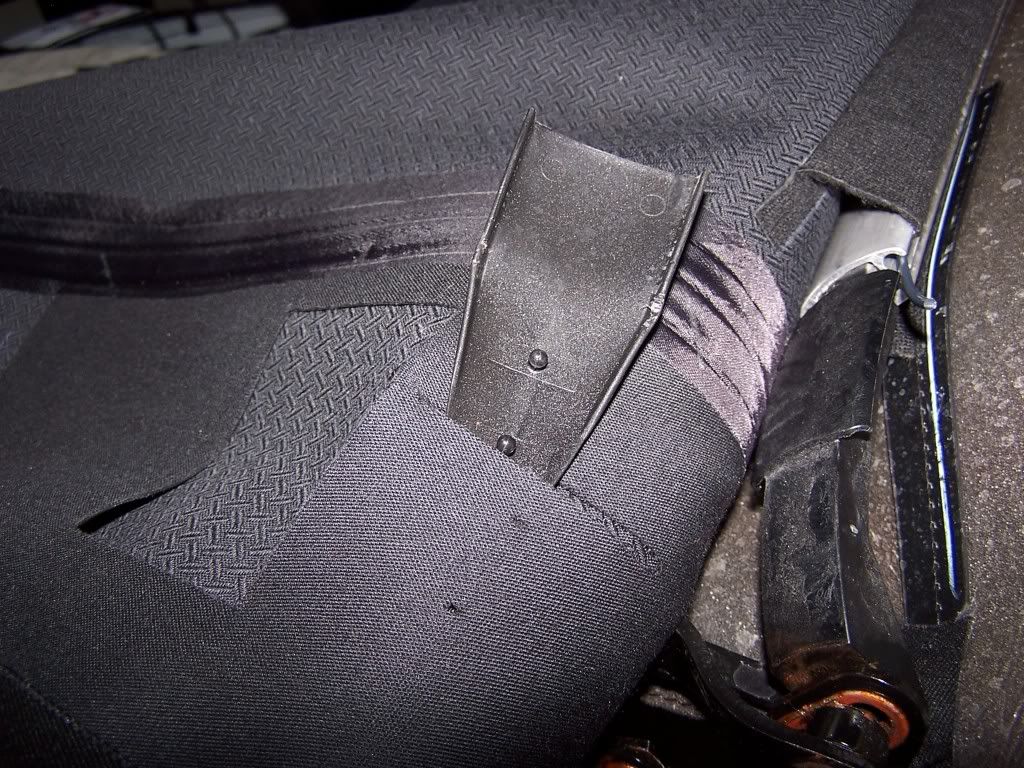
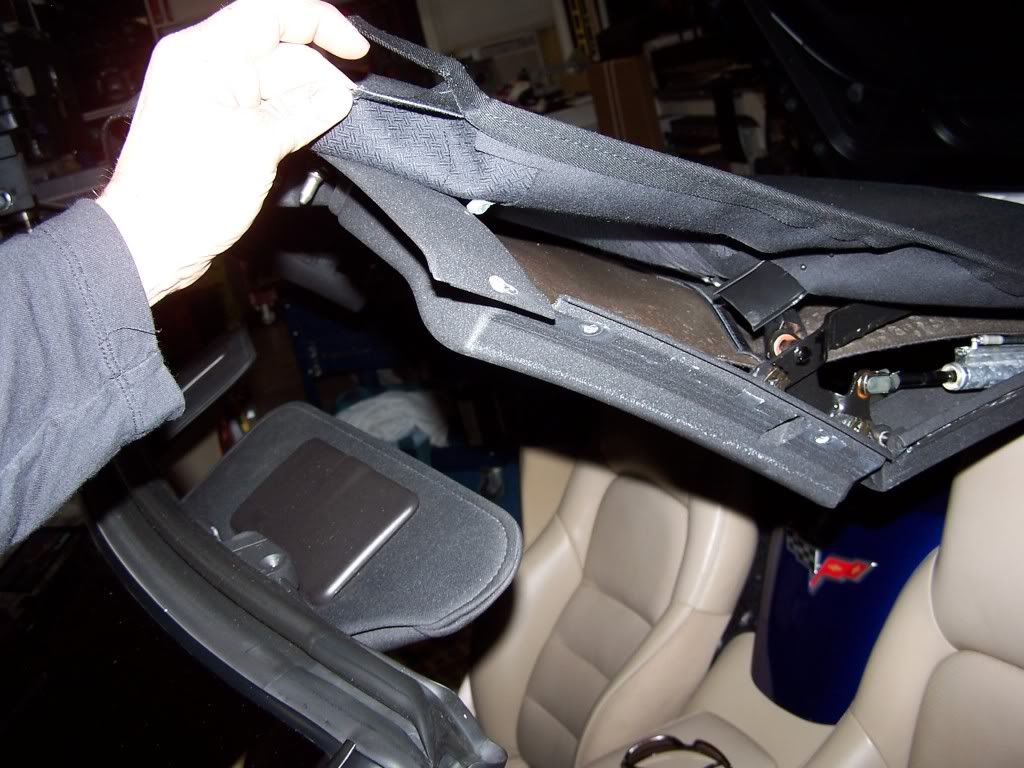
Now back to the install. The front edge of top now needs to be pulled off the front edge of the frame. The top will now fold back and if you look at the 2 pics you can see the Tension Belt end sticking out of the top. The Tension Belt looks like a piece of wire with a small flat oval end on it.
It runs from the front corner of the top frame along the frame above where the door glass would roll up and then hooks to the top frame at back of frame top.
1
Disconnect the defroster wires by just pulling the connection apart. One on each side of back glass.
MORE TO COME
It runs from the front corner of the top frame along the frame above where the door glass would roll up and then hooks to the top frame at back of frame top.
1
Disconnect the defroster wires by just pulling the connection apart. One on each side of back glass.
MORE TO COME
01-15-2012, 06:07 PM
#9
Burning Brakes
Thread Starter
With top still in the bow 1 and 5 up its time to remove the rear of the top that hooks to bow 5 (the rear bow of top). The rubber has been removed from the rear of the top earlier so it will just pull out of the grove in bow 5.
Pic below is what the top looks like at the end of bow 5
Rear of top pulling out of bow 5

1
1
Bow 5 with the top pulled off
MORE TO COME
Pic below is what the top looks like at the end of bow 5
Rear of top pulling out of bow 5
1
1
Bow 5 with the top pulled off
MORE TO COME
01-15-2012, 06:38 PM
#10
Burning Brakes
Thread Starter
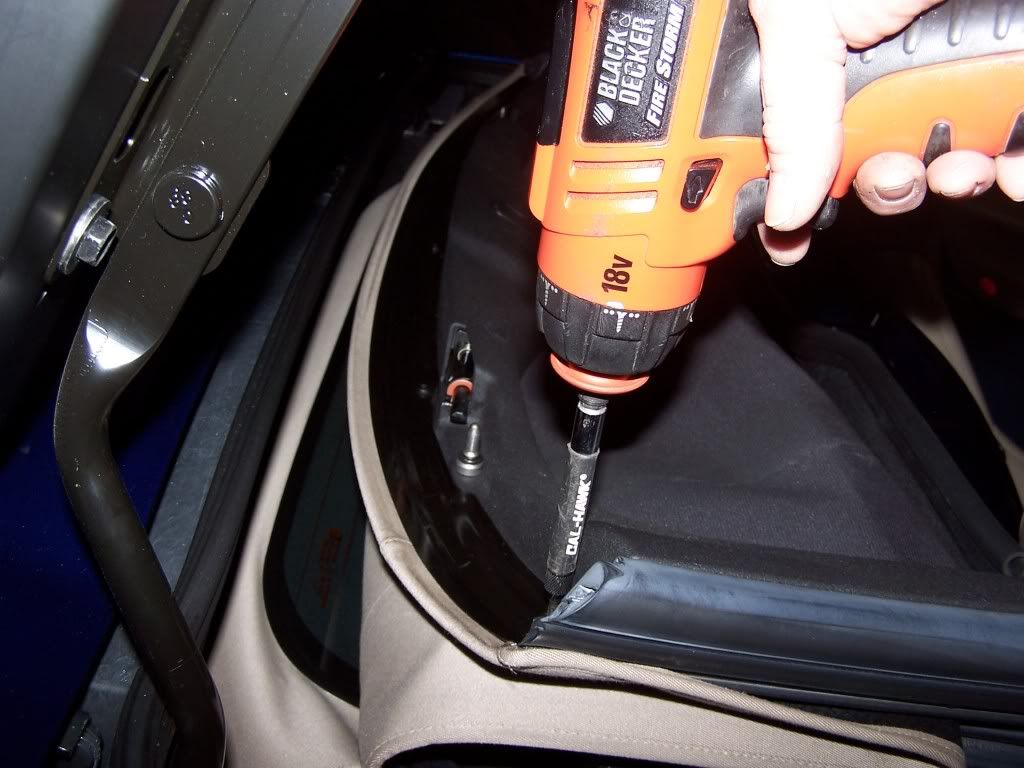
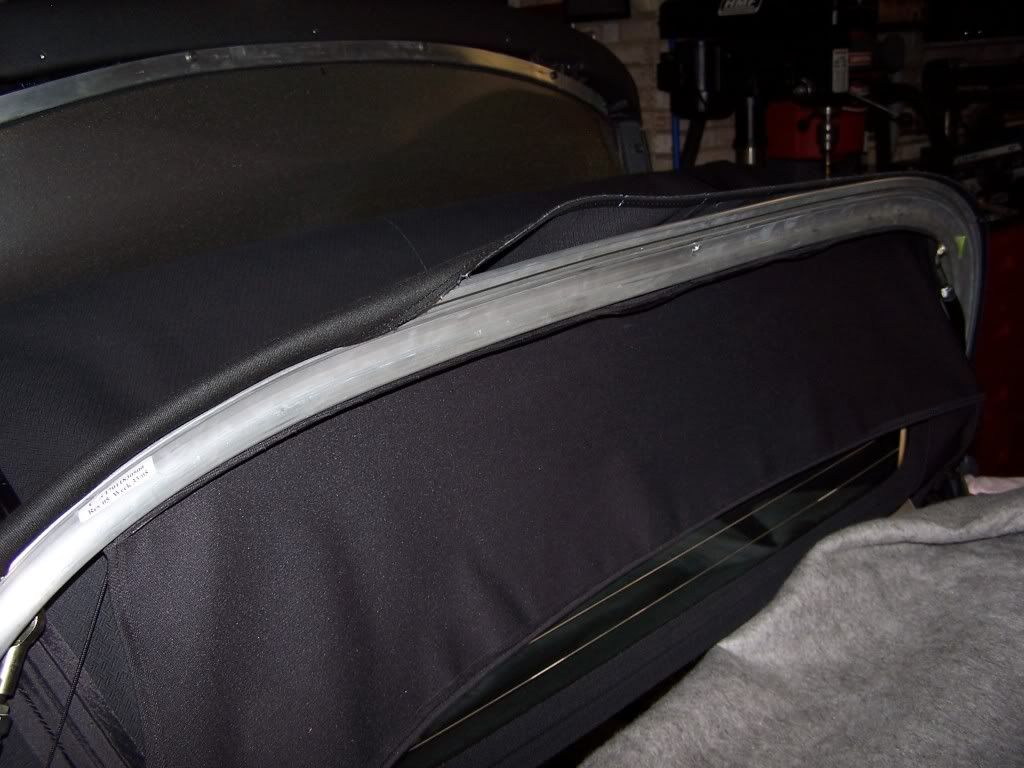
Now remove the 3 Torx screws that holds the the upper door glass seal rubber metal retainer that goes above the door glass. This is the one that goes at the rear top edge above where the door glass would roll up to.
The top just hooks and lays in a grove in the frame in this area below. When the metal rubber retainer is reinstalled it holds the top in place.
MORE TO COME
The top just hooks and lays in a grove in the frame in this area below. When the metal rubber retainer is reinstalled it holds the top in place.
MORE TO COME
01-15-2012, 07:04 PM
#11
Burning Brakes
Thread Starter
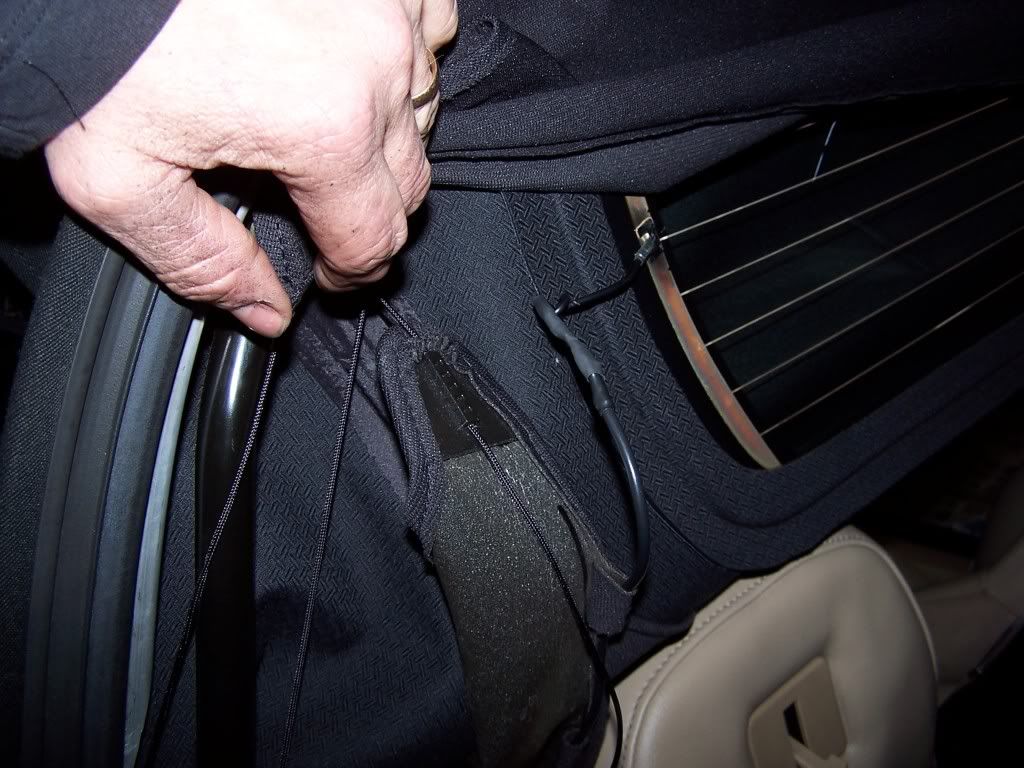
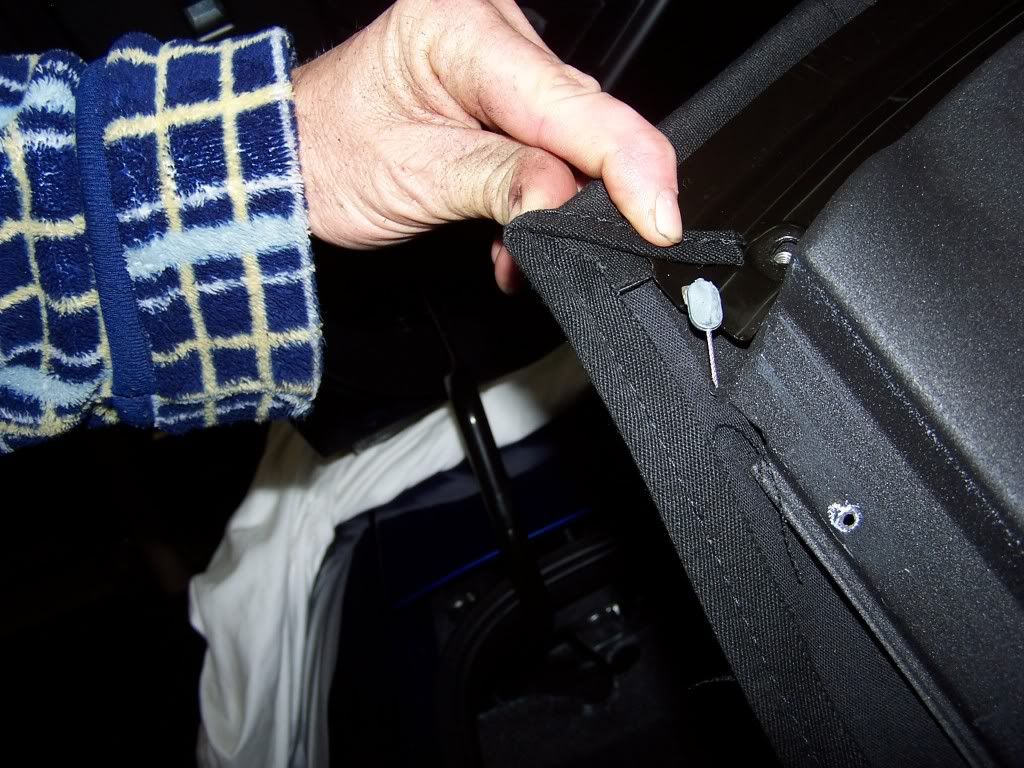
Now there is still one Torx screw in the top of the vertical door seal rubber so pull the top till it stops at the top corner.
Remove the Torx screw that is back in a hole in the top of rear vertical rubber.
The top can now be pulled back.
In this pic below you can also see the Tension Cable that runs from the front of the top to the back on each side. Silver wire.
Pull the Tension Cable out thur the rear area of the top now. Pic below is the front corner of the top.
01-15-2012, 07:35 PM
#12
Burning Brakes
Thread Starter
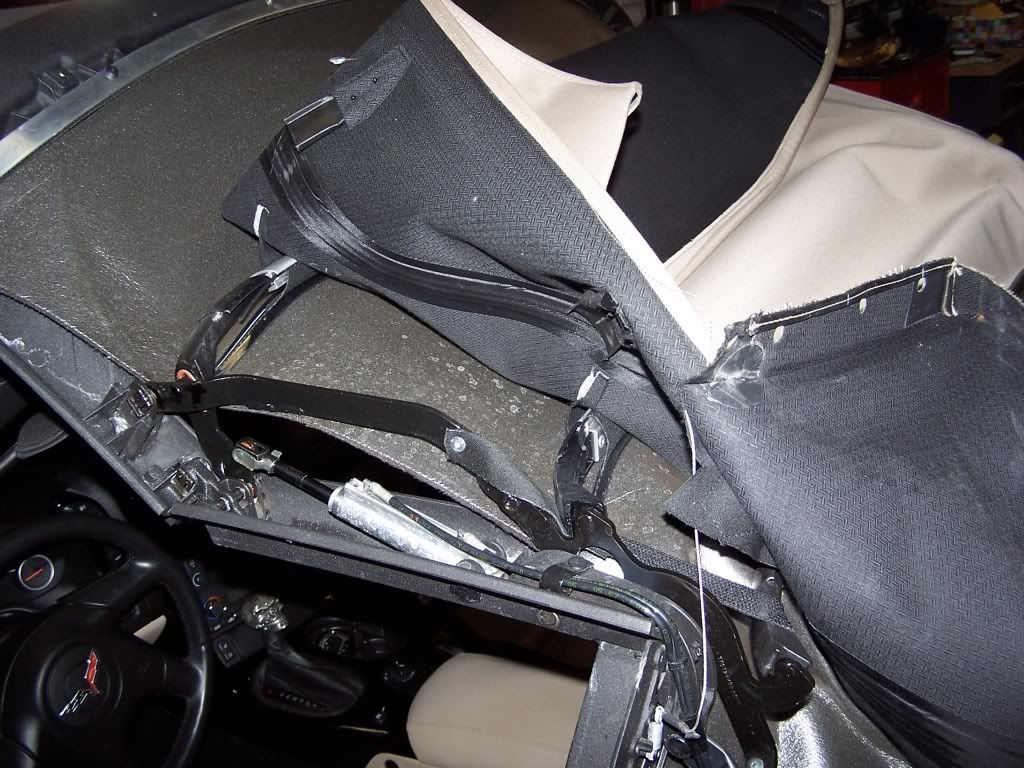
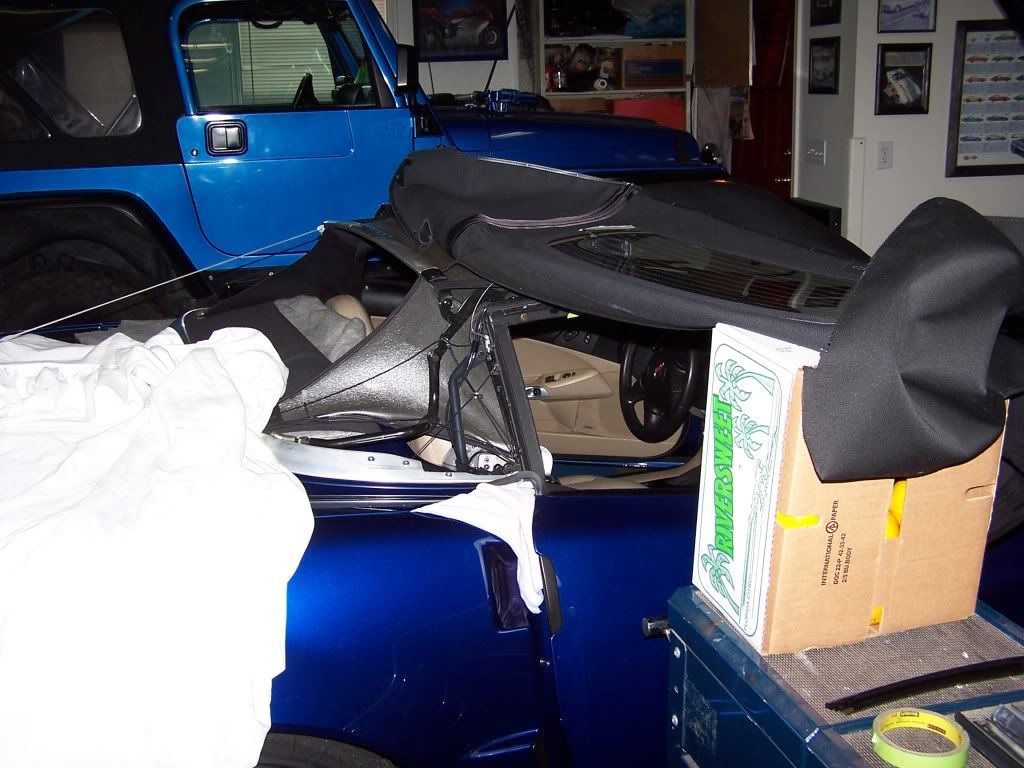
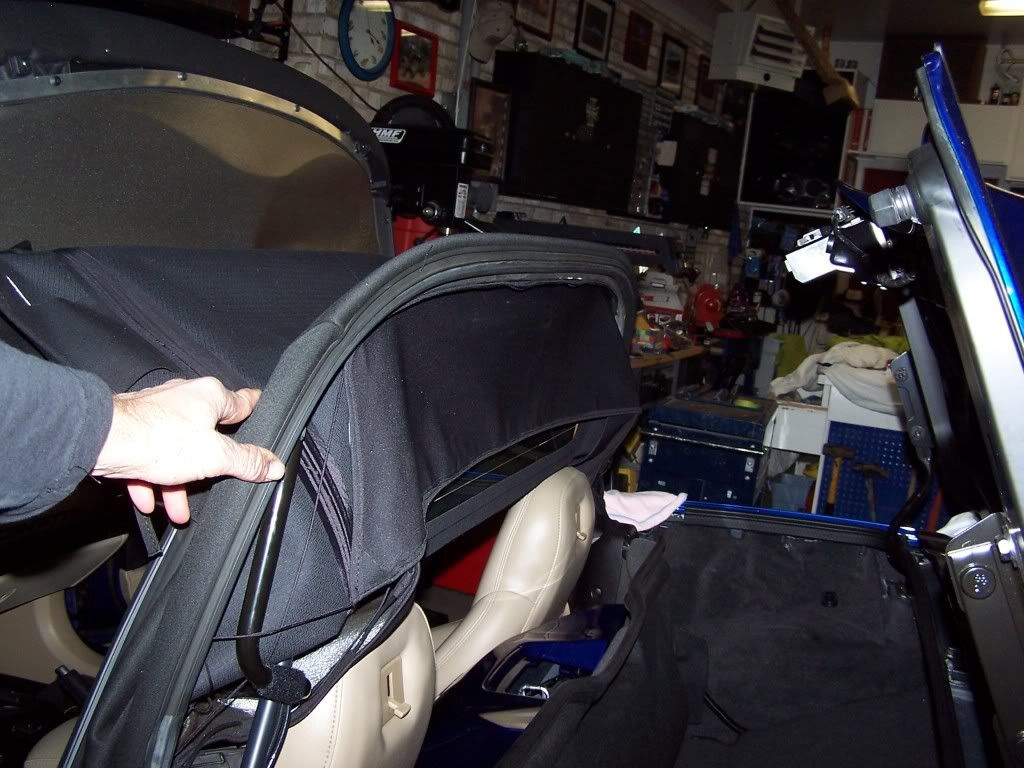
I have a power top so I should mention that my top would fall down after awhile of being in the bow 1 and 5 up position. Be ready as you are working with the top because it will drop down every now and then. Just run it back into the position you need as you work. I constantly had to raise the top to the position that was need. Top should now be in the up position. You can now see the bows in the top frame. The top has to now be slid out of the 3 center bows in the top frame. I slid the top from the drivers side out the pass side. Just one grove per bow that the top slides into. Bows 2, 3 and 4.
1
Top is now removed
MORE TO COME
1
Top is now removed
MORE TO COME
01-15-2012, 07:58 PM
#13
Burning Brakes
Thread Starter
I came back to EDIT this in to this post bacause I forgot to put these in before I installed the top on the top frame. This make it easier.
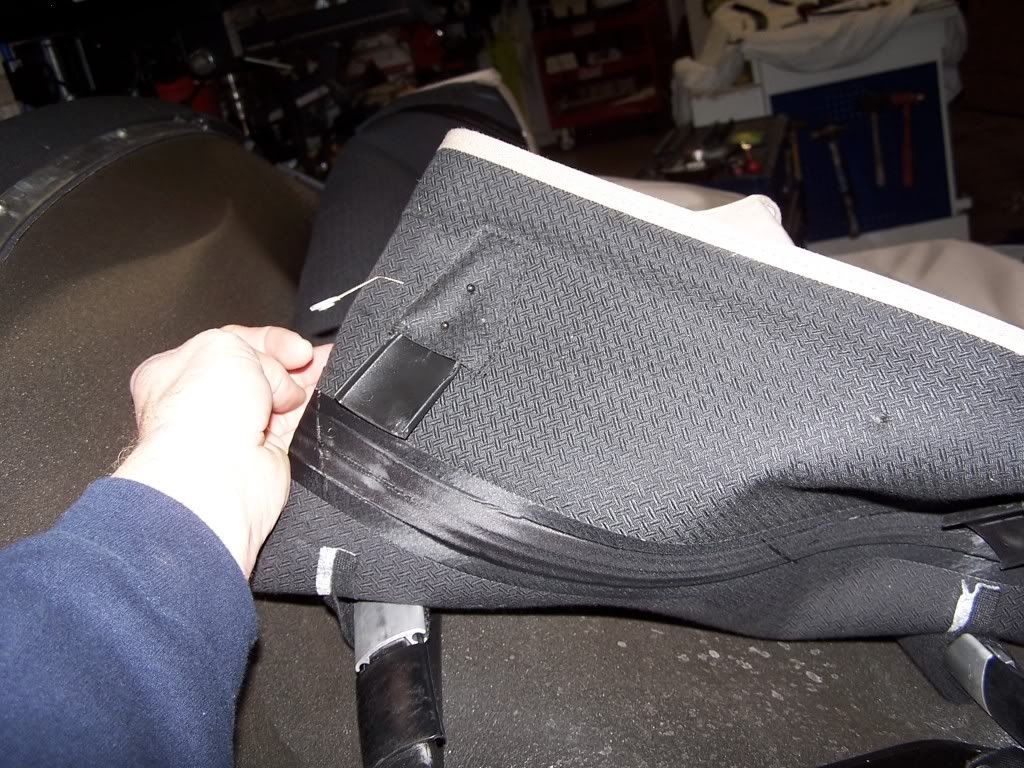
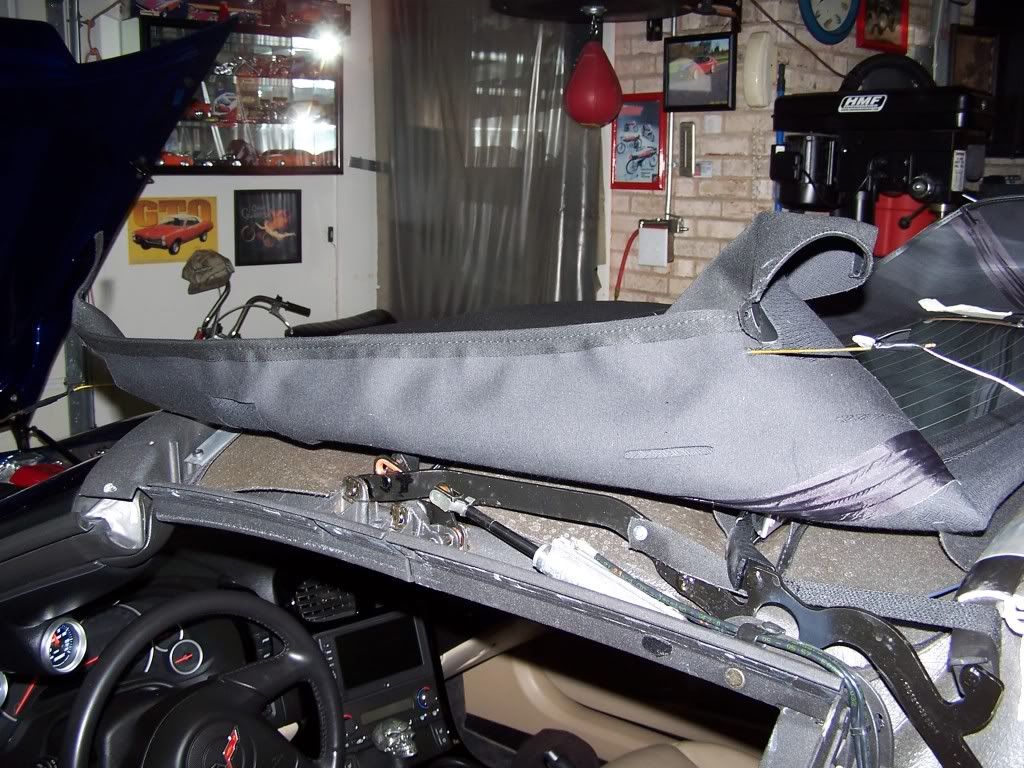
This where I realized I had forgotten to install the plastic pieces in the top before I installed the top on the car. 3 per side in the area's of bows 2, 3 and 4. These help keep the frame bows from tearing through the top. Install them before you put the top on the and you'll save yourself 25 minutes and standing on your head.
Now time to put the top back on.
Pic of top off
Here we go.
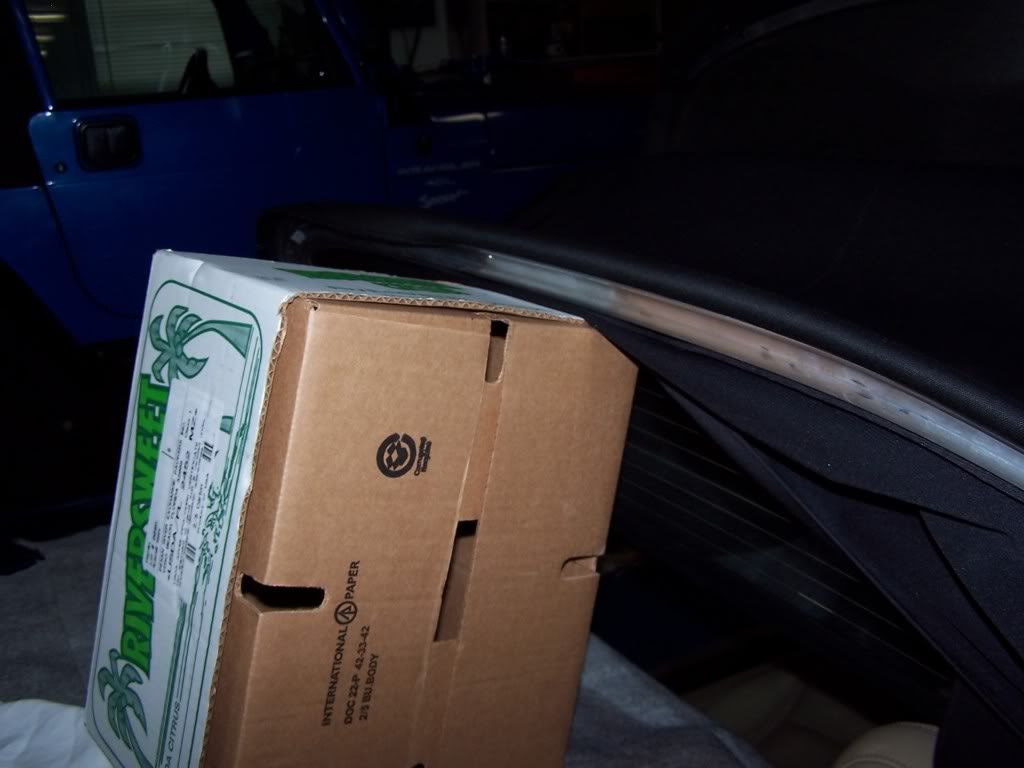
I put a box at the pass side on a cart at the height of the top frame to keep it from falling down while I put the top back in the bows 2, 3 and 4. If you have someone to help slide the top in it would be a lot easier and box would not be needed. Fold the top so the so you can slide the top in the 3 groves and slide to the drivers side.
1
MORE TO COME
This where I realized I had forgotten to install the plastic pieces in the top before I installed the top on the car. 3 per side in the area's of bows 2, 3 and 4. These help keep the frame bows from tearing through the top. Install them before you put the top on the and you'll save yourself 25 minutes and standing on your head.
Now time to put the top back on.
Pic of top off
Here we go.
I put a box at the pass side on a cart at the height of the top frame to keep it from falling down while I put the top back in the bows 2, 3 and 4. If you have someone to help slide the top in it would be a lot easier and box would not be needed. Fold the top so the so you can slide the top in the 3 groves and slide to the drivers side.
1
MORE TO COME
Last edited by Rayzzz; 01-15-2012 at 08:58 PM.
01-15-2012, 08:19 PM
#14
Burning Brakes
Thread Starter
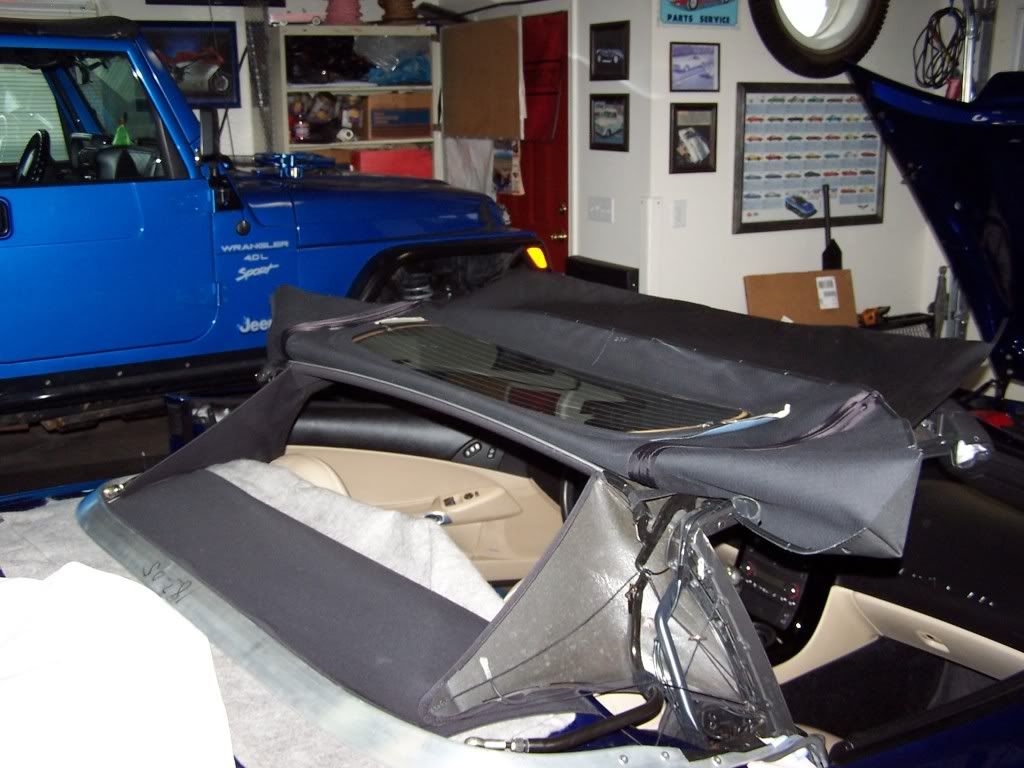
Pull the top down the side and wrap the top around the bottom corner of top frame.
Pull the top over bow 5 at rear (rear bow) and push into the bottom of bow 5. It will push in but will be loose until you put the rubber seal back into bow 5.
1
1
I used a box to hold the top up so I could get the seal in without the top falling down.
MORE TO COME
Pull the top over bow 5 at rear (rear bow) and push into the bottom of bow 5. It will push in but will be loose until you put the rubber seal back into bow 5.
1
1
I used a box to hold the top up so I could get the seal in without the top falling down.
MORE TO COME
01-15-2012, 08:34 PM
#15
Burning Brakes
Thread Starter
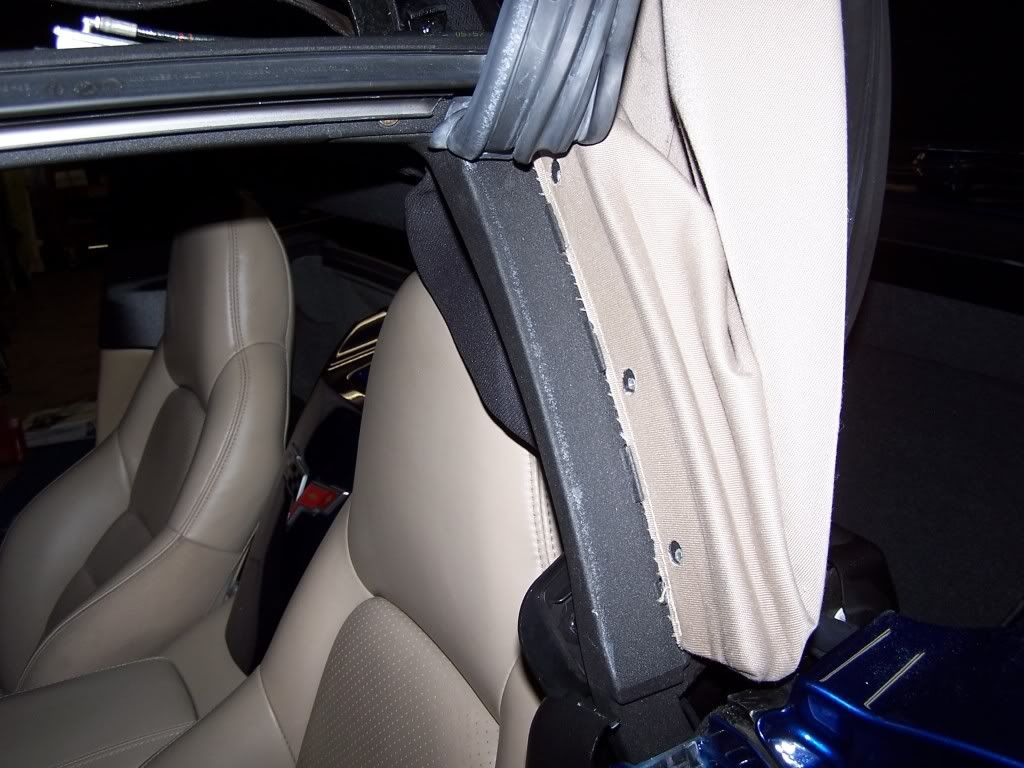
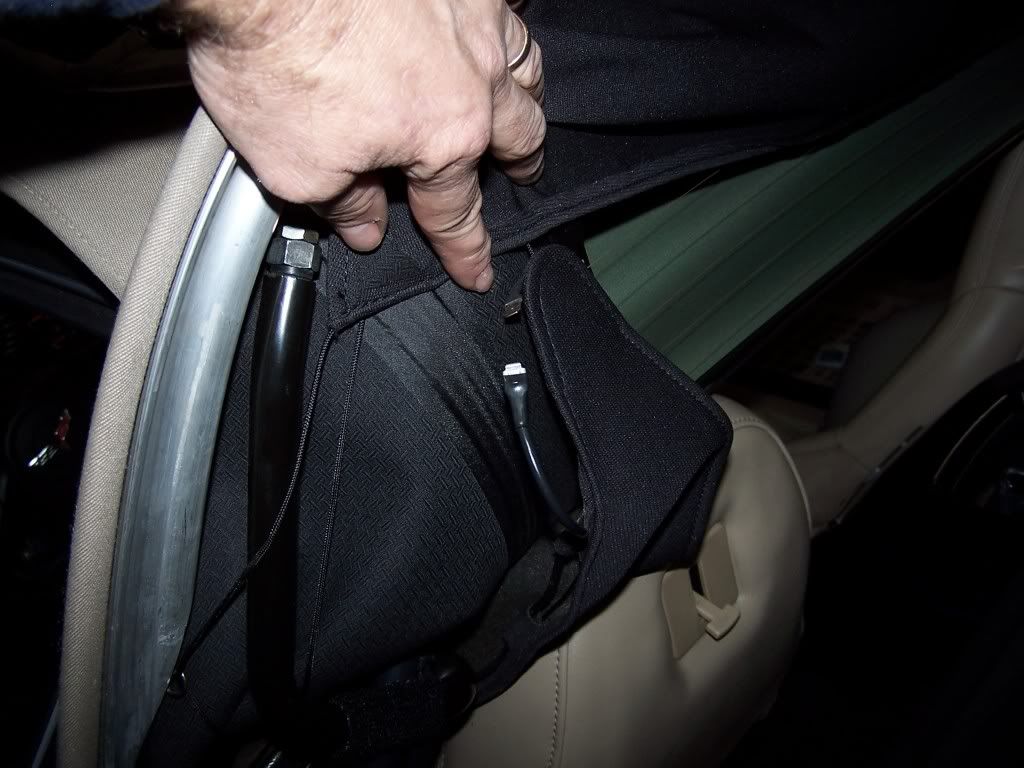
Now pull the top to the door vertical seal area and push the top into lock in area of the top frame.
Continue up to the top of top frame corner.
Install the door glass vertical metal seal retainer with 3 Torx screws. This piece also holds the top in this area.
MORE TO COME
Continue up to the top of top frame corner.
Install the door glass vertical metal seal retainer with 3 Torx screws. This piece also holds the top in this area.
MORE TO COME
01-15-2012, 08:58 PM
#16
Burning Brakes
Thread Starter
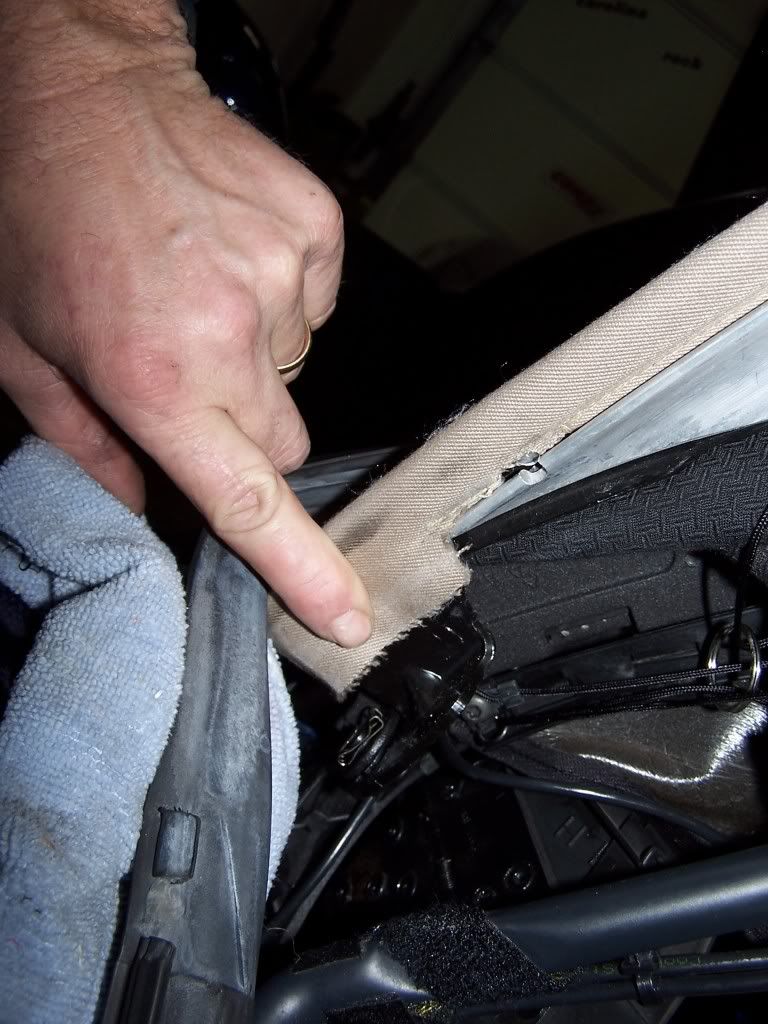
I installed the seal by pushing the seal in with a plastic stick from the bottom of seal top.

Install the Torx screw in the top corner of rubber.
This where I realized I had forgotten to install the plastic pieces in the top before I installed the top on the car. 3 per side in the area's of bows 2, 3 and 4. These help keep the frame bows from tearing through the top. Install them before you put the top on the and you'll save yourself 25 minutes and standing on your head.
MORE TO COME
01-15-2012, 09:07 PM
#17
Burning Brakes
Thread Starter
Now start to install the rear seal in bow 5. It just pushes in bow 5. I started at the bottom corner and worked my way around the bow to the other side. Remember this seal is connected to the vertical door glass seal on each side.
1
1
Seal in bow 5 installed.
1
1
Seal in bow 5 installed.
01-15-2012, 09:18 PM
#18
Burning Brakes
Thread Starter
Another picture of protector installed. The one's I forgot to install earlier.
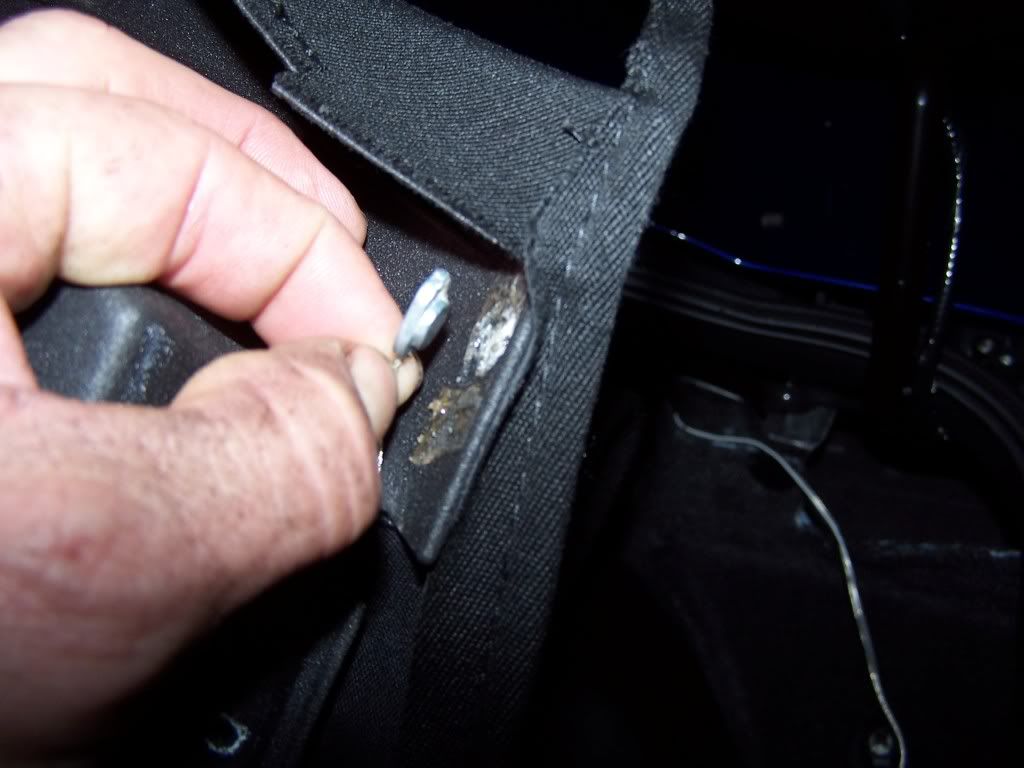
I took a coat hanger and taped it to the Tension Cable and pulled the cable though the top. You can just see the oval end of cable here.
Hook up the defroster wires on each side of back glass. I also put heat shrink on the wire connection to protect them and hold them together better.
1
I took a coat hanger and taped it to the Tension Cable and pulled the cable though the top. You can just see the oval end of cable here.
Hook up the defroster wires on each side of back glass. I also put heat shrink on the wire connection to protect them and hold them together better.
1
01-15-2012, 09:36 PM
#19
Burning Brakes
Thread Starter
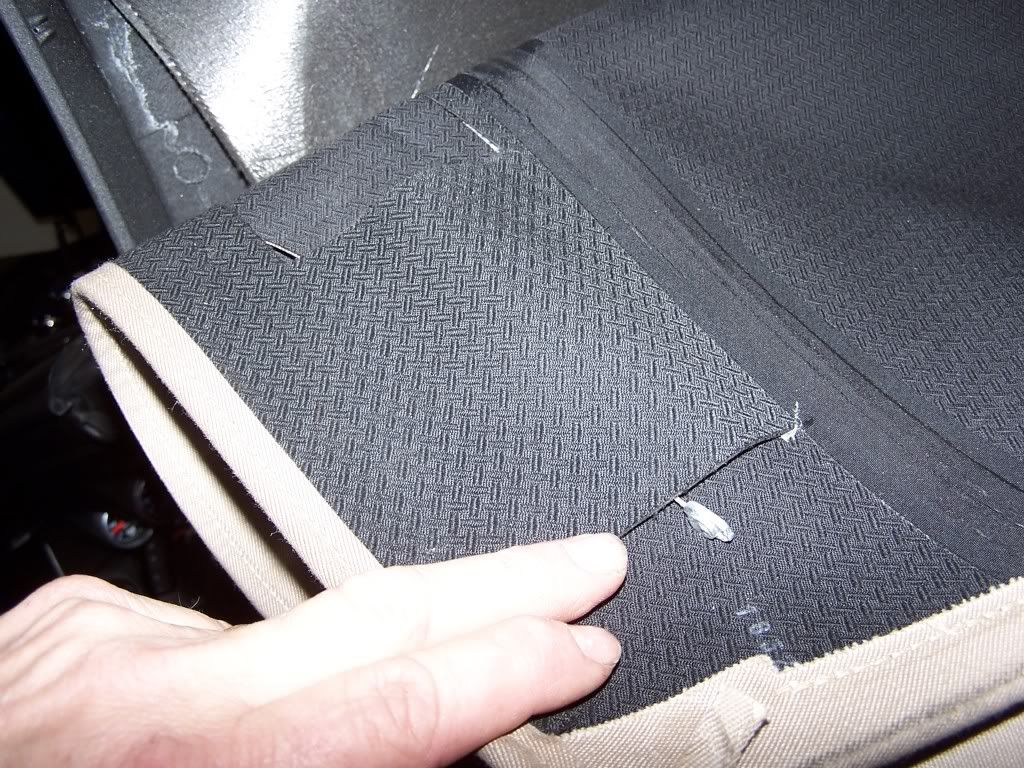
Pull the top over the front corner of top frame. You can see where the Tension Cable end goes into an oval hole in the top frame. I used a little butyl sticky tape to hold cable end in place because it only sets in the hole in bow 1 and the front metal strip holds it in place later.
I used a hook tool and pulled the rest of the top onto the front of the top frame. The top now covers the hole that the cable end goes into.
I used a hook tool and pulled the rest of the top onto the front of the top frame. The top now covers the hole that the cable end goes into.
01-15-2012, 09:53 PM
#20
Burning Brakes
Thread Starter
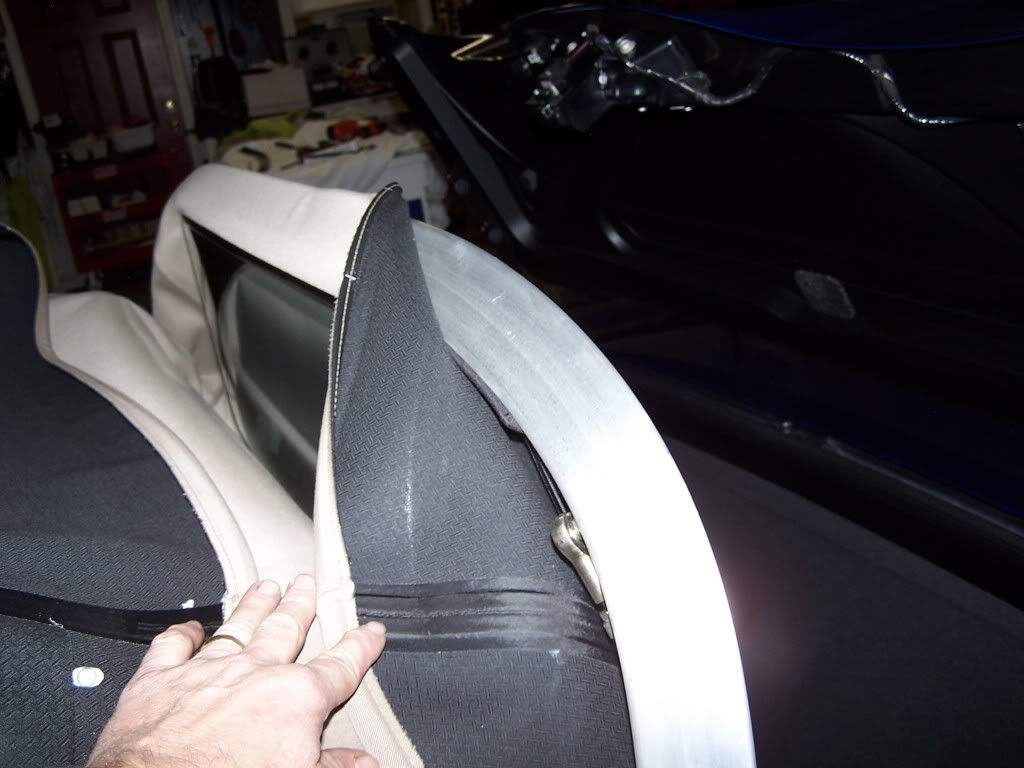
Pull the top around the front of bow 1. The top lays in a grove in bow 1 and the metal trim piece gets screwed on with 5 Torx screws. Leave the 2 end ones out so you can wrap the top little tails under metal trim.
This is a pic from the pass side but it shows the angle that the top tail goes at under the metal trim at both sides. Put the tails under the metal trim and install the 2 outer Torx screws.
This is a pic from the pass side but it shows the angle that the top tail goes at under the metal trim at both sides. Put the tails under the metal trim and install the 2 outer Torx screws.
The following users liked this post:
beabob (08-29-2016)
