
[Z06] [DIY HOW-TO] Replacing the Rear Brake Duct Scoops
 08-02-2010, 10:50 PM
#1
Safety Car

Thread Starter

Hey guys,
I figured I'd make my first how-to contribution to the C6 world with this one on replacing the rear brake duct scoops on a Z06 (and now Grand Sports too I guess). I like lots of pictures because, at least for me... they help far more than reading a bunch of text.
I drove mine up the Alaska Highway and my current scoops got hammered pretty hard by rocks. Turns out these scoops are a paltry $6 each from the dealer so replacing them was a no-brainer.
Here's how to do the job!
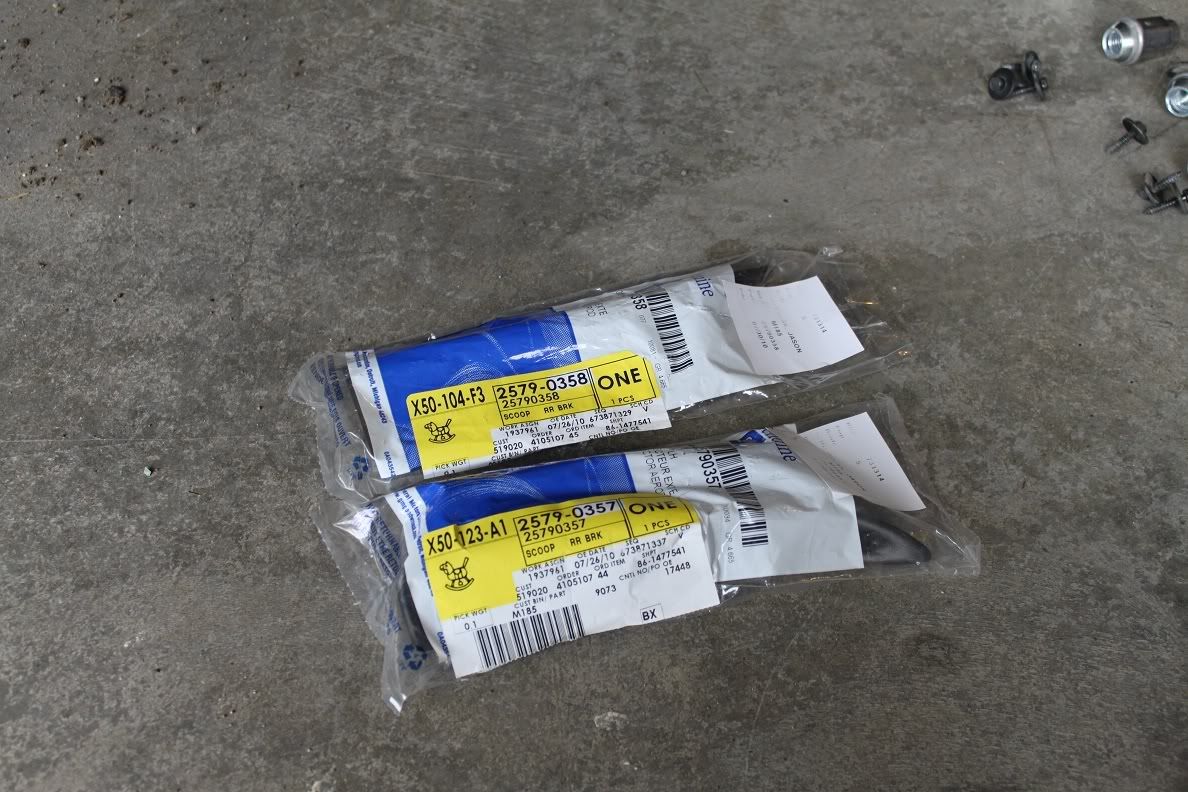
To start, you'll obviously need a LH and a RH scoop. I got them from the dealer for $12 total. As far as tools, all that's needed is a 7mm wrench or ratchet, and a slotted (flat) screwdriver; as well as the obvious items such as a jack and jackstands, and a way to get the wheels off.
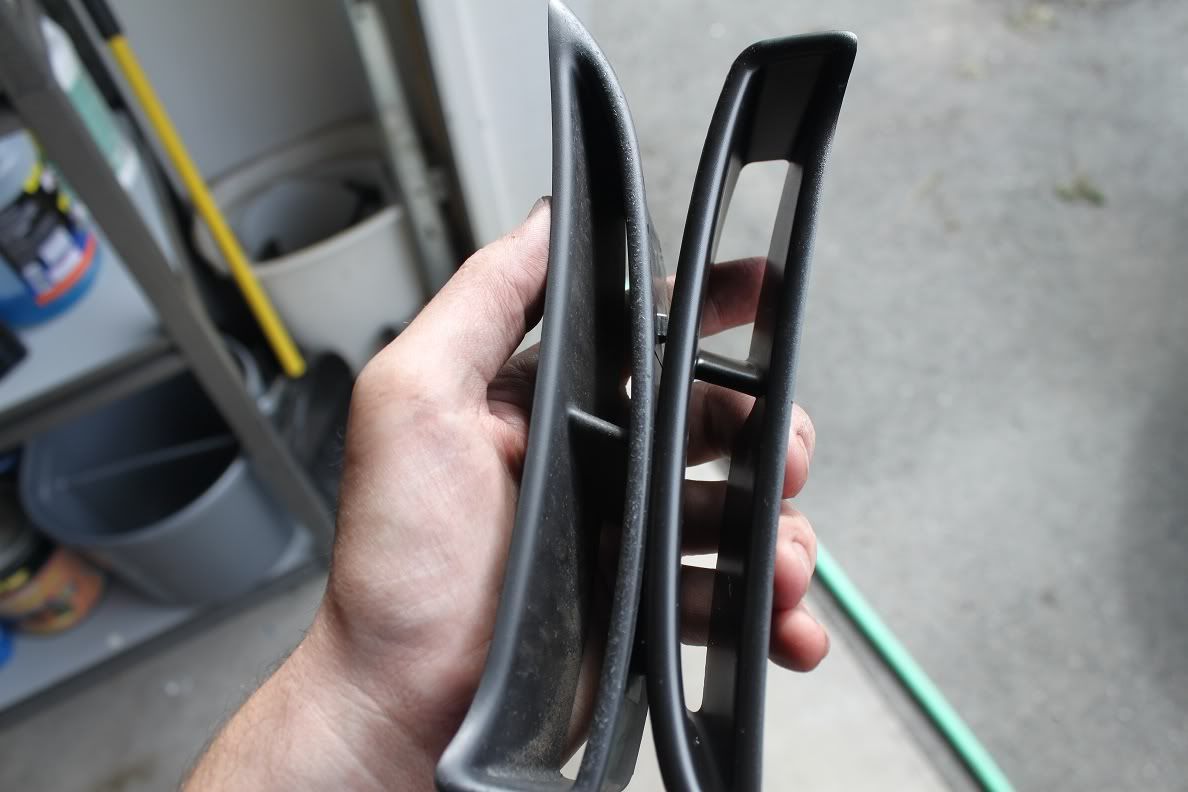
You'll notice that if you have a 2006, the replacement scoops will have a wider lip, which covers more of the paint surrounding the area. Good move, GM!
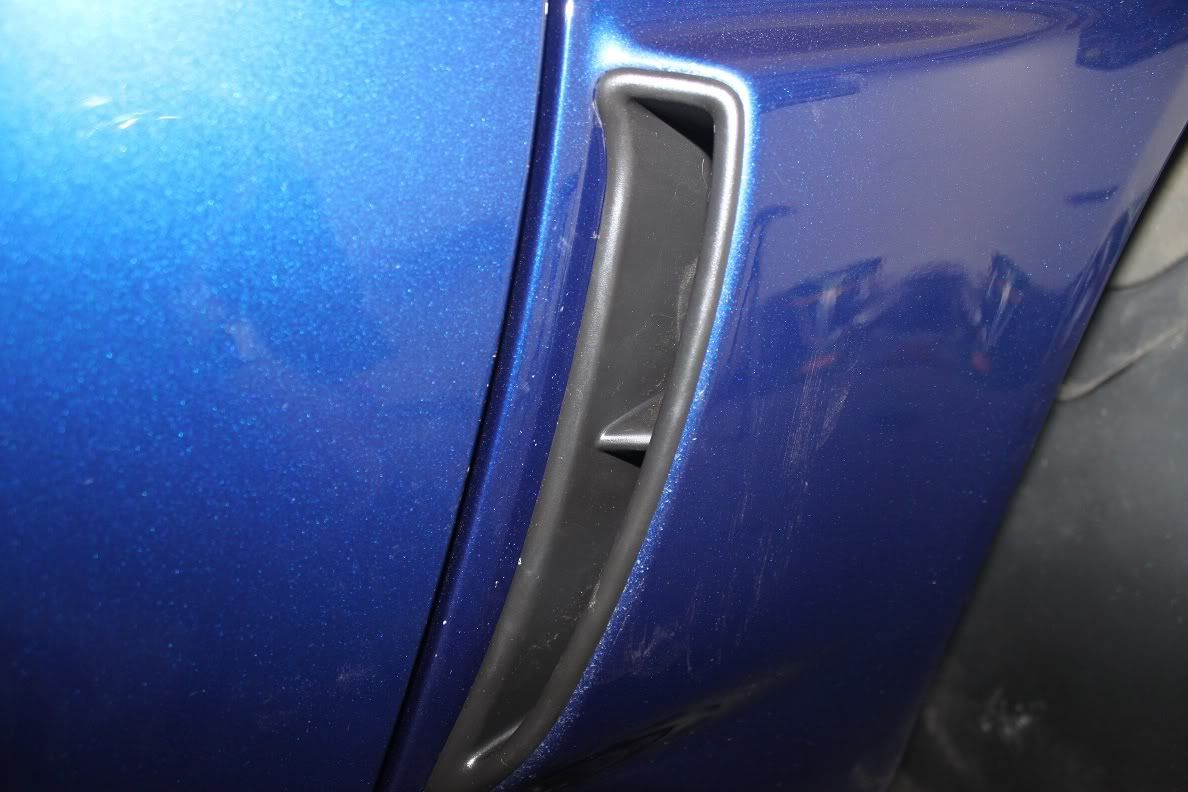
Here is a "before" shot, showing the narrow-lipped 2006 scoops, and all the damage I had.

First, raise and suitably support the vehicle and remove the wheels.
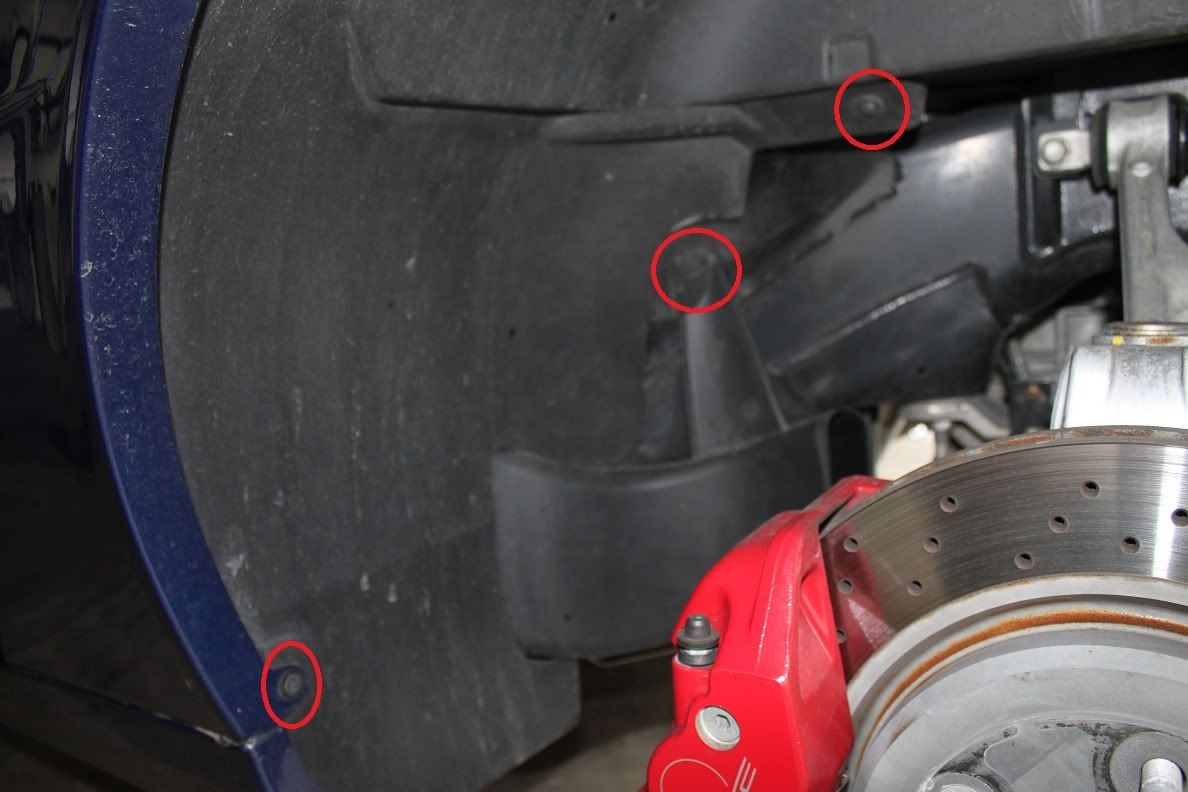
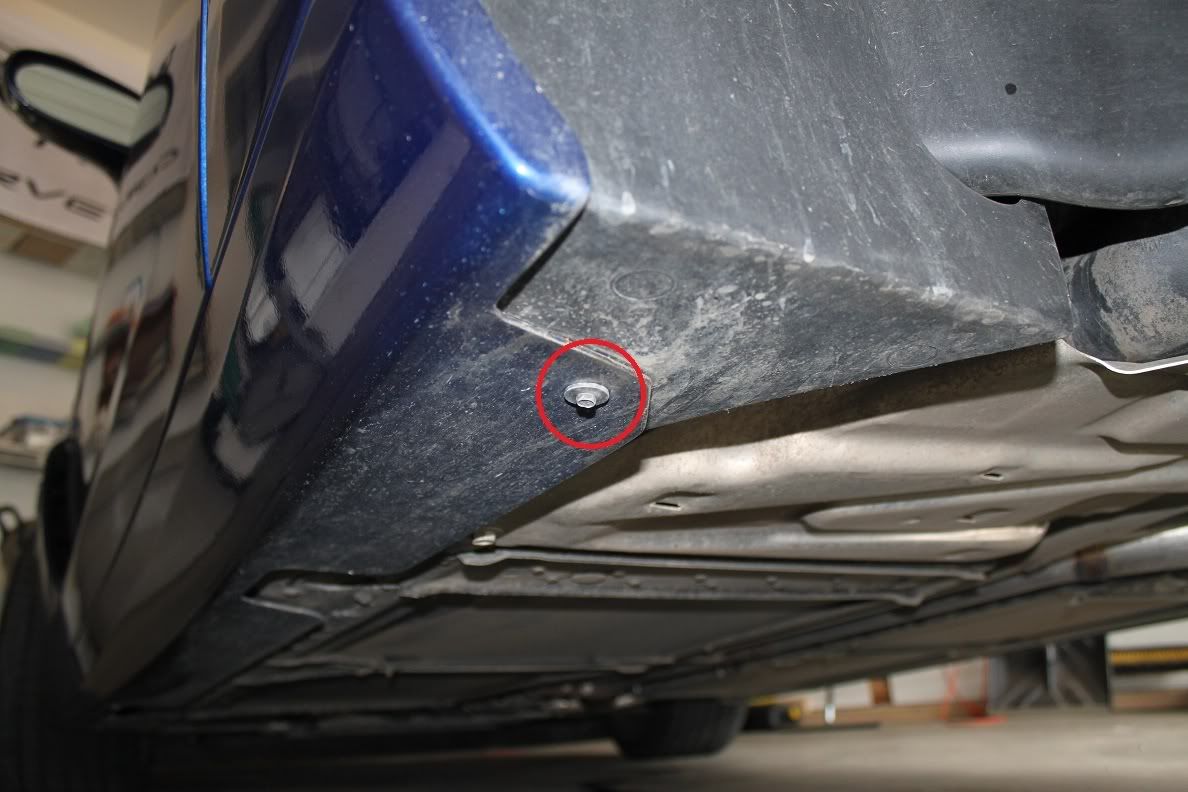
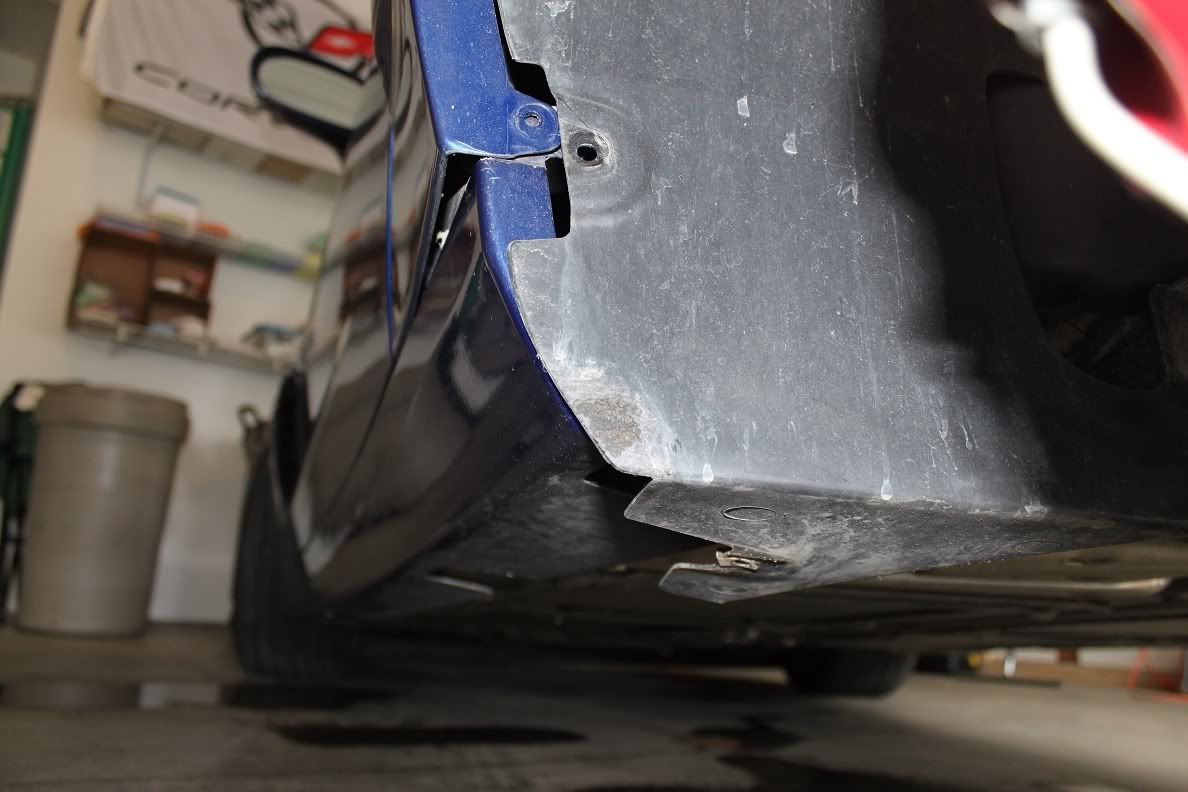
This will expose the wheel well liner. It's only necessary to remove the front of it. There are four 7mm bolts to remove (all circled in red on the following two pictures; note one is on the BOTTOM of the car).
The next three pictures show what I found, to be the easiest way to snake the liner out of the wheelwell.
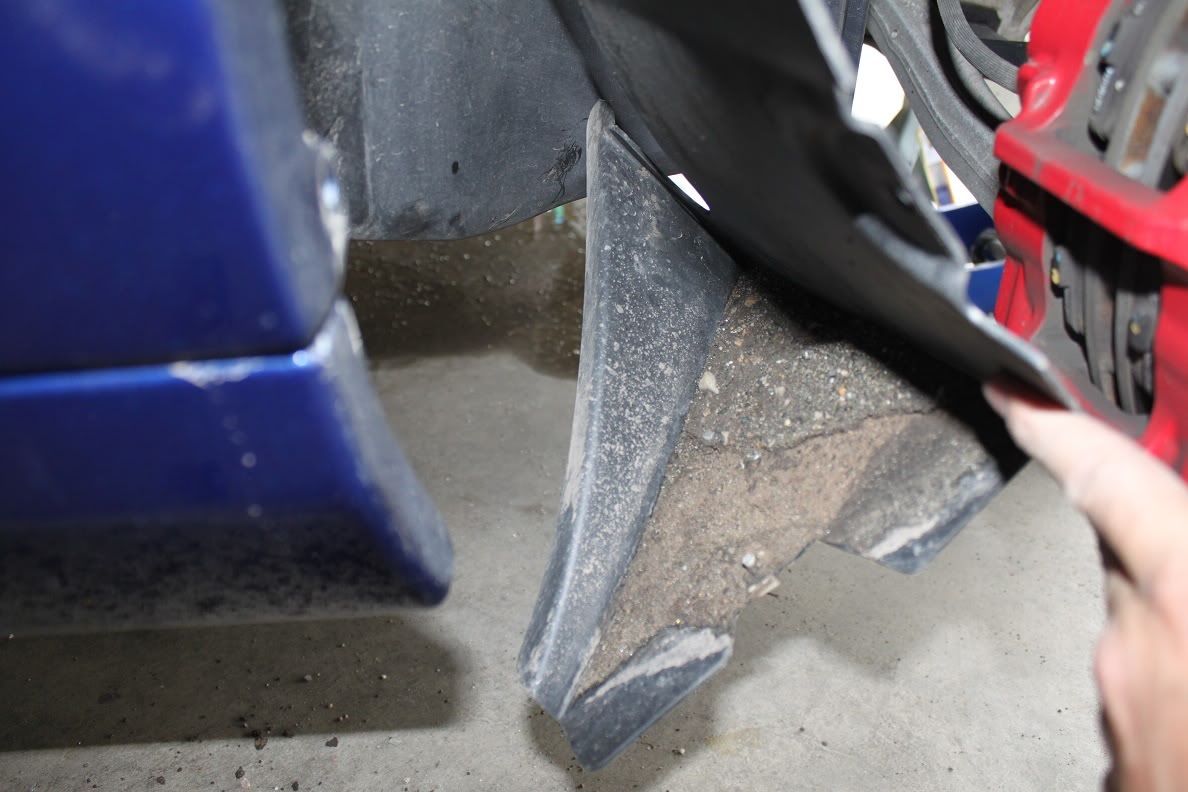
At this point, it gets a bit trickier. You want to (carefully) muscle the liner away from the lip on the rocker panel and the quarter panel in order to fully free it. As you are doing all this, you'll probably have a few pounds of dirt and gravel come tumbling out!
Anyway, eventually you will have freed the bottom portion of the wheel well liner, as shown below:
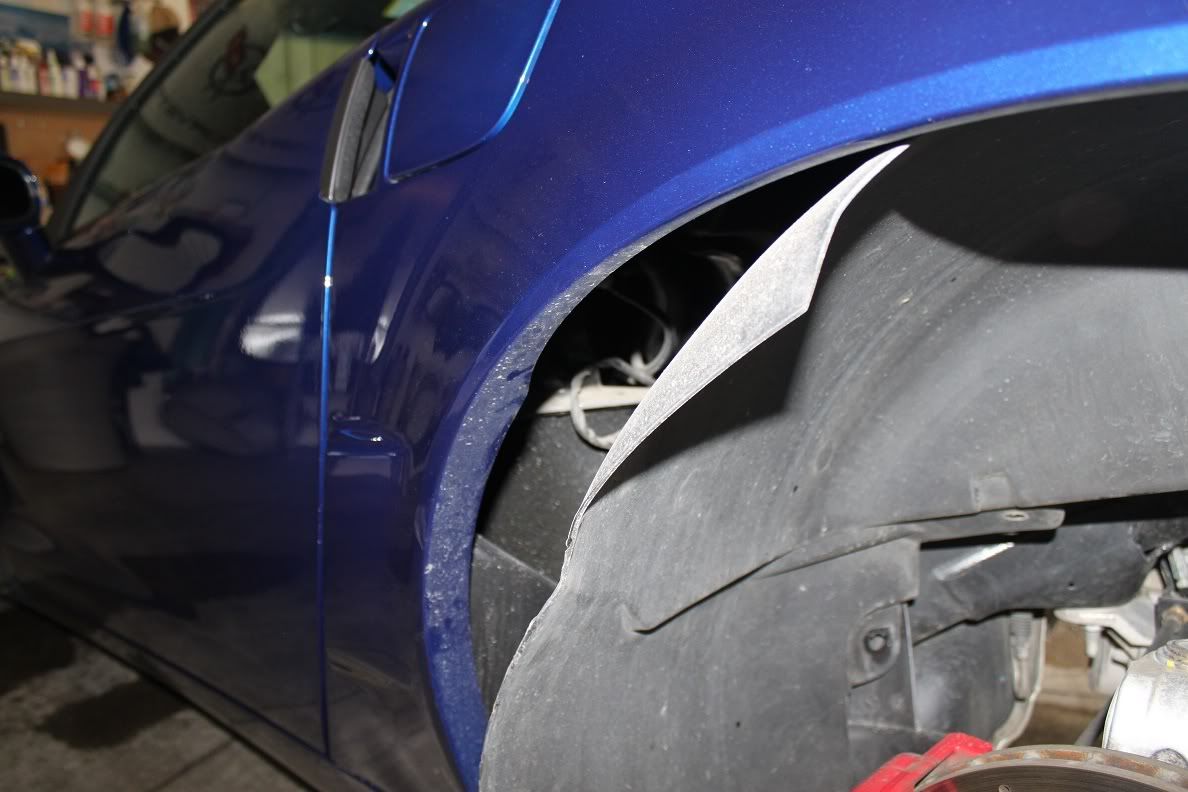
Begin loosening the liner from the quarter panel lip as you work your way to the top of the wheel well, as shown: (note that you can pull the quarter panel away from the car about an inch or two; use this carefully to your advantage)

...and that's about as far as you need to go. Once done, you can pull the front part of the liner all the way back to the axle (and reveal another treasure trove of dirt... )
)
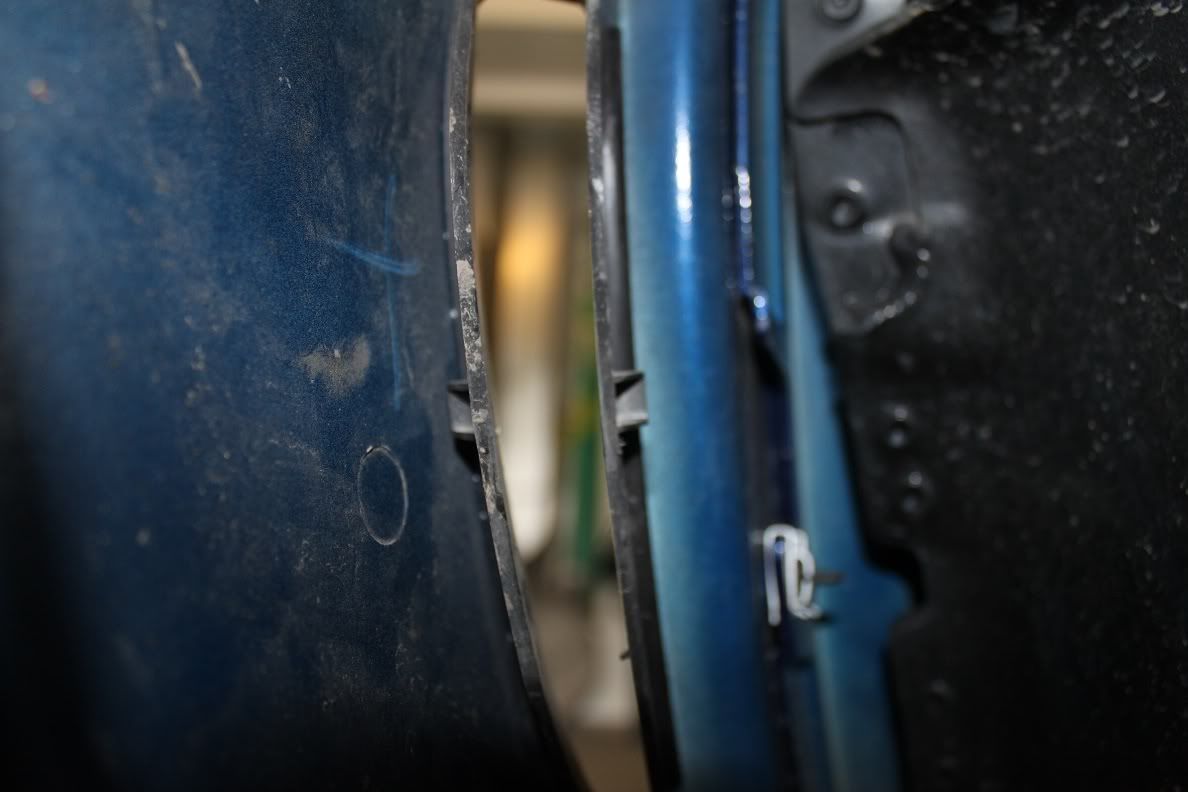
Here's a shot into the gap we've just created:
Looking towards the brake duct scoop, you will see the brake duct meeting the scoop, as shown. Note that there are THREE parts here: The duct, the scoop as seen from outside the car, and a third part that "frames" the scoop from behind the body panel. We do not need to remove that frame.
We need to get the brake duct out of the way. it's held on by two latches that are attached to that piece that frames the scoop. As you can see from the picture above, one latch is easy to access but the other is between the body panel and the duct, and you'll invent some new swear words trying to unhook that side. But eventually it DOES come off. Here's the removed scoop, with the two ports that the latches were stuck in:
Next, a good view with the duct removed. We can clearly see the surrounding frame piece, and then the scoop itself is on the inside in what looks like two vertical "oval" shapes. There are four latches attached to the scoop, that lock it into the surrounding frame. Use the flat screwdriver to pry them gently loose. Once all four are loose, the scoop can be pushed out of the body panel and it is removed.
A view from outside the car, with the scoop removed:
A view from behind the panel, with the scoop removed:
Now, the new piece simply pops in from the front, and that's it. You may need to push hard to get the latches to engage; it's held in place pretty tight. It helps to use a free hand to work it from inside the wheel well too. Eventually you will get all four latches to latch.
Here we are!
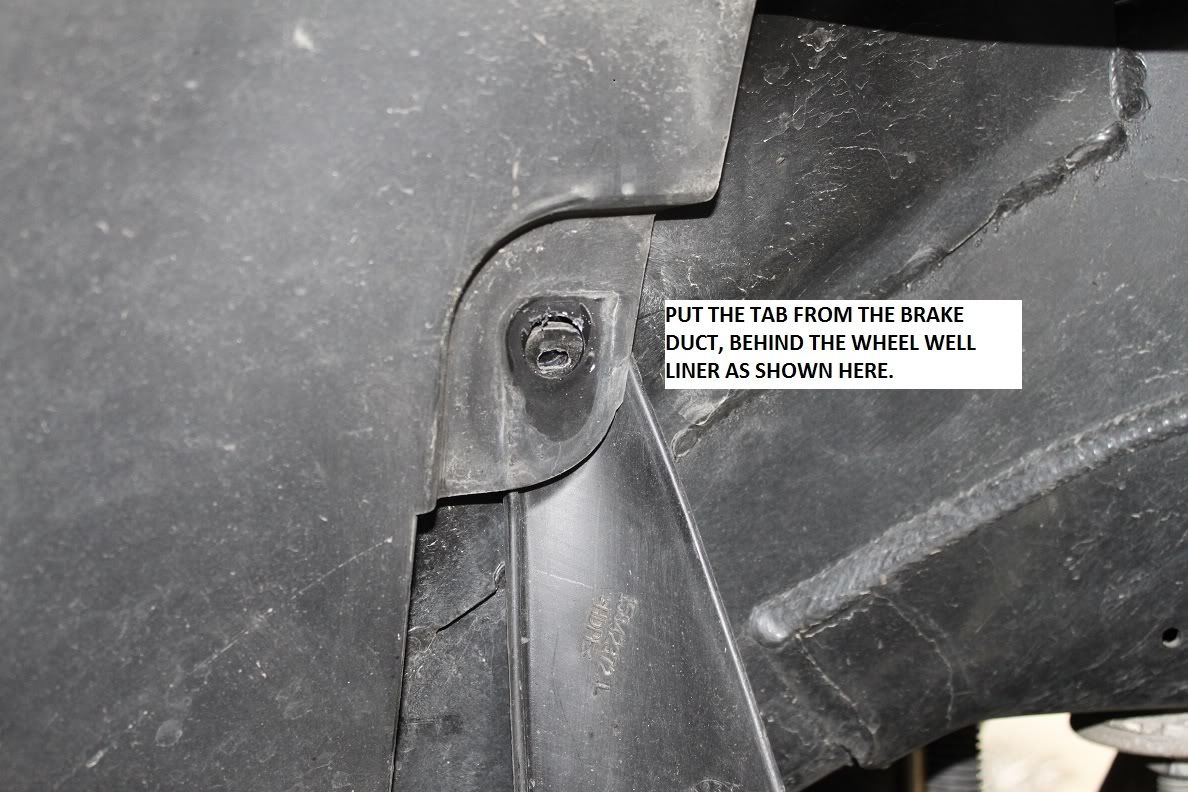
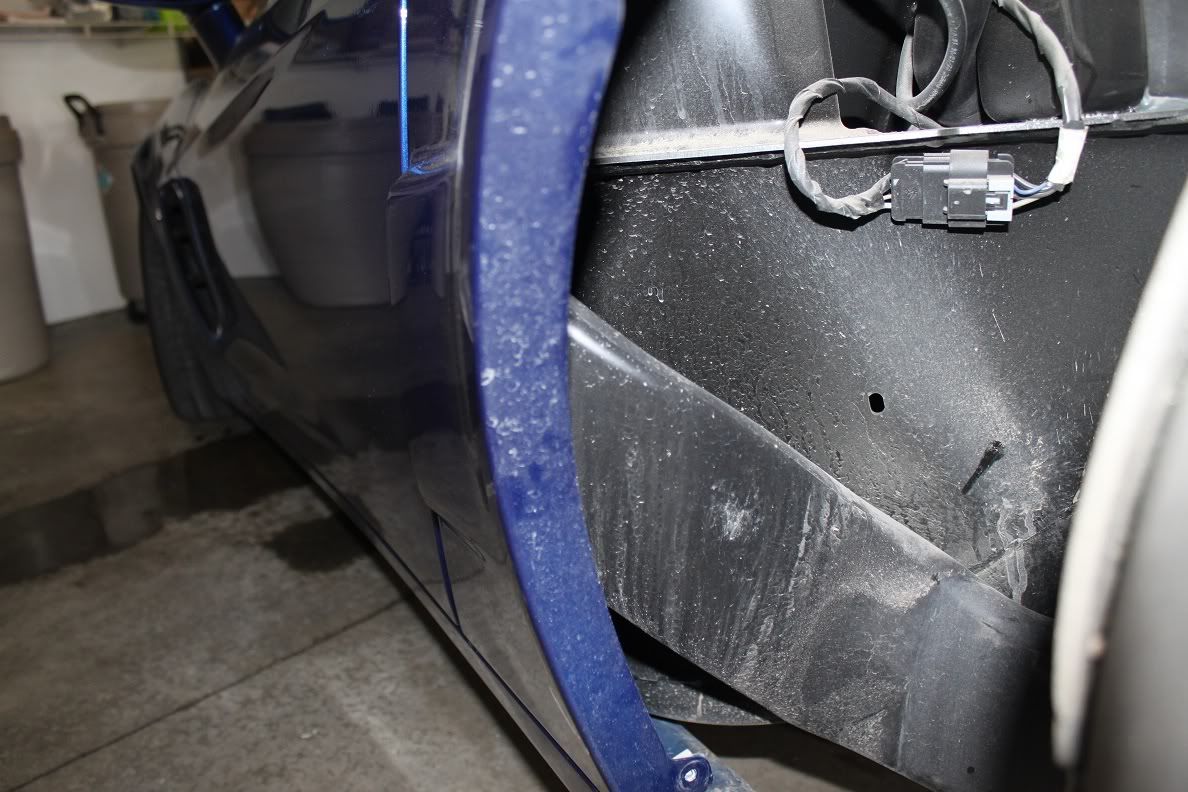
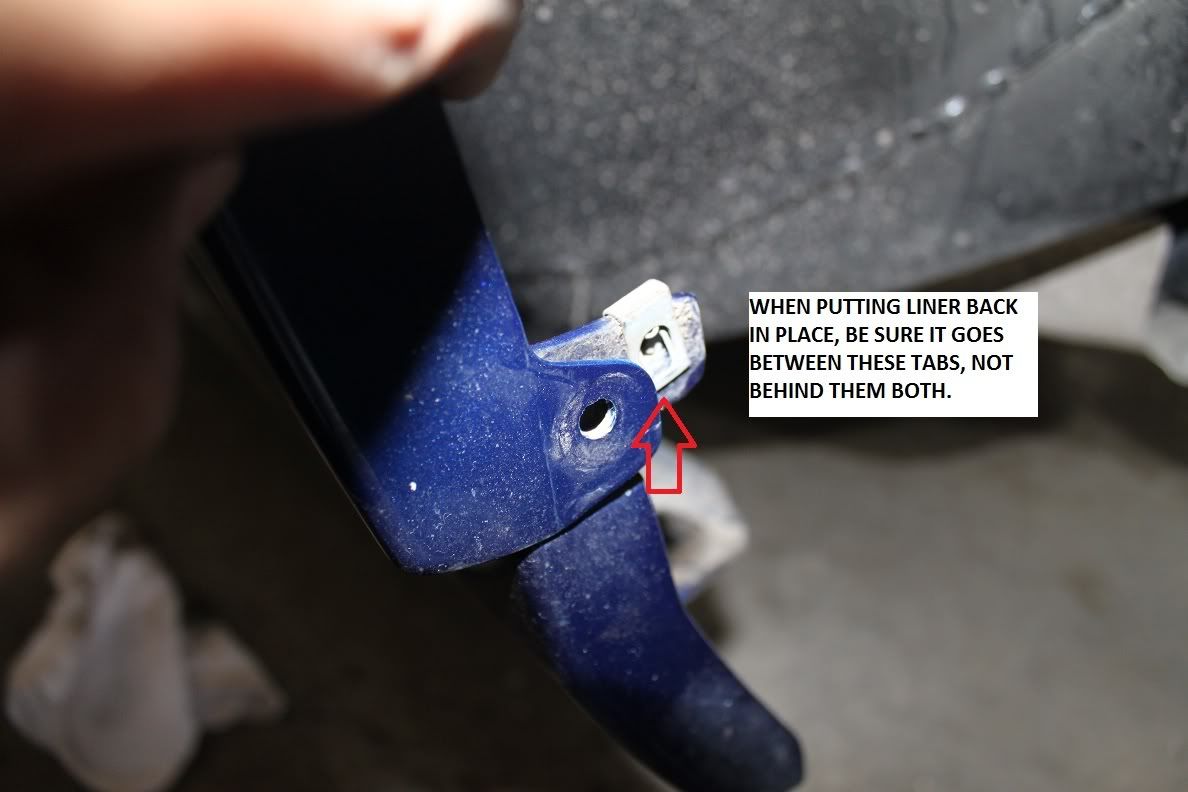
Now everything pretty much goes back together in the reverse order. attach the brake duct first (much easier to attach than to remove!), then start easing the wheel well liner back into place. You'll need to fuss with the lower front portion to make it fit. One thing to be aware of, is that when the liner gets to the rocker panel, it needs to go between the two tabs as shown below. Left to its own, it will try to end up behind them both.
Finish getting that liner back in, situate the brake duct where it needs to go, and put the four screws back in.
That completes one side; the steps are identical for the other side.
All thats left is the wheels and lowering the car, and you're good to go! This whole job took me about 90 minutes, and that includes the time it took to document my process.
I hope someone finds this helpful!
I figured I'd make my first how-to contribution to the C6 world with this one on replacing the rear brake duct scoops on a Z06 (and now Grand Sports too I guess). I like lots of pictures because, at least for me... they help far more than reading a bunch of text.
I drove mine up the Alaska Highway and my current scoops got hammered pretty hard by rocks. Turns out these scoops are a paltry $6 each from the dealer so replacing them was a no-brainer.
Here's how to do the job!
To start, you'll obviously need a LH and a RH scoop. I got them from the dealer for $12 total. As far as tools, all that's needed is a 7mm wrench or ratchet, and a slotted (flat) screwdriver; as well as the obvious items such as a jack and jackstands, and a way to get the wheels off.
You'll notice that if you have a 2006, the replacement scoops will have a wider lip, which covers more of the paint surrounding the area. Good move, GM!
Here is a "before" shot, showing the narrow-lipped 2006 scoops, and all the damage I had.
First, raise and suitably support the vehicle and remove the wheels.
This will expose the wheel well liner. It's only necessary to remove the front of it. There are four 7mm bolts to remove (all circled in red on the following two pictures; note one is on the BOTTOM of the car).
The next three pictures show what I found, to be the easiest way to snake the liner out of the wheelwell.
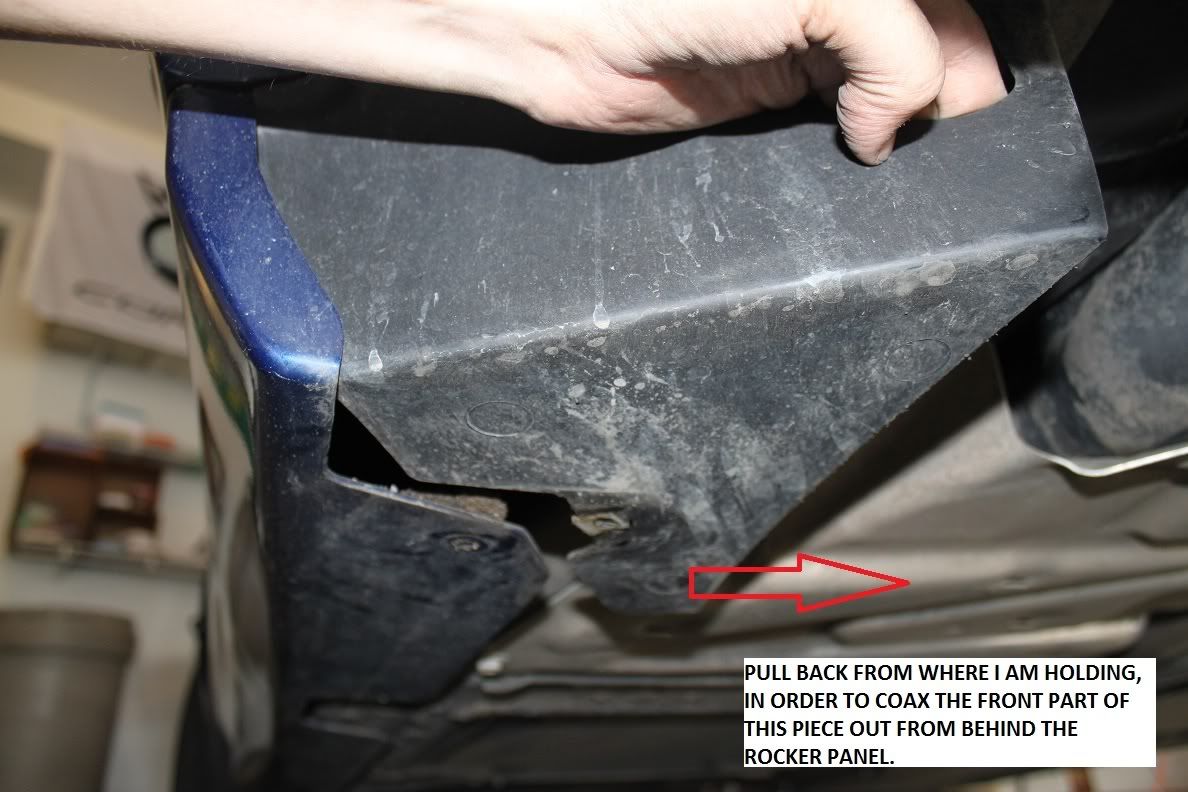
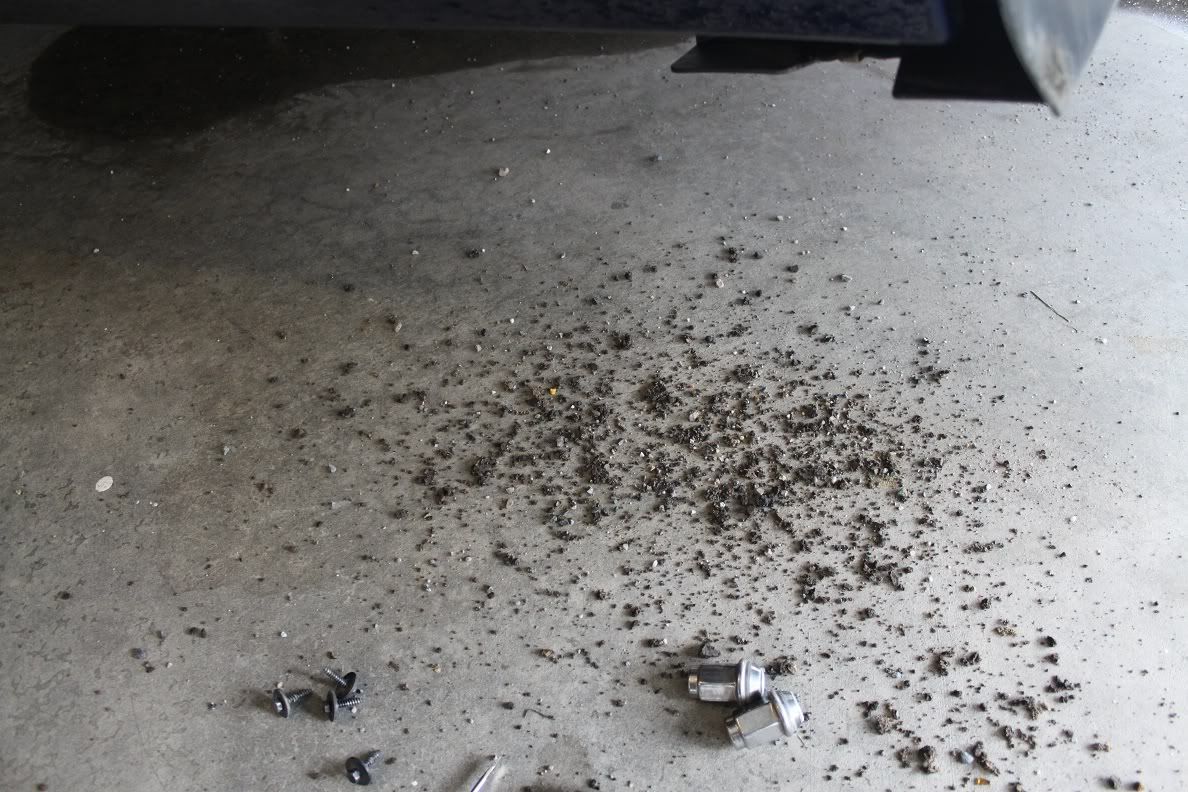
At this point, it gets a bit trickier. You want to (carefully) muscle the liner away from the lip on the rocker panel and the quarter panel in order to fully free it. As you are doing all this, you'll probably have a few pounds of dirt and gravel come tumbling out!
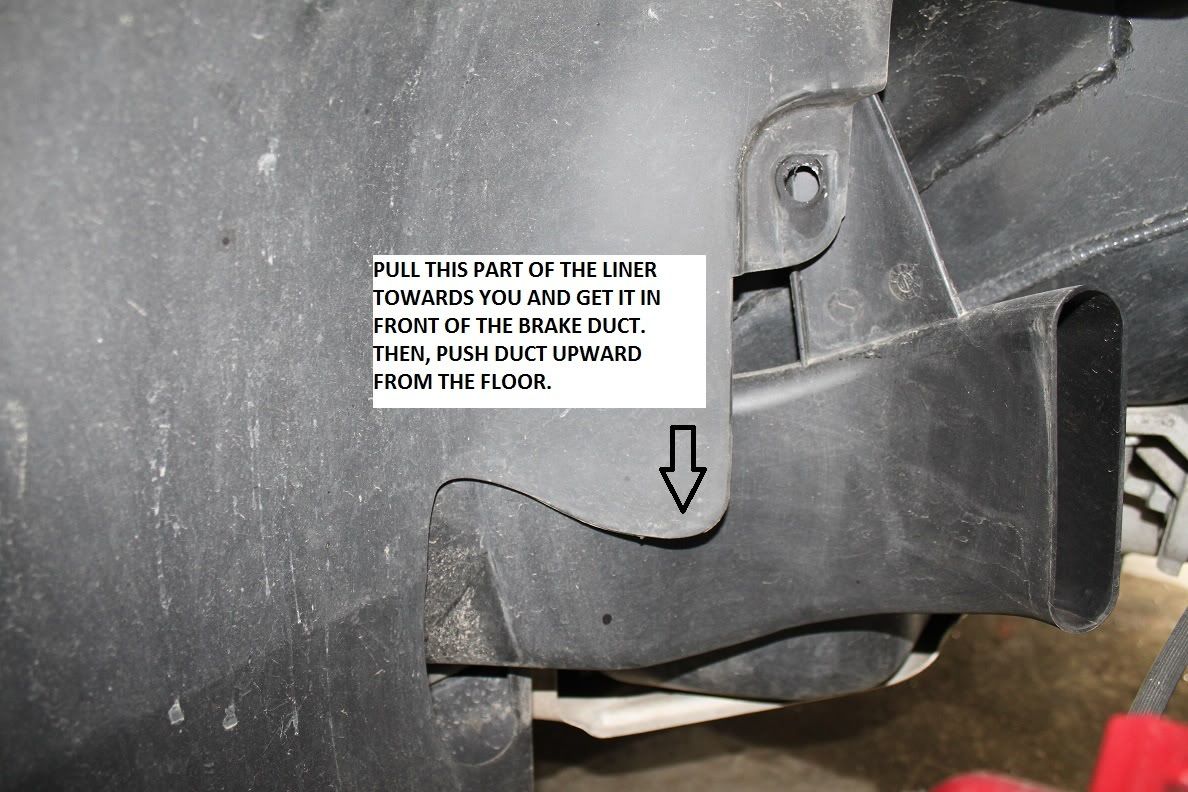
Anyway, eventually you will have freed the bottom portion of the wheel well liner, as shown below:
Begin loosening the liner from the quarter panel lip as you work your way to the top of the wheel well, as shown: (note that you can pull the quarter panel away from the car about an inch or two; use this carefully to your advantage)
...and that's about as far as you need to go. Once done, you can pull the front part of the liner all the way back to the axle (and reveal another treasure trove of dirt...
)Here's a shot into the gap we've just created:
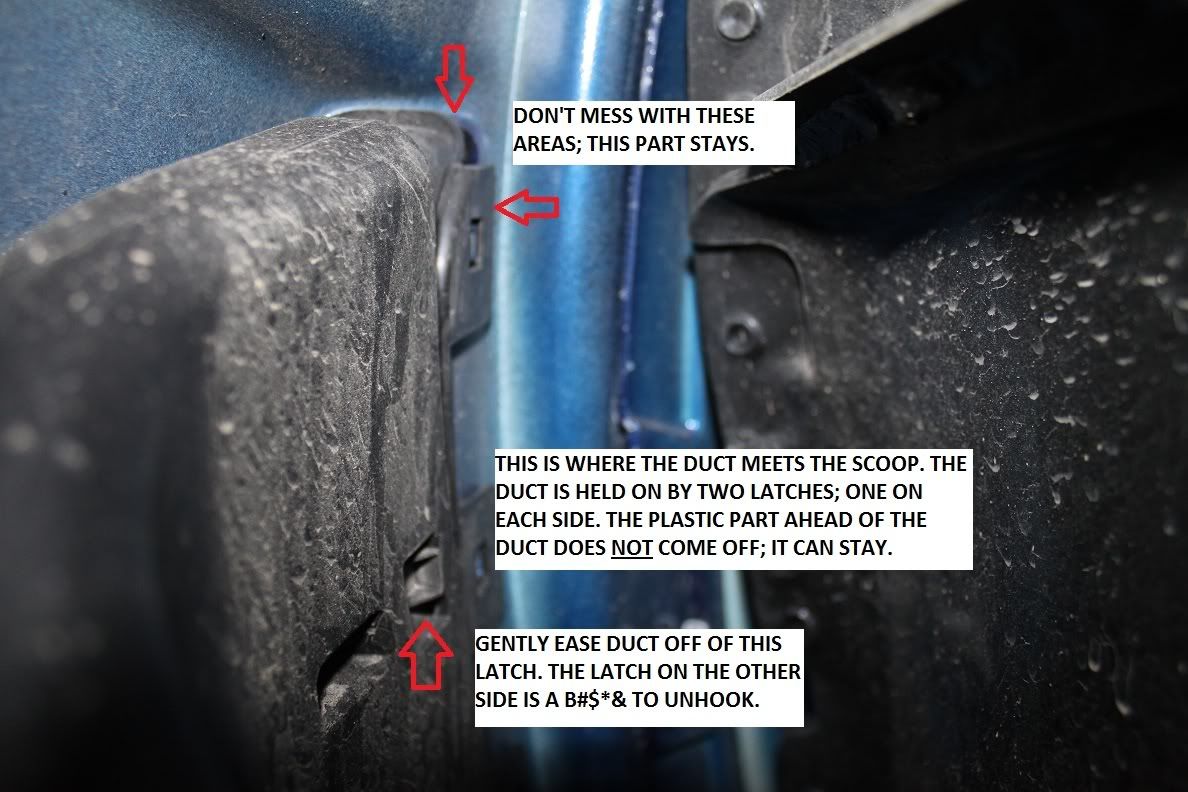
Looking towards the brake duct scoop, you will see the brake duct meeting the scoop, as shown. Note that there are THREE parts here: The duct, the scoop as seen from outside the car, and a third part that "frames" the scoop from behind the body panel. We do not need to remove that frame.
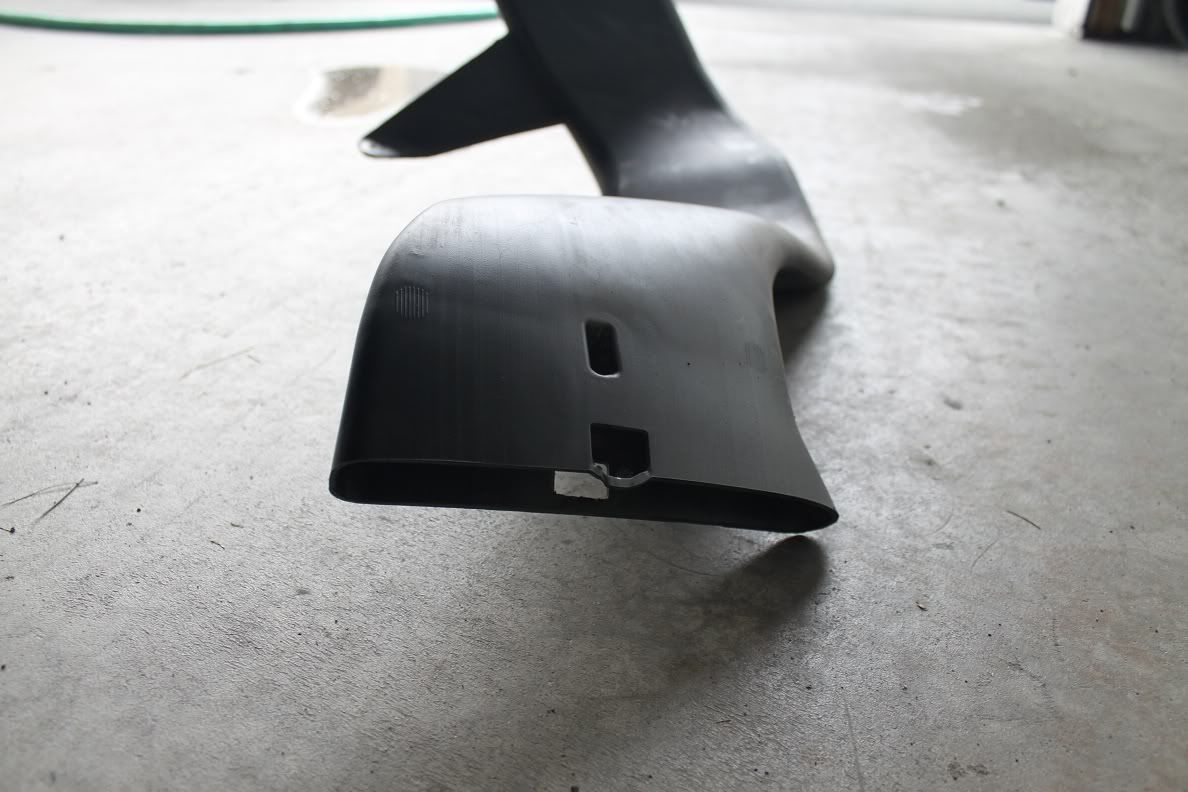
We need to get the brake duct out of the way. it's held on by two latches that are attached to that piece that frames the scoop. As you can see from the picture above, one latch is easy to access but the other is between the body panel and the duct, and you'll invent some new swear words trying to unhook that side. But eventually it DOES come off. Here's the removed scoop, with the two ports that the latches were stuck in:
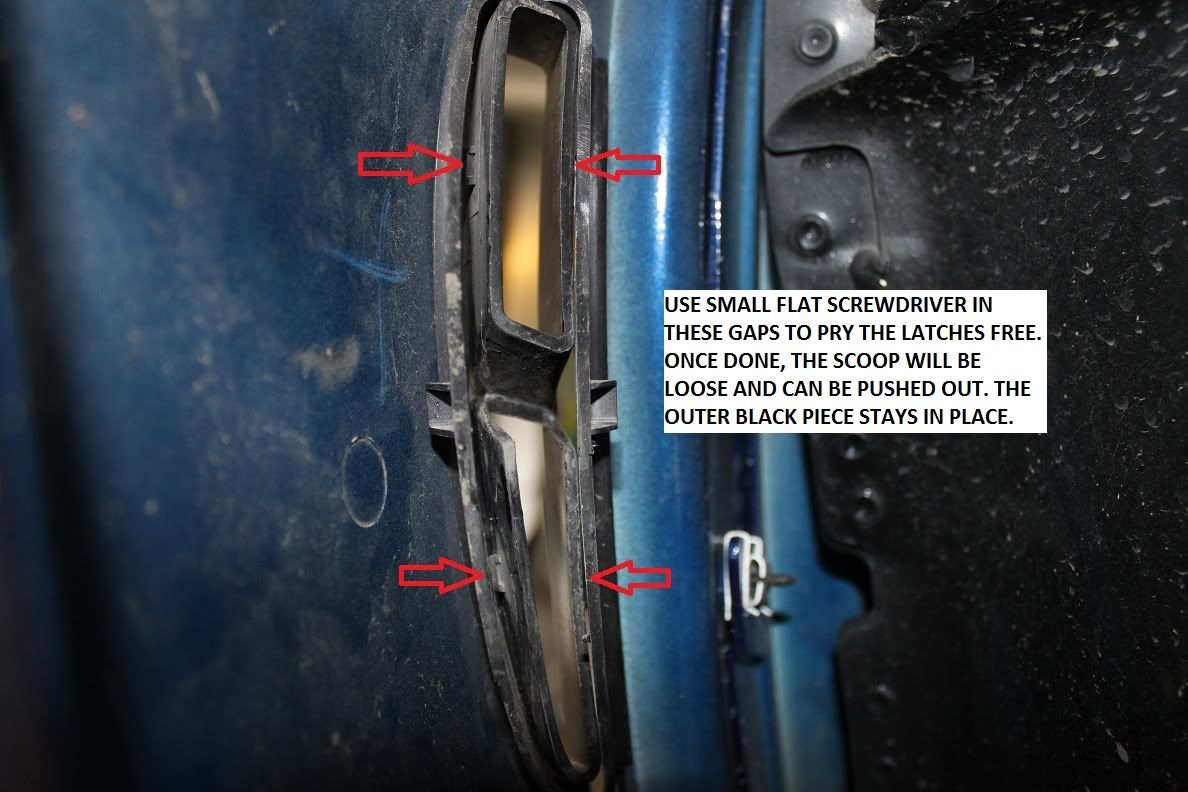
Next, a good view with the duct removed. We can clearly see the surrounding frame piece, and then the scoop itself is on the inside in what looks like two vertical "oval" shapes. There are four latches attached to the scoop, that lock it into the surrounding frame. Use the flat screwdriver to pry them gently loose. Once all four are loose, the scoop can be pushed out of the body panel and it is removed.
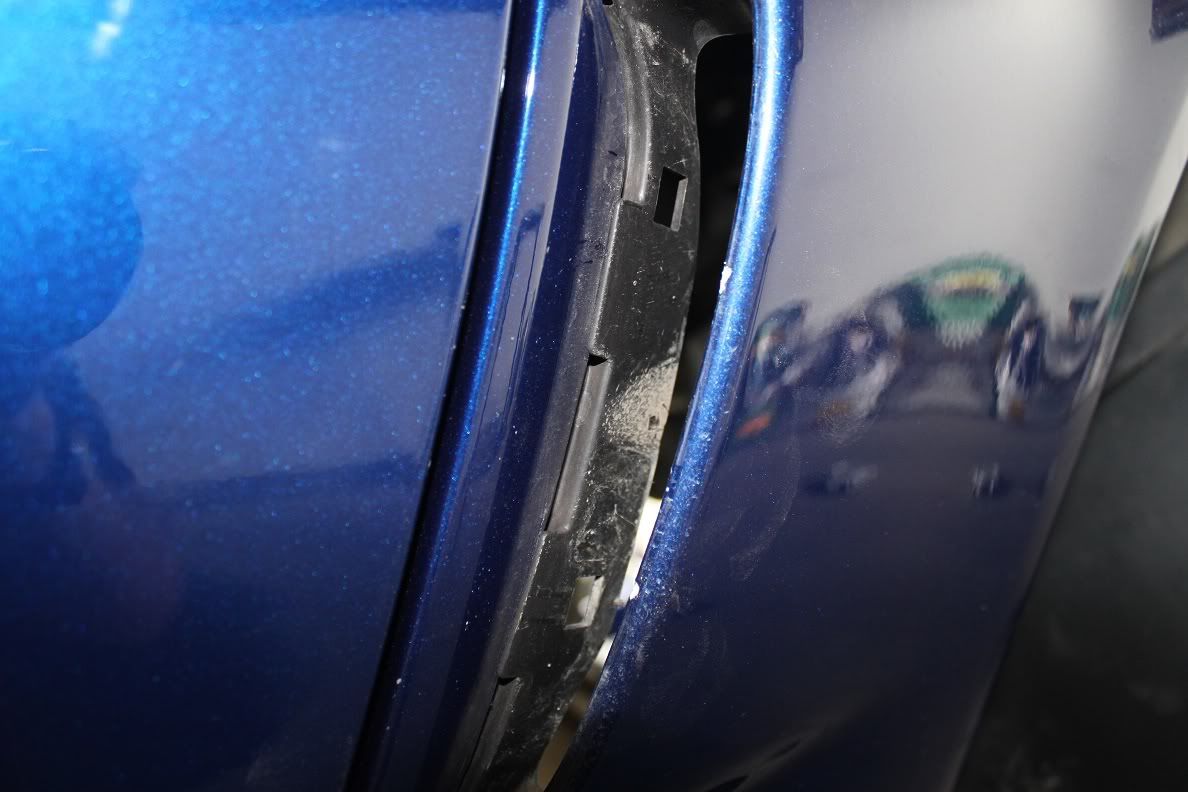
A view from outside the car, with the scoop removed:
A view from behind the panel, with the scoop removed:
Now, the new piece simply pops in from the front, and that's it. You may need to push hard to get the latches to engage; it's held in place pretty tight. It helps to use a free hand to work it from inside the wheel well too. Eventually you will get all four latches to latch.
Here we are!
Now everything pretty much goes back together in the reverse order. attach the brake duct first (much easier to attach than to remove!), then start easing the wheel well liner back into place. You'll need to fuss with the lower front portion to make it fit. One thing to be aware of, is that when the liner gets to the rocker panel, it needs to go between the two tabs as shown below. Left to its own, it will try to end up behind them both.
Finish getting that liner back in, situate the brake duct where it needs to go, and put the four screws back in.
That completes one side; the steps are identical for the other side.
All thats left is the wheels and lowering the car, and you're good to go! This whole job took me about 90 minutes, and that includes the time it took to document my process.
I hope someone finds this helpful!

The following 3 users liked this post by Alaskanpilot:

 08-03-2010, 03:06 PM
#3
Melting Slicks

Excellent write up.
Thank you
Thank you

 07-10-2013, 07:22 AM
#8
Thanks for the great write-up. Your detail and thoroughness is greatly appreciated. I may also recommend posting this at the Z06vette.com forum. They're very good about keeping the DIY list updated and readily available. I copied my exhaust install to that forum - just requires a copy / paste if you're already a member. Thanks again.
09-13-2014, 09:05 AM
#9
Good write-up. The good photos helped me find an easier way to do this. See my post in the C6 general discussion.
09-13-2014, 10:23 AM
#10
Race Director


Great write up.
When this job is done it also makes sense to install some closed cell foam weather stripping between the liner and the fender lip to prevent all those rocks and gravel from getting in behind and dropping down into the body seam behind the door.
When this job is done it also makes sense to install some closed cell foam weather stripping between the liner and the fender lip to prevent all those rocks and gravel from getting in behind and dropping down into the body seam behind the door.
09-13-2014, 10:40 AM
#11
Instructor

GREAT write up!!
Even MORE importantly, I'd like to say "KUDO'S" for actually DRIVING your Z up one of the most scenic (and tough) highways in America!!
One thing I cannot stand (IMO) is a person having such a FINE road car, and then putting it into a trailer for the ride "to wherever", driving around the fairgrounds, and then putting it back into a trailer for the trip home!
I, like you, bought my ZO6 TO DRIVE and enjoy.
LIFE'S TOO SHORT FOR TRAILER'S!!
GOOD ON 'YA!!!
 03-28-2015, 03:07 PM
#14
Nice job! After seeing the pictures you took, couldn't a guy cut out the little center divider of the trim piece and just remove them and snap in the new ones? The old ones would be wrecked but??
( I see someone posted this very solution, Sorry)
Mark
( I see someone posted this very solution, Sorry)
Mark
Last edited by CHEV AGAIN; 03-28-2015 at 03:09 PM.
04-08-2015, 02:53 PM
#15
Racer
 04-10-2015, 08:17 PM
#16
Racer


Easiest mod to date.
Chris
 07-23-2015, 03:24 PM
#19
Le Mans Master

Member Since: Jul 2007
Location: Arkansas
Posts: 5,006
Received 1,335 Likes
on
775 Posts
St. Jude Donor '09-'10-'11-'12-'13-'14-'15-'16-'17,'22-'23


[QUOTE=new_hampster;1587820976]Good write-up. The good photos helped me find an easier way to do this. See my post in the C6 general discussion.[/QUOTE
Great write up and pictures above but this is by far an easier and faster way
Great write up and pictures above but this is by far an easier and faster way
07-23-2015, 03:49 PM
#20
Racer

