
[Z06] Elite Engineering Catch Can Install
 03-13-2013, 10:34 PM
#1
Team Owner

Thread Starter

After removing my ported throttle body for possible replacement with another offering form a different vendor and finding a puddle of oil in my intake manifold, I knew that it was time for a catch can.
I chose the Elite Engineering Catch can after reading several good things about it here in the forum and installed it today.
While I am sure that others will do things differently, this was my approach.
The Elite Engineering Catch Can Assembly comes packaged as such and contains all necessary hardware.
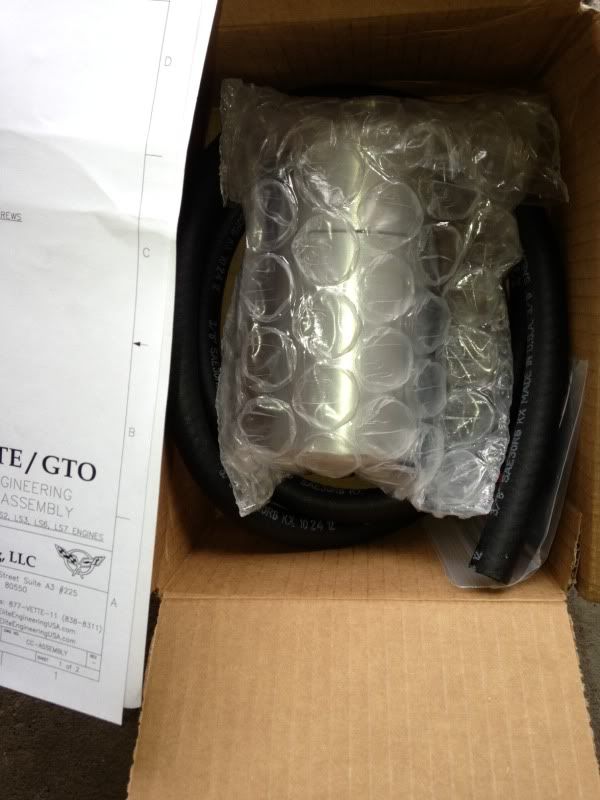
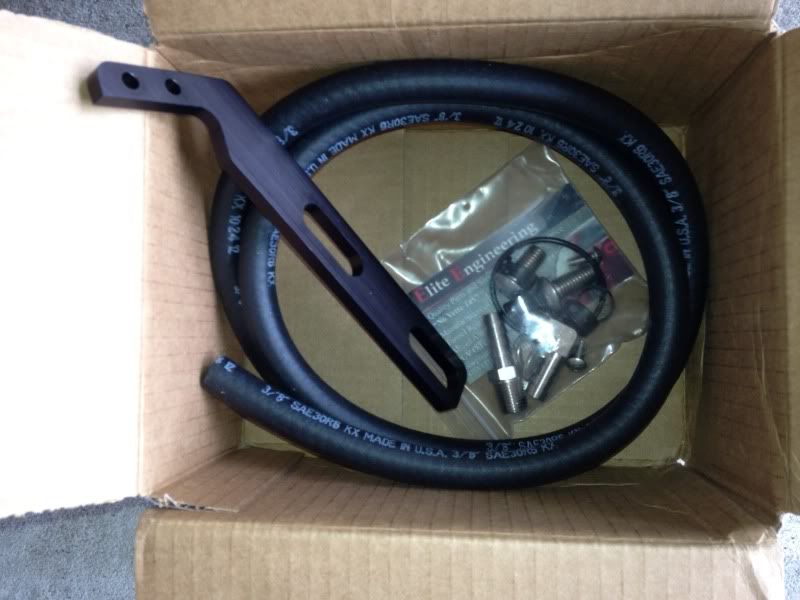
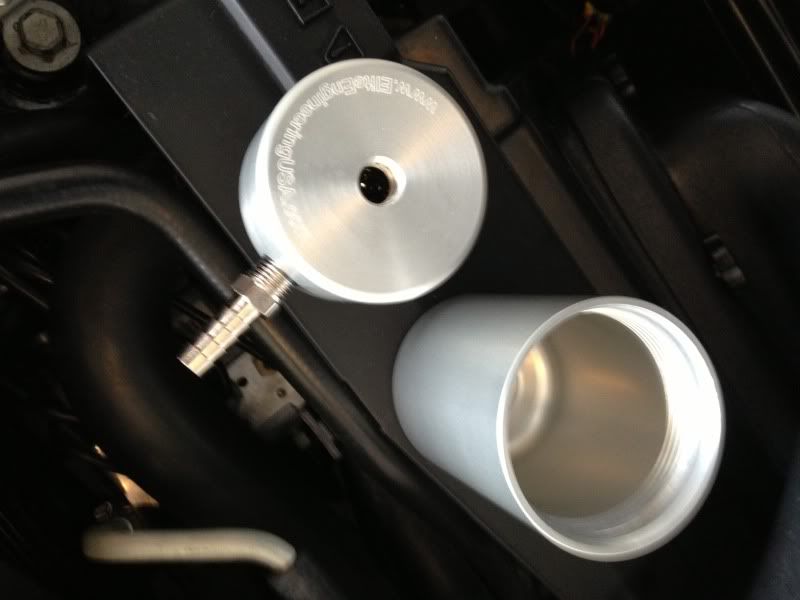
This is what it looks like out of the box.
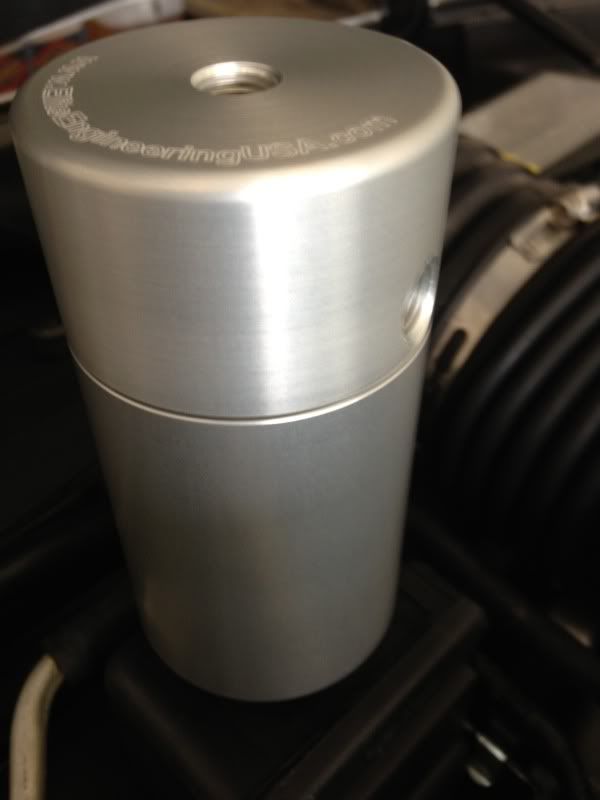
It has a top portion which has a hole in the top for the elbow connection going to the engine's PCV system. And a side hole in the same upper portion, for a straight connection going to the intake manifold.
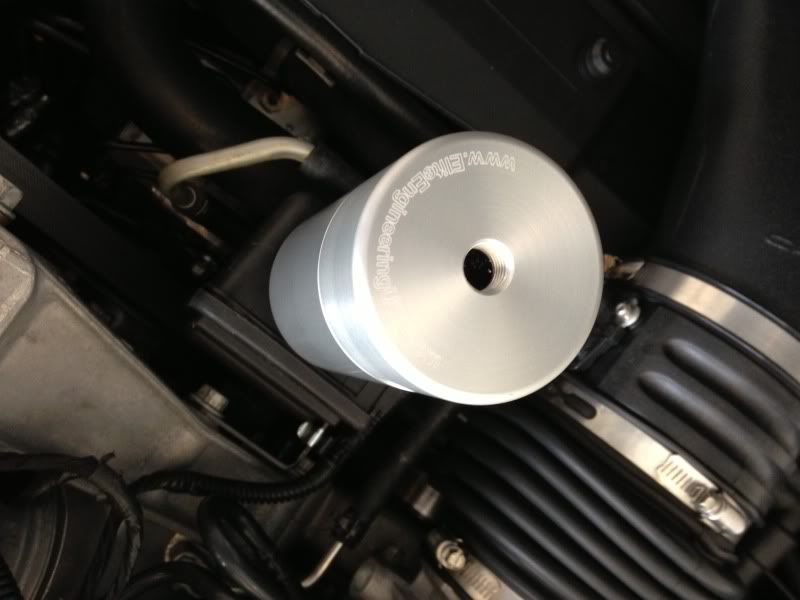
The straight, or exit connection, as mentioned earlier, will go to the intake manifold. A 14mm wrench is used to tighten it and this is as far in as it goes. The elbow connection will go to the engine's PCV system. I used blue Loctite on the connections, but teflon tape can be used as well. I arranged these so that the connectors would be parallel to each other and pointing towards the intake manifold.
The elbow connection is seen in this pic and this is what the top portion of the catch can looks like from it's underside.
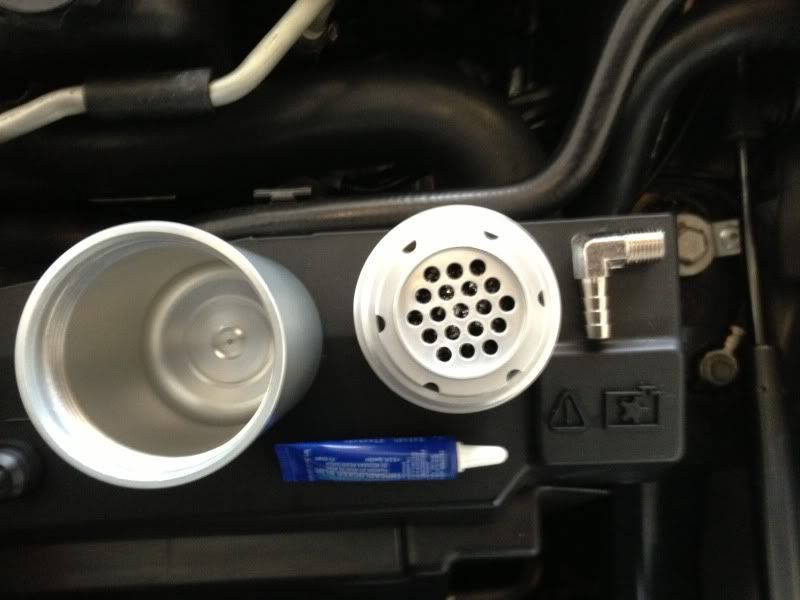
There is a supplied bracket which attaches to the upper portion of the catch can assembly, using the supplied screws. A 1/8" hex wrench is used to tighten these screws.
The bracket attached.
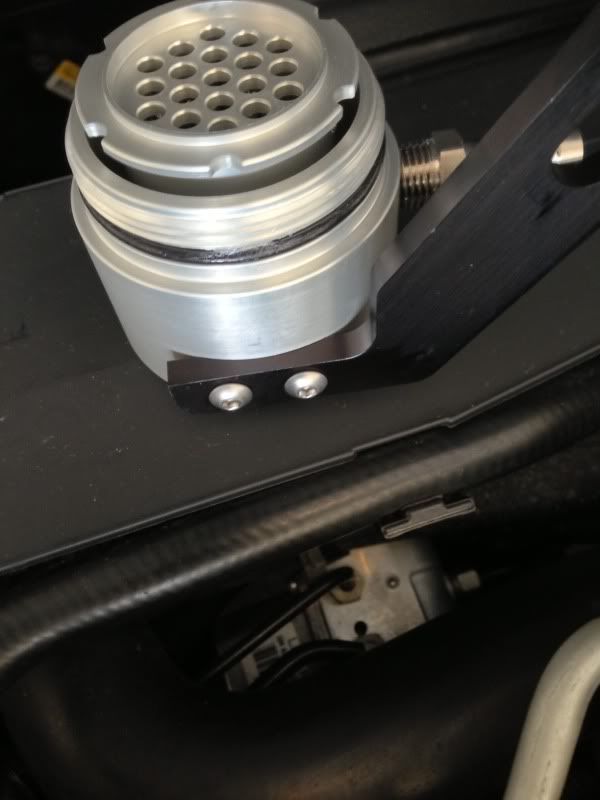
This bracket and the upper portion of the catch can will attach to the passenger side cylinder head.
The two supplied screws are placed into the cylinder head for trial fit. A #6 hex wrench will be used to tighten them with the supplied lock washers to secure the bracket to the cylinder head.
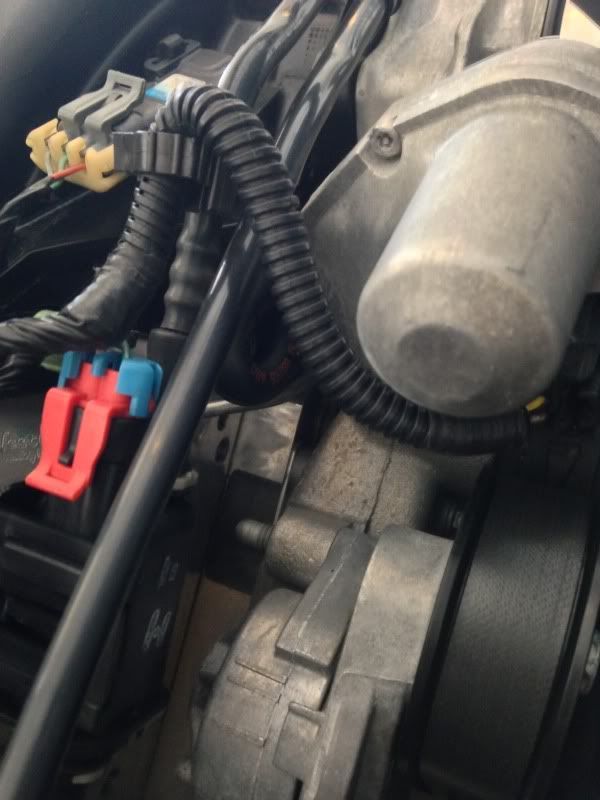
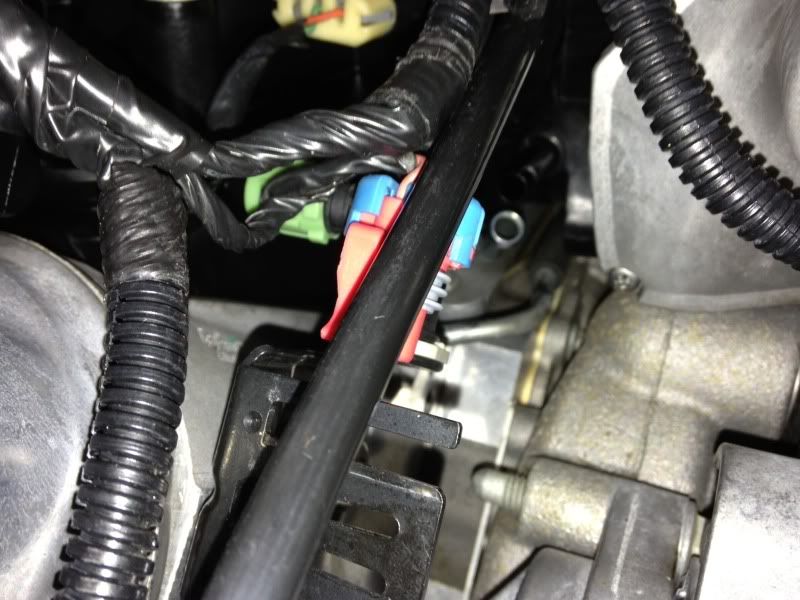
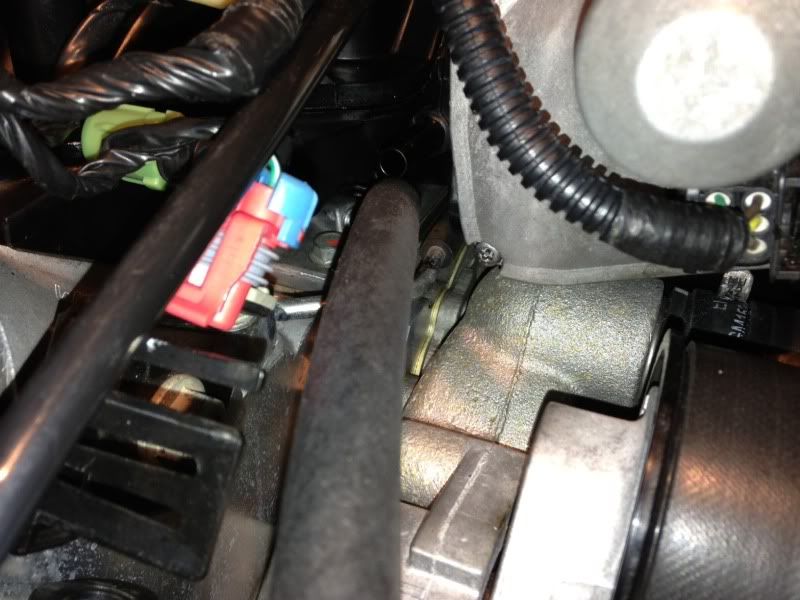
To give myself a little more room to work I removed this sensor. You can see it's red clip in the pic below.
It slides off it's bracket.
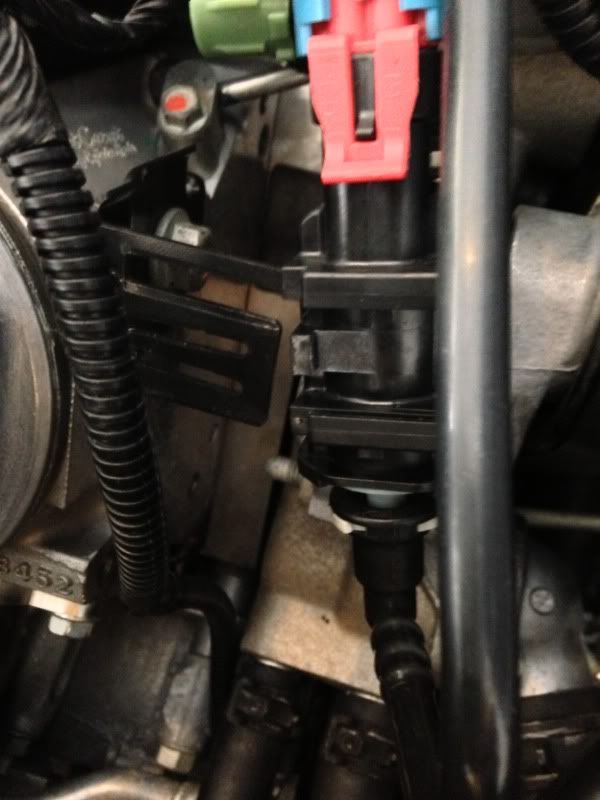
And is disconnected once off the bracket.
Once it's out of the way I had an easier route to the PCV hose.
And with the hose off.
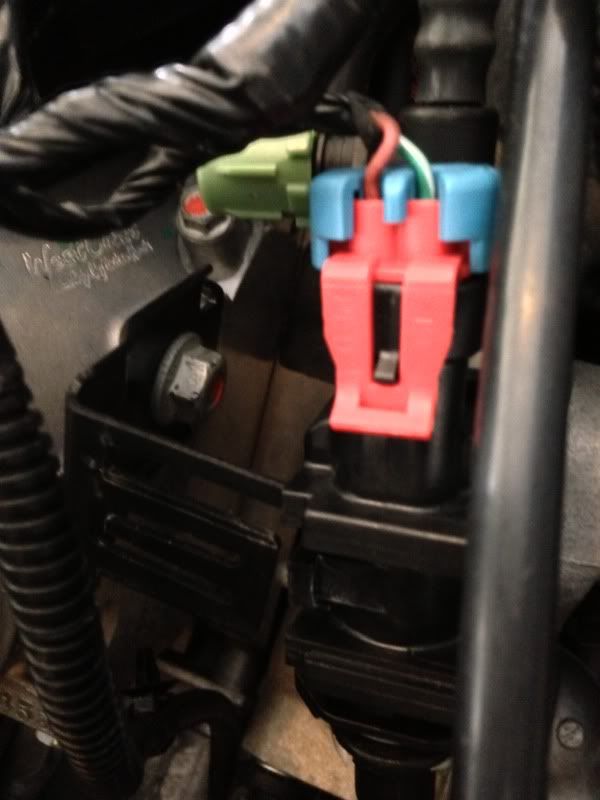
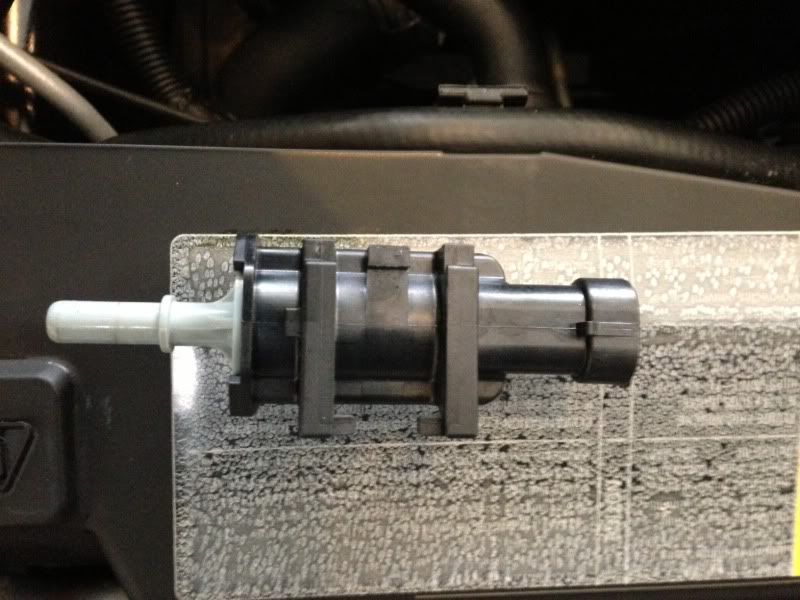
The sensor.
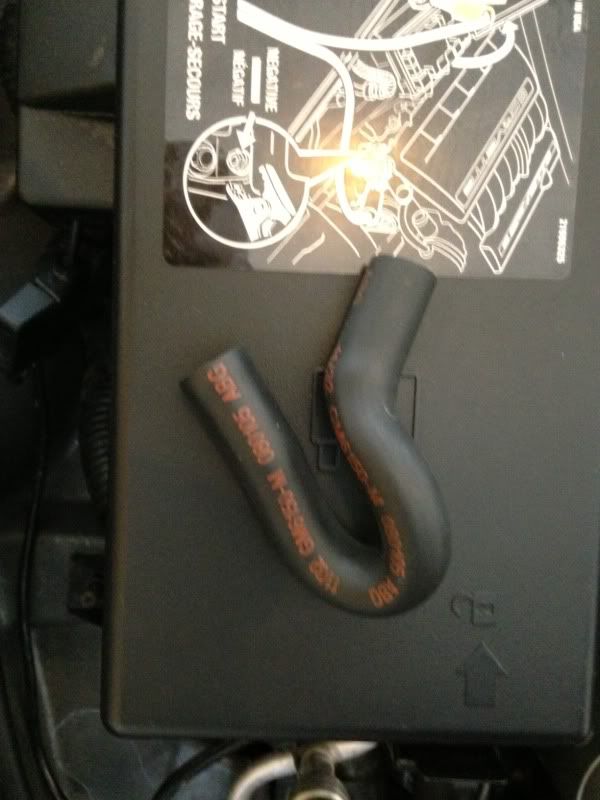
The hose.
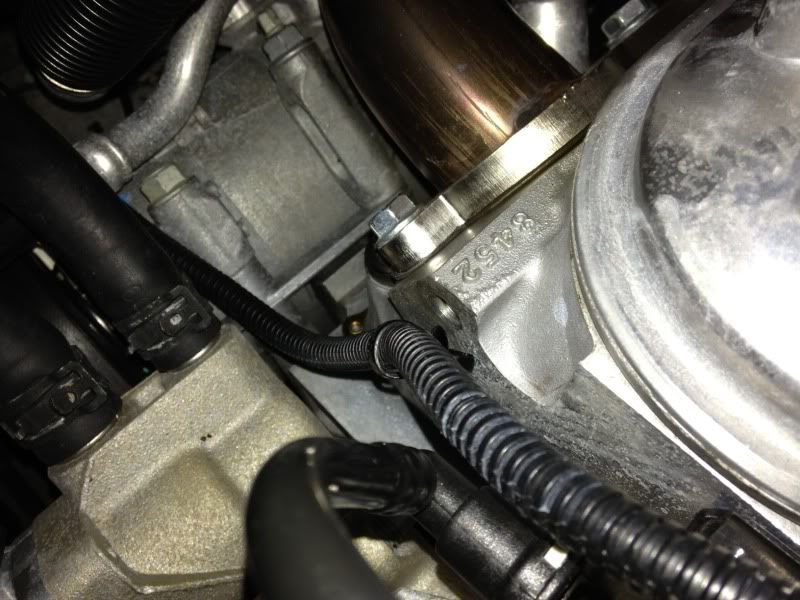
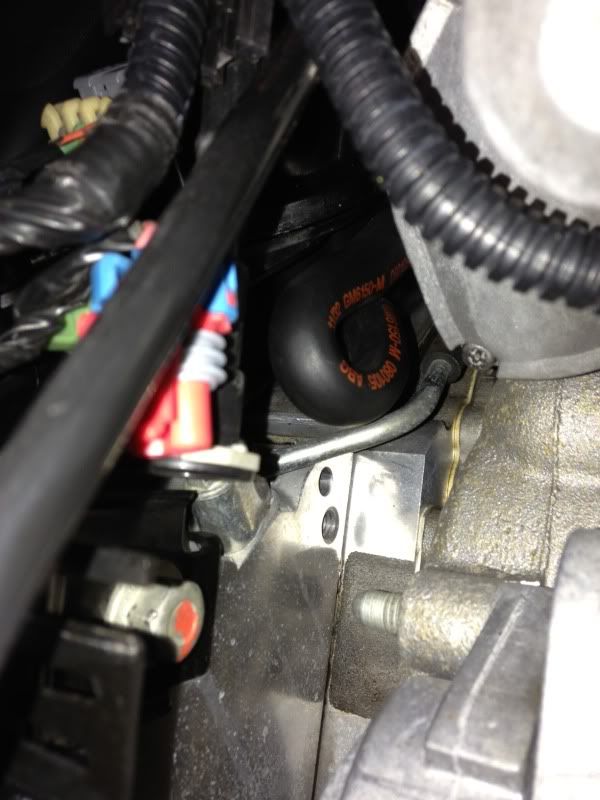
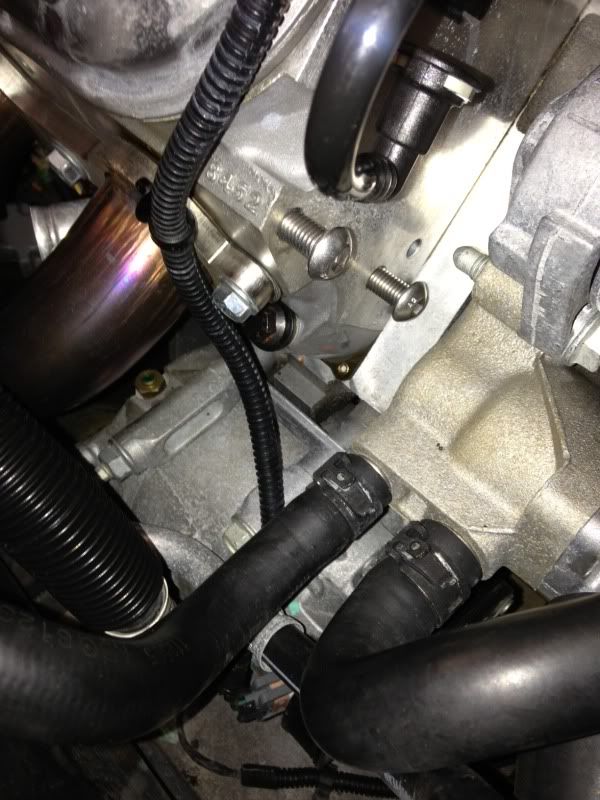
There are two holes in the cylinder head where the bracket will be be secured. The upper hole has a push type fastener connected to the harness. Pull this out and use this hole as the upper attachment point for the bracket.
Now we can trial fit the screws which will be used to secure the catch can bracket.
Trial fit of the screws. They will be tightened with the supplied lock washers to secure the bracket, using a #6 hex wrench.
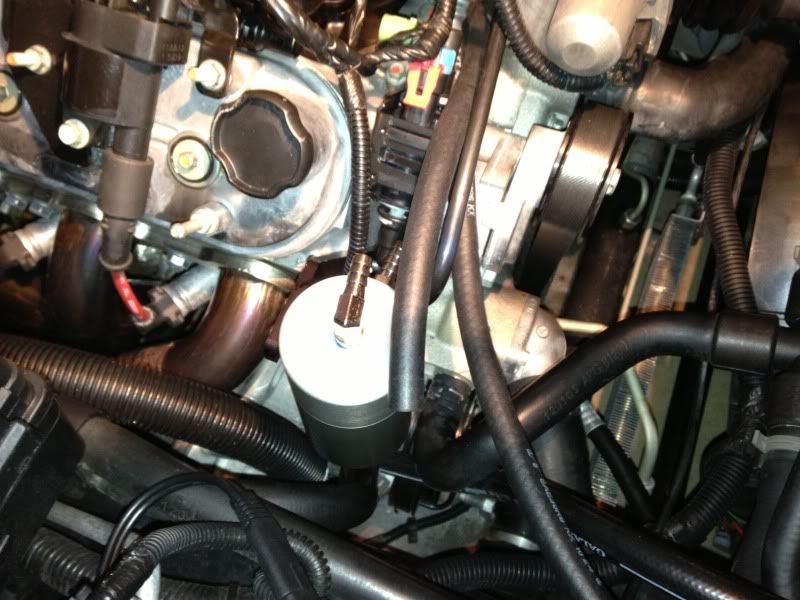
After the catch and bracket are secured, I ran the hoses. I ran the one to the PCV barb from the valley cover first. Some people don't use the clamps. I did. And the hose slips on easier if a little bit of WD40 is sprayed into the open end of it.
I ran this far enough to reach the upper barb (elbow port on top) of the catch can and then a little extra for good measure, before I cut it and used the other end to attach to the intake manifold to run to the side barb (straight port) of the catch can.
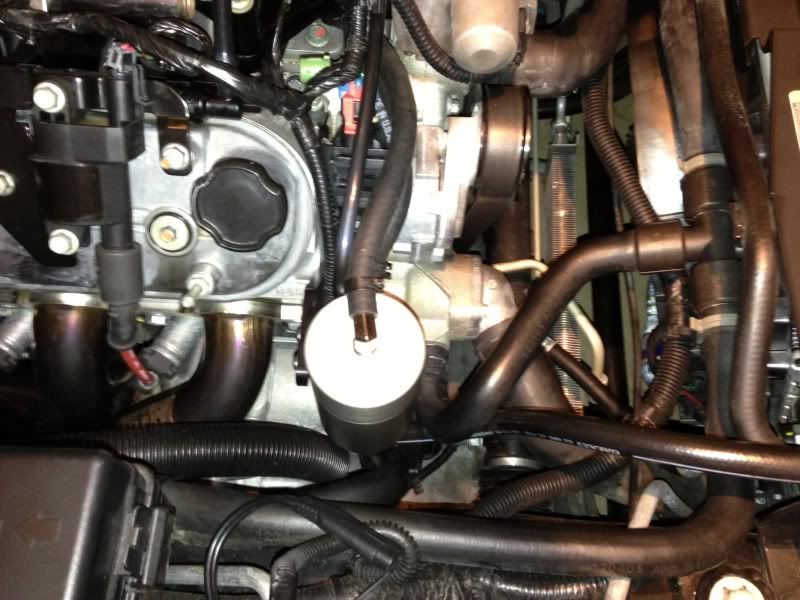
In order to make for the neatest install, I ended up having to remove the catch can from the bracket, and leaving the bracket attached to the cylinder head, so that I could reattach the sensor and route the hoses in such a way as to not leave any kinks, excessive curves or dips.
It's cold, so these hoses are stiff.
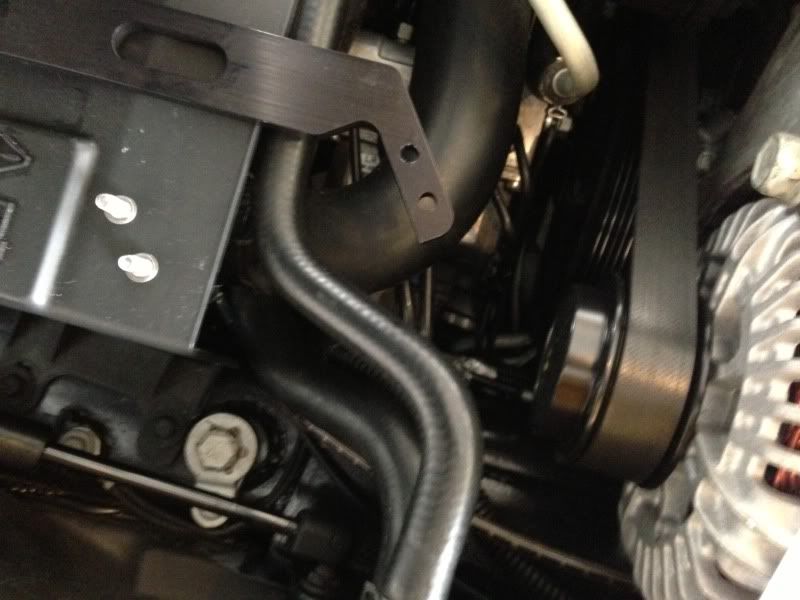
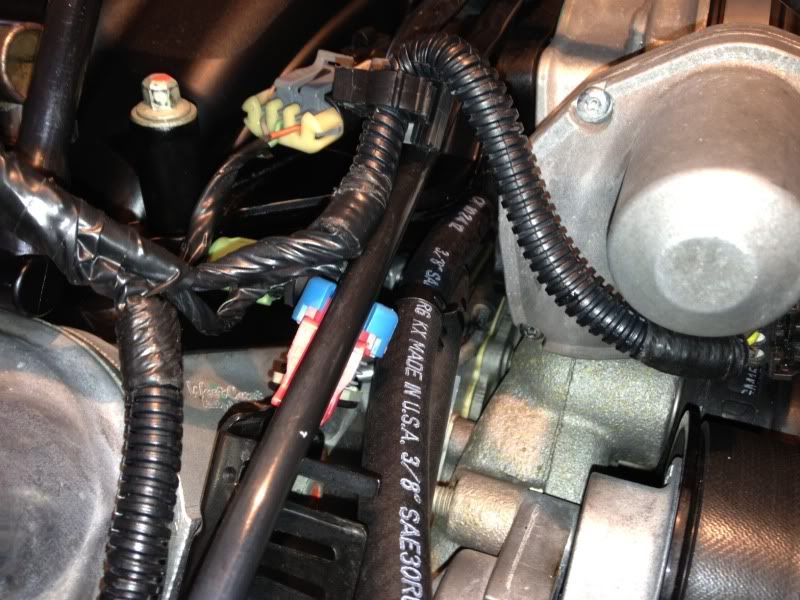
Hoses trimmed to the proper length and attached. I ran the hoses to the catch can, to the outside, or right of the hard plastic factory tubing which goes to the sensor.
I chose the Elite Engineering Catch can after reading several good things about it here in the forum and installed it today.
While I am sure that others will do things differently, this was my approach.
The Elite Engineering Catch Can Assembly comes packaged as such and contains all necessary hardware.
This is what it looks like out of the box.
It has a top portion which has a hole in the top for the elbow connection going to the engine's PCV system. And a side hole in the same upper portion, for a straight connection going to the intake manifold.
The straight, or exit connection, as mentioned earlier, will go to the intake manifold. A 14mm wrench is used to tighten it and this is as far in as it goes. The elbow connection will go to the engine's PCV system. I used blue Loctite on the connections, but teflon tape can be used as well. I arranged these so that the connectors would be parallel to each other and pointing towards the intake manifold.
The elbow connection is seen in this pic and this is what the top portion of the catch can looks like from it's underside.
There is a supplied bracket which attaches to the upper portion of the catch can assembly, using the supplied screws. A 1/8" hex wrench is used to tighten these screws.
The bracket attached.
This bracket and the upper portion of the catch can will attach to the passenger side cylinder head.
The two supplied screws are placed into the cylinder head for trial fit. A #6 hex wrench will be used to tighten them with the supplied lock washers to secure the bracket to the cylinder head.
To give myself a little more room to work I removed this sensor. You can see it's red clip in the pic below.
It slides off it's bracket.
And is disconnected once off the bracket.
Once it's out of the way I had an easier route to the PCV hose.
And with the hose off.
The sensor.
The hose.
There are two holes in the cylinder head where the bracket will be be secured. The upper hole has a push type fastener connected to the harness. Pull this out and use this hole as the upper attachment point for the bracket.
Now we can trial fit the screws which will be used to secure the catch can bracket.
Trial fit of the screws. They will be tightened with the supplied lock washers to secure the bracket, using a #6 hex wrench.
After the catch and bracket are secured, I ran the hoses. I ran the one to the PCV barb from the valley cover first. Some people don't use the clamps. I did. And the hose slips on easier if a little bit of WD40 is sprayed into the open end of it.
I ran this far enough to reach the upper barb (elbow port on top) of the catch can and then a little extra for good measure, before I cut it and used the other end to attach to the intake manifold to run to the side barb (straight port) of the catch can.
In order to make for the neatest install, I ended up having to remove the catch can from the bracket, and leaving the bracket attached to the cylinder head, so that I could reattach the sensor and route the hoses in such a way as to not leave any kinks, excessive curves or dips.
It's cold, so these hoses are stiff.
Hoses trimmed to the proper length and attached. I ran the hoses to the catch can, to the outside, or right of the hard plastic factory tubing which goes to the sensor.
Last edited by '06 Quicksilver Z06; 03-20-2013 at 01:21 PM.


 03-13-2013, 11:09 PM
#3
Burning Brakes

Great post.  Perfect timing. My Elite Engineering catch can should be here tomorrow or Friday. Thanks.
I can not say enough about doing business with Jordan Priestley at JDP Motorsports. EXCELLENT vendor.
Perfect timing. My Elite Engineering catch can should be here tomorrow or Friday. Thanks. I can not say enough about doing business with Jordan Priestley at JDP Motorsports. EXCELLENT vendor.
03-13-2013, 11:12 PM
#4
Safety Car

Good job Ricky.
03-13-2013, 11:26 PM
#5
Race Director

 funny you posted this Ricky , I was having dinner wtih a group of friends last Friday and one of them who recently sold his C6 had orderded this catch can and never installed it so its new in the box in his garage, and will be sold to me at a nice discount
  03-13-2013, 11:38 PM
#6

Nice write up.
I've read the dry sump tank insert from Aviaid will help prevent oil from getting into the intake manifold. Hoping that does the trick, otherwise I may consider one of these cans too.
I've read the dry sump tank insert from Aviaid will help prevent oil from getting into the intake manifold. Hoping that does the trick, otherwise I may consider one of these cans too.
03-14-2013, 12:00 AM
#7
Team Owner
Good choice of cans Ricky (think we talked about this?)
I have tried several and this one not only works the best, it also fits the best. And there is room to unscrew the bottom (to empty oil) before it bottoms out on the heater hoses running beneath.
I did not use any clamps as the hoses cannot move when they are inserted between engine and can. Thats the way I have mine too.
And congrats on getting the hoses to the correct ports ..... many mess this up or are very confused about it. (you don't seem too confused)
DH
I have tried several and this one not only works the best, it also fits the best. And there is room to unscrew the bottom (to empty oil) before it bottoms out on the heater hoses running beneath.
I did not use any clamps as the hoses cannot move when they are inserted between engine and can. Thats the way I have mine too.
And congrats on getting the hoses to the correct ports ..... many mess this up or are very confused about it. (you don't seem too confused
)DH
03-14-2013, 01:29 AM
#8
Team Owner
Thread Starter
Good choice of cans Ricky (think we talked about this?)
I have tried several and this one not only works the best, it also fits the best. And there is room to unscrew the bottom (to empty oil) before it bottoms out on the heater hoses running beneath.
I did not use any clamps as the hoses cannot move when they are inserted between engine and can. Thats the way I have mine too.
And congrats on getting the hoses to the correct ports ..... many mess this up or are very confused about it. (you don't seem too confused)
DH
I have tried several and this one not only works the best, it also fits the best. And there is room to unscrew the bottom (to empty oil) before it bottoms out on the heater hoses running beneath.
I did not use any clamps as the hoses cannot move when they are inserted between engine and can. Thats the way I have mine too.
And congrats on getting the hoses to the correct ports ..... many mess this up or are very confused about it. (you don't seem too confused
)DH
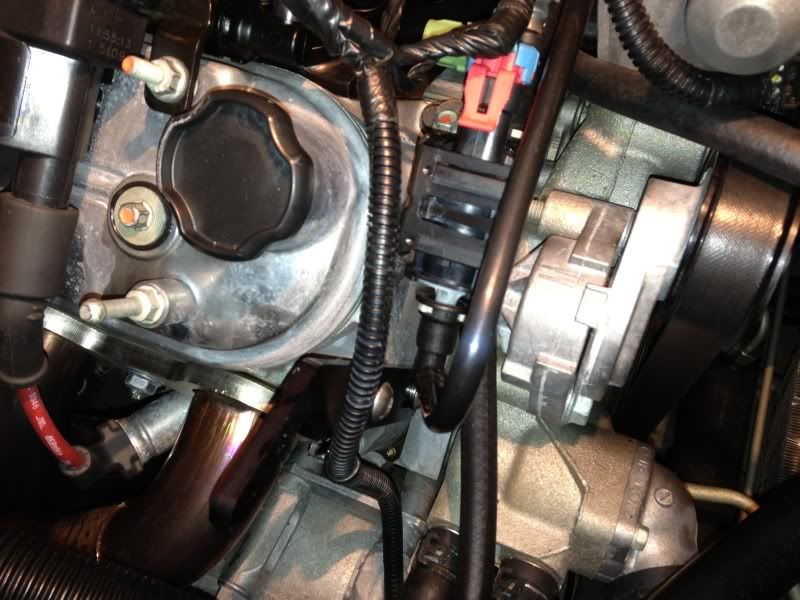
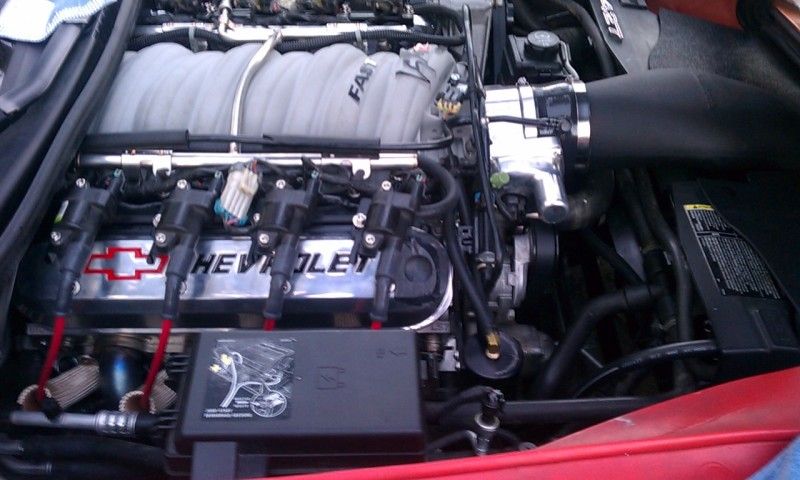
Yes Howie, you are right on all counts above. The following pic shows the routing of the hoses a bit better
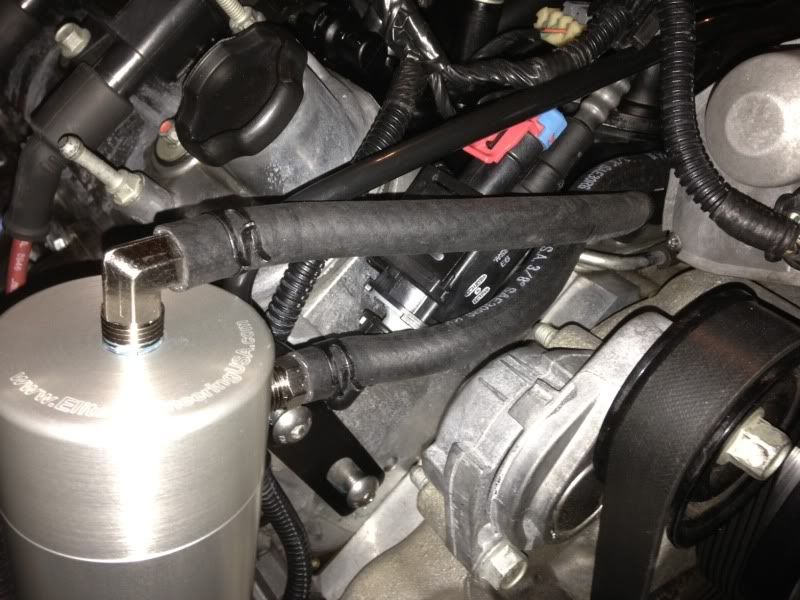
I also have a similar setup in my F150 and I know how much oil it catches. So installing one of these on the Vette was a no brainer. Don't know why I waited so long.
 03-14-2013, 02:49 AM
#9
Le Mans Master


Member Since: Jan 2009
Location: Pottsboro; Sometimes Dallas Texas
Posts: 6,112
Likes: 0
Received 4 Likes
on
4 Posts
St. Jude Donor '12

it looks just like the CCA can on inside except it has a filter media as well.. The diff is also the cca has a drain **** on the bottom....


 03-19-2013, 12:06 PM
#13
Burning Brakes
These Elite Engineering catch cans are REALLY nice.

The directions from '06 Quicksilver Z06, the directions that come in the box and the directions on Elite Engineering website are all good. Surprisingly, during install I checked the throttle body and there really was no, ZERO, oil residue. (I'll take that.)

Like I typed earlier Jordan and JDP MOTORSPORTS is a great vendor.
The directions from '06 Quicksilver Z06, the directions that come in the box and the directions on Elite Engineering website are all good.
Surprisingly, during install I checked the throttle body and there really was no, ZERO, oil residue. (I'll take that.)Like I typed earlier Jordan and JDP MOTORSPORTS is a great vendor.
03-19-2013, 06:40 PM
#15
Intermediate

Member Since: Aug 2011
Posts: 35
Likes: 0
Received 0 Likes
on
0 Posts
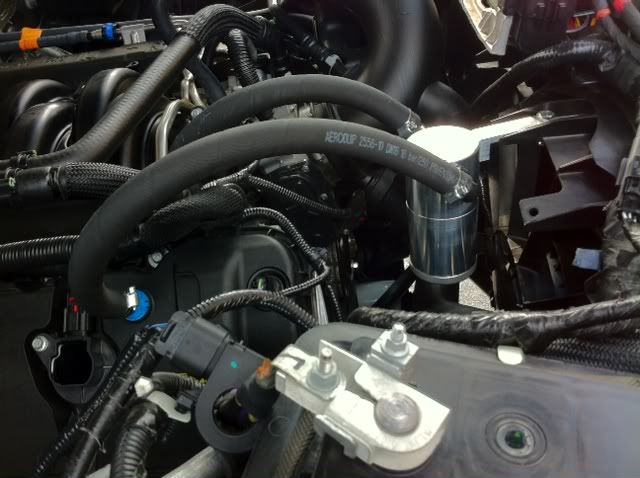
Have used both EE and DC3 cans on my cars. Both due there job but like tbe EE. Installed mine using the adapter, it sits out and not hidden under the cover. Basic reason for this was Im using braided hoses and it was just to tight/crowded looking with the braided hose around the electrical bracket. Can really looks nice not hidden and with the braided hose, plus a little easier to get to.
03-19-2013, 10:42 PM
#16
Team Owner
Thread Starter
These Elite Engineering catch cans are REALLY nice.
The directions from '06 Quicksilver Z06, the directions that come in the box and the directions on Elite Engineering website are all good. Surprisingly, during install I checked the throttle body and there really was no, ZERO, oil residue. (I'll take that.)
Like I typed earlier Jordan and JDP MOTORSPORTS is a great vendor.
The directions from '06 Quicksilver Z06, the directions that come in the box and the directions on Elite Engineering website are all good.
Surprisingly, during install I checked the throttle body and there really was no, ZERO, oil residue. (I'll take that.)Like I typed earlier Jordan and JDP MOTORSPORTS is a great vendor.
03-19-2013, 11:15 PM
#17
Instructor

I have an EE catch can as well. Their customer service is superb. I highly recomend
03-19-2013, 11:33 PM
#18
Racer
Member Since: Nov 2005
Location: Davenport IA
Posts: 339
Likes: 0
Received 0 Likes
on
0 Posts

So why a catch can instead of routing hose down the back and slicing at an angle to create natural vacuum?
I know that's old school (pre EPA) but works for my duramax.
Jay
I know that's old school (pre EPA) but works for my duramax.
Jay
03-20-2013, 02:52 PM
#19
Burning Brakes
Thanks and thanks again for the write up. Like you, I originally used removable LocTite. I really did not like the way that the elbow screwed into the top of the catch can. (Before a thorough inspection, I actually thought that I may have stripped it.) Did you have a hard time screwing the elbow connector into the top of the catch can? Because of that, I switched to the teflon tape.
Also, I kind of like what Dochopr did with the adapter(s). Dochopr you used two adapters correct? One on top and one on bottom? I like the idea of moving that beautiful catch can forward a little bit to show it off and I wouldn't have to worry about my coil cover vibrating a scratch into the top of the catch can. (I hate scratches.)
'06 Quicksilver Z06 I spent a few hundred dollars this week keeping my car unnecessarily cherry. OEM splitter, air dam, color keyed door handles and a catch can. I sure hope that my heads REALLY are good. They seemed to measure out OK with john_g_46's tool. There is NO WAY, that I can spend money that I do not have on heads and a torquer 110.
Like you, I originally used removable LocTite. I really did not like the way that the elbow screwed into the top of the catch can. (Before a thorough inspection, I actually thought that I may have stripped it.) Did you have a hard time screwing the elbow connector into the top of the catch can? Because of that, I switched to the teflon tape. Also, I kind of like what Dochopr did with the adapter(s). Dochopr you used two adapters correct? One on top and one on bottom? I like the idea of moving that beautiful catch can forward a little bit to show it off and I wouldn't have to worry about my coil cover vibrating a scratch into the top of the catch can. (I hate scratches.)
'06 Quicksilver Z06 I spent a few hundred dollars this week keeping my car unnecessarily cherry. OEM splitter, air dam, color keyed door handles and a catch can. I sure hope that my heads REALLY are good. They seemed to measure out OK with john_g_46's tool. There is NO WAY, that I can spend money that I do not have on heads and a torquer 110.
03-20-2013, 03:59 PM
#20
Team Owner
Thread Starter
Thanks and thanks again for the write up. Like you, I originally used removable LocTite. I really did not like the way that the elbow screwed into the top of the catch can. (Before a thorough inspection, I actually thought that I may have stripped it.) Did you have a hard time screwing the elbow connector into the top of the catch can? Because of that, I switched to the teflon tape.
Also, I kind of like what Dochopr did with the adapter(s). Dochopr you used two adapters correct? One on top and one on bottom? I like the idea of moving that beautiful catch can forward a little bit to show it off and I wouldn't have to worry about my coil cover vibrating a scratch into the top of the catch can. (I hate scratches.)
'06 Quicksilver Z06 I spent a few hundred dollars this week keeping my car unnecessarily cherry. OEM splitter, air dam, color keyed door handles and a catch can. I sure hope that my heads REALLY are good. They seemed to measure out OK with john_g_46's tool. There is NO WAY, that I can spend money that I do not have on heads and a torquer 110.
Like you, I originally used removable LocTite. I really did not like the way that the elbow screwed into the top of the catch can. (Before a thorough inspection, I actually thought that I may have stripped it.) Did you have a hard time screwing the elbow connector into the top of the catch can? Because of that, I switched to the teflon tape. Also, I kind of like what Dochopr did with the adapter(s). Dochopr you used two adapters correct? One on top and one on bottom? I like the idea of moving that beautiful catch can forward a little bit to show it off and I wouldn't have to worry about my coil cover vibrating a scratch into the top of the catch can. (I hate scratches.)
'06 Quicksilver Z06 I spent a few hundred dollars this week keeping my car unnecessarily cherry. OEM splitter, air dam, color keyed door handles and a catch can. I sure hope that my heads REALLY are good. They seemed to measure out OK with john_g_46's tool. There is NO WAY, that I can spend money that I do not have on heads and a torquer 110.