
[Z06] The Most Hoodrat Way to Mount a Harmonic Balancer, and Other Tales of a DIY H/C Swap
 06-04-2013, 08:33 PM
#1
Drifting

Thread Starter

Step one is don't use cheap torque wrenches, and use some damn common sense so you don't do this:

That is a broken oil pan bolt, one of the M6 in the back.
Luckily enough meat to pull it out with locking pliers.

The above reason is why I had to drop the oil pan and I posted about getting a new gasket. I just wanted to get some progress and not wait for parts, plus it's like $65 (you spent all that money on heads/cam/headers and you're gonna skimp on a gasket??? - yes). well i got lucky - no oil leaks yet.
Here she is ready mid way thru tear down

Hi-tech engine jacking system
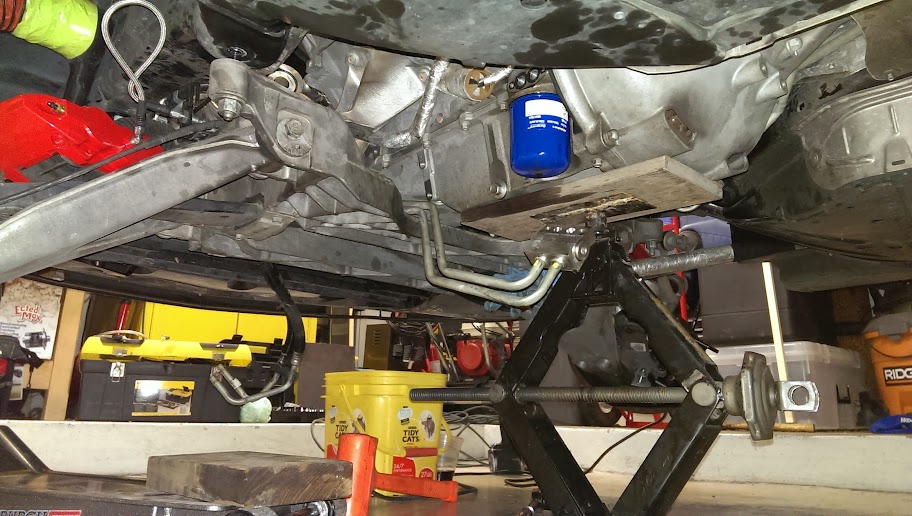
Cradle hangin
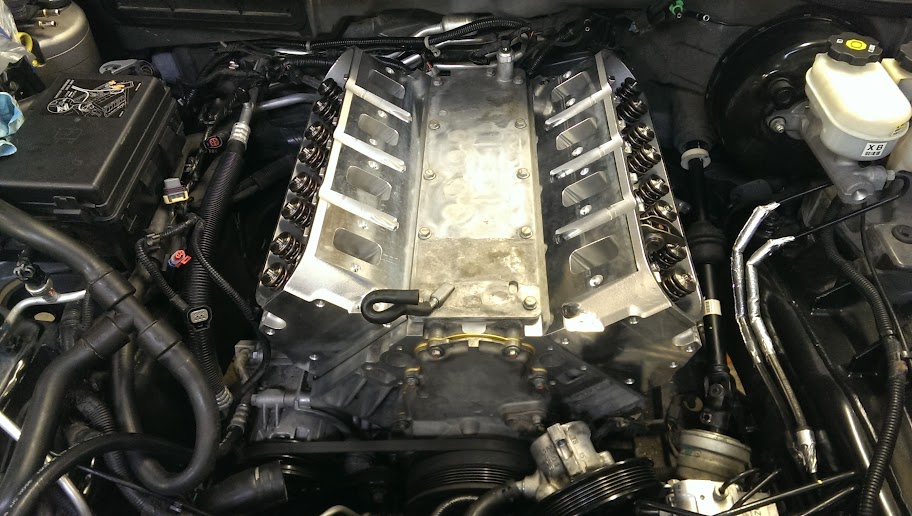
Some progress. Old heads about to come off


UNLEANNNNN


Vacuuming out the bolt holes


Cleaned mating surface

It snowed alot that week


More progress


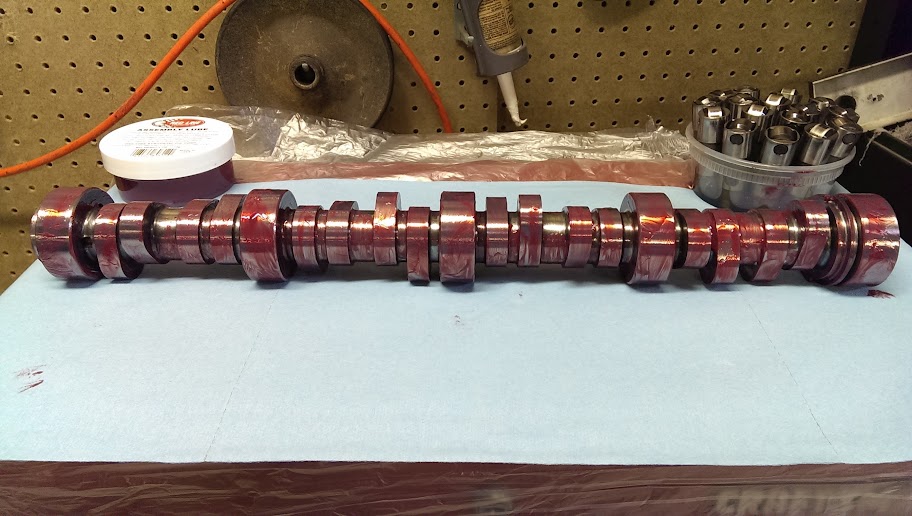
New Cam all lubed up (old lifters in background).
In she goes - I used the water pump bolts for extra grip as slowly inserted the bump stick

new lifters taking a bath

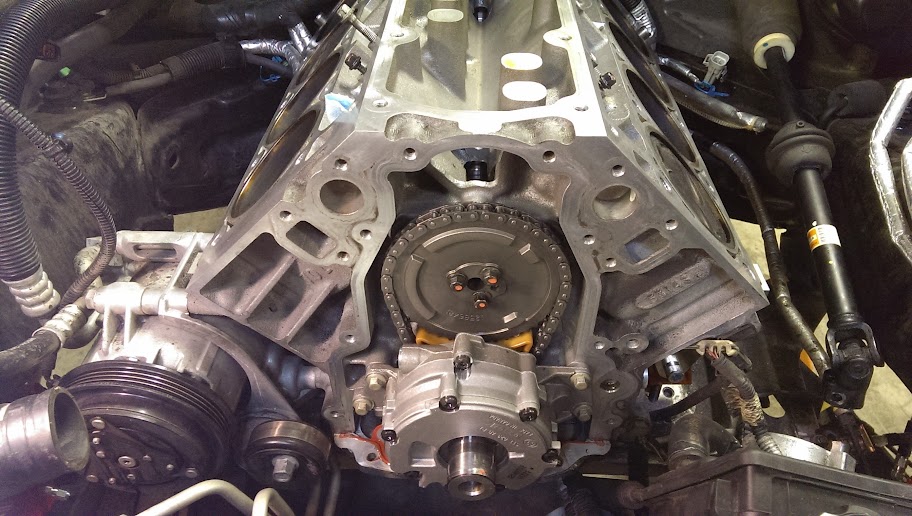
Timing chain and sprocket back on. DON'T forget to loctite the cam retention plate like i did - I had it almost back together and then took it all back apart. (after being like, wait did i loctite those? Don't drink too much beer while working on your car either)

Drunk... ARE THESE RED DOTS LINED UP RIGHT???

About the oil pump - I've heard of others having trouble getting each of the cogs to line up. I laid under the car and got my head up to peer down the length of the crank rod, and looking through the oil pump. I got the first sprocket onto the crank and then reach in with your finger and peer through the hole to get the teeth lined up. Then do the same with the second cog and it's really easy. I even did it twice.
Ghetto ***! That's how you do it without unplugging the AC condensor. I couldn't get the radiator unmated from the damn thing anyway

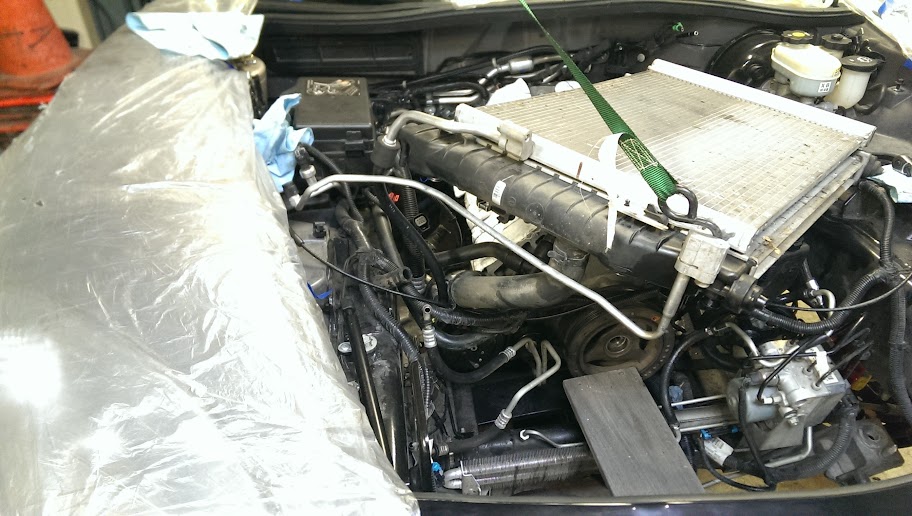
In above pic, notice wooden deck plank
So i was having some trouble mounting the balancer. i did head it to 200 degrees but even so i could not get it on with a dead blow hammer in the short swing space. I kept measuring the progress with a tape measure after every 100 blows and it just wasn't moving. So out comes the wooden deck plank
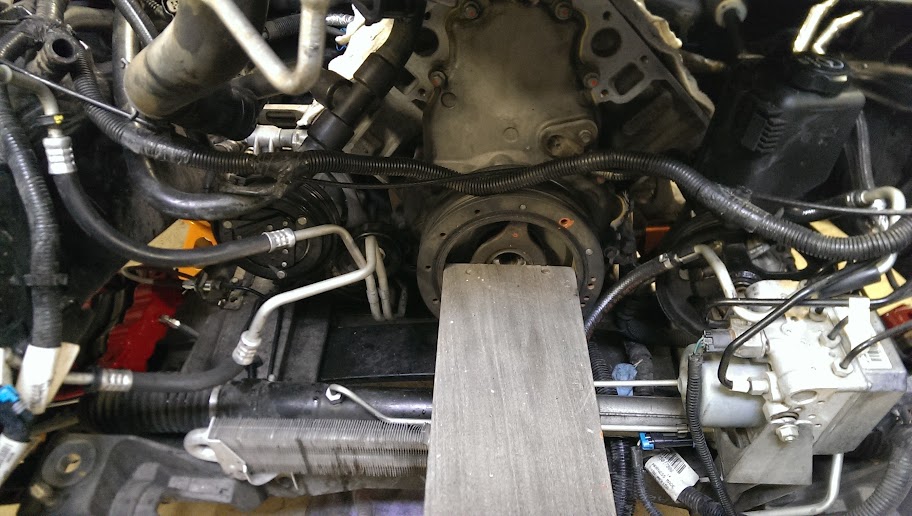

It worked! Be careful if you try this and cover everything up or do something to keep wood particles from flying about. Because they do.

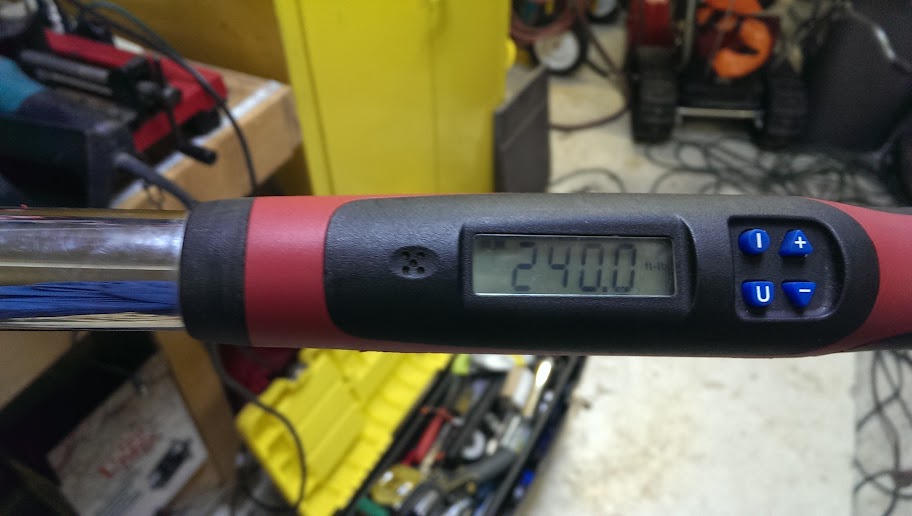
With 5280's long *** torque wrench I was able to hit 240 ft.lb on the new crank bolt. Sweet! No screwdrivers in any flywheels or anything. Just in 4th gear and with parking brake set to max.

Super hi tech "CAI" mod (1x5" rectangle cuts)
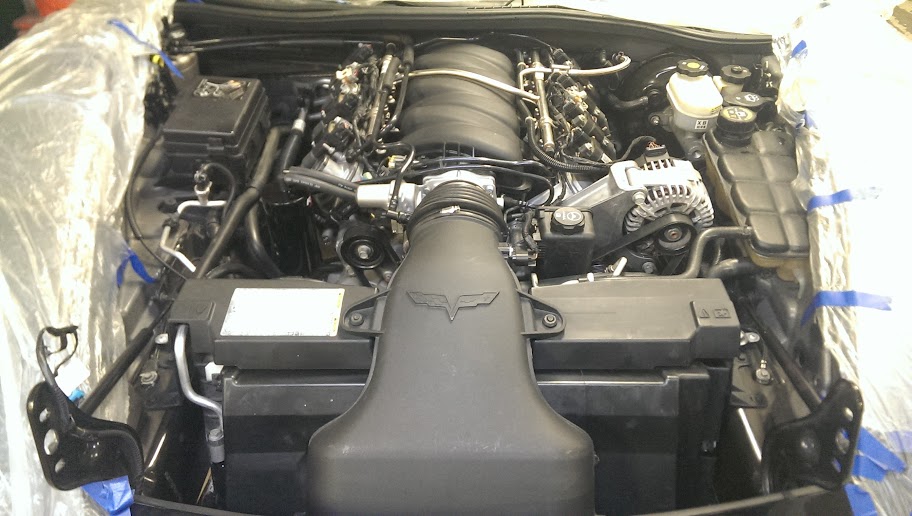
Getting there


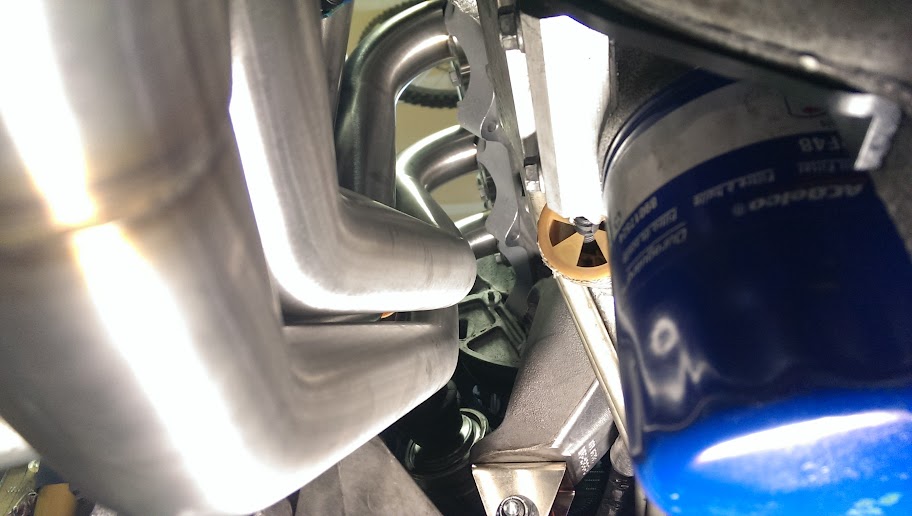
Hanging up exhaust - i had the great idea to run the O2 wires ABOVE the tunnel plate... but not long enough


Pretty V Bands


Pfadt engine mounts


All the rockers ready to go in (I used 7.775 pushrods)


RX Catch Can


Left coil packs off for starter catastrophe check

That is a broken oil pan bolt, one of the M6 in the back.
Luckily enough meat to pull it out with locking pliers.
The above reason is why I had to drop the oil pan and I posted about getting a new gasket. I just wanted to get some progress and not wait for parts, plus it's like $65 (you spent all that money on heads/cam/headers and you're gonna skimp on a gasket??? - yes). well i got lucky - no oil leaks yet.
Here she is ready mid way thru tear down
Hi-tech engine jacking system
Cradle hangin
Some progress. Old heads about to come off
UNLEANNNNN
Vacuuming out the bolt holes
Cleaned mating surface
It snowed alot that week
More progress
New Cam all lubed up (old lifters in background).
In she goes - I used the water pump bolts for extra grip as slowly inserted the bump stick
new lifters taking a bath
Timing chain and sprocket back on. DON'T forget to loctite the cam retention plate like i did - I had it almost back together and then took it all back apart. (after being like, wait did i loctite those? Don't drink too much beer while working on your car either)
Drunk... ARE THESE RED DOTS LINED UP RIGHT???
About the oil pump - I've heard of others having trouble getting each of the cogs to line up. I laid under the car and got my head up to peer down the length of the crank rod, and looking through the oil pump. I got the first sprocket onto the crank and then reach in with your finger and peer through the hole to get the teeth lined up. Then do the same with the second cog and it's really easy. I even did it twice.
Ghetto ***! That's how you do it without unplugging the AC condensor. I couldn't get the radiator unmated from the damn thing anyway
In above pic, notice wooden deck plank
So i was having some trouble mounting the balancer. i did head it to 200 degrees but even so i could not get it on with a dead blow hammer in the short swing space. I kept measuring the progress with a tape measure after every 100 blows and it just wasn't moving. So out comes the wooden deck plank
It worked! Be careful if you try this and cover everything up or do something to keep wood particles from flying about. Because they do.
With 5280's long *** torque wrench I was able to hit 240 ft.lb on the new crank bolt. Sweet! No screwdrivers in any flywheels or anything. Just in 4th gear and with parking brake set to max.
Super hi tech "CAI" mod (1x5" rectangle cuts)
Getting there
Hanging up exhaust - i had the great idea to run the O2 wires ABOVE the tunnel plate... but not long enough
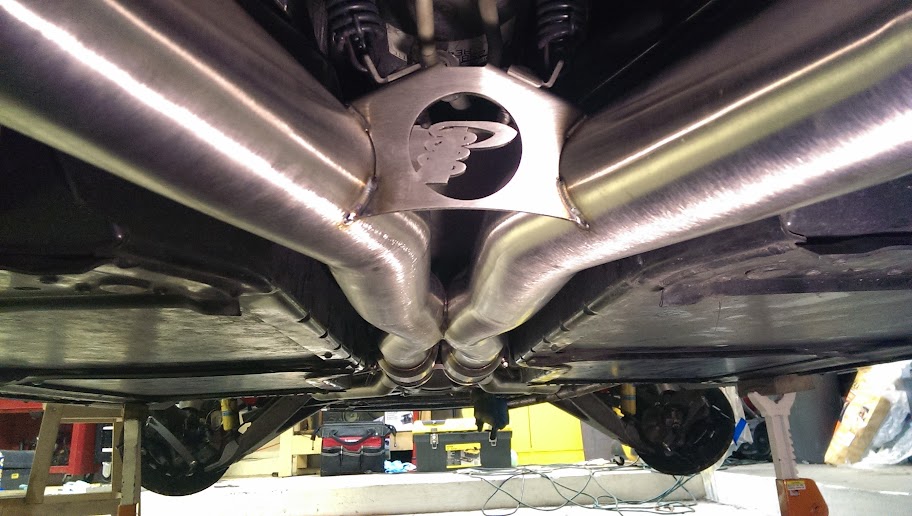
Pretty V Bands
Pfadt engine mounts
All the rockers ready to go in (I used 7.775 pushrods)
RX Catch Can
Left coil packs off for starter catastrophe check
Last edited by erichg1000; 06-04-2013 at 08:37 PM.
 06-04-2013, 08:44 PM
#2


...
Ghetto ***! That's how you do it without unplugging the AC condensor. I couldn't get the radiator unmated from the damn thing anyway
Ghetto ***! That's how you do it without unplugging the AC condensor. I couldn't get the radiator unmated from the damn thing anyway
In above pic, notice wooden deck plank
So i was having some trouble mounting the balancer. i did head it to 200 degrees but even so i could not get it on with a dead blow hammer in the short swing space. I kept measuring the progress with a tape measure after every 100 blows and it just wasn't moving. So out comes the wooden deck plank
It worked! Be careful if you try this and cover everything up or do something to keep wood particles from flying about. Because they do.
Ghetto ***! That's how you do it without unplugging the AC condensor. I couldn't get the radiator unmated from the damn thing anyway
Ghetto ***! That's how you do it without unplugging the AC condensor. I couldn't get the radiator unmated from the damn thing anyway
In above pic, notice wooden deck plank
So i was having some trouble mounting the balancer. i did head it to 200 degrees but even so i could not get it on with a dead blow hammer in the short swing space. I kept measuring the progress with a tape measure after every 100 blows and it just wasn't moving. So out comes the wooden deck plank
It worked! Be careful if you try this and cover everything up or do something to keep wood particles from flying about. Because they do.
 Now I've seen everything.
 That's "ratchet".
That piece of wood, looks like it has screw holes in the end of it.
Did you pull it up from the deck? If so, your wife is going to have your *** if she sees these pics.
But hey, whatever works.
Congrats on the build.

Last edited by '06 Quicksilver Z06; 06-04-2013 at 08:57 PM.


 06-04-2013, 10:09 PM
#5
Race Director


Erich, what lifters did you use? Did you replace the timing chain? If so with what.
Great documentation. Beautiful looking (Pfadt) headers.
Great documentation. Beautiful looking (Pfadt) headers.
06-04-2013, 11:53 PM
#7
Supporting Vendor
Wow, that was sooooo the wrong way to install the balancer. I'll bet money that you killed the thrust bearing on the crank and will likely be pulling the entire engine in the not too distant future.
06-05-2013, 12:01 AM
#8
Drifting
Thread Starter
Oh and sub - what's the bet?
06-05-2013, 12:10 AM
#9
Supporting Vendor
Several different companies sell an installation tool but you can make one yourself for about $15. All you need is the proper size threaded rod, a thrust washer and the nut.
06-05-2013, 12:12 AM
#10
Drifting
Thread Starter
well now i'm all sad face. I guess i'll be upping the blackstone oil report frequency. in way over my head with this car. *** that if my thrust bearings are shot because i'm an idiot, i will be suicidal. that said, i did knock on wood (will, with a hammer. on a harmonic balancer)
Last edited by erichg1000; 06-05-2013 at 12:34 AM.
06-05-2013, 07:52 AM
#11
Pro

hmmm..I used a block of wood too. Only to get it on about half way. Was not too hard to tap on. I also did it without going through the grill but rather in the engine bay. After that I used a longer crank bolt to pull it all the way on. 700 miles issue free so far.
Good advice subfloor for all to DIYers out there. Better to use the right tool than risk it.
Good advice subfloor for all to DIYers out there. Better to use the right tool than risk it.
06-05-2013, 09:11 AM
#12
Drifting
Thread Starter
I only was tapping the wood enough to get the balancer on enough to use the old bolt to put it on the rest of the way.
I used stock LS7 lifters (new ones).
I did not replace the timing chain.
Of note - if you "drop" the oil pan to get oil pump off, you don't need to remove the two horizontal bolts in the bell housing. Just do the M8 and two M6 bolts (the two verticle in the very rear, the rest going to the front are all M8), back them out half an inch or so, and then go back to the front of car and push down on the pan a little. THat's enough clearance to get the pump off without damaging the gasket. If you drop it all the way, there is a chance you could get an oil leak (if you don't do a whole new gasket etc). I got lucky that I dropped the whole pan and didn't get a leak.
And for baby jebus's sake don't quote the whole original post it takes years to load.
06-05-2013, 09:57 AM
#13
Drifting


Step one is don't use cheap torque wrenches, and use some damn common sense so you don't do this:
That is a broken oil pan bolt, one of the M6 in the back.
Luckily enough meat to pull it out with locking pliers.
The above reason is why I had to drop the oil pan and I posted about getting a new gasket. I just wanted to get some progress and not wait for parts, plus it's like $65 (you spent all that money on heads/cam/headers and you're gonna skimp on a gasket??? - yes). well i got lucky - no oil leaks yet.
Here she is ready mid way thru tear down
Hi-tech engine jacking system
Cradle hangin
Some progress. Old heads about to come off
UNLEANNNNN
Vacuuming out the bolt holes
Cleaned mating surface
It snowed alot that week
More progress
New Cam all lubed up (old lifters in background).
In she goes - I used the water pump bolts for extra grip as slowly inserted the bump stick
new lifters taking a bath
Timing chain and sprocket back on. DON'T forget to loctite the cam retention plate like i did - I had it almost back together and then took it all back apart. (after being like, wait did i loctite those? Don't drink too much beer while working on your car either)
Drunk... ARE THESE RED DOTS LINED UP RIGHT???
About the oil pump - I've heard of others having trouble getting each of the cogs to line up. I laid under the car and got my head up to peer down the length of the crank rod, and looking through the oil pump. I got the first sprocket onto the crank and then reach in with your finger and peer through the hole to get the teeth lined up. Then do the same with the second cog and it's really easy. I even did it twice.
Ghetto ***! That's how you do it without unplugging the AC condensor. I couldn't get the radiator unmated from the damn thing anyway
In above pic, notice wooden deck plank
So i was having some trouble mounting the balancer. i did head it to 200 degrees but even so i could not get it on with a dead blow hammer in the short swing space. I kept measuring the progress with a tape measure after every 100 blows and it just wasn't moving. So out comes the wooden deck plank
It worked! Be careful if you try this and cover everything up or do something to keep wood particles from flying about. Because they do.
With 5280's long *** torque wrench I was able to hit 240 ft.lb on the new crank bolt. Sweet! No screwdrivers in any flywheels or anything. Just in 4th gear and with parking brake set to max.
Super hi tech "CAI" mod (1x5" rectangle cuts)
Getting there
Hanging up exhaust - i had the great idea to run the O2 wires ABOVE the tunnel plate... but not long enough
Pretty V Bands
Pfadt engine mounts
All the rockers ready to go in (I used 7.775 pushrods)
RX Catch Can
Left coil packs off for starter catastrophe check
I only was tapping the wood enough to get the balancer on enough to use the old bolt to put it on the rest of the way.
I used stock LS7 lifters (new ones).
I did not replace the timing chain.
Of note - if you "drop" the oil pan to get oil pump off, you don't need to remove the two horizontal bolts in the bell housing. Just do the M8 and two M6 bolts (the two verticle in the very rear, the rest going to the front are all M8), back them out half an inch or so, and then go back to the front of car and push down on the pan a little. THat's enough clearance to get the pump off without damaging the gasket. If you drop it all the way, there is a chance you could get an oil leak (if you don't do a whole new gasket etc). I got lucky that I dropped the whole pan and didn't get a leak.
And for baby jebus's sake don't quote the whole original post it takes years to load.
I used stock LS7 lifters (new ones).
I did not replace the timing chain.
Of note - if you "drop" the oil pan to get oil pump off, you don't need to remove the two horizontal bolts in the bell housing. Just do the M8 and two M6 bolts (the two verticle in the very rear, the rest going to the front are all M8), back them out half an inch or so, and then go back to the front of car and push down on the pan a little. THat's enough clearance to get the pump off without damaging the gasket. If you drop it all the way, there is a chance you could get an oil leak (if you don't do a whole new gasket etc). I got lucky that I dropped the whole pan and didn't get a leak.
And for baby jebus's sake don't quote the whole original post it takes years to load.
Was there something broken, or why couldn't you get the radiator off?
 06-05-2013, 10:23 AM
#15
Drifting
Thread Starter
I know i'm trashing my douchebag cred with a DIY 
Nothing was broken on the radiator, it's just i couldn't get the condesor to clear the mounting tabs, the bottom condensor hardline keeps hitting the corner of the radiator. hard to explain.
I think the oil pan gasket is around $65. It wasn't just the cost, but also dropping the rack all the way off the car, I was using the rack to hold the engine up (had a spacer between the engine mounts and the rack) so that I could even drop the pan down enough to remove the broken bolt.
06-05-2013, 10:24 AM
#16
Burning Brakes

Excellent write up Eric, thanks. So if you had to do it over, other than buying two cases of beer would you pull the oil pan to remove the oil pump or leave it in place? I know this was a pretty expensive job, but why not replace the timing chain while it's open? I would really love to see dyno results. Where do you think your hp numbers are now? If I pay for shipping, can you ship me the plank of wood? 
06-05-2013, 10:30 AM
#18
Supporting Vendor

Member Since: Nov 2005
Location: Supporting the Corvette Community at Abel Chevrolet in Rio Vista, CA 707-374-6317 Ext.123
Posts: 14,498
Received 1,425 Likes
on
597 Posts
St. Jude Donor '08

Why did you have to put 240 lbft on the new bolt? Is it an ARP bolt? If not, and you used a stock bolt, you need to remove it and do it correctly.
I also agree with Sub Floor about whacking the balancer on. That is not good on the thrust bearing. It doesn't take much to ruin it.
I also agree with Sub Floor about whacking the balancer on. That is not good on the thrust bearing. It doesn't take much to ruin it.
06-05-2013, 10:45 AM
#19
Drifting
Thread Starter
Excellent write up Eric, thanks. So if you had to do it over, other than buying two cases of beer would you pull the oil pan to remove the oil pump or leave it in place? I know this was a pretty expensive job, but why not replace the timing chain while it's open? I would really love to see dyno results. Where do you think your hp numbers are now? If I pay for shipping, can you ship me the plank of wood?
I didn't replace the chain because budget and Texas Speed told me the stock chain would hold up fine with this medium cam.
I am gonna have to hang on to the plank. Sorry... has to go back on the deck (haha jk it's scrap)
REGARDING 240 FT.LBS - I was following the DIY for H/C swap from the C5 LS1Tech guide, and that is the torque to make sure the balancer is seated properly, using the old bolt. Then I removed the old bolt and mounted up the new ARP bolt using the torque + 140 degrees or whatever it was i can't remember
06-05-2013, 11:27 AM
#20
Supporting Vendor
I know i'm trashing my douchebag cred with a DIY
Nothing was broken on the radiator, it's just i couldn't get the condesor to clear the mounting tabs, the bottom condensor hardline keeps hitting the corner of the radiator. hard to explain.
I think the oil pan gasket is around $65. It wasn't just the cost, but also dropping the rack all the way off the car, I was using the rack to hold the engine up (had a spacer between the engine mounts and the rack) so that I could even drop the pan down enough to remove the broken bolt.
I agree with Rich as the 240ftlbs only applies to the original bolt and you should definitely do it properly.