[Z06] new crank bolt install.........follow SM or ATI instructions
#1
Melting Slicks


Thread Starter
The ATI balancer will be installed soon, I have different instructions from the GM SM and the instruction sheet with the ATI. I am using a NEW GM crank bolt.
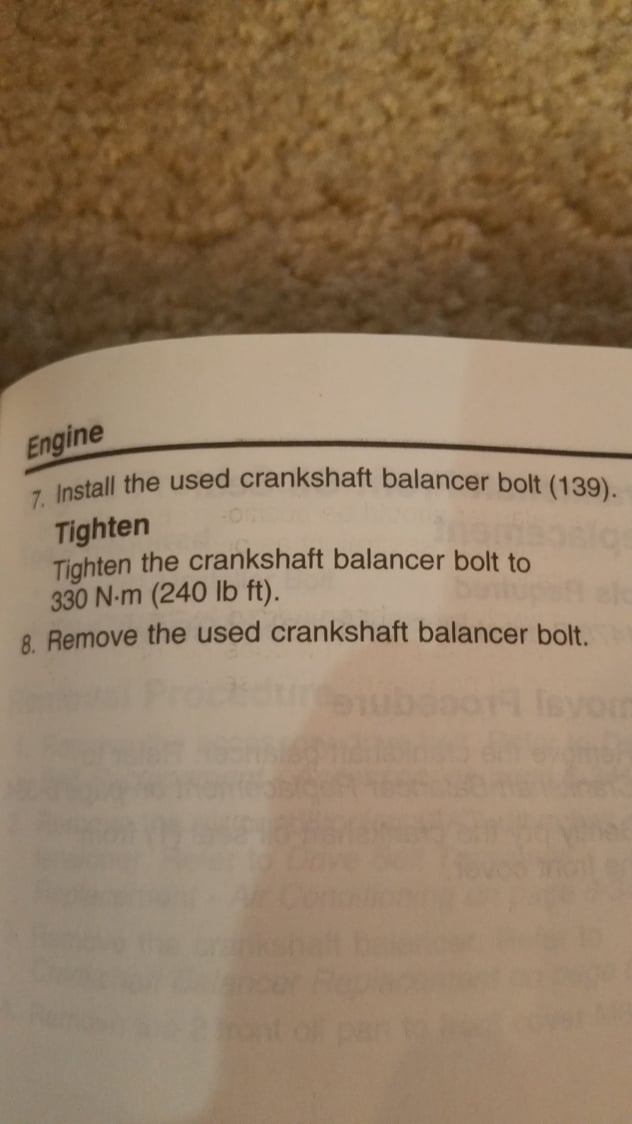
The difference comes after you use the old bolt and torque down to 240 ft/lbs and remove.
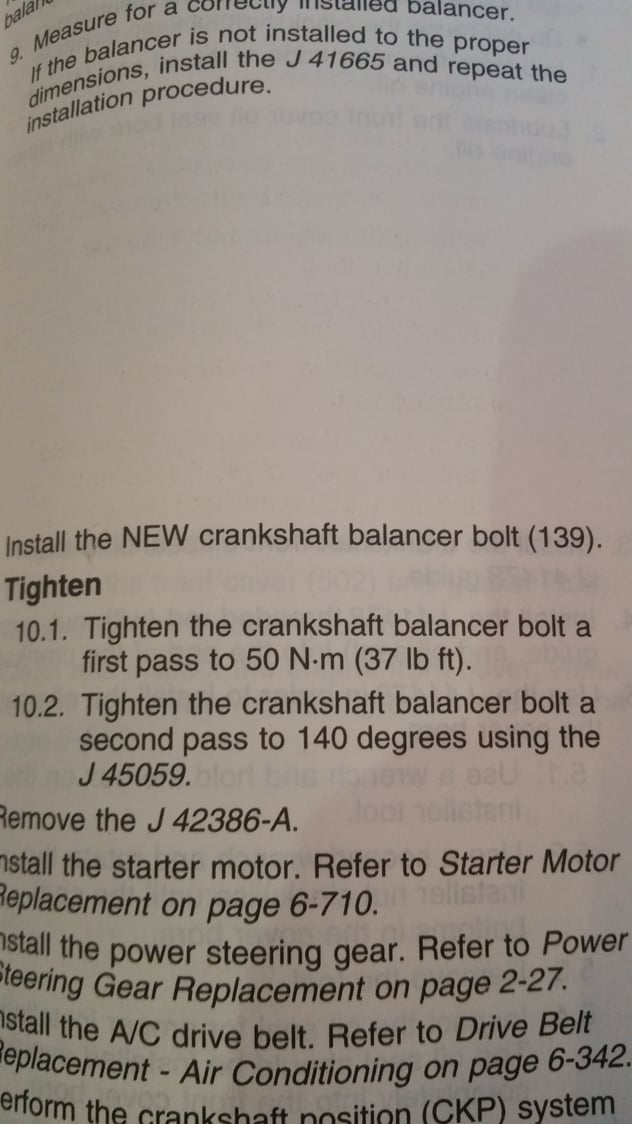
The ATI instructions say torque new bolt to 37 ft/lbs then go another 140 degrees as your final tightening spec. The GM SM instructions say 37 ft/lbs then go another 230 degrees as the final tightening spec.
So which should I follow?
#2
Le Mans Master


You wouldn't catch me putting 240 ft/lbs on a used TTY bolt - Yes, I know what it says in the SM - use old bolt..
I would press the balancer on to the crank to the proper depth (that spec should be in your SM) with your tool, then install the new bolt.
Spec is 2.4 to 4.48mm crank recess.
And if you are using the GM bolt, then logically you should follow GM's procedure. If you had an ARP bolt, follow their process.
But I am also the guy that pins balancers to cranks just to avoid all this locking flywheel / high bolt Tq crap, so..
FYI - my SM says Tq to 110 - loosen 360 degrees - Tq to 59 - tighten past 200 degrees.. Now, doesn't pinning the crank sound attractive?
I would press the balancer on to the crank to the proper depth (that spec should be in your SM) with your tool, then install the new bolt.
Spec is 2.4 to 4.48mm crank recess.
And if you are using the GM bolt, then logically you should follow GM's procedure. If you had an ARP bolt, follow their process.
But I am also the guy that pins balancers to cranks just to avoid all this locking flywheel / high bolt Tq crap, so..

FYI - my SM says Tq to 110 - loosen 360 degrees - Tq to 59 - tighten past 200 degrees.. Now, doesn't pinning the crank sound attractive?

Last edited by Dan_the_C5_Man; 01-30-2016 at 12:49 PM.
#3
Melting Slicks


Thread Starter
The way I see it, the balancer has to line up with your pullies so your belts will line up properly and not get thrown, so if I press the balancer until the AC pulley on the balancer lines up with the belt tensioner for the AC compressor then the balancer is pressed on enough.
Wish I could pin the crank but no way I'm going to be able to do that in the garage so the ATI will just get pressed on for now.
Wish I could pin the crank but no way I'm going to be able to do that in the garage so the ATI will just get pressed on for now.
#4
Le Mans Master


The way I see it, the balancer has to line up with your pullies so your belts will line up properly and not get thrown, so if I press the balancer until the AC pulley on the balancer lines up with the belt tensioner for the AC compressor then the balancer is pressed on enough.
Wish I could pin the crank but no way I'm going to be able to do that in the garage so the ATI will just get pressed on for now.
Wish I could pin the crank but no way I'm going to be able to do that in the garage so the ATI will just get pressed on for now.
Remember, there is a taper involved here; the only thing keeping it from spinning (and coming loose) is the press fit.
Standing over the top of the motor and eye-balling the pulley alignment is not the way to go.

Last edited by Dan_the_C5_Man; 01-30-2016 at 05:50 PM.
#5
Melting Slicks


Member Since: Nov 2009
Location: Klein TX
Posts: 3,037
Received 906 Likes
on
570 Posts
2023 C6 of the Year Finalist - Unmodified
2022 C6 of the Year Finalist - Unmodified

Instructions for installing ATI LS Superdampers:
http://www.atiracing.com/instruction...LS7-Damper.pdf
For more info call ATI tech help @ (410) 298-4343
http://www.atiracing.com/instruction...LS7-Damper.pdf
For more info call ATI tech help @ (410) 298-4343
#6
Purchase a good, USA made installation tool. You can unload it here. The cost to replace what could be destroyed if you don't have a real good engagement of the crank threads before you really have to crank on it, would be insignificant compared to the cost of the tool. Although it may sound like a quick take off, put new on, deal. Anything that goes wrong is very big bucks.
Have you considered how your going to keep the motor from turning?
Have you considered how your going to keep the motor from turning?
#8
Melting Slicks


Thread Starter
ATI is on. Followed ATI instructions with new GM bolt.
Really no f-ing way in hell anyone really can go 230 degrees with the new bolt after torqueing to 37 ft./lbs. so I went the 140 degrees (barely made it there).
Pullies lined up perfect (yes I got the proper depth also from the edge of the crank snout to the damper).
Really no f-ing way in hell anyone really can go 230 degrees with the new bolt after torqueing to 37 ft./lbs. so I went the 140 degrees (barely made it there).
Pullies lined up perfect (yes I got the proper depth also from the edge of the crank snout to the damper).
#9
Supporting Vendor
ATI is on. Followed ATI instructions with new GM bolt.
Really no f-ing way in hell anyone really can go 230 degrees with the new bolt after torqueing to 37 ft./lbs. so I went the 140 degrees (barely made it there).
Pullies lined up perfect (yes I got the proper depth also from the edge of the crank snout to the damper).
Really no f-ing way in hell anyone really can go 230 degrees with the new bolt after torqueing to 37 ft./lbs. so I went the 140 degrees (barely made it there).
Pullies lined up perfect (yes I got the proper depth also from the edge of the crank snout to the damper).
The end result was the same but consider yourself lucky you didn't break something if you actually tried to turn that bolt 240 degrees.


#10
Le Mans Master


..And my 2011 SM says something completely different than above (I posted it earlier).. Seems as if GM applied some lessons learned through the years (and process improvement is always a good thing). 

#11
Melting Slicks


Thread Starter
What year is your car? Seems every year there's a different procedure to achieve the same thing, and I didn't read my sm wrong.
After doing the 240 ftlbs with the old bolt and remove the new bolt goes to 37 and then turned an additional 230 degrees.
I post up pics later of what it says in my 09 sm. I know what I read in there.
After doing the 240 ftlbs with the old bolt and remove the new bolt goes to 37 and then turned an additional 230 degrees.
I post up pics later of what it says in my 09 sm. I know what I read in there.
#13
Le Mans Master


Interesting thread.
In for answer.
Opinion:
All three instructions guides in post # 12 differ.
Is it because each one of the three refer to a different engine?
Are the instructions different because each engine has a different crank shaft?
Could be on going improvements by GM from research in their instructions.
Can a forum co-member get today's (Feb 2016) dealership on-line current instruction?
My LS2 2005 SM pg 6-88 says:
(Note balancer position, weights and etc before removal)
Install balancer with tool, remove tool.
Install old bolt and torque to 240 ft lbs, remove old bolt.
Measure recess.
Install new bolt toque tighten to 37 ft lbs first pass.
Second pass tighten to 140 degrees.
Reinstall starter etc PLUS perform Crankshaft Position System variation lean procedure.
Last edited by Kenny94945; 02-02-2016 at 08:07 AM.


