

 03-25-2015, 06:57 PM
Last edit by: IB Advertising
See related guides and technical advice from our community experts:
Browse all: Interior How-Tos
- Corvette: How to Replace Stock Shifter
Step by step instructions for do-it-yourselfers...
Browse all: Interior How-Tos

How-To: Install Short Shifter / Replace Stock Shifter
05-04-2014, 06:47 PM
#81
Instructor


No problems at all. 
You are, indeed, very lucky. I would recommend this mod with certainty if you've already done that twice.
There is no additional transfer through the shifter, and I believe their availability is still same/next day.
Having the same combo (sans cam), I will tell you that money shifting with said combo will, indeed, be the death of that engine. As you can see from the long list of users here, it's well worth the price of admission.
 05-05-2014, 01:16 PM
#82
Instructor
Ordered my shifter this morning. Thanks for such good info!
05-05-2014, 03:56 PM
#83
Tech Contributor
Thread Starter
Member Since: Jan 2006
Location: Saint Louis MO
Posts: 4,761
Likes: 0
Received 219 Likes
on
110 Posts
St. Jude Donor '14-'15
Hey, no problem! There's no shame in mis-shifting - I just don't want to see you lose an engine over it.
I think you'll be extremely impressed with the near-impossibility to do this with your new shifter.
I think you'll be extremely impressed with the near-impossibility to do this with your new shifter.
05-06-2014, 12:01 PM
#84
Drifting


My MGW has improved noticeably in smoothness and effort now that I have some miles on it. I guess I'd say it's worked itself in.
Hint: on the shift ****, I used just a tiny bit of the grease they supply on the end of the shaft and inside the ****. This made the installation/removal of the **** for alignment MUCH easier, and much easier to finally put on.
Hint: on the shift ****, I used just a tiny bit of the grease they supply on the end of the shaft and inside the ****. This made the installation/removal of the **** for alignment MUCH easier, and much easier to finally put on.
05-07-2014, 01:48 AM
#85
Tech Contributor
Thread Starter
Member Since: Jan 2006
Location: Saint Louis MO
Posts: 4,761
Likes: 0
Received 219 Likes
on
110 Posts
St. Jude Donor '14-'15
My MGW has improved noticeably in smoothness and effort now that I have some miles on it. I guess I'd say it's worked itself in.
Hint: on the shift ****, I used just a tiny bit of the grease they supply on the end of the shaft and inside the ****. This made the installation/removal of the **** for alignment MUCH easier, and much easier to finally put on.
Hint: on the shift ****, I used just a tiny bit of the grease they supply on the end of the shaft and inside the ****. This made the installation/removal of the **** for alignment MUCH easier, and much easier to finally put on.
 Mine was... extremely difficult to get back on. I will say, though, that it won't rattle loose any time soon.
  05-08-2014, 02:34 PM
#89
Le Mans Master

Great instructions.
I took the Core-shifters "Hurst" shifter out of my C5 and put it in the C7 last night.... Fits and works perfectly.... I also like the Hurst stick because it is straight instead of angled backward like the stock stick, since my arms are long and being closer to the dash is actually better.
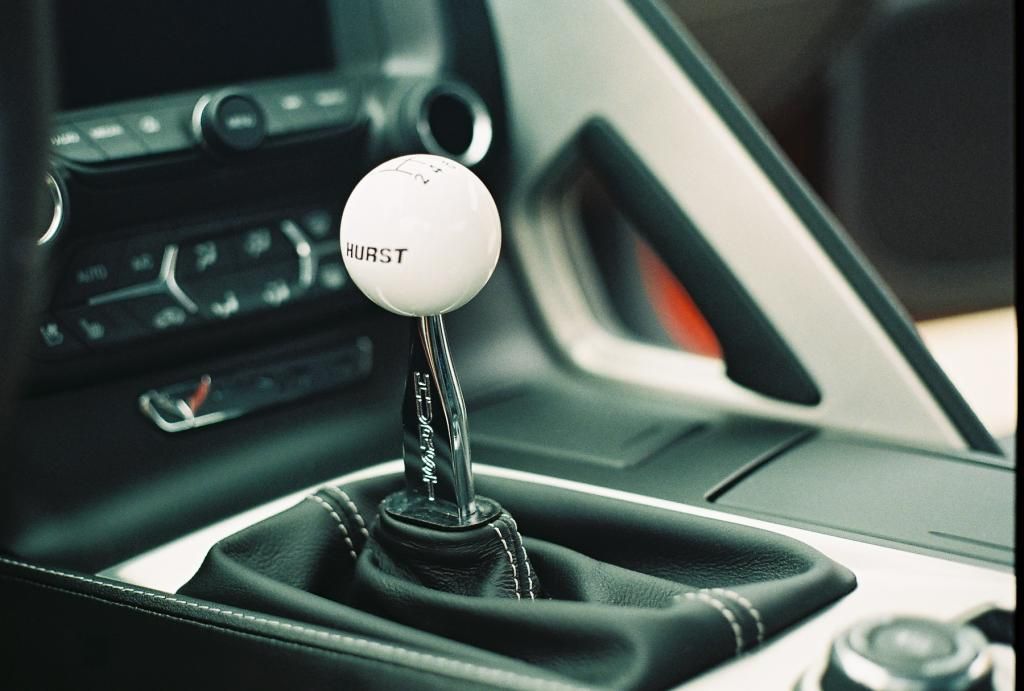
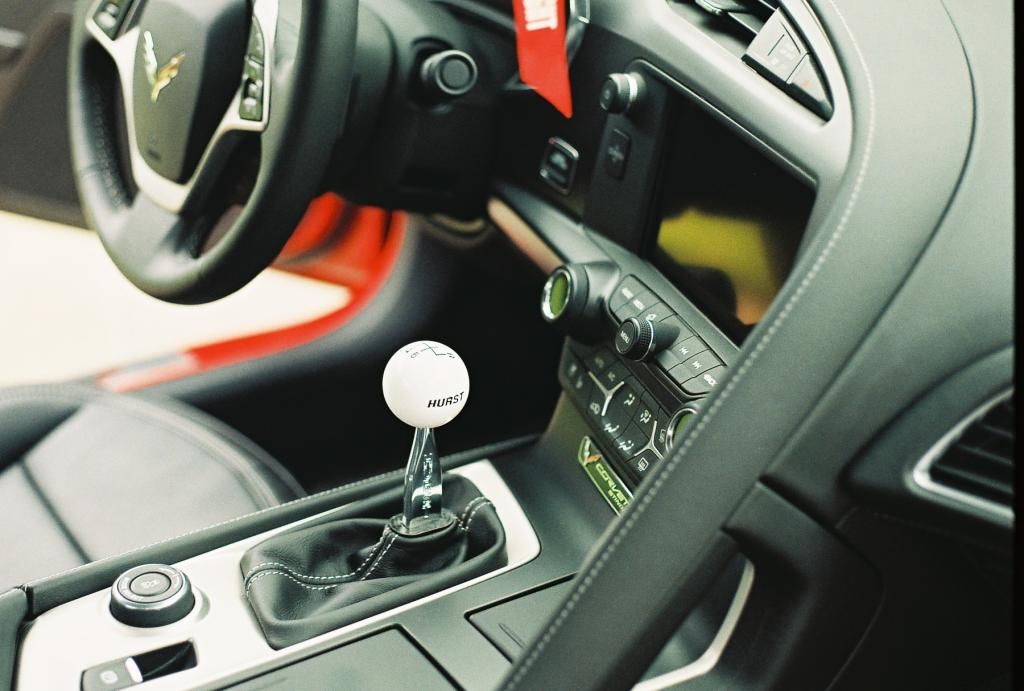
I took the Core-shifters "Hurst" shifter out of my C5 and put it in the C7 last night.... Fits and works perfectly.... I also like the Hurst stick because it is straight instead of angled backward like the stock stick, since my arms are long and being closer to the dash is actually better.
Last edited by TEXHAWK0; 05-12-2014 at 11:20 PM.
05-08-2014, 05:05 PM
#90
Advanced

Member Since: Apr 2014
Posts: 80
Likes: 0
Received 0 Likes
on
0 Posts
 .
05-08-2014, 05:44 PM
.
05-08-2014, 05:44 PM
#91
Le Mans Master
I guess you could figure it out since the gear is displayed on the dash...
but I may eventually put the right gear pattern on.
The following users liked this post:
braveheart3158 (05-02-2021)
05-19-2014, 10:49 PM
#94
Heel & Toe

Member Since: May 2014
Posts: 21
Likes: 0
Received 0 Likes
on
0 Posts
okkk this is how my install went down
1. i made a minor scratch near the lower driver door kick panel with my T40 torque bit
2. then i dropped the chinsey little key to tighten the lock screws in the tunnel lost forever I can see the end of it buried at the bottom of eternity
3. last but not least my Birkenstock sandle scratched the sill plate.
4. I have an an extra O-ring from the shifter boot that goes with the little chrome piece to hold it together
Now I will go test it and see if it is worth the cut finger and 3hours after work installing it.

 :beatdeadhors e:
1. i made a minor scratch near the lower driver door kick panel with my T40 torque bit
2. then i dropped the chinsey little key to tighten the lock screws in the tunnel lost forever I can see the end of it buried at the bottom of eternity
3. last but not least my Birkenstock sandle scratched the sill plate.
4. I have an an extra O-ring from the shifter boot that goes with the little chrome piece to hold it together
Now I will go test it and see if it is worth the cut finger and 3hours after work installing it.
:beatdeadhors e:
05-19-2014, 10:55 PM
#95
Tech Contributor
Thread Starter
Member Since: Jan 2006
Location: Saint Louis MO
Posts: 4,761
Likes: 0
Received 219 Likes
on
110 Posts
St. Jude Donor '14-'15
okkk this is how my install went down
1. i made a minor scratch near the lower driver door kick panel with my T40 torque bit
2. then i dropped the chinsey little key to tighten the lock screws in the tunnel lost forever I can see the end of it buried at the bottom of eternity
3. last but not least my Birkenstock sandle scratched the sill plate.
4. I have an an extra O-ring from the shifter boot that goes with the little chrome piece to hold it together
Now I will go test it and see if it is worth the cut finger and 3hours after work installing it.
1) If you describe or take a pic of the panel, I can let you know the part number and if it's cheap to replace.
2) Grab an extendable magnet tool (cheap and easy to find from an auto parts or hardware store) and grab the key out from the torque tube.
3) Don't feel bad - I had a rock pop up into mine while driving, scratched the HELL out of it.

Sorry about your finger - we do shed a lot of blood for our cars.
 05-19-2014, 11:43 PM
#96
Heel & Toe
Member Since: May 2014
Posts: 21
Likes: 0
Received 0 Likes
on
0 Posts
thanks theta. I just checked it out and I could here it but seems to have worked itself out.
I think i will wait till next year when I install headers to look for it (if i remember).
The scratches are minute. May get replacement sill plates later also.
Can you get to the bottom of the tunnel from under the car or is it one giant piece of metal?
I thought about the magnetic telescoping tool from hardware/auto store and there is no way I can get to it. It is barely visible.
05-19-2014, 11:52 PM
#97
Heel & Toe
Member Since: May 2014
Posts: 21
Likes: 0
Received 0 Likes
on
0 Posts
I would like to say the shifter is ~ten times better then the stock unit.
I feel more confident when shifting and the gears (all seven of them) are in the same place everytime.
Overall it was worth it. Wish I had more time to drive it...so much car I have to remember that on ramps and corners are dangerous with throttle.
I feel more confident when shifting and the gears (all seven of them) are in the same place everytime.
Overall it was worth it. Wish I had more time to drive it...so much car I have to remember that on ramps and corners are dangerous with throttle.
05-20-2014, 12:04 AM
#98
Tech Contributor
Thread Starter
Member Since: Jan 2006
Location: Saint Louis MO
Posts: 4,761
Likes: 0
Received 219 Likes
on
110 Posts
St. Jude Donor '14-'15
thanks theta. I just checked it out and I could here it but seems to have worked itself out.
I think i will wait till next year when I install headers to look for it (if i remember).
The scratches are minute. May get replacement sill plates later also.
Can you get to the bottom of the tunnel from under the car or is it one giant piece of metal?
I thought about the magnetic telescoping tool from hardware/auto store and there is no way I can get to it. It is barely visible.
I think i will wait till next year when I install headers to look for it (if i remember).
The scratches are minute. May get replacement sill plates later also.
Can you get to the bottom of the tunnel from under the car or is it one giant piece of metal?
I thought about the magnetic telescoping tool from hardware/auto store and there is no way I can get to it. It is barely visible.

And if you're ever in trouble with non-ferrous metal:
05-21-2014, 10:26 PM
#99


Interesting that the MGW shifter box is open vs. the OEM being enclosed. Any issues with it being open i.e. dirt/debris eventually working in there?
 05-21-2014, 11:01 PM
#100
Heel & Toe
Member Since: May 2014
Posts: 21
Likes: 0
Received 0 Likes
on
0 Posts
I see what you are saying..from underneath the box it is open so your thought is something can get pulled up into the shifter box. This would defy the law of gravity or you would have to be inverted while driving.
Their design is not perfect.
Their design is not perfect.