

 03-25-2015, 06:57 PM
Last edit by: IB Advertising
See related guides and technical advice from our community experts:
Browse all: Interior How-Tos
- Corvette: How to Replace Stock Shifter
Step by step instructions for do-it-yourselfers...
Browse all: Interior How-Tos

How-To: Install Short Shifter / Replace Stock Shifter
04-02-2014, 05:54 PM
#1
Tech Contributor
Thread Starter
Member Since: Jan 2006
Location: Saint Louis MO
Posts: 4,761
Likes: 0
Received 218 Likes
on
110 Posts
St. Jude Donor '14-'15
Update 6/11/14: Full PDF of MGW Short Shifter installation available here: MGW-C7-Shifter-Install.pdf
After a few requests for this thread, I wanted to put the information out there. This is certainly not difficult, but it helps some people to have a step-by-step to go by when they're in the car and away from a laptop.
Disclaimer: All rights to these images belong to GM, and the use of these images is restricted to personal installation only. Do not reproduce these images for any other reason.
My MGW is arriving tomorrow, and I hope to add a few actual pictures of the process, as I believe MGW still uses the C6 instructions for the C7 (and I may be incorrect there, but that's how it originally was).
Step 1:
Step 2:

Step 3:
Step 4:
Step 5:
Step 6:
Step 7:
Reverse steps, and re-install components. Enjoy your new shifter!
After a few requests for this thread, I wanted to put the information out there. This is certainly not difficult, but it helps some people to have a step-by-step to go by when they're in the car and away from a laptop.
Disclaimer: All rights to these images belong to GM, and the use of these images is restricted to personal installation only. Do not reproduce these images for any other reason.
My MGW is arriving tomorrow, and I hope to add a few actual pictures of the process, as I believe MGW still uses the C6 instructions for the C7 (and I may be incorrect there, but that's how it originally was).
Step 1:
Step 2:
Step 3:
Step 4:
Step 5:
Step 6:
Step 7:
Reverse steps, and re-install components. Enjoy your new shifter!
Last edited by Theta; 06-11-2014 at 01:33 AM.

The following 3 users liked this post by Theta:


 Nice of you to do this. Look forward to your actual pics.
The following users liked this post:
IB Torres (10-17-2023)


 04-04-2014, 03:49 AM
#4
Tech Contributor
Thread Starter
Member Since: Jan 2006
Location: Saint Louis MO
Posts: 4,761
Likes: 0
Received 218 Likes
on
110 Posts
St. Jude Donor '14-'15
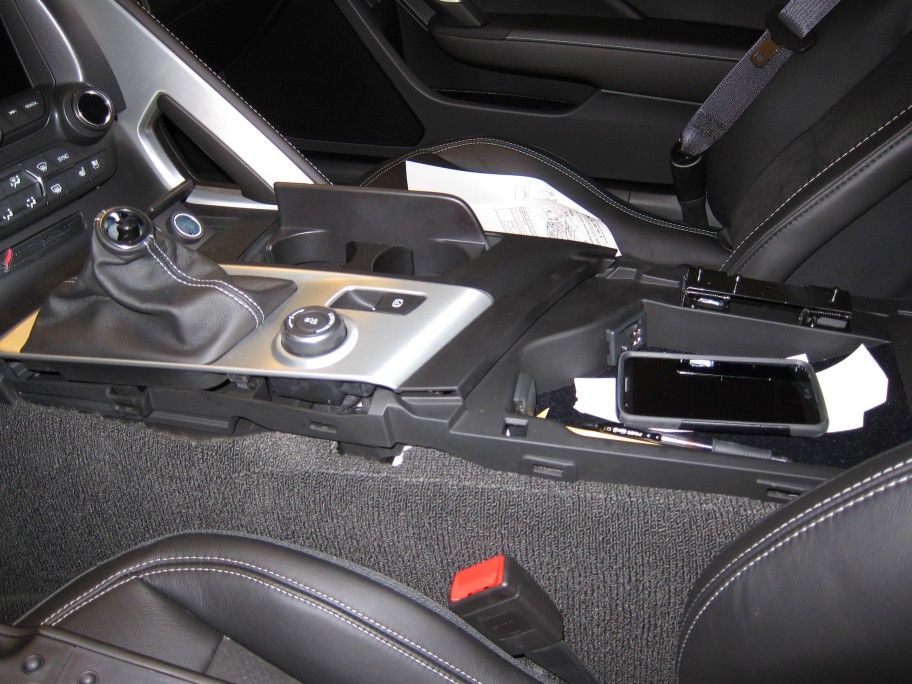
Here are my install pictures for you guys - it took 3 times as long to do the pics and edit / annotate them than to do the install. Hopefully you guys find this useful.
I take the time to do this stuff to help, and not for notoriety. Hope most of you guys get that by this point.
Oh, and panel tools are your friends, guys. If you don't have some, get some. Period.
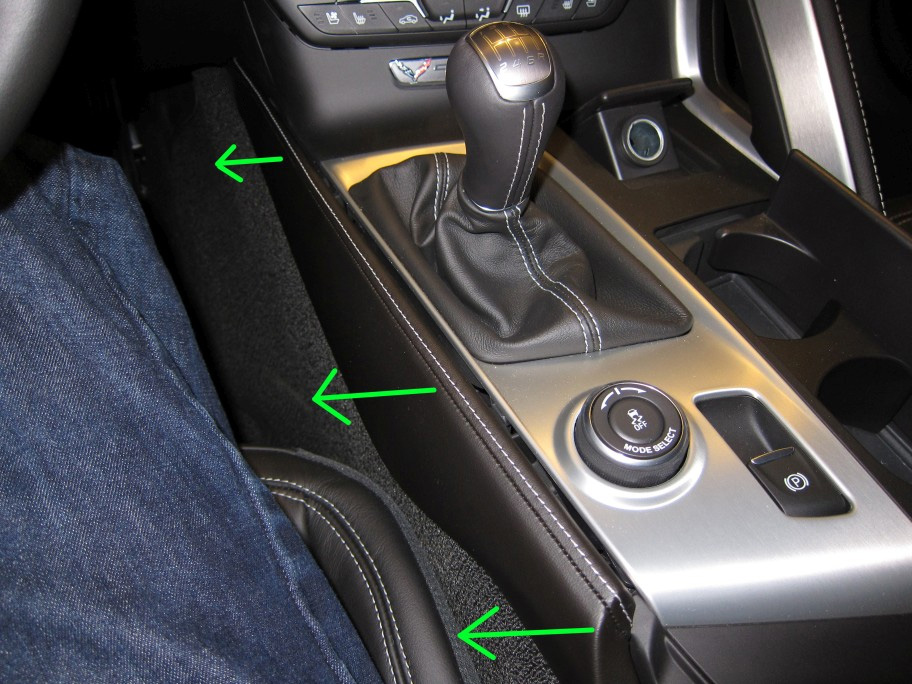
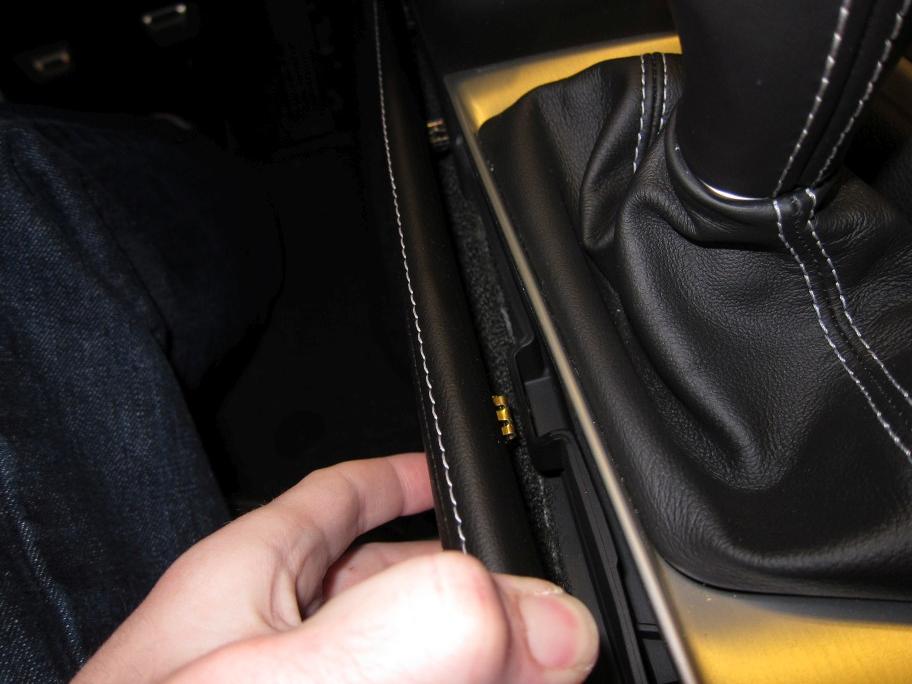
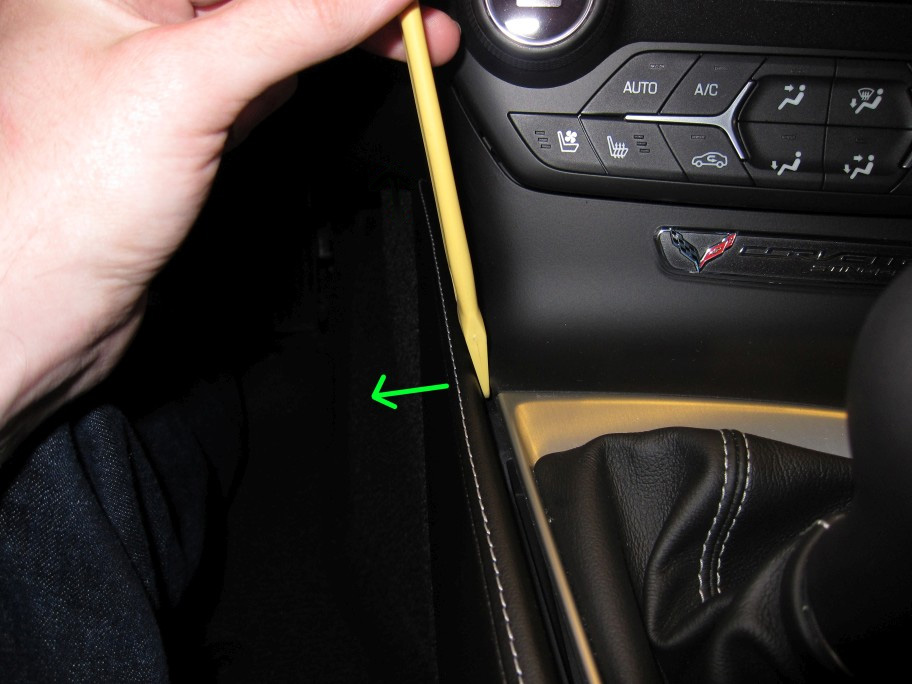
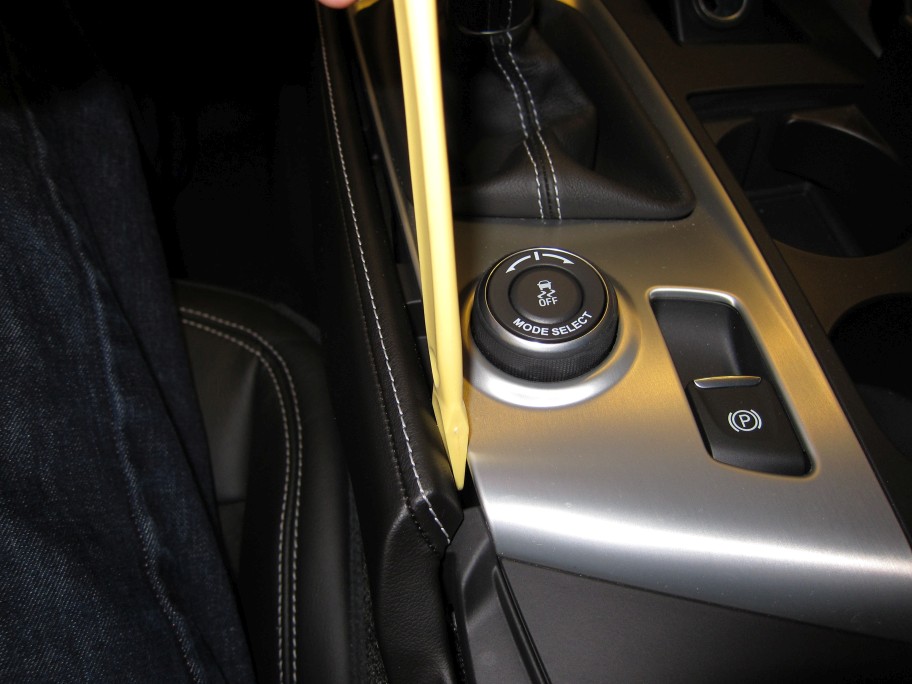
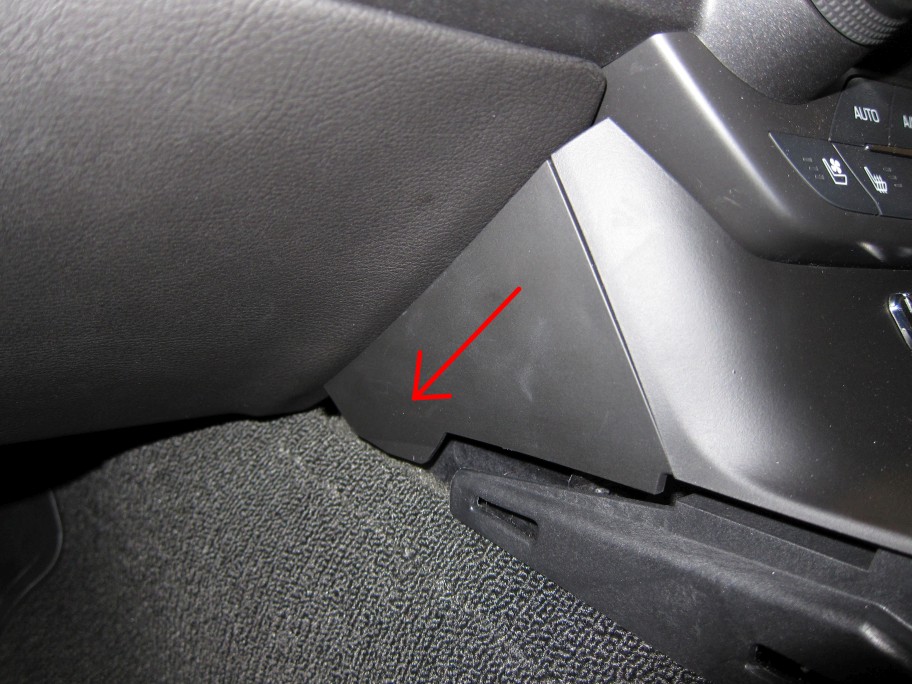
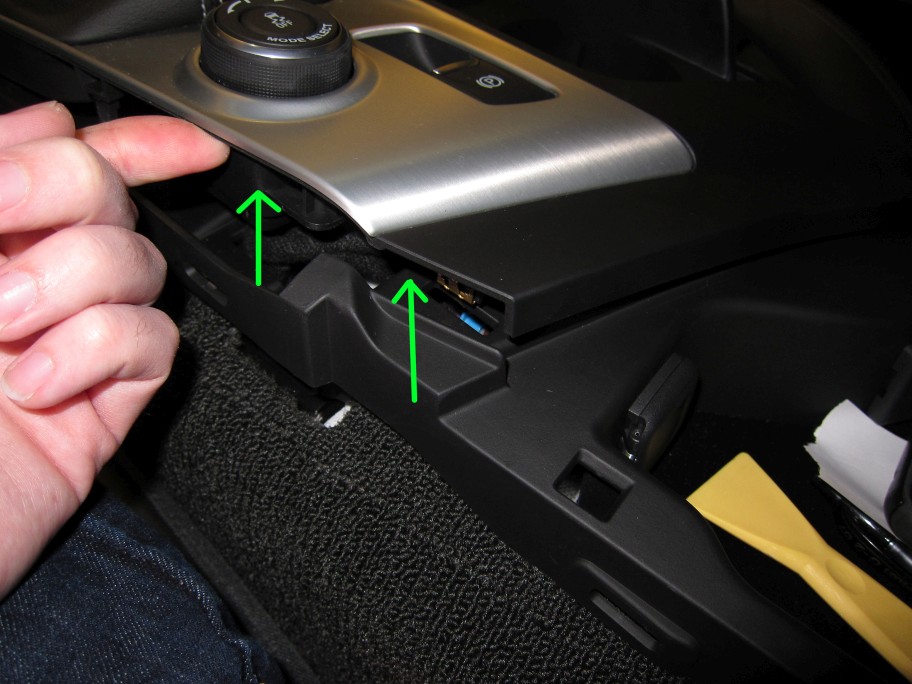
This section is all clips except the front. Undo the rear and move toward the front, then slide the front towards the dash to release the hook.
I take the time to do this stuff to help, and not for notoriety. Hope most of you guys get that by this point.
Oh, and panel tools are your friends, guys. If you don't have some, get some. Period.
This section is all clips except the front. Undo the rear and move toward the front, then slide the front towards the dash to release the hook.
Last edited by Theta; 06-11-2014 at 01:47 AM.
The following users liked this post:
Hopper12 (05-24-2017)
04-04-2014, 03:51 AM
#5
Tech Contributor
Thread Starter
Member Since: Jan 2006
Location: Saint Louis MO
Posts: 4,761
Likes: 0
Received 218 Likes
on
110 Posts
St. Jude Donor '14-'15
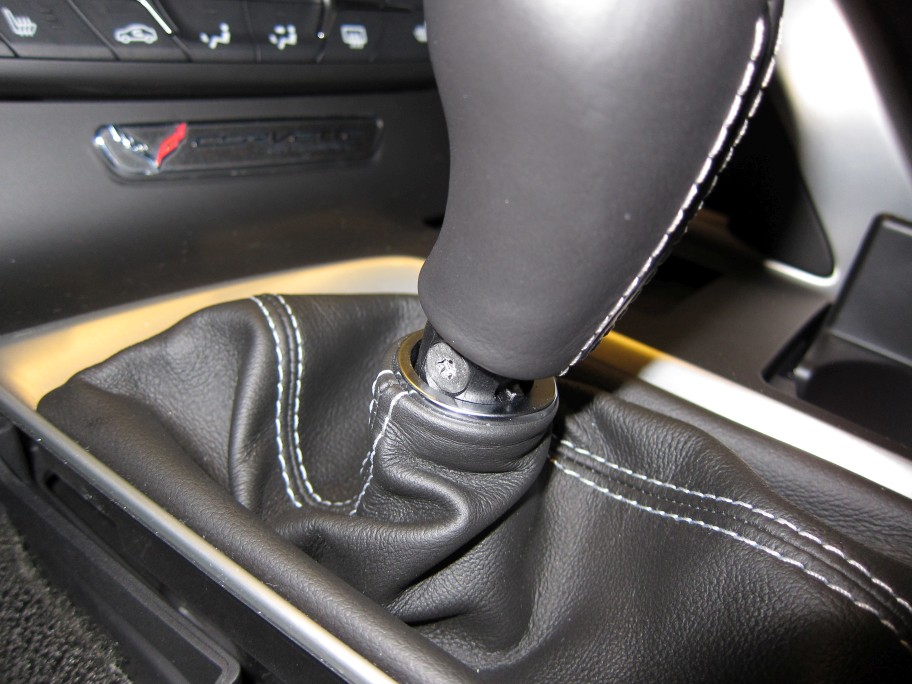
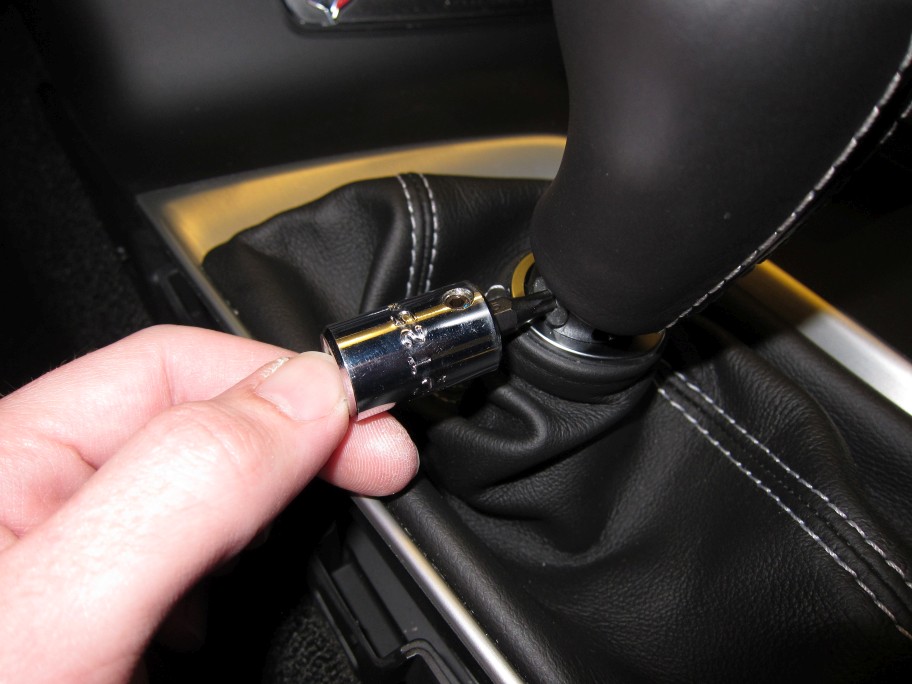
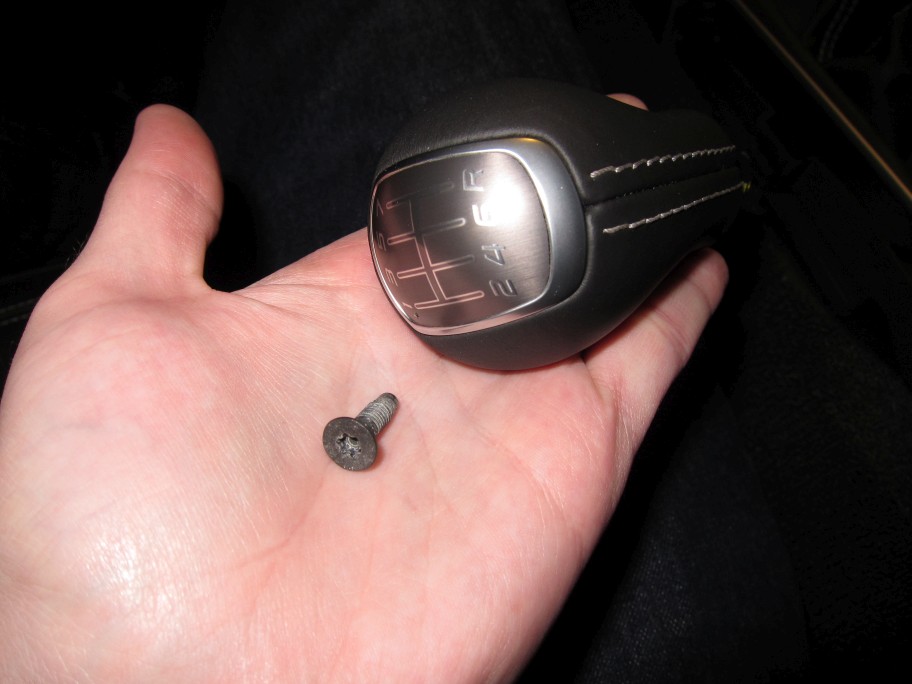
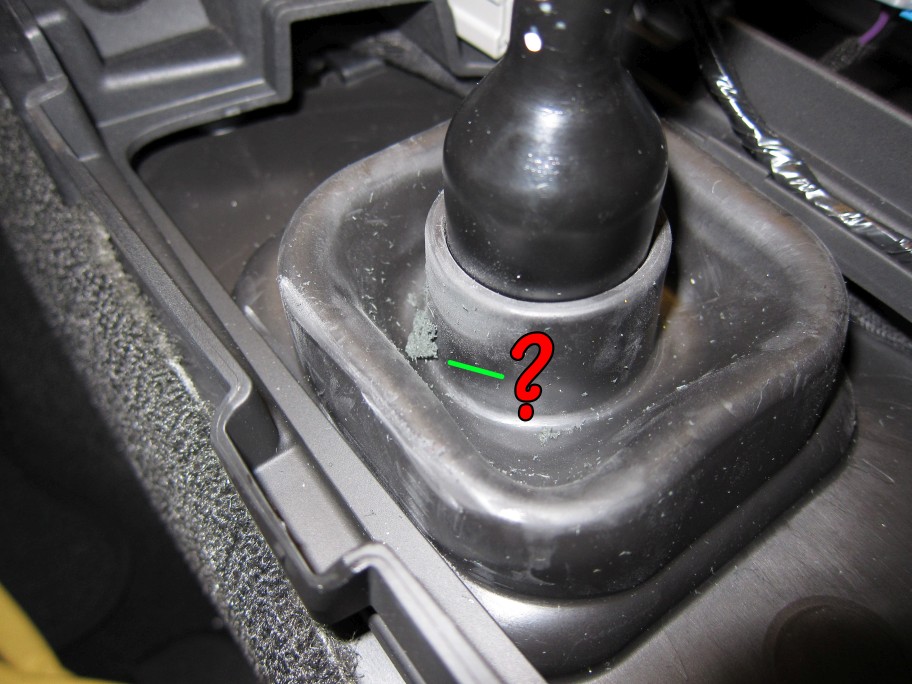
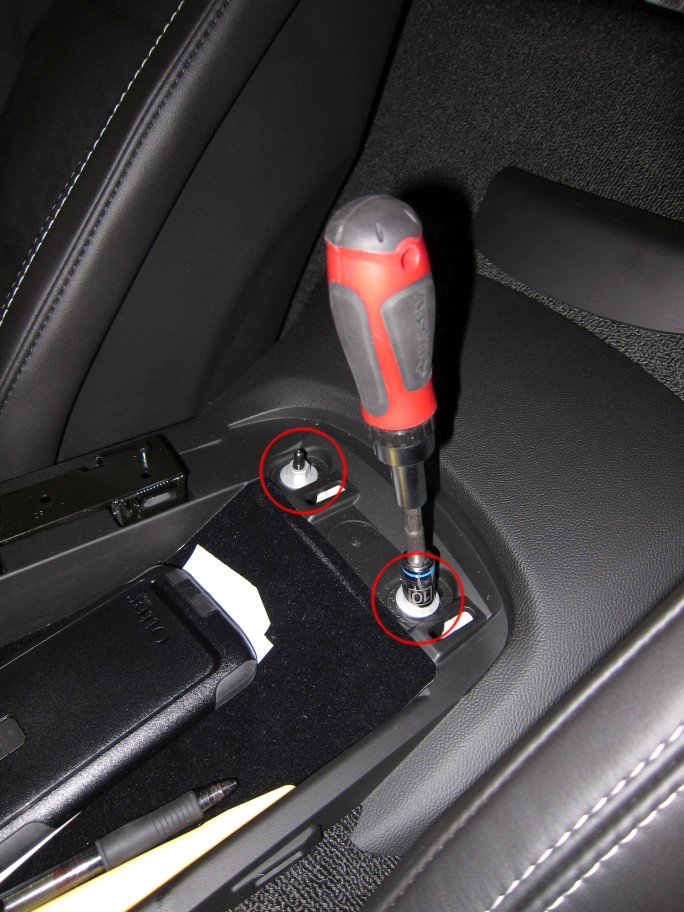
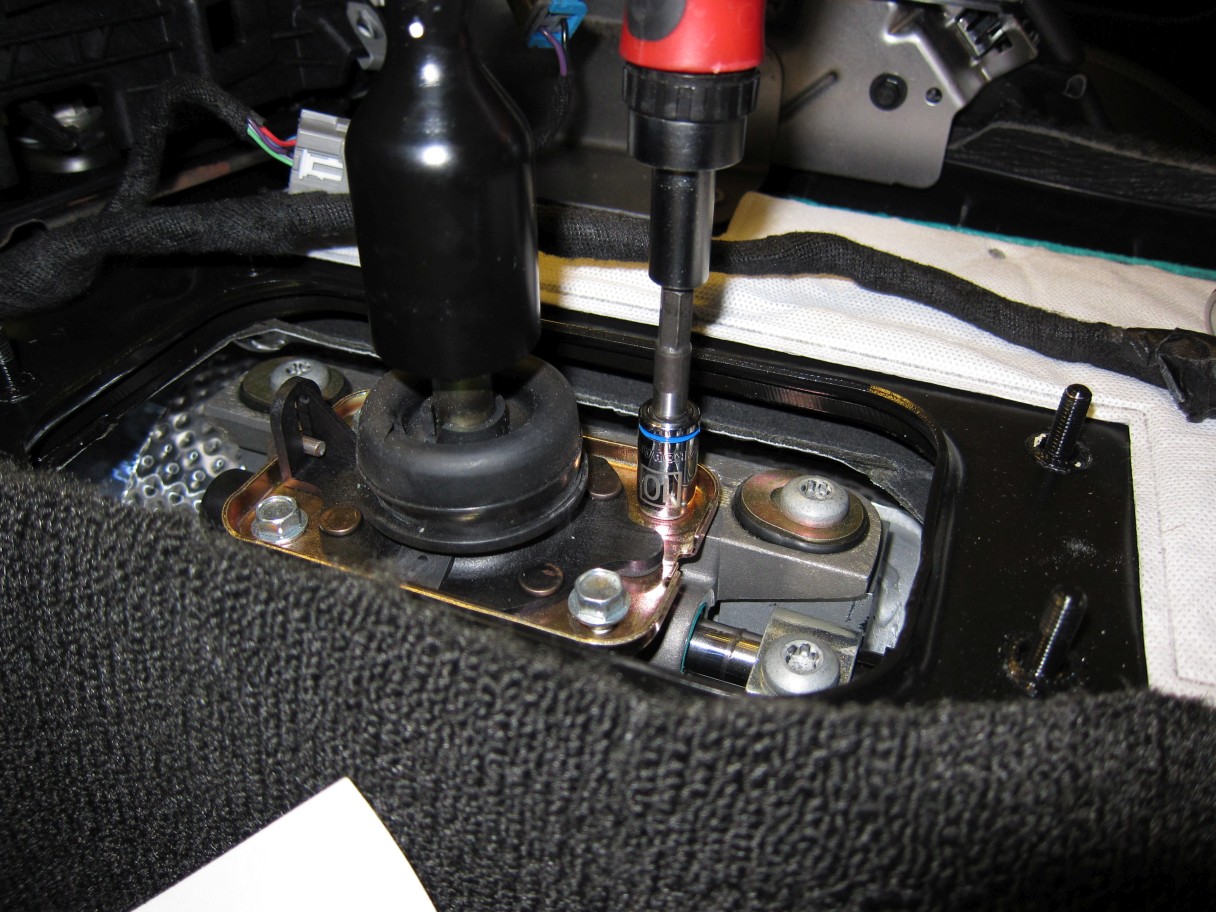
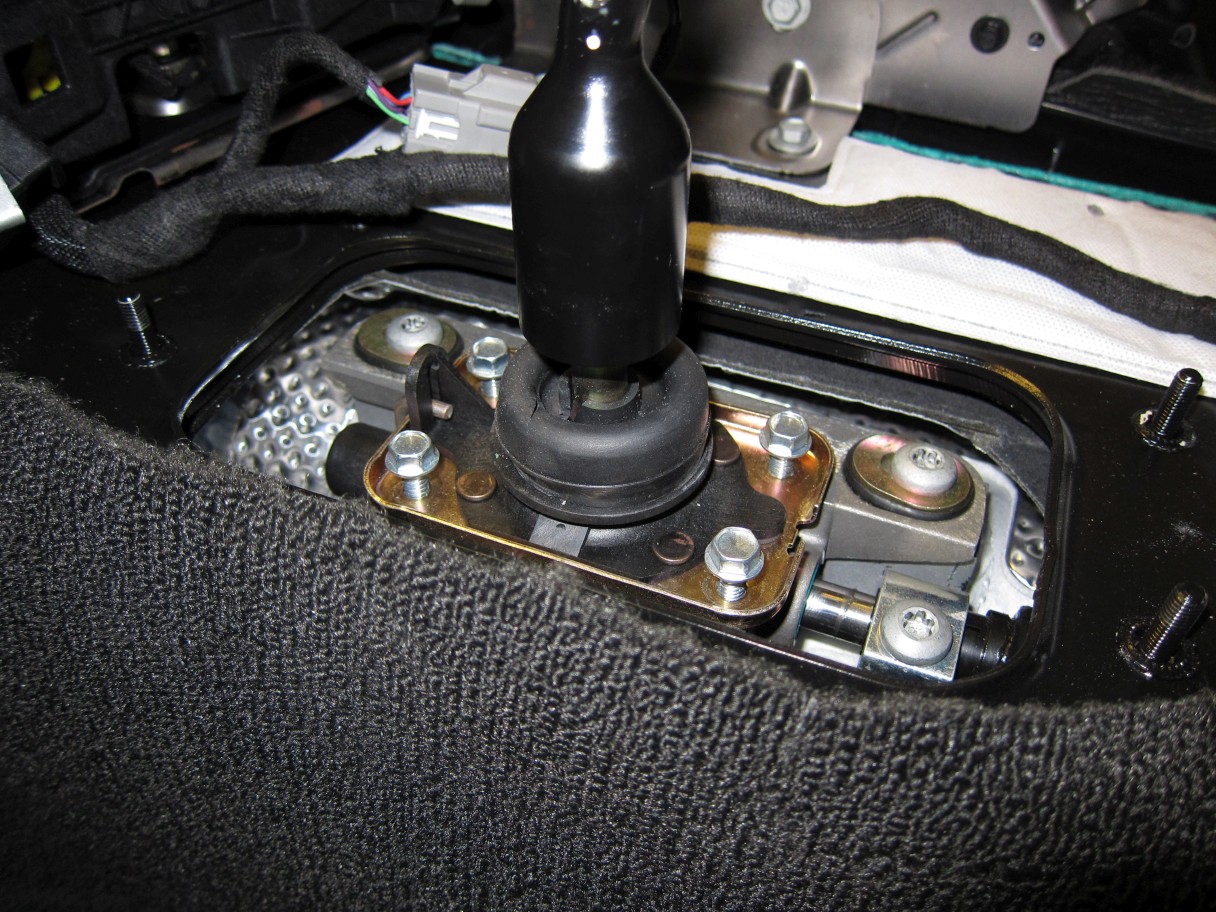
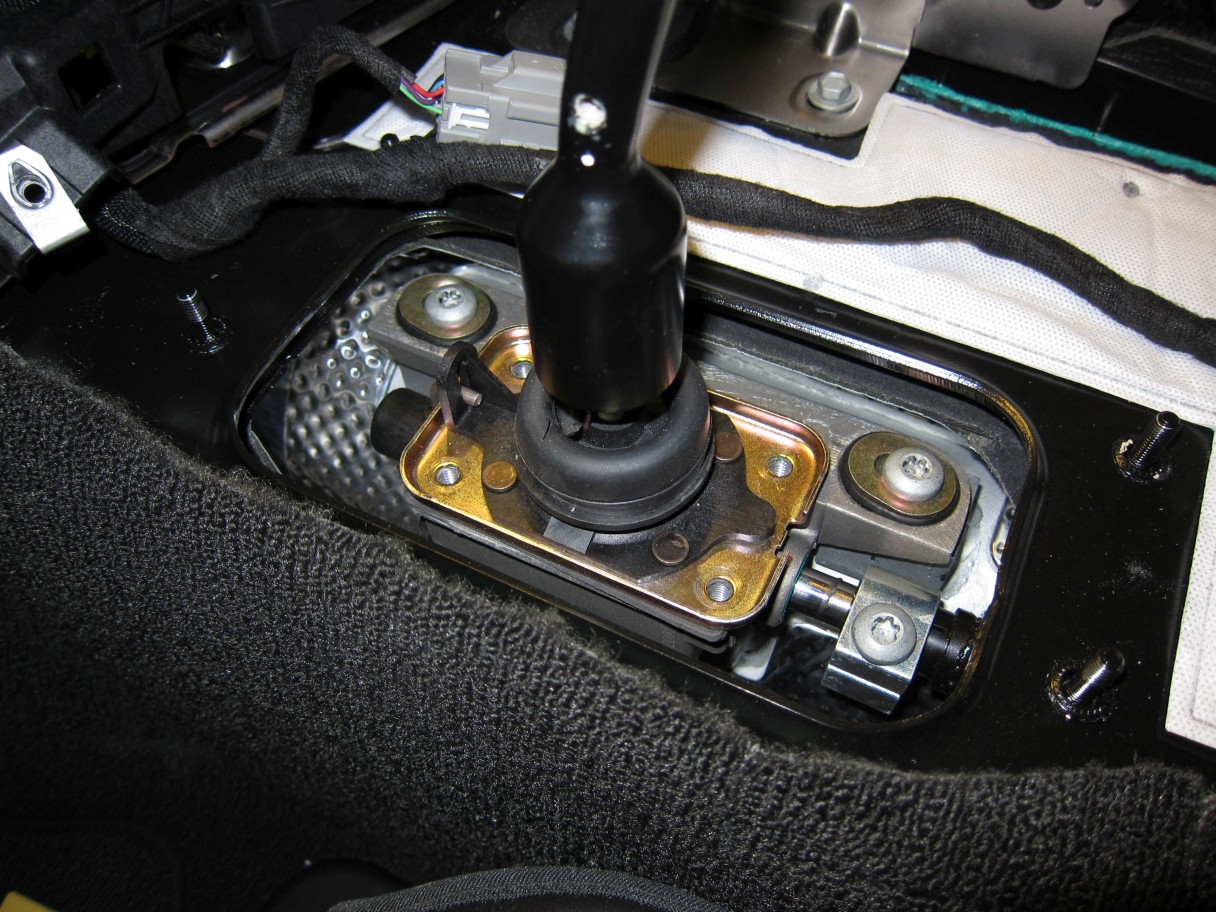
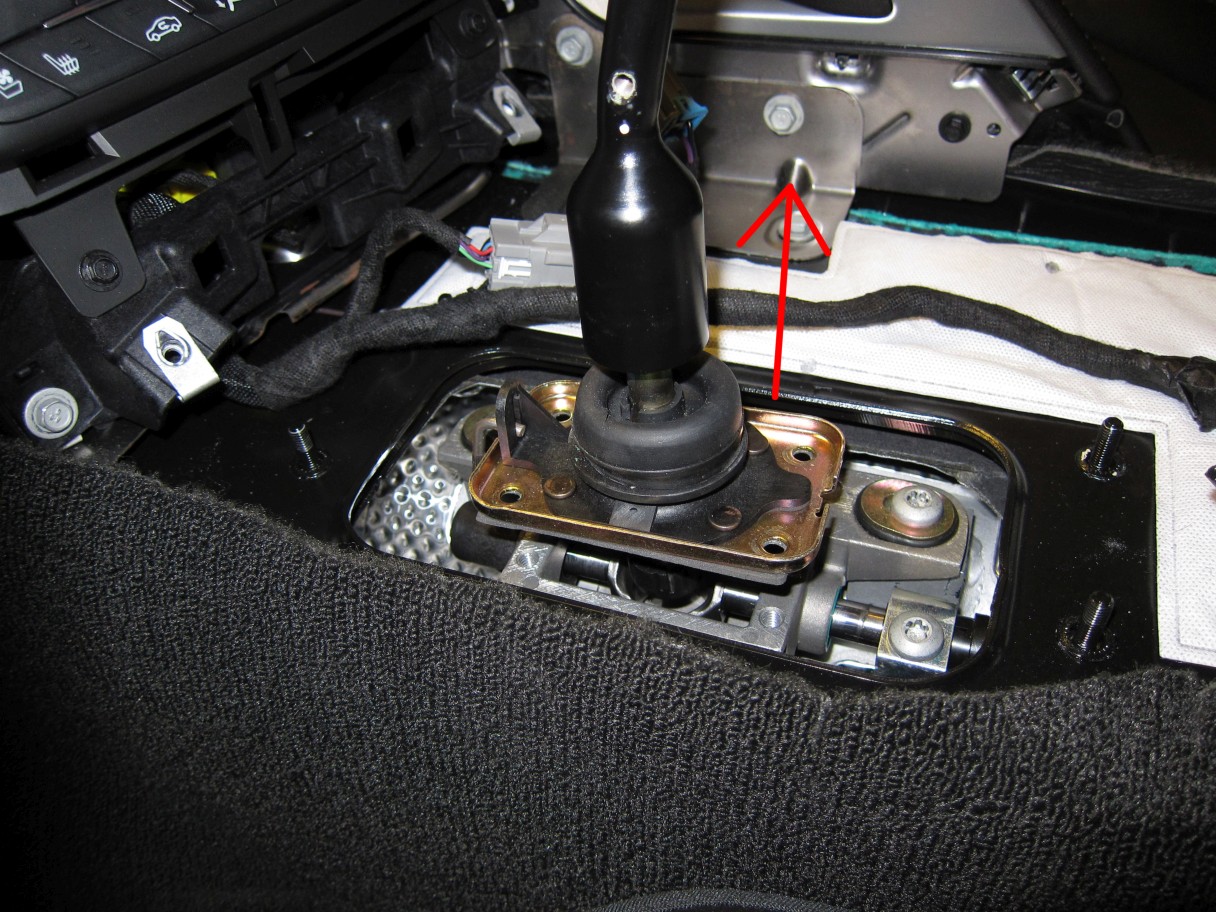
Twist the chrome ring and leather boot counterclockwise while simultaneously and forcefully pulling the ring "up" towards the shift ****. After about 30 degrees of rotation, push the chrome ring and leather boot down, exposing the T25 Torx screw.


Last edited by Theta; 06-11-2014 at 01:48 AM.
04-04-2014, 03:53 AM
#6
Tech Contributor
Thread Starter
Member Since: Jan 2006
Location: Saint Louis MO
Posts: 4,761
Likes: 0
Received 218 Likes
on
110 Posts
St. Jude Donor '14-'15
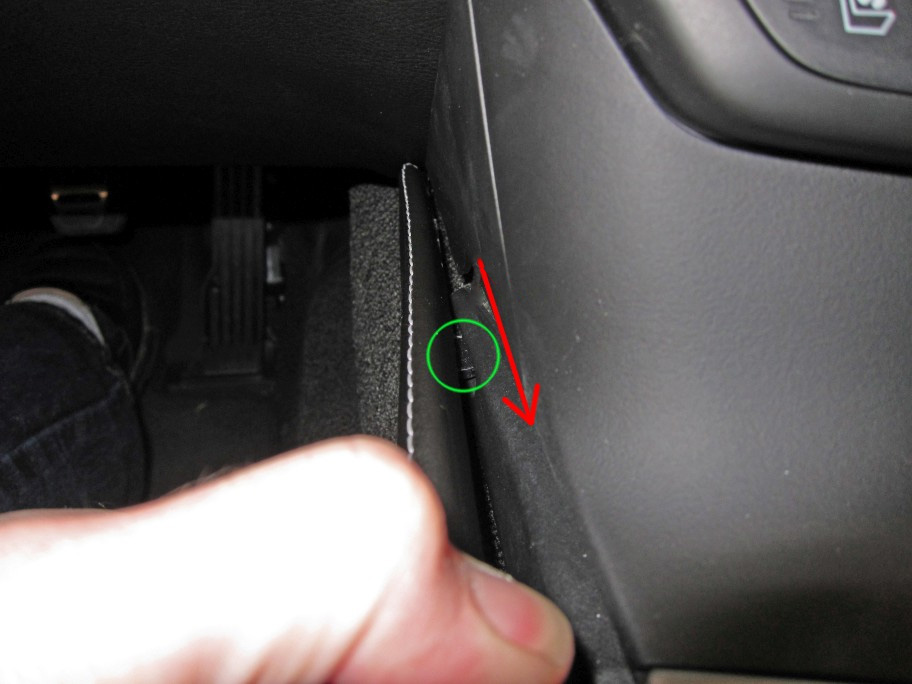
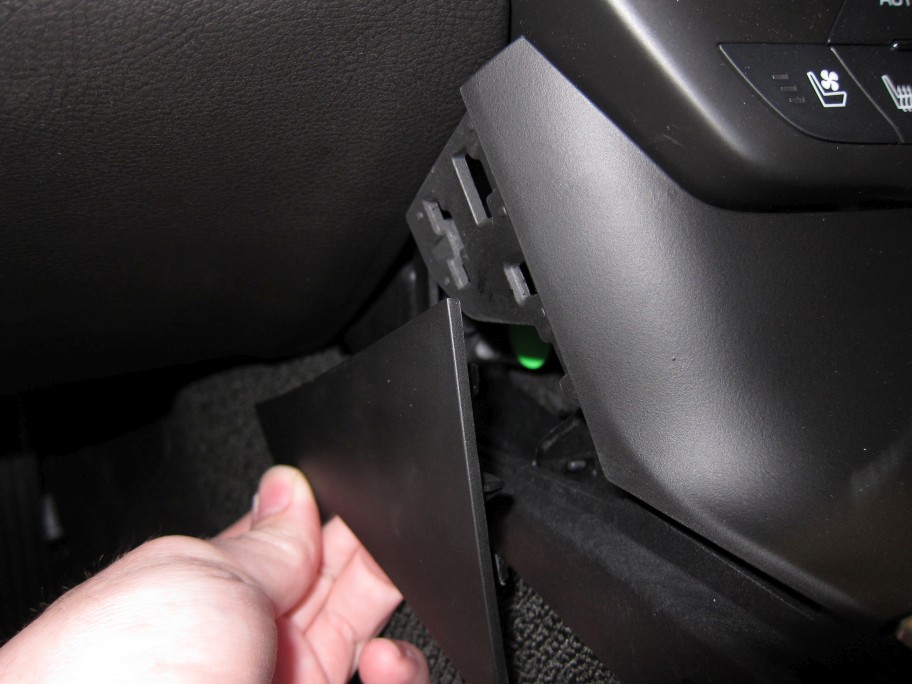
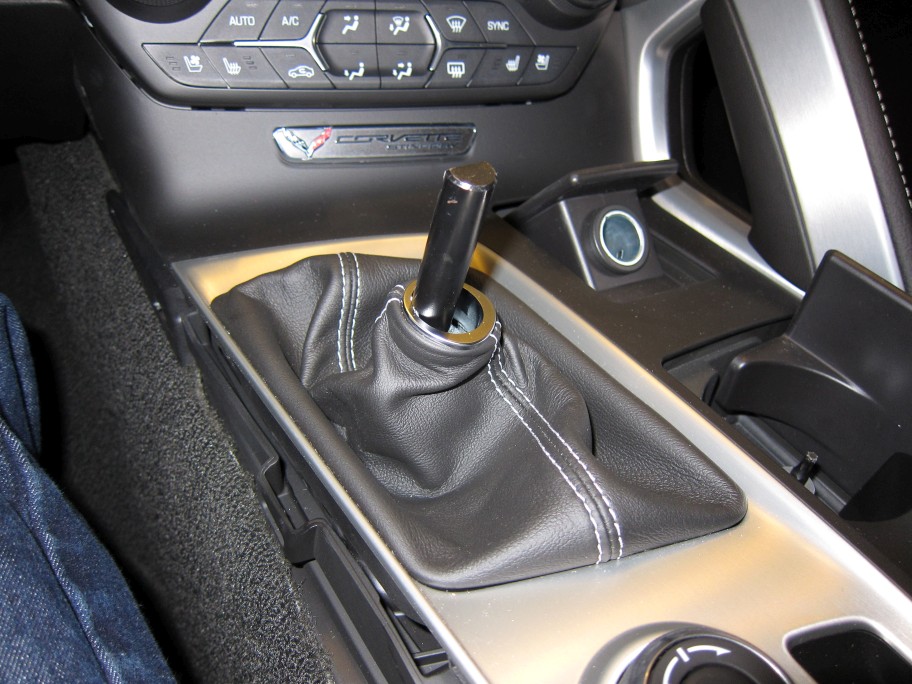
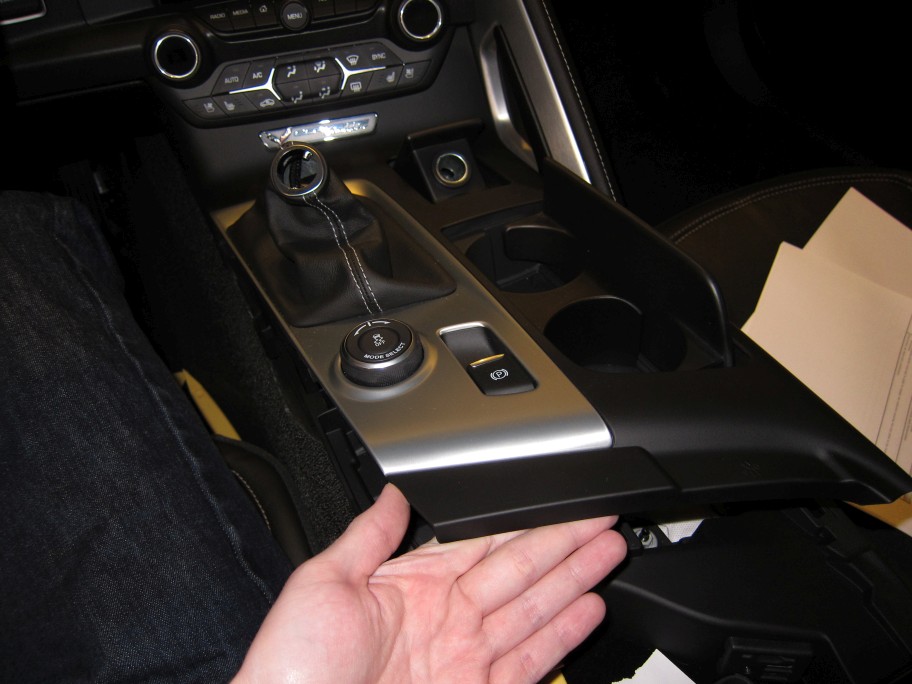
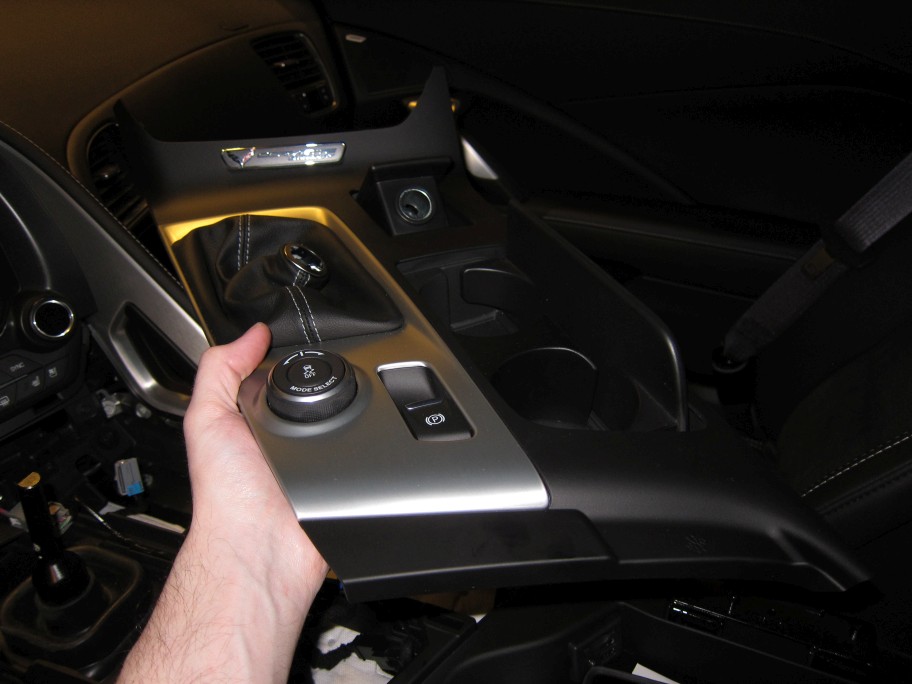
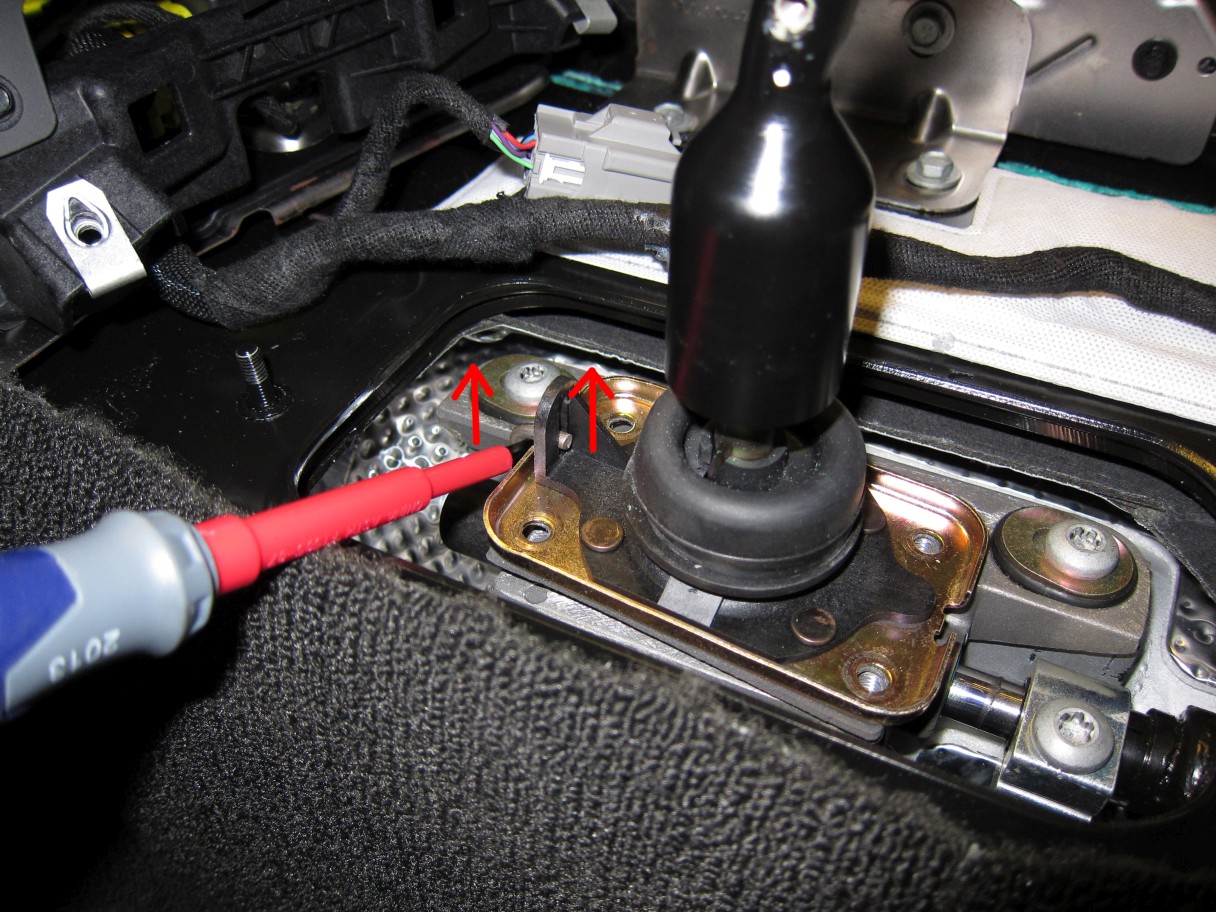
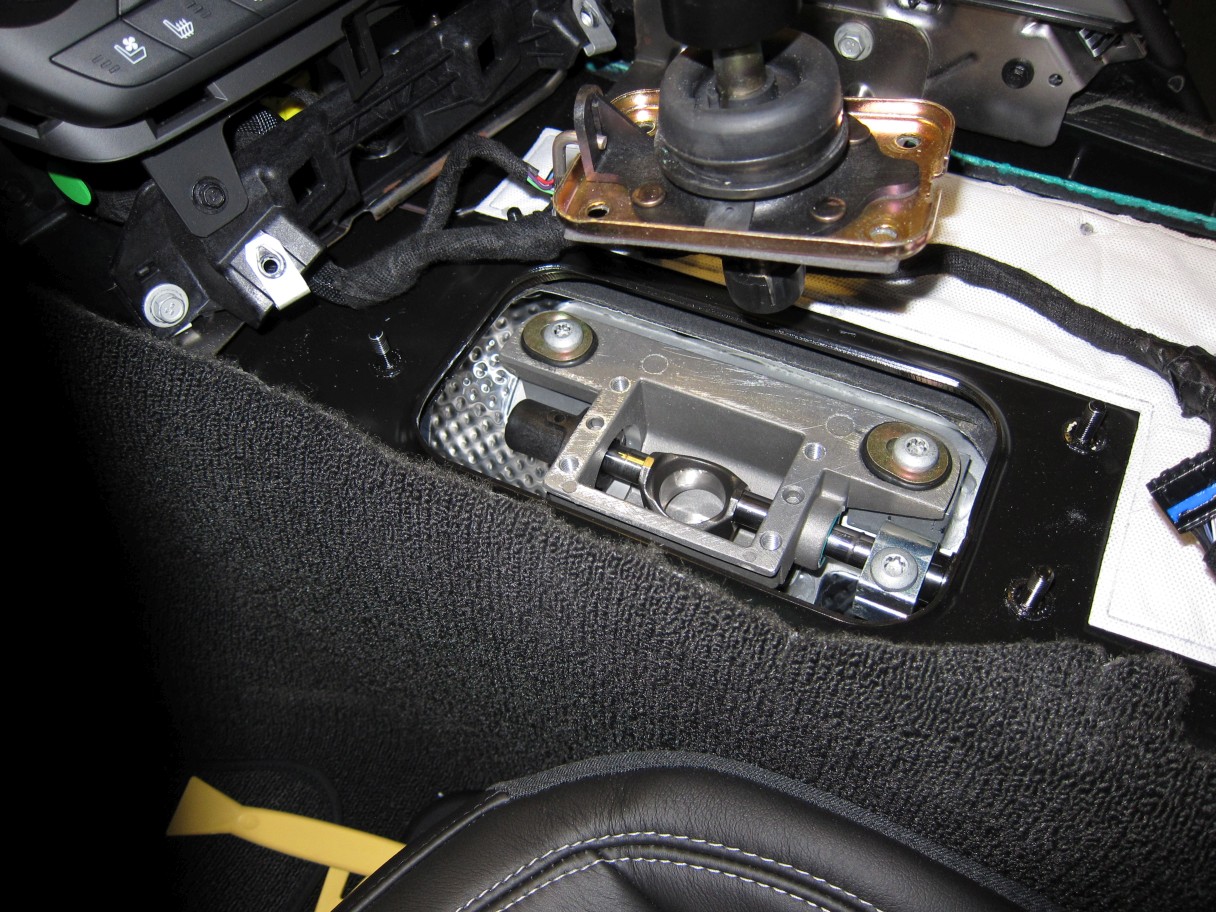
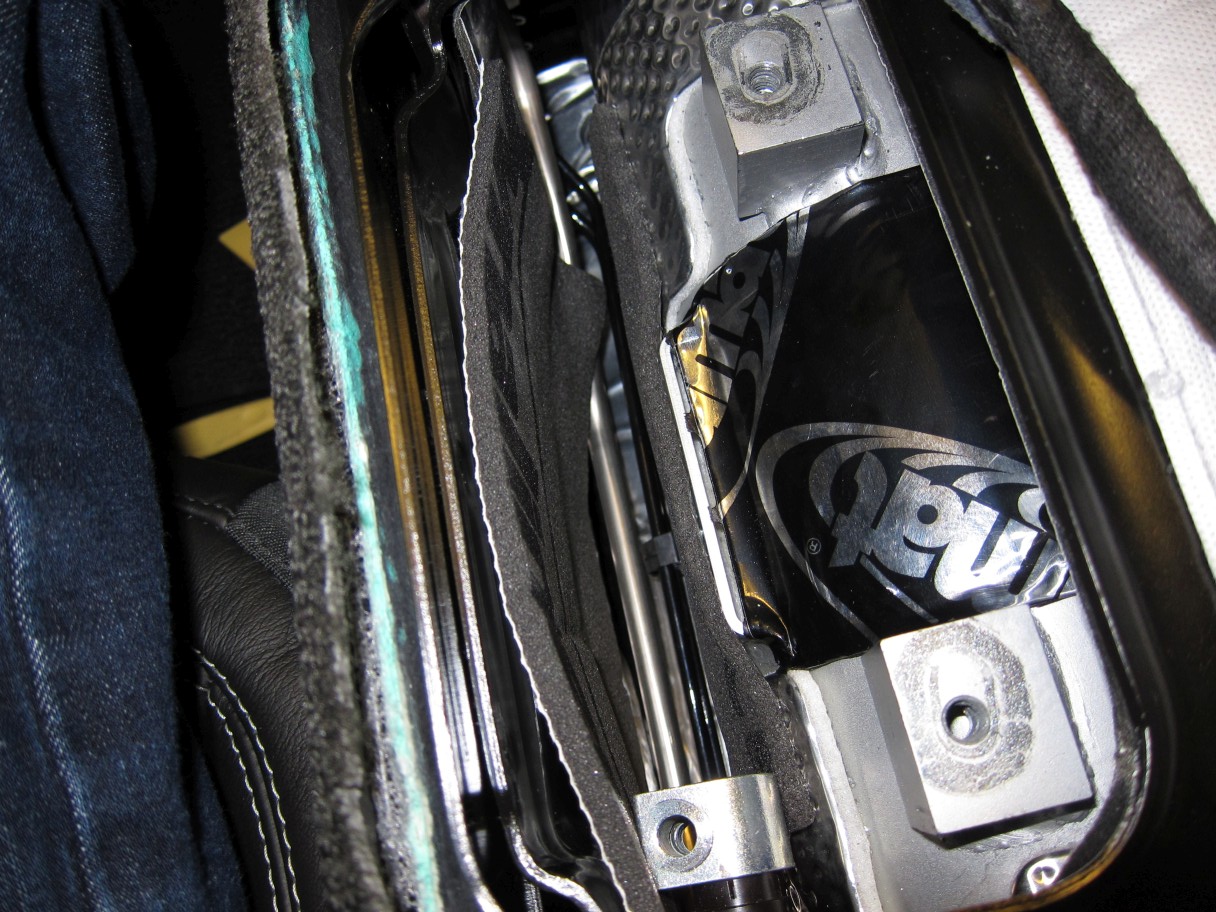
Next up, remove the top panel. Use a panel tool to pop the front clips up.
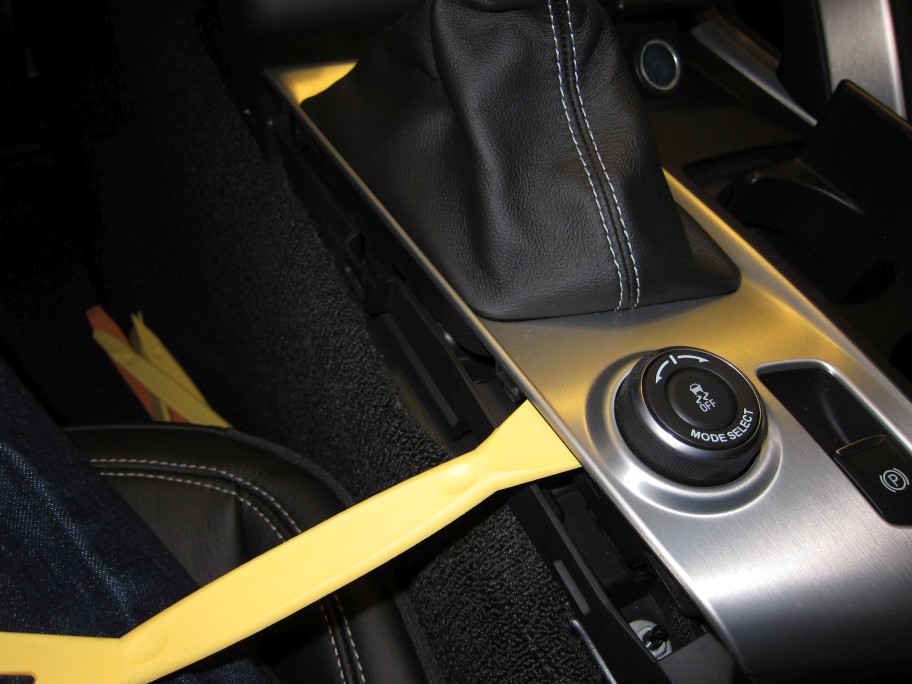
Now, you'll notice the rear interferes with the lid cover - time to take that off.

This seems tricky, it's not. See notes:
Now, you'll notice the rear interferes with the lid cover - time to take that off.
This seems tricky, it's not. See notes:
The following users liked this post:
BenCasey (11-30-2015)
04-04-2014, 03:54 AM
#7
Tech Contributor
Thread Starter
Member Since: Jan 2006
Location: Saint Louis MO
Posts: 4,761
Likes: 0
Received 218 Likes
on
110 Posts
St. Jude Donor '14-'15
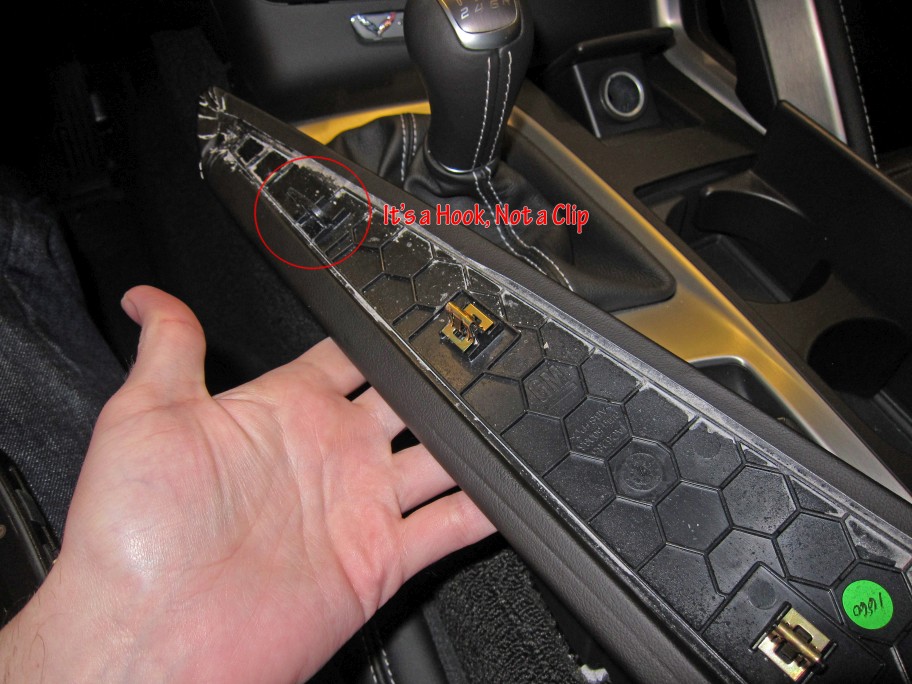
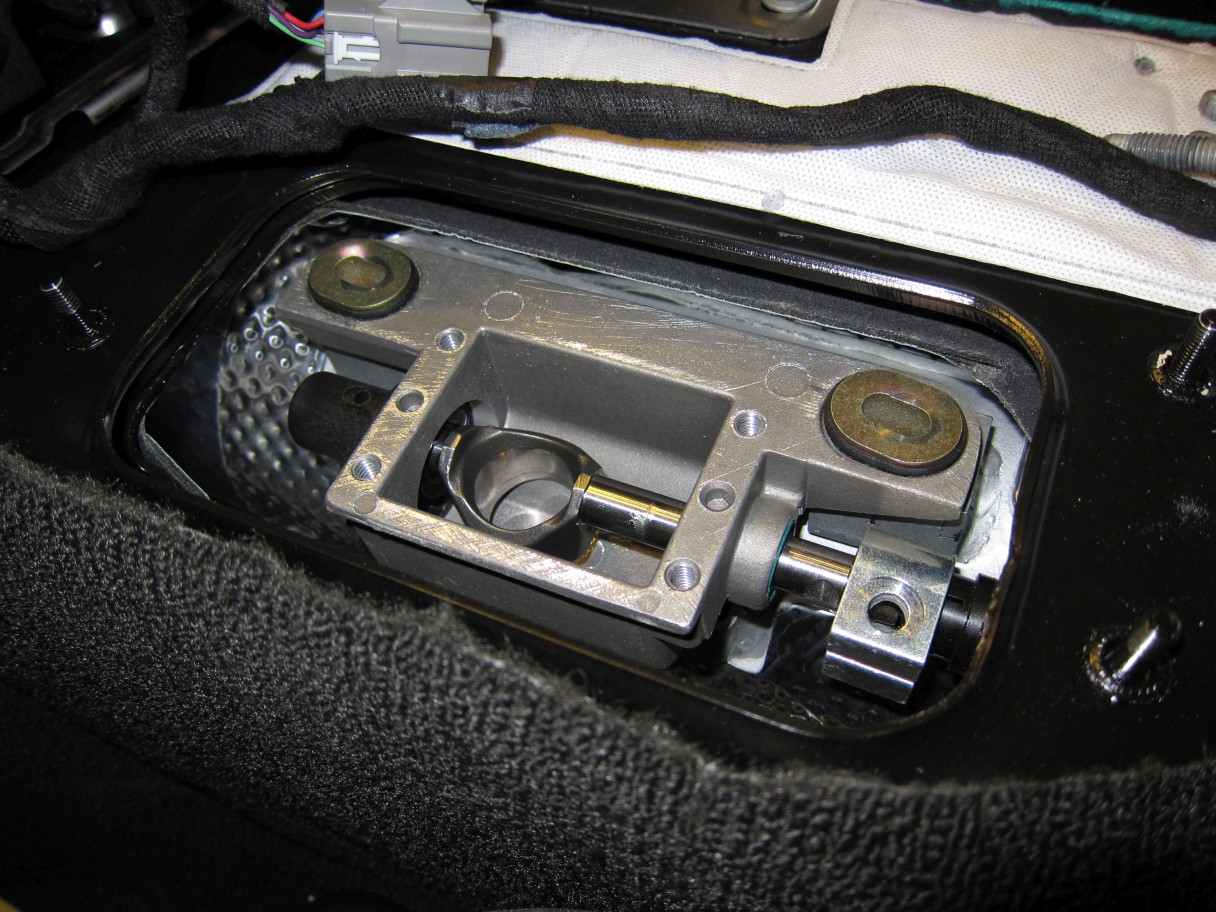
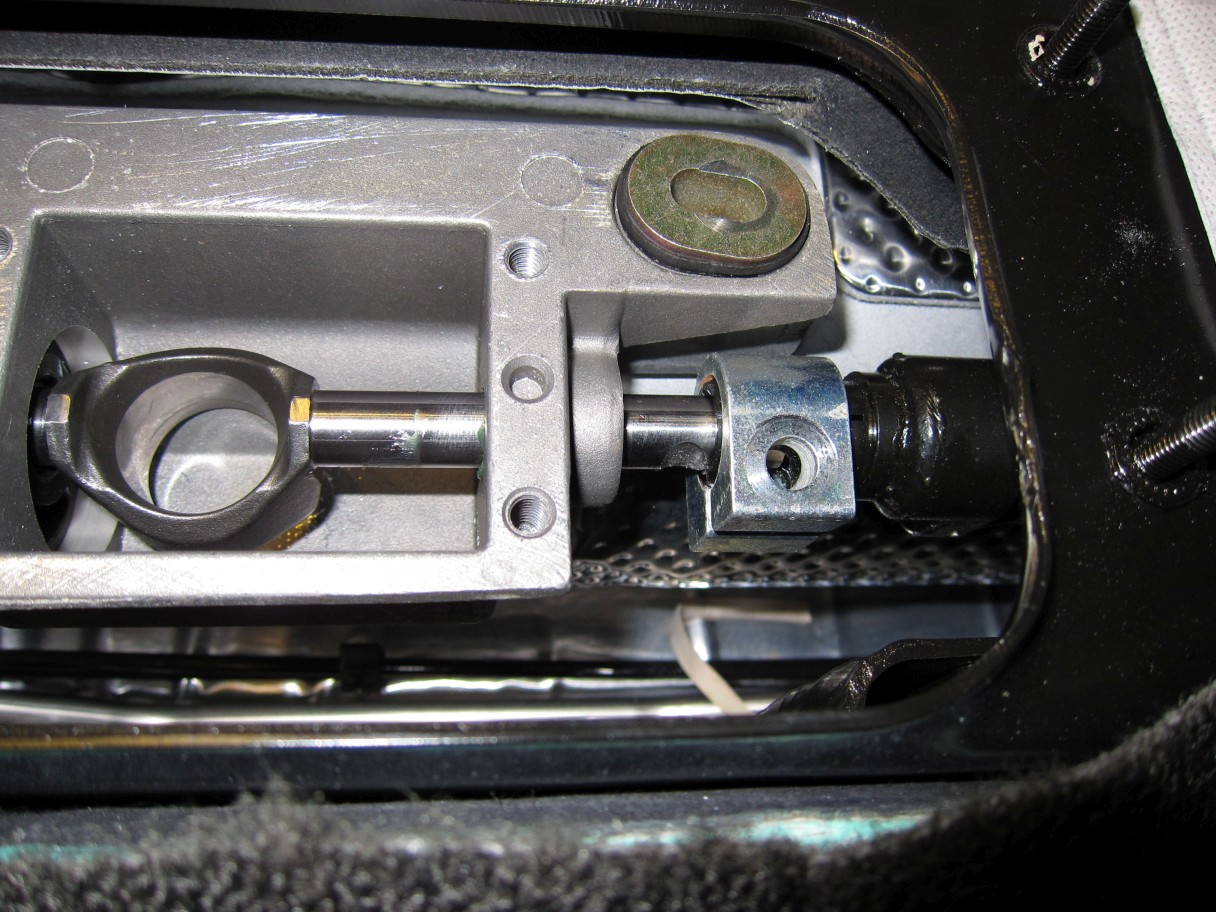
Continue removing top panel by popping remaining clips with panel tool. Slowly lift up and away from the dash to release the two front curved sections:
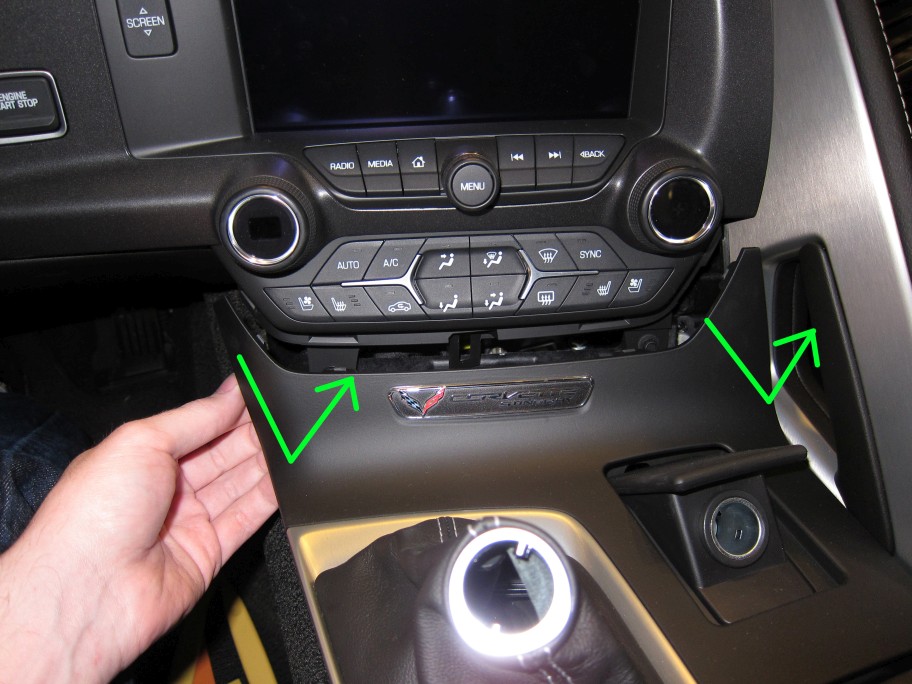
Pivot the front so that the two front 'fangs' aren't damaged:
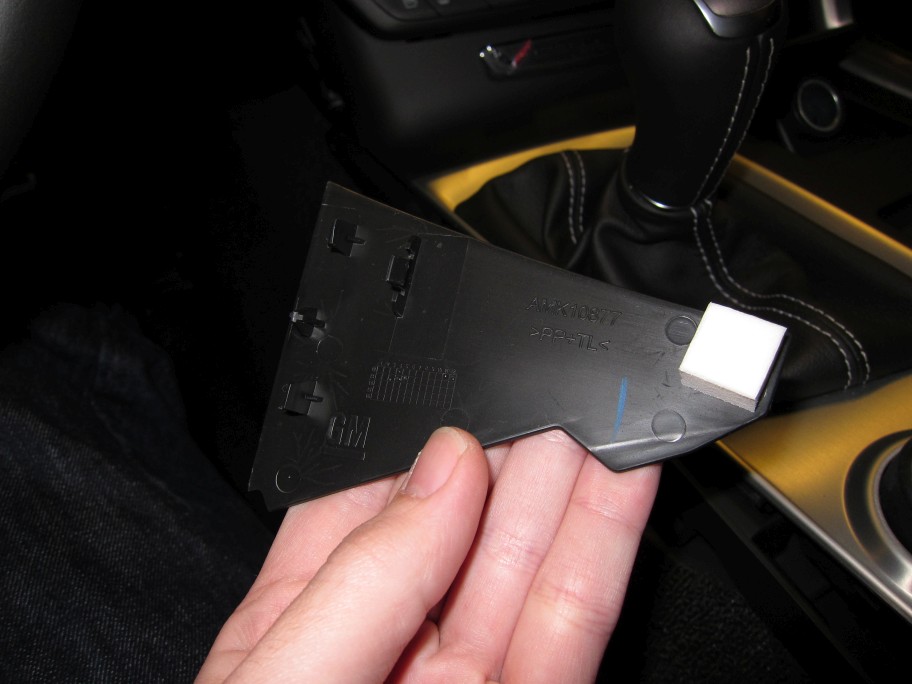
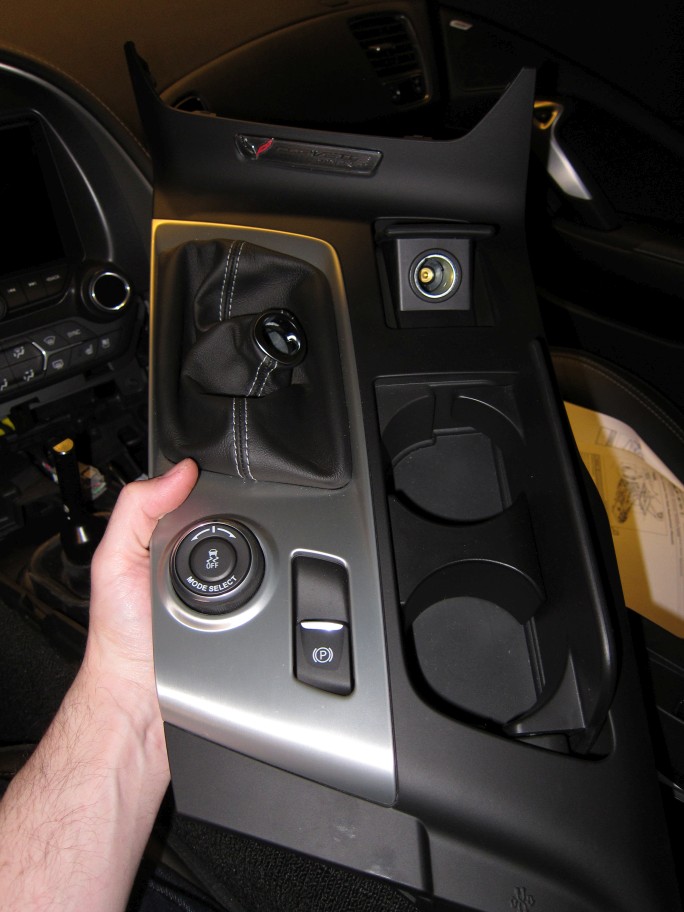
Panel Removed:
Pivot the front so that the two front 'fangs' aren't damaged:
Panel Removed:
Last edited by Theta; 04-07-2014 at 01:33 PM.
04-04-2014, 03:58 AM
#8
Tech Contributor
Thread Starter
Member Since: Jan 2006
Location: Saint Louis MO
Posts: 4,761
Likes: 0
Received 218 Likes
on
110 Posts
St. Jude Donor '14-'15
Next level:
That's disconcerting.. Probably just factory remains...
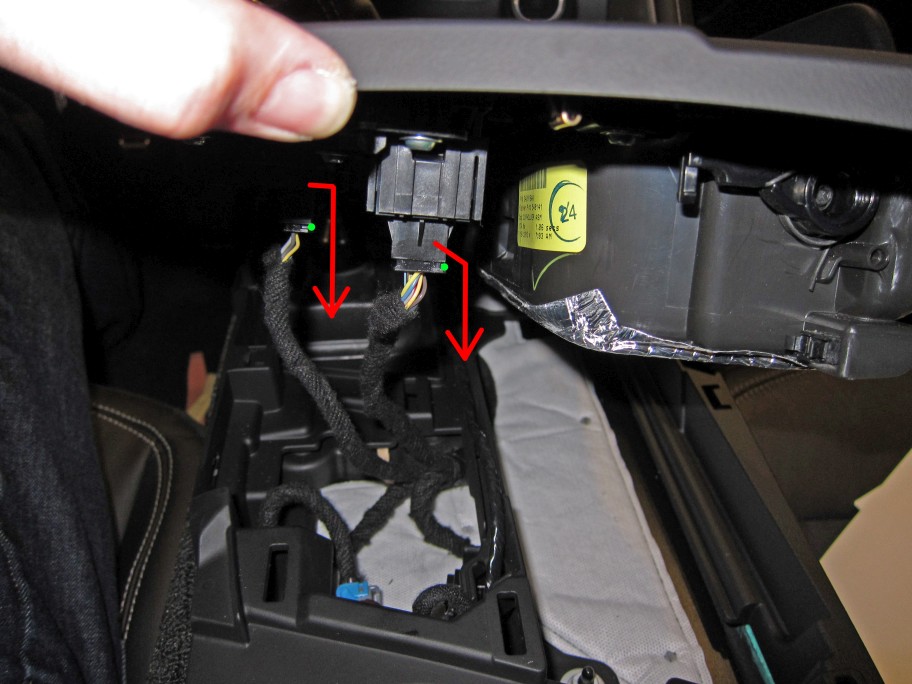
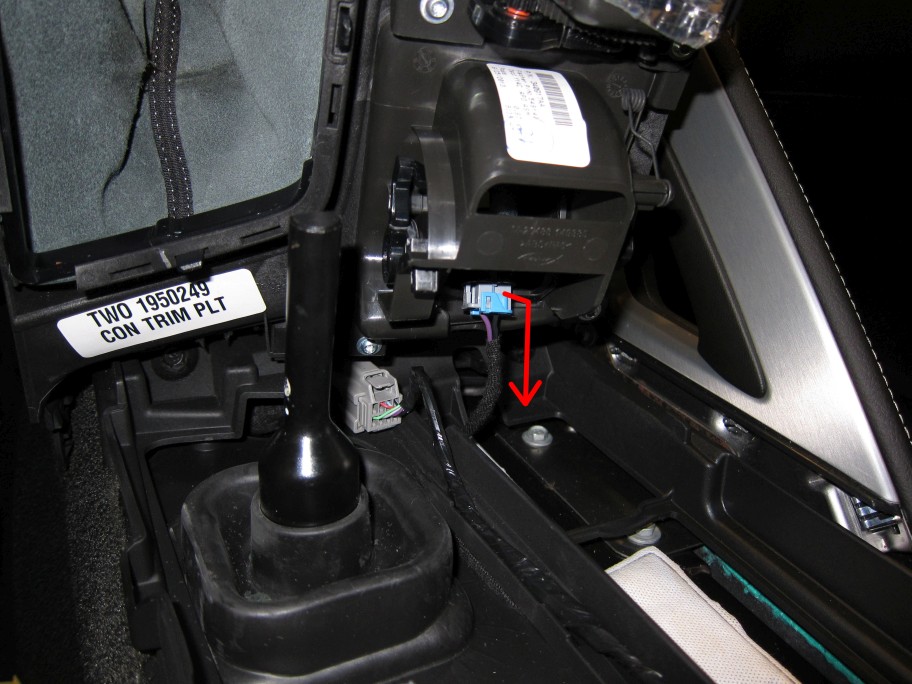
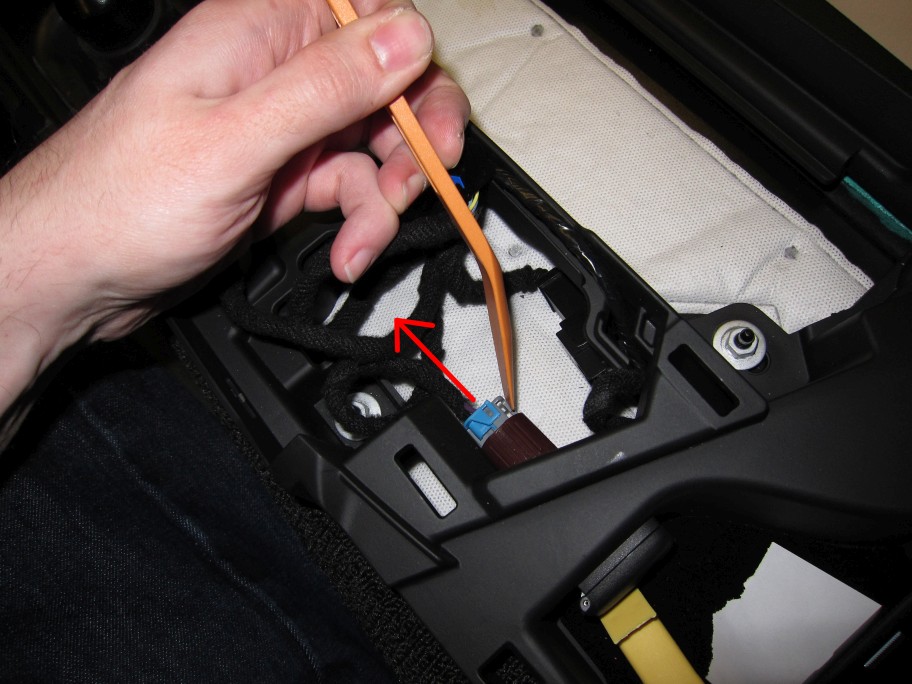
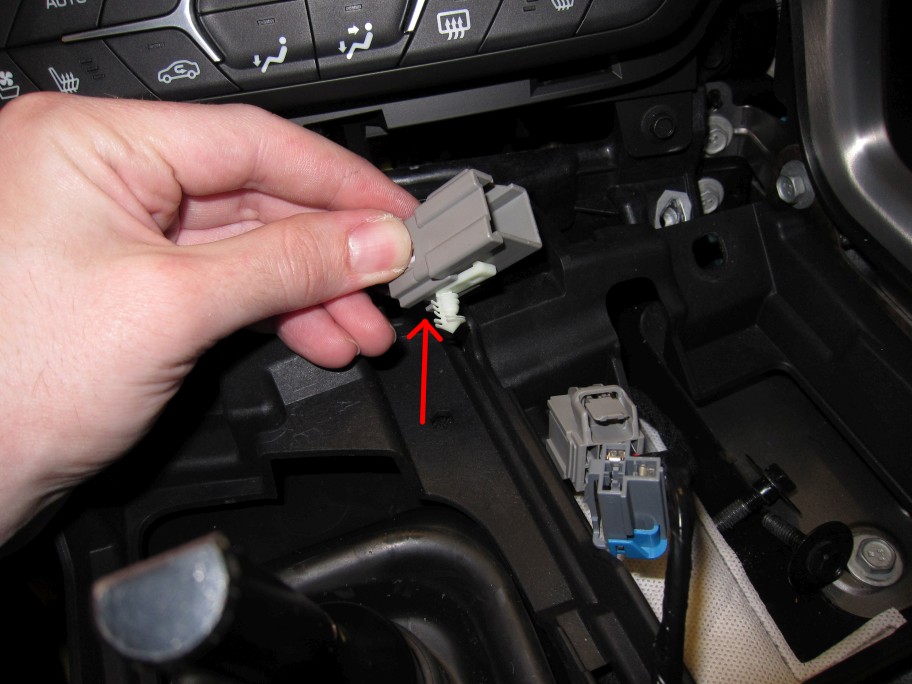
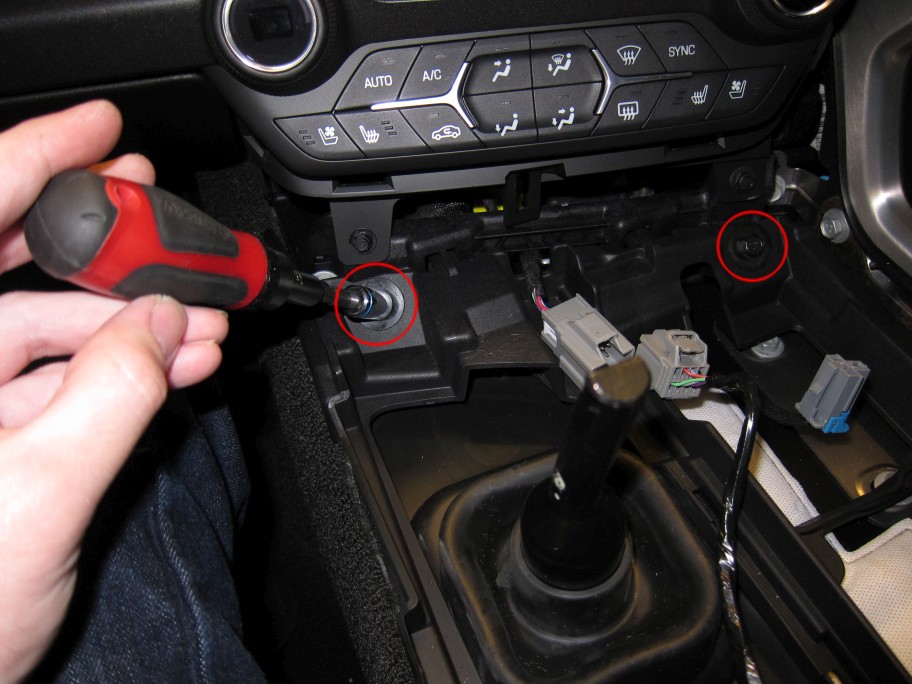
Remove electrical plugs as shown:
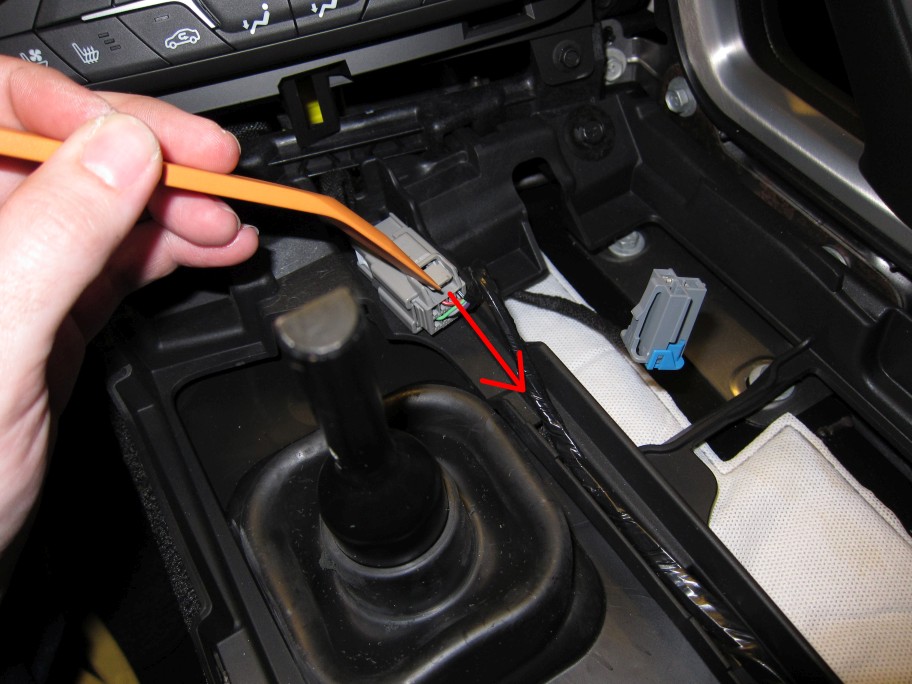
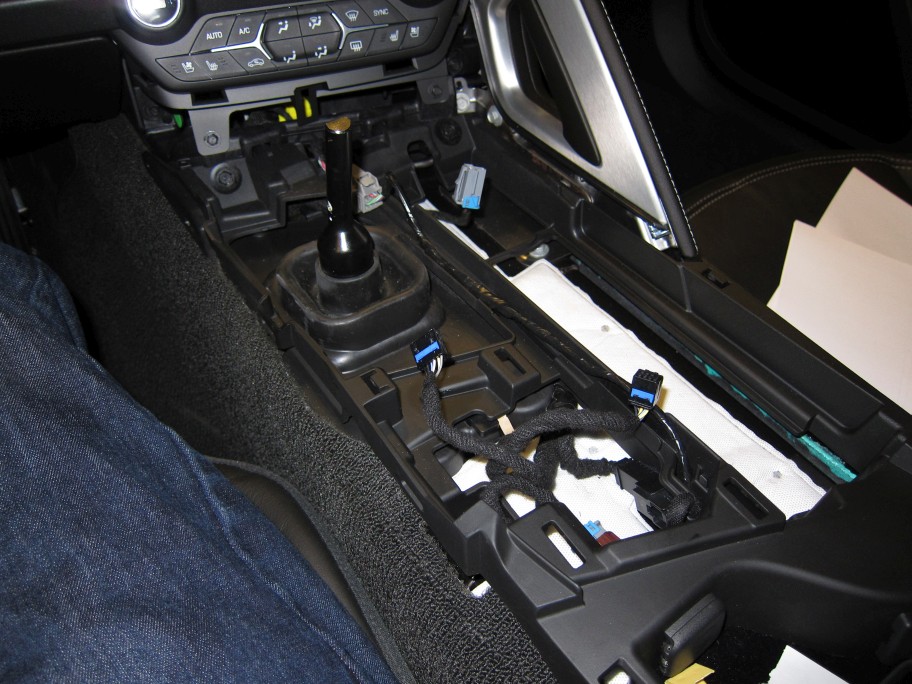
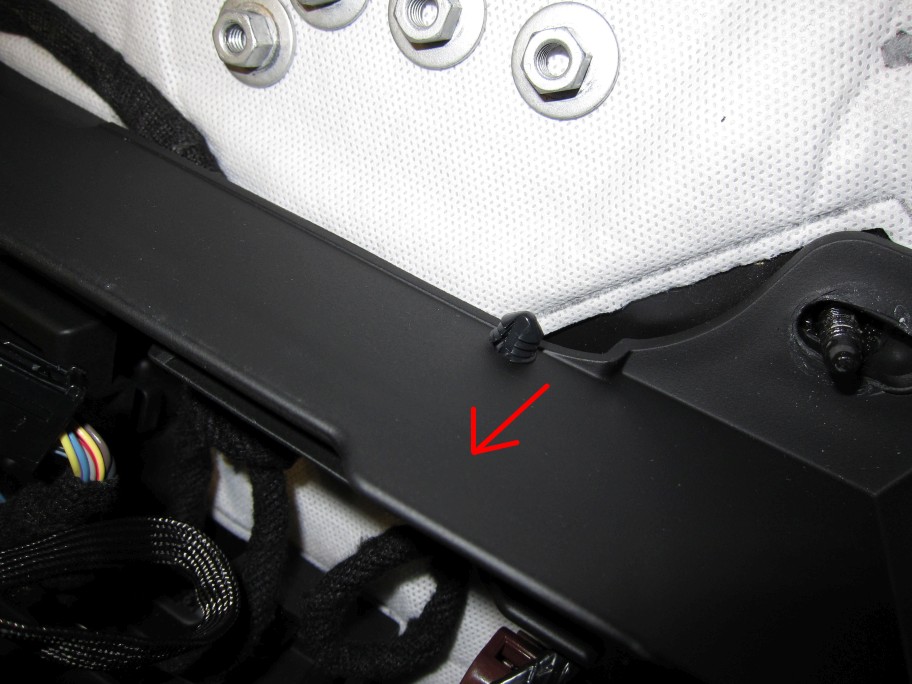
Move wire out of catch area:
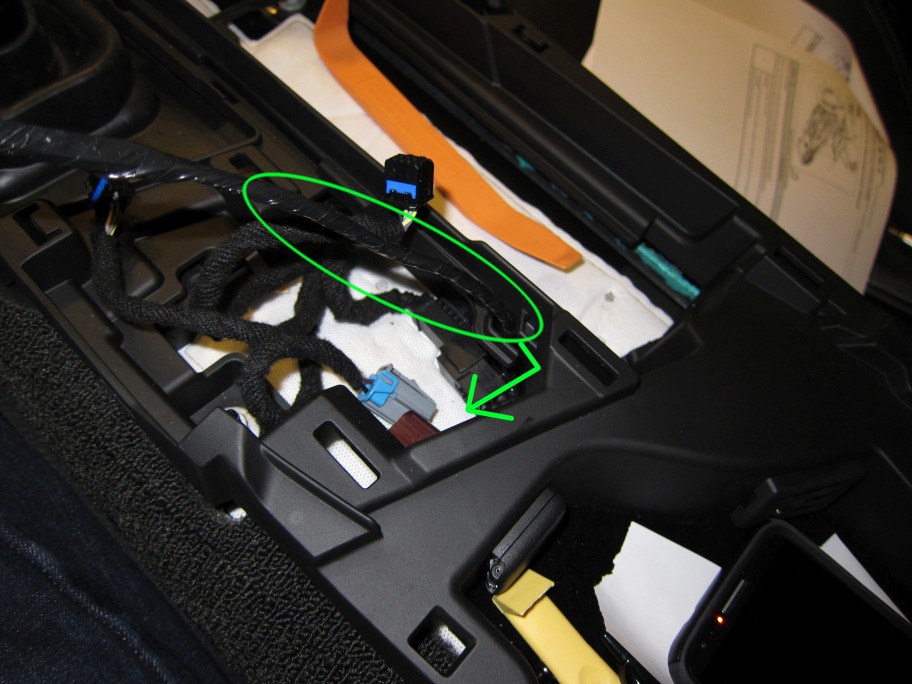
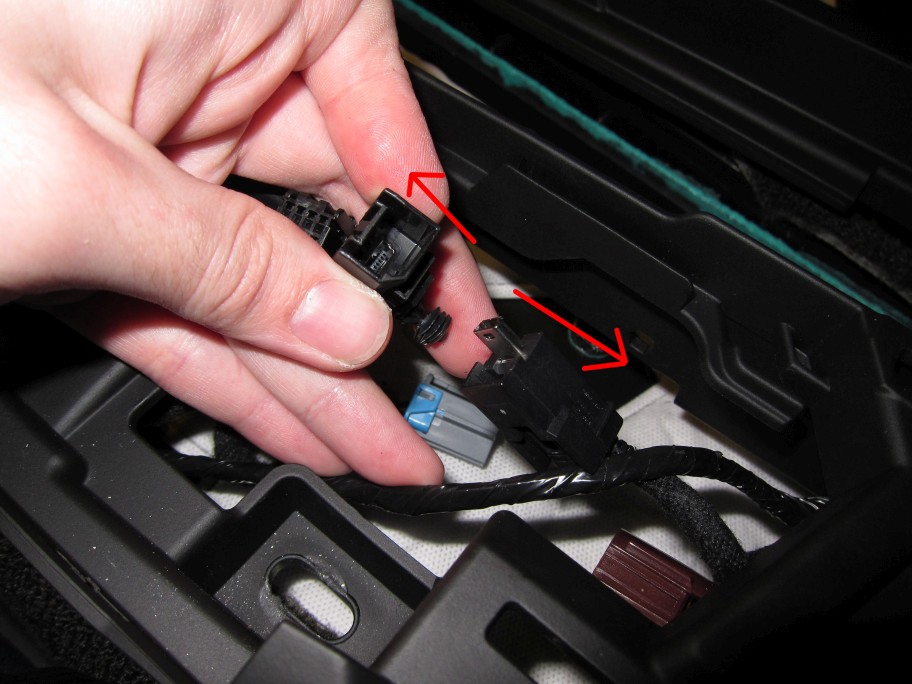
Remove clipped wire bundles:
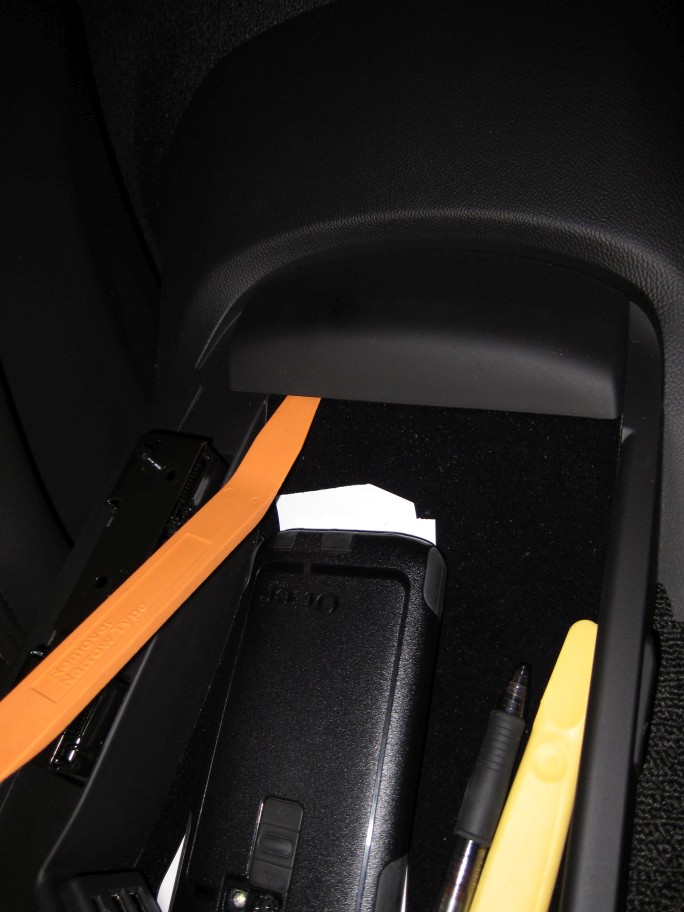
Disconnect USB connection:
That's disconcerting.. Probably just factory remains...
Remove electrical plugs as shown:
Move wire out of catch area:
Remove clipped wire bundles:
Disconnect USB connection:
 04-04-2014, 04:06 AM
#10
Tech Contributor
Thread Starter
Member Since: Jan 2006
Location: Saint Louis MO
Posts: 4,761
Likes: 0
Received 218 Likes
on
110 Posts
St. Jude Donor '14-'15
Next Level:
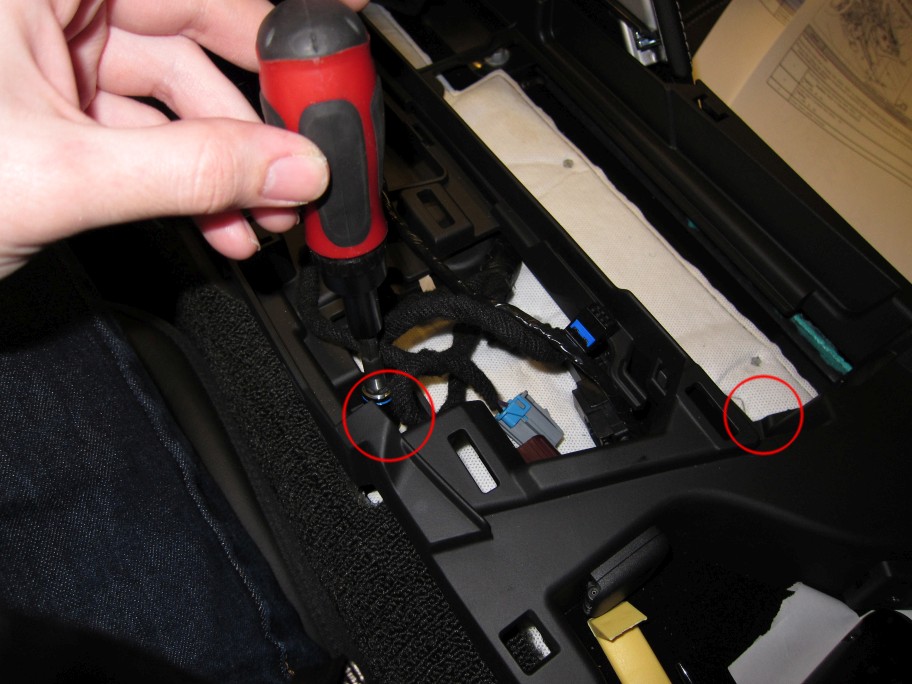
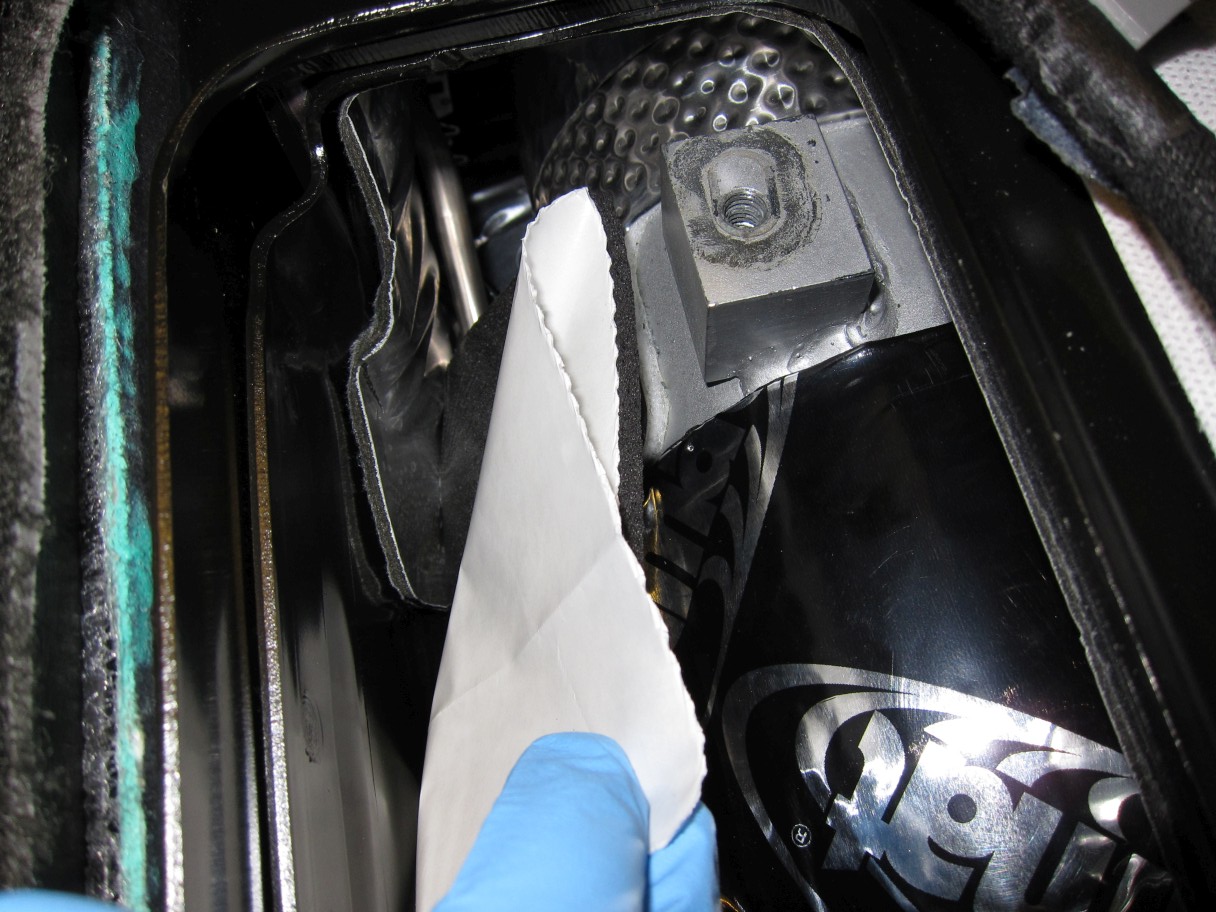
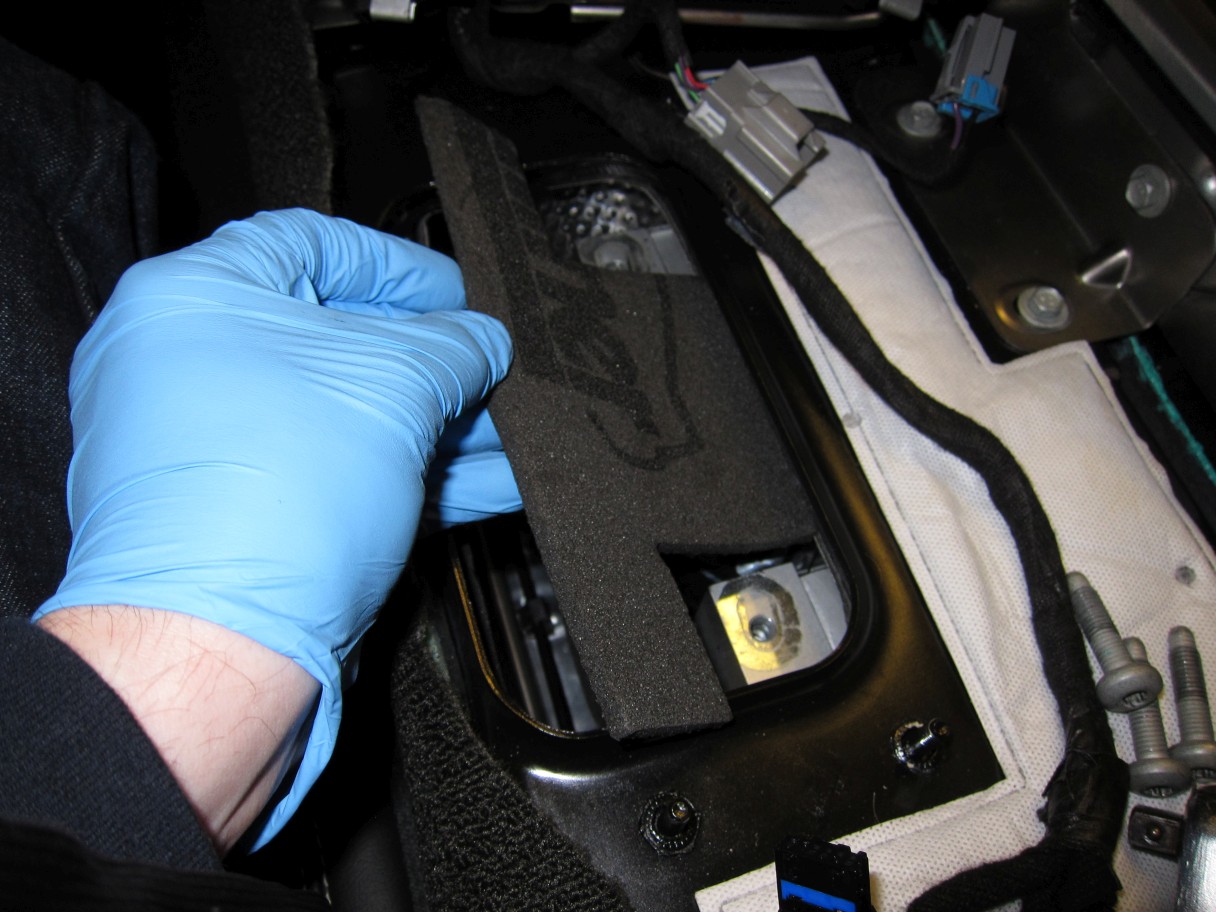
Remove First Cover (green shows rubber held in by clips):

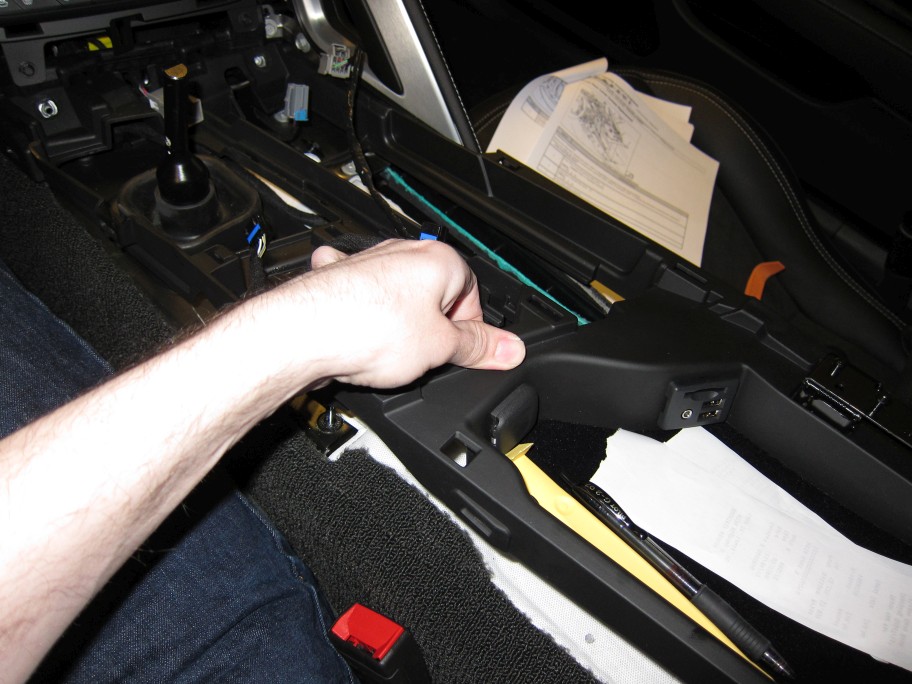
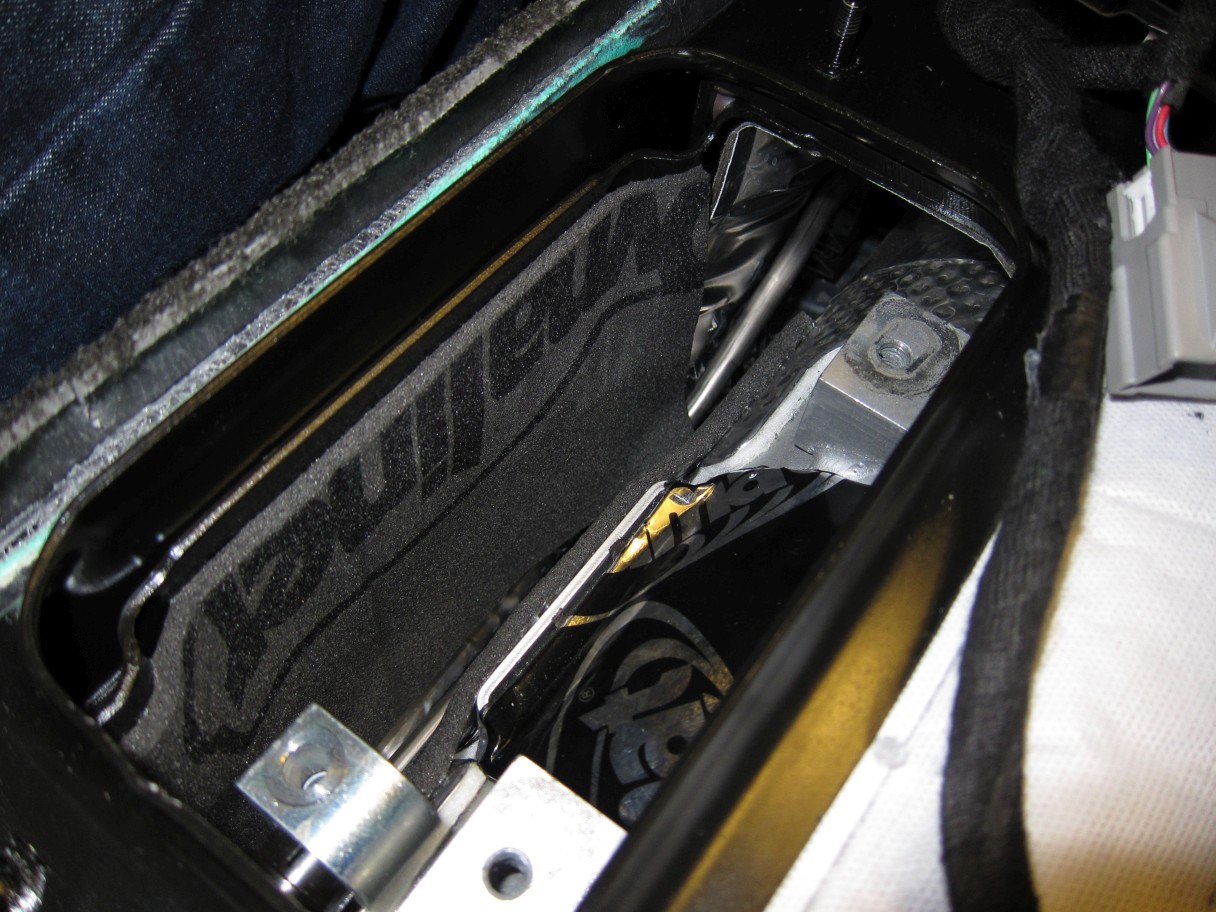
Once this is done, move to the next layer:
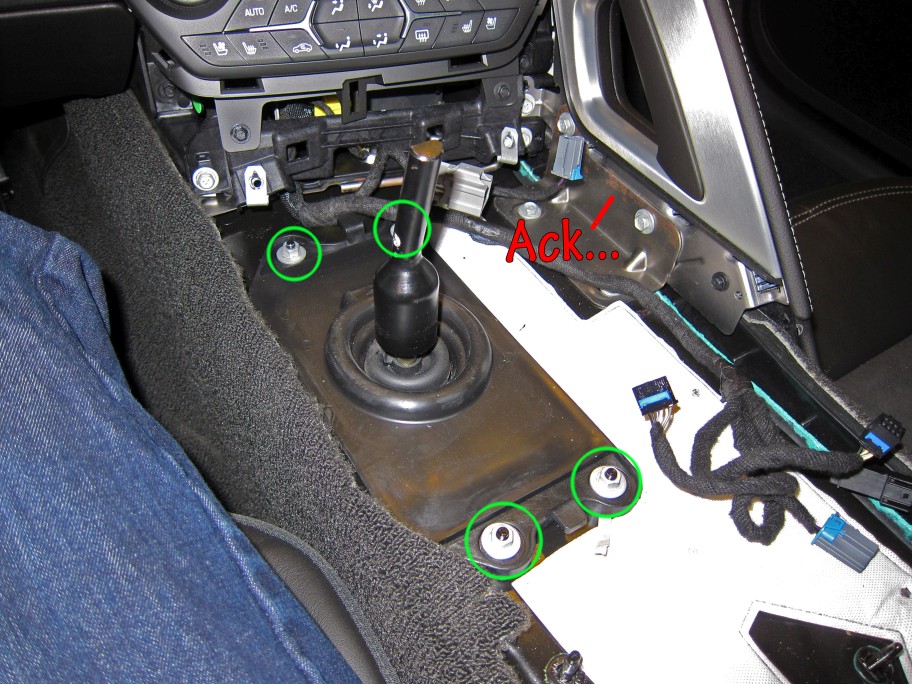
Crap, rust! -- Remove 4 10mm Nuts:
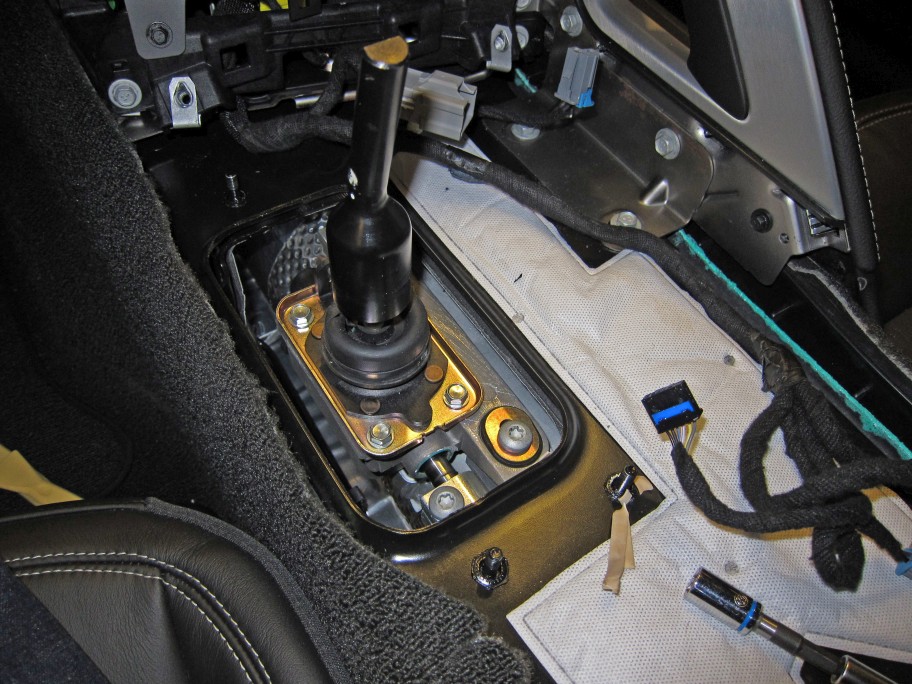
Move to the next layer after removing nuts:
Ending here for the evening - more tomorrow!
Remove First Cover (green shows rubber held in by clips):
Once this is done, move to the next layer:
Crap, rust! -- Remove 4 10mm Nuts:
Move to the next layer after removing nuts:
Ending here for the evening - more tomorrow!
The following 4 users liked this post by Theta:
04-04-2014, 11:36 AM
#11
Melting Slicks


Great work Theta! That's incredibly detailed and very useful. This will be very helpful for me next week when I install my MGW shifter. I copied everything you put here into a document which I have nicely formatted. Once you are complete with this, I will finish the document and convert it to a printable PDF which I wil add to this thread with credit to you, That way it can be easily printed and used by other members while working in their car as they proceed with their install. I know I will be using this as a guide line when I install mine next week. Thanks again for the great contributions!!!
04-04-2014, 09:05 PM
#13
Tech Contributor
Member Since: Aug 1999
Location: Should this thoughtful, valuable contribution meet with no acknowledgement or 'thanks' this post----
Posts: 16,382
Received 399 Likes
on
257 Posts

good stuff...in my book you qualify as a 'Tech Contributor' (like myself)...if you want to join the 'club' I will set the wheels in motion for you....just PM me if interested...there are some benefits..
Jerry
.Jerry
 W
W  04-05-2014, 01:05 AM
#16
Tech Contributor
Thread Starter
Member Since: Jan 2006
Location: Saint Louis MO
Posts: 4,761
Likes: 0
Received 218 Likes
on
110 Posts
St. Jude Donor '14-'15
I will say I'm very impressed with the quality and thought that goes into this MGW shifter.
Still doing the final bit of install and write-up out here in the garage, but it's well worth the money after seeing and installing it.
Still doing the final bit of install and write-up out here in the garage, but it's well worth the money after seeing and installing it.
04-05-2014, 03:11 AM
#17
Tech Contributor
Thread Starter
Member Since: Jan 2006
Location: Saint Louis MO
Posts: 4,761
Likes: 0
Received 218 Likes
on
110 Posts
St. Jude Donor '14-'15
This set has taken an obnoxiously-long time to photo, sort, edit, etc. Sorry for the delay, it's still coming tonight...
04-05-2014, 03:21 AM
#18
Tech Contributor
Thread Starter
Member Since: Jan 2006
Location: Saint Louis MO
Posts: 4,761
Likes: 0
Received 218 Likes
on
110 Posts
St. Jude Donor '14-'15
Continuing where I left off yesterday...
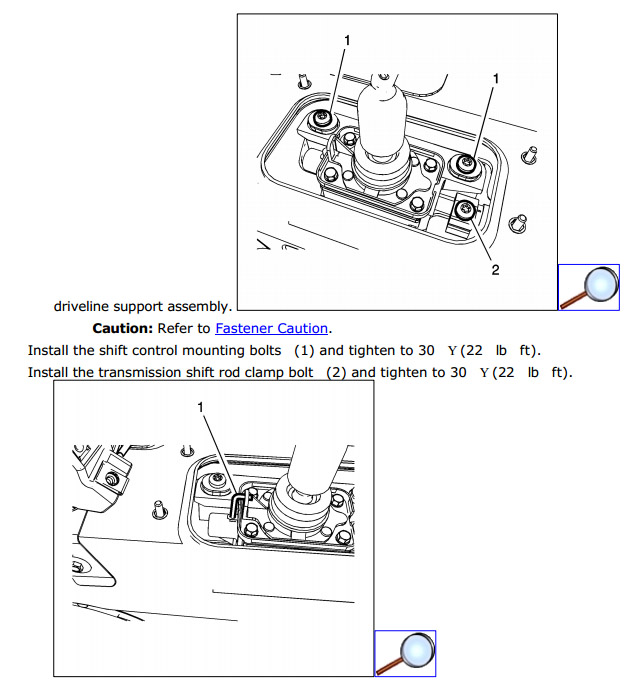
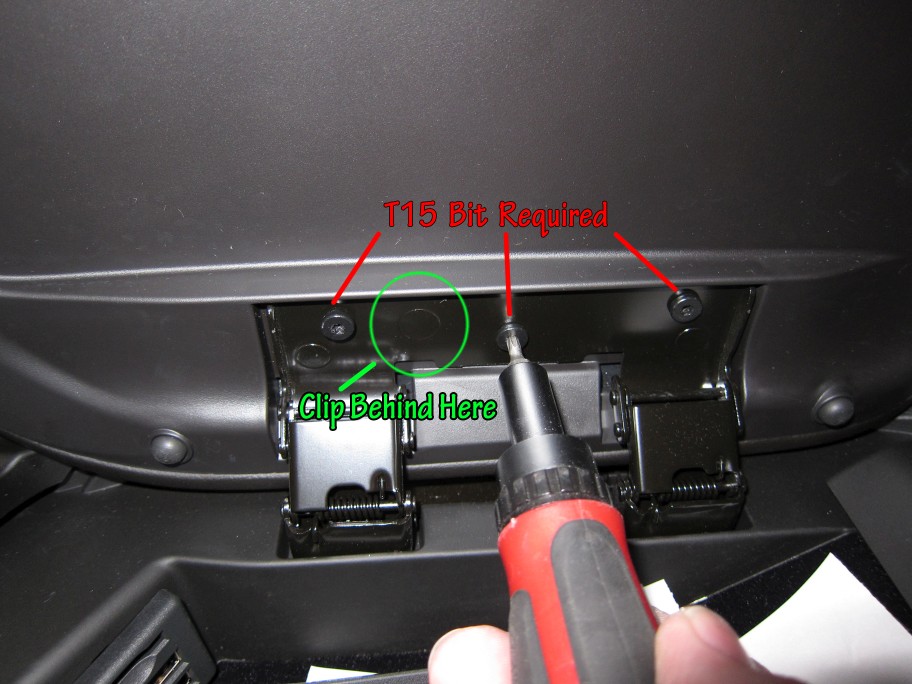
Before we start, locate a T40 Torx driver or bit.
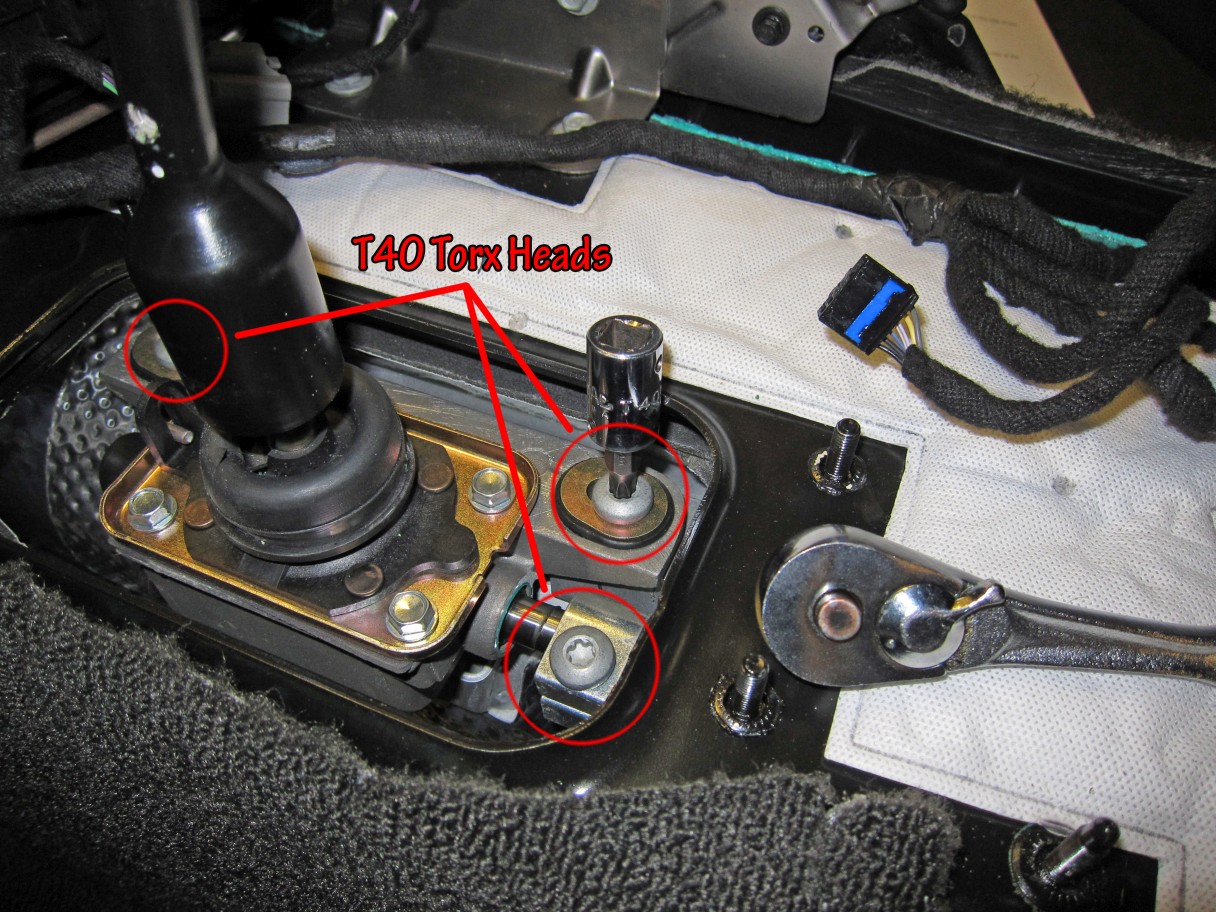
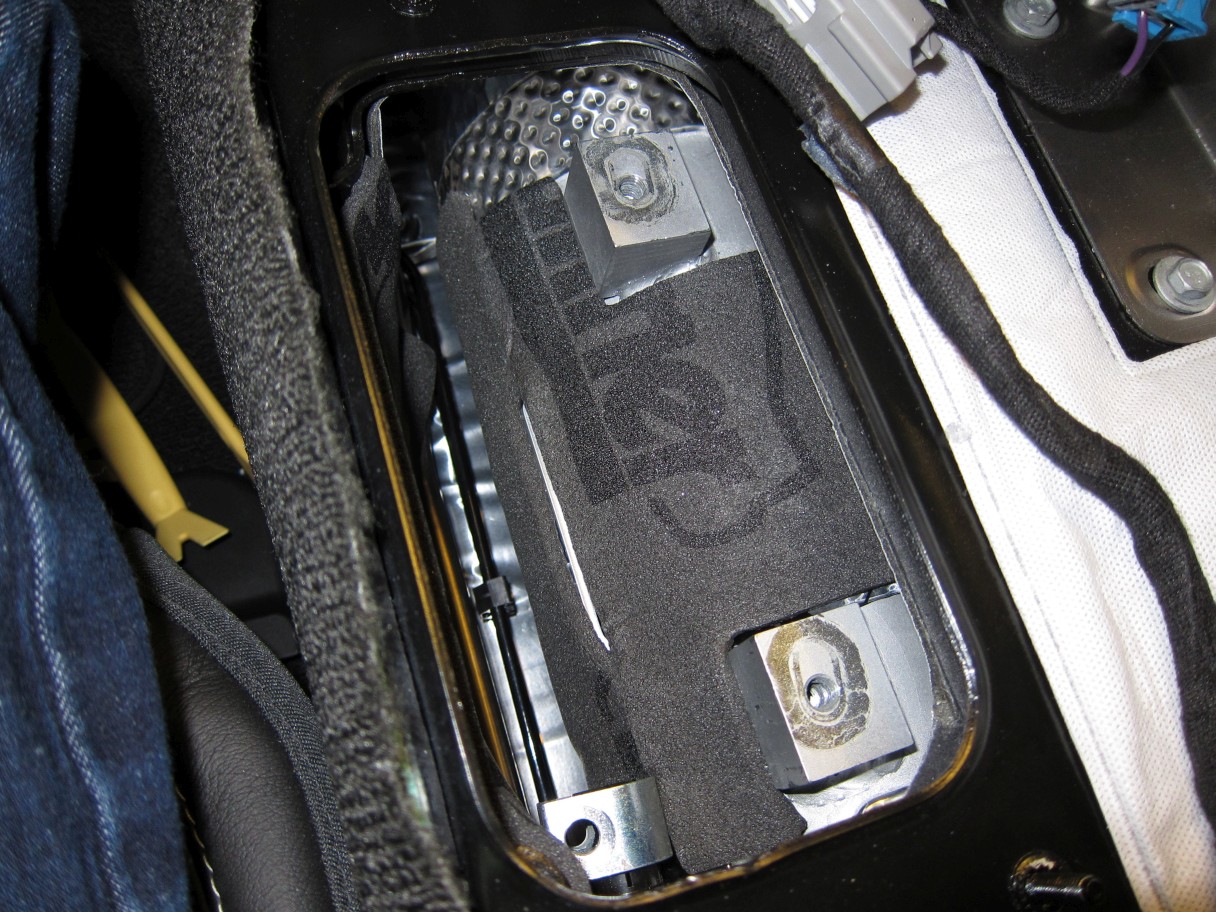
Begin by removing these four 10mm bolts:
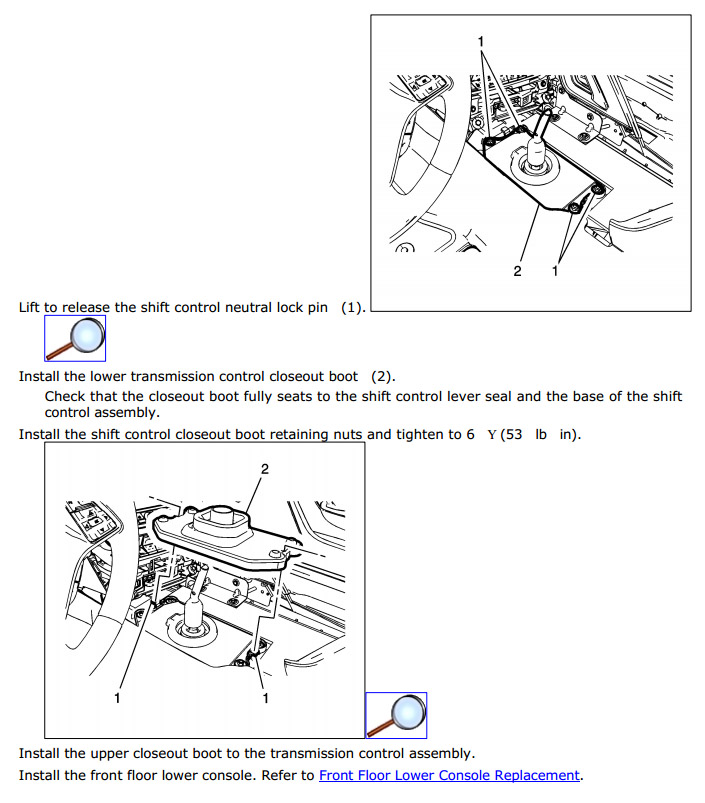
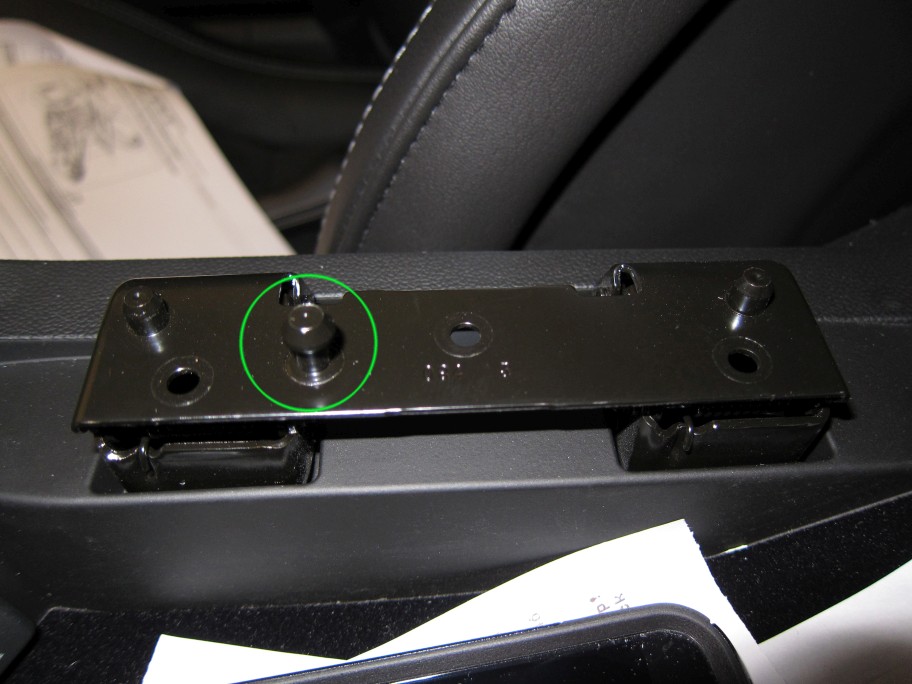
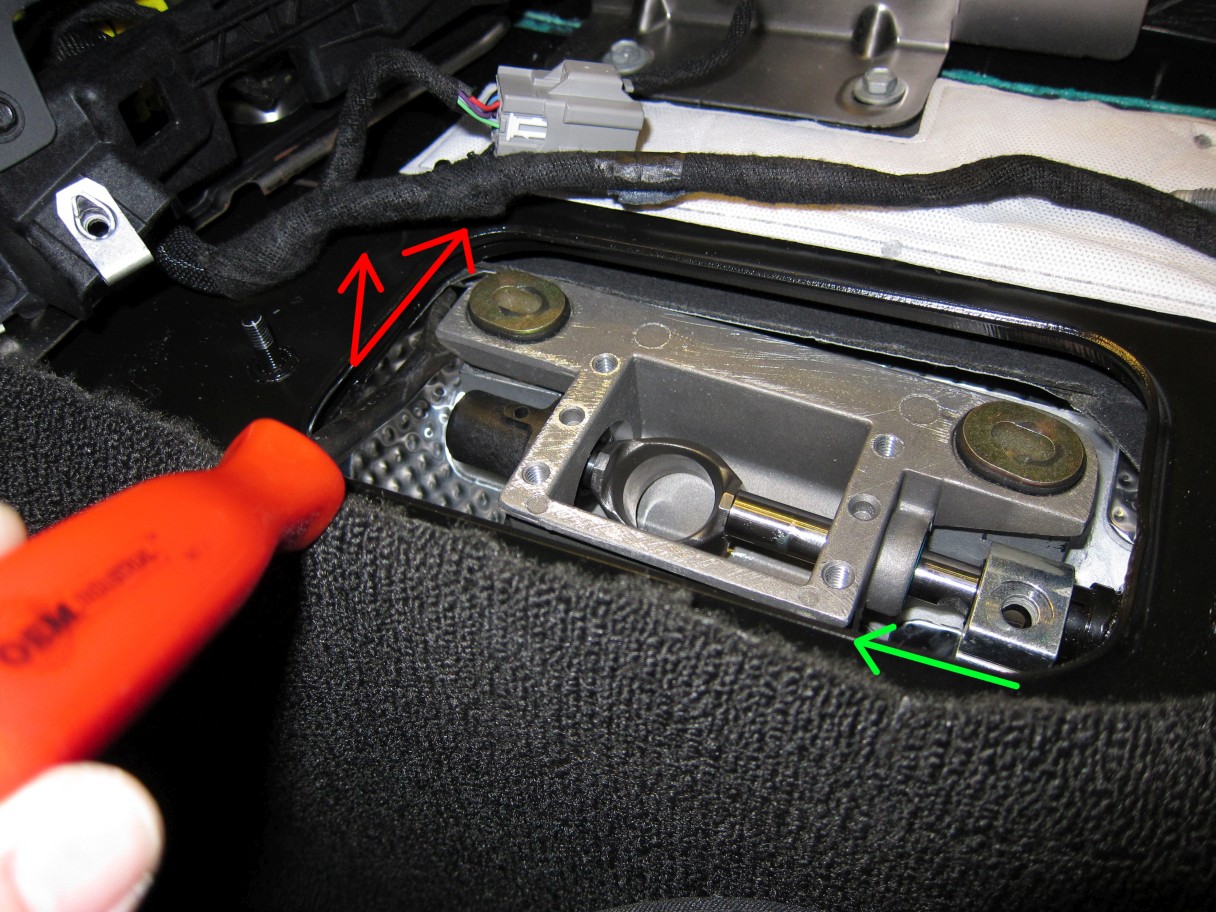
Use a screwdriver or other rigid tool to 'pry' locking pin upward:
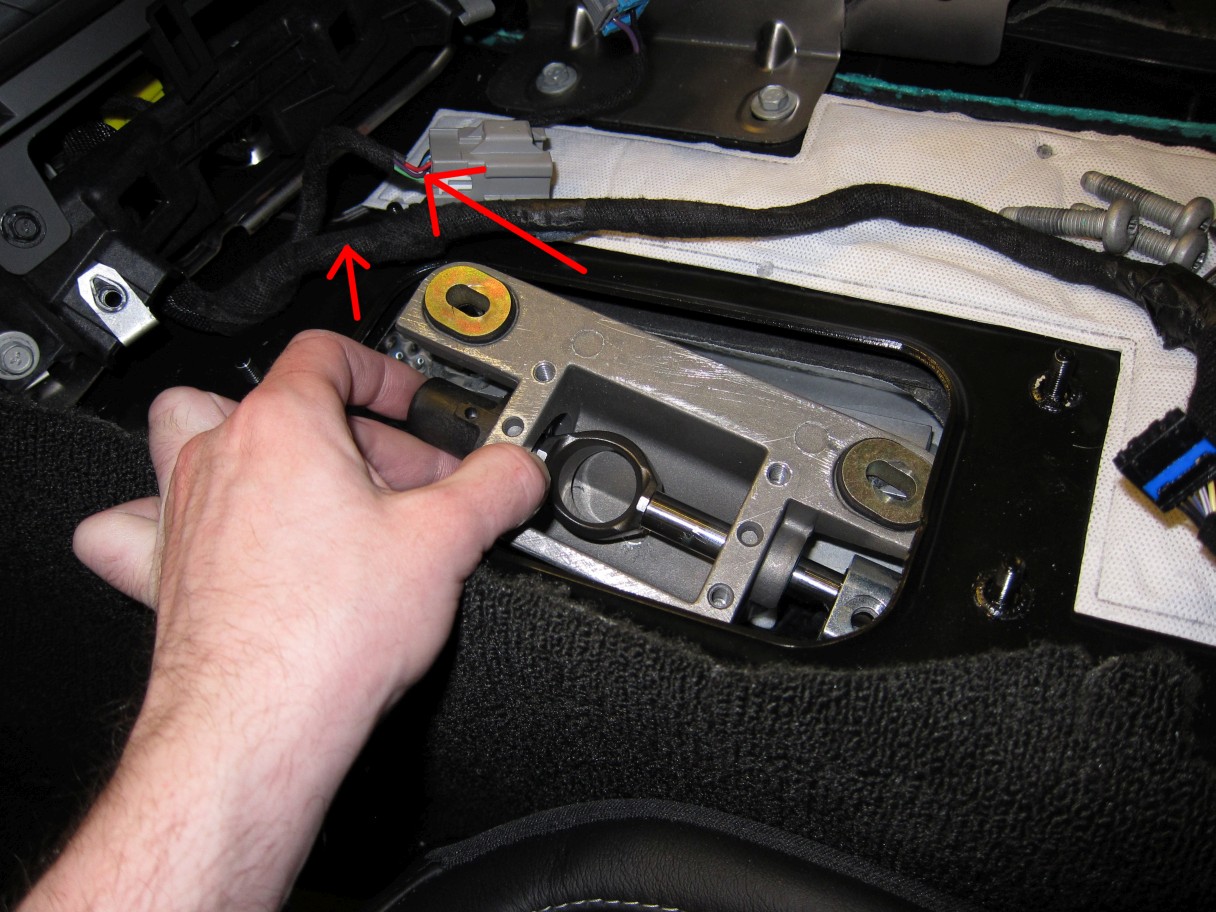
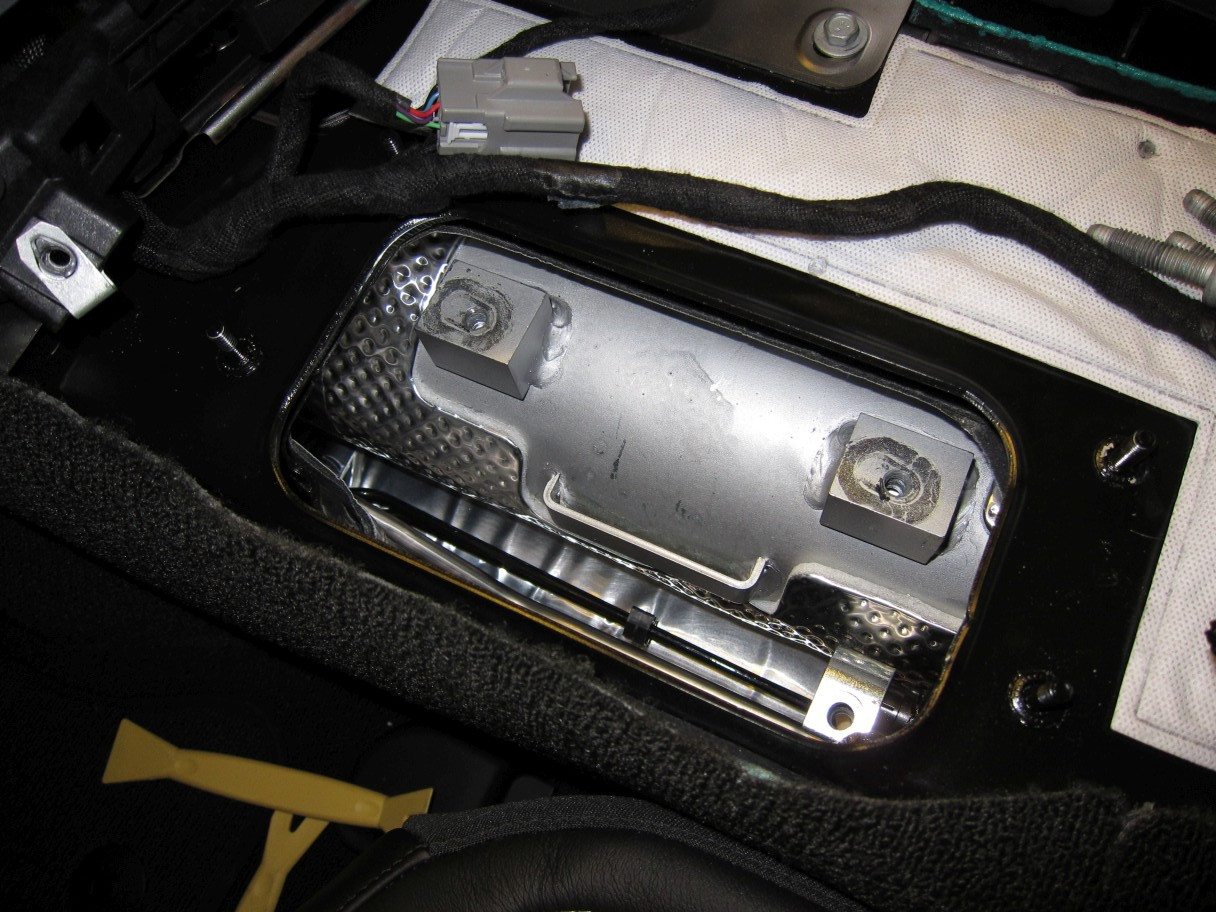
Once this is done, lift the entire assembly out:
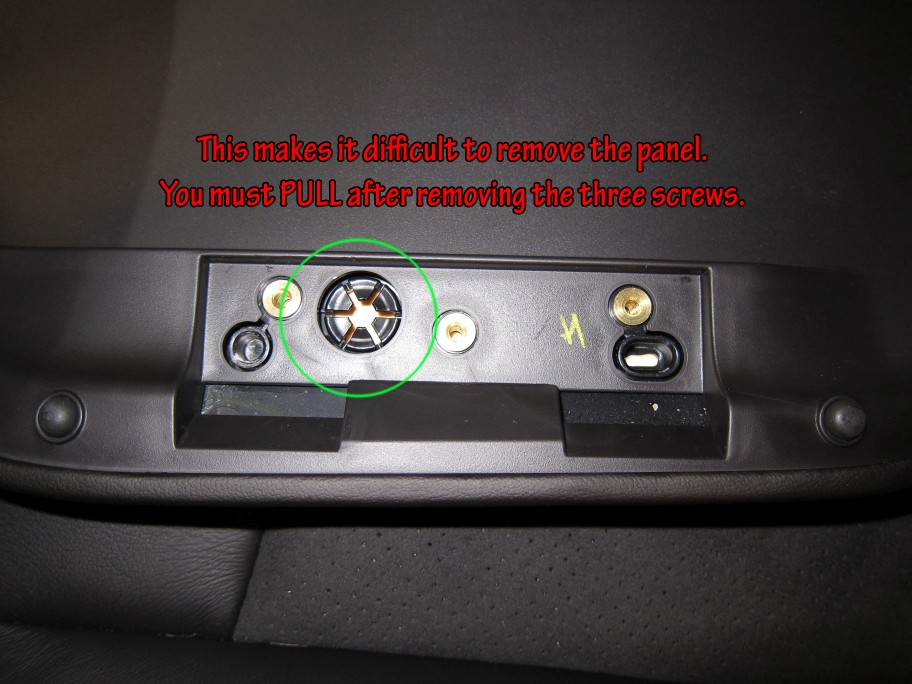
Remove the three T40 bolts:
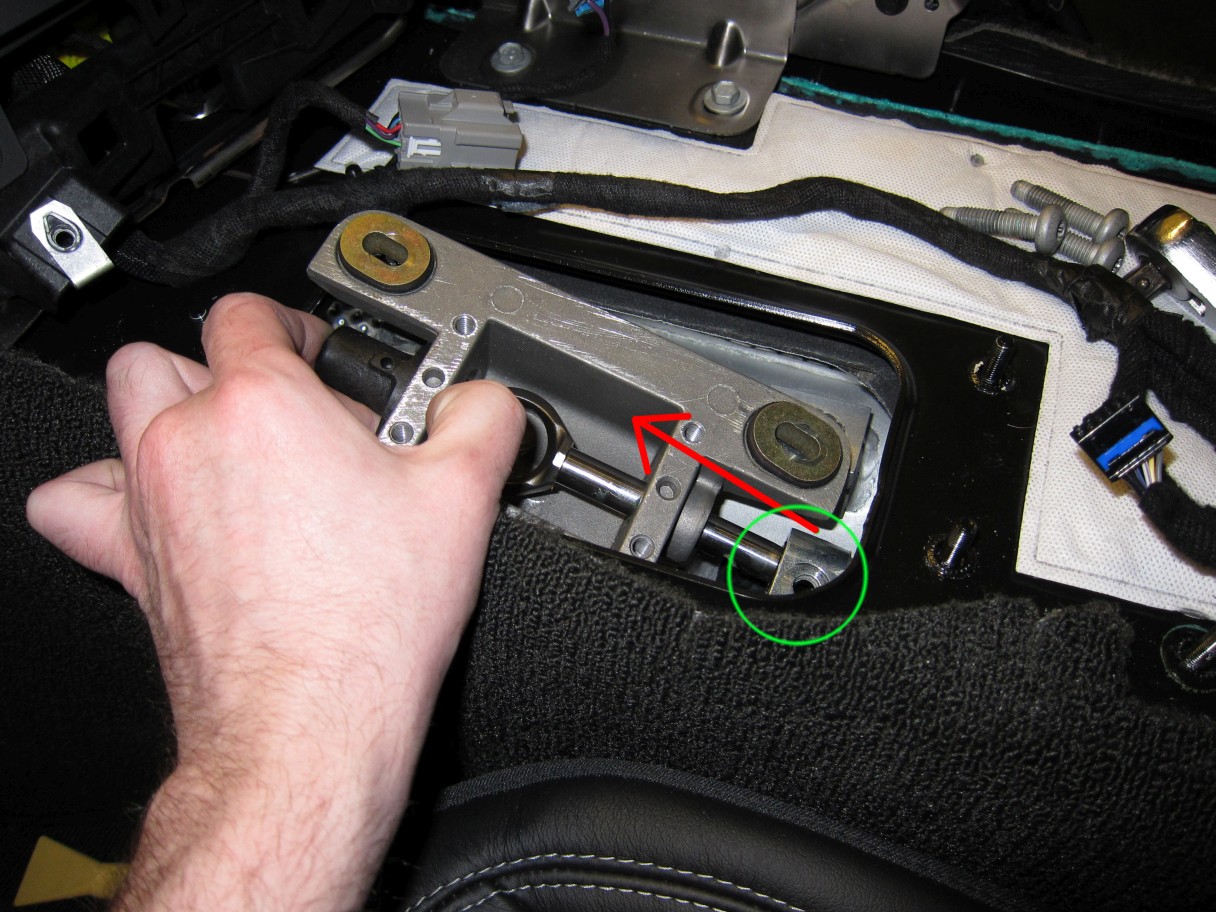
Carefully, using a steel panel tool or similar, 'pry' the factory box upward using a gentle twisting motion:
Slide the lower box out carefully, keeping in mind to separate the rod from the clamp.
Before we start, locate a T40 Torx driver or bit.
Begin by removing these four 10mm bolts:
Use a screwdriver or other rigid tool to 'pry' locking pin upward:
Once this is done, lift the entire assembly out:
Remove the three T40 bolts:
Carefully, using a steel panel tool or similar, 'pry' the factory box upward using a gentle twisting motion:
Slide the lower box out carefully, keeping in mind to separate the rod from the clamp.
04-05-2014, 03:24 AM
#19
Tech Contributor
Thread Starter
Member Since: Jan 2006
Location: Saint Louis MO
Posts: 4,761
Likes: 0
Received 218 Likes
on
110 Posts
St. Jude Donor '14-'15
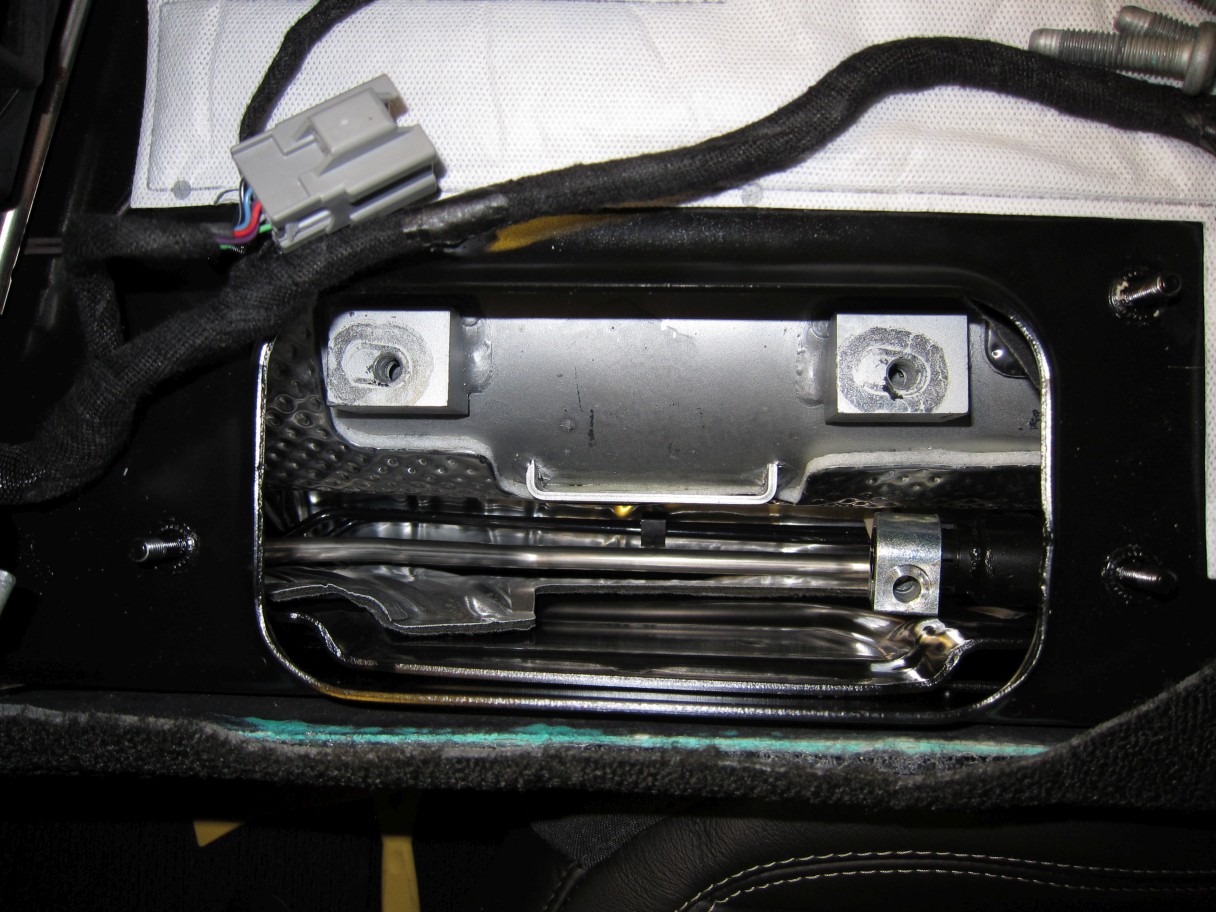
Bring the factory lower box to a work area (unless you want to get grease in your car):
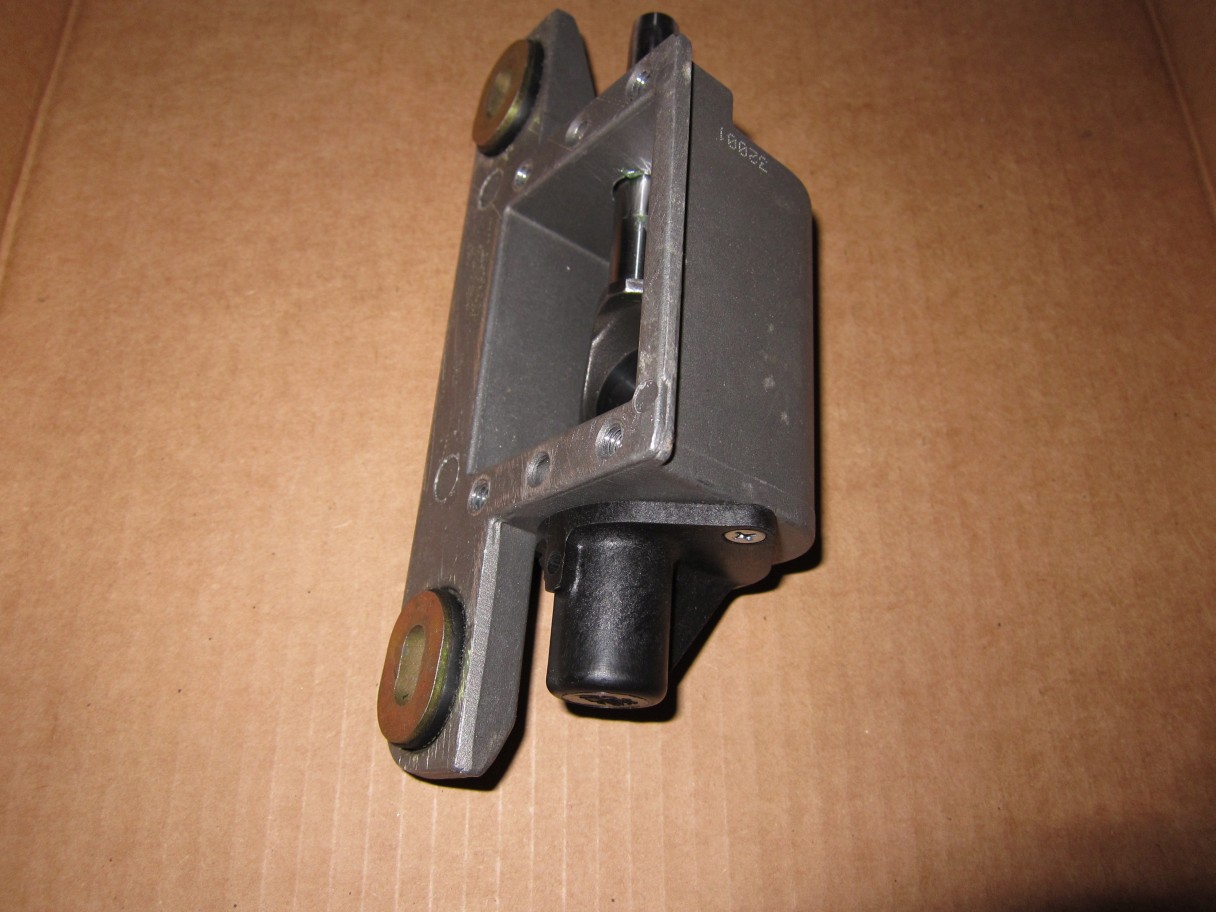
Unscrew the plastic cap:
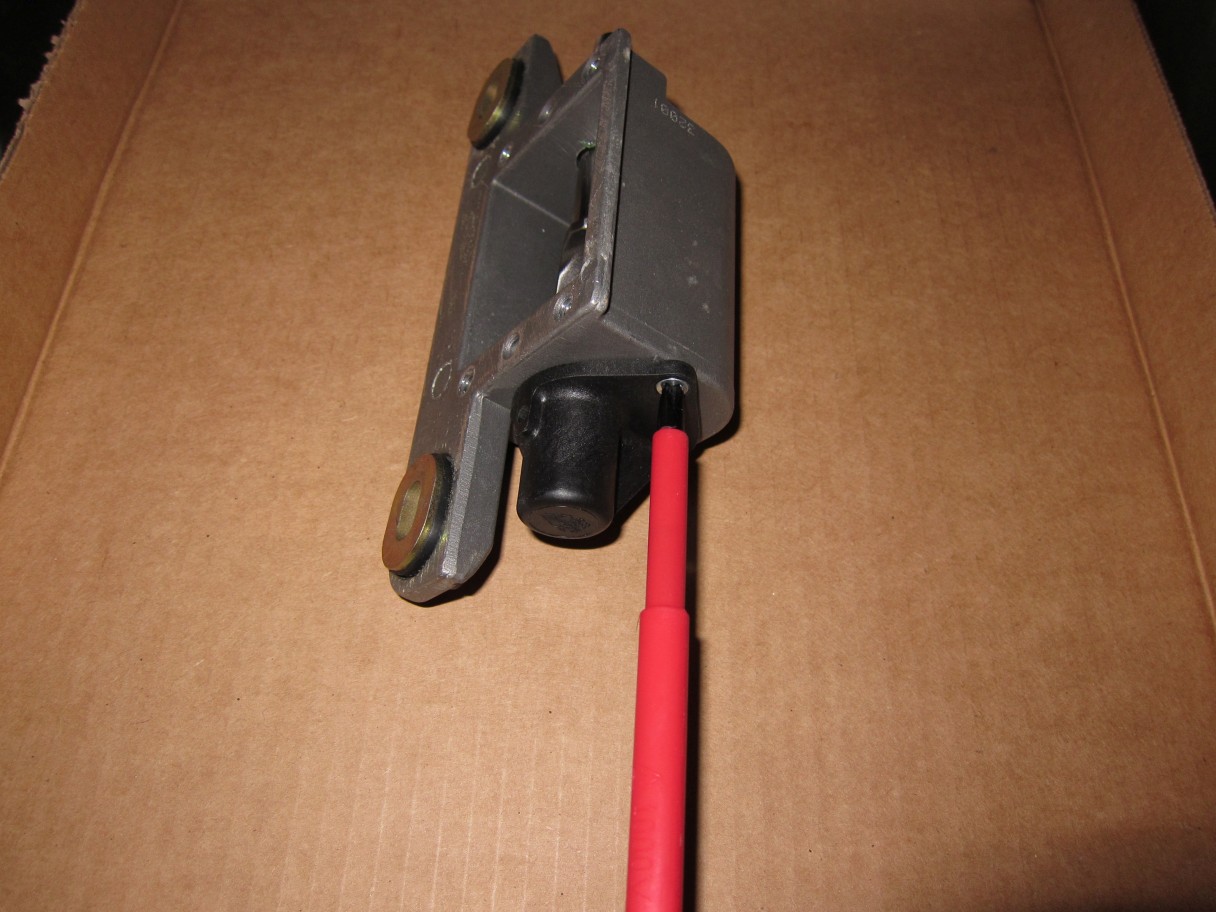
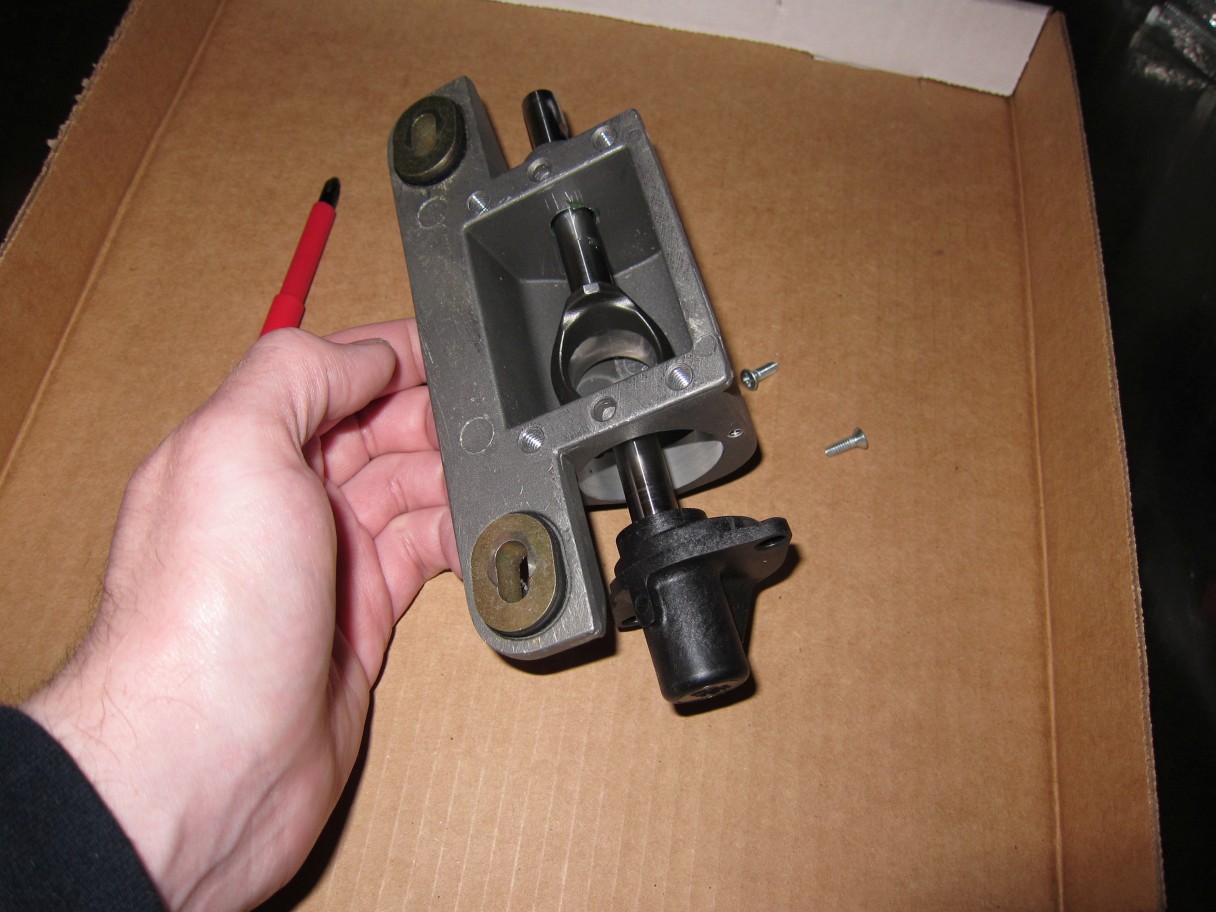
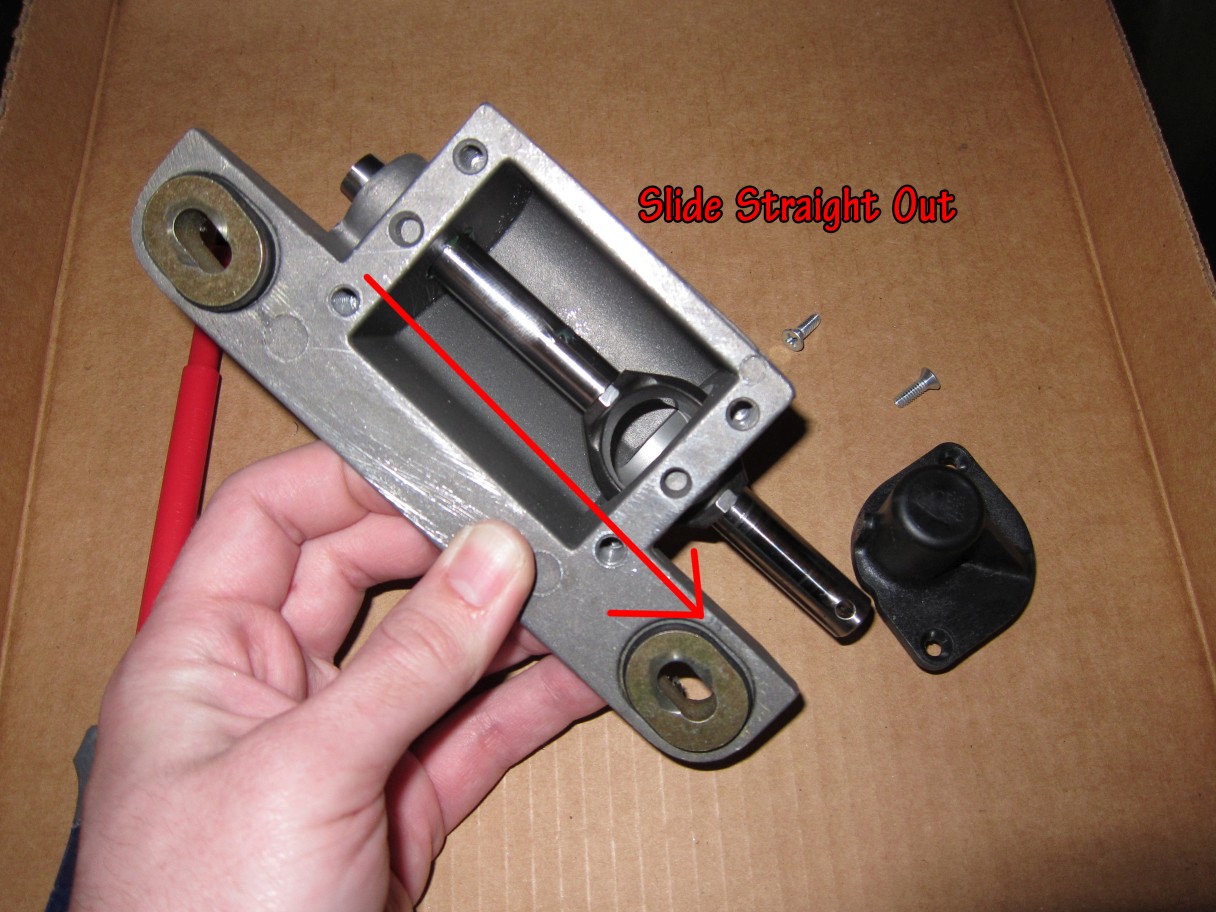
Slide rod straight out:
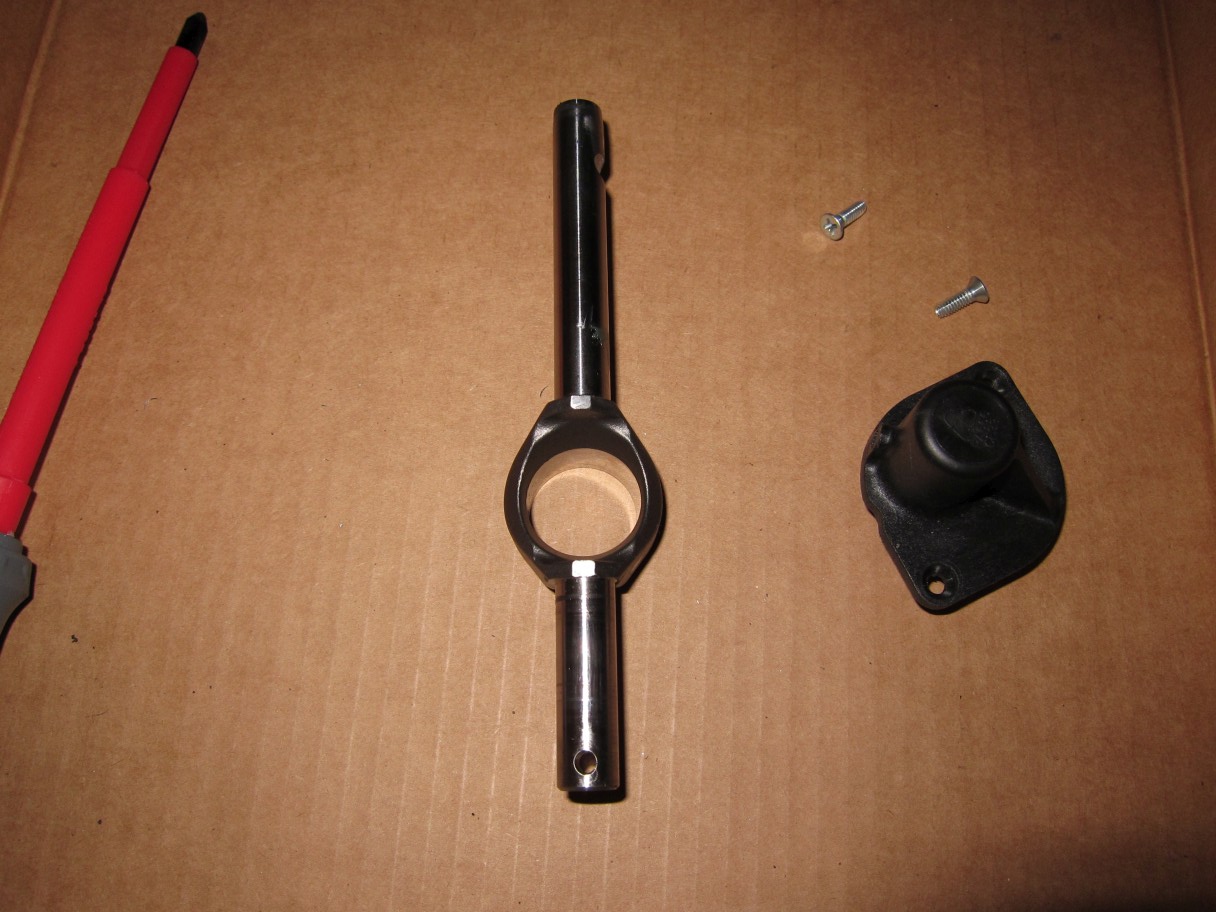
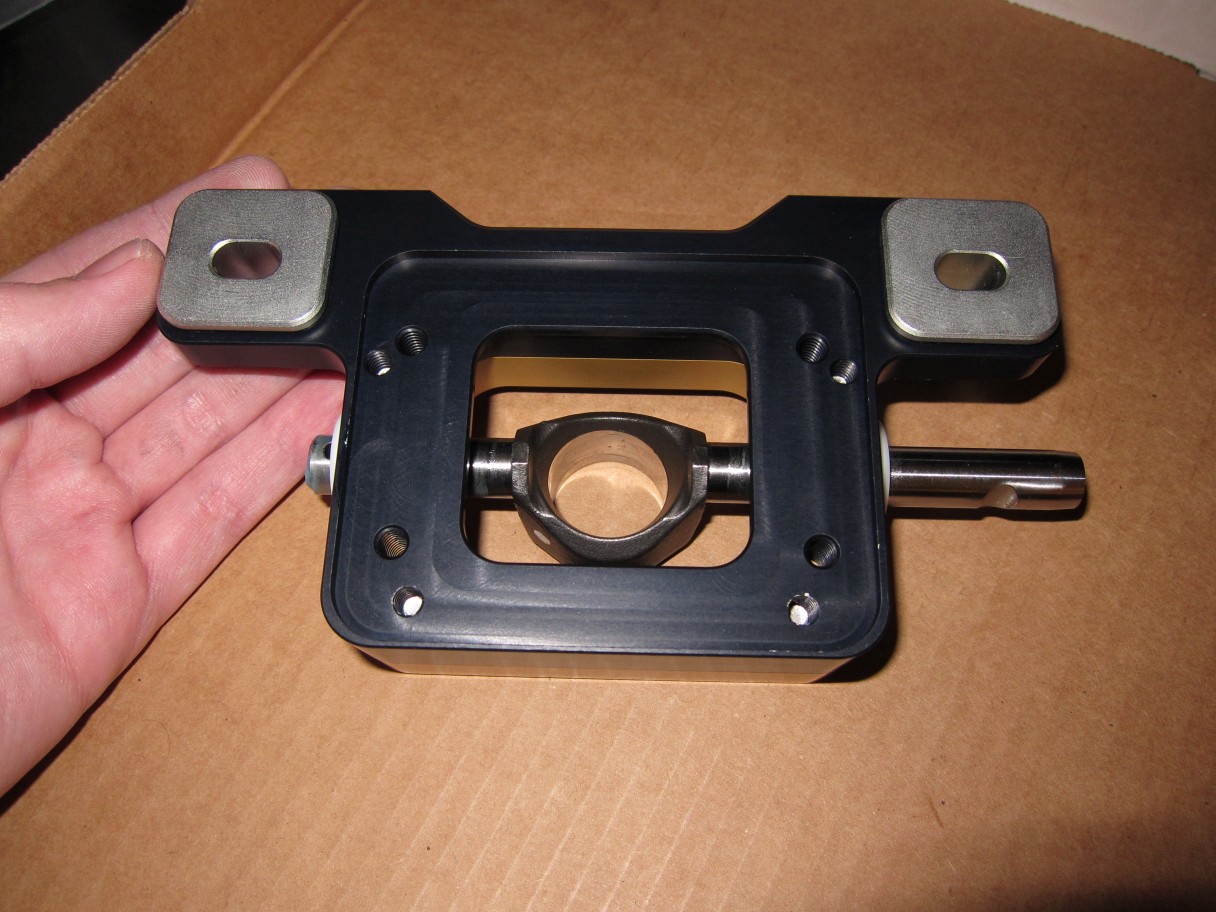
A look at the MGW lower box kit:
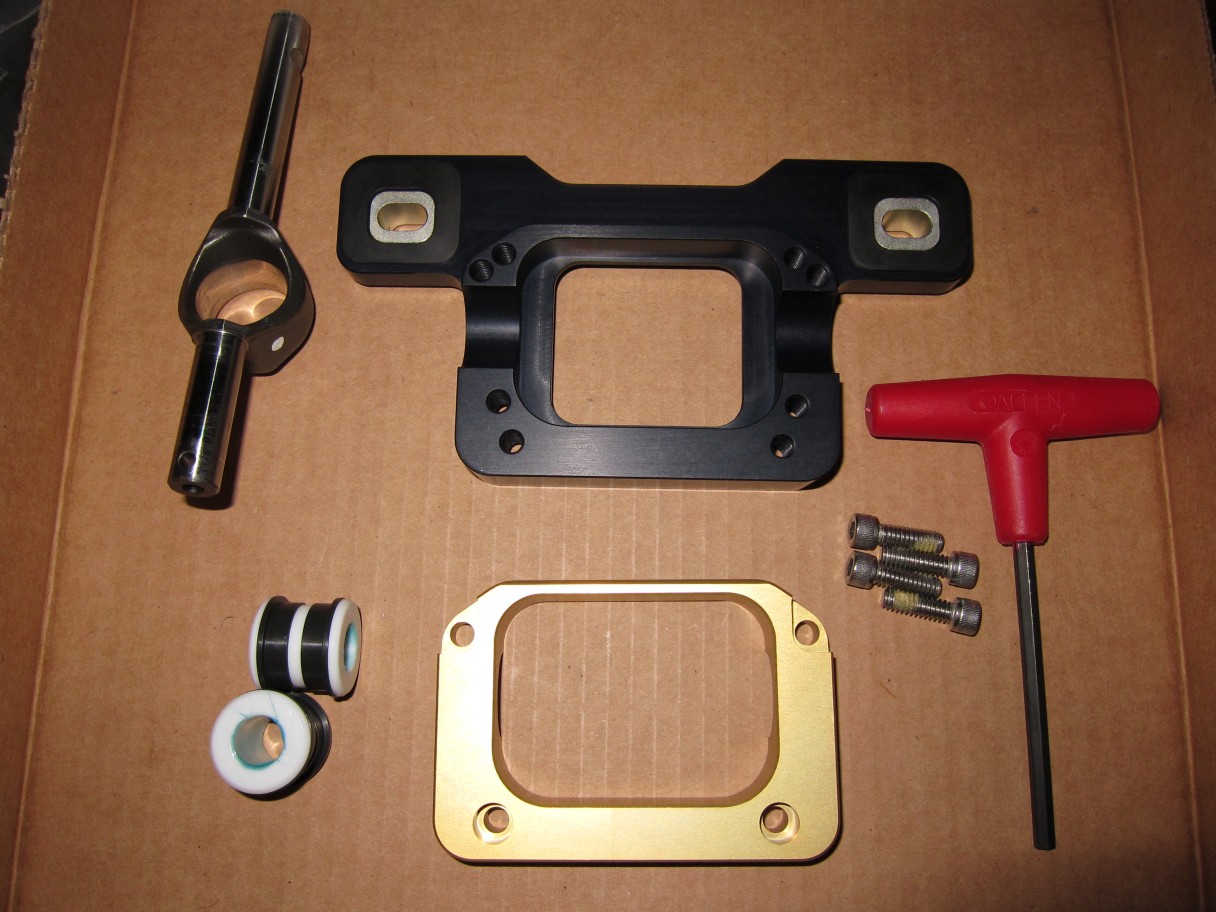
Insert rod into bushings, align as shown:
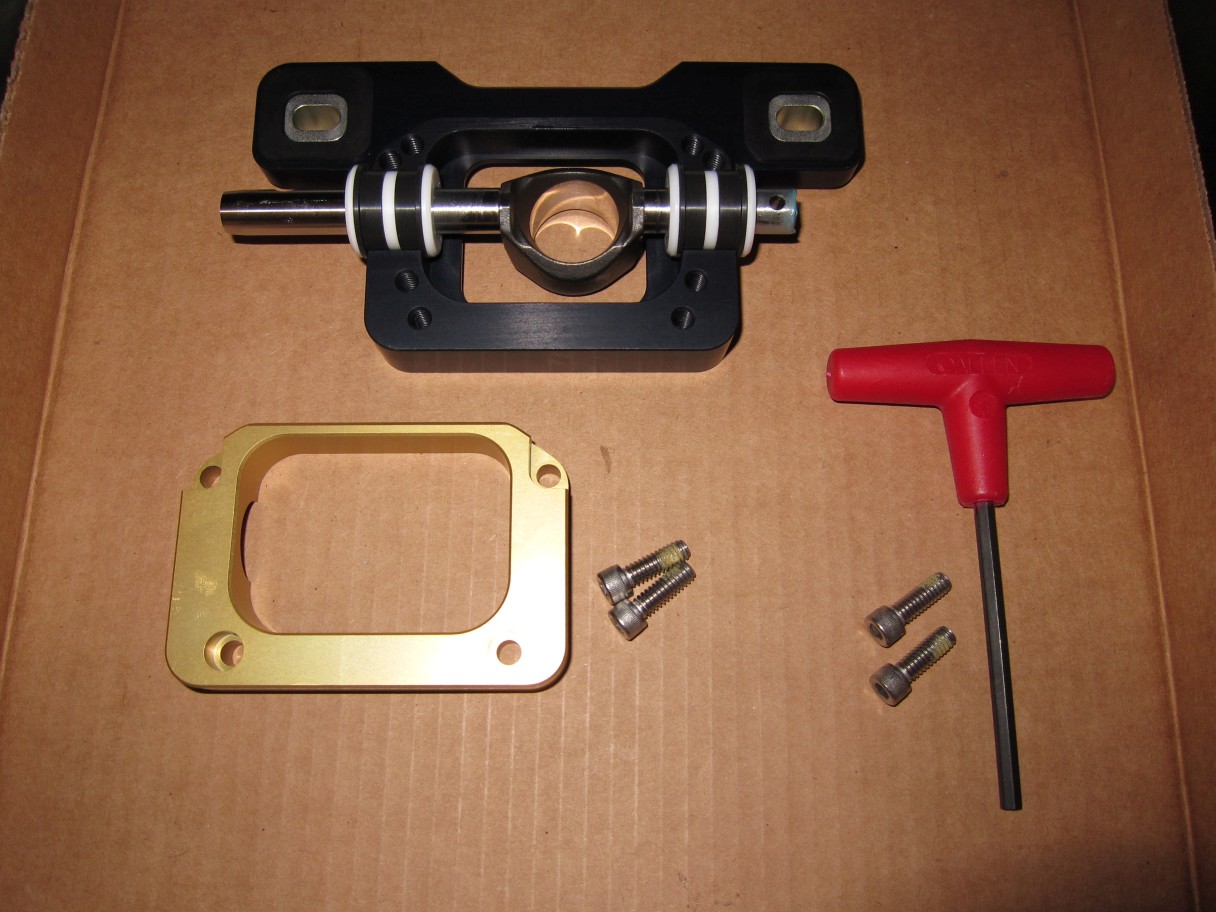
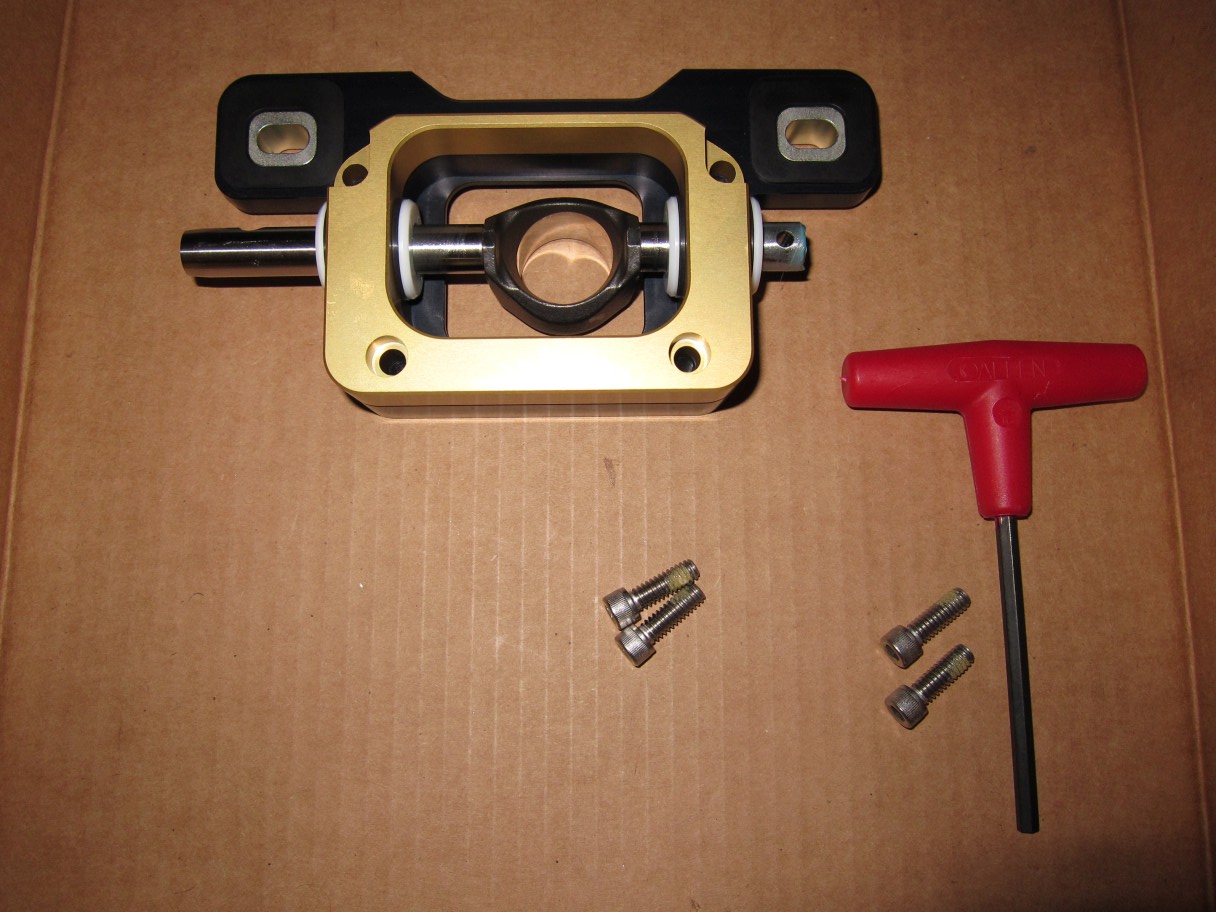
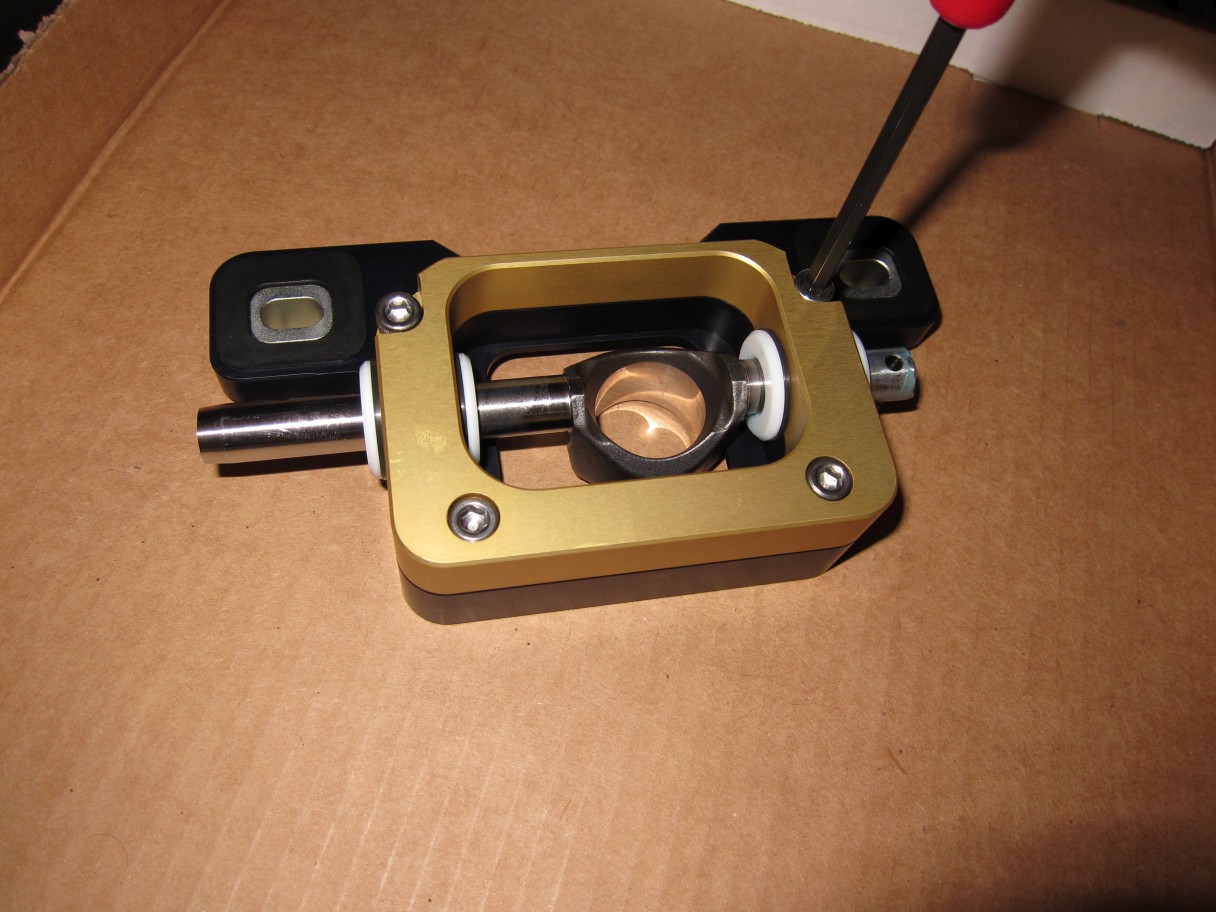
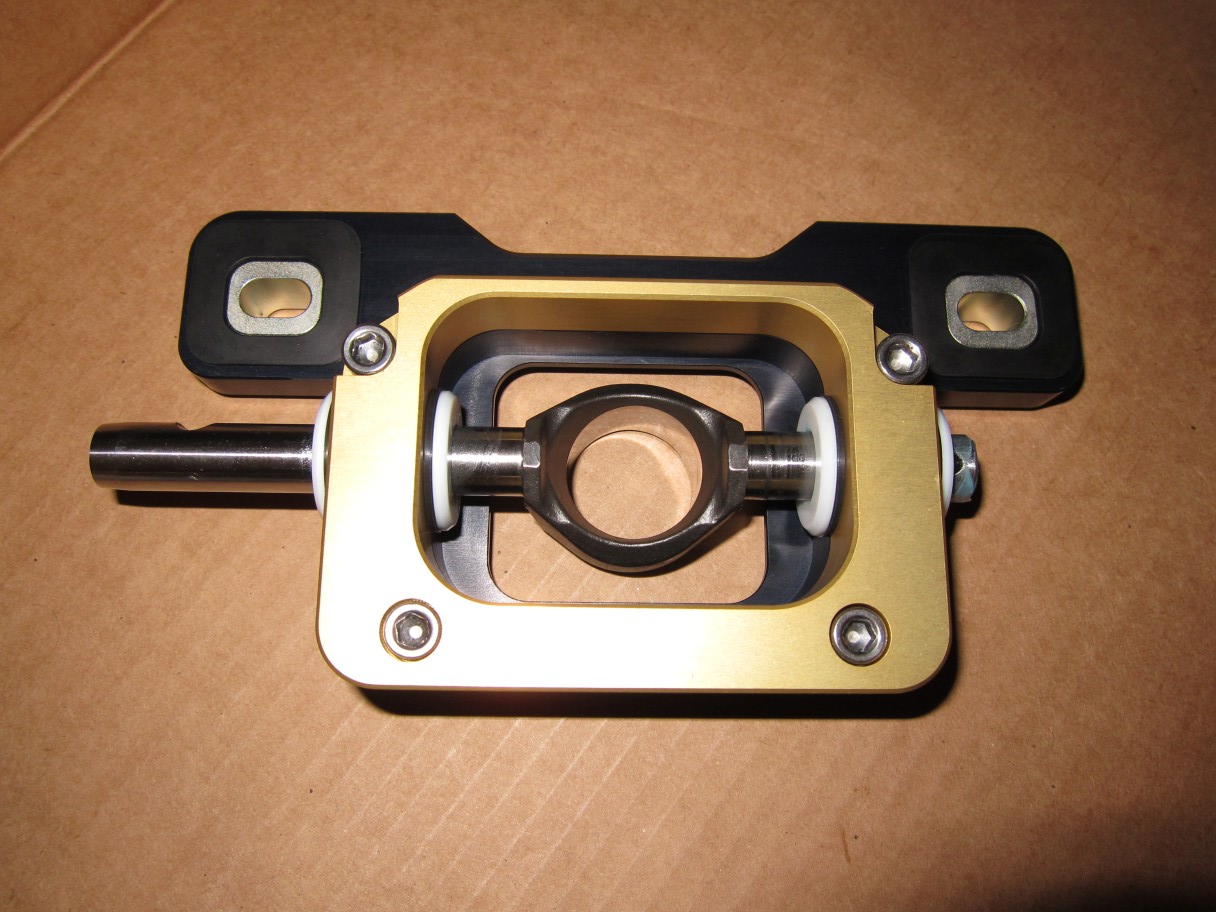
Flipped over:
Unscrew the plastic cap:
Slide rod straight out:
A look at the MGW lower box kit:
Insert rod into bushings, align as shown:
Flipped over:
04-05-2014, 03:30 AM
#20
Tech Contributor
Thread Starter
Member Since: Jan 2006
Location: Saint Louis MO
Posts: 4,761
Likes: 0
Received 218 Likes
on
110 Posts
St. Jude Donor '14-'15
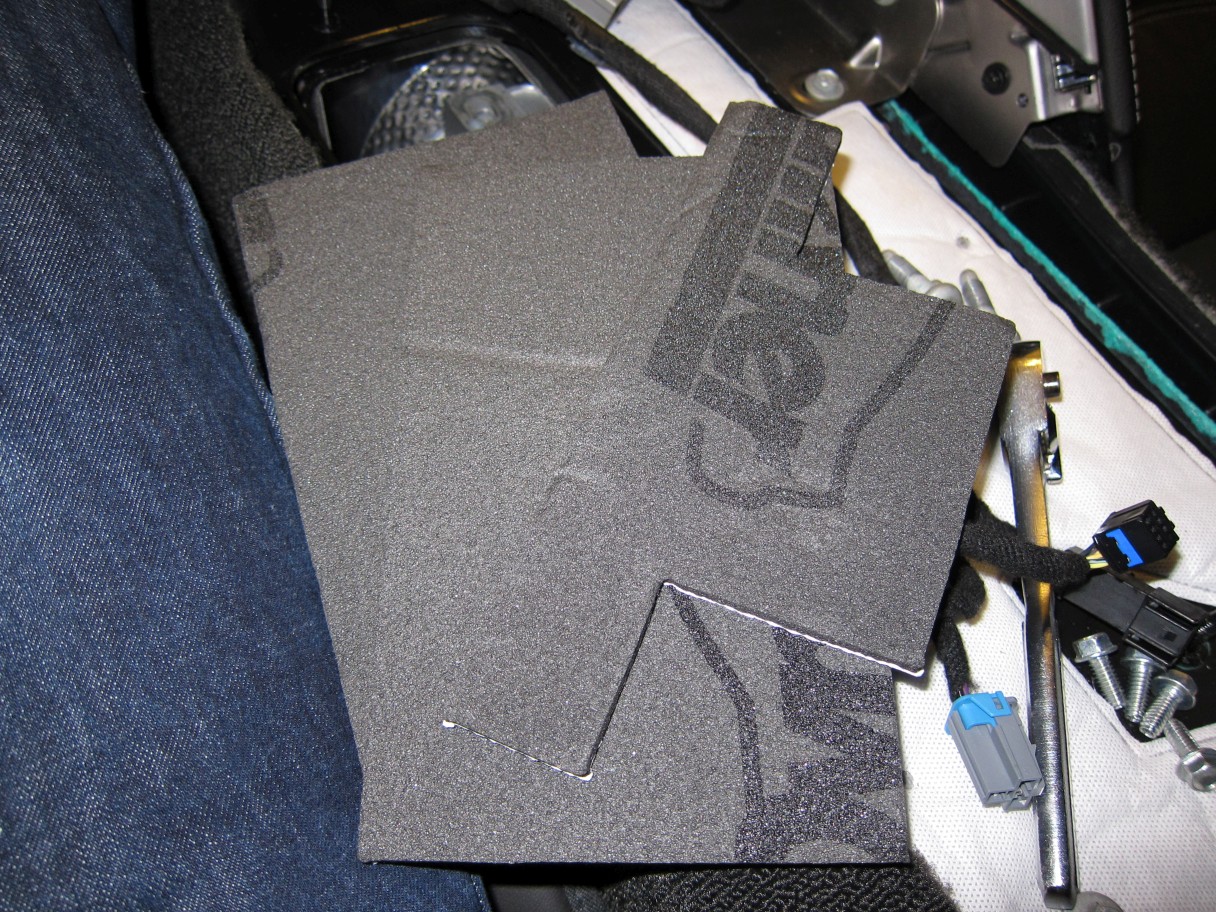
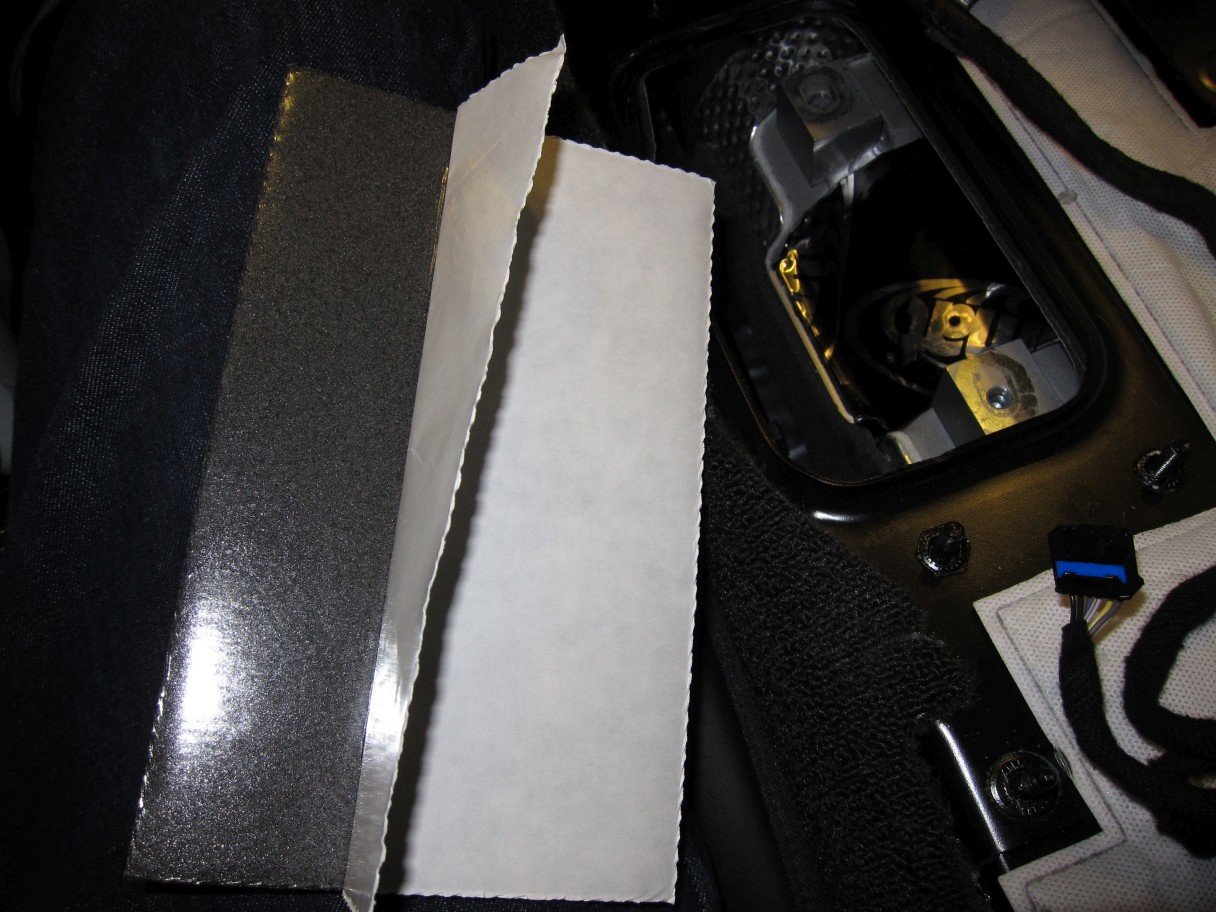
Insulation time - this is pretty similar to MGW's videos (which are quite good). The C7 is very similar to the C6 in this respect.
I'll show you a few tips on application, though - they'll come in handy on the sections you have to put all the way down low.
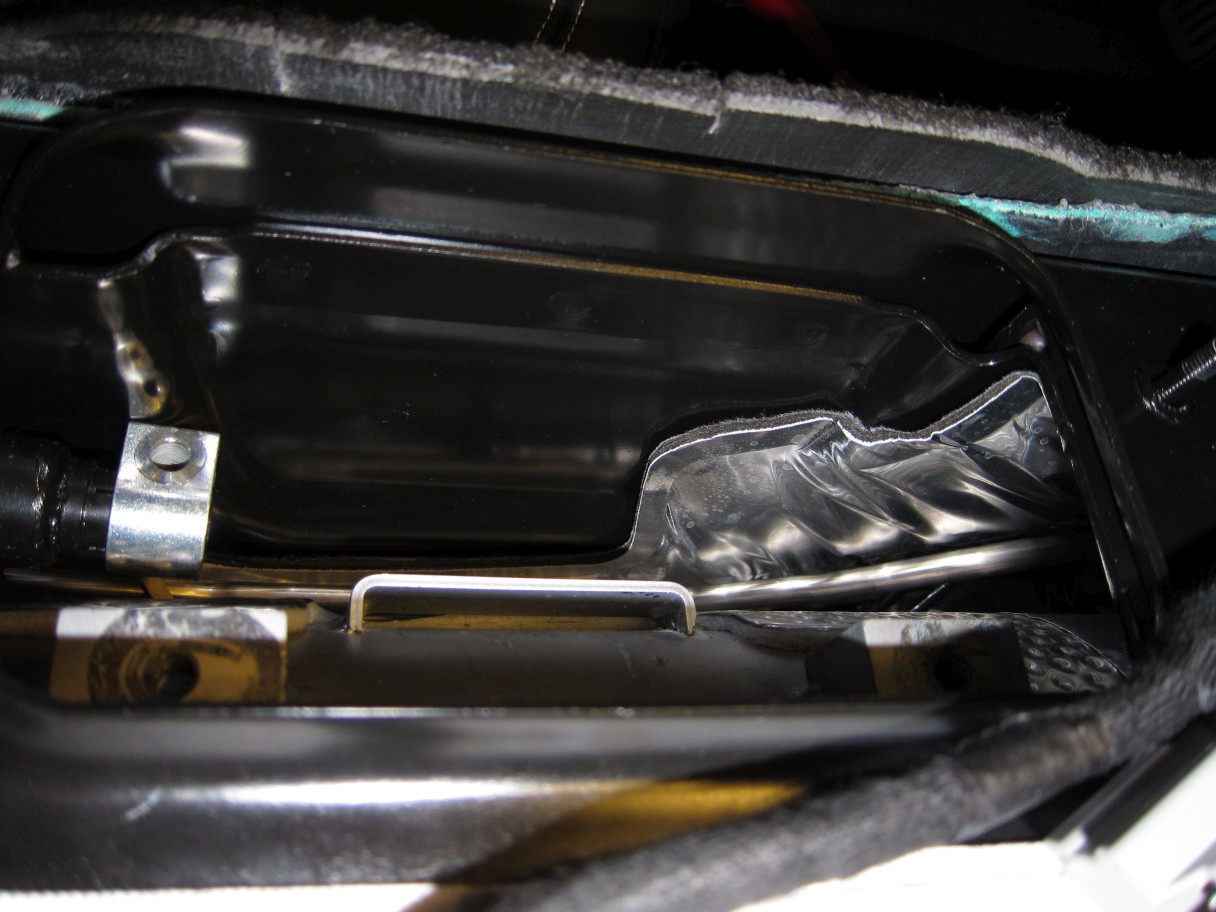
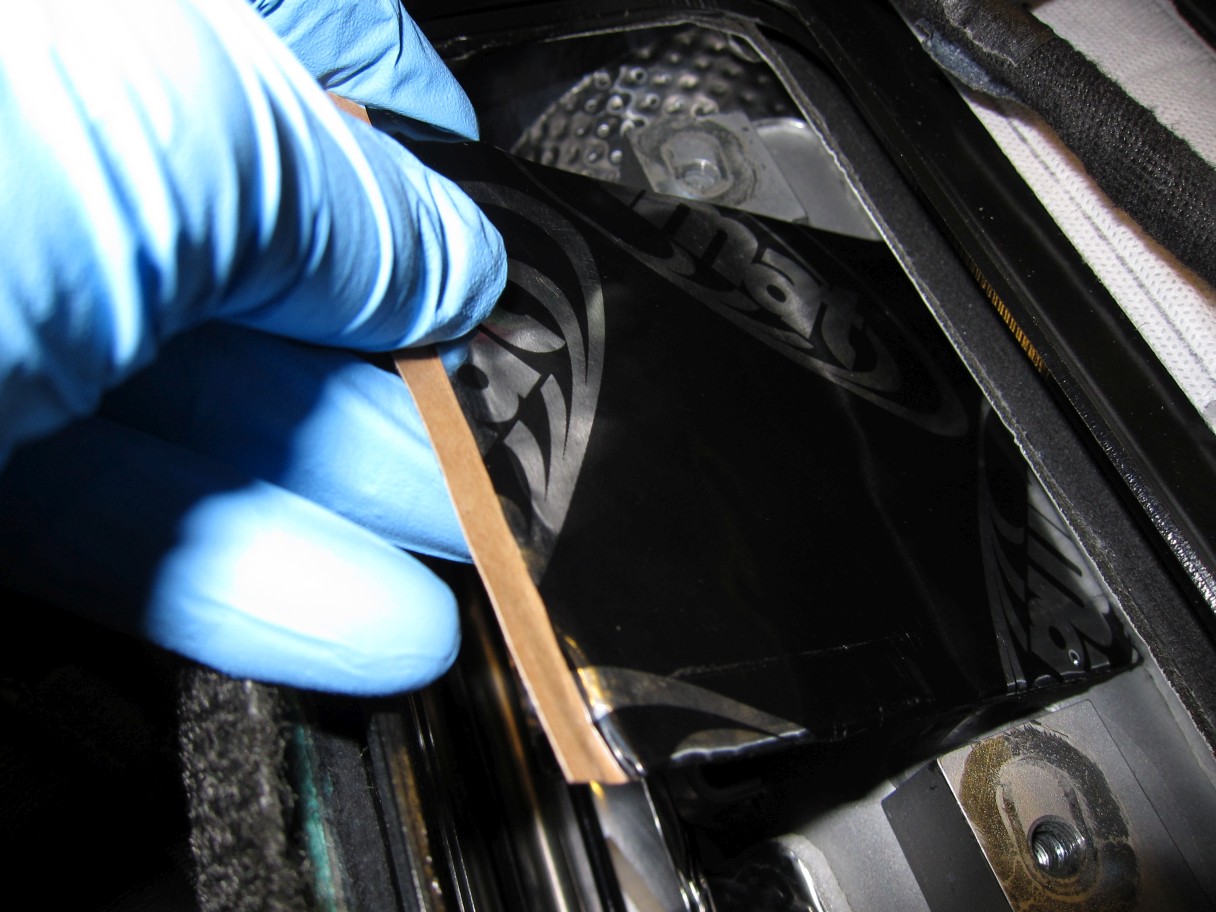
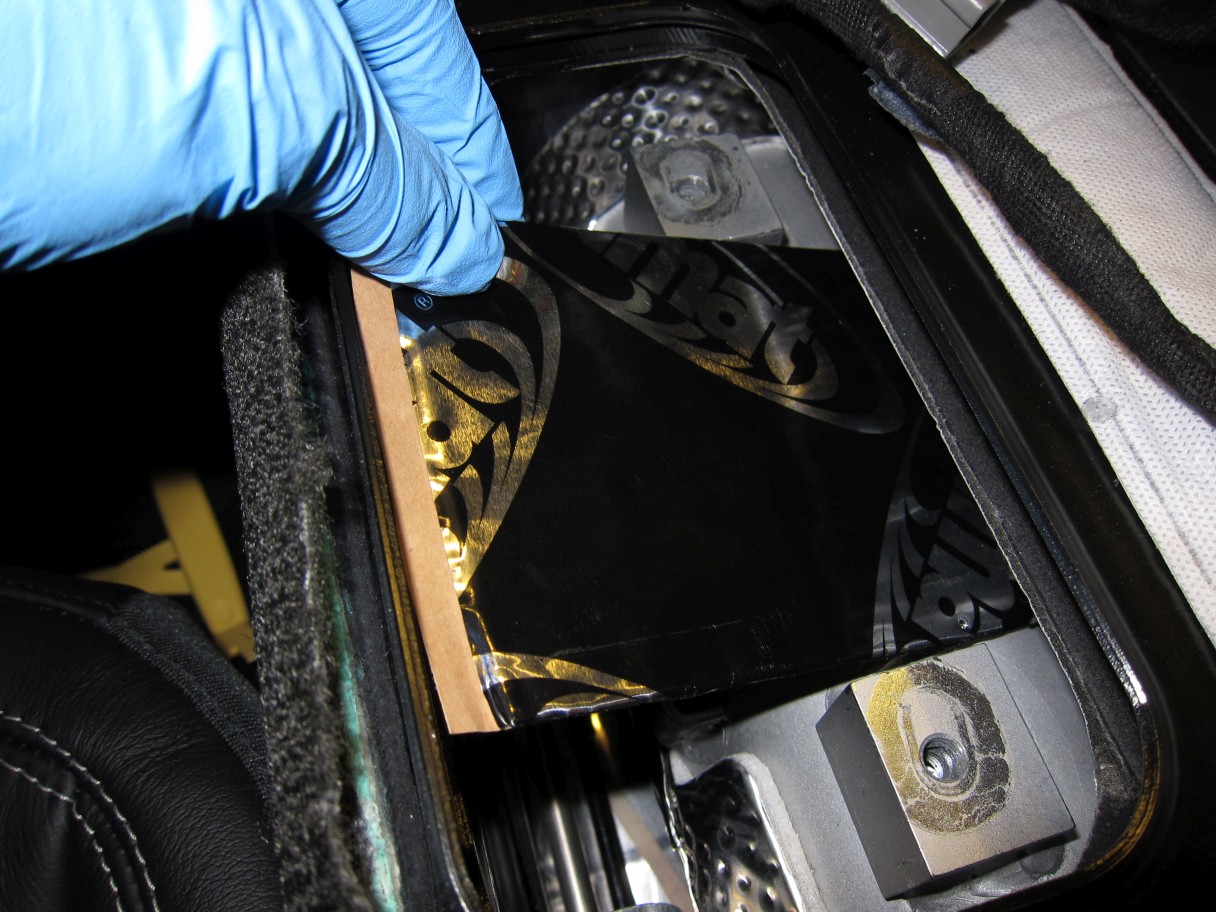
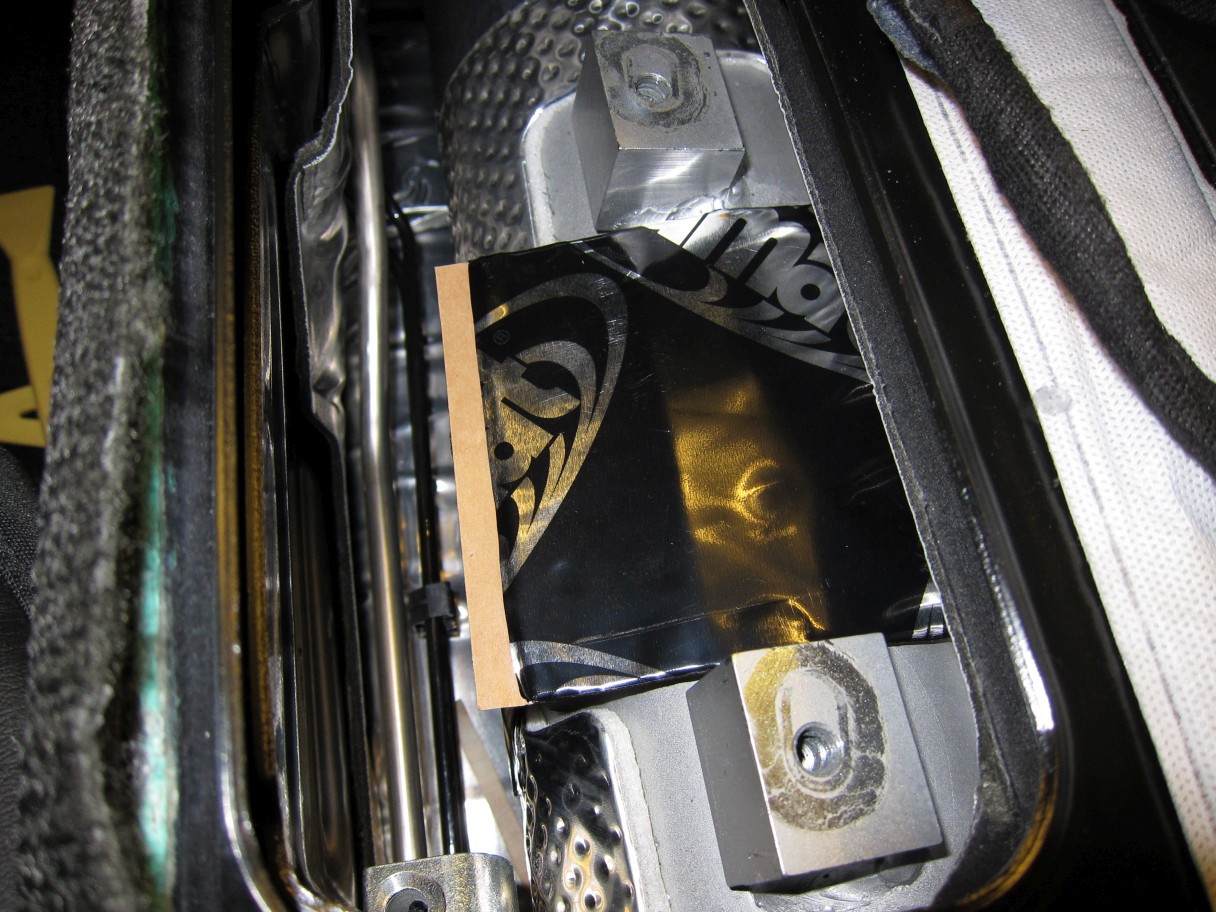
This part is notoriously annoying. Peel back a small amount of the backing before shoving the piece under the torque tube:
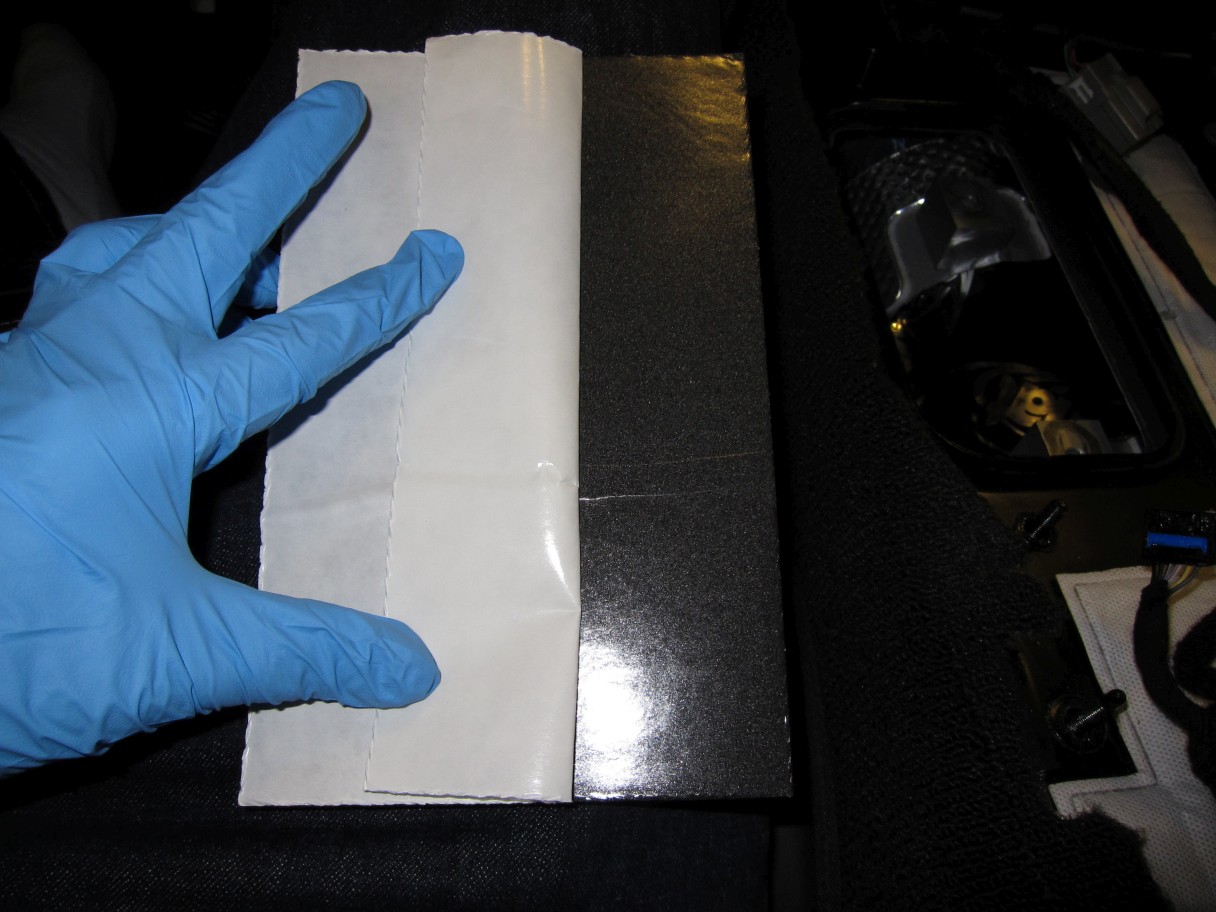
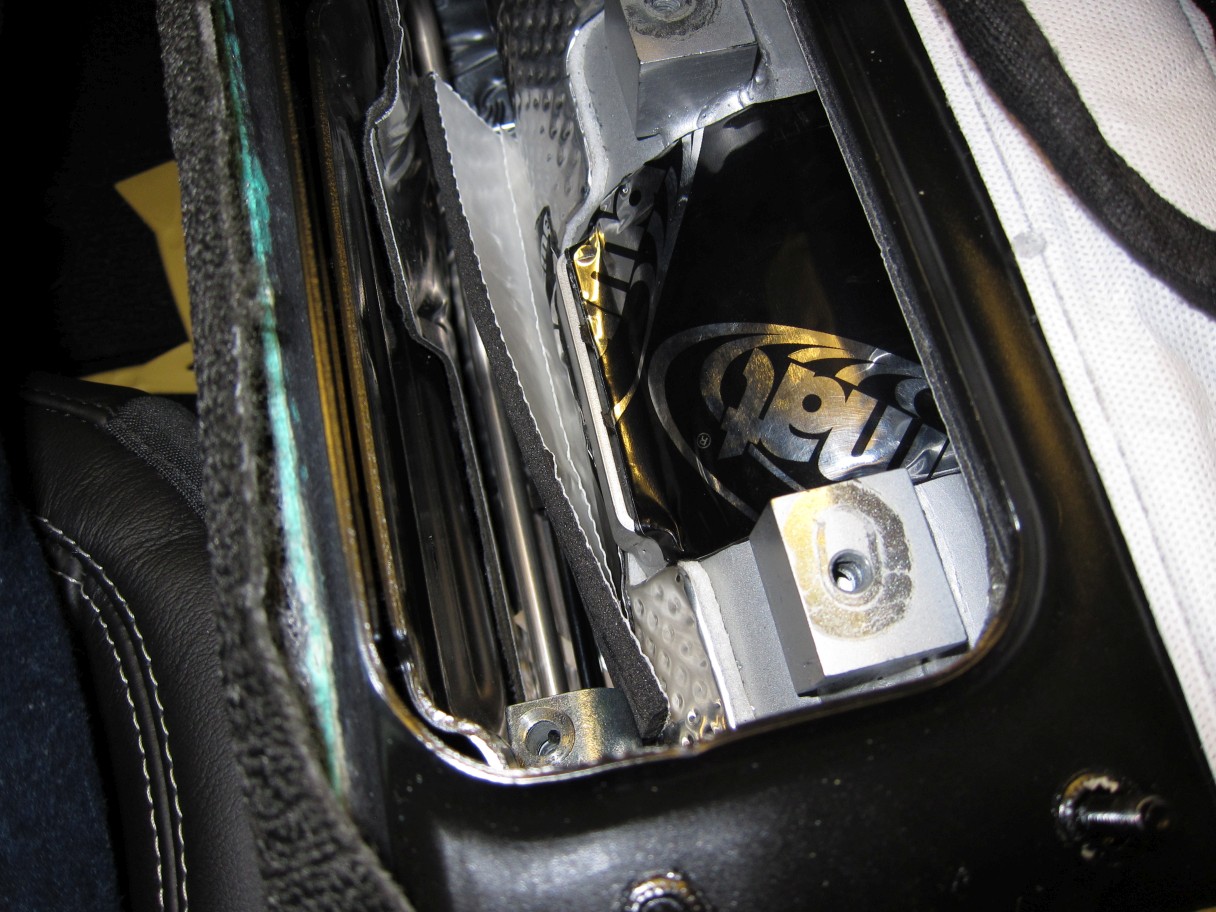
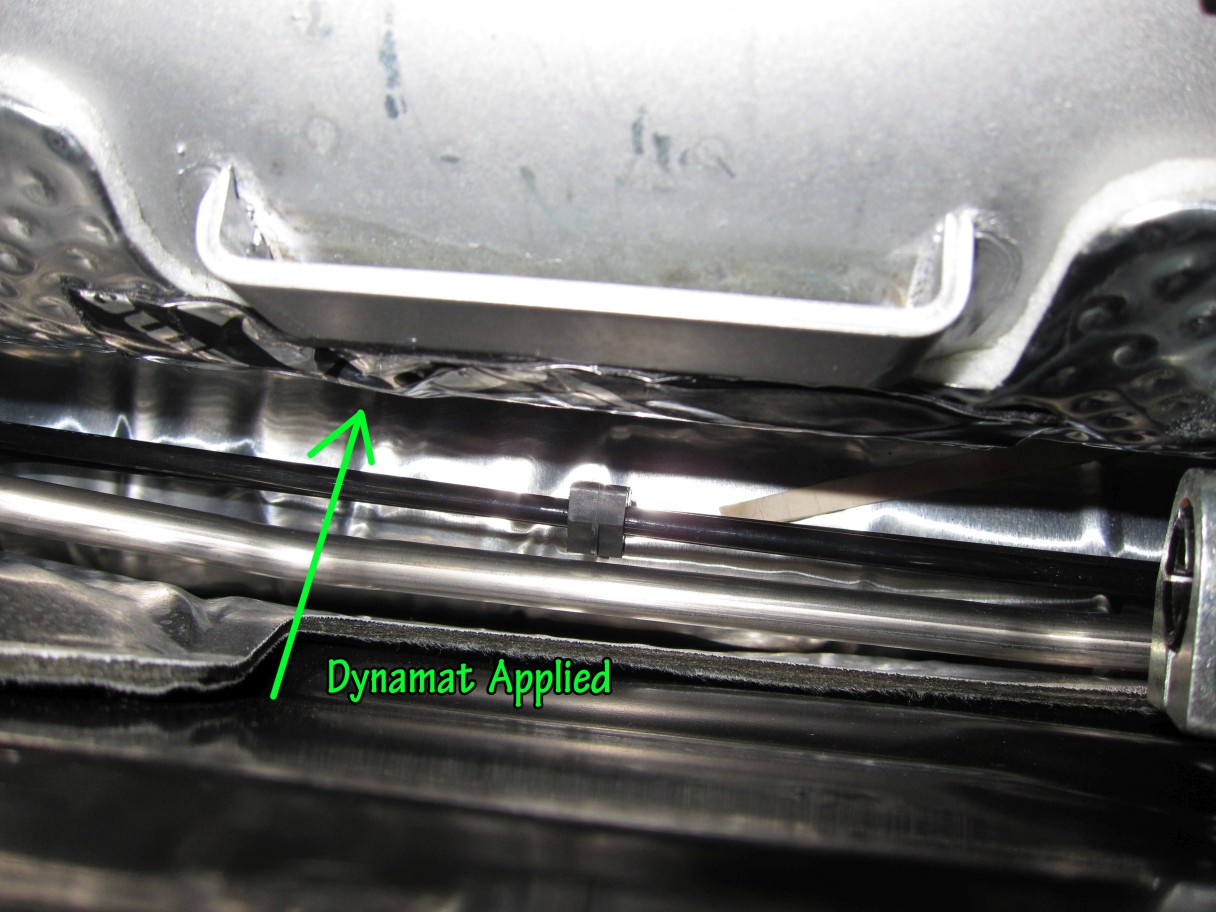
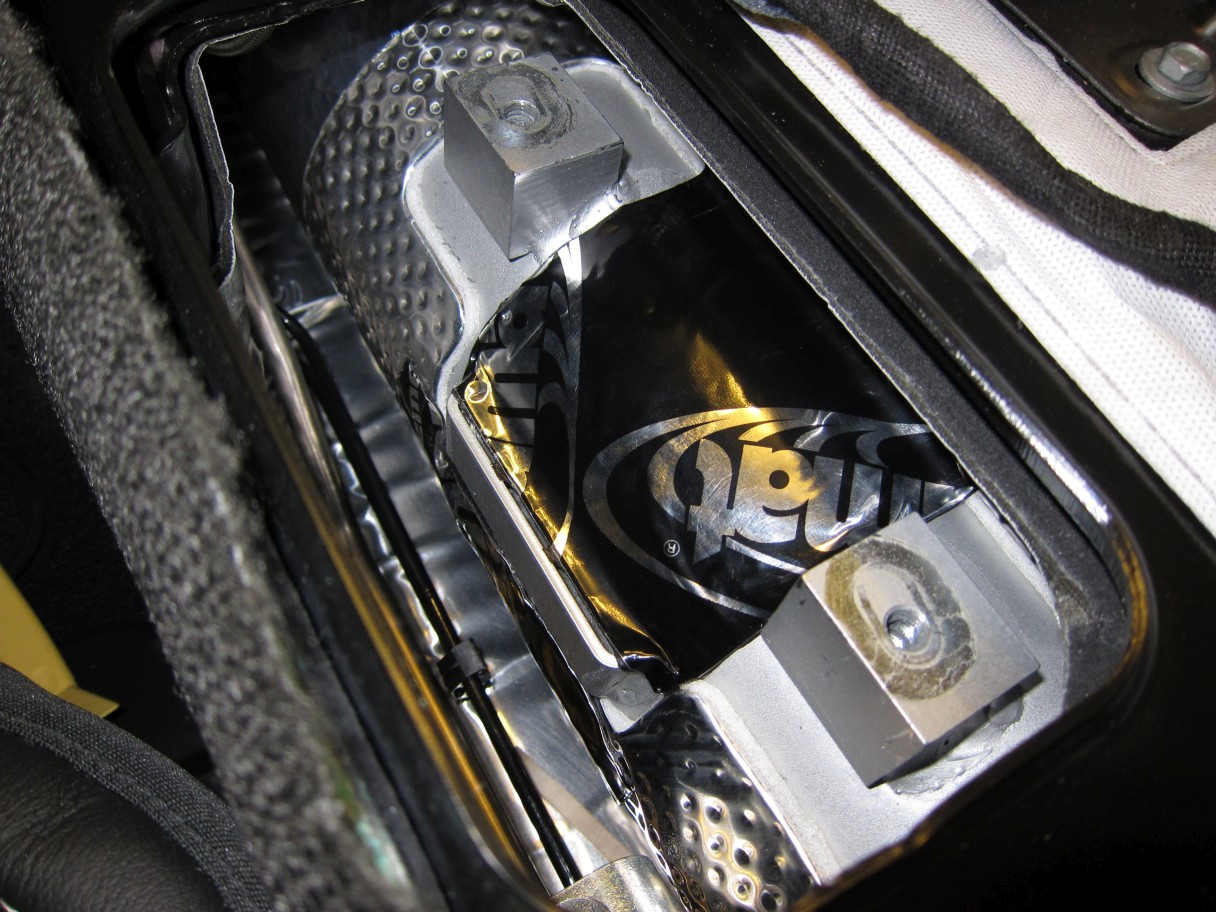
Once the bottom is firmly affixed, peel back the rest of the cover:
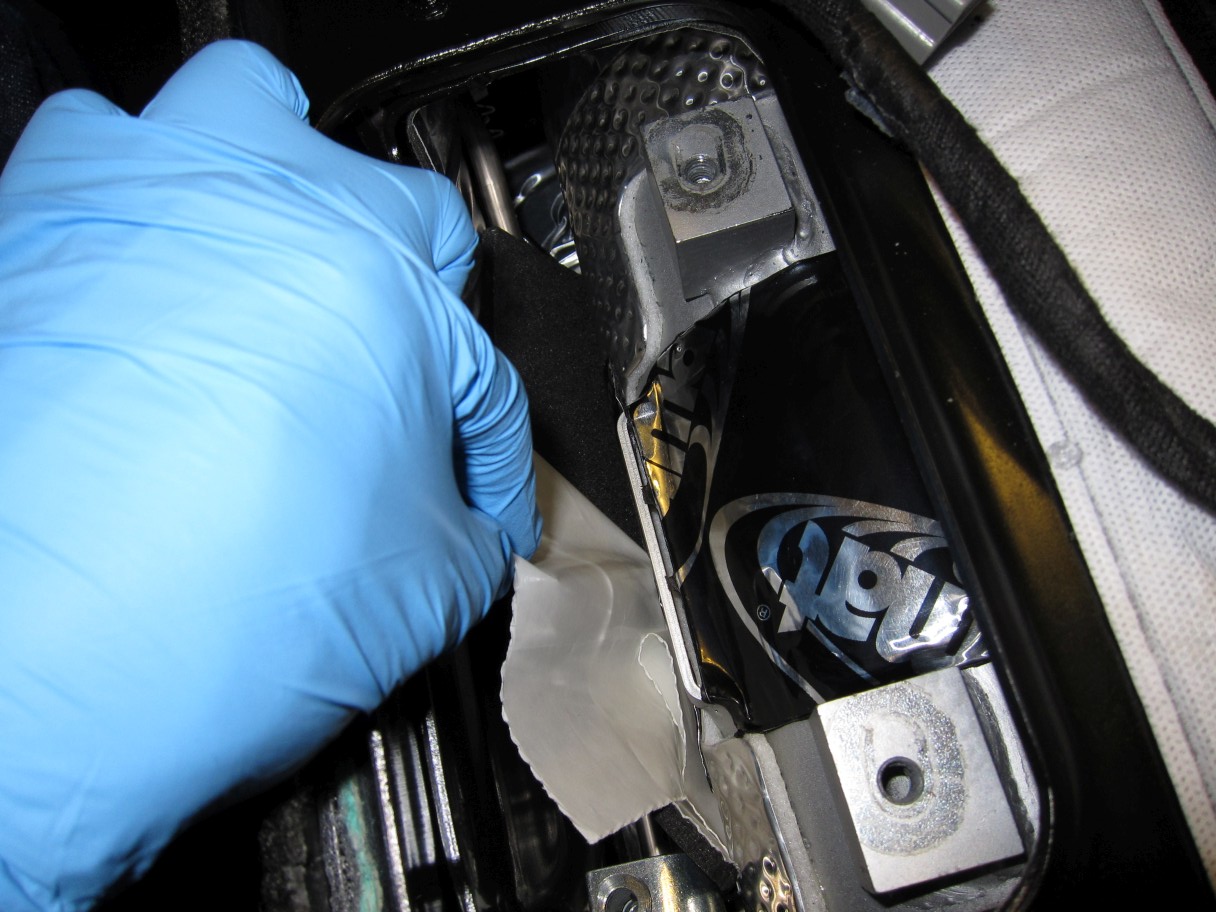
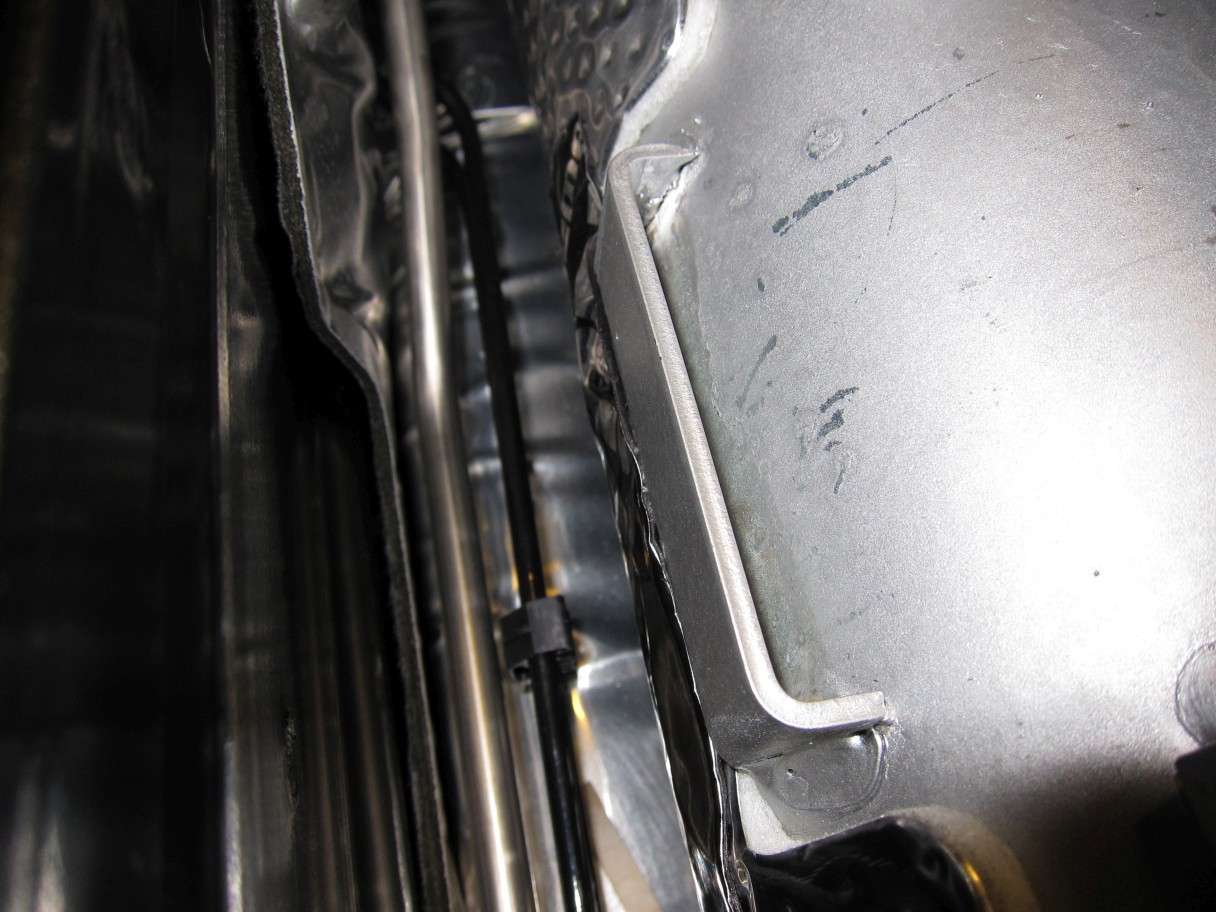
Same goes for the side:
I'll show you a few tips on application, though - they'll come in handy on the sections you have to put all the way down low.
This part is notoriously annoying. Peel back a small amount of the backing before shoving the piece under the torque tube:
Once the bottom is firmly affixed, peel back the rest of the cover:
Same goes for the side: