
How to: Suede/microfiber interior conversion swap. Step by step with photos.
 08-24-2014, 07:30 PM
#1
Pro

Thread Starter
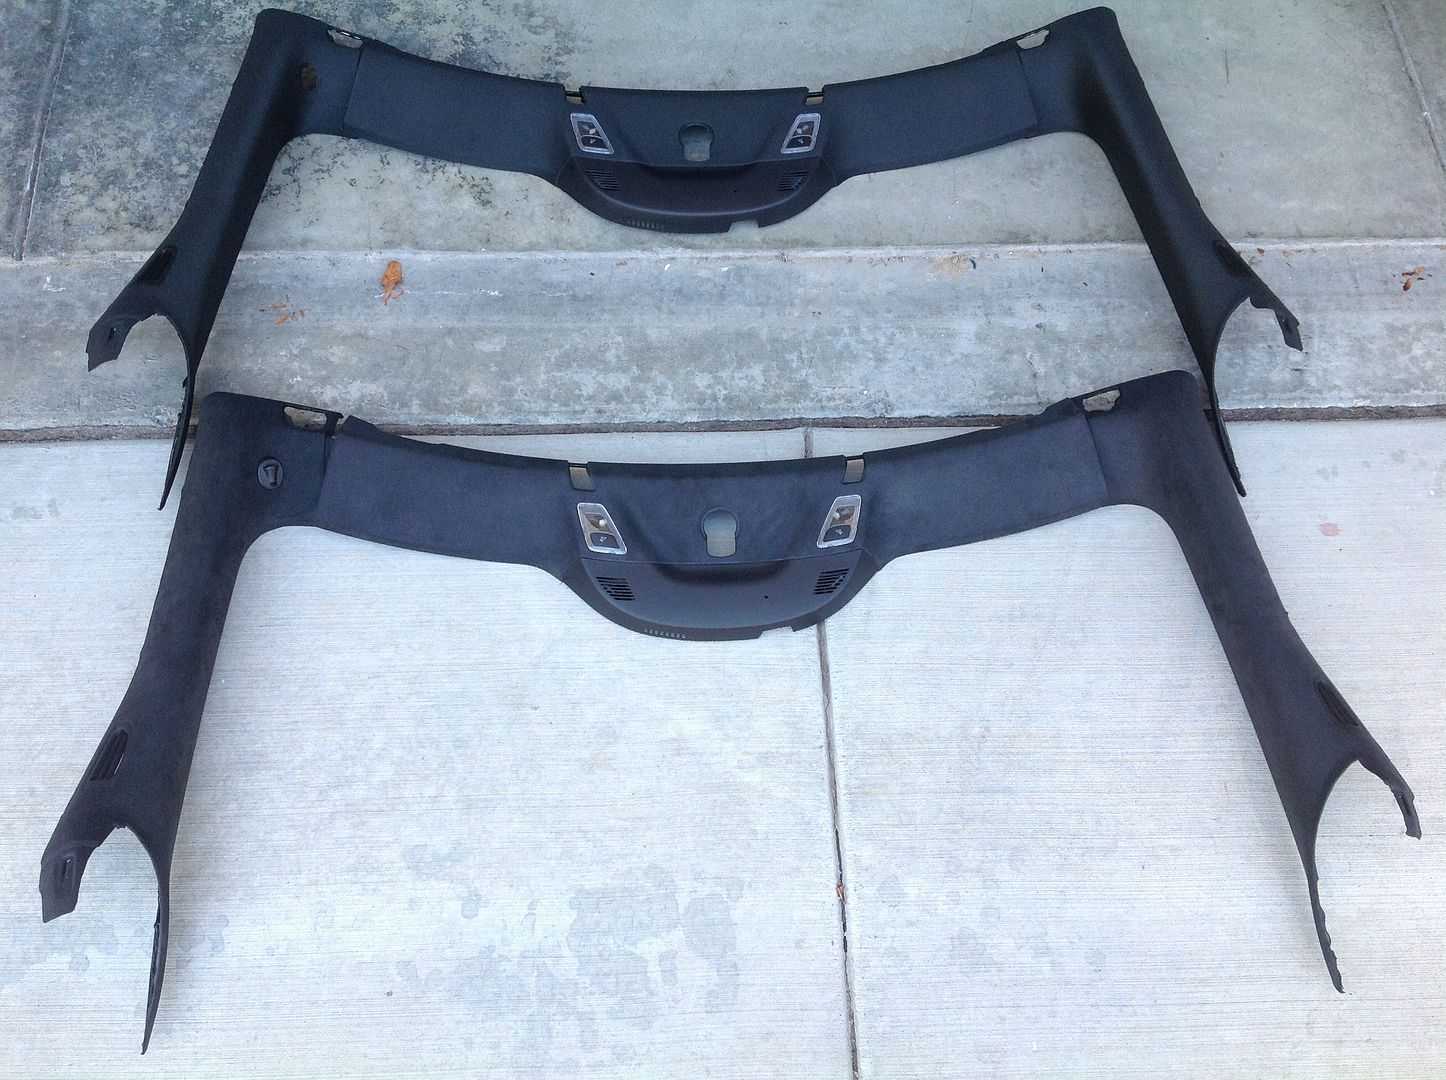
The suede microfiber was not available when I ordered my car early last year so I ordered all the panels from my GM dealer to do a full swap. It is more expensive to buy all the the panel and just R&I them. The bonus is the job can be in done in 2 hours or less and then you can sell all the stock panels to someone that wants to wrap them in a different color or suede. You also don't have to take you car to a messy glue filled upholstery shop.
These part numbers are for black suede / microfiber
22961178 headliner
23201107 shift boot
22956927 left A-pillar
22956928 right A-pillar
22936955 front header panel
23148813 left sunvisor
23148811 right sunvisor
22826722 rear halo center panel
23176130 rear quarter window panel
23176131 rear quarter window panel
Tools needed:
Torx bit set
Tiny flat screwdriver and/or pick set (my preference)
Feeler gauge set
2- #1 flat blade screwdrivers
Plastic panel tools and/or panel popper tool
10mm socket and ratchet
Patience


Last edited by 48supertruck; 08-26-2014 at 12:11 AM.

The following 5 users liked this post by 48supertruck:
427C62013A (02-01-2019),
GTB/ZR-1 (01-26-2016),
IM4A2Z (08-07-2019),
NoSlipN (04-20-2016),
r00t61 (02-23-2016)
08-24-2014, 07:42 PM
#2


Good luck! I hope it's as easy as you anticipate.
Looking forward to the pics.
Looking forward to the pics.
Last edited by owc6; 08-24-2014 at 07:44 PM.
08-24-2014, 08:05 PM
#3
Pro
Thread Starter
First we need to remove the sunvisor retainers. The covers that hide the screws are a very close tolerance plastic door. I used a .010 feeler gauge to pry the door open on the left and I had to use a .006 on the right to get the door open. The feeler gauge left no marks in the plastic. Then remove the screws with a T15 torx bit.

 08-24-2014, 08:12 PM
#4
Pro
Thread Starter
Next we are going to remove the sunvisors. Pop the plastic covers off with a pick or small screwdriver and remove the three torx screws. Then unplug the wiring. Repeat for both sides.


Last edited by 48supertruck; 08-24-2014 at 08:36 PM.
08-24-2014, 08:34 PM
#5
Pro
Thread Starter
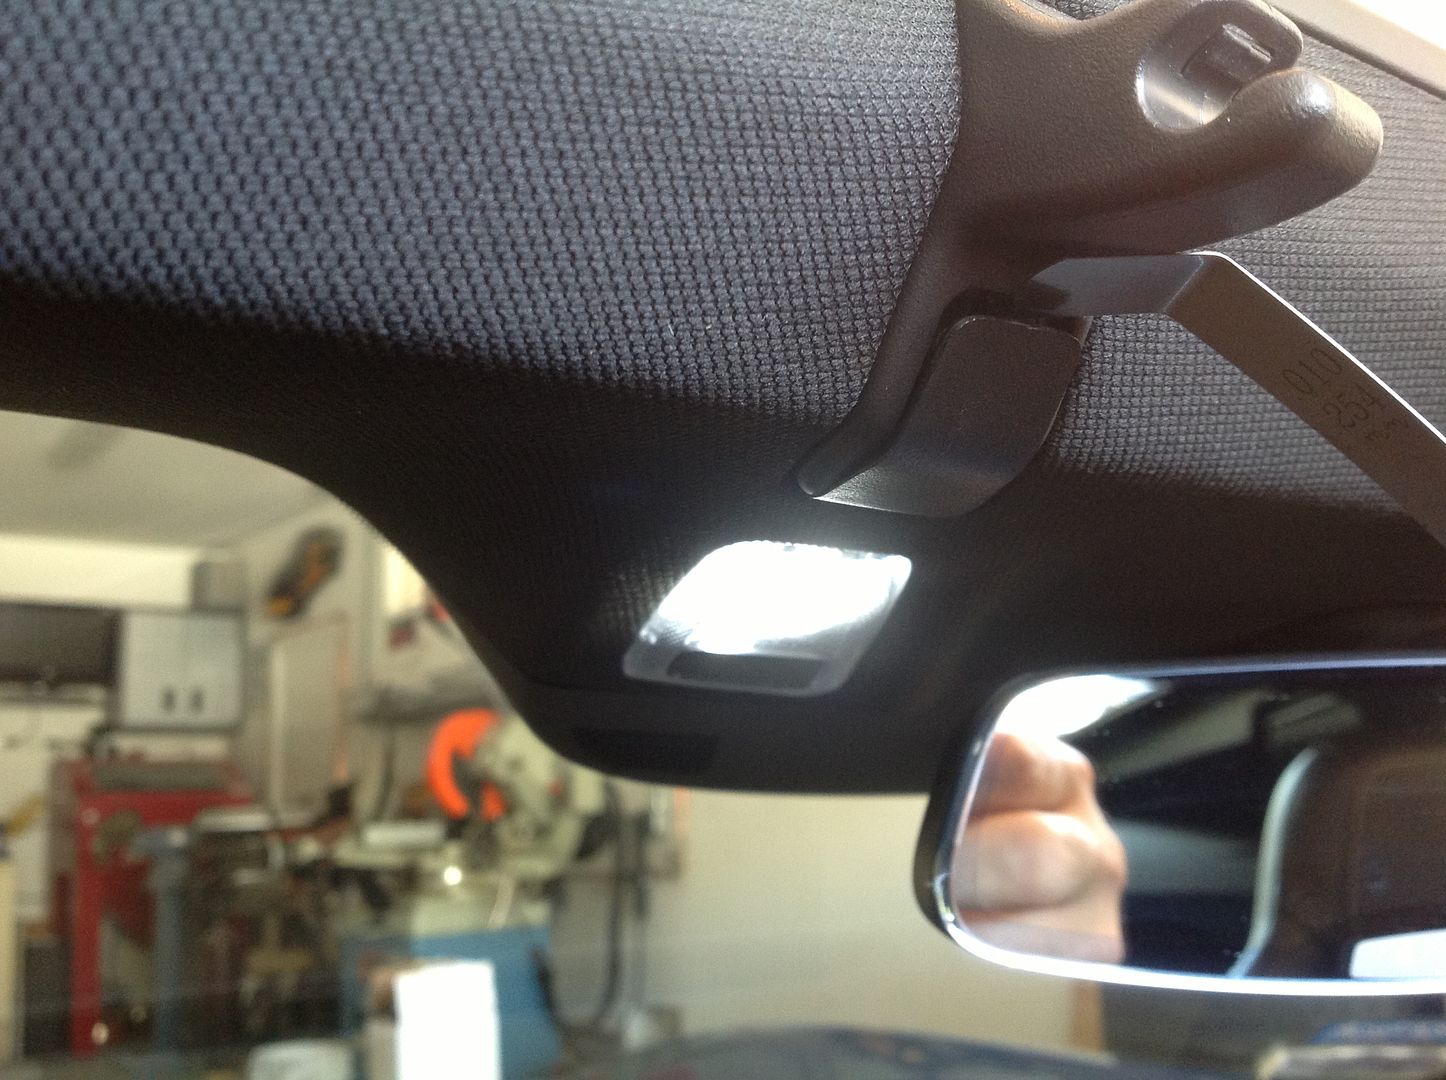
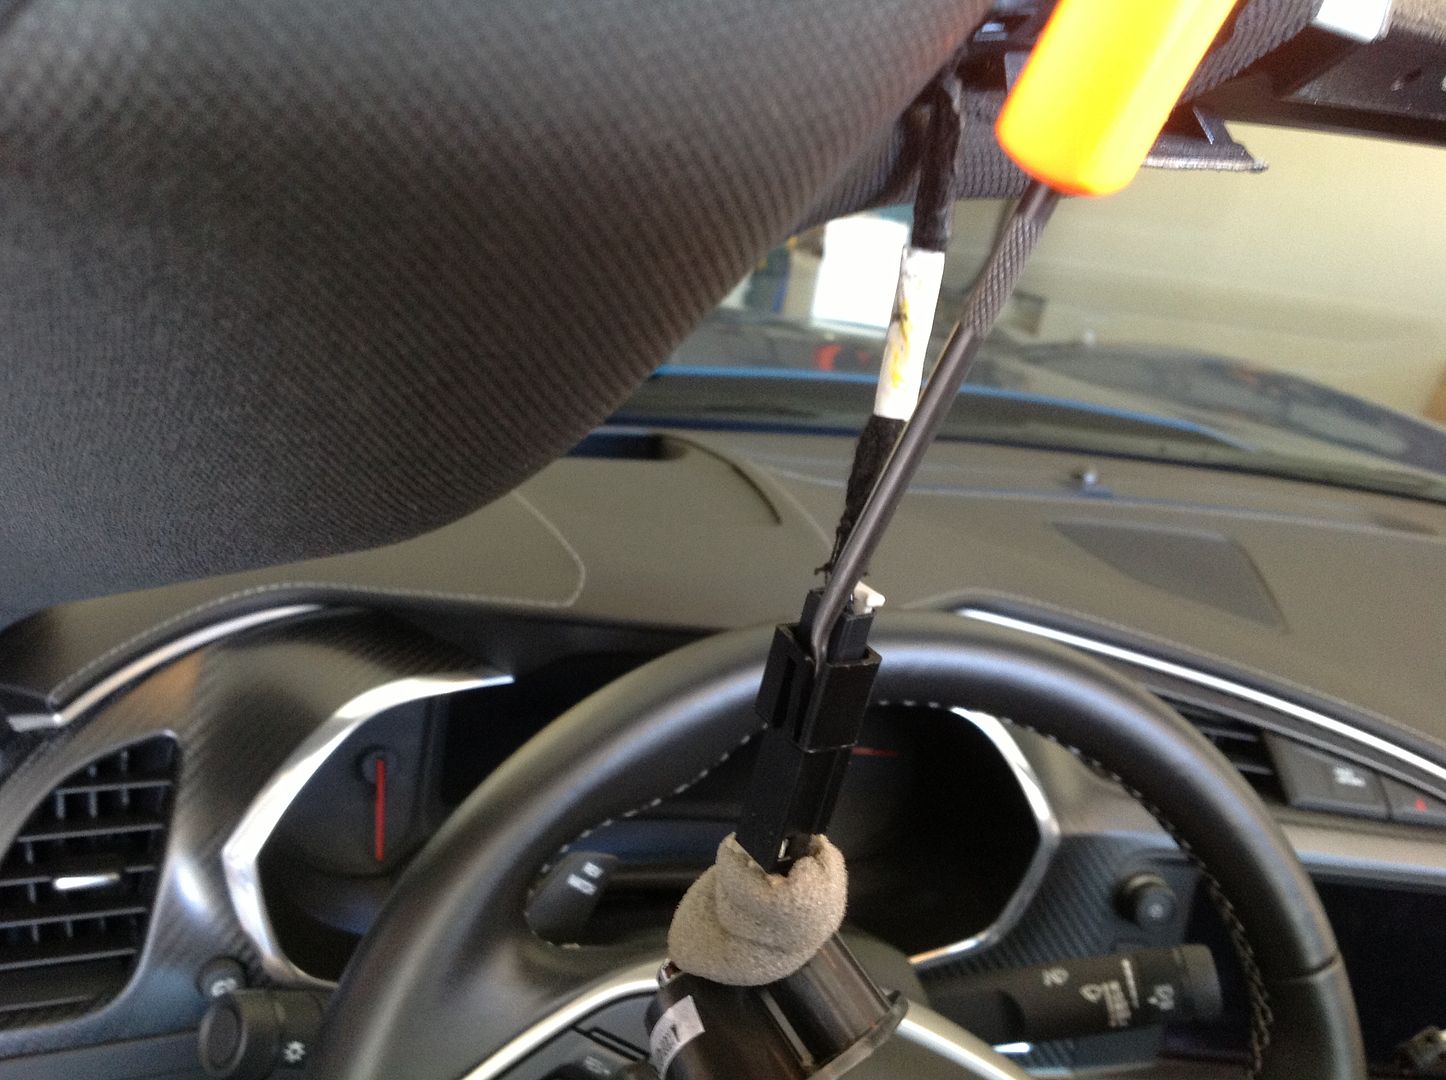
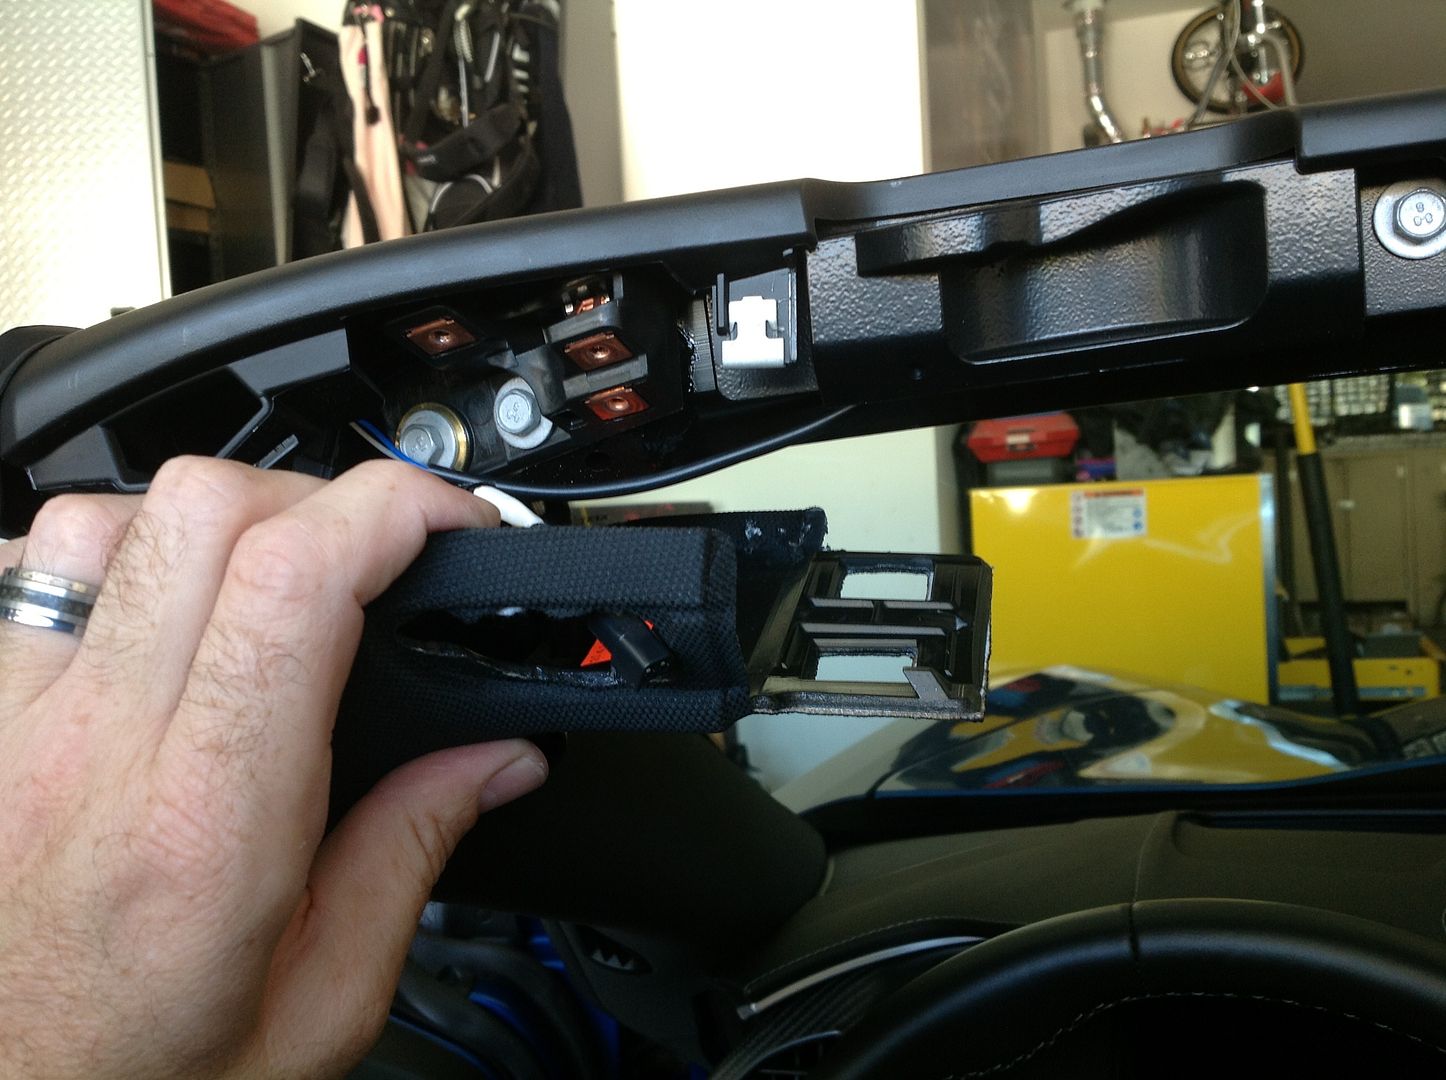
Now the mirror needs or be removed and this one is tricky. First you need to pop the plastic cover off the backside. I used the .010 feeler gauge on this little cover also. When you get the cover off, rotate the mirror all the way up towards the sky. This will keep you from scratching the plastic header panel during removal and reassembly. Trust me.
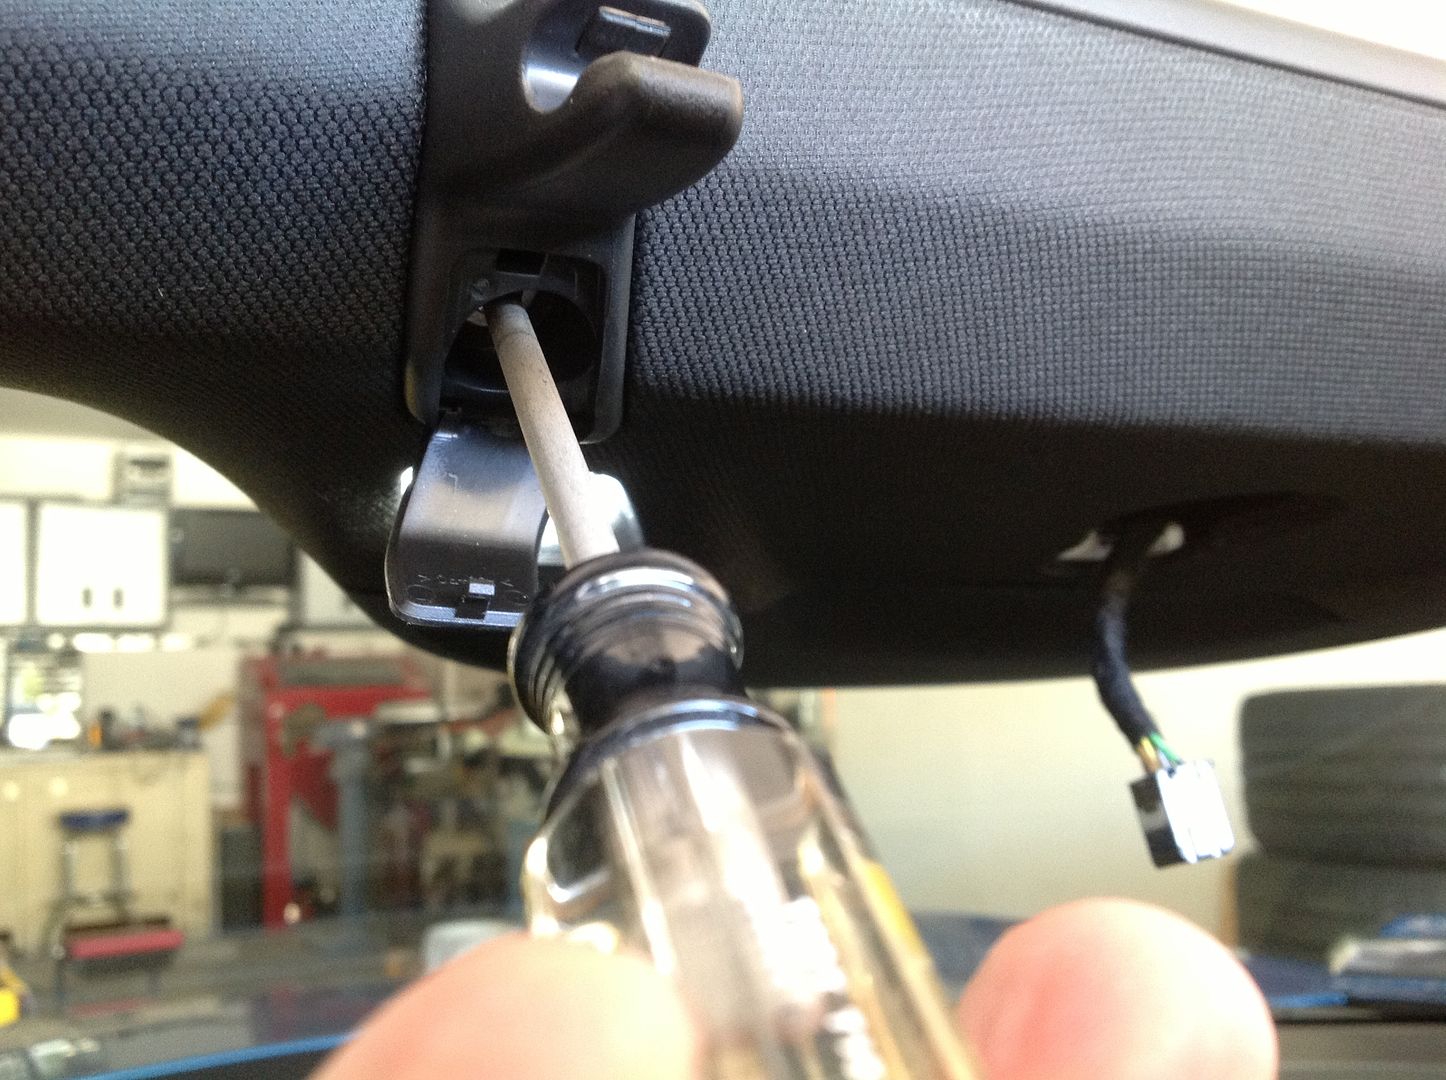
Either insert 2- #1 flat blade screwdrivers in the holes on the mirror stem or I happened to find one that fit all the way through. The mirror twists off. You are going to rotate the entire mirror and stem counter clockwise if you looking up at it. In my photo, I was pushing the screwdriver towards the windshield. Are you confused yet? Do not push on the mirror or you are liable to damage it. It did not twist very easy so I needed to put some effort into it to get it to turn. It rotated about 45 degrees before it released from the header. Then unhook the wiring plug.
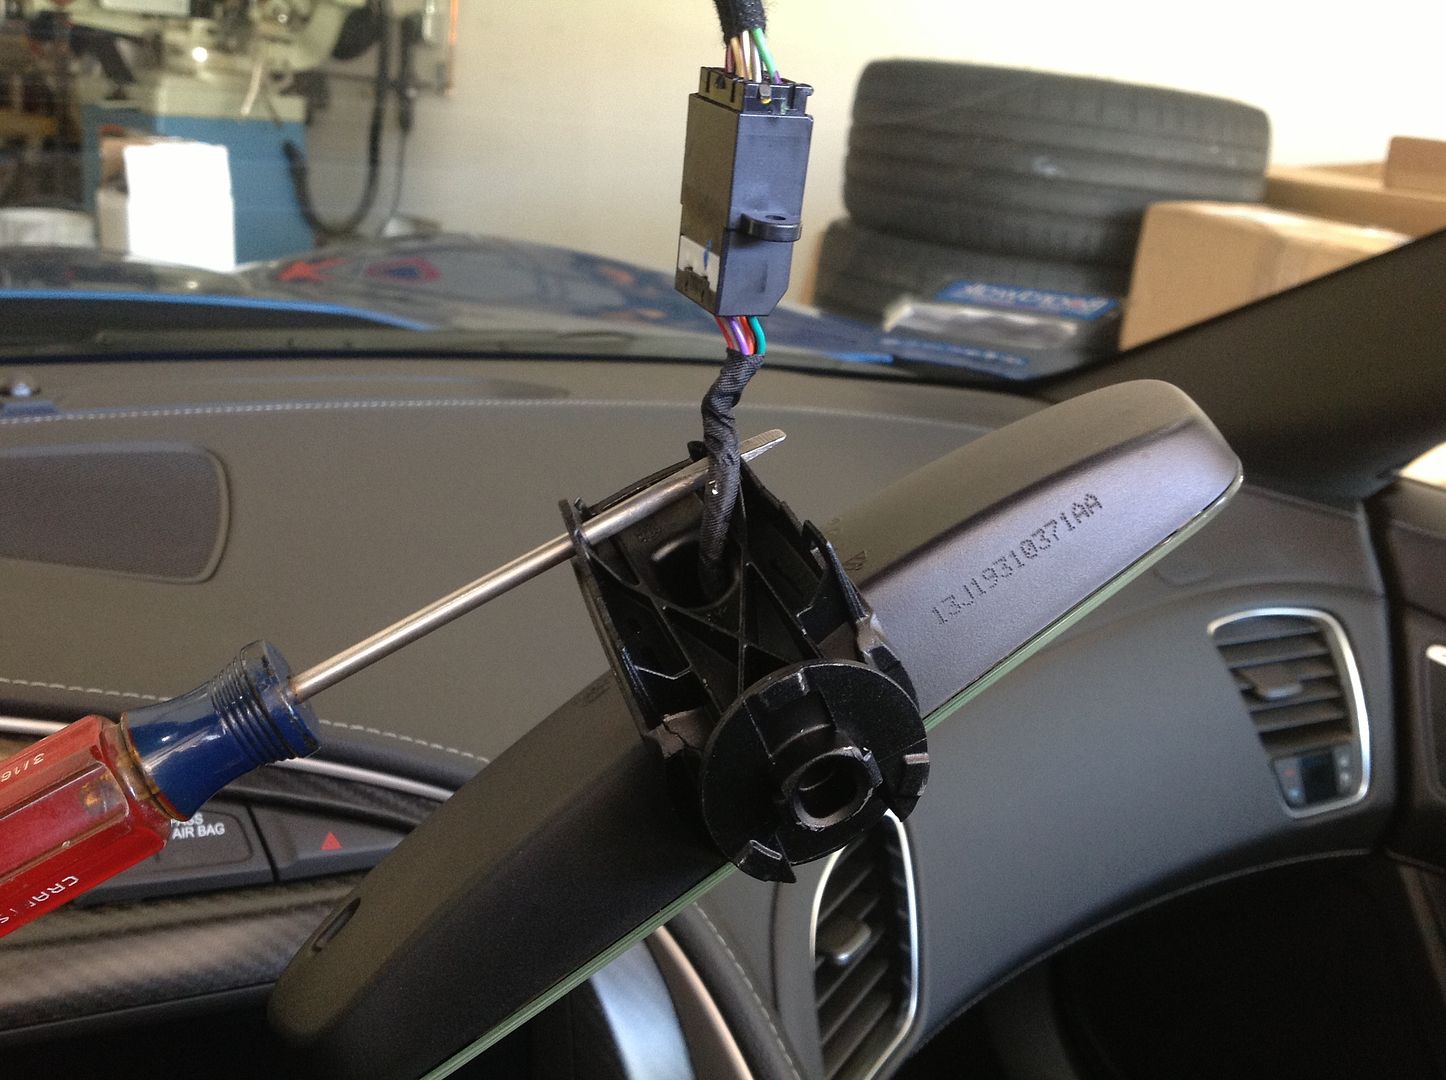

Either insert 2- #1 flat blade screwdrivers in the holes on the mirror stem or I happened to find one that fit all the way through. The mirror twists off. You are going to rotate the entire mirror and stem counter clockwise if you looking up at it. In my photo, I was pushing the screwdriver towards the windshield. Are you confused yet? Do not push on the mirror or you are liable to damage it. It did not twist very easy so I needed to put some effort into it to get it to turn. It rotated about 45 degrees before it released from the header. Then unhook the wiring plug.

 08-24-2014, 08:48 PM
#6
Pro
Thread Starter
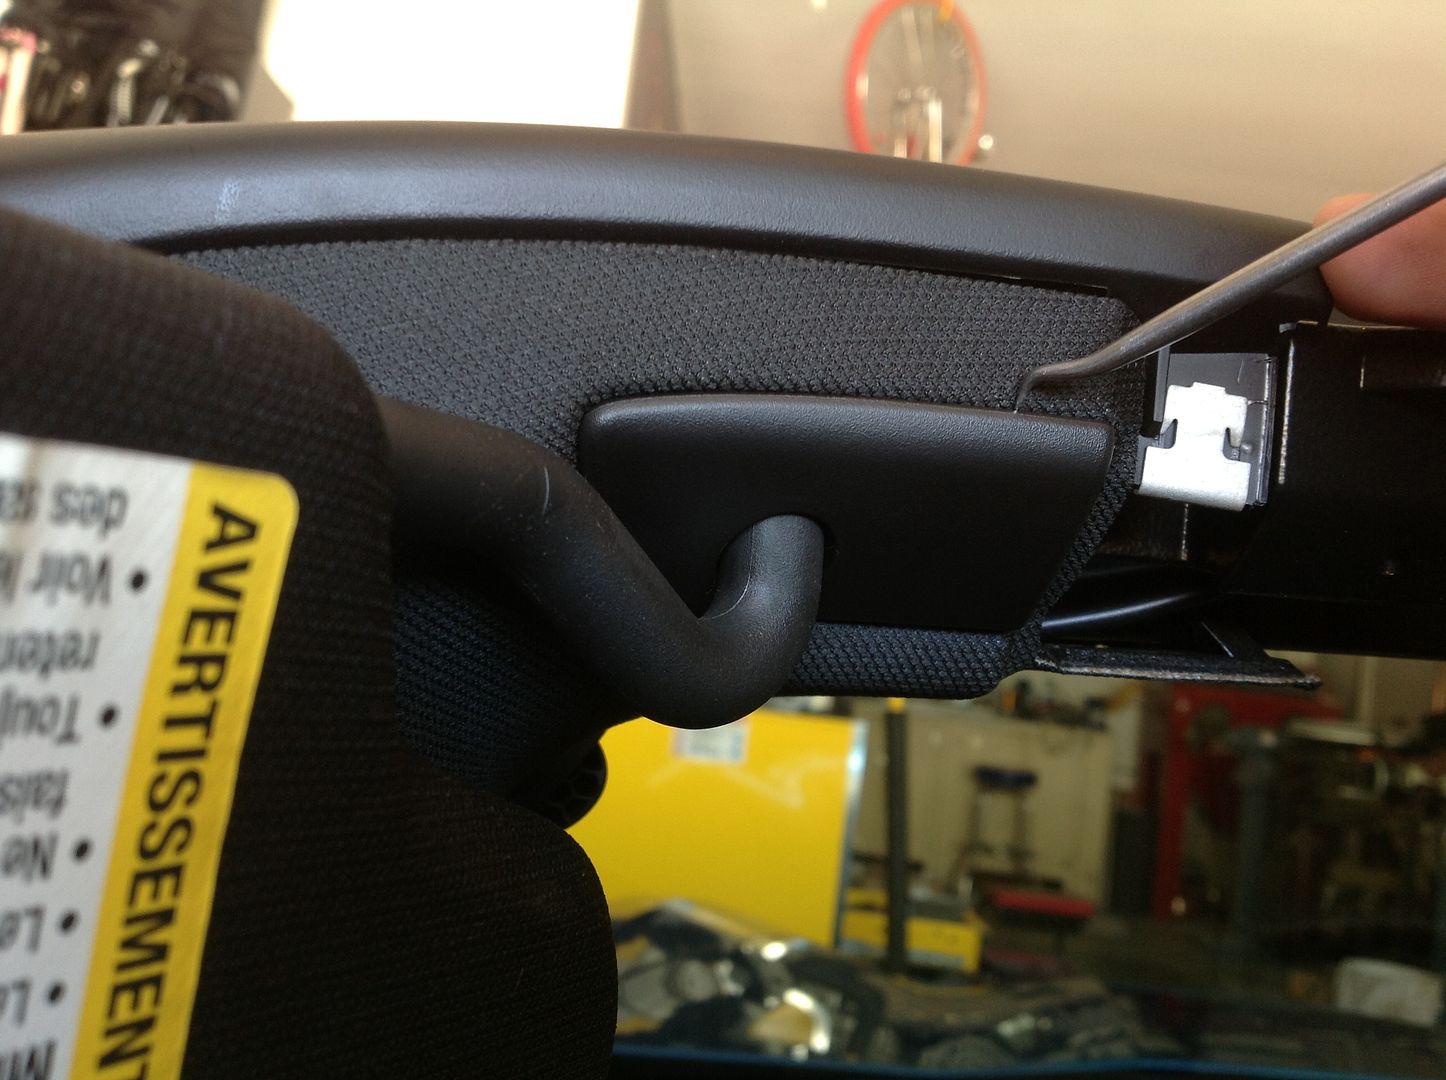
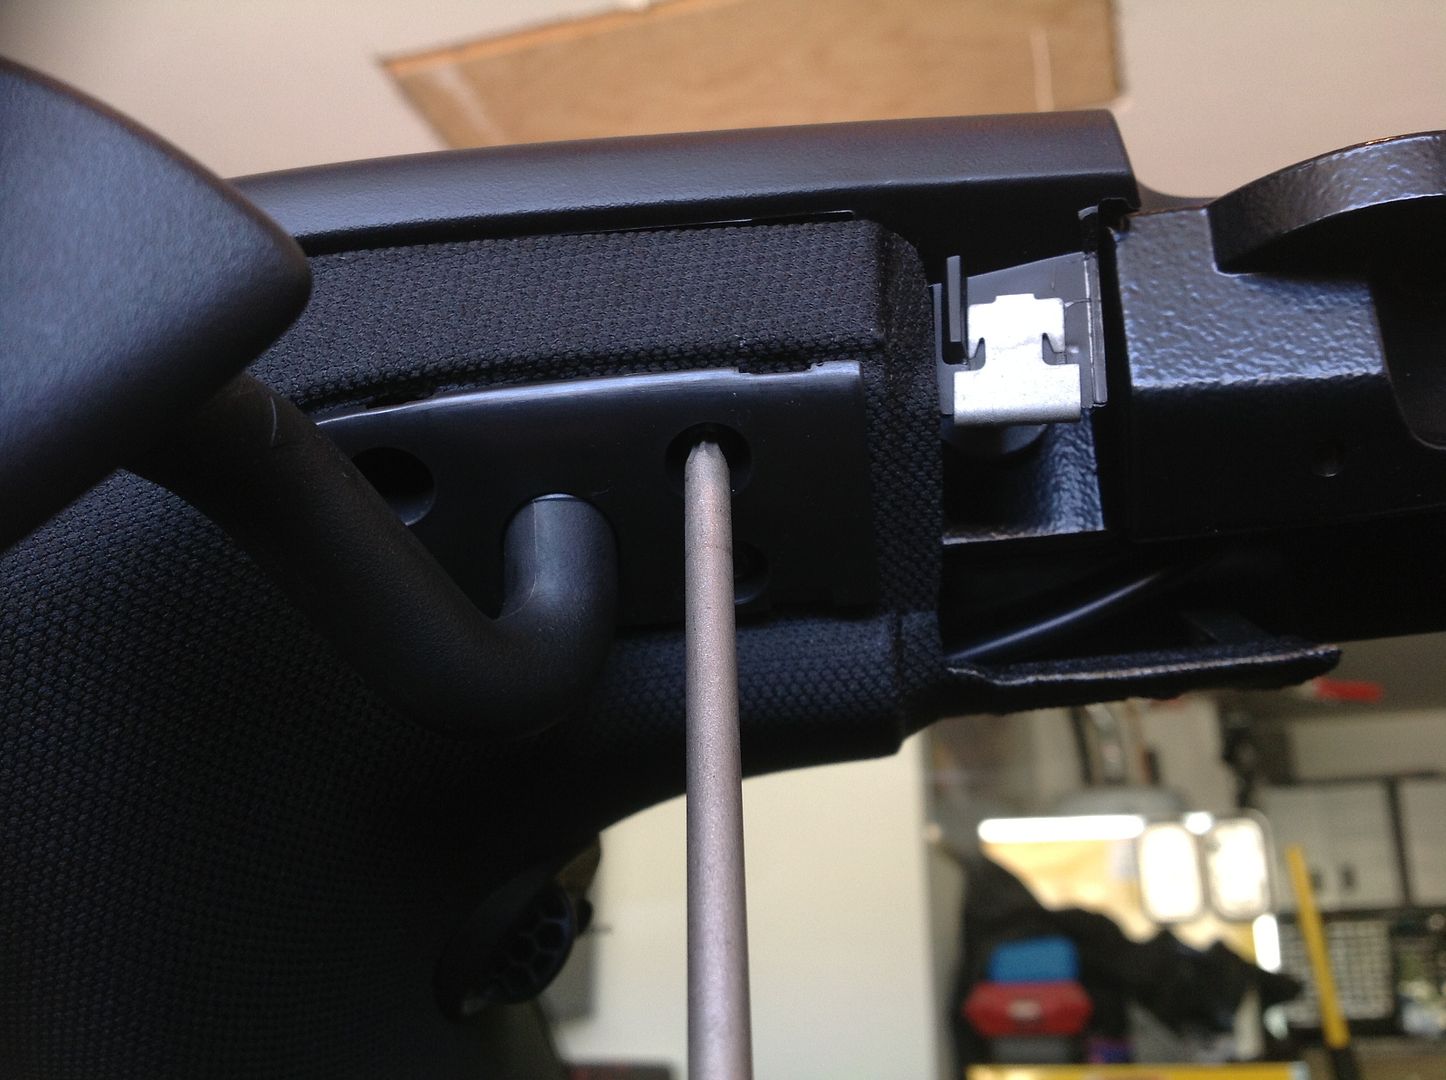
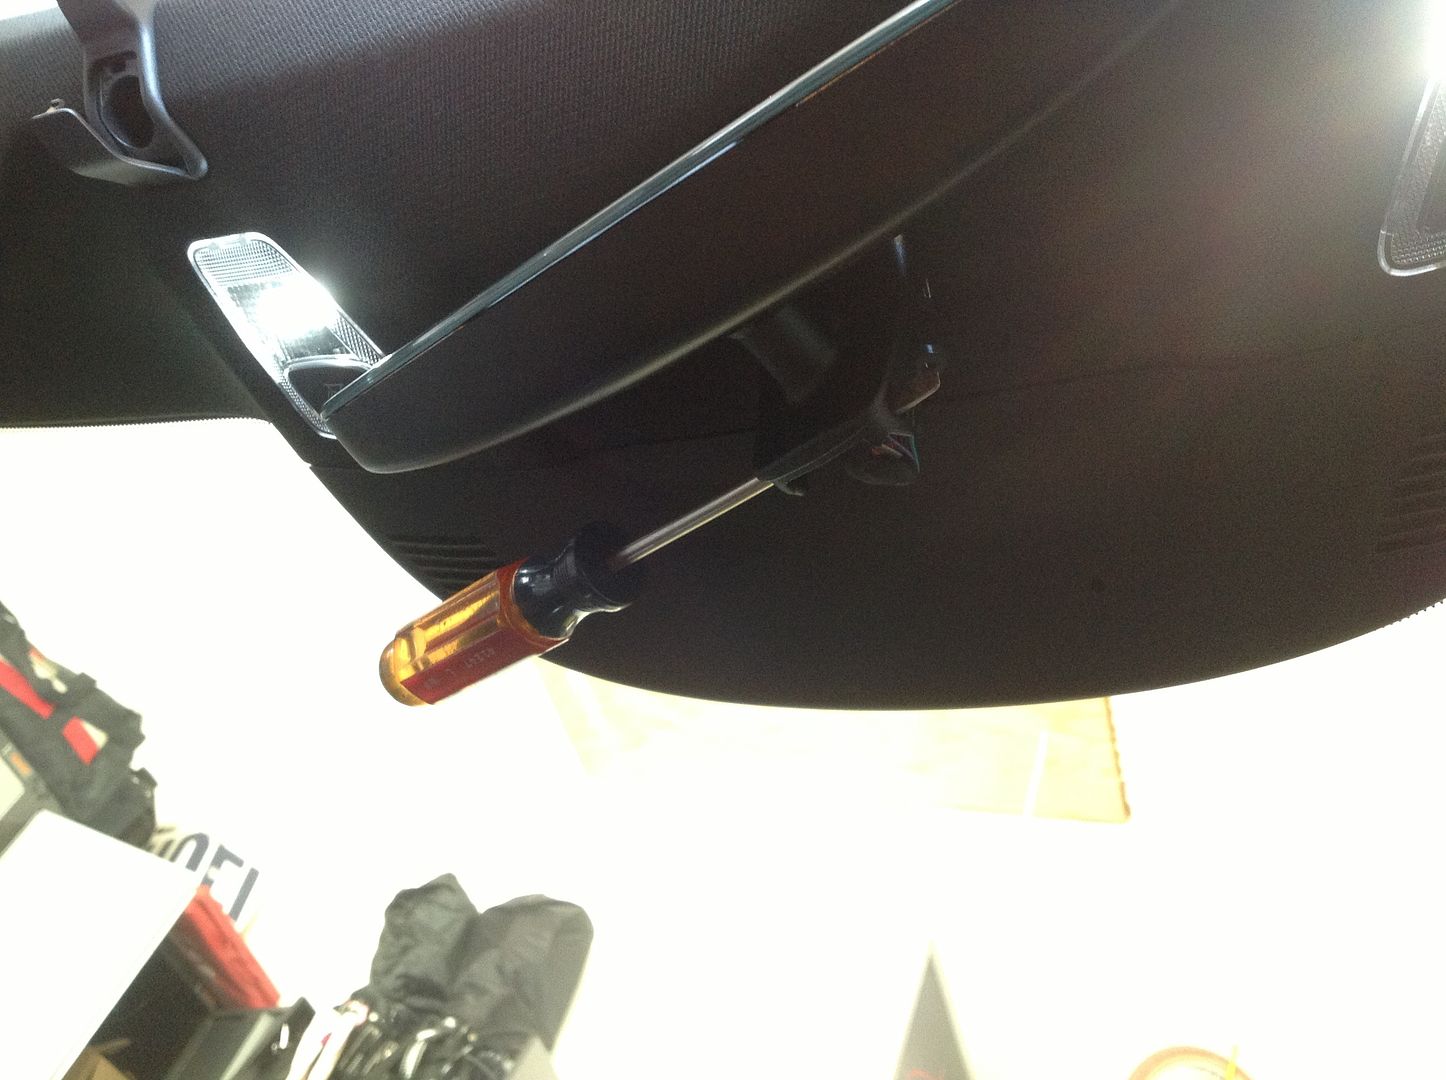
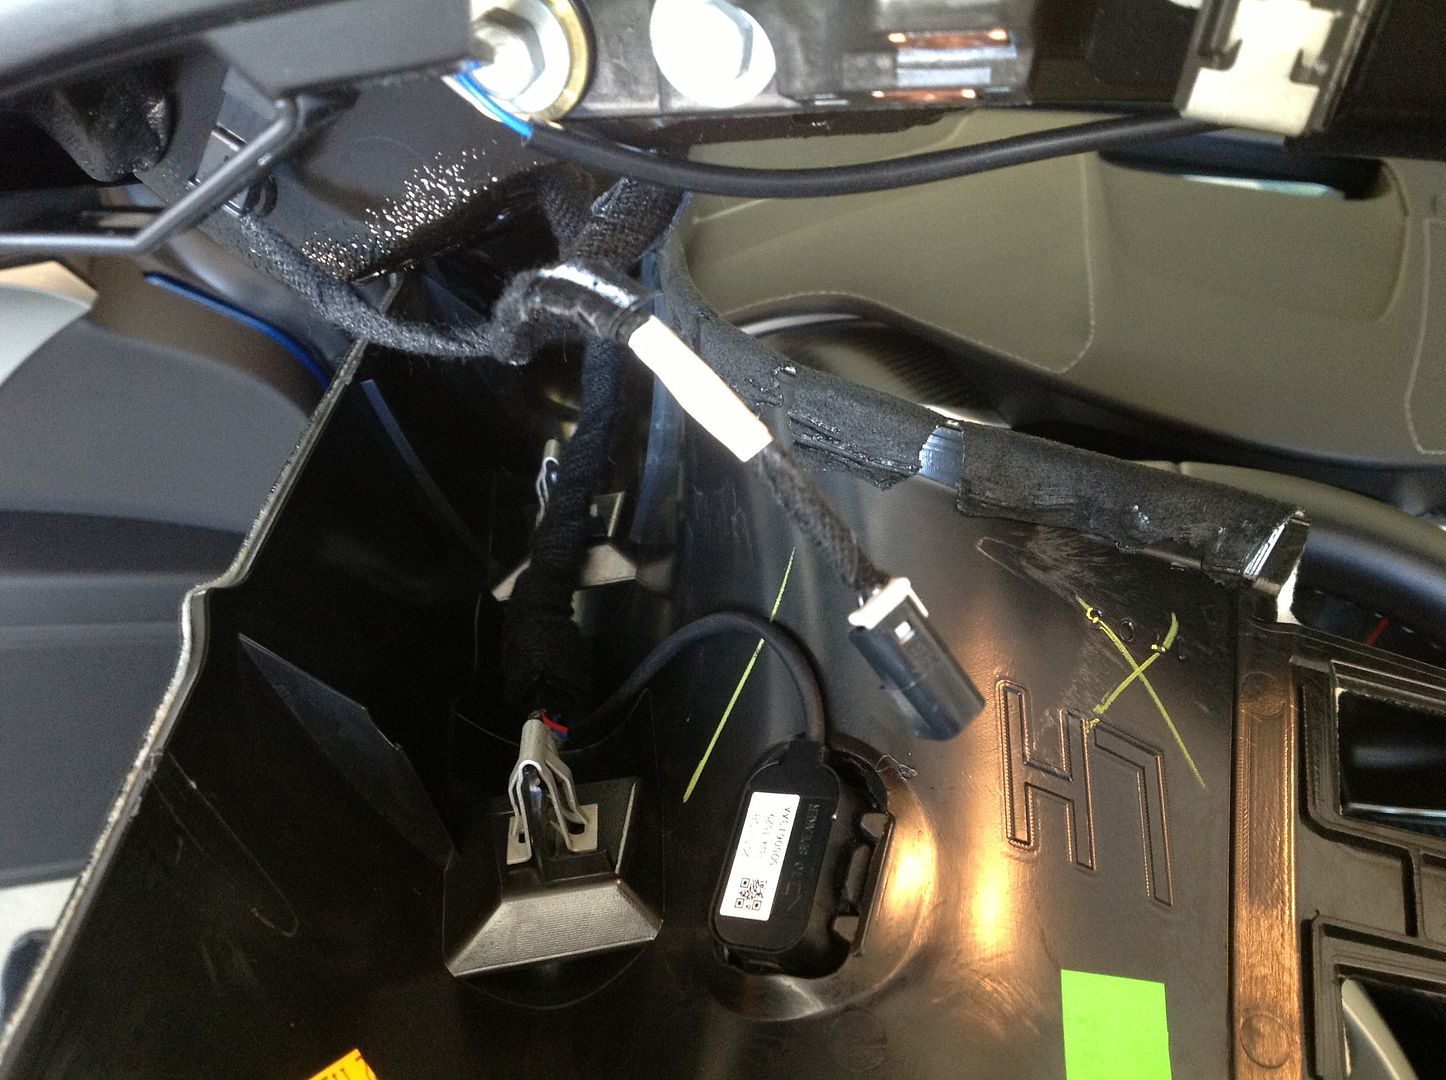
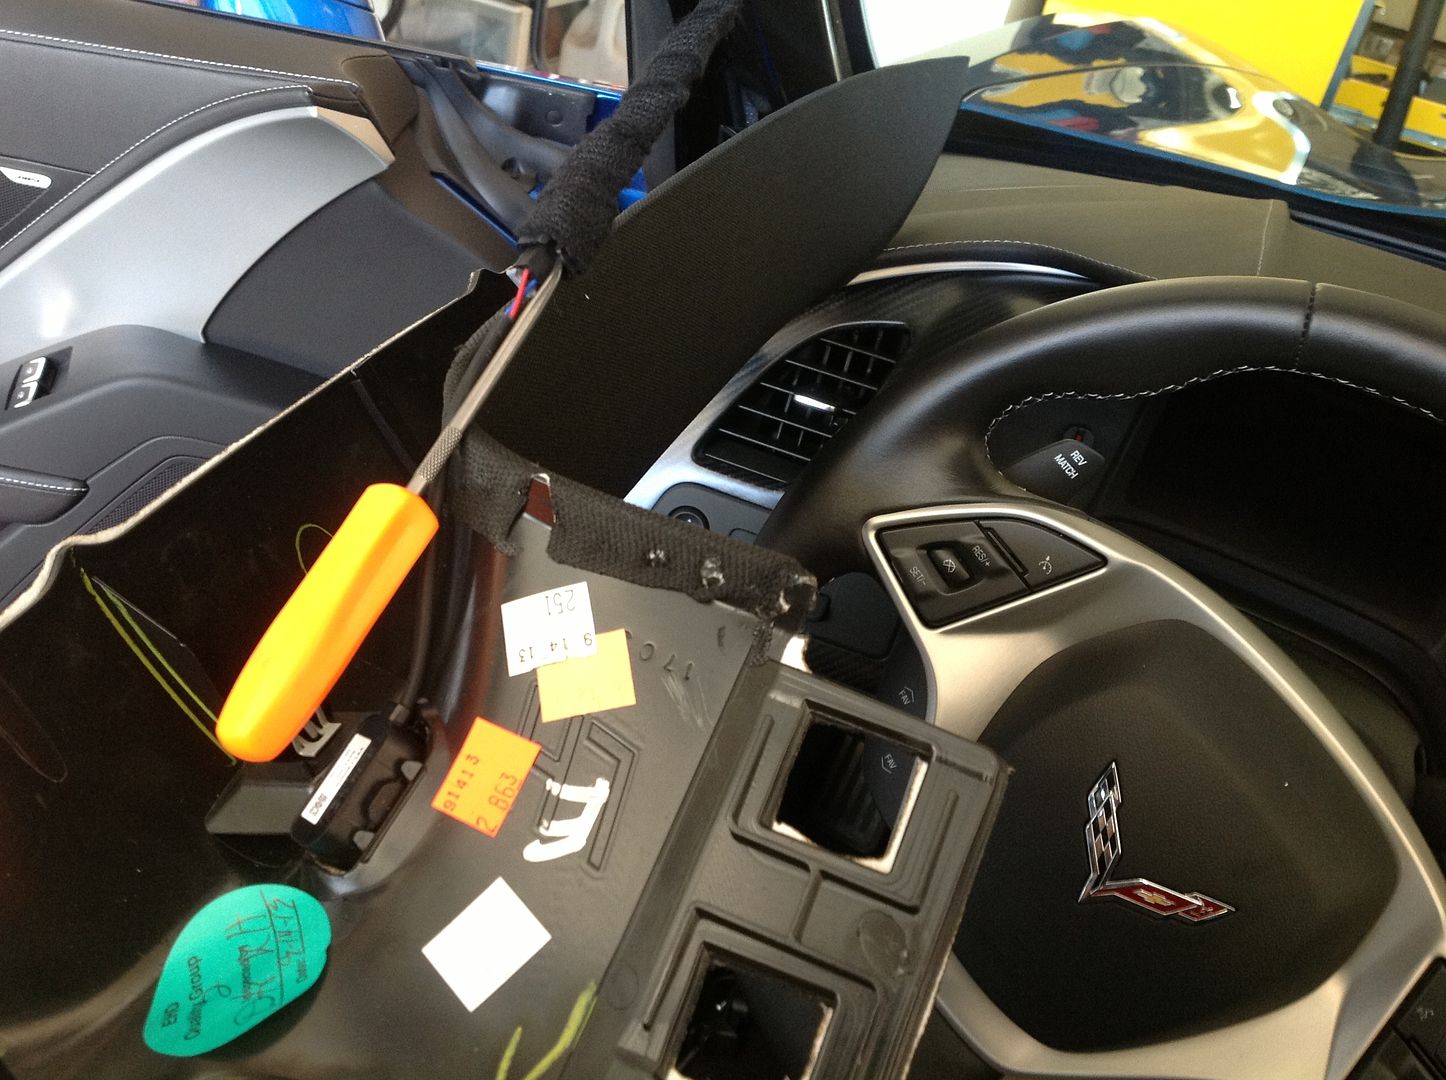
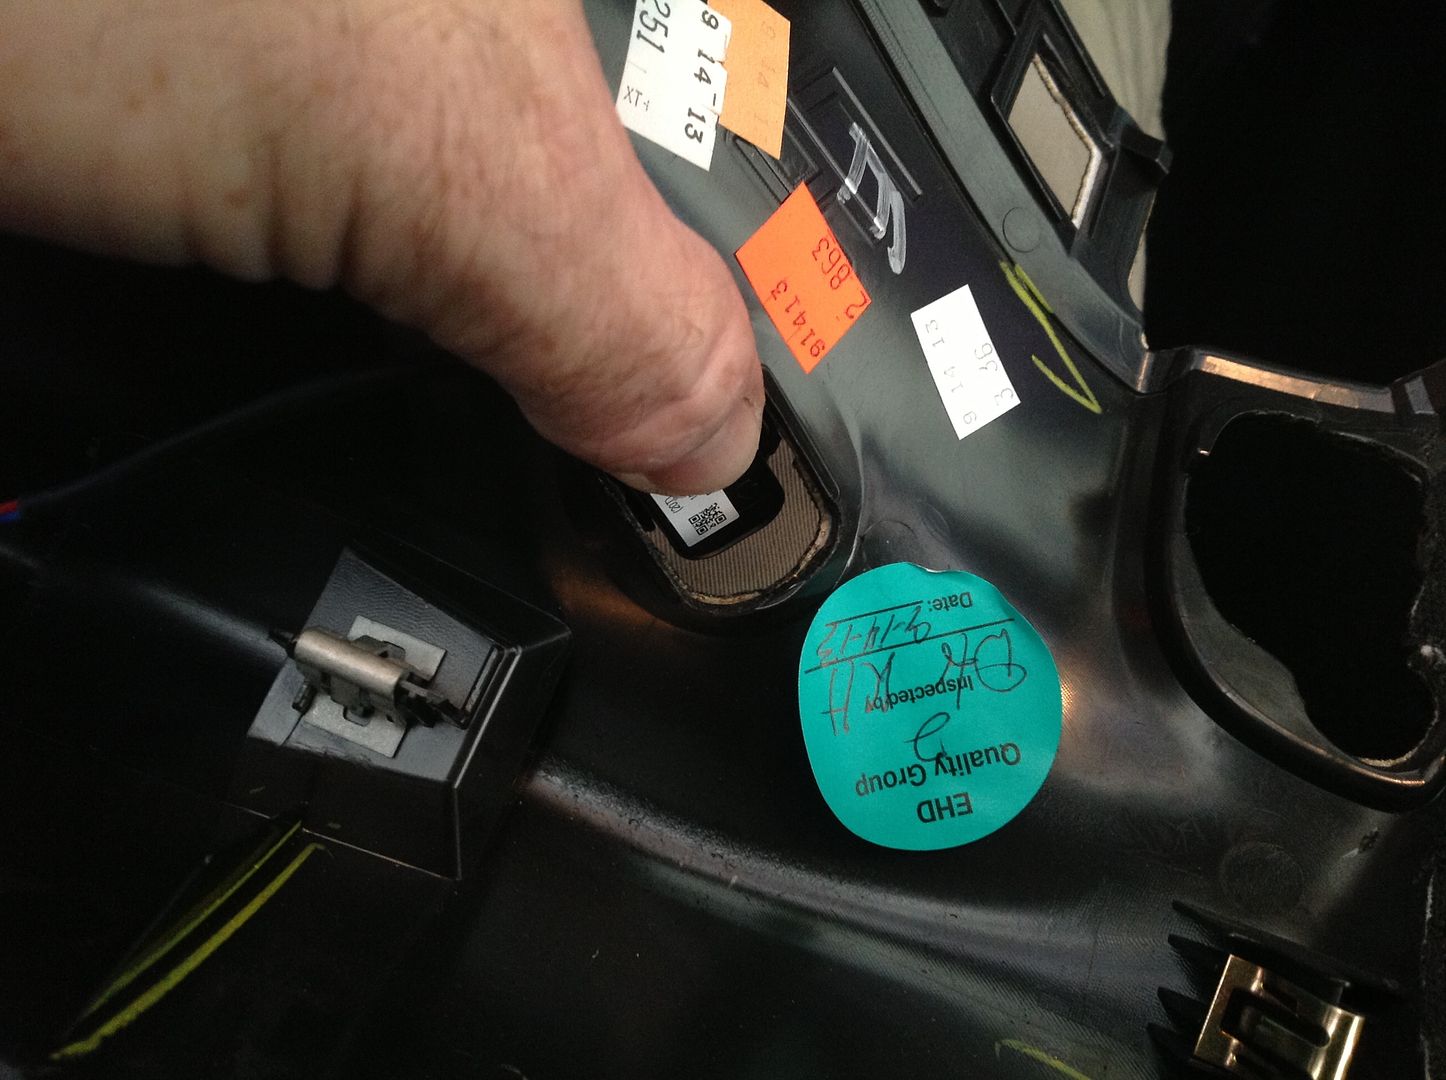
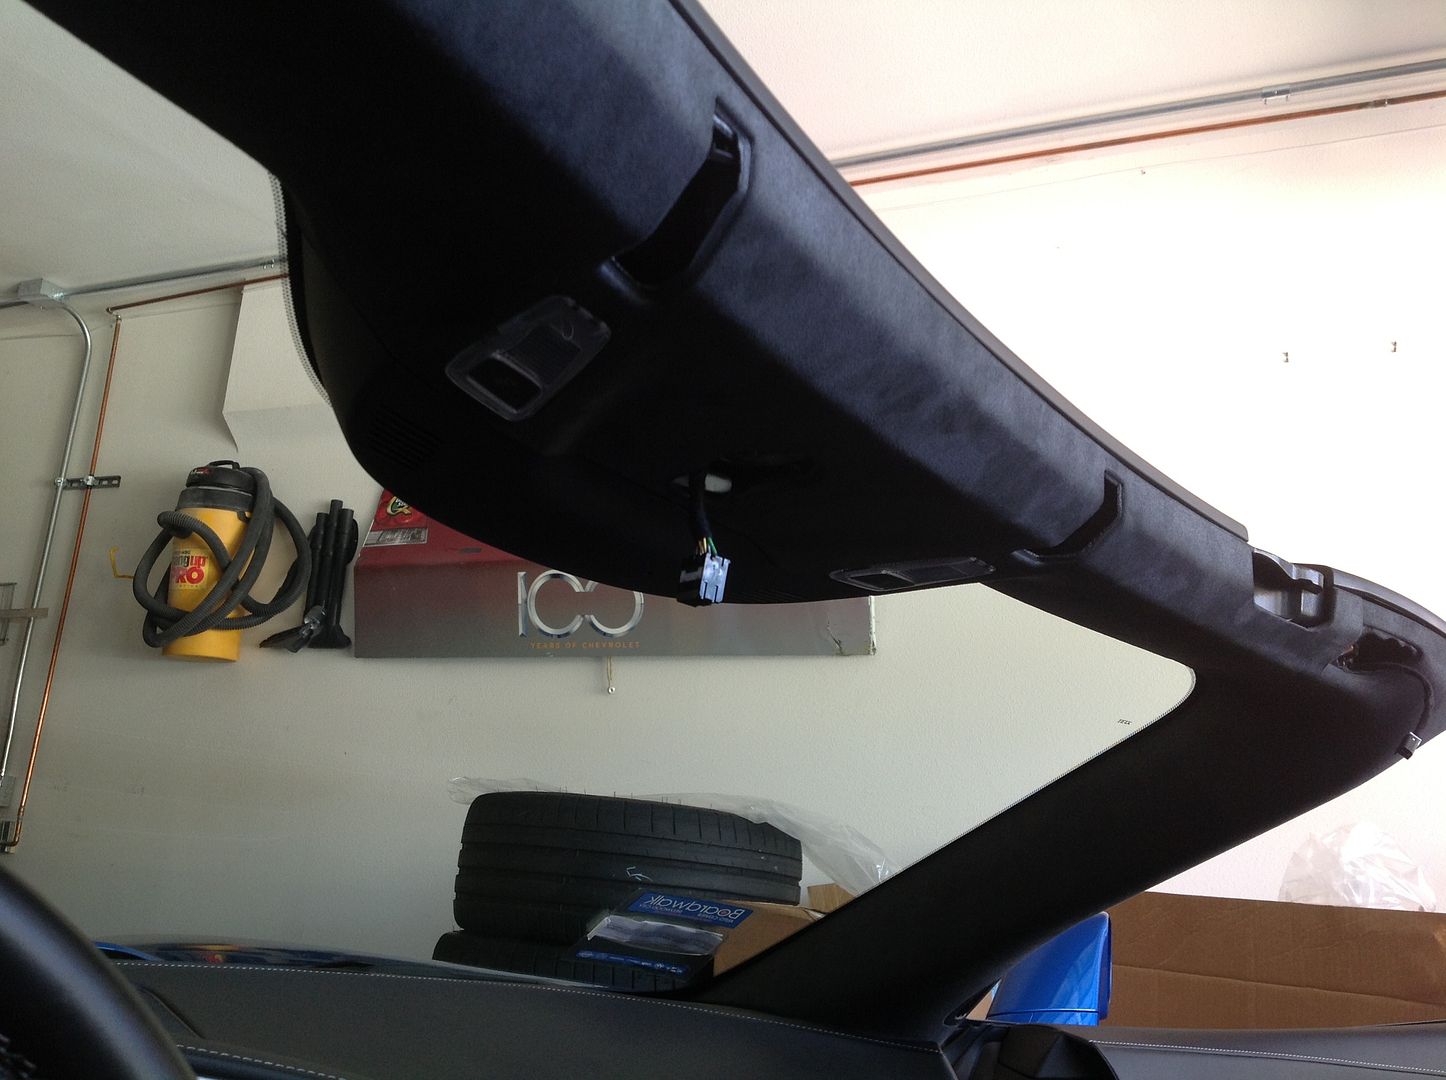
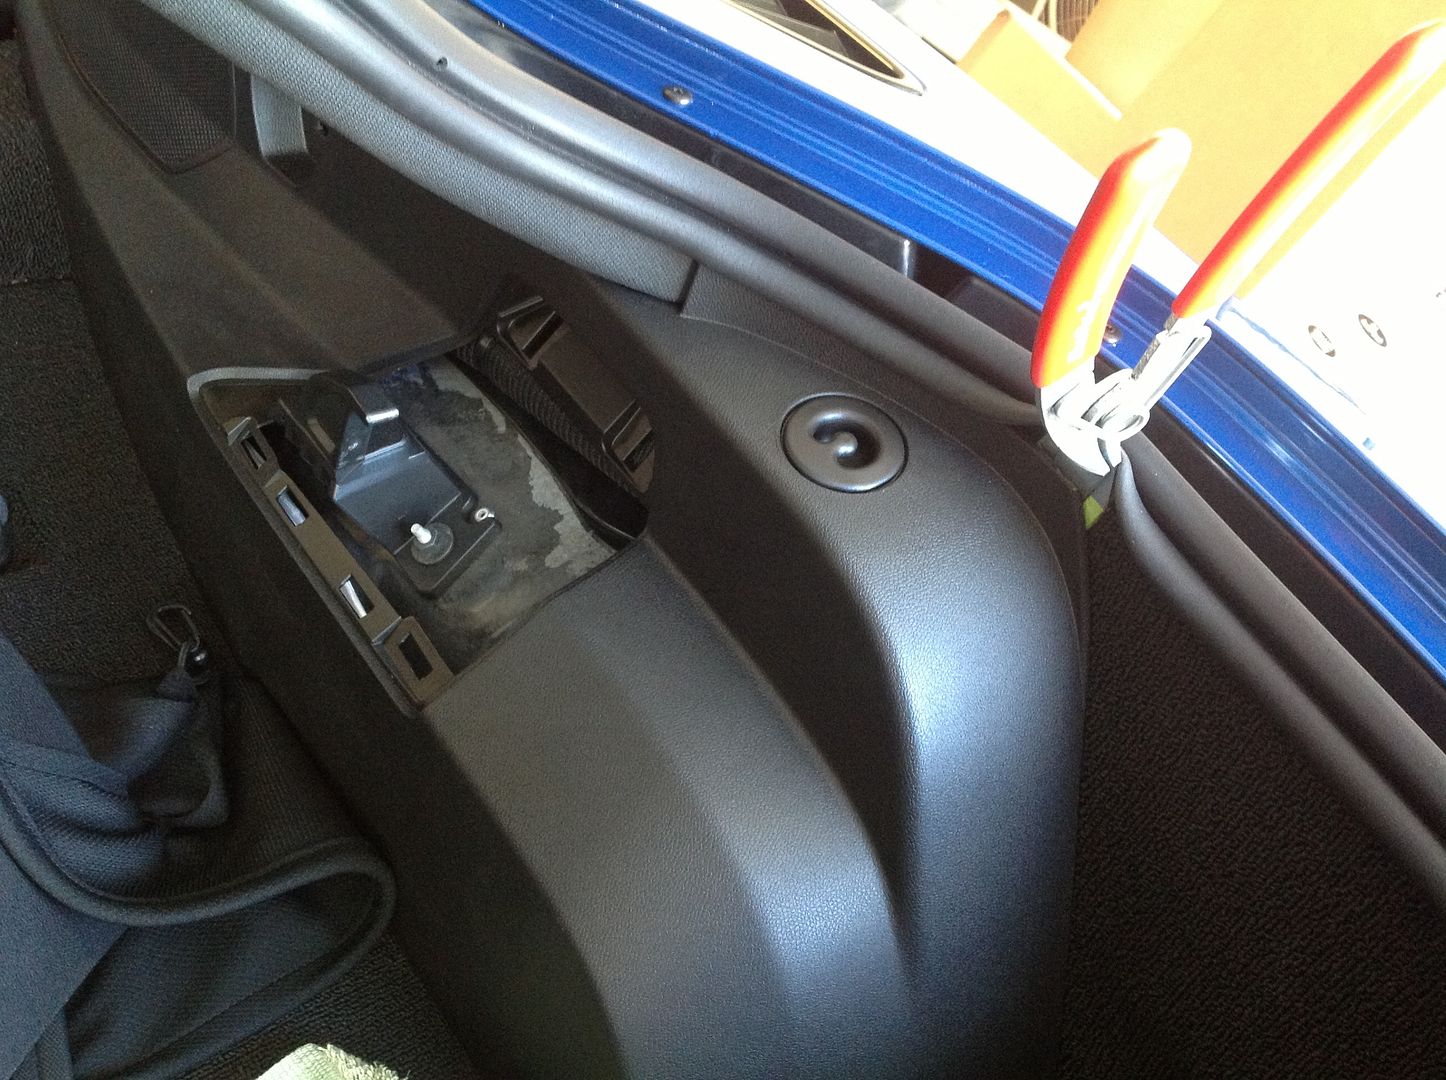
Pop the center header trim off. It is all snap clips.
There is a "whatchamacallit do hickey" that needs to be removed and transferred to the new header panel. I have no idea what it is. It is all snapped in, so you just need to pry all the clips to release the box, wiring and speakers/microphones. Unhook the map light wiring also.
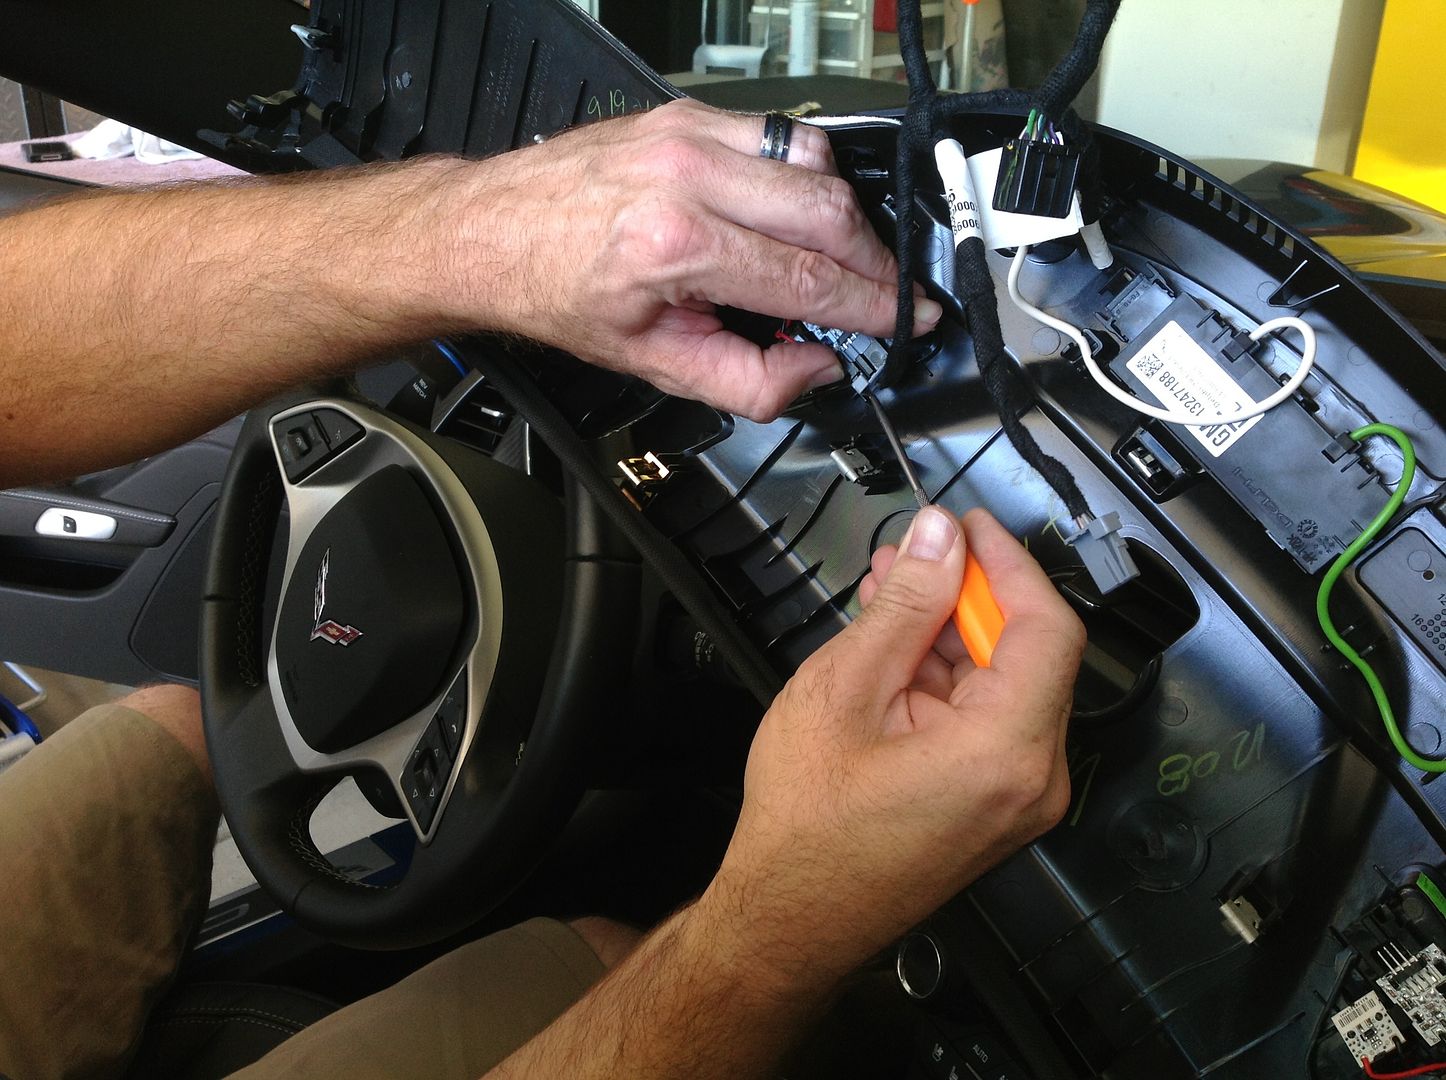
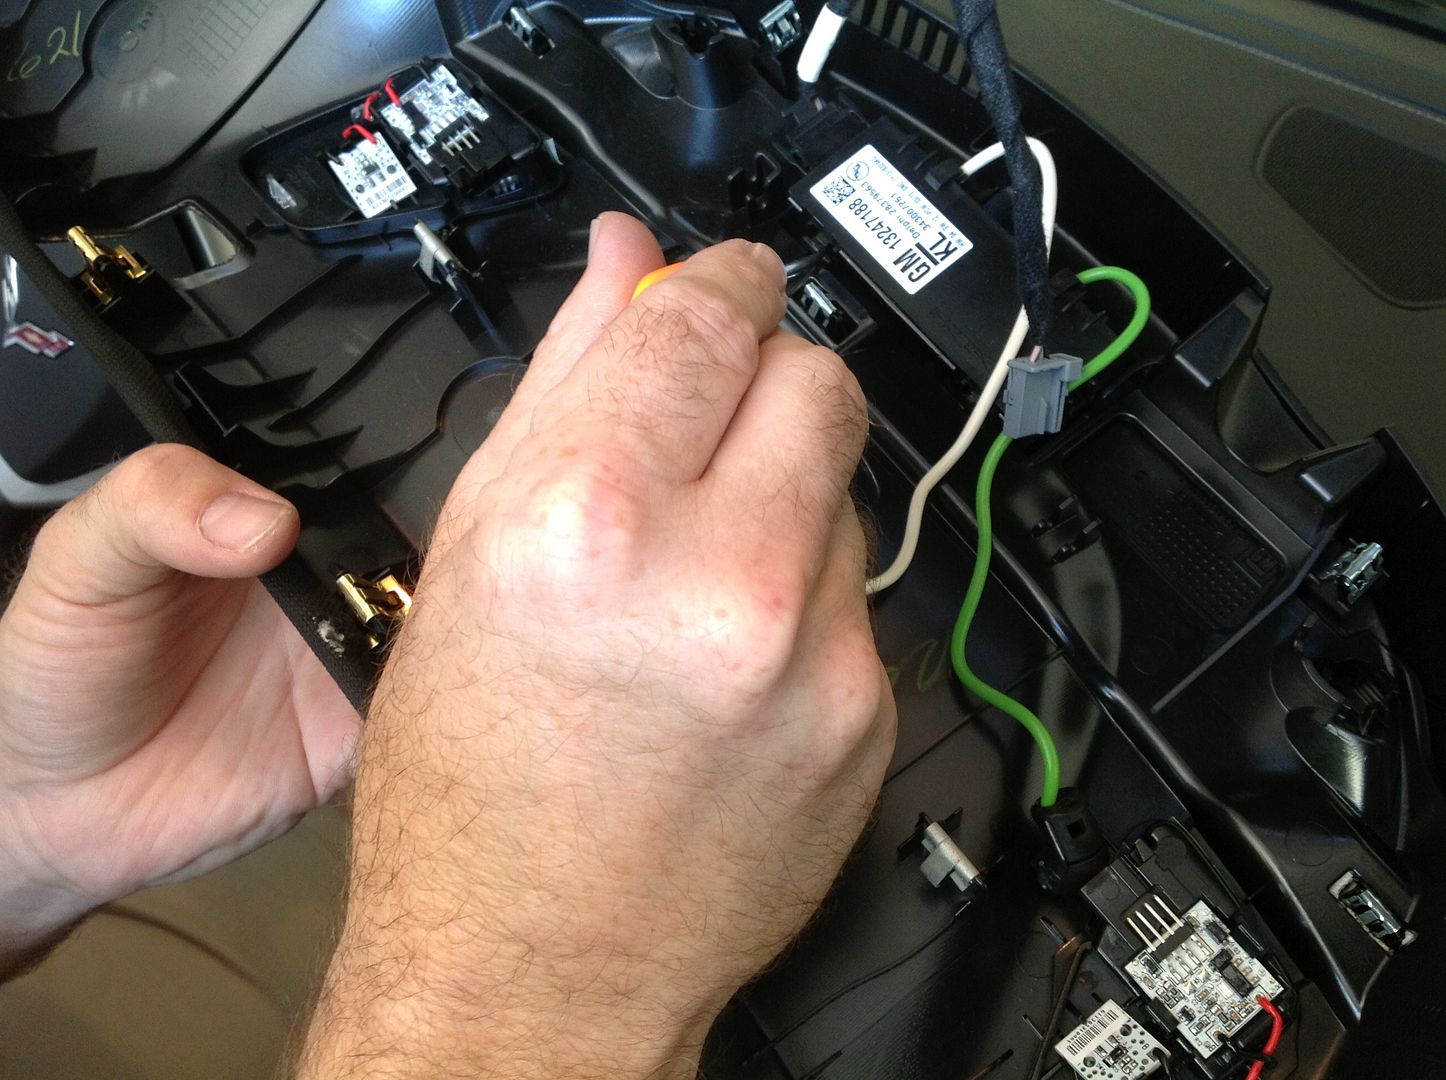

There is a "whatchamacallit do hickey" that needs to be removed and transferred to the new header panel. I have no idea what it is. It is all snapped in, so you just need to pry all the clips to release the box, wiring and speakers/microphones. Unhook the map light wiring also.


 08-24-2014, 09:01 PM
#7
Pro
Thread Starter
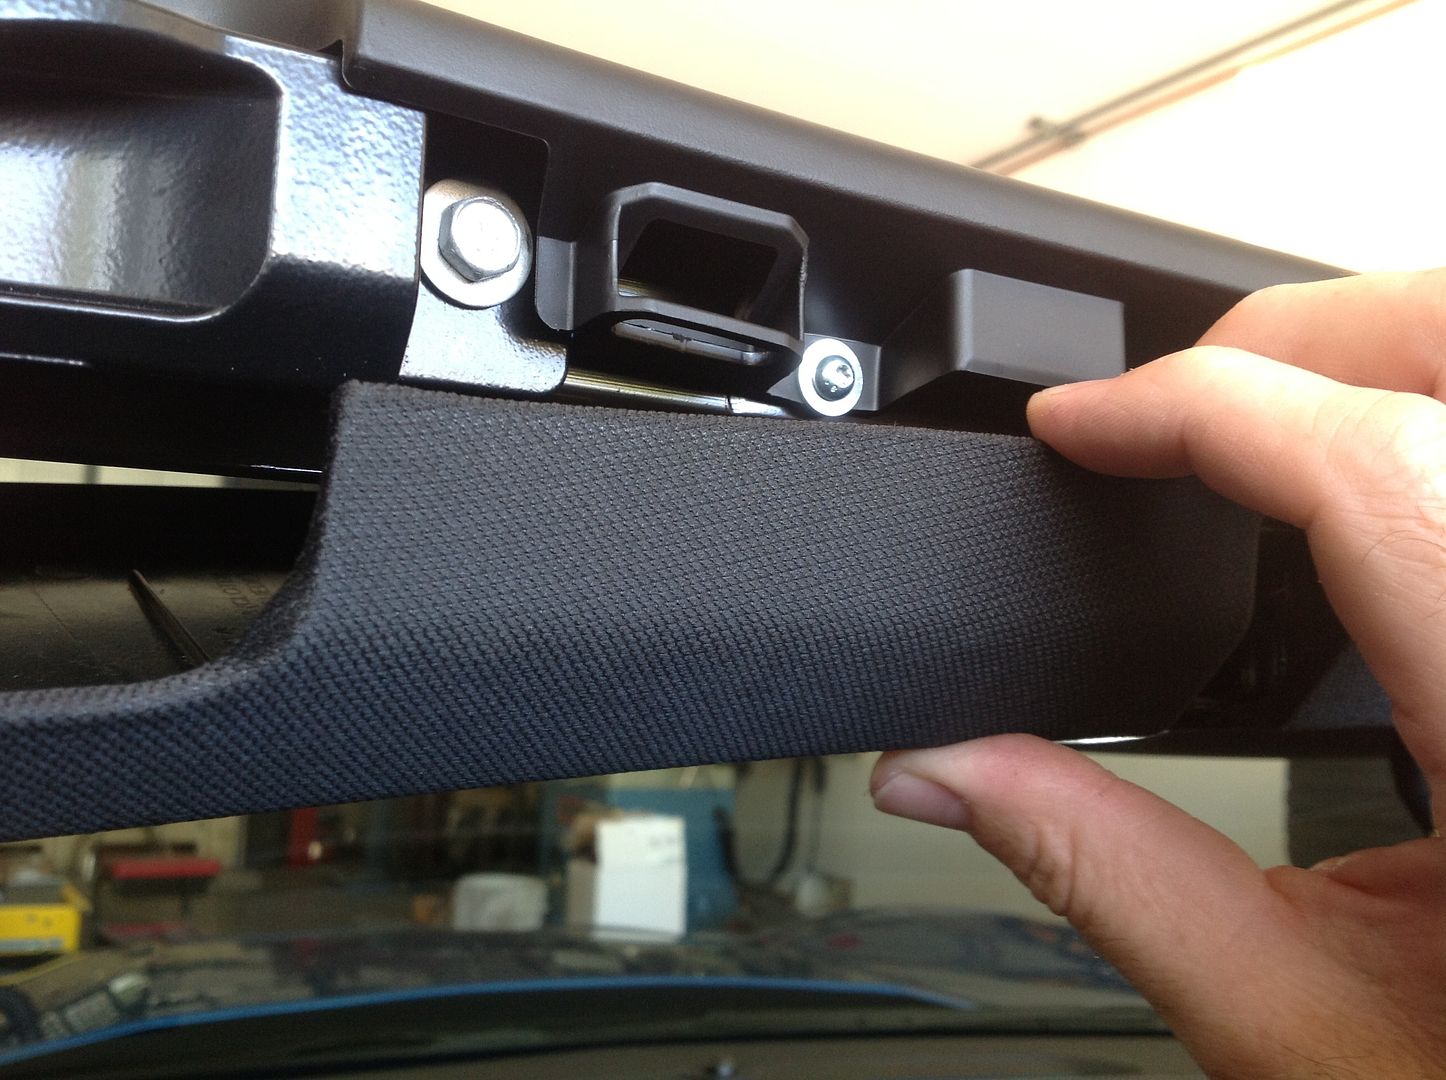
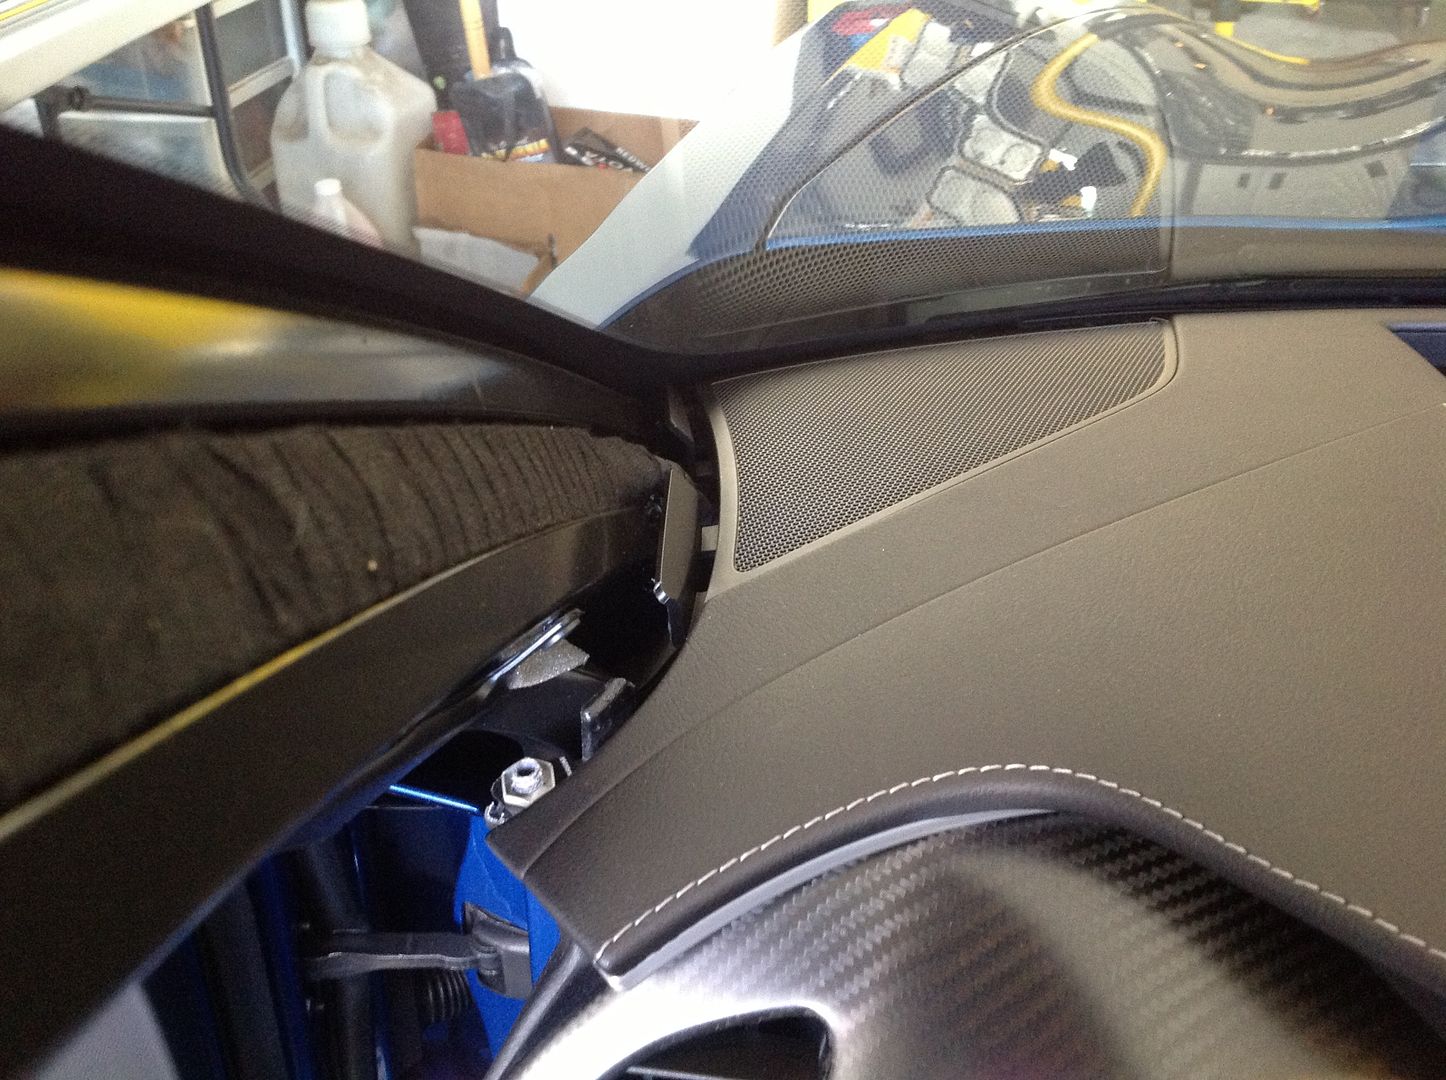
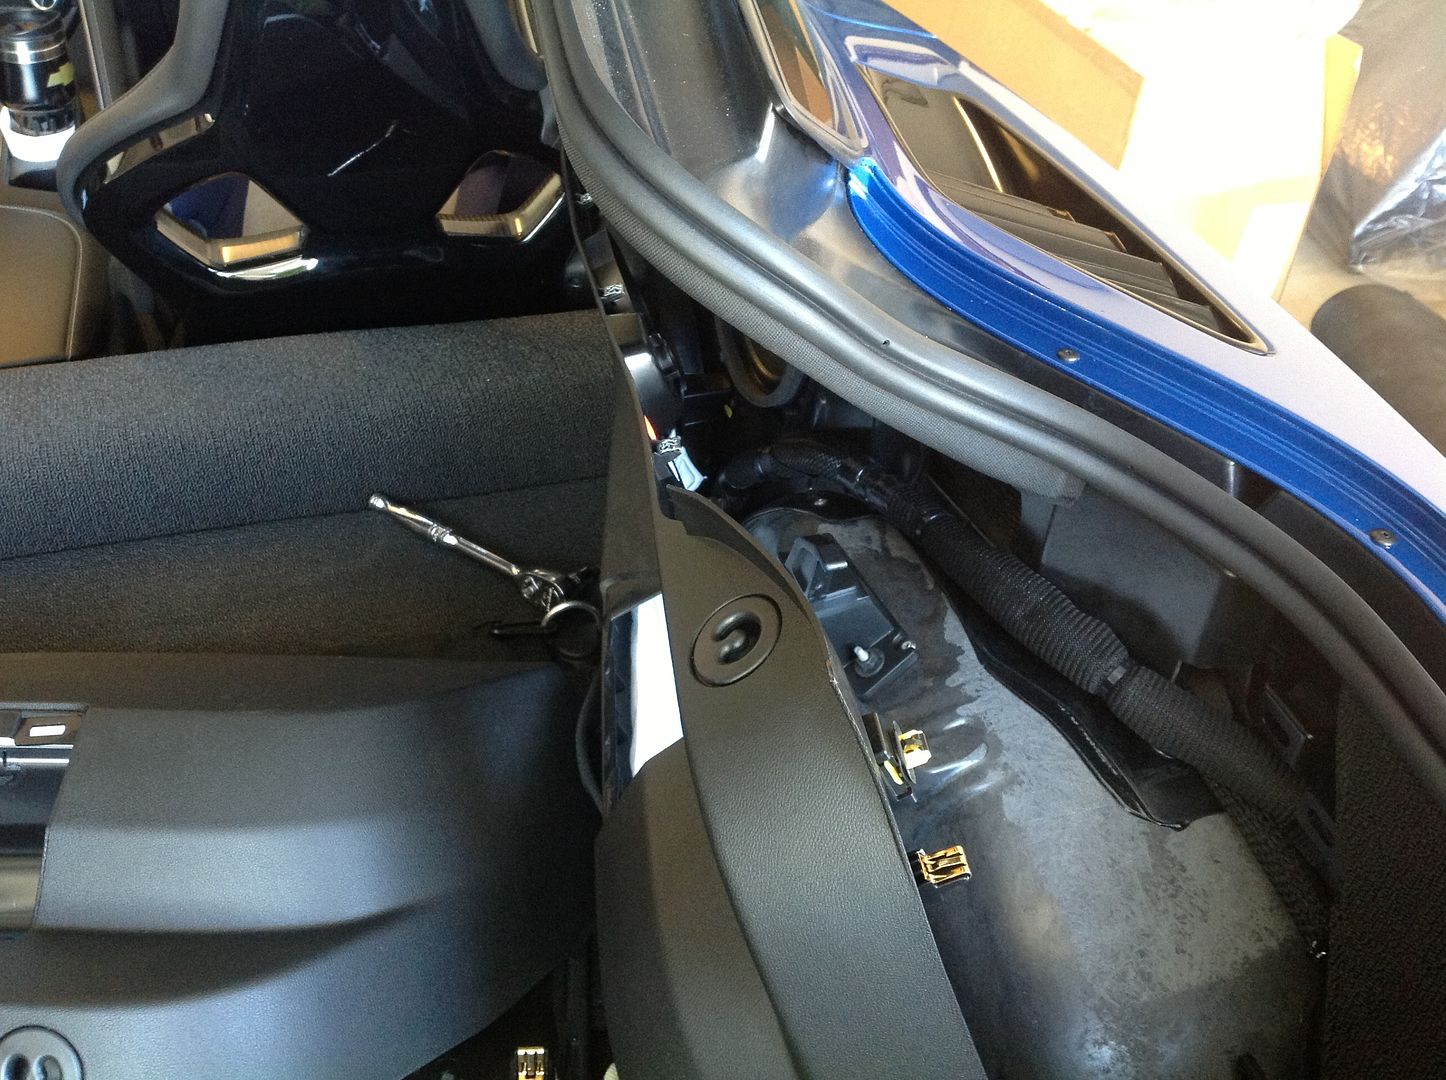
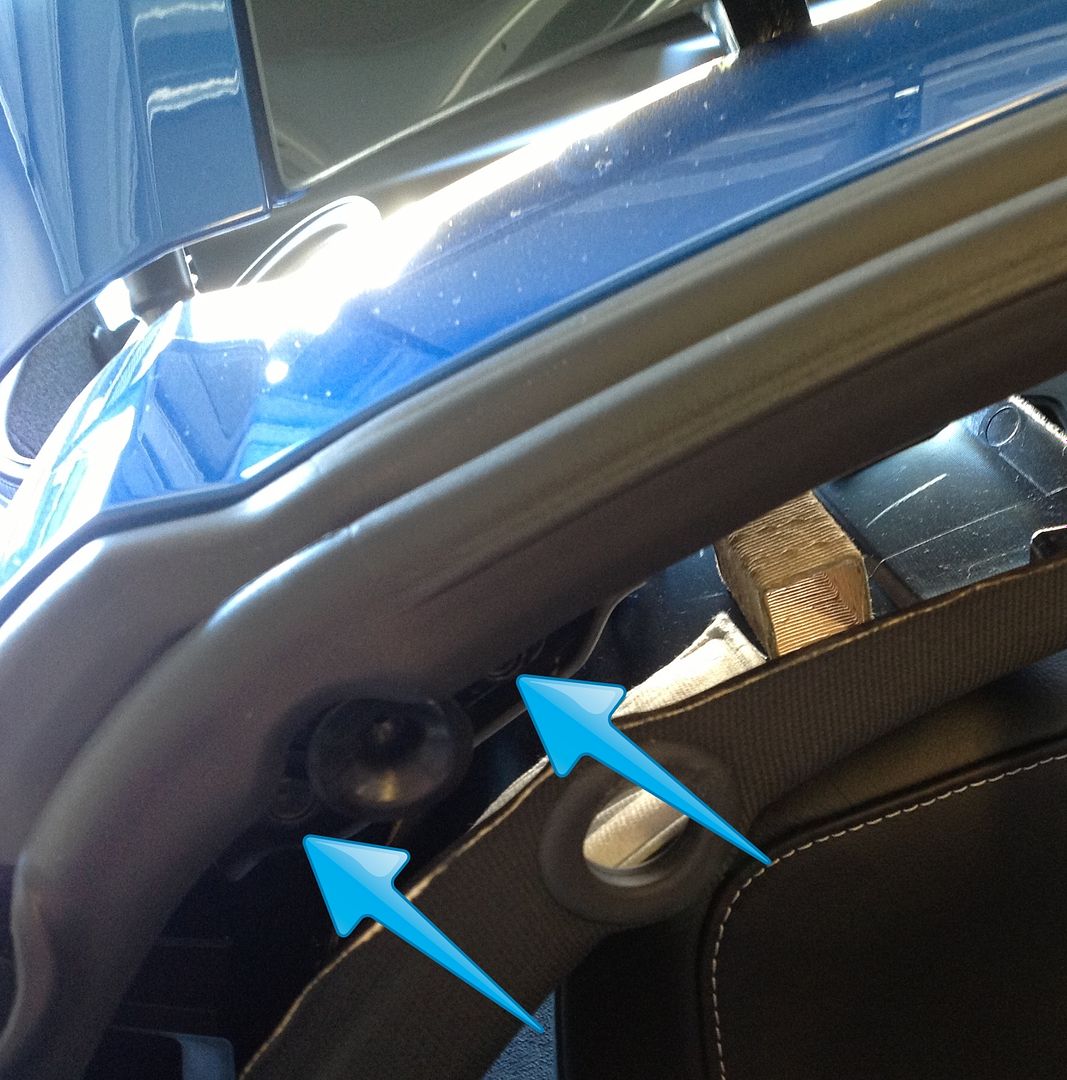
This piece needs to come off before the main A-pillar trim will come off. Repeat both sides. The lower piece and upper are all snap clips.
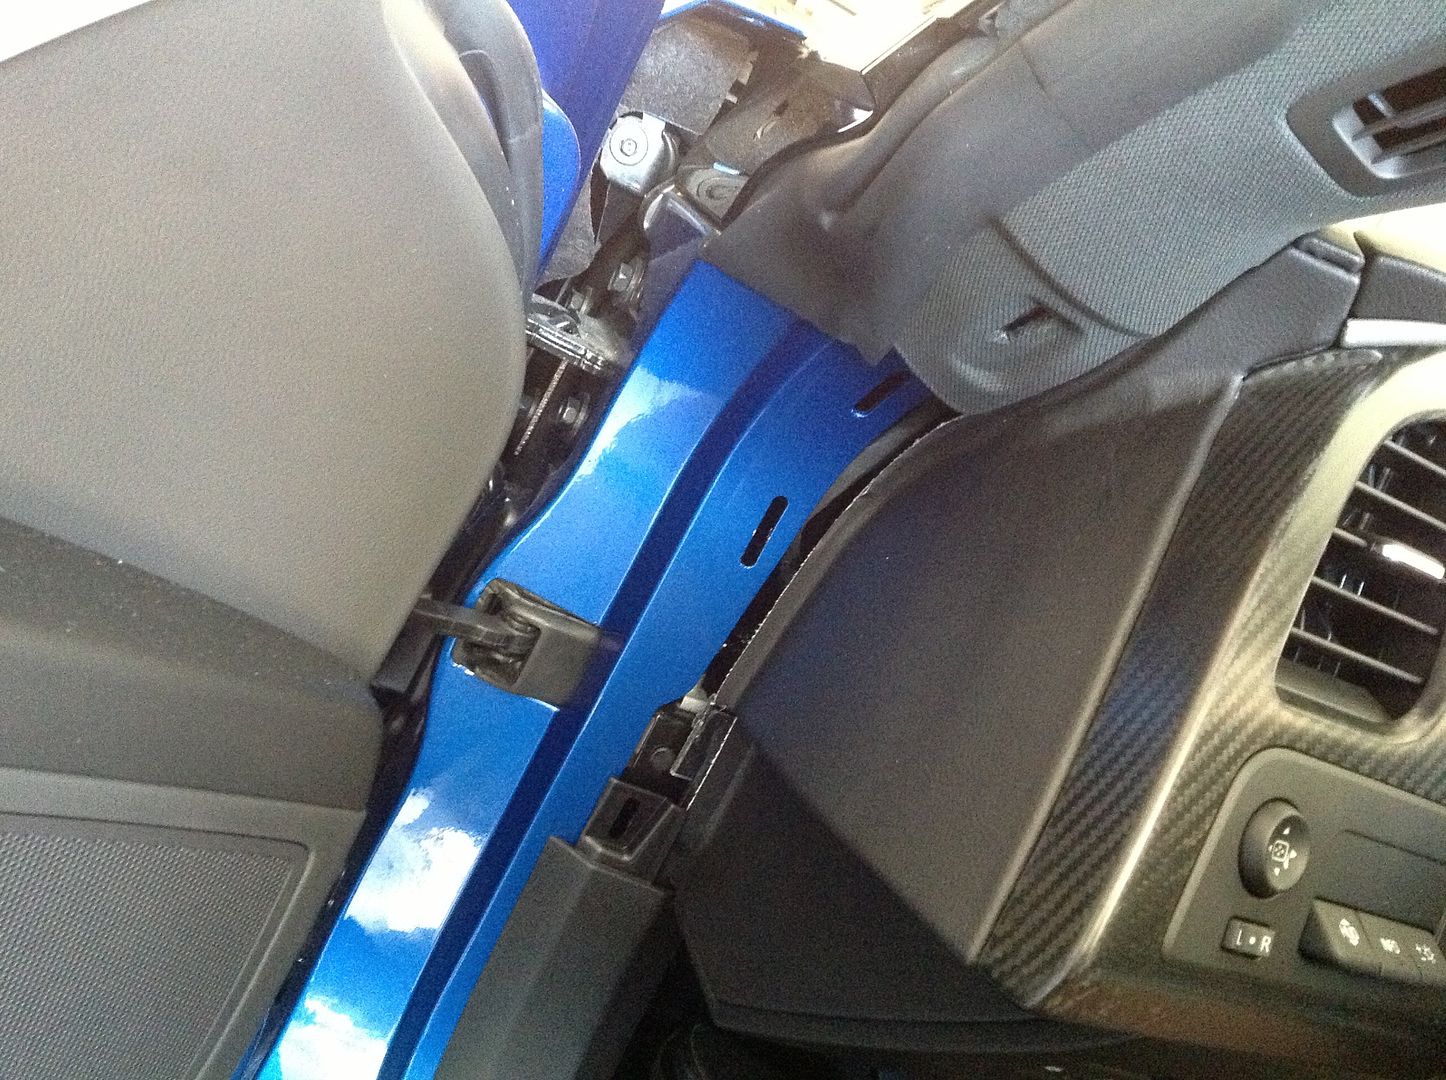
Pull down on the A-pillar trim to release the clips, then pull up to separate the trim from the dash groove.
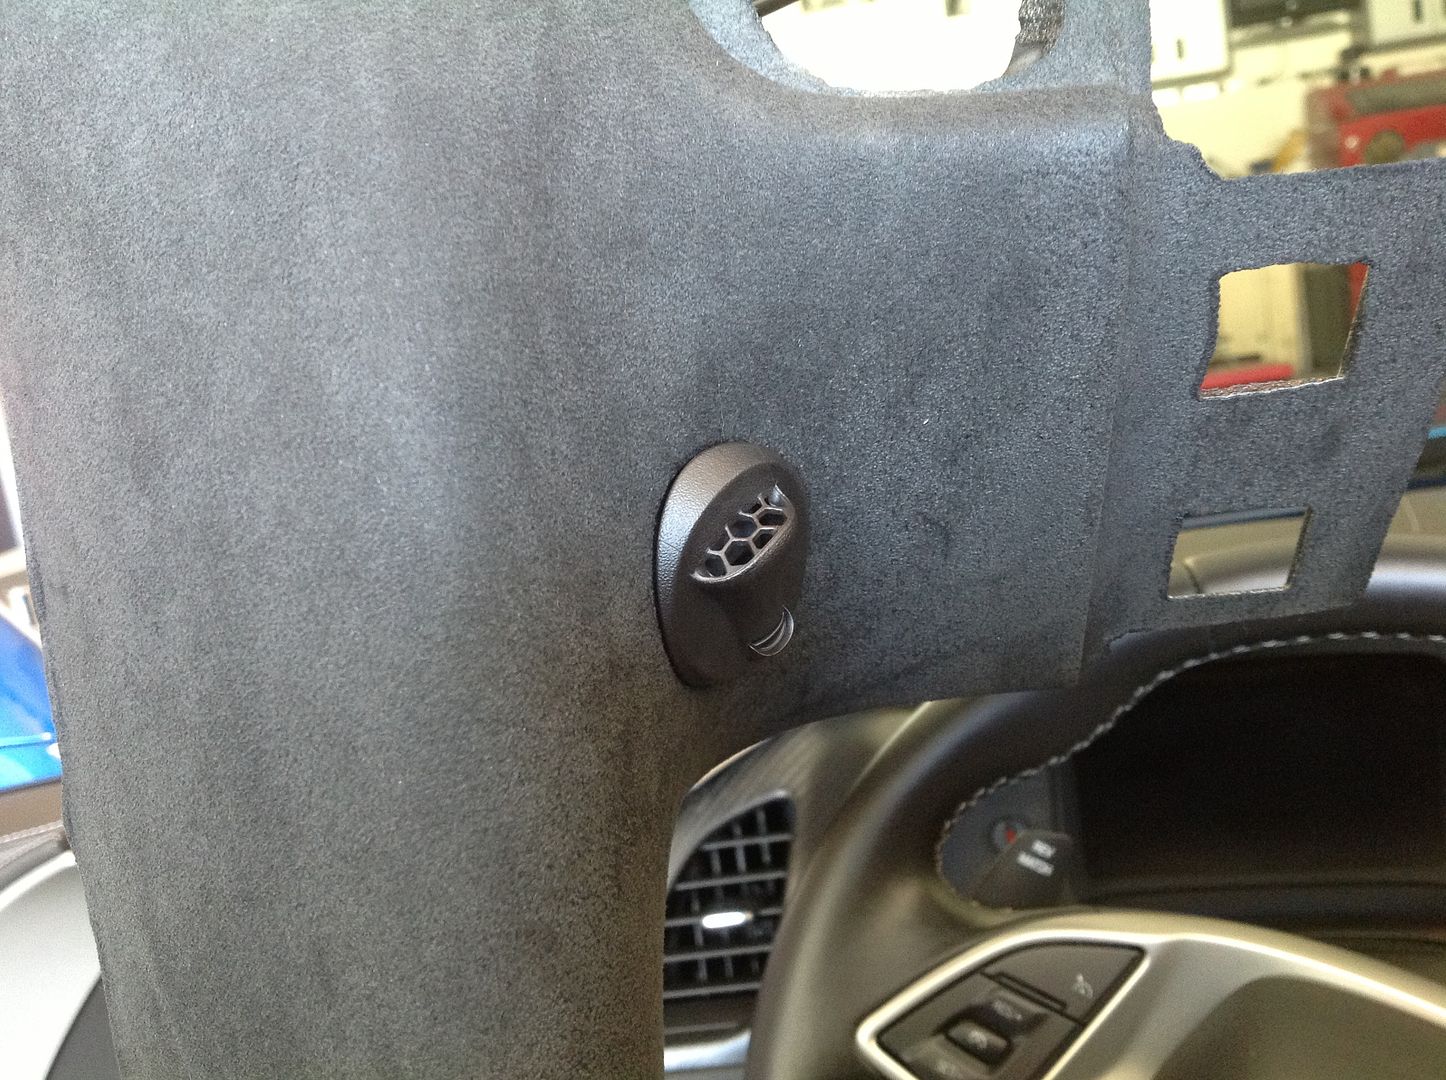
The left A-pillar trim has the hands free microphone in it that needs to unhooked and transferred to the new trim. It just snaps in.
This photo shows the dash groove the A-pillar slides into.

Pull down on the A-pillar trim to release the clips, then pull up to separate the trim from the dash groove.

The left A-pillar trim has the hands free microphone in it that needs to unhooked and transferred to the new trim. It just snaps in.


This photo shows the dash groove the A-pillar slides into.
 08-24-2014, 10:00 PM
#8
Pro
Thread Starter
Pop right A-pillar trim out the same way as the left. There is nothing to swap over to the new trim. Slide the new suede trim into that dash groove and then snap it into place. Make sure the sunvisor wiring is pulled through the hole. Then snap in the lower trim. Simple.
 08-24-2014, 10:10 PM
#9
Pro
Thread Starter
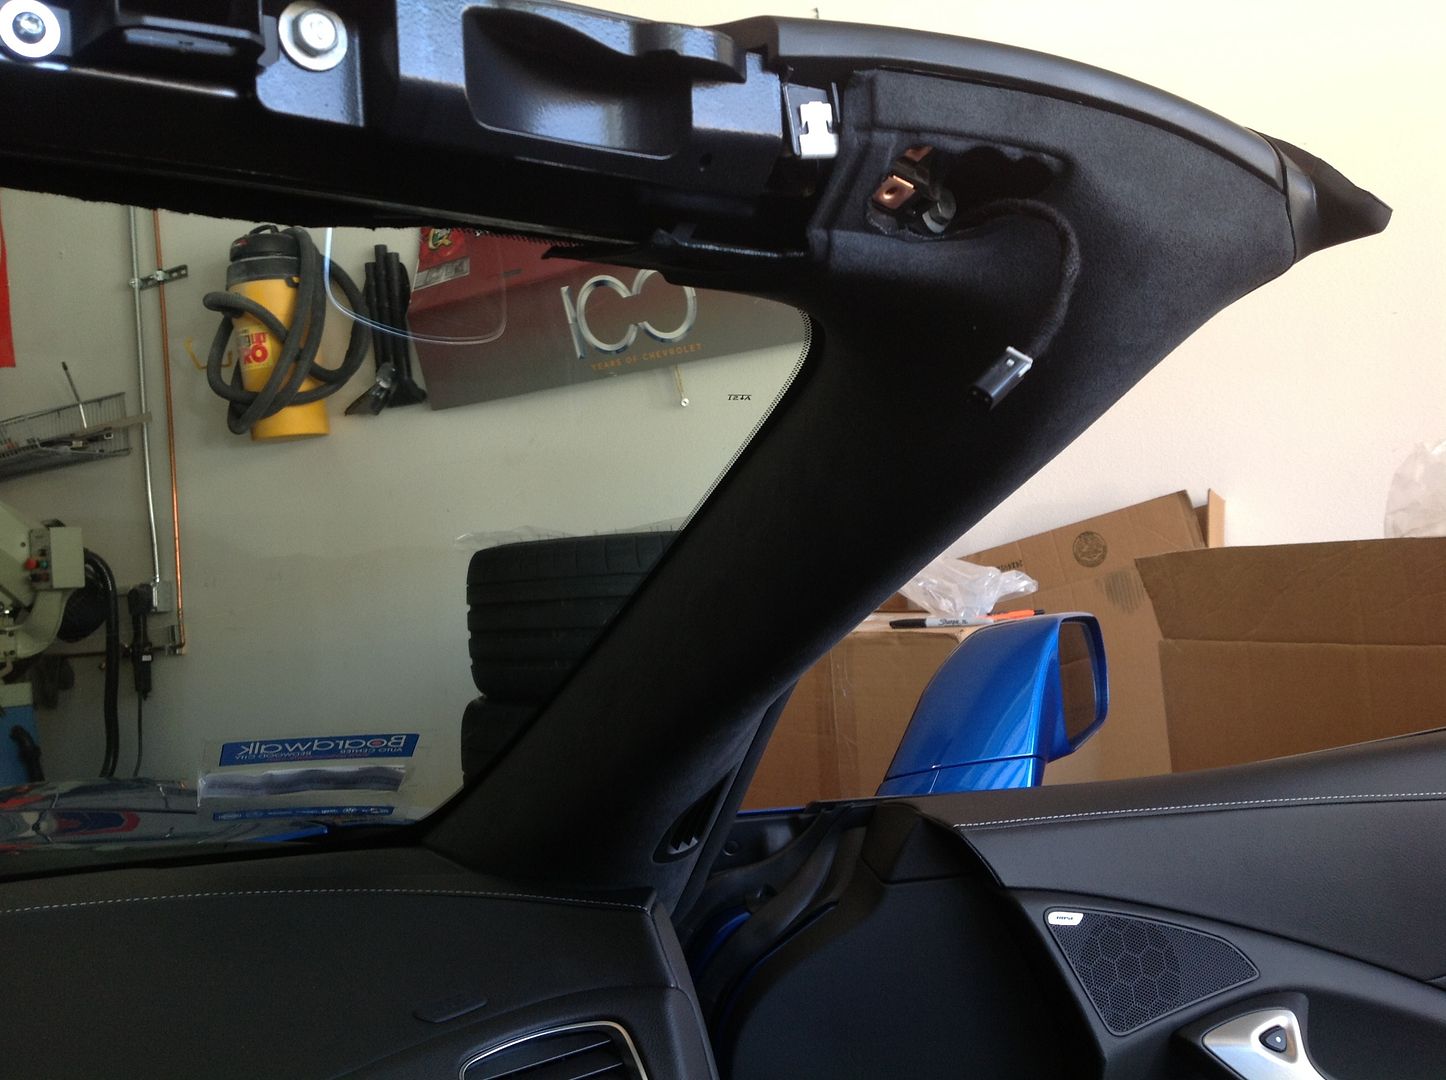
Replace hands free mic in the new left trim.
What the hell are all those stickers for?
Plug in the mic wiring and slide the new trim in and snap in place, pull sunvisor wiring through the hole. Replace lower trim. Make sure all the weatherstripping is flipped over the edges of all the trims.
What the hell are all those stickers for?


Plug in the mic wiring and slide the new trim in and snap in place, pull sunvisor wiring through the hole. Replace lower trim. Make sure all the weatherstripping is flipped over the edges of all the trims.


Last edited by 48supertruck; 08-24-2014 at 10:36 PM.
08-24-2014, 10:15 PM
#10
Pro
Thread Starter
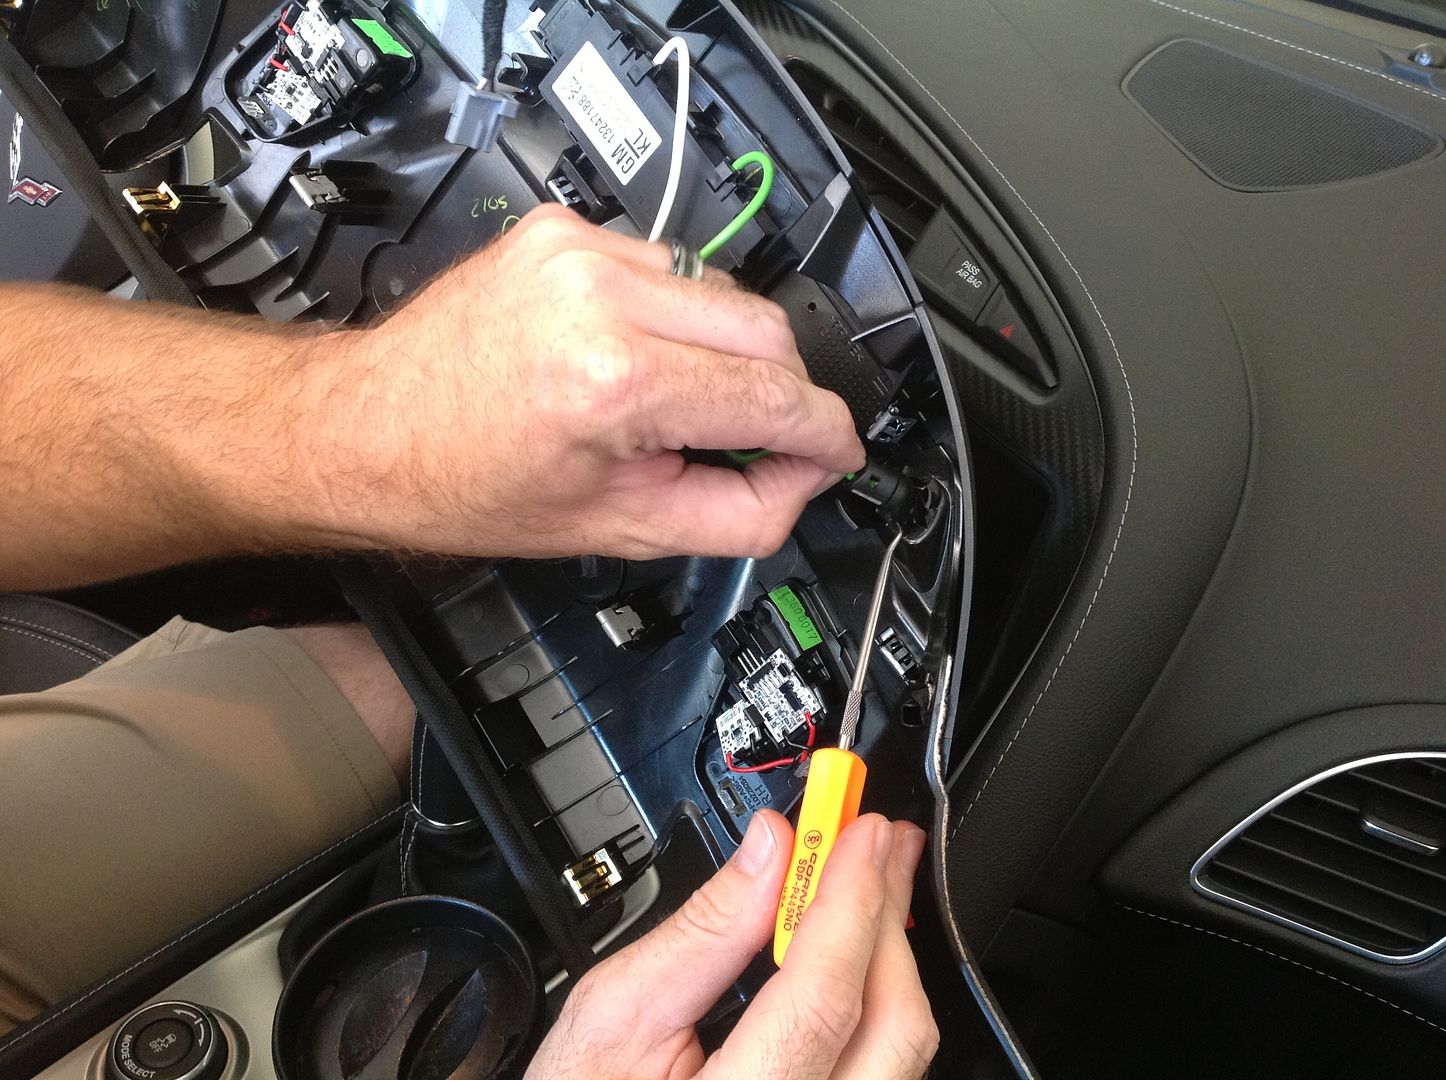
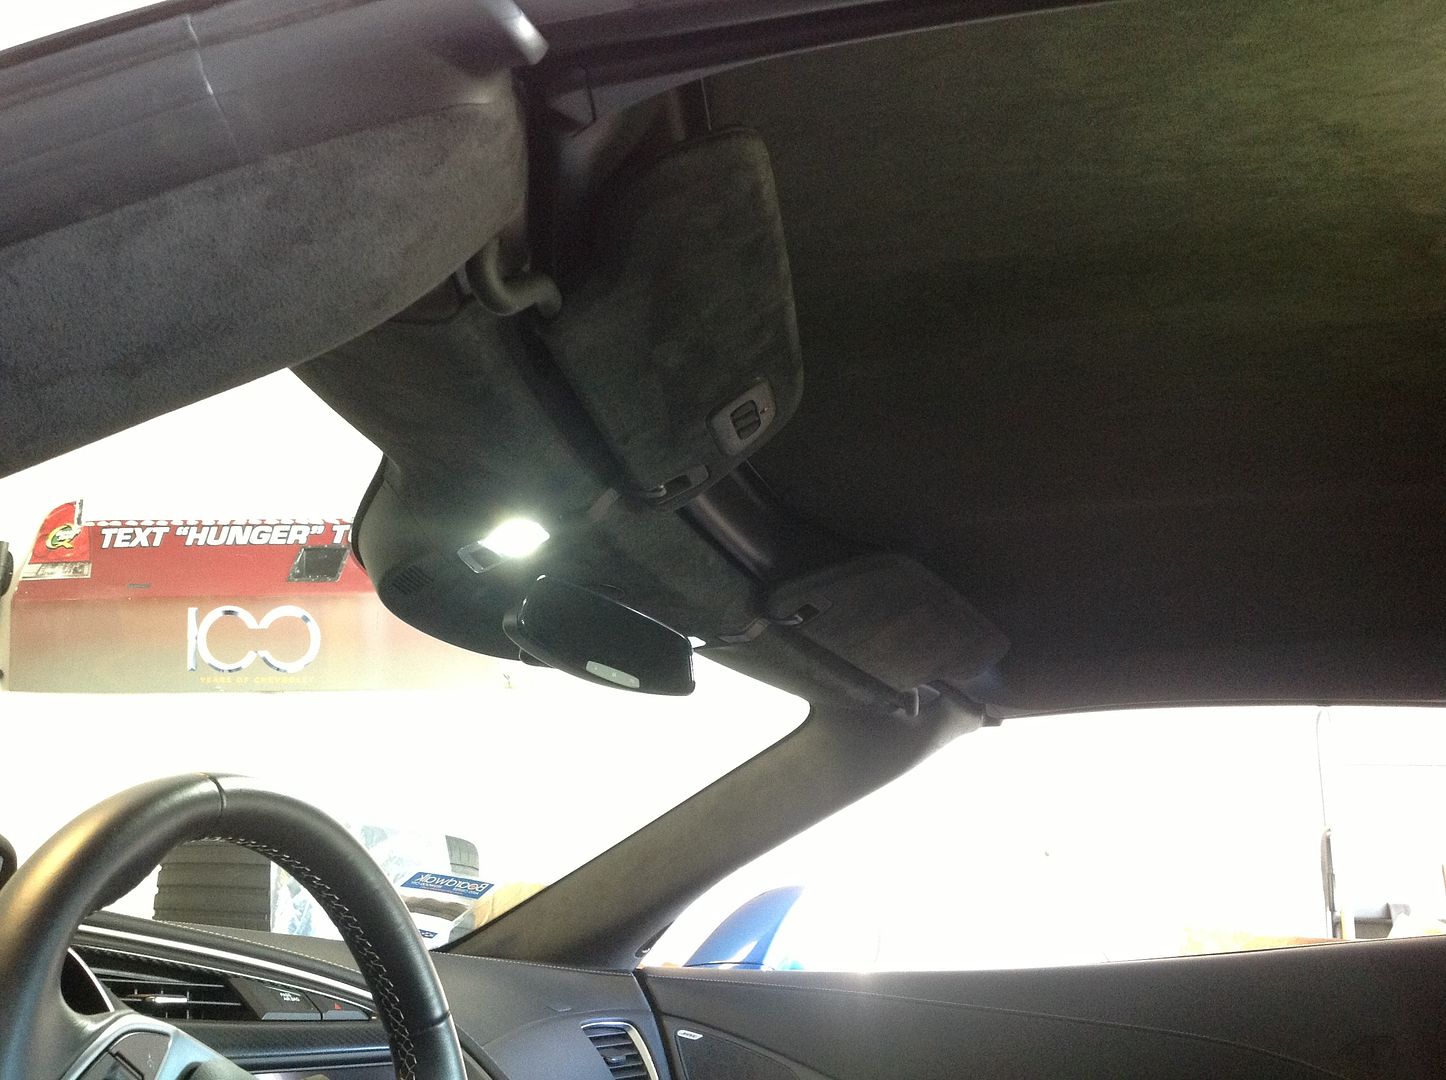
Replace the electronics and map light wiring that were removed from the old header panel and reinstall them into the new panel. Make sure the mirror wiring is pulled through the hole. Install the new suede header.
 08-24-2014, 10:26 PM
#11
Pro
Thread Starter
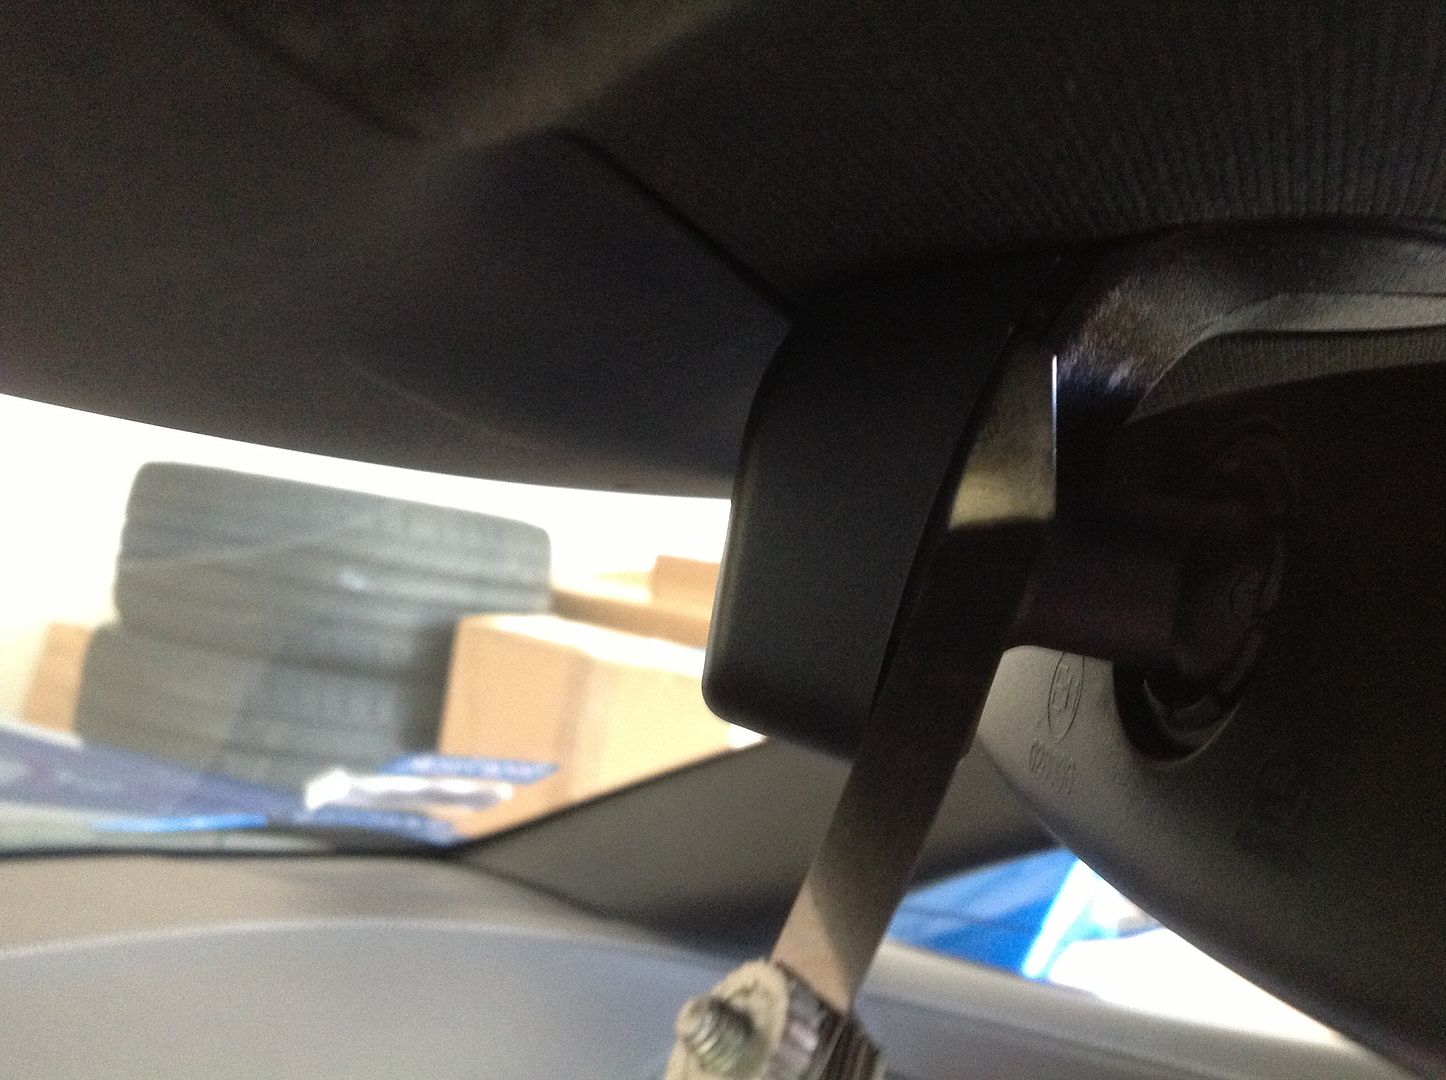
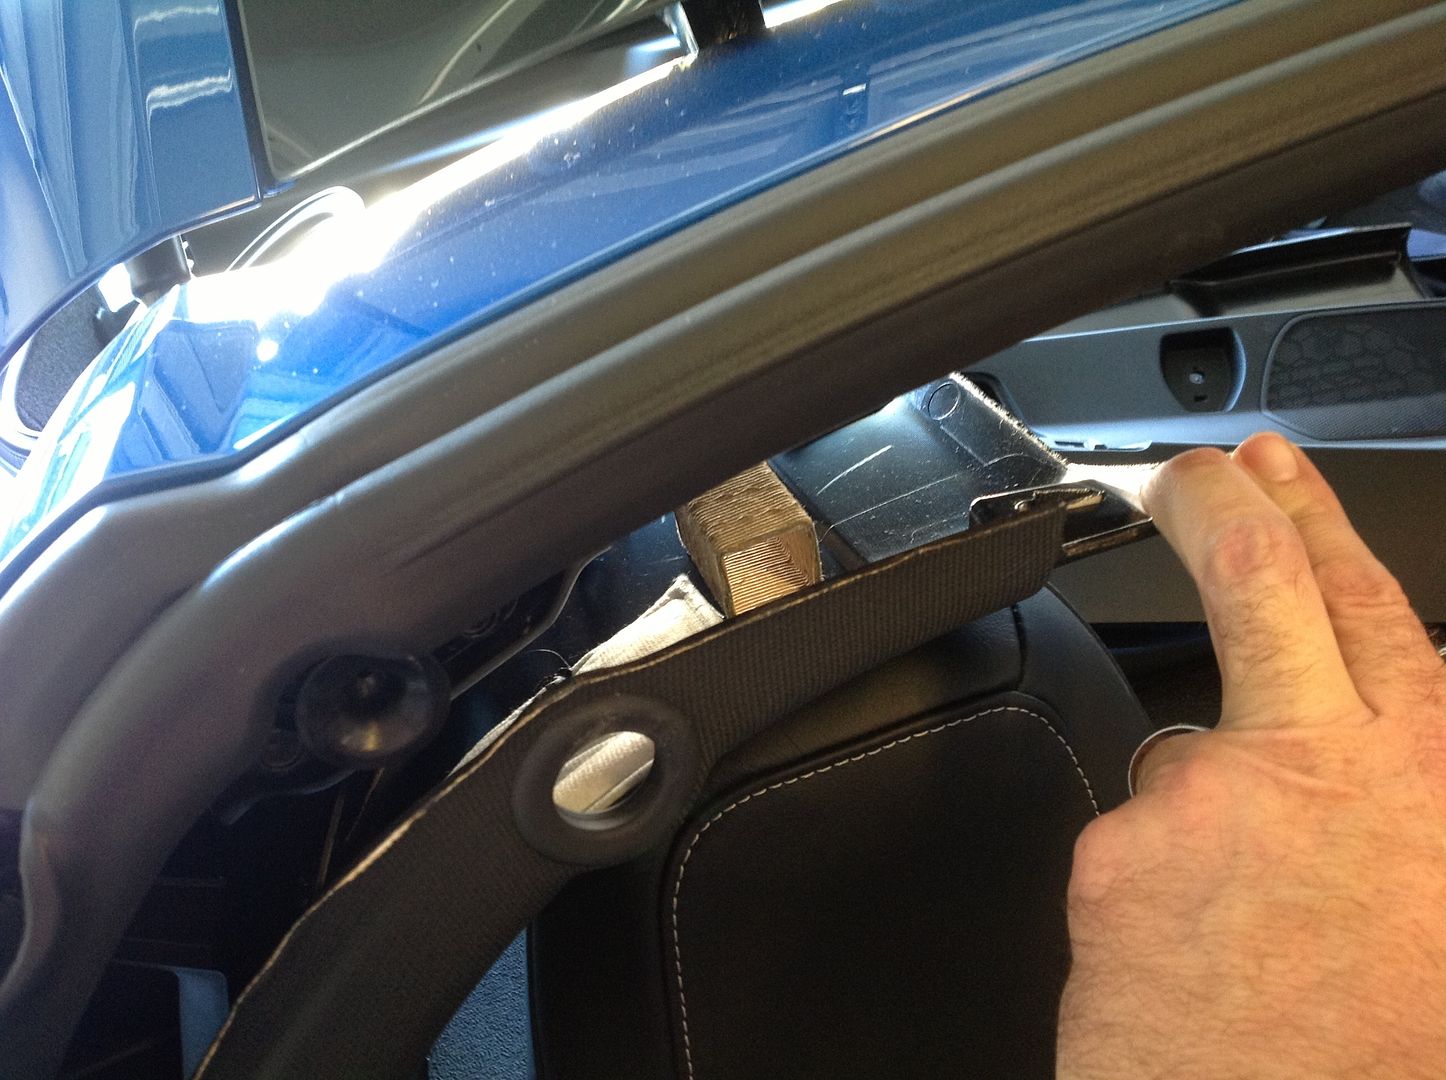
Install mirror in the reverse order it came out. Insert it at that 45 degree angle it came out so it is flush with the header trim and twist it till it locks into place. Tuck the wiring into the back of the stem and replace plastic cover.
I removed the sunvisor waring labels on the new visors and reinstalled both visors. Bolt in the sunvisor retainer clips and now the front section is done.
I removed the sunvisor waring labels on the new visors and reinstalled both visors. Bolt in the sunvisor retainer clips and now the front section is done.

 08-24-2014, 10:58 PM
#14
Pro
Thread Starter
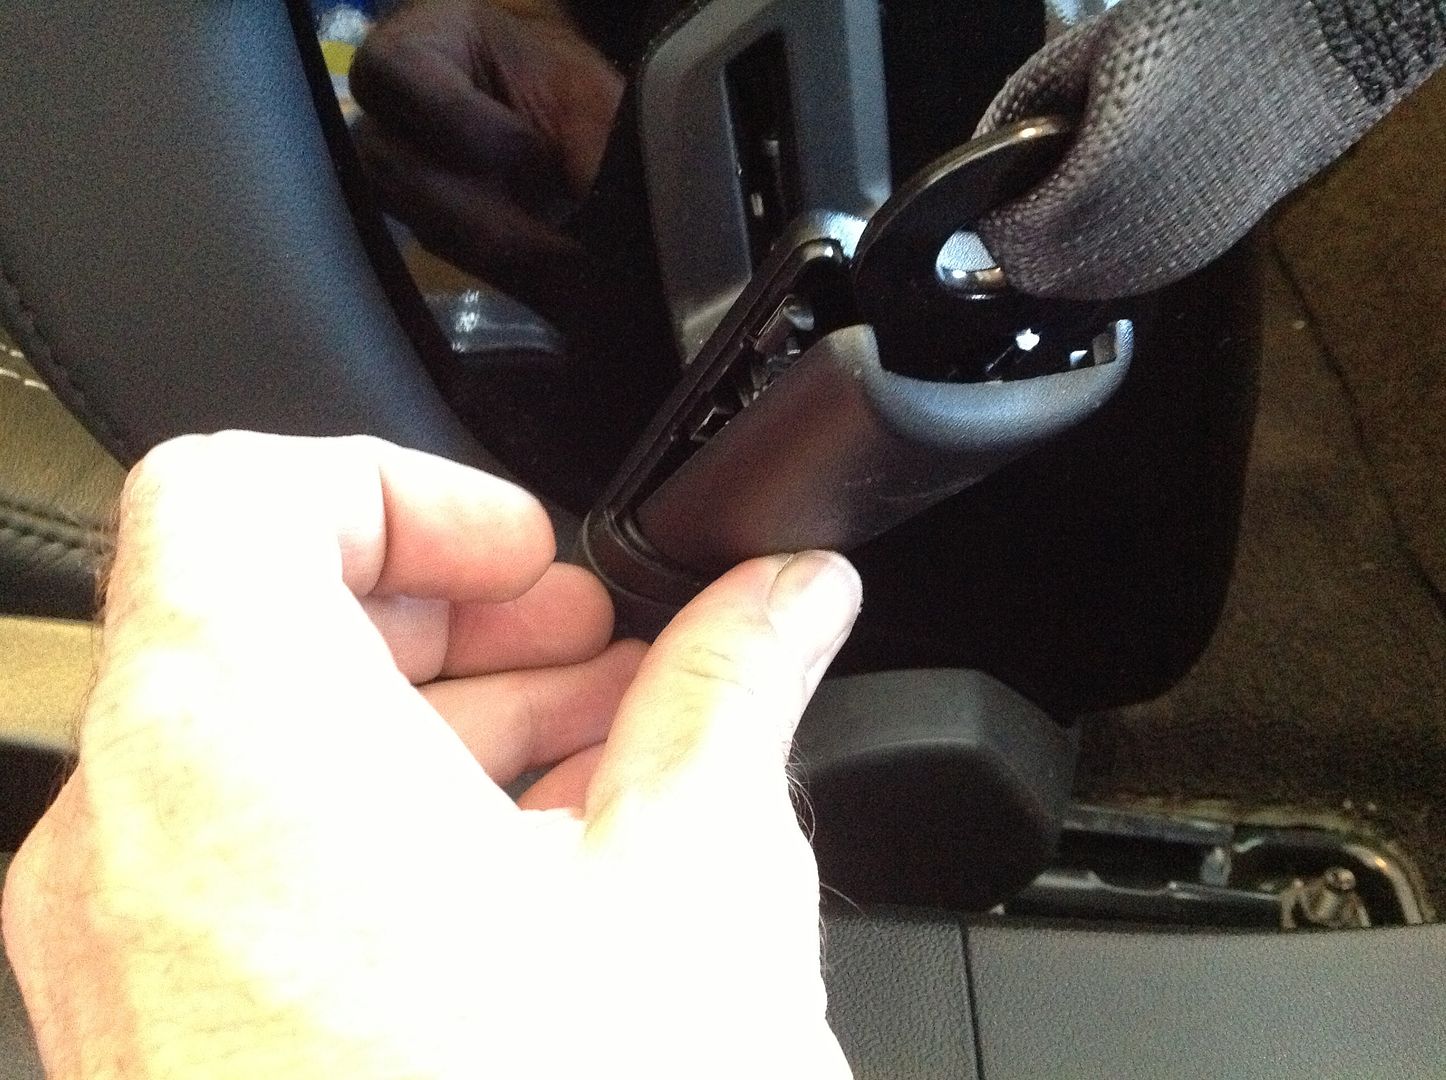
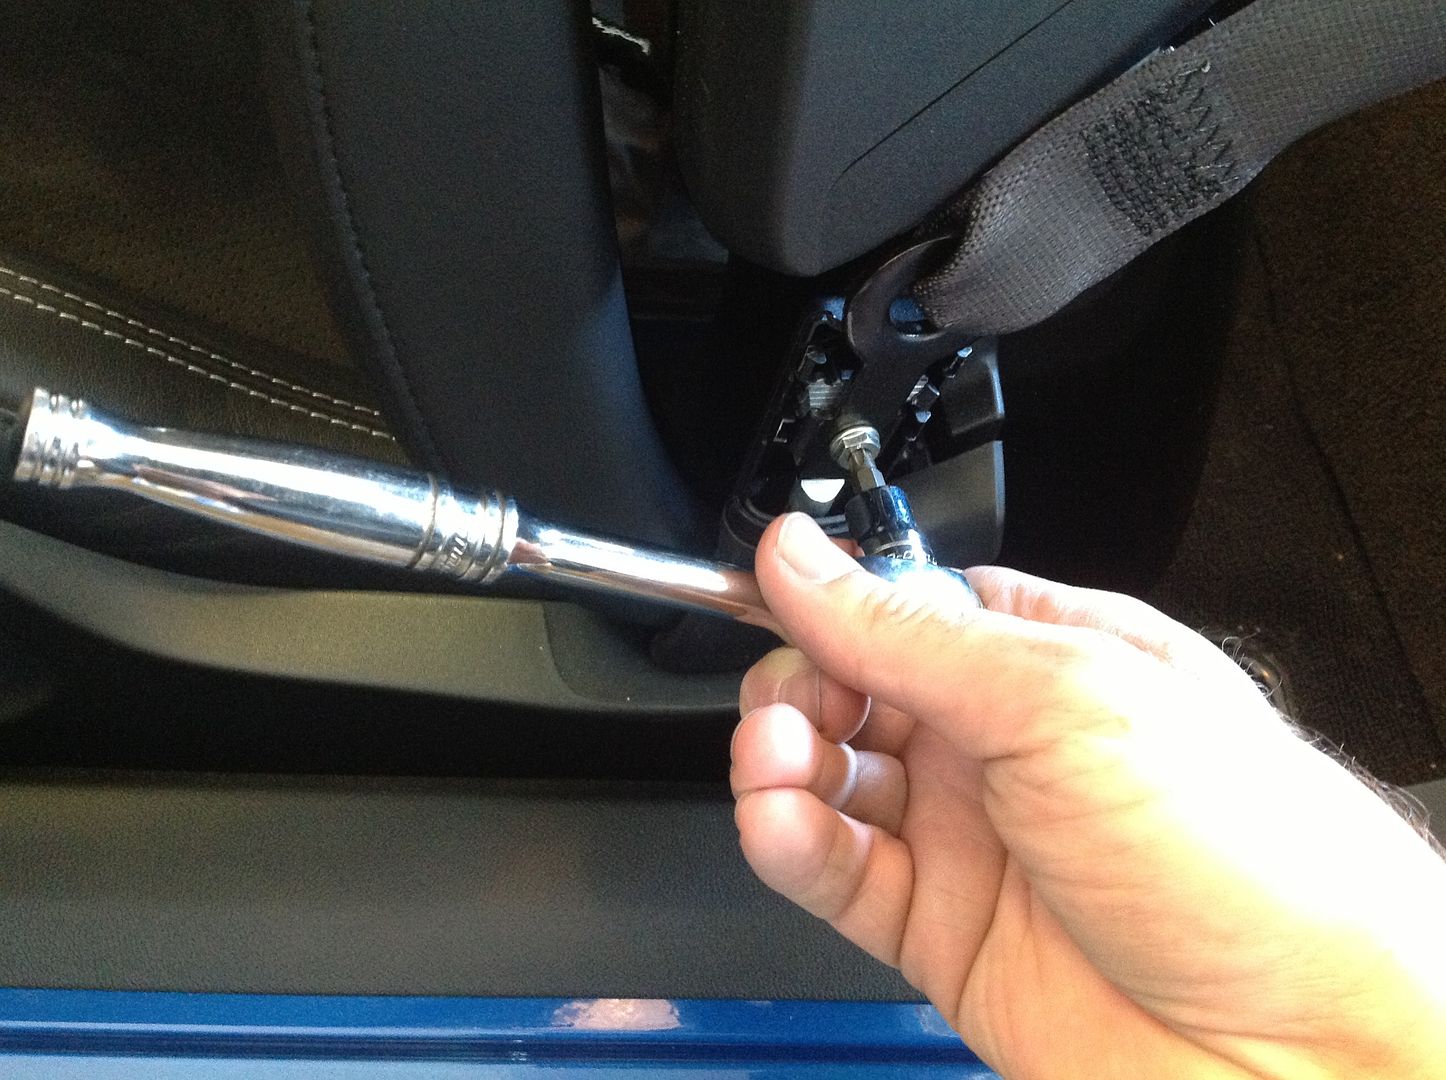
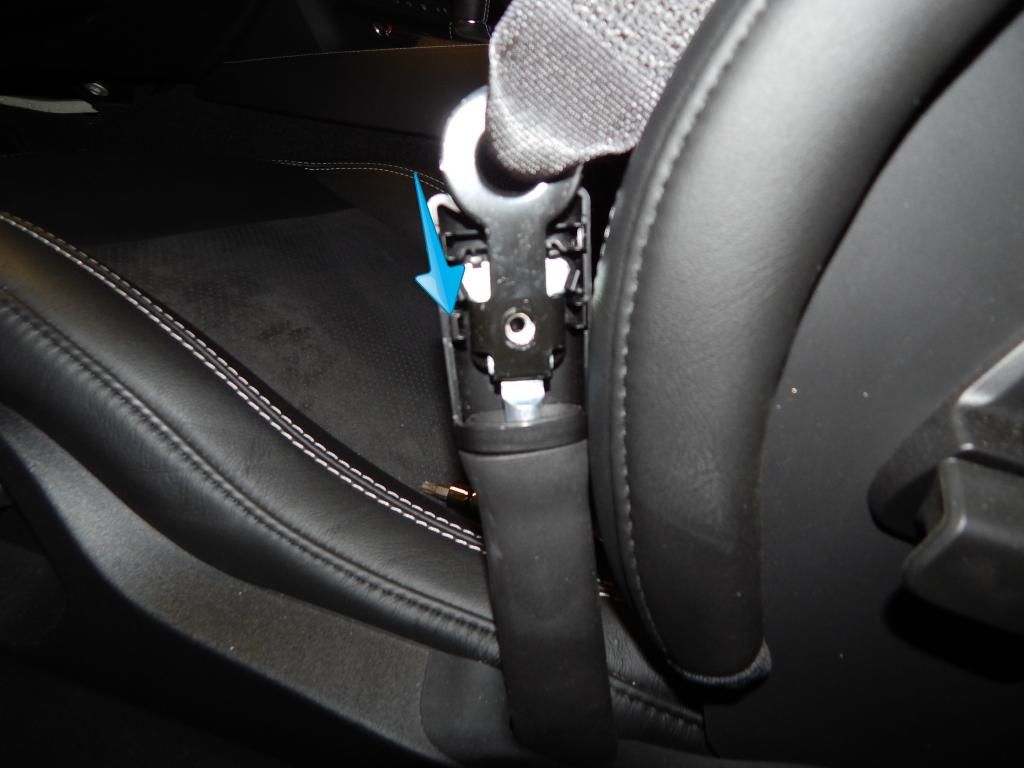
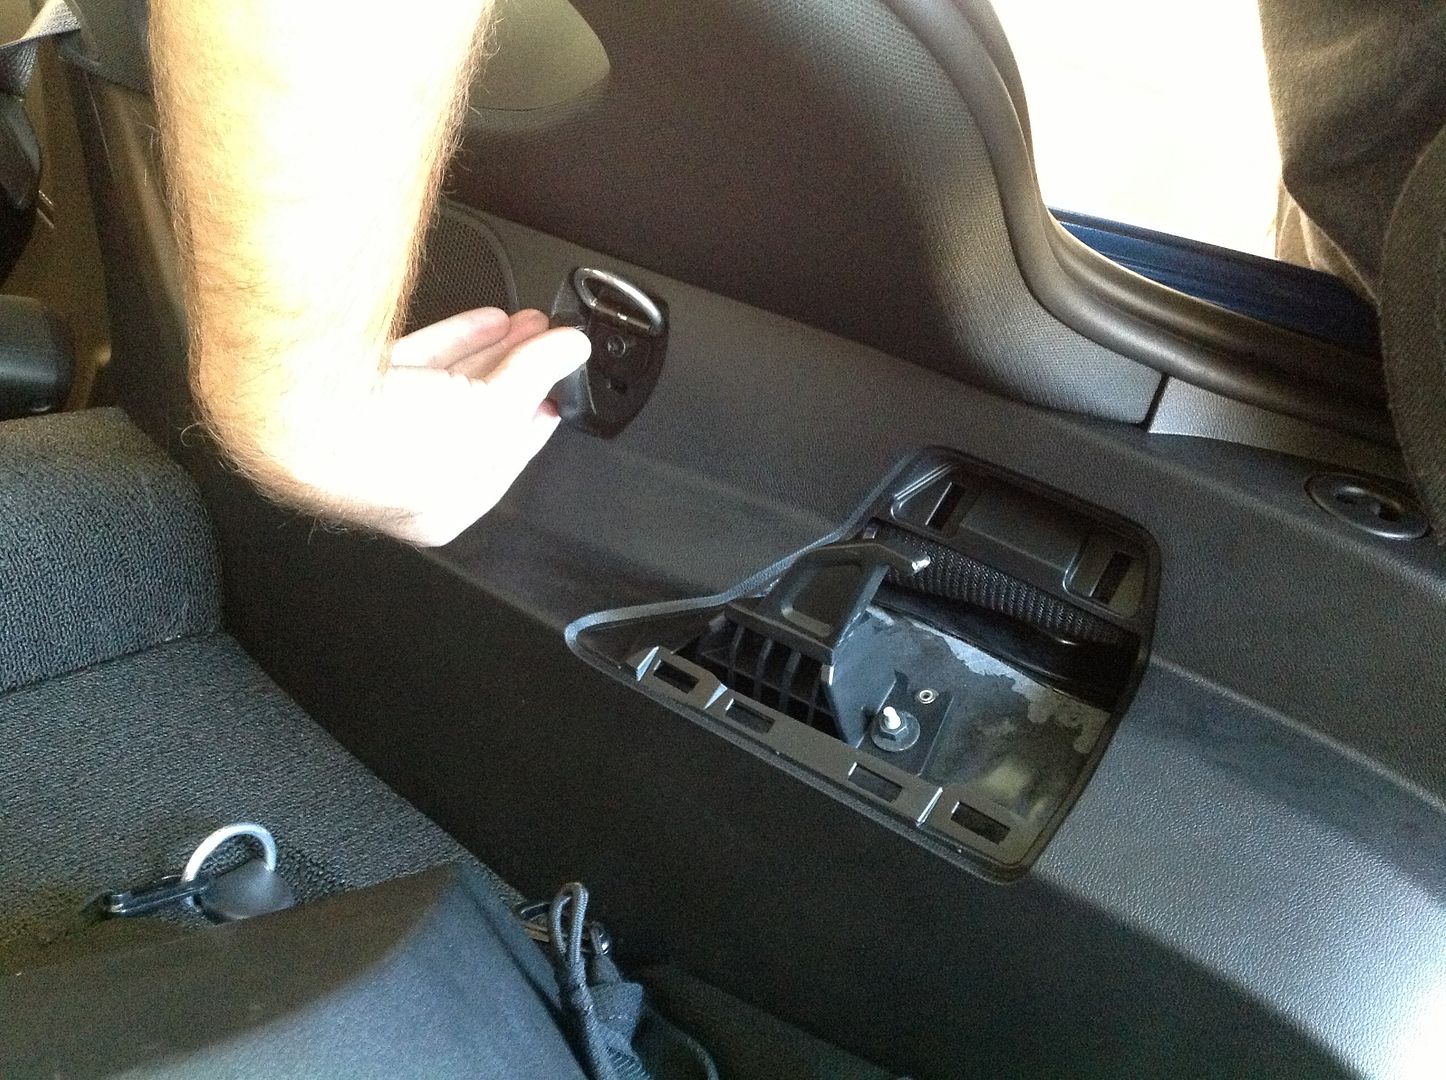
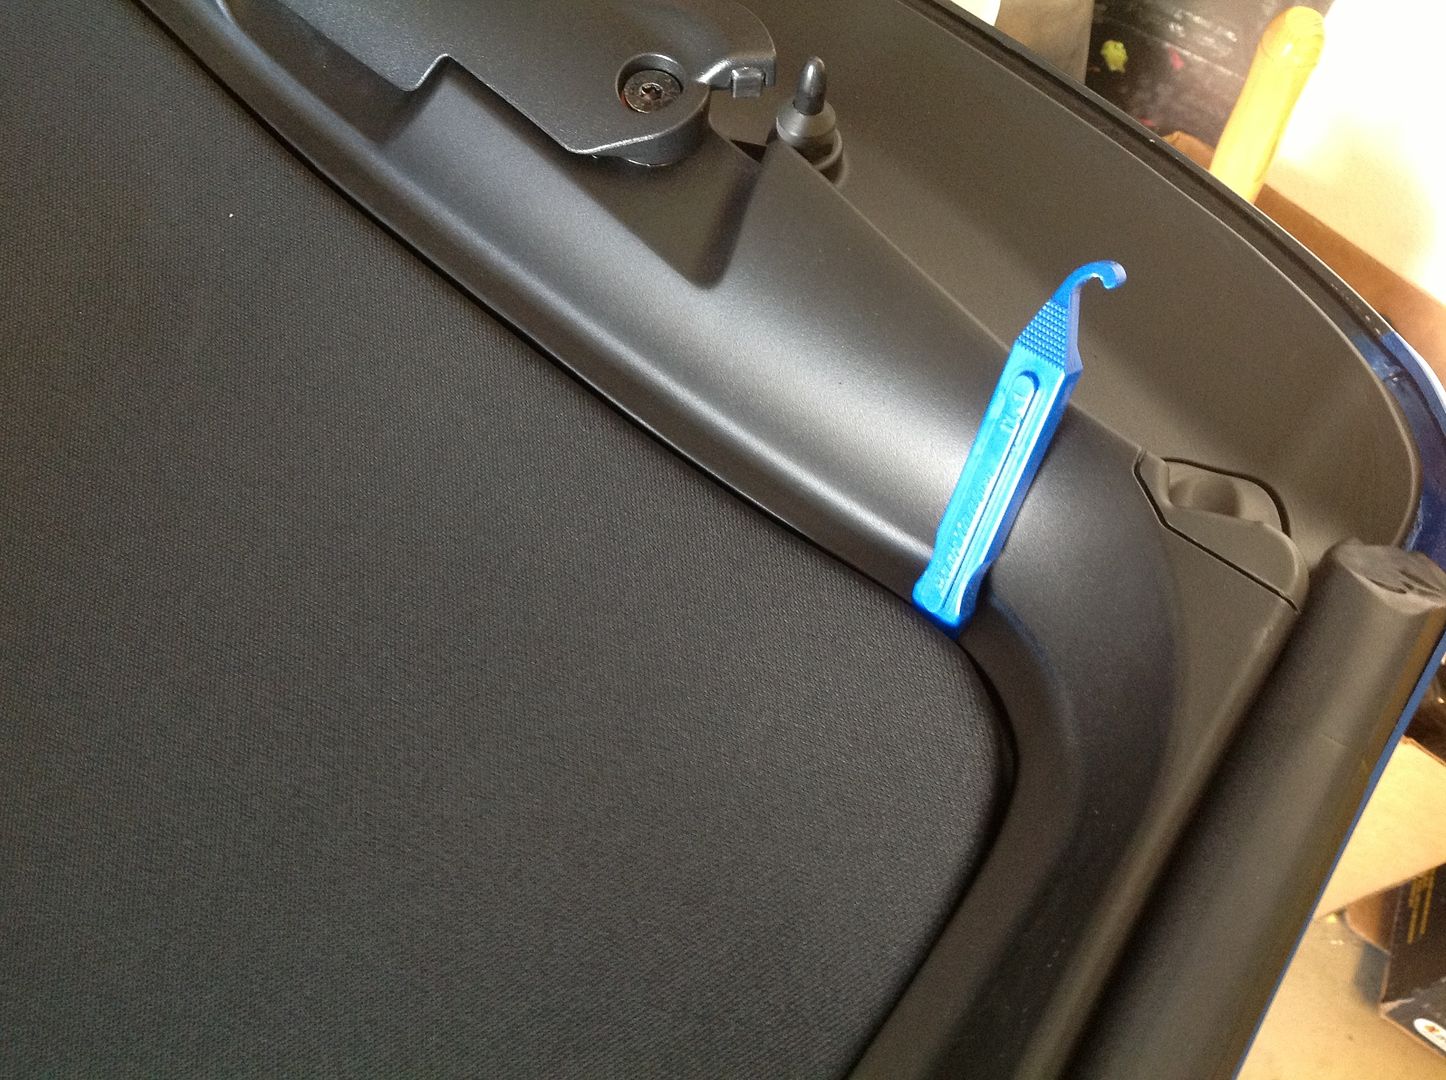
Pry out the seat belt bezel.
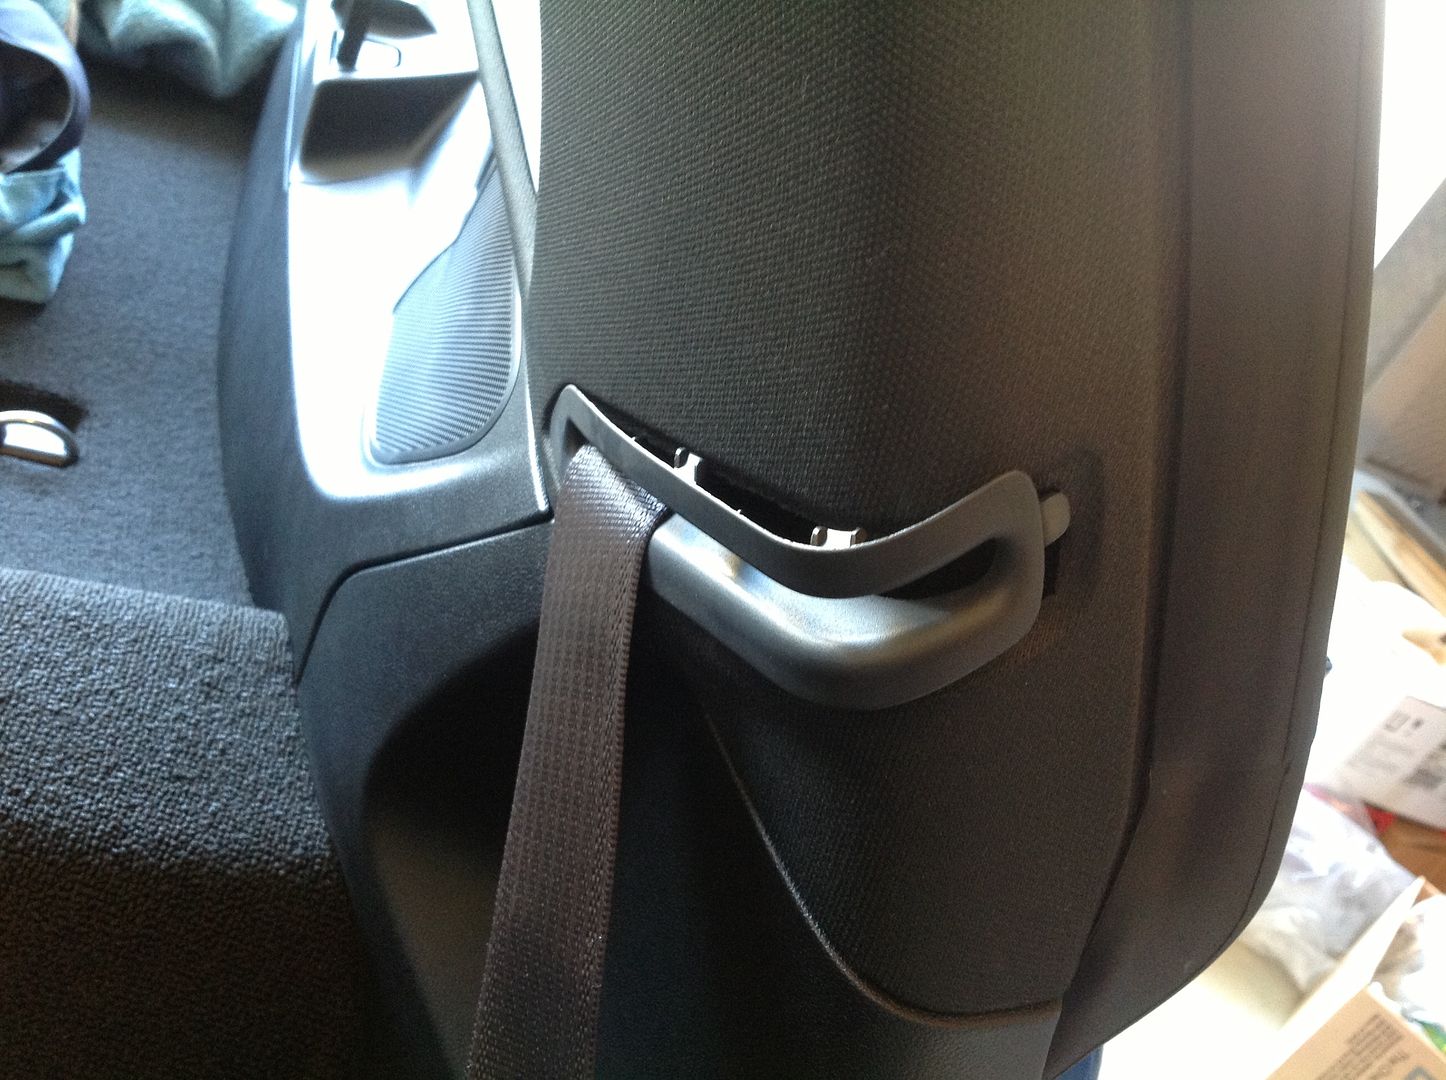
You will have to unbolt the seat belt from the seat, pry the plastic cover off, unbolt the seat belt. Be careful to not slip with the ratchet, you will damage the sill plate. Slide the seat belt down to unhook it.
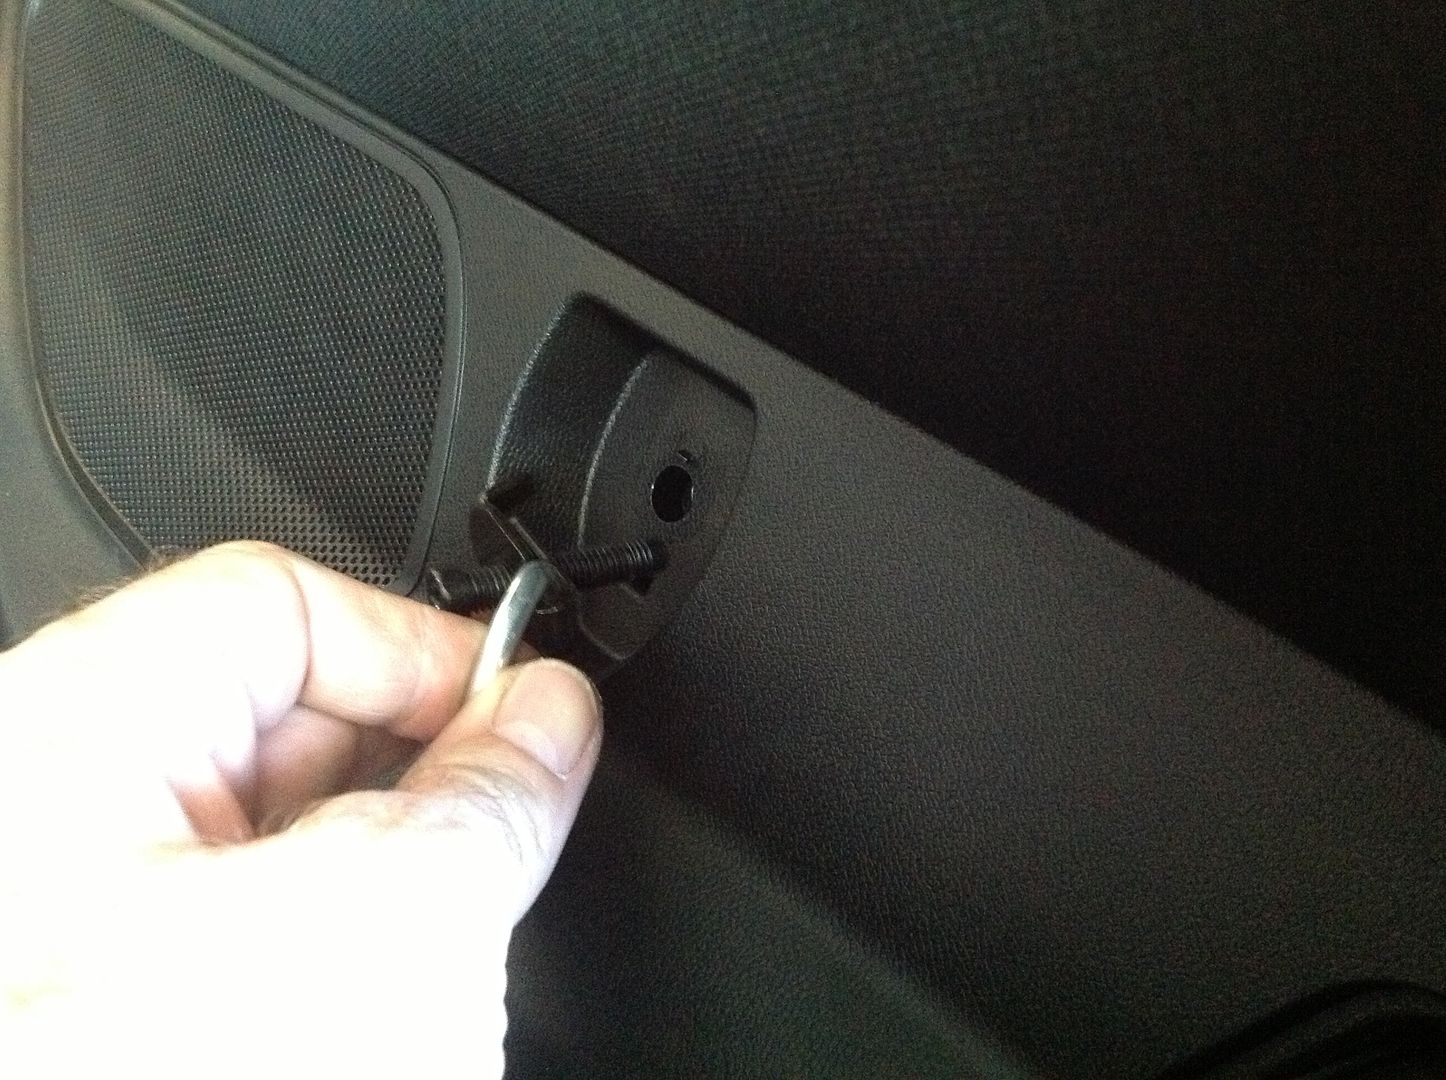
Pop the targa top hook cover off. Pry on the bottom first and then pull it sideways.
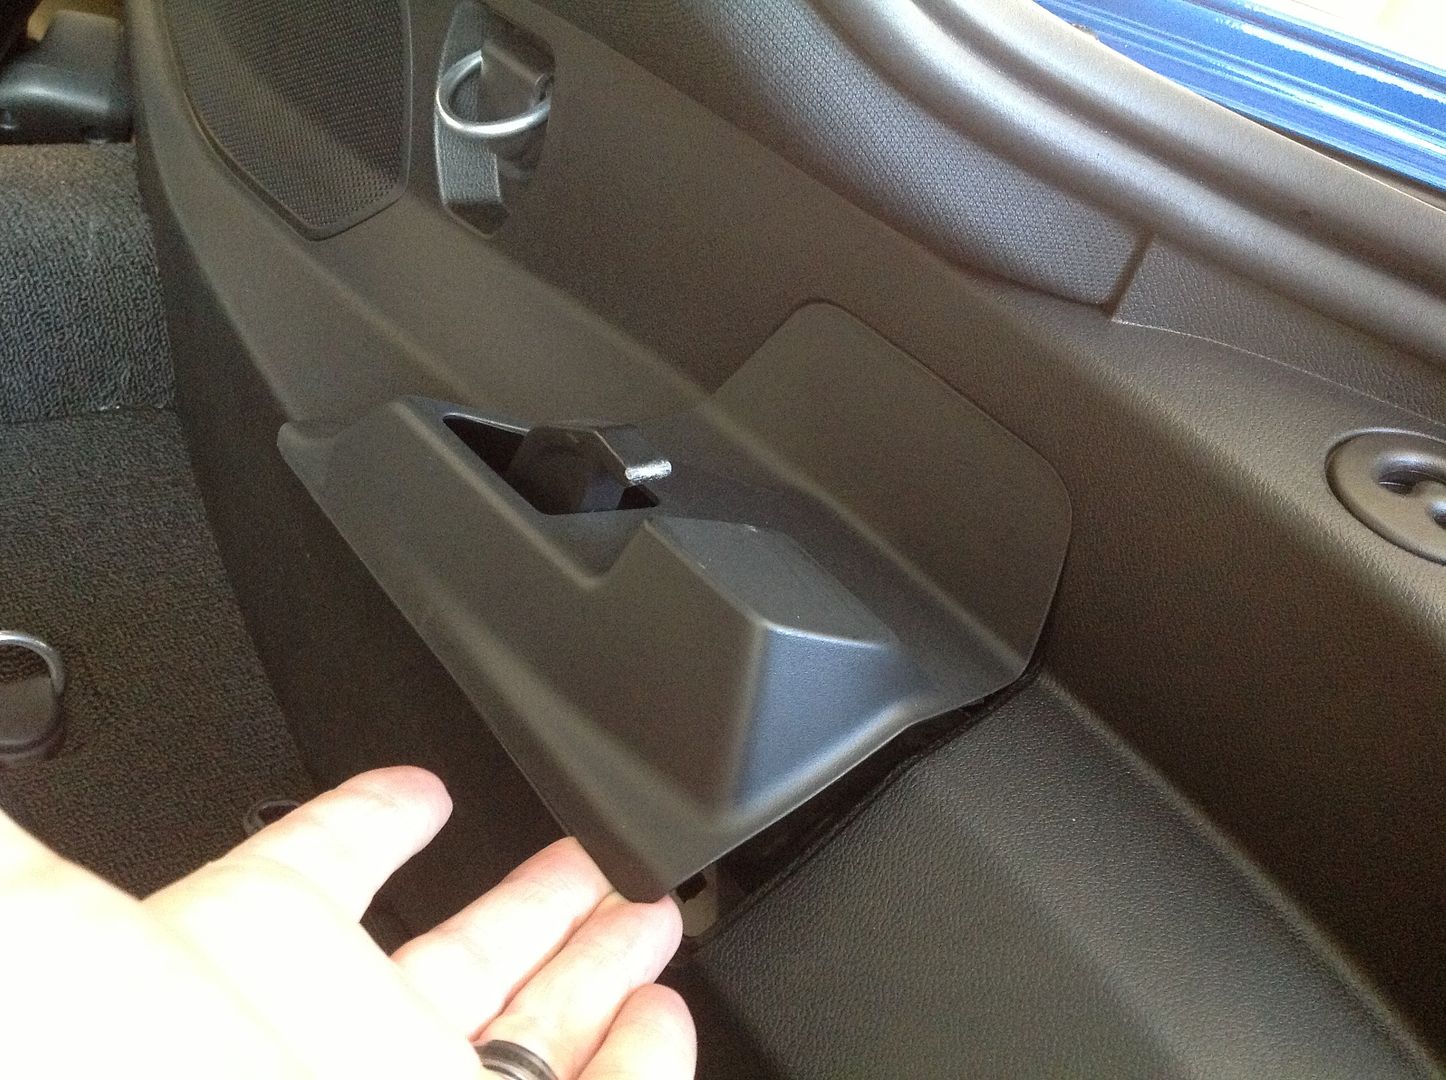
Pry off rear tie down hook cover and unbolt the D-ring with a torx bit.

You will have to unbolt the seat belt from the seat, pry the plastic cover off, unbolt the seat belt. Be careful to not slip with the ratchet, you will damage the sill plate. Slide the seat belt down to unhook it.


Pop the targa top hook cover off. Pry on the bottom first and then pull it sideways.


Pry off rear tie down hook cover and unbolt the D-ring with a torx bit.

 08-24-2014, 11:35 PM
#15
Looking good so far! 
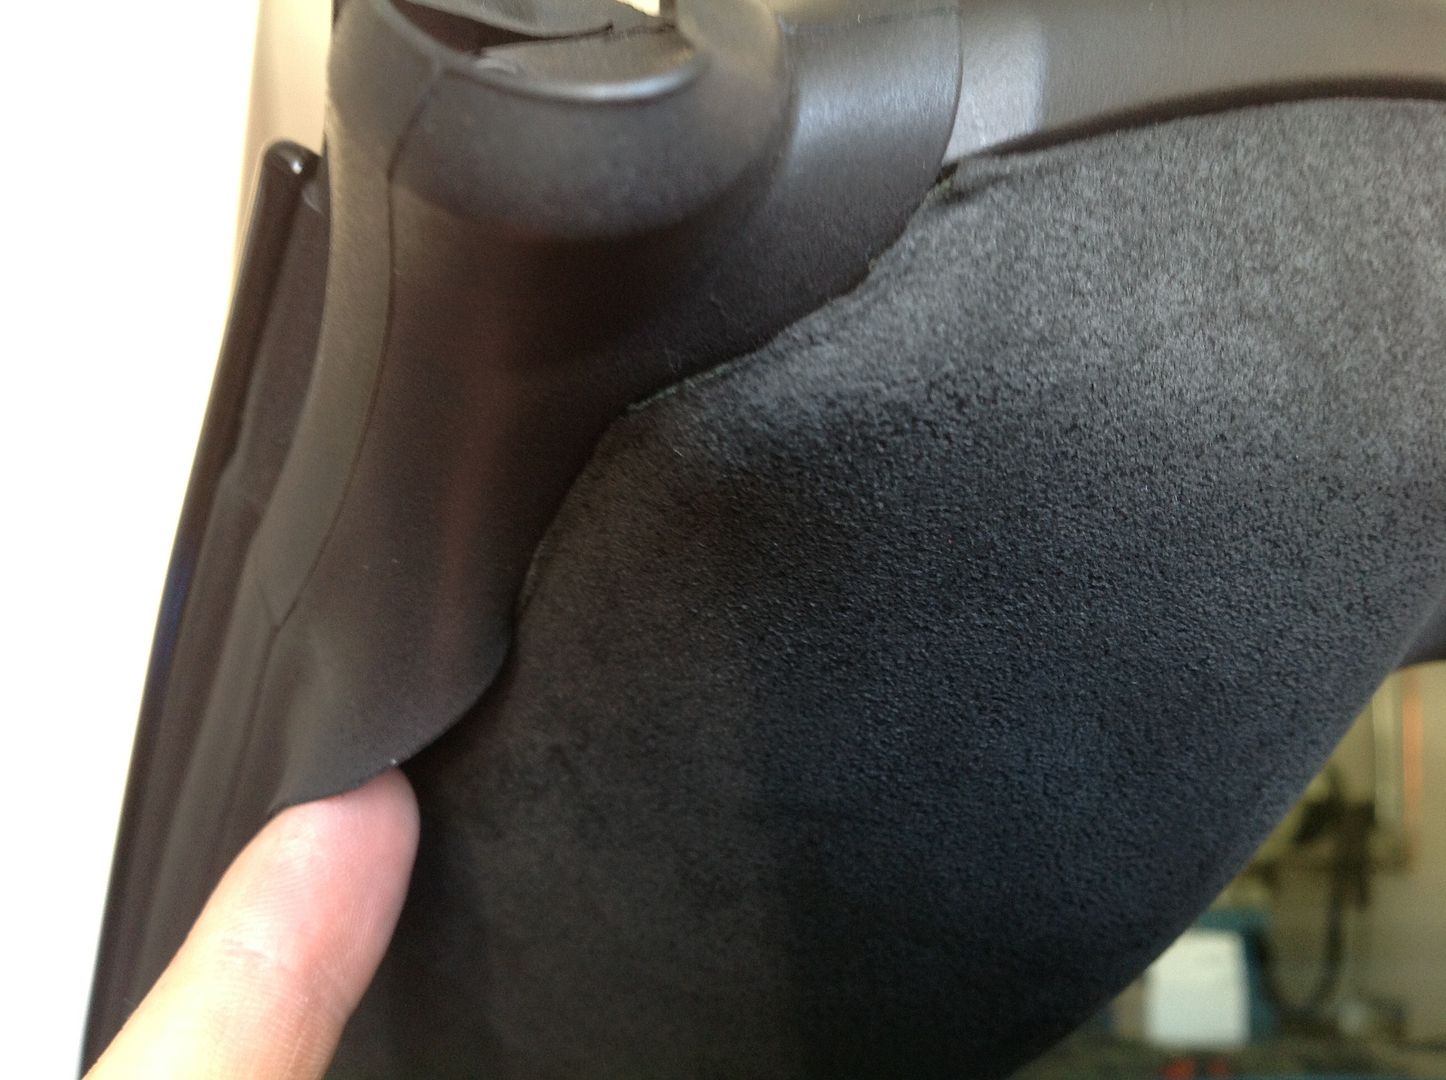
Somewhat random request here: do you have any close-up pictures of the raw edge of the "suede"?
Somewhat random request here: do you have any close-up pictures of the raw edge of the "suede"?
08-24-2014, 11:42 PM
#16
Pro
Thread Starter
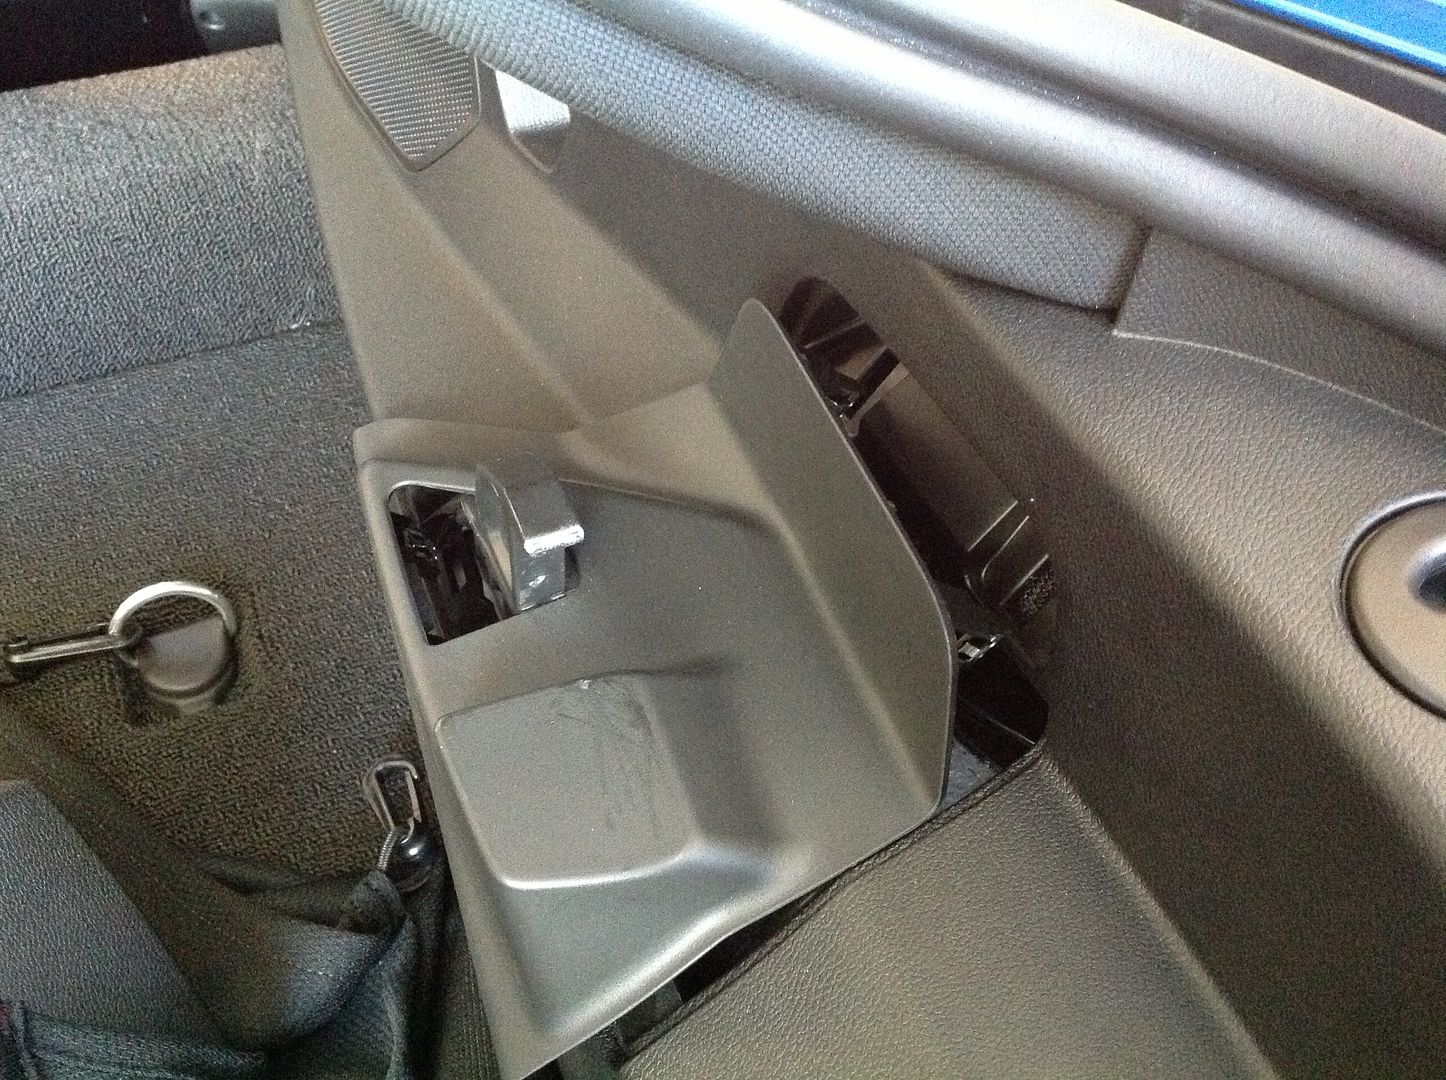
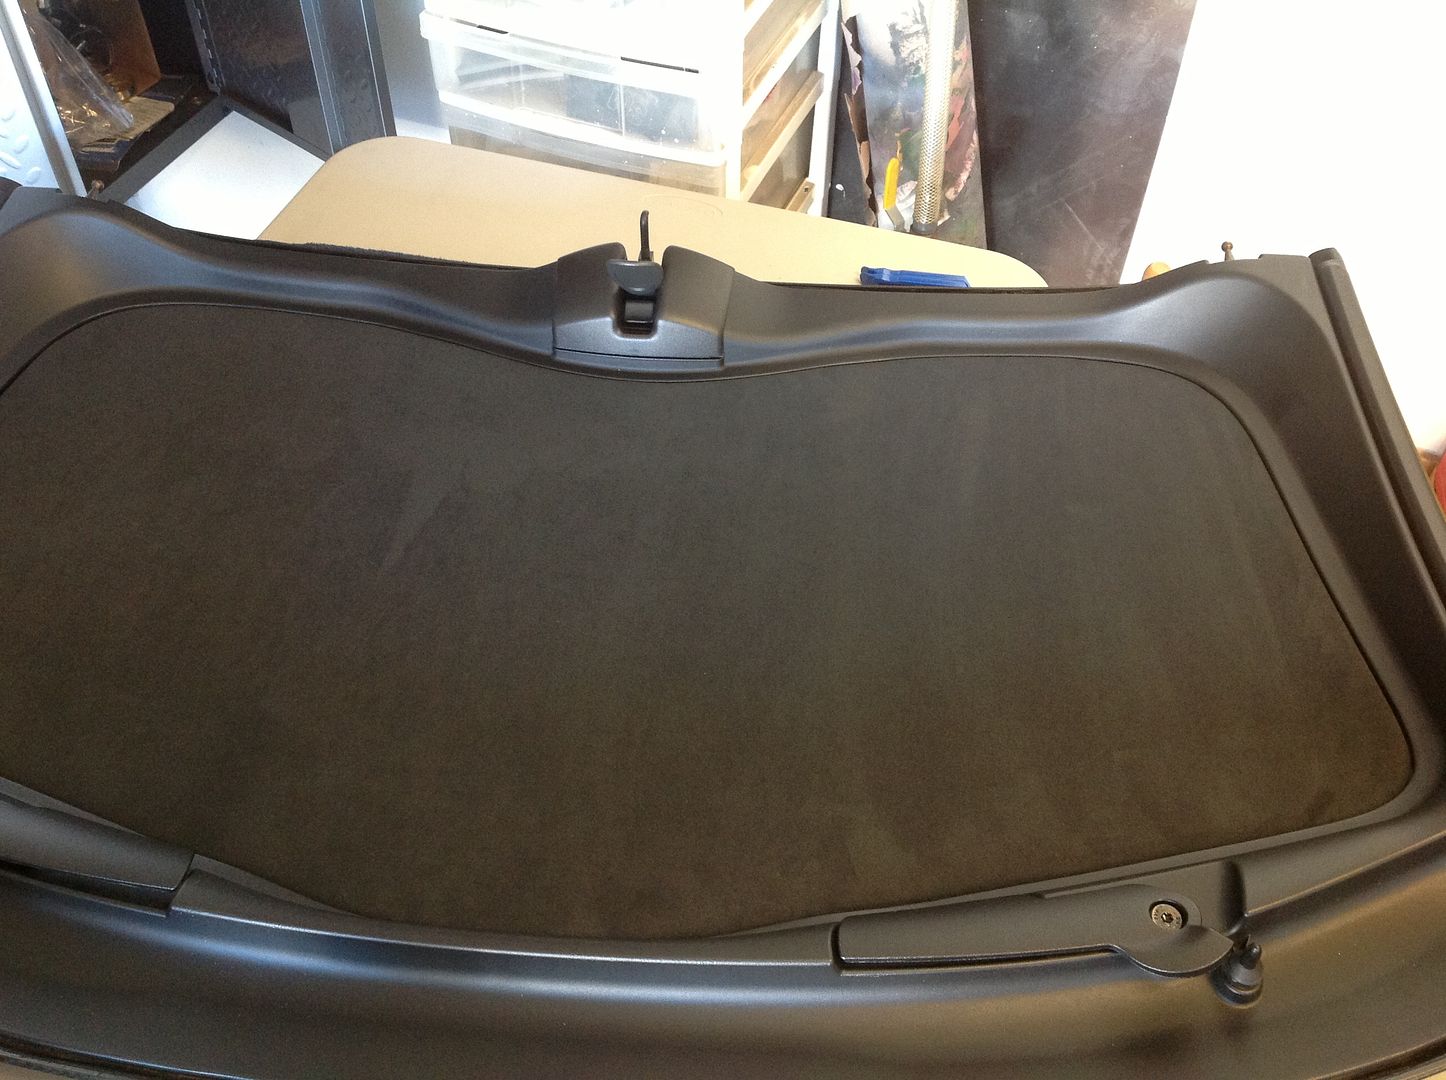
All of the rear panels are ready to pop out. They are all snap in. Pop the lower plastic panel out first, then the upper cloth covered panel.


 08-24-2014, 11:53 PM
#17
Pro
Thread Starter
While I had the panels out, I have been wanting to fix the ill fitting roof gap on the right side.
Before:
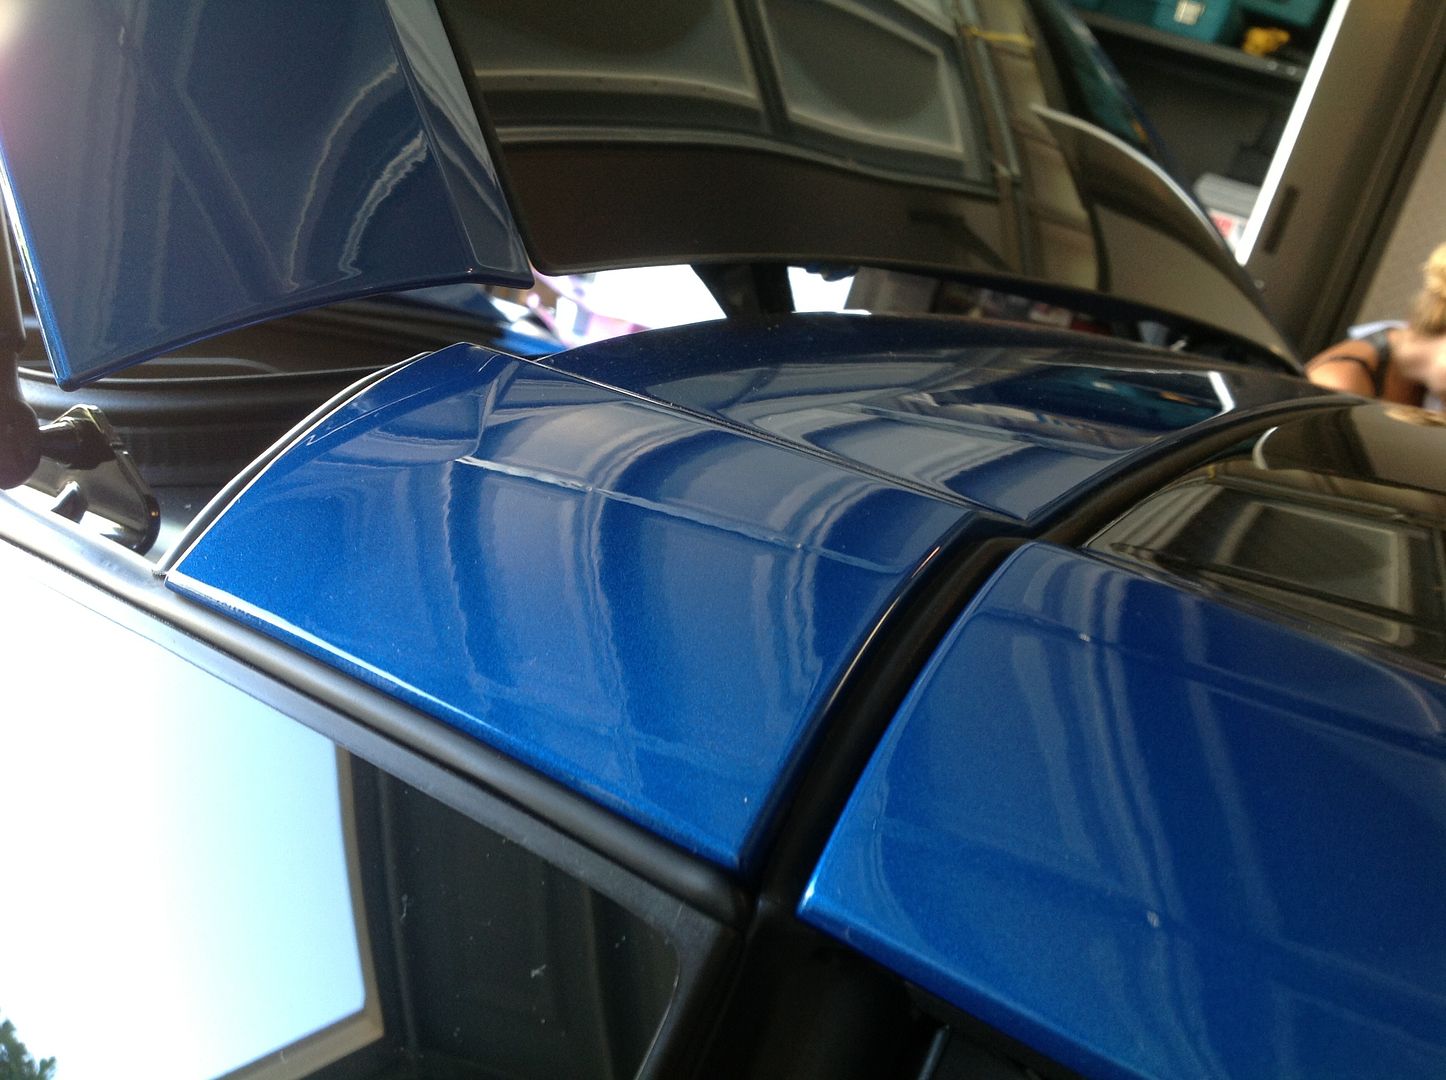
With the top in place, loosen the two bolts with a 10mm wrench and move the top to the desired location.
After:
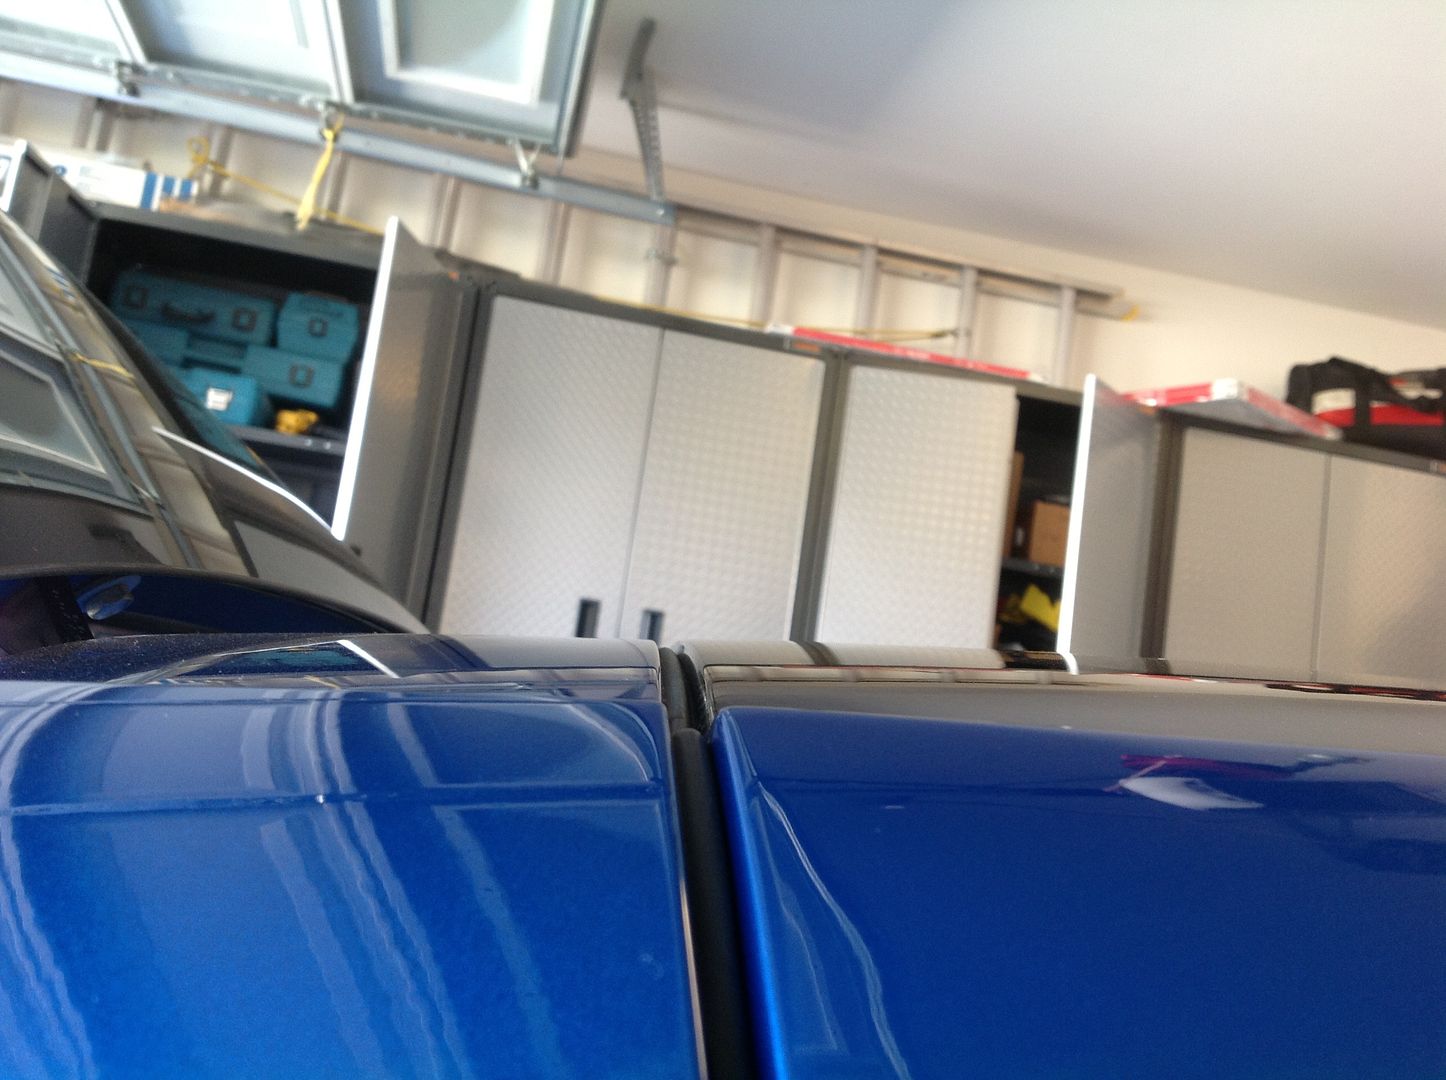
Before:

With the top in place, loosen the two bolts with a 10mm wrench and move the top to the desired location.

After:


 08-25-2014, 12:28 AM
#19
Pro
Thread Starter
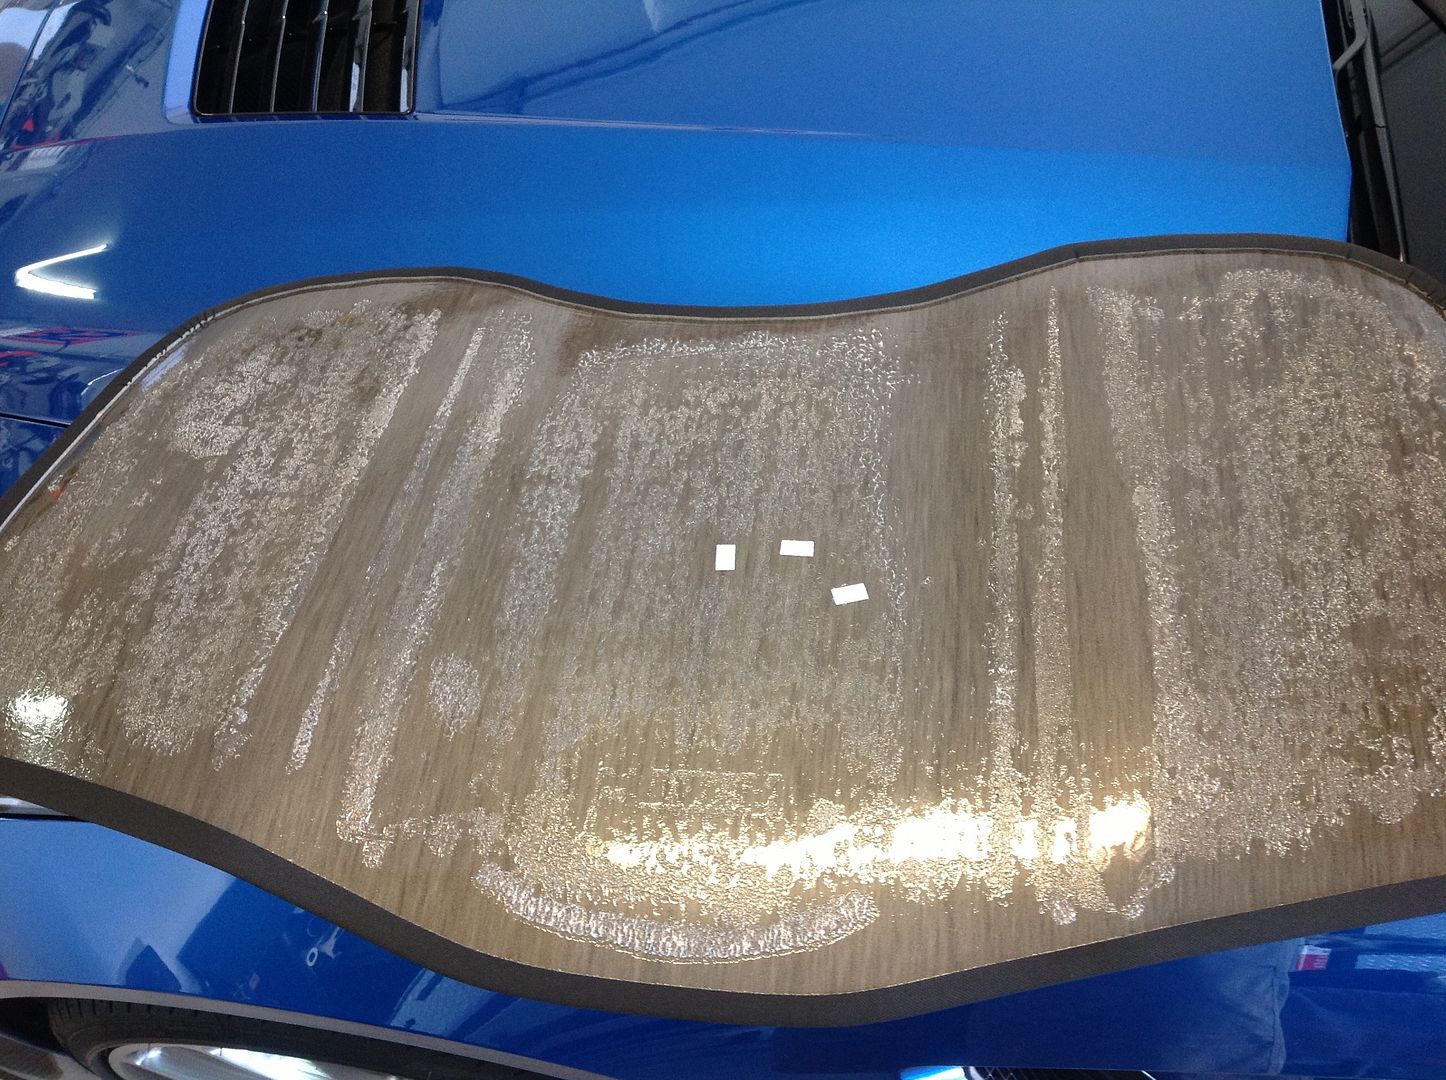
The headliner is just glued to the roof. I lifted the corner, Yes with a bicycle tire tool. I was getting lazy at this point. 
Slowly pull it off and the new one comes with a new sticky backing.
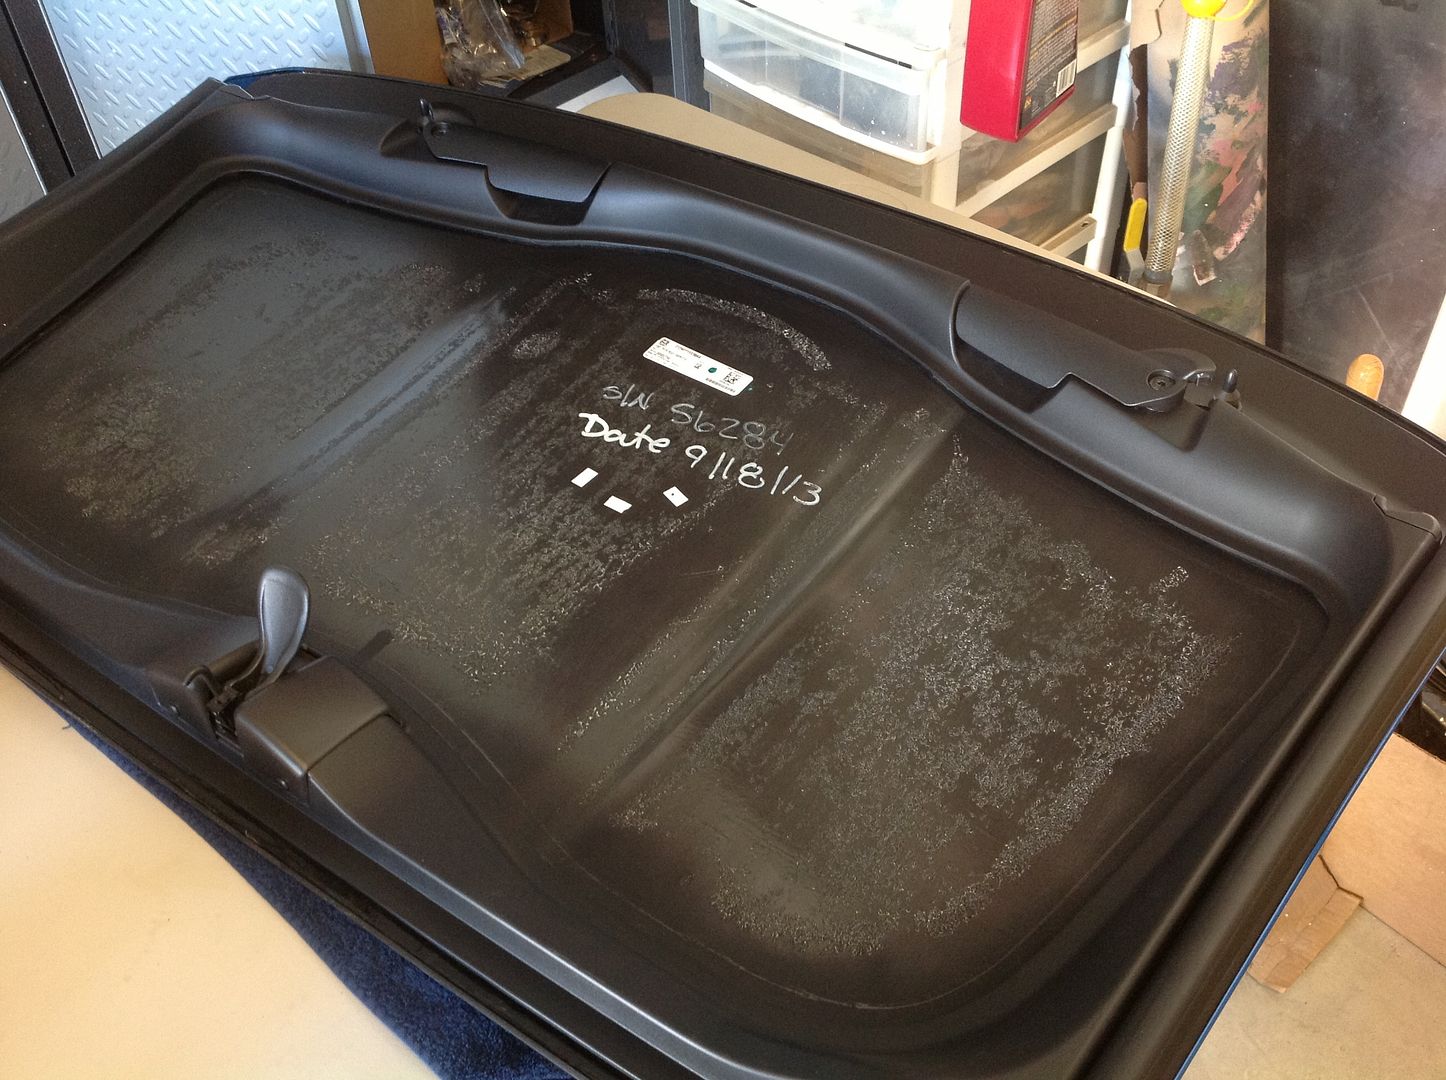
Slowly pull it off and the new one comes with a new sticky backing.


The following 2 users liked this post by 48supertruck:
Keithwinnfl (06-06-2020),
Speedfreaq (07-28-2020)
08-25-2014, 12:36 AM
#20
Pro
Thread Starter
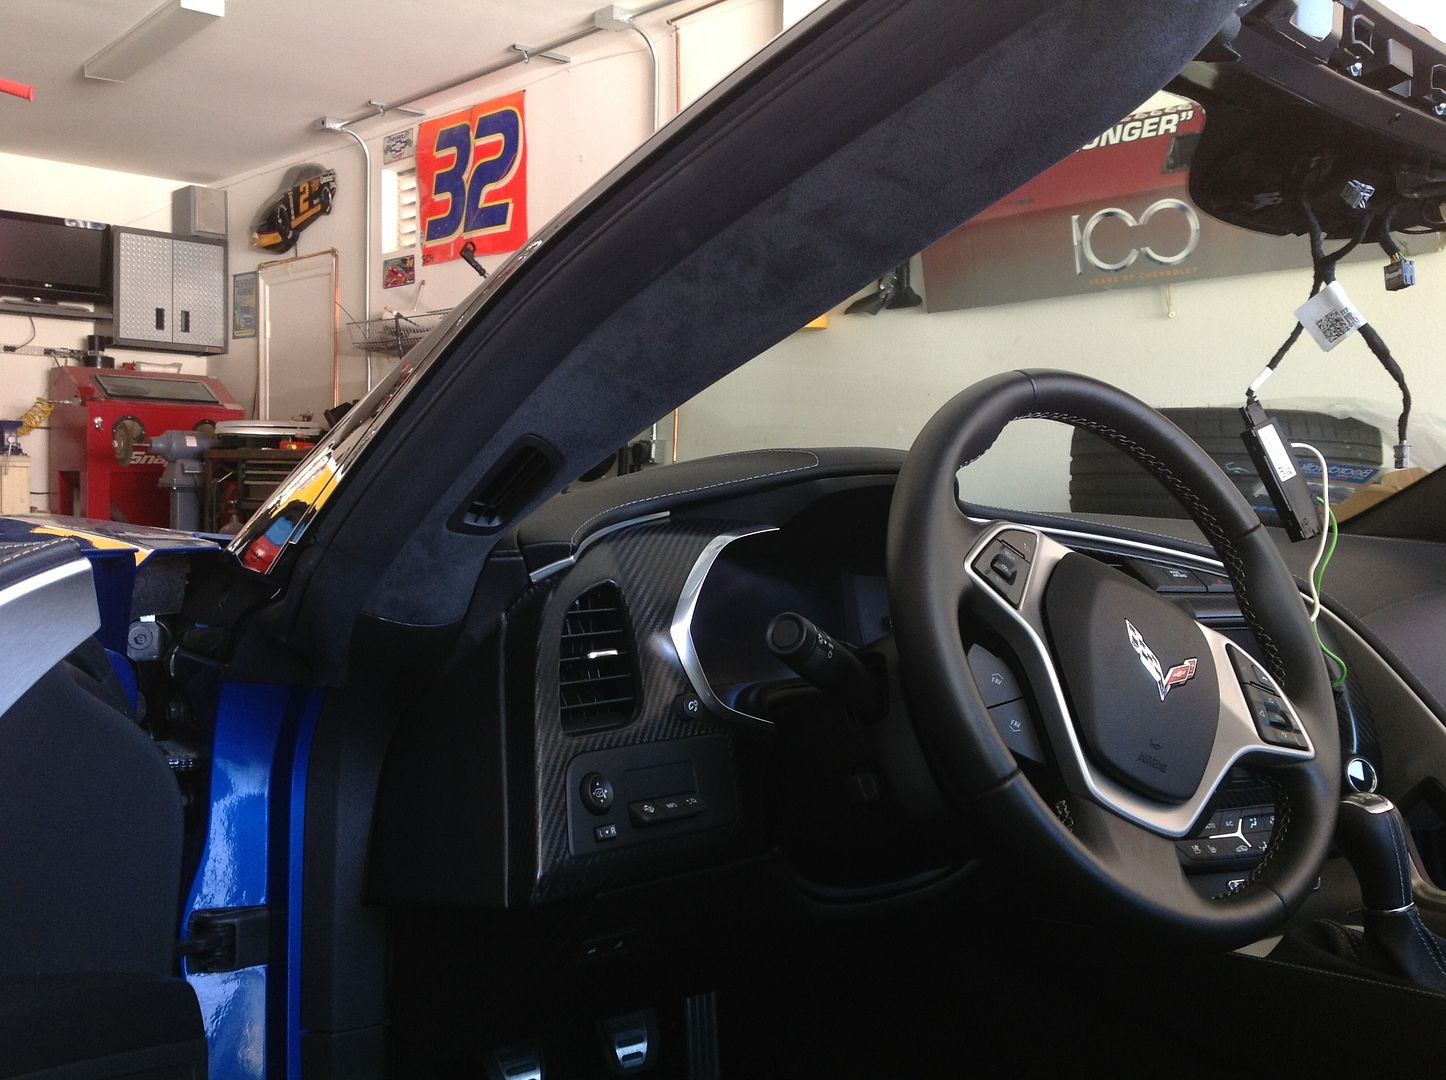
All done.
Thanks you very much to forum member Theta. I could not of done this project without his assistance. He is a valuable asset to the Corvette GM community. Thanks again Sean. Get well.
Thanks you very much to forum member Theta. I could not of done this project without his assistance. He is a valuable asset to the Corvette GM community. Thanks again Sean. Get well.

The following 2 users liked this post by 48supertruck:
Keithwinnfl (06-06-2020),
Renarello (04-17-2024)