Tip: The power in the after shots is created in the before shots
 10-15-2009, 12:15 PM
#1
Former Vendor
Thread Starter

The power in the after shots is created in the before shots
In my life I've had the good fortune to work on a lot of cool cars and with a lot of cool people for which I'm always very thankful for. I've also had the good fortune to work on a lot of very neglected cars, some special interest and some not but to the owner it was alway important and when it's important to the owner then it's important to me.
One of the things I've learned when doing dramatic extreme makeovers, whether on oxidized single stage paints or swirled-out clear coats, is the importance of capturing great before shots.
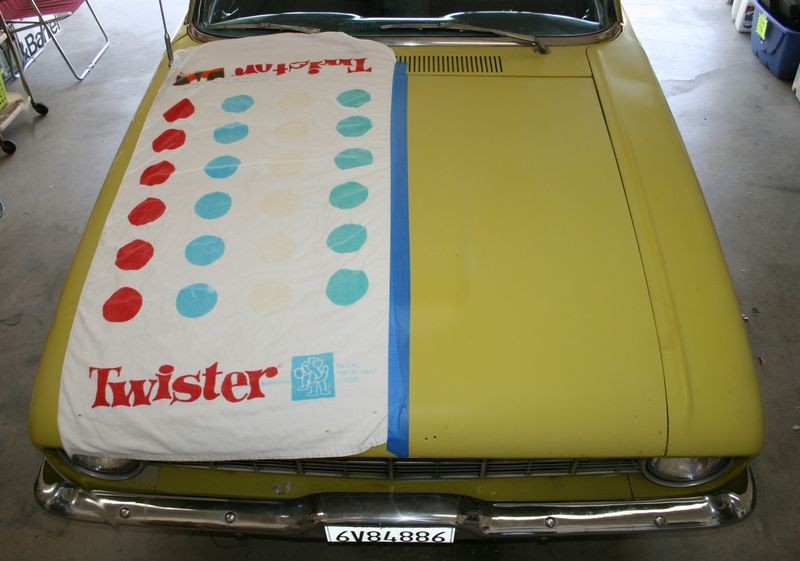
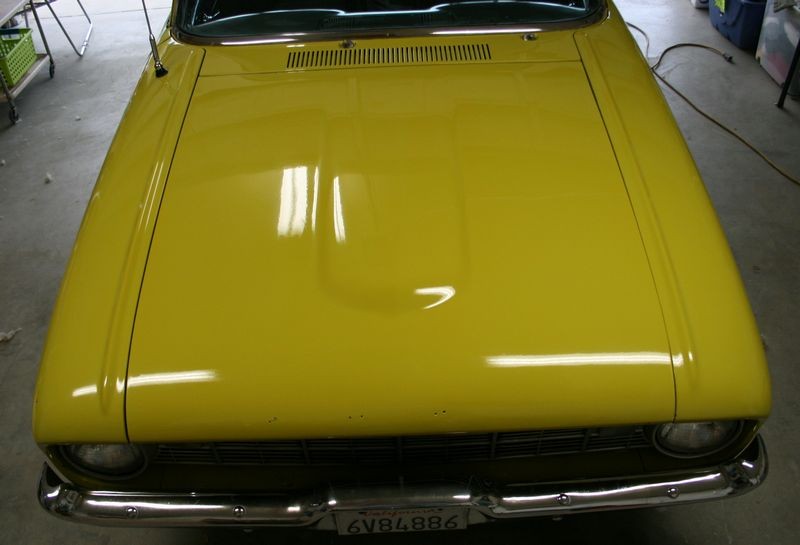
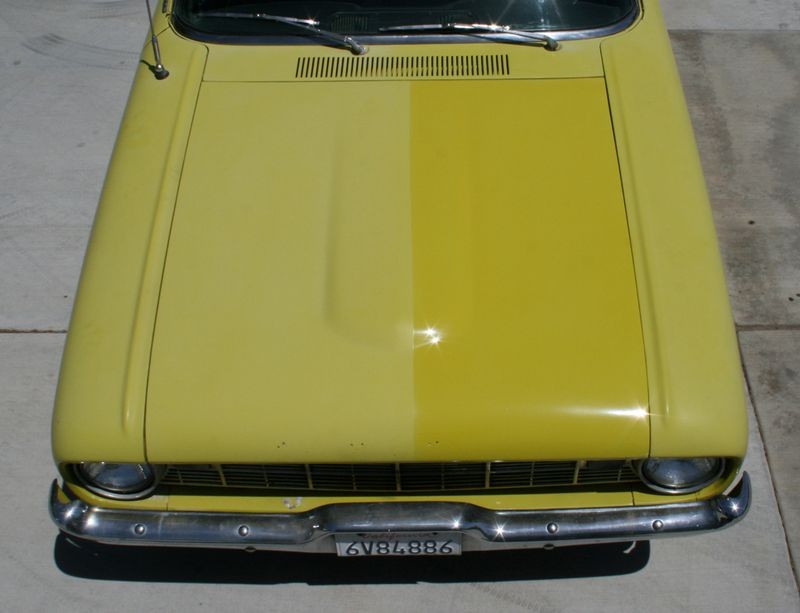
One of the biggest problems with capturing a great before shot is someone, not understanding the value in the before shot and all it's ugliness, will take some kind of paint polishing product and make a clean, shiny spot in an otherwise really neglected and ugly panel like the hood or the trunk-lid. These types of panels make the best before and after shots because they are usually large, they are usually in the worst shape, you can look down on them, or in this case take an overhead shot of them, and the hood is specifically the panel that gets the most attention from car enthusiasts.
So over the years when I've discussed doing future extreme makeovers on project cars with the owners I've always stressed the importance of not touching the paint till AFTER we get the before shots.
It's just so uncanny that if you don't bring this topic up, then sometime before you arrive at the car's location or the car is brought to your location, someone and their good intentions will do you the favor of rubbing something smack dab in the middle of the hood and make a shiny spot and ruin the before pictures.
Anyway, a couple of years ago while scheduling an Extreme Makeover, I wrote this little sentence that I think states the concept very clearly and wanted to post it in it's own thread with a time stamp for others to learn from and hopefully explain the "why" behind the idea...
So here it is and you can quote me on this,
Quote:
"If you ever do an extreme makeover on a car or some other project, remember the power in the after shots is created in the before shots"
So do your best to get GREAT before shots before bringing your hand or your polisher down onto the paint and making a shiny spot. And try to educate the owner if there's going to be time passing before the project is scheduled to also not take any action until after the before shots area captured. Just as a precaution. Better safe than sorry.
Often times I'll see a great write-up on a spectacular and dramatic before and after project and the detailer will say something like,
"Sorry I didn't get any before pictures"
This happens all the time. It's happened to me because I didn't have a camera handy or the batteries were dead.
So just a note to anyone reading this, if you ever do an extreme makeover on something cool or special interest, remember, the power is in the before pictures, so make plans to capture them before buffing on the car.
Here's an example,
I met this gentleman at our local Autozone and mentioned to him that his car was a great candidate for an extreme makeover; explained the process and gave him my phone number and in our conversation I let him know the importance of not making a shiny spot on the hood.
I figured like most people he'll never call. A few months later this guy calls me and reminds me of the car and asks if I still want to use it for an extreme makeover? Let's me know he's going to take his Dad along for an upcoming car cruise and car show.
I asked him,
Have you worked on it at all?
He said no
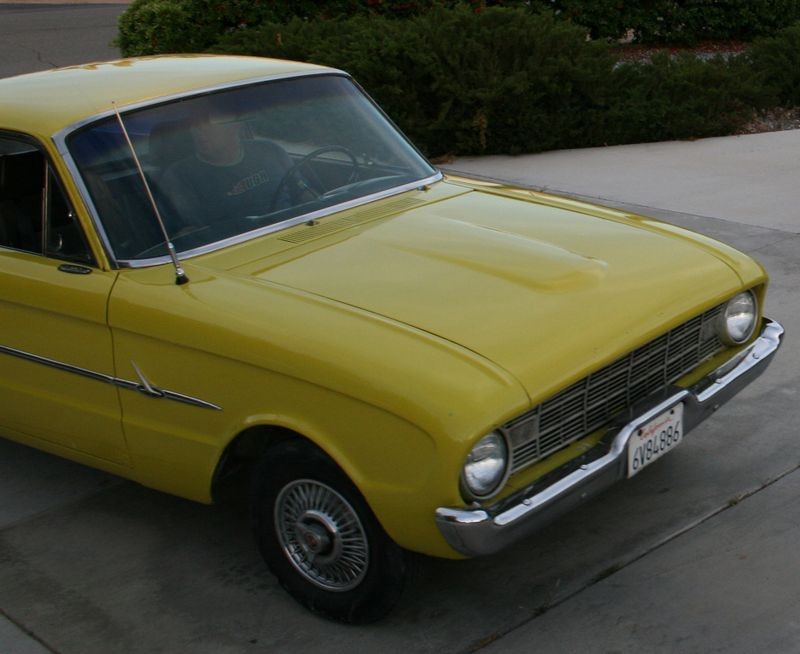
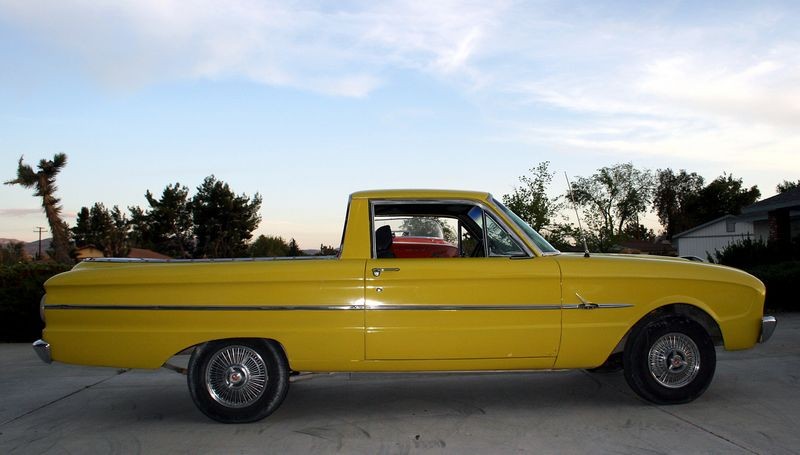
So I said, bring it on over and we'll buff it out till it shines like a diamond, which he did. Anyway, it's just a nice old Ford and it was fun to polish out. I was just happy he didn't rub some kind of compound in the middle of the hood in the months between when I met him at Autozone and the day he brought it over.
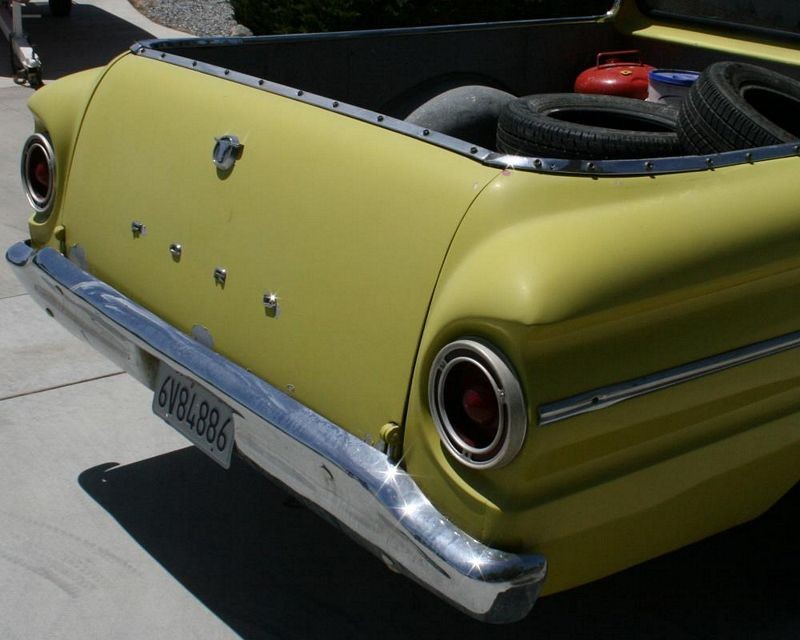
He purchased this 1960 Ford Ranchero off eBay in running condition for $900.00 and has been tinkering on it in his spare time while using it as a daily driver back and forth to the cement plant where he works. So the paint sits out in the Mojave Desert sun and bakes with a coating of all kinds of dust from the cement plant landing on it.
Before

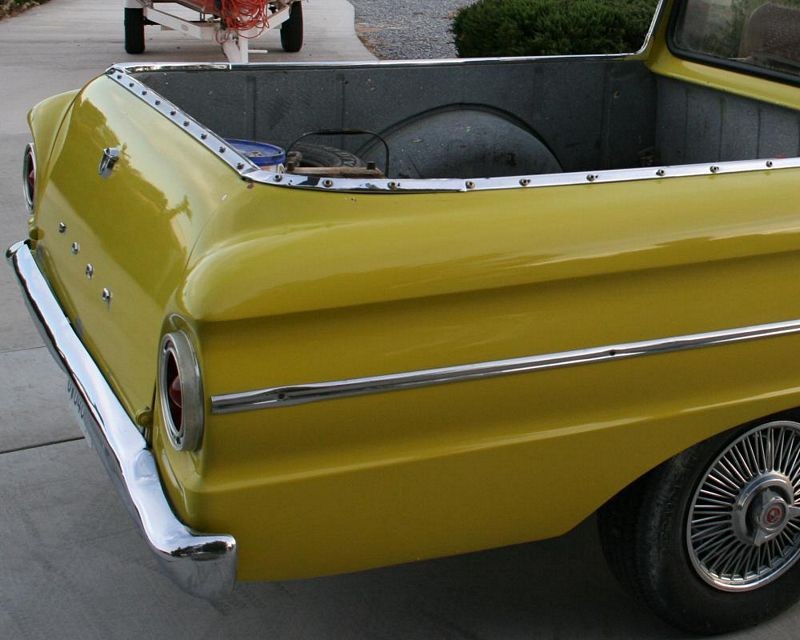
One half covered and taped-off
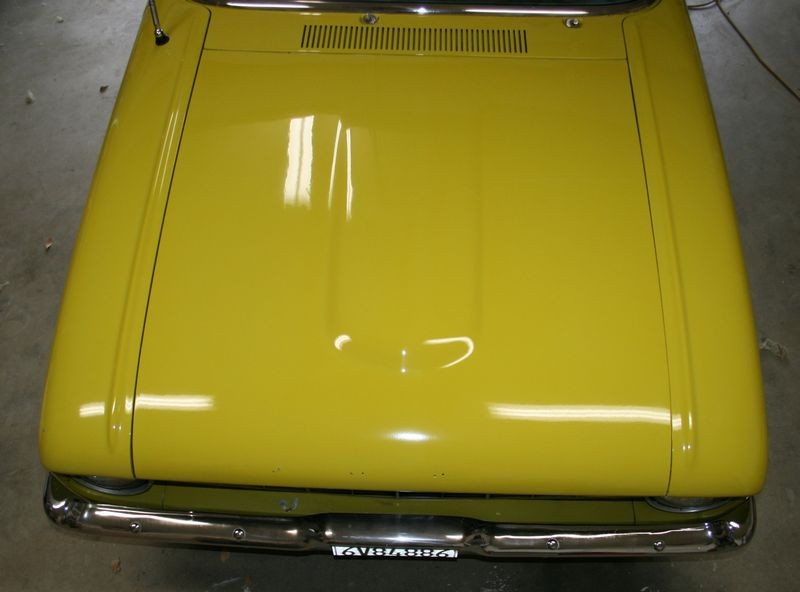
Before and after results

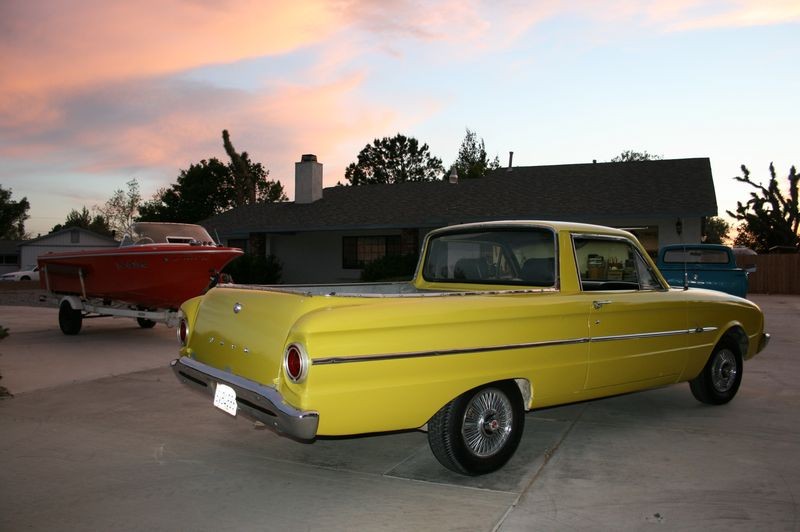
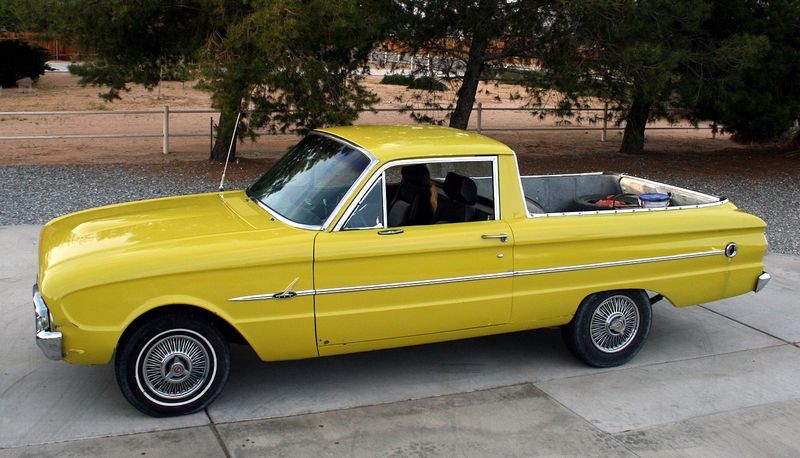
After
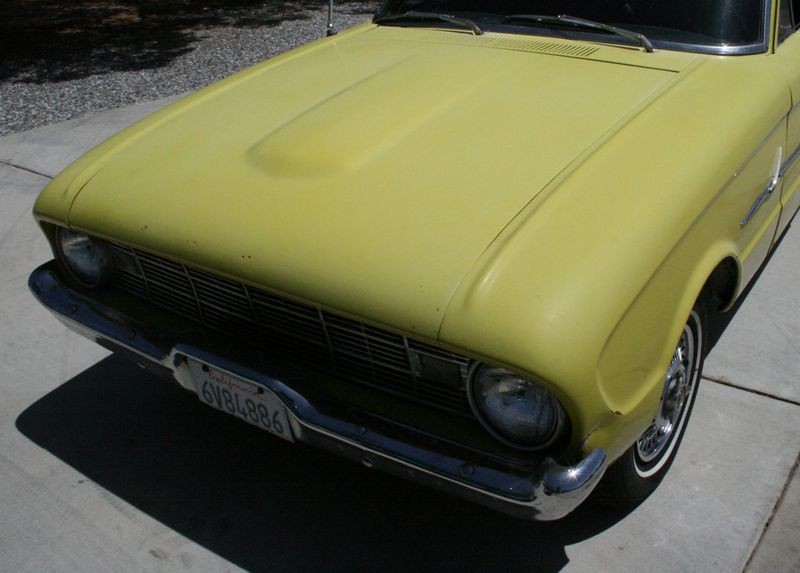
A few more from this Extreme Makeover


From the back...

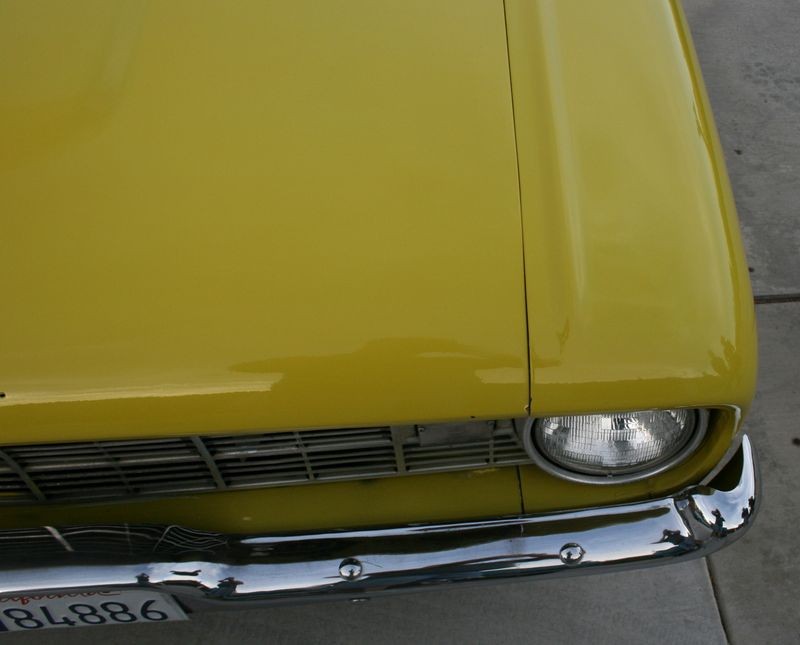
Some more of the hood,


In my life I've had the good fortune to work on a lot of cool cars and with a lot of cool people for which I'm always very thankful for. I've also had the good fortune to work on a lot of very neglected cars, some special interest and some not but to the owner it was alway important and when it's important to the owner then it's important to me.
One of the things I've learned when doing dramatic extreme makeovers, whether on oxidized single stage paints or swirled-out clear coats, is the importance of capturing great before shots.
One of the biggest problems with capturing a great before shot is someone, not understanding the value in the before shot and all it's ugliness, will take some kind of paint polishing product and make a clean, shiny spot in an otherwise really neglected and ugly panel like the hood or the trunk-lid. These types of panels make the best before and after shots because they are usually large, they are usually in the worst shape, you can look down on them, or in this case take an overhead shot of them, and the hood is specifically the panel that gets the most attention from car enthusiasts.
So over the years when I've discussed doing future extreme makeovers on project cars with the owners I've always stressed the importance of not touching the paint till AFTER we get the before shots.
It's just so uncanny that if you don't bring this topic up, then sometime before you arrive at the car's location or the car is brought to your location, someone and their good intentions will do you the favor of rubbing something smack dab in the middle of the hood and make a shiny spot and ruin the before pictures.
Anyway, a couple of years ago while scheduling an Extreme Makeover, I wrote this little sentence that I think states the concept very clearly and wanted to post it in it's own thread with a time stamp for others to learn from and hopefully explain the "why" behind the idea...
So here it is and you can quote me on this,
Quote:
"If you ever do an extreme makeover on a car or some other project, remember the power in the after shots is created in the before shots"
So do your best to get GREAT before shots before bringing your hand or your polisher down onto the paint and making a shiny spot. And try to educate the owner if there's going to be time passing before the project is scheduled to also not take any action until after the before shots area captured. Just as a precaution. Better safe than sorry.
Often times I'll see a great write-up on a spectacular and dramatic before and after project and the detailer will say something like,
"Sorry I didn't get any before pictures"
This happens all the time. It's happened to me because I didn't have a camera handy or the batteries were dead.
So just a note to anyone reading this, if you ever do an extreme makeover on something cool or special interest, remember, the power is in the before pictures, so make plans to capture them before buffing on the car.
Here's an example,
I met this gentleman at our local Autozone and mentioned to him that his car was a great candidate for an extreme makeover; explained the process and gave him my phone number and in our conversation I let him know the importance of not making a shiny spot on the hood.
I figured like most people he'll never call. A few months later this guy calls me and reminds me of the car and asks if I still want to use it for an extreme makeover? Let's me know he's going to take his Dad along for an upcoming car cruise and car show.
I asked him,
Have you worked on it at all?
He said no
So I said, bring it on over and we'll buff it out till it shines like a diamond, which he did. Anyway, it's just a nice old Ford and it was fun to polish out. I was just happy he didn't rub some kind of compound in the middle of the hood in the months between when I met him at Autozone and the day he brought it over.
He purchased this 1960 Ford Ranchero off eBay in running condition for $900.00 and has been tinkering on it in his spare time while using it as a daily driver back and forth to the cement plant where he works. So the paint sits out in the Mojave Desert sun and bakes with a coating of all kinds of dust from the cement plant landing on it.
Before
One half covered and taped-off
Before and after results
After
A few more from this Extreme Makeover
From the back...
Some more of the hood,
Copyright �PBMA - Autogeekonline.net� All Rights Reserved
Last edited by MikePhillips; 11-30-2009 at 04:01 PM. Reason: Forgot to add our copyright notice.
 10-15-2009, 12:15 PM
#2
Former Vendor
Thread Starter
Continured...
The roof was white in some places due to extreme oxidation.

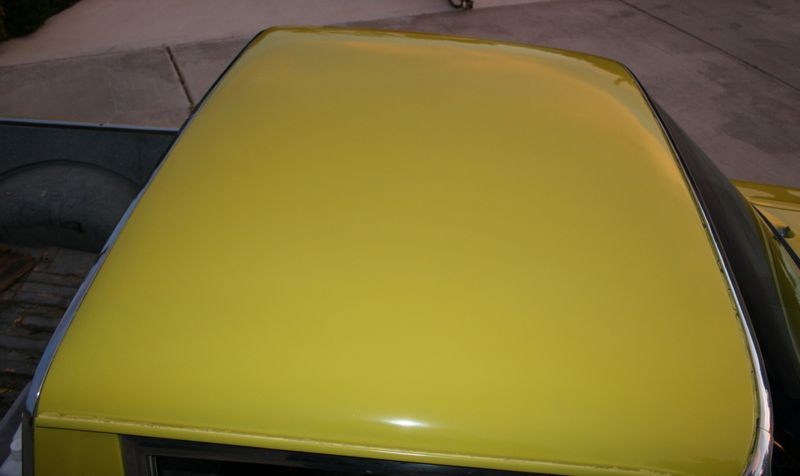
Note the problem with modern clear coats is swirls while the problem with older single stage paints is oxidation. It's not that modern clear coats won't oxidize it's just that process takes a lot longer and the more visual and noticeable problem is swirls.
I took over a hundred pictures, here's a few more random shots...


One of the problems most detailers run into when taking before and after pictures is that projects like this take all day, that is the machine compounding, polishing and waxing usually takes anywhere from 6 to 14 hours depending upon how bad the paint is, how fast you are at what you do and how important the project it.
If the project is very important most detailers will slow down and pay more attention to each square inch as they polish the paint to perfection. A production detailer can buff out a car about as fast as they can walk around the car so there's a wide spectrum as to how much time a buff-out like the above will take and a lot of it depends upon the detailer. I think I had about 6-7 hours into this project and the owner helped throughout the process except for the rotary buffer steps.
Normally we would reach for M80 Speed Glaze as it will usually do a good job of chewing off the dead, oxidized paint from a single stage finish when used with a wool pad and a rotary buffer while gorging the paint with same type of polishing oils found in M07 but instead we used M105 with a rotary buffer and a wool cutting pad followed by M205 using a W-8000 foam polishing pad on a rotary buffer and it worked like a charm.
We did the optional step of re-polishing the single stage paint using M07 Show Car Glaze to really gorge the paint with the high concentration of polishing oils found in M07 and then sealed the paint using NXT Tech Wax Paste version 1.0 (That's what I had in the garage).
After we got into it the owner commented how he wasn't aware how involved we were going to get as he thought we were just going to wax it.
Products Used
M105/W5500/RB - 1500 RPM
M205/W-8000/RB - 1500 RPM
M07/W-8006/DA - 5.0 Speed Setting
NXT/W9207/DA - 4.0 Speed Setting
Friendly suggestion...
Anytime you find yourself in a position to buff out something interesting or unique, do your best to get the before pictures. While the after pictures make the car look its best, it's the before pictures that show how you took a diamond in the rough and turned it into a glistening gemstone.
The roof was white in some places due to extreme oxidation.
Note the problem with modern clear coats is swirls while the problem with older single stage paints is oxidation. It's not that modern clear coats won't oxidize it's just that process takes a lot longer and the more visual and noticeable problem is swirls.
I took over a hundred pictures, here's a few more random shots...
One of the problems most detailers run into when taking before and after pictures is that projects like this take all day, that is the machine compounding, polishing and waxing usually takes anywhere from 6 to 14 hours depending upon how bad the paint is, how fast you are at what you do and how important the project it.
If the project is very important most detailers will slow down and pay more attention to each square inch as they polish the paint to perfection. A production detailer can buff out a car about as fast as they can walk around the car so there's a wide spectrum as to how much time a buff-out like the above will take and a lot of it depends upon the detailer. I think I had about 6-7 hours into this project and the owner helped throughout the process except for the rotary buffer steps.
Normally we would reach for M80 Speed Glaze as it will usually do a good job of chewing off the dead, oxidized paint from a single stage finish when used with a wool pad and a rotary buffer while gorging the paint with same type of polishing oils found in M07 but instead we used M105 with a rotary buffer and a wool cutting pad followed by M205 using a W-8000 foam polishing pad on a rotary buffer and it worked like a charm.
We did the optional step of re-polishing the single stage paint using M07 Show Car Glaze to really gorge the paint with the high concentration of polishing oils found in M07 and then sealed the paint using NXT Tech Wax Paste version 1.0 (That's what I had in the garage).
After we got into it the owner commented how he wasn't aware how involved we were going to get as he thought we were just going to wax it.
Products Used
M105/W5500/RB - 1500 RPM
M205/W-8000/RB - 1500 RPM
M07/W-8006/DA - 5.0 Speed Setting
NXT/W9207/DA - 4.0 Speed Setting
Friendly suggestion...
Anytime you find yourself in a position to buff out something interesting or unique, do your best to get the before pictures. While the after pictures make the car look its best, it's the before pictures that show how you took a diamond in the rough and turned it into a glistening gemstone.


 10-16-2009, 09:24 PM
#6
Uber Waxer

I always forget to get pics, I get too busy trying to get the job finished in my free time and dont stop to think about pics until im almost done.
 10-17-2009, 09:02 AM
#8
Team Owner

Very impressive, awesome results.
10-17-2009, 01:41 PM
#10
Le Mans Master

Excellent post. I find taking the before pics to be the hardest part of the detail. I usually forget about them until I am half way into the detail and even if I remember they always come out looking a lot better than the car does in person.
I find it is a lot easier making a crappy car look great in pictures than it is to actually capture the swirls in a photograph.
I would love to hear any tips anybody has for taking these before pics.
Unfortunately I am usually taking before shots early in the morning which is the best time of day for photographing a car and worst time to capture swirls and the after shots are usually when the sun is high in the sky and the worst time to be photgraphing a car and probably the best time to capture swirls. Too bad it is not the opposite.
 10-17-2009, 11:31 PM
#12
Safety Car

Member Since: Sep 2008
Location: Allen Park MI
Posts: 4,408
Likes: 0
Received 0 Likes
on
0 Posts

The Ranchero looks great. I bet he never dreamed it could look that good. Once in a while I'll notice a car that could really benefit from a good polish, and I'll think if they only knew what to do.
10-18-2009, 08:05 PM
#13
Safety Car
You ruined it! He had that flat clear look going that is so popular with the custom cars and you ruined it! 
 j/k - You did a great job and the pictures really tell the story!
j/k - You did a great job and the pictures really tell the story!
10-19-2009, 04:01 PM
#14
Former Vendor
Thread Starter
Yeah, that's me too, I have to consciously think about the big picture, (capturing the project with photos from start to beginning), or I'll forget.
You hit the nail on the head in your comments about capturing swirls in the morning as there's no sun overhead so it's kind of hard to do without a Swirl Finder Light.
One thing you can do is to try to save a horizontal section till the sun is overhead, like the trunk lid, or at least a portion of the trunk lid. Kind of a pain in the bottom but it's one way of getting the swirl shots.
Another way is to get the Swirl Finder Light, Autogeek now carries them, see my comments in this thread.
The Brinkman Swirl Finder Light aka The Cruel Master!
Note: I take one with me wherever I go because sometimes it can help me to get a new client.
Here's another tip, in a lot of my swirl shots you'll see my finger, sometimes it looks like I'm pointing at the swirls. Actually I'm just giving the camera a "Focus Point".
Usually, on a surface with an even appearance, like the hood or trunk-lid of a car, most cameras can't find anything to focus on so any shots you do take are often times out of focus.
I take my finger and place it on the paint, or hover directly over it and this gives my camera something to focus on, then I take the shot.
Like this,

The Swirl Finder Light, aka The Cruel Master works really well for capturing swirls with your camera as well as checking your work.
Checking my work...
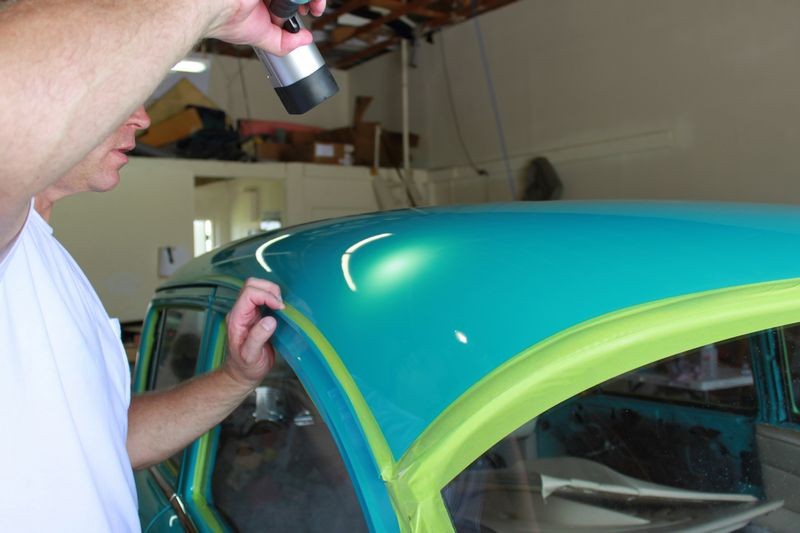
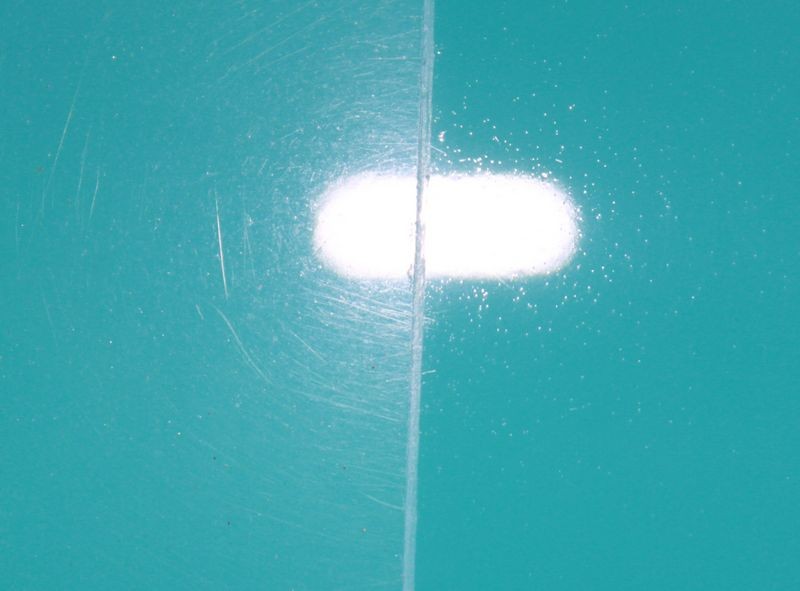
Here's a shot taken inside the garage using the Swirl Finder Light with the light right on the tape line between before and after.
Capturing swirls with the Swirl Finder Light
And a few minutes later we backed the 1957 Chevy into the sun and captures swirls using the sun that was overhead at the time...
Using the sun overhead to reveal swirls

Instead of using your finger you can also place a piece of Painter's Tape, or Detailing Clay, or even a Nickle or a Penny on the paint, the item doesn't have to be large, in fact smaller is better but you don't want it sliding around on the paint potentially instilling a scratch, that's why a little piece of detailing clay works pretty well then after you capture your shots, simply remove it and then remove any clay smudges.

One thing you can do is to try to save a horizontal section till the sun is overhead, like the trunk lid, or at least a portion of the trunk lid. Kind of a pain in the bottom but it's one way of getting the swirl shots.
Another way is to get the Swirl Finder Light, Autogeek now carries them, see my comments in this thread.
The Brinkman Swirl Finder Light aka The Cruel Master!
Note: I take one with me wherever I go because sometimes it can help me to get a new client.
Here's another tip, in a lot of my swirl shots you'll see my finger, sometimes it looks like I'm pointing at the swirls. Actually I'm just giving the camera a "Focus Point".
Usually, on a surface with an even appearance, like the hood or trunk-lid of a car, most cameras can't find anything to focus on so any shots you do take are often times out of focus.
I take my finger and place it on the paint, or hover directly over it and this gives my camera something to focus on, then I take the shot.
Like this,
The Swirl Finder Light, aka The Cruel Master works really well for capturing swirls with your camera as well as checking your work.
Checking my work...
Here's a shot taken inside the garage using the Swirl Finder Light with the light right on the tape line between before and after.
Capturing swirls with the Swirl Finder Light
And a few minutes later we backed the 1957 Chevy into the sun and captures swirls using the sun that was overhead at the time...
Using the sun overhead to reveal swirls
Instead of using your finger you can also place a piece of Painter's Tape, or Detailing Clay, or even a Nickle or a Penny on the paint, the item doesn't have to be large, in fact smaller is better but you don't want it sliding around on the paint potentially instilling a scratch, that's why a little piece of detailing clay works pretty well then after you capture your shots, simply remove it and then remove any clay smudges.