How to fix holograms and swirls part 2
 11-10-2012, 10:16 AM
#21
Drifting


How are you determining which scratches are too deep to remove? Catch a fingernail? Try the Trizact and if it doesn't come out, stop?
Also, with the Trizact, do you want to sand in one direction, perpendicular to the scratch?
Also, with the Trizact, do you want to sand in one direction, perpendicular to the scratch?
 11-13-2012, 06:34 AM
#22
Race Director

Thread Starter
If they catch a finger nail, that's a good sign they are too deep to remove. I will still lightly sand on them in an attempt to make them better or less noticable. Most of the ones I am pointing to in my last post were too deep. They look better after sanding and compounding, but still there if you look. I sand perpendicular to most of them. If one is being particularly stubbborn, I will sand in an X pattern or just hit in in a different direction a few times.
I'm still working on the back bumper cover. It was raining when i got home yesterday so maybe I can pick up on it today.
I'm still working on the back bumper cover. It was raining when i got home yesterday so maybe I can pick up on it today.
11-14-2012, 08:32 AM
#23
Race Director
Thread Starter
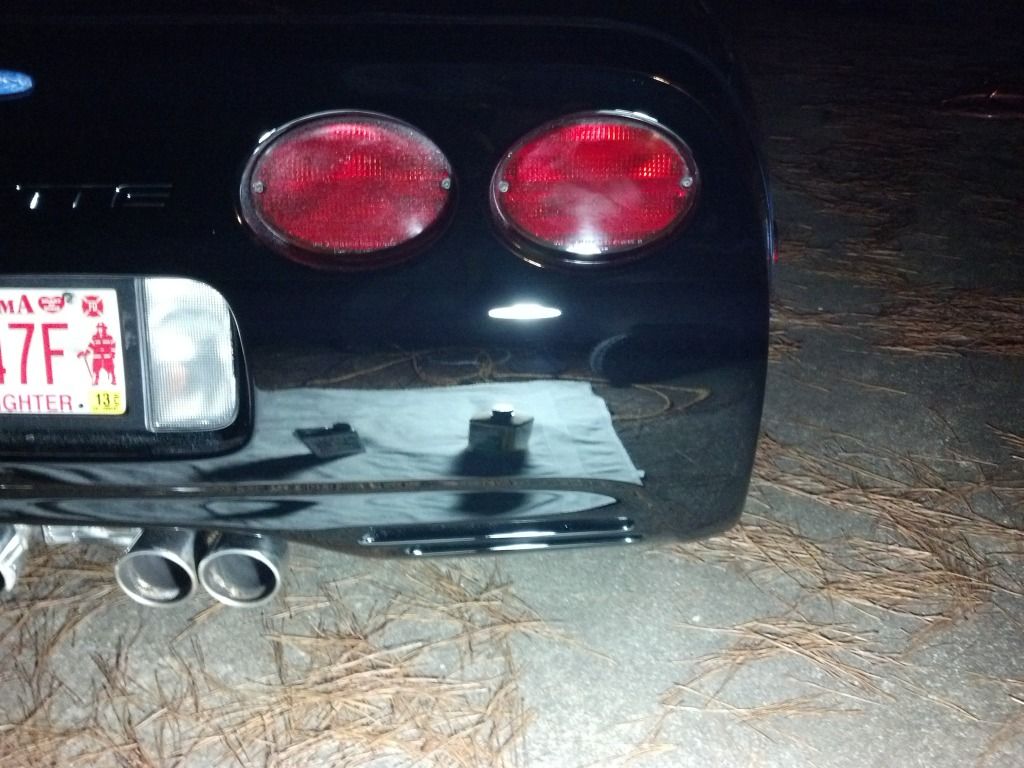
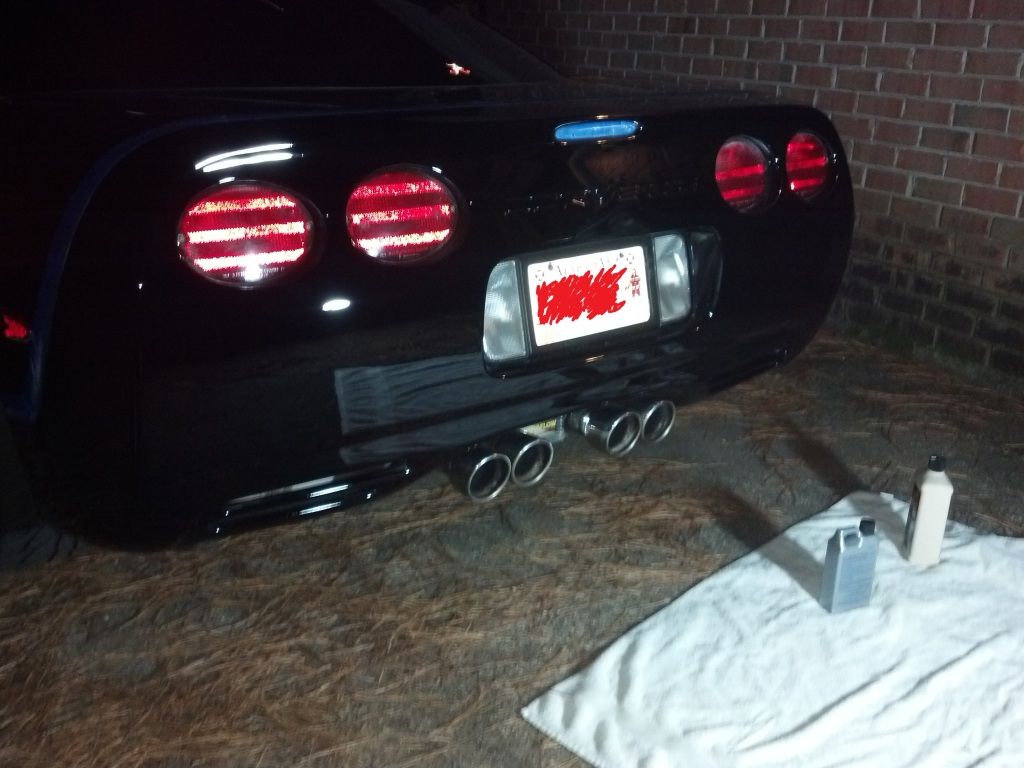
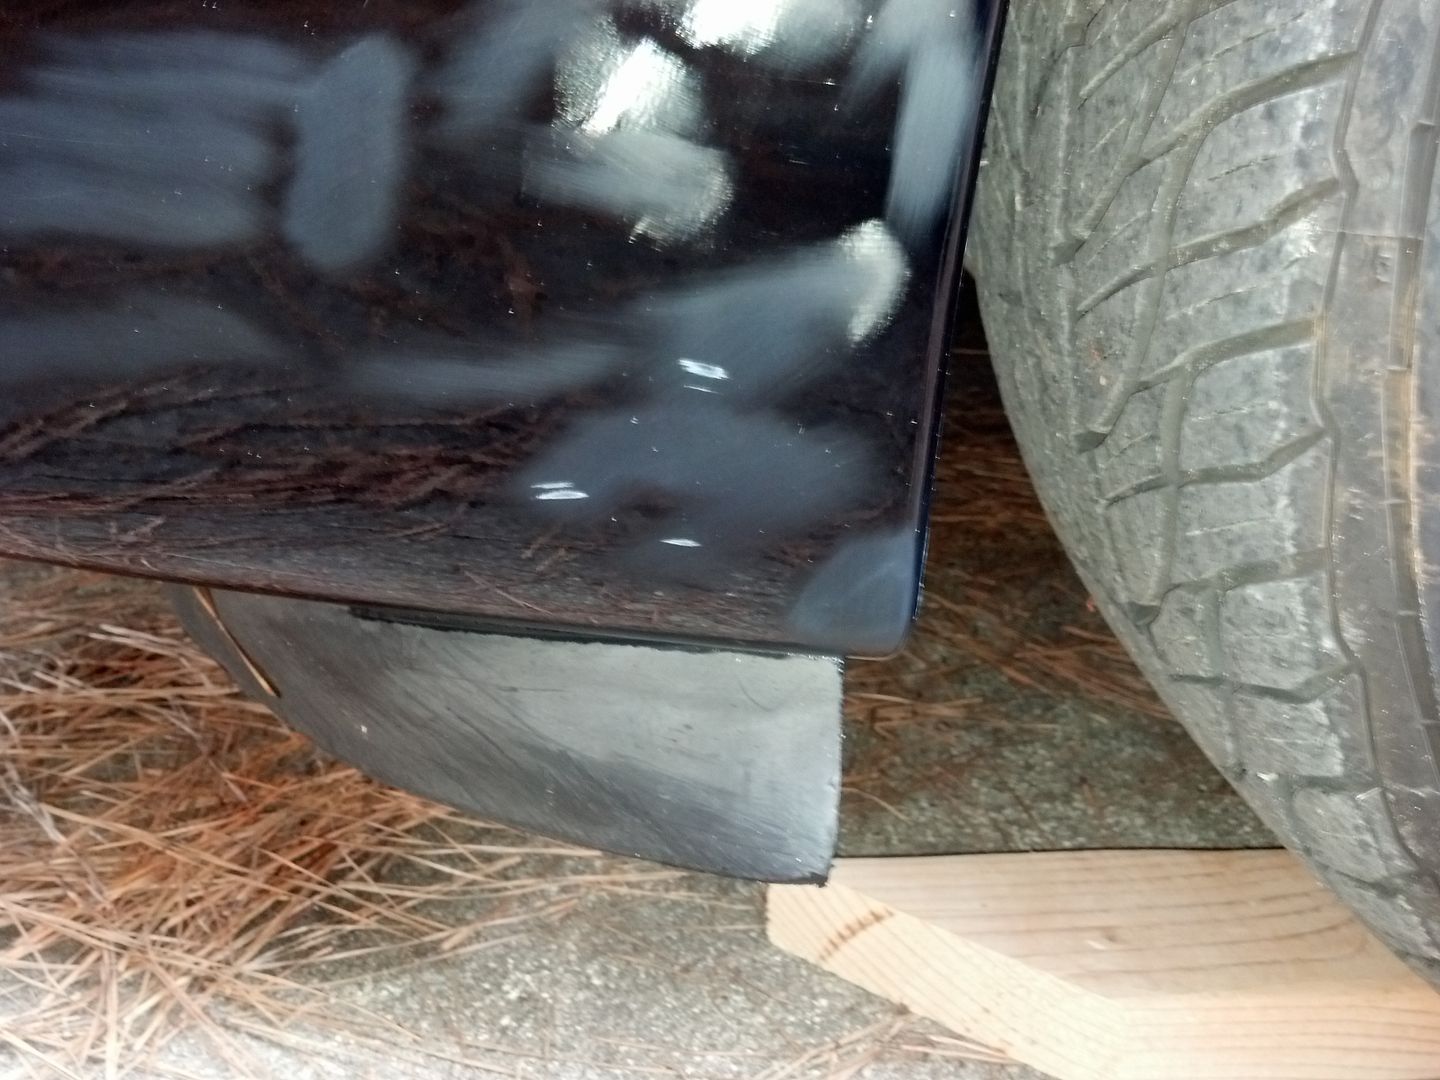
I finally got the back bumper cover finished. Here are some pictures of the back. Finished up at about 9pm last night. 26 hours into the correction now.
11-16-2012, 07:30 AM
#25
Race Director
Thread Starter
I have used a few of Lake Country's 3" hydrotech pads, but I won't buy anymore of them. The first one disentigrated within about twenty sections of use with the PCXP. Autogeek sent me a new one, but it did the same. I only got about two minutes out of the replacement. I'm not sure what causes it, but the pad somehow becomes sort of "heavier" on one side, and then it it starts to wobble. once it does this, it seems like there is no way to make it run without it doing that, no matter which way I position the polisher or speeds. They are great for tight areas, but they just don't last.
If they made 3" flat pads, like the 5.5" ones I've been using, I'd jump all over those. I also picked up some microfiber pads sand have yet to try those. I may use those today.
Here is the start on the back passenger fender. I got it done last night, but I forgot to take finished pics. I'll get them up soon.
11-19-2012, 01:31 PM
#26
Race Director
Thread Starter
Here is the back fender finished. It's like night and day-
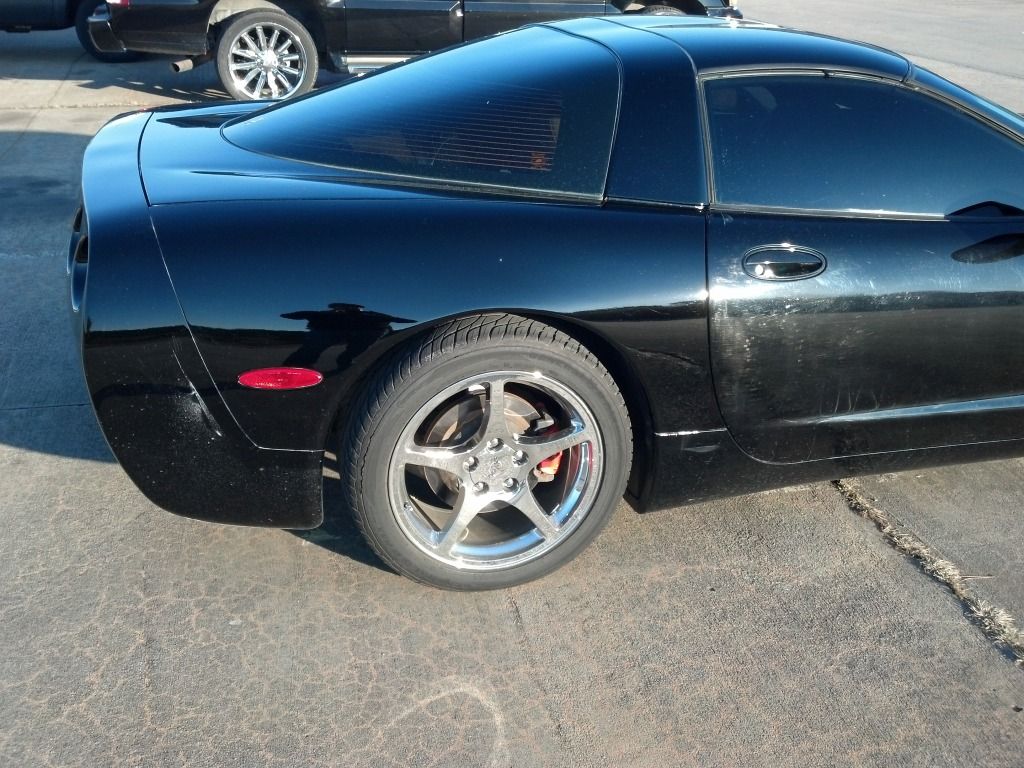
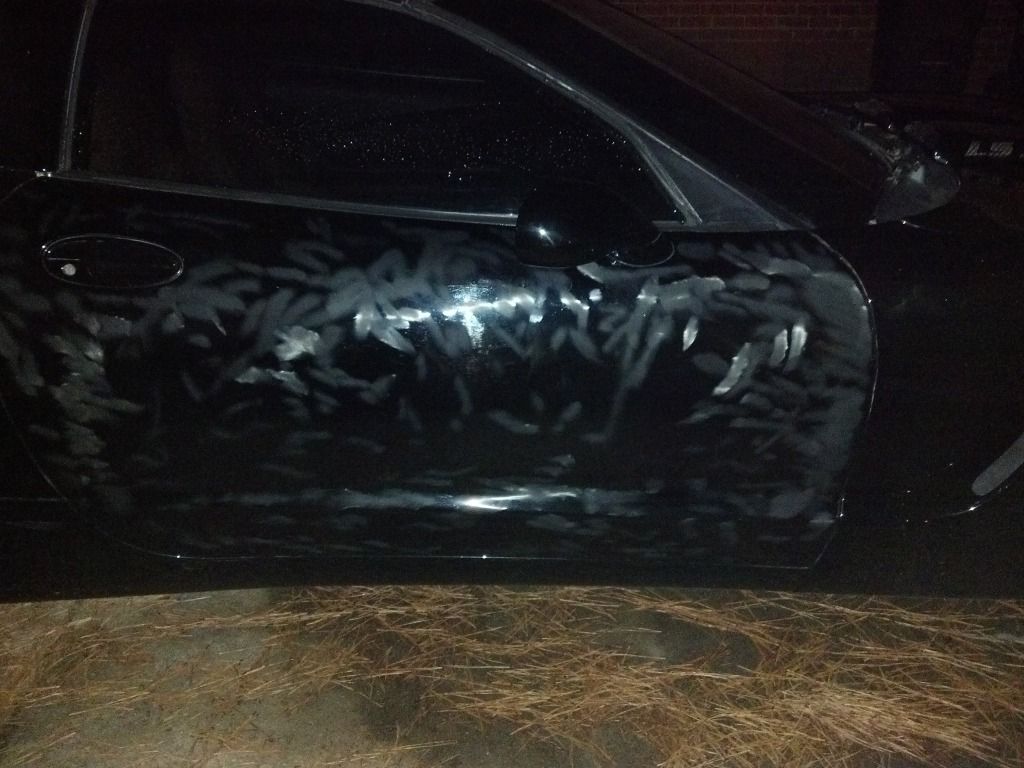
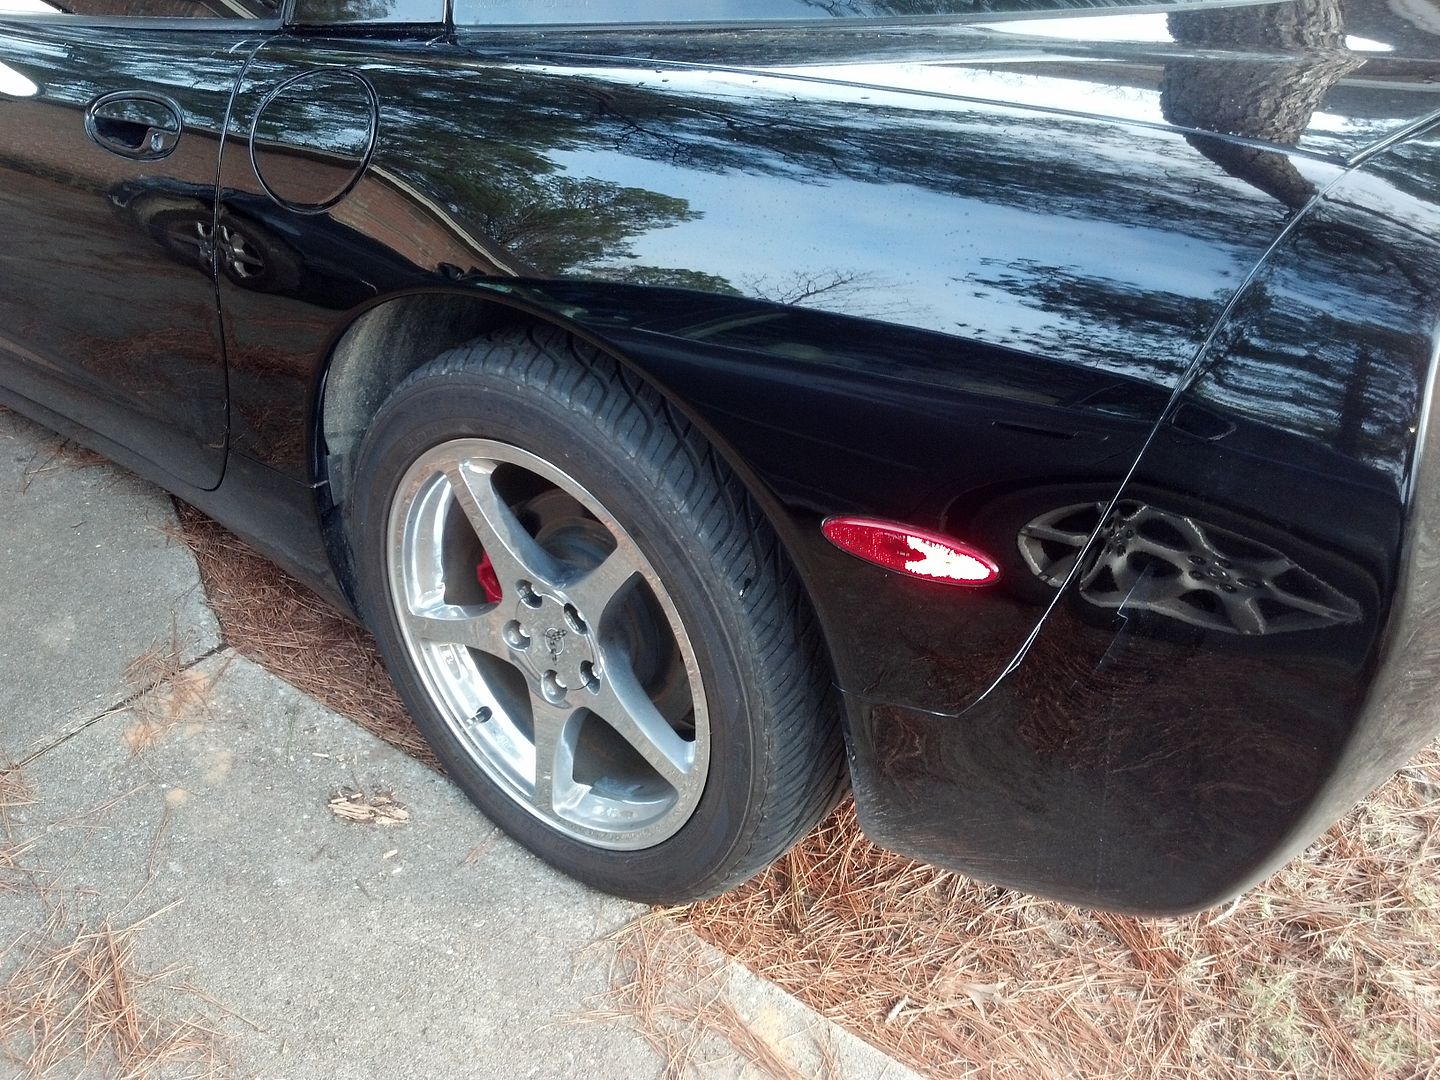
You can also see just how bad the rest of the paint is on the car by looking at that door..
Here's another shot of that side. The afternoon sun shows alot.
I started sanding the RIDS on the door, and got that done. Here are some shots of that process finished.
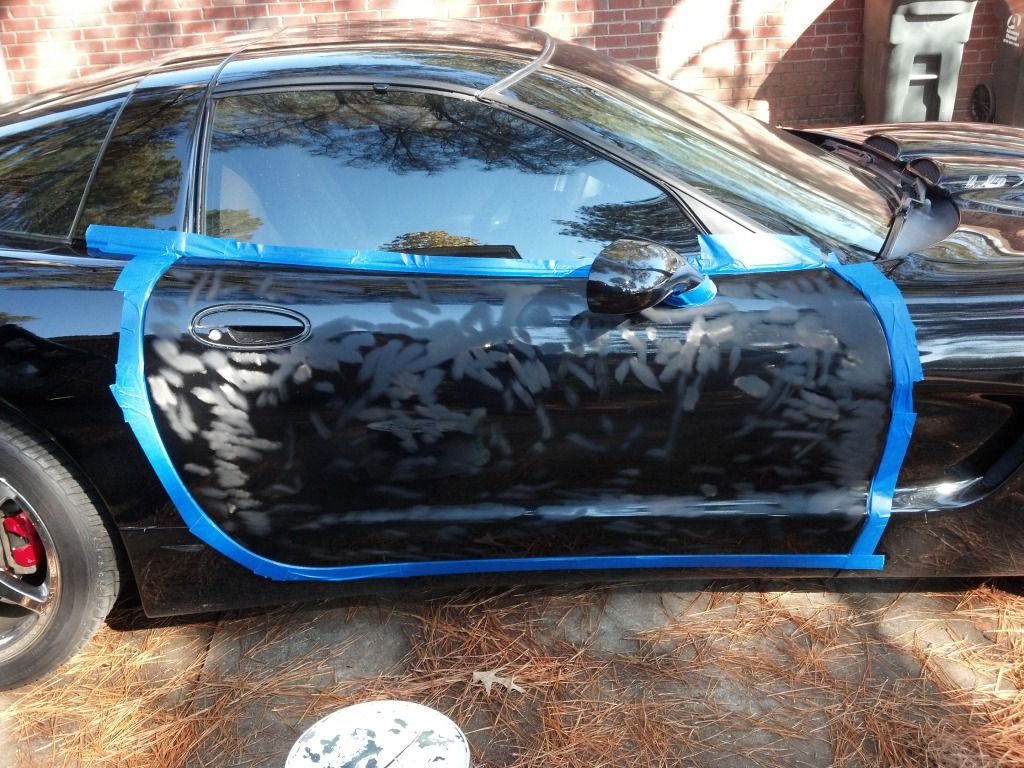
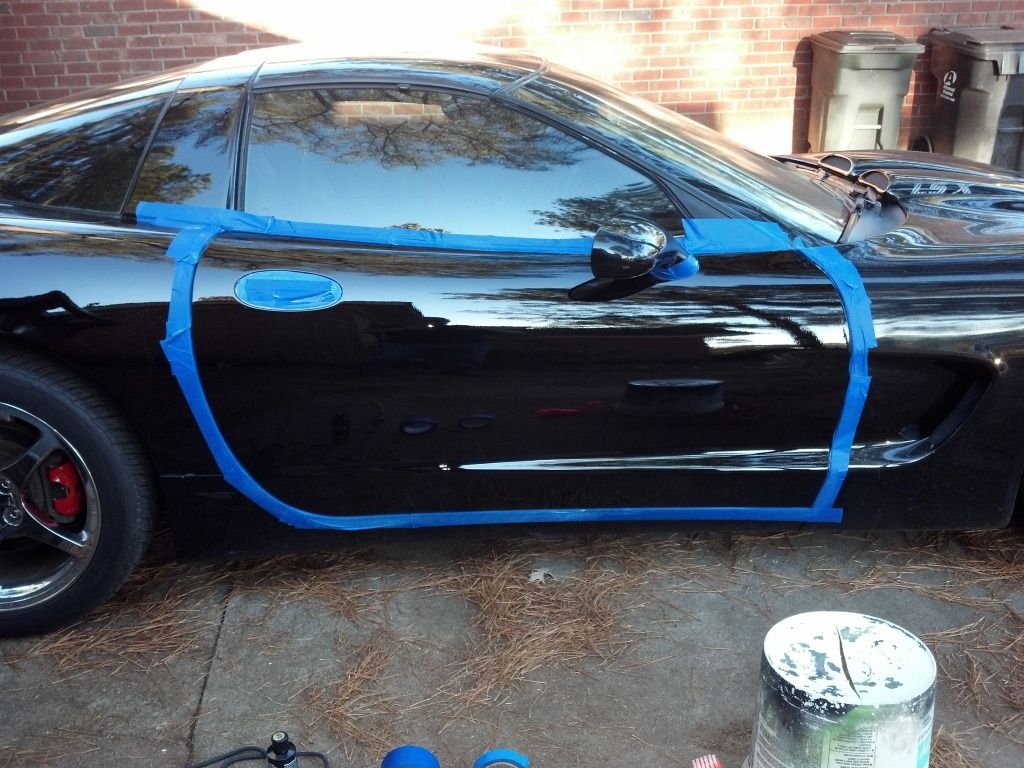
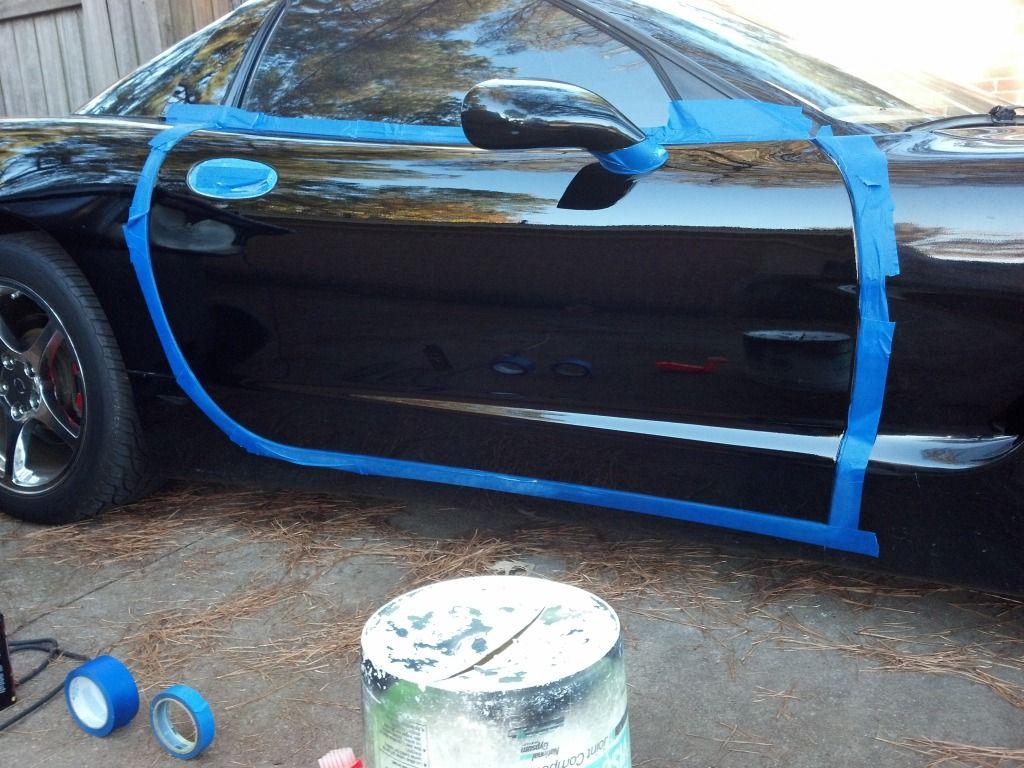
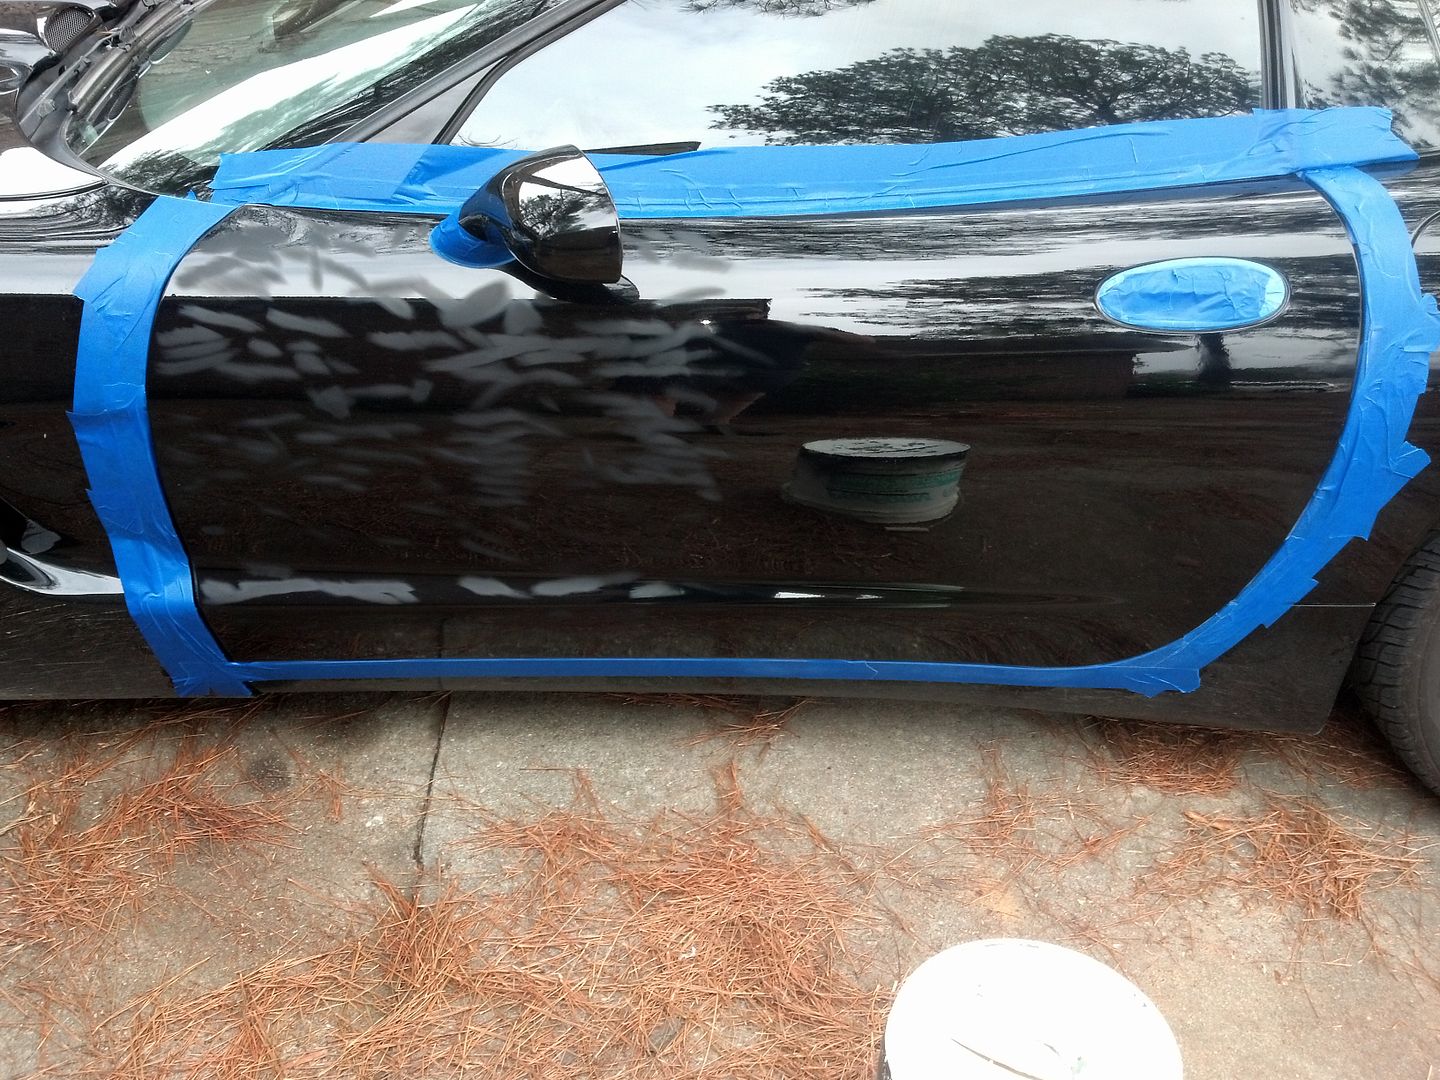
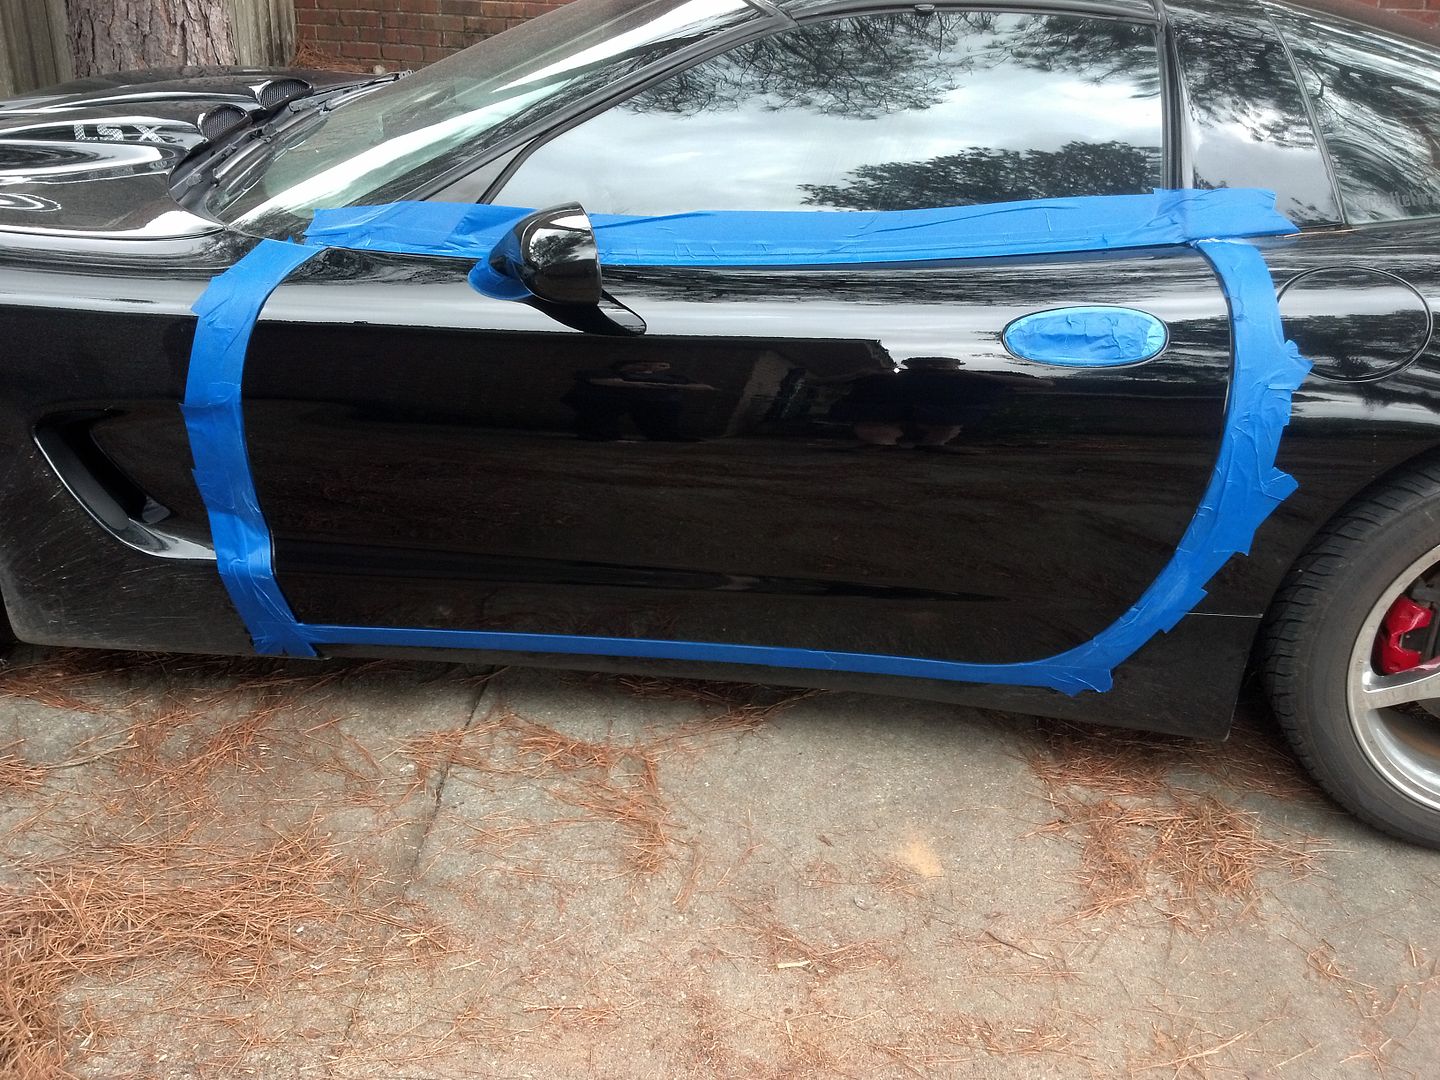
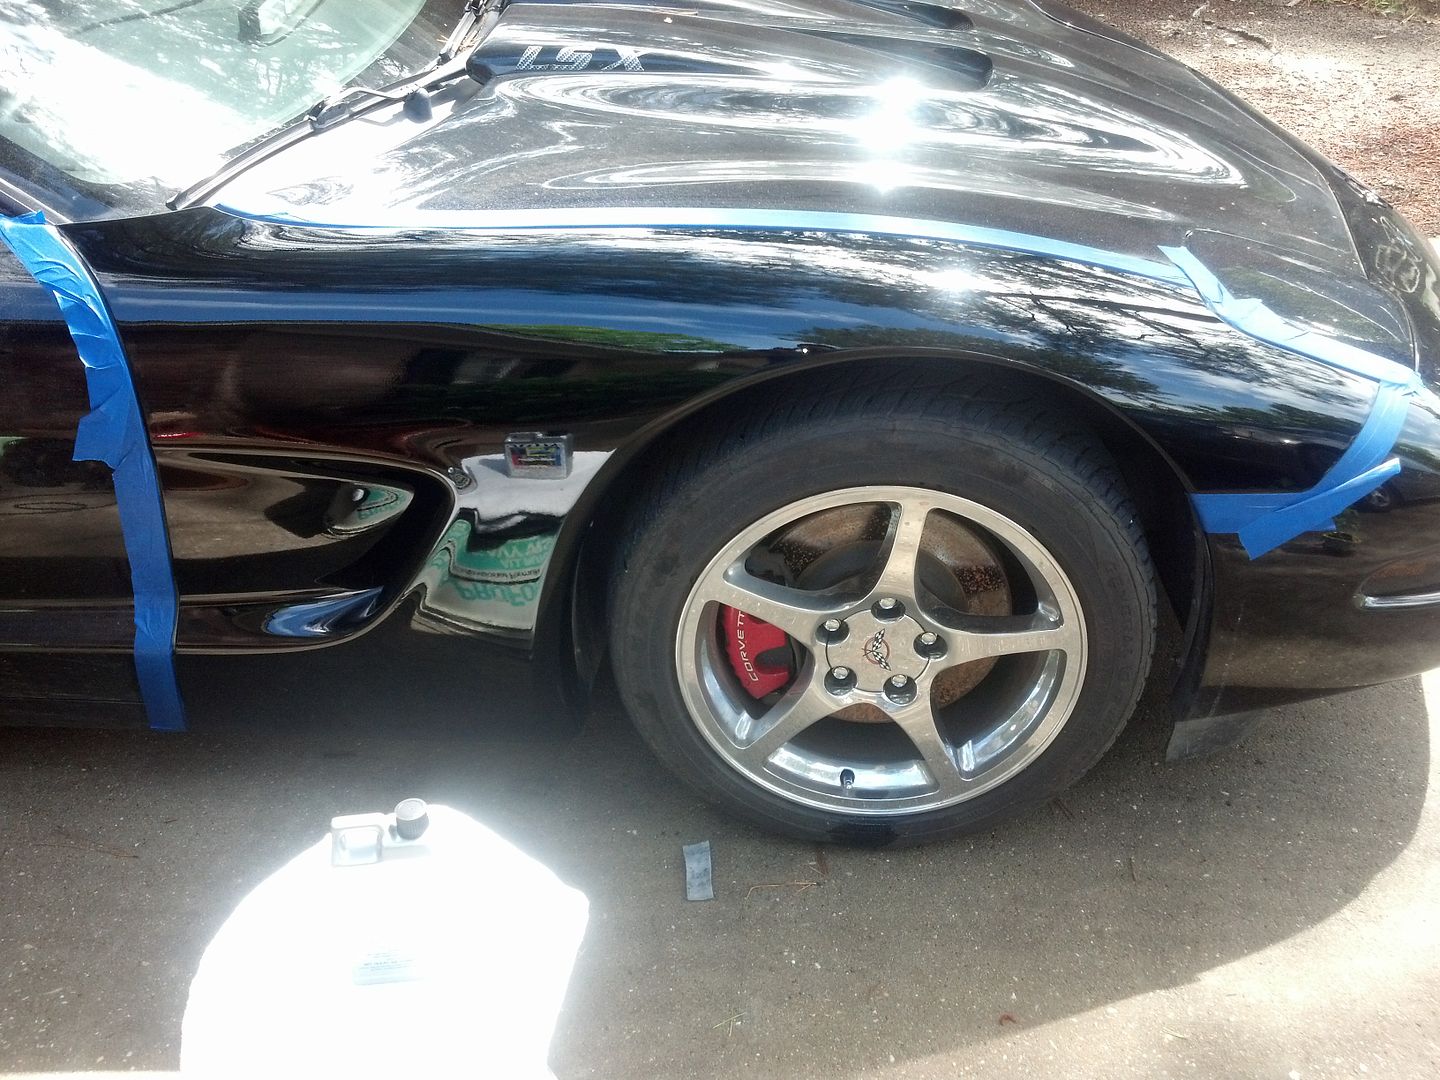
Took on that door next. Here's a shot of it taped off and ready
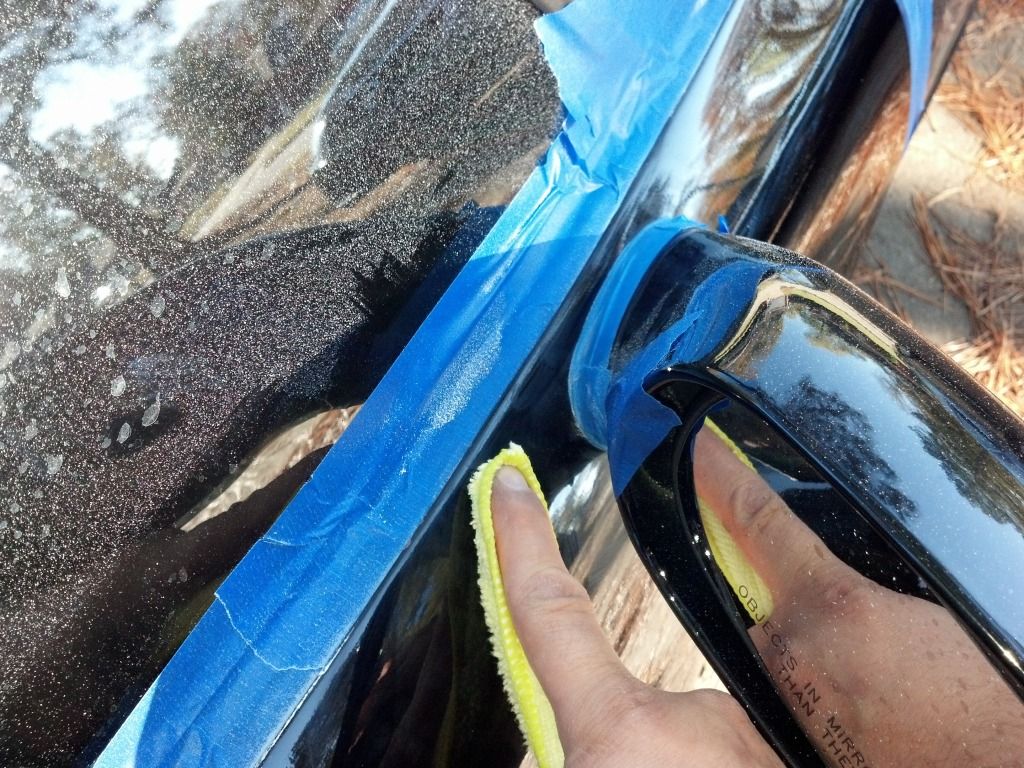
I didn't take any pictures along the way other than a few. This pic shows the necessary hand compounding that is needs to get in behind this mirror. I did that with every step. No big deal.
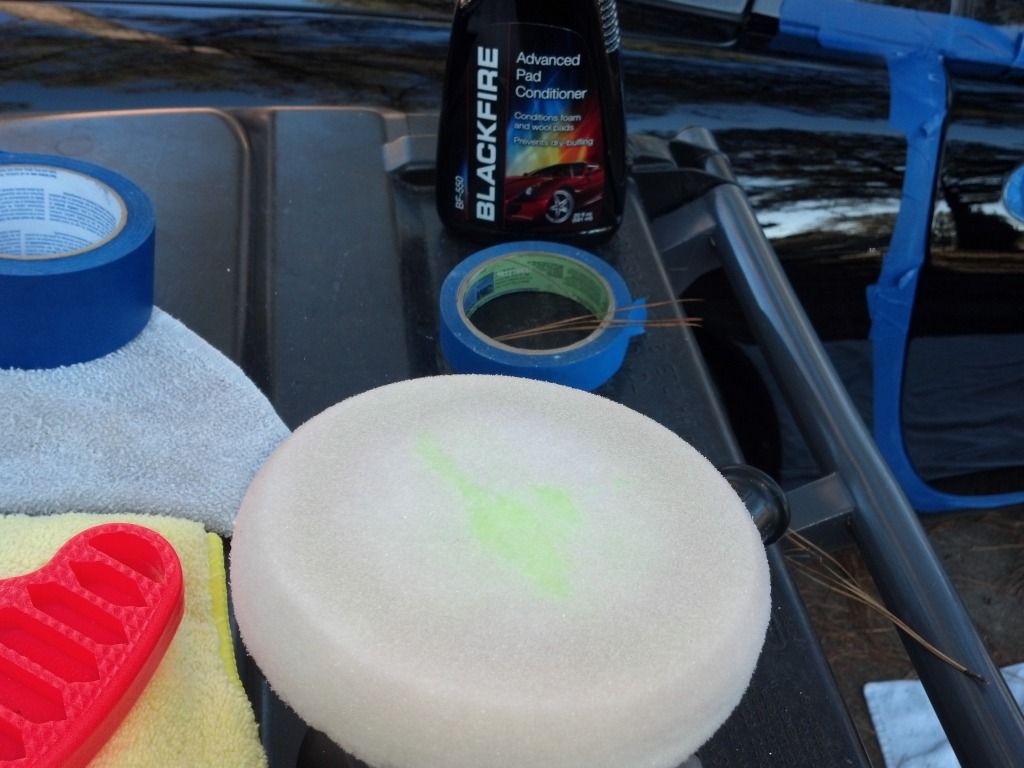
Here is a shot of the white pad before glaze. I'm pretty sure Blackfire pad conditioner is some sort of radioactive solution..or antifreeze

Here are finished shots

The stuff on the ground is just stuff I set up in an attempt to show reflection. Check out my microfiber magnetic ground covering. Most people know it as pine straw.
34 hours in now.
You can also see just how bad the rest of the paint is on the car by looking at that door..
Here's another shot of that side. The afternoon sun shows alot.
I started sanding the RIDS on the door, and got that done. Here are some shots of that process finished.
Took on that door next. Here's a shot of it taped off and ready
I didn't take any pictures along the way other than a few. This pic shows the necessary hand compounding that is needs to get in behind this mirror. I did that with every step. No big deal.
Here is a shot of the white pad before glaze. I'm pretty sure Blackfire pad conditioner is some sort of radioactive solution..or antifreeze
Here are finished shots
The stuff on the ground is just stuff I set up in an attempt to show reflection. Check out my microfiber magnetic ground covering. Most people know it as pine straw.
34 hours in now.
11-20-2012, 12:55 PM
#27
Le Mans Master


Holy crap! Great work, but sorry you had to do this. I had a guy remove all my "swirls" but hologramed the heck out of my wifes paint. Grrr.
11-22-2012, 09:04 AM
#28
Team Owner


Member Since: Jun 2004
Location: Houston Texas
Posts: 96,211
Received 75 Likes
on
61 Posts
St. Jude Donor '09

I'm afraid you're going to need something more powerful then a polish to make that finish look the way it should. Yes, it will give it a darker appearance, but these are mid range polishes that have moderate cutting abilities. Step up to a dedicated compound and you'll level the finish much better.
Sorry things didn't work out with Bryan? You should of asked him what he would have recommended or have him do a dest spot to seewhat would work.
Sorry things didn't work out with Bryan? You should of asked him what he would have recommended or have him do a dest spot to seewhat would work.

A golden opportunity missed......
01-14-2013, 07:56 AM
#29
Race Director
Thread Starter
I have been pretty busy / lazy over the holidays, and have not wanted to mess with this thing. Burned out isn't the word, but I have not exactly looked forward to getting back to it. I realized though that it wasn't going to get done until I got my butt out there and did it.
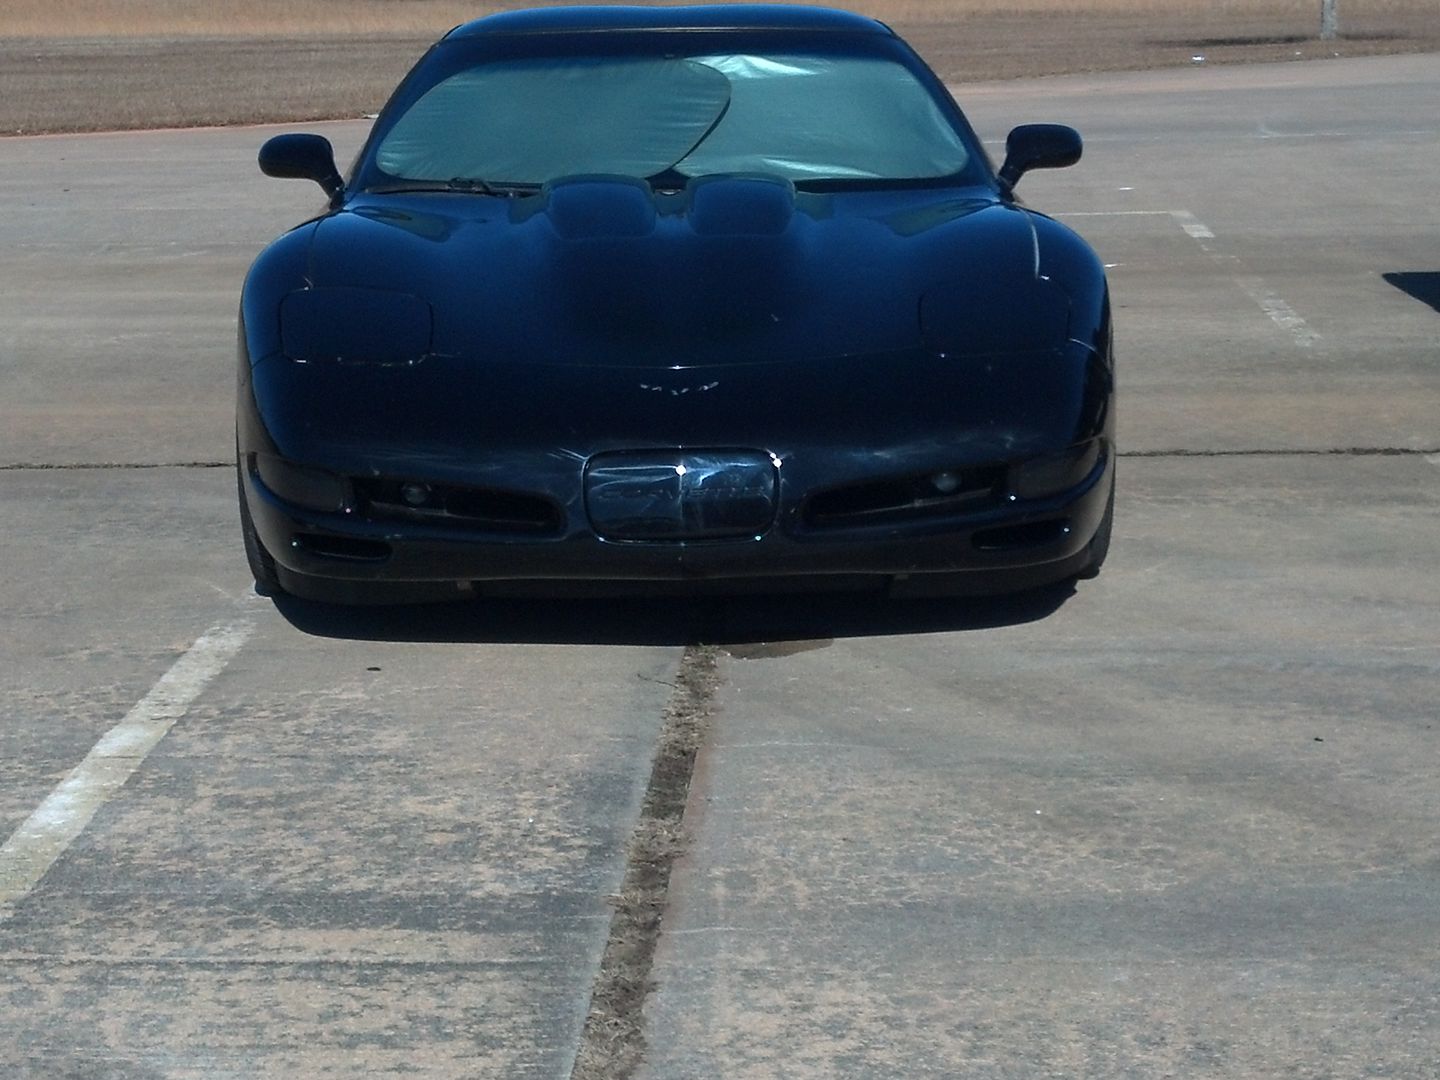
Here is a pic I snapped in the parking lot at work, just because I wanted to show again just how bad these swirls are. I continue to be speechless by what I see.
And here are a few shots of the light sanding I have done on the scratches. The nose was not too bad.
I had not seen this previously, so I was a little disappointed..again. MORE burn through marks. I just can't believe how bad this got. I sure am glad I stepped in and made the decision to fix it myself.
Five hours to do the nose. 35 hours in at this point.
01-14-2013, 07:57 AM
#30
Race Director
Thread Starter
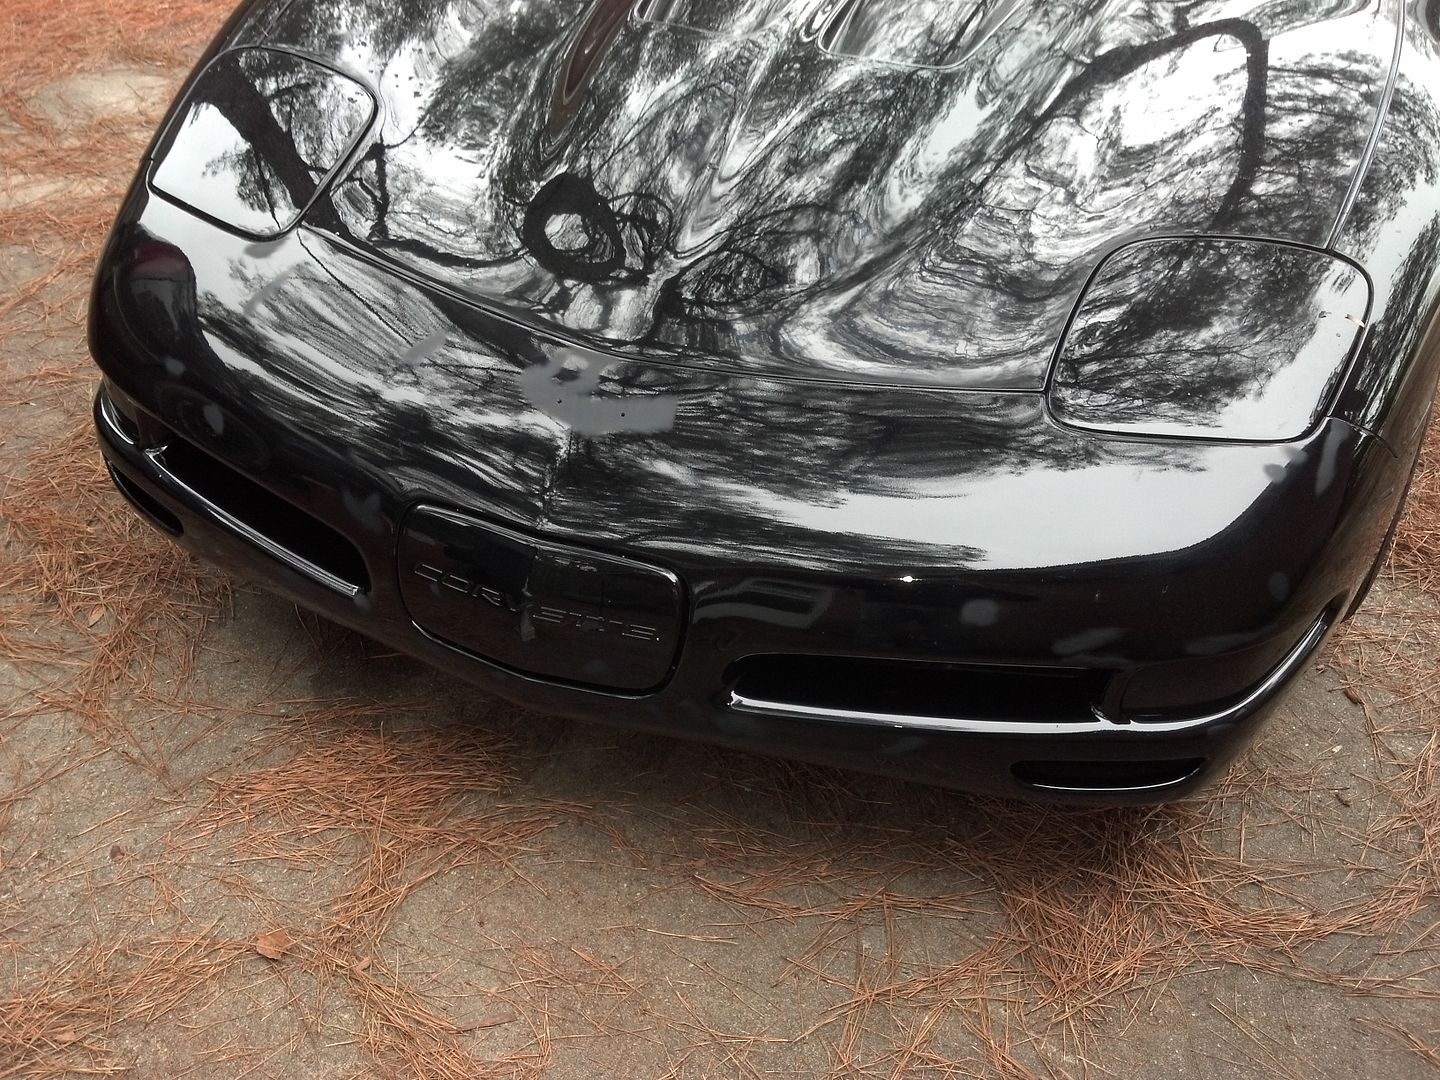
Here are some finished pics of the nose
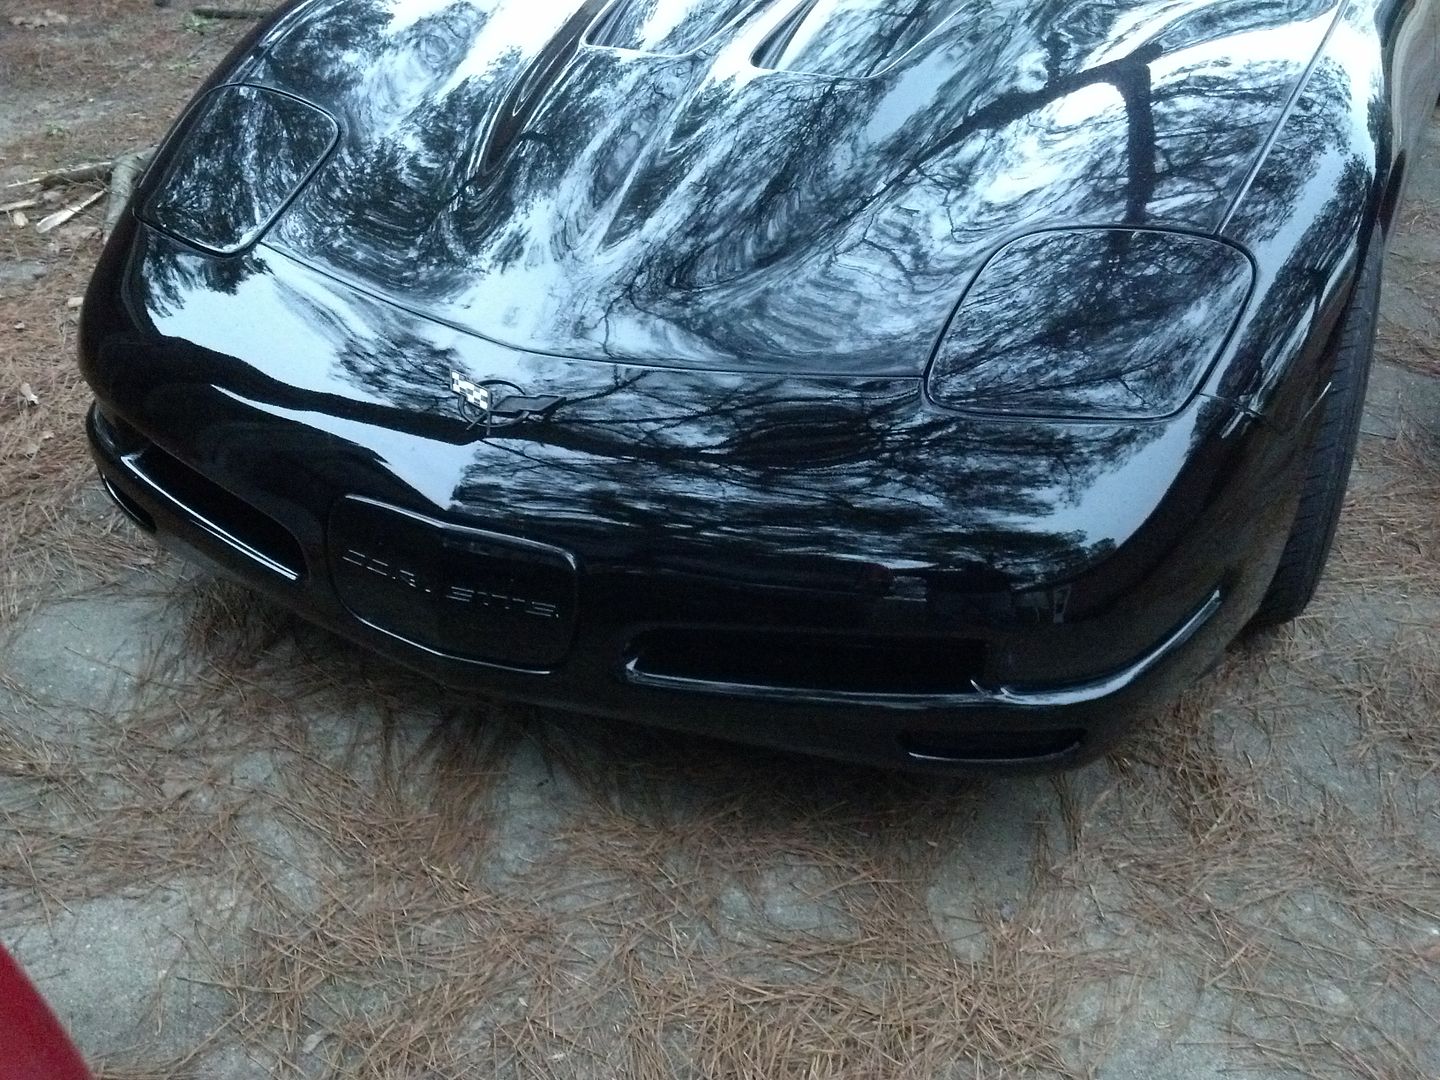
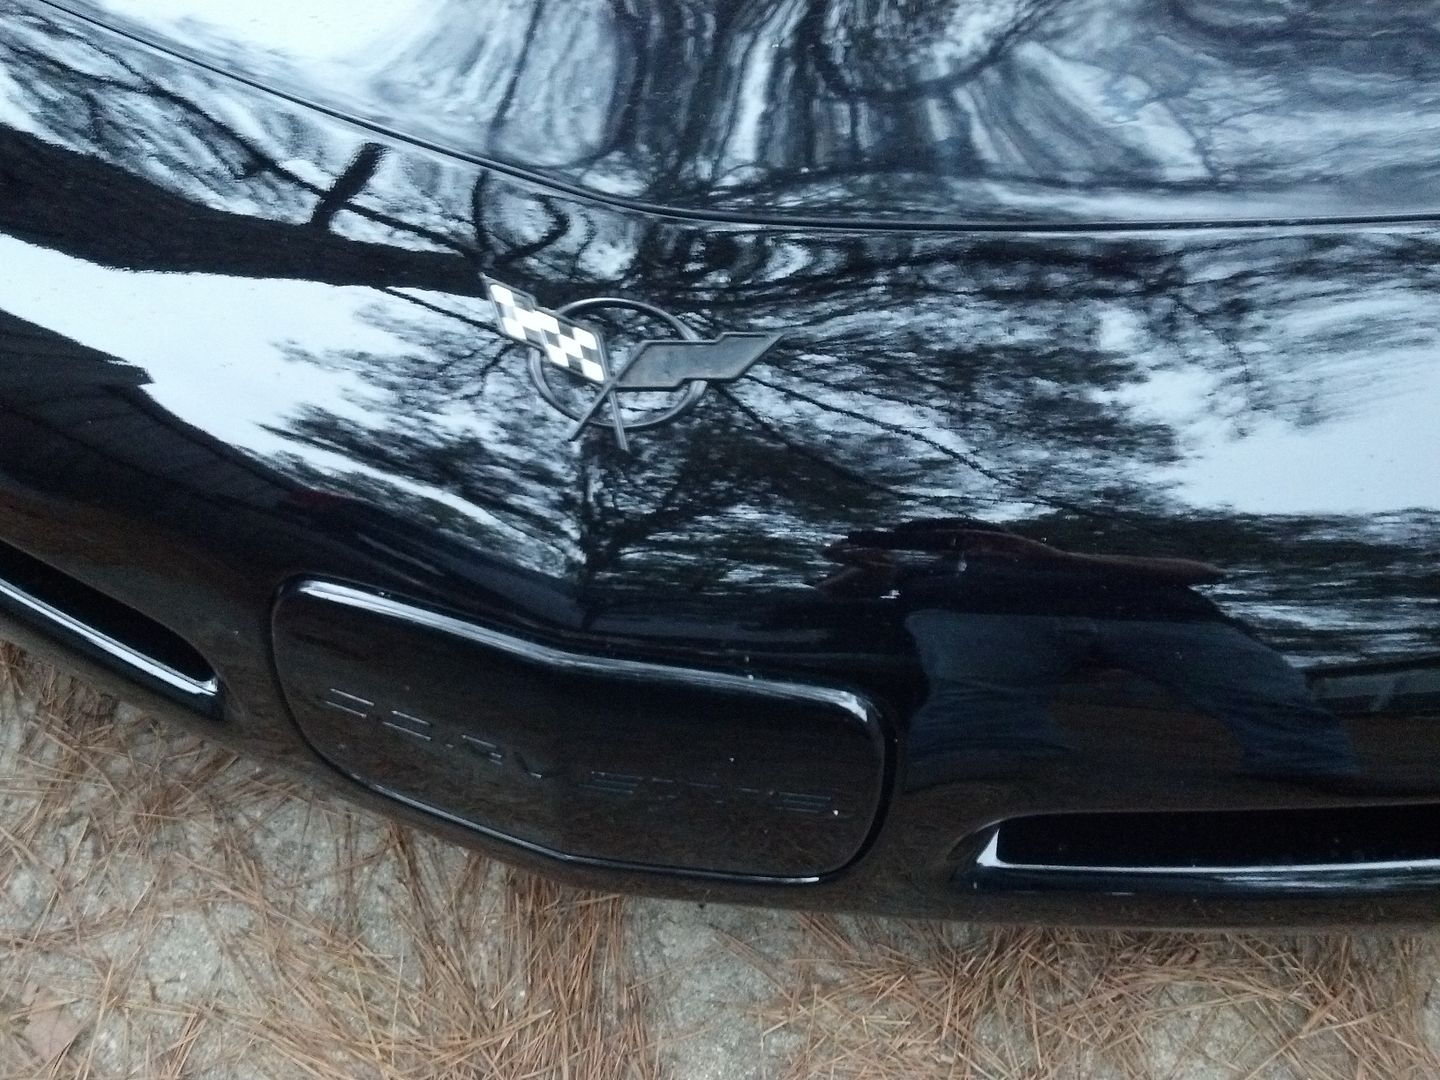
And if you notice..my dang nose emblem has decided to self destruct. The red insert that goes on the right hand side of the crossed flags decided to turn loose going down the road. It must have been from the stress of being taken off. I sure hate that because these nose emblems are not cheap. I guess I will make something up and put it in there for the time being.
It has a few bug guts in those pictures. I had been driving it for a couple days before these pics were taken.
01-14-2013, 07:58 AM
#31
Race Director
Thread Starter
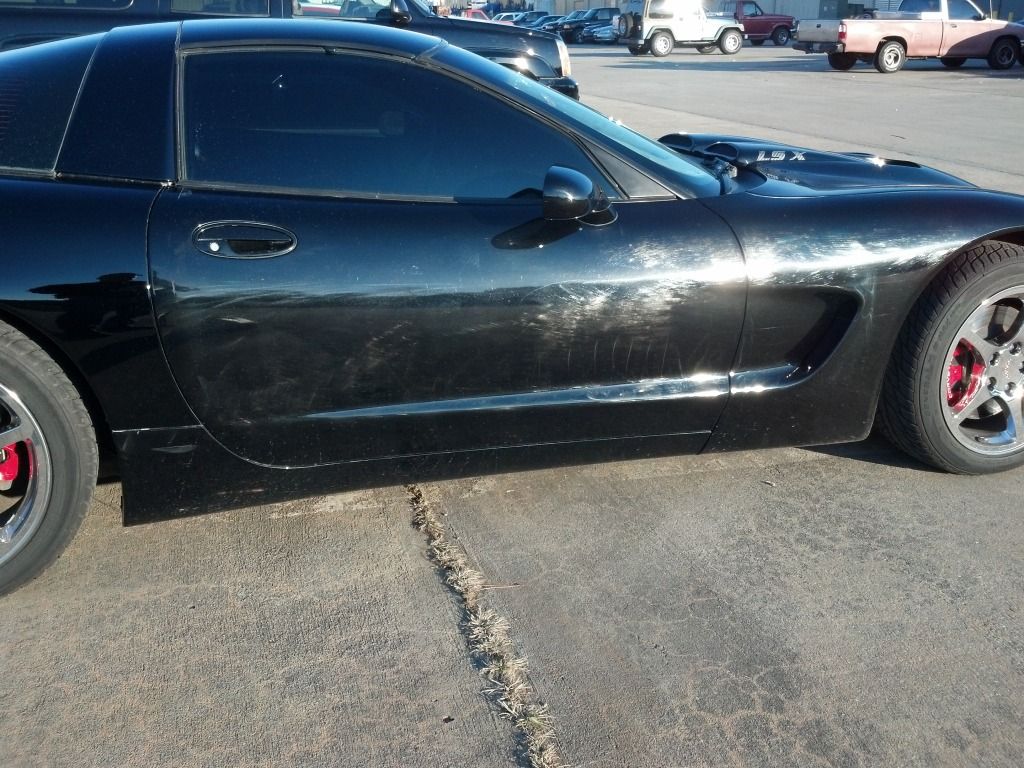
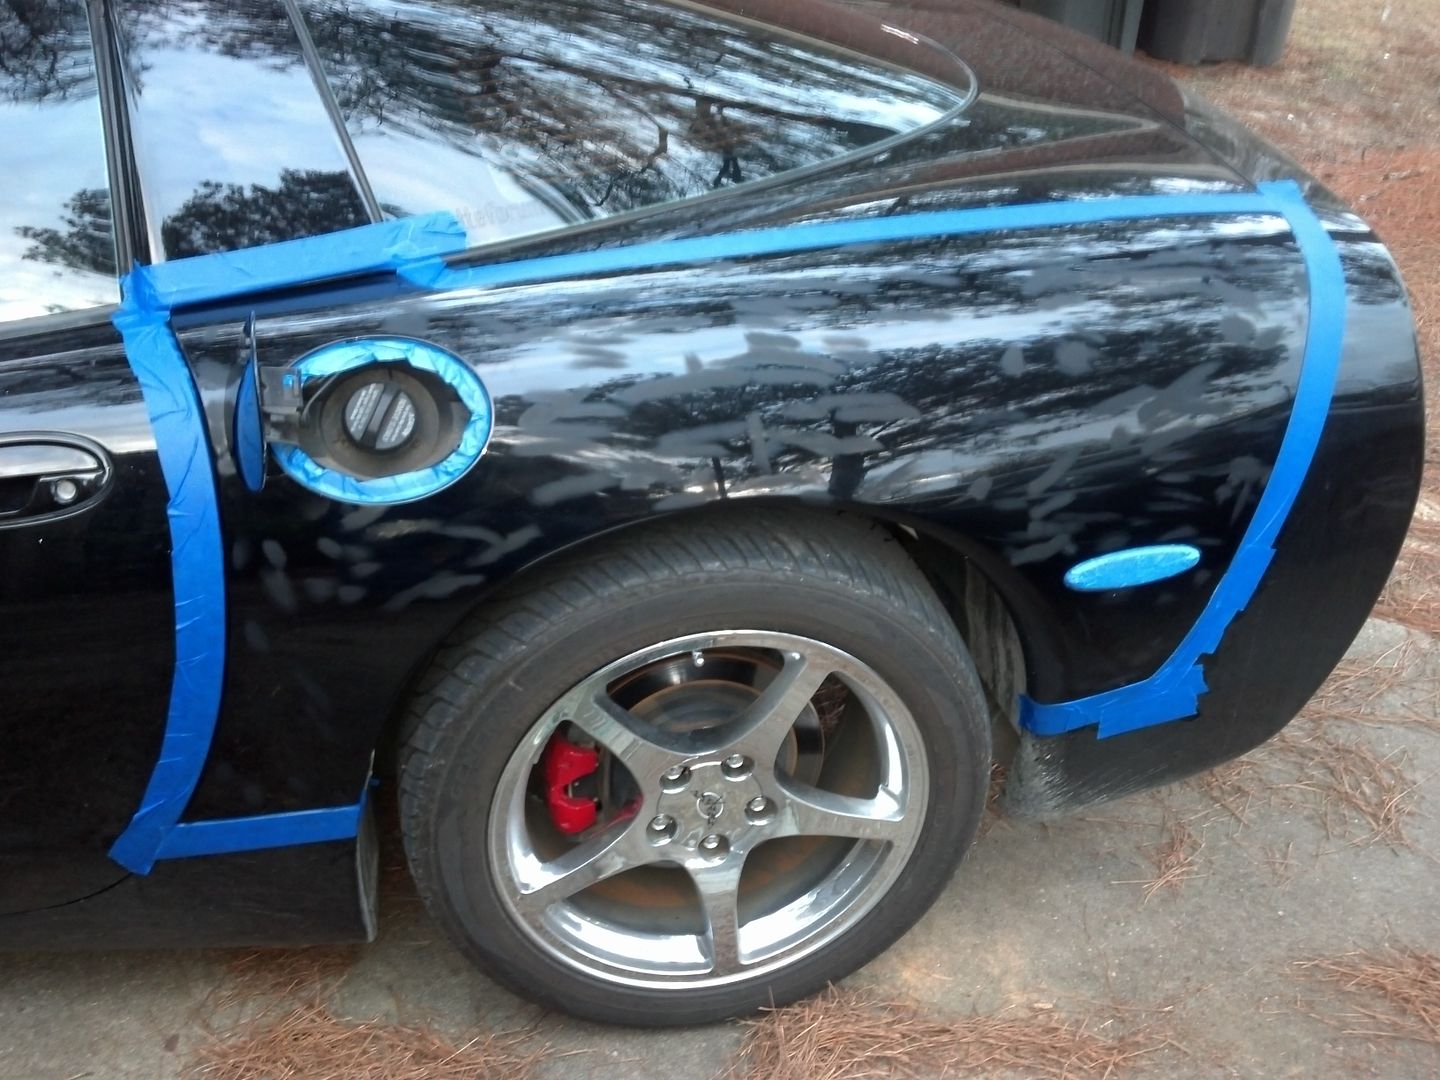
Got the fender and the driver door done over the weekend.
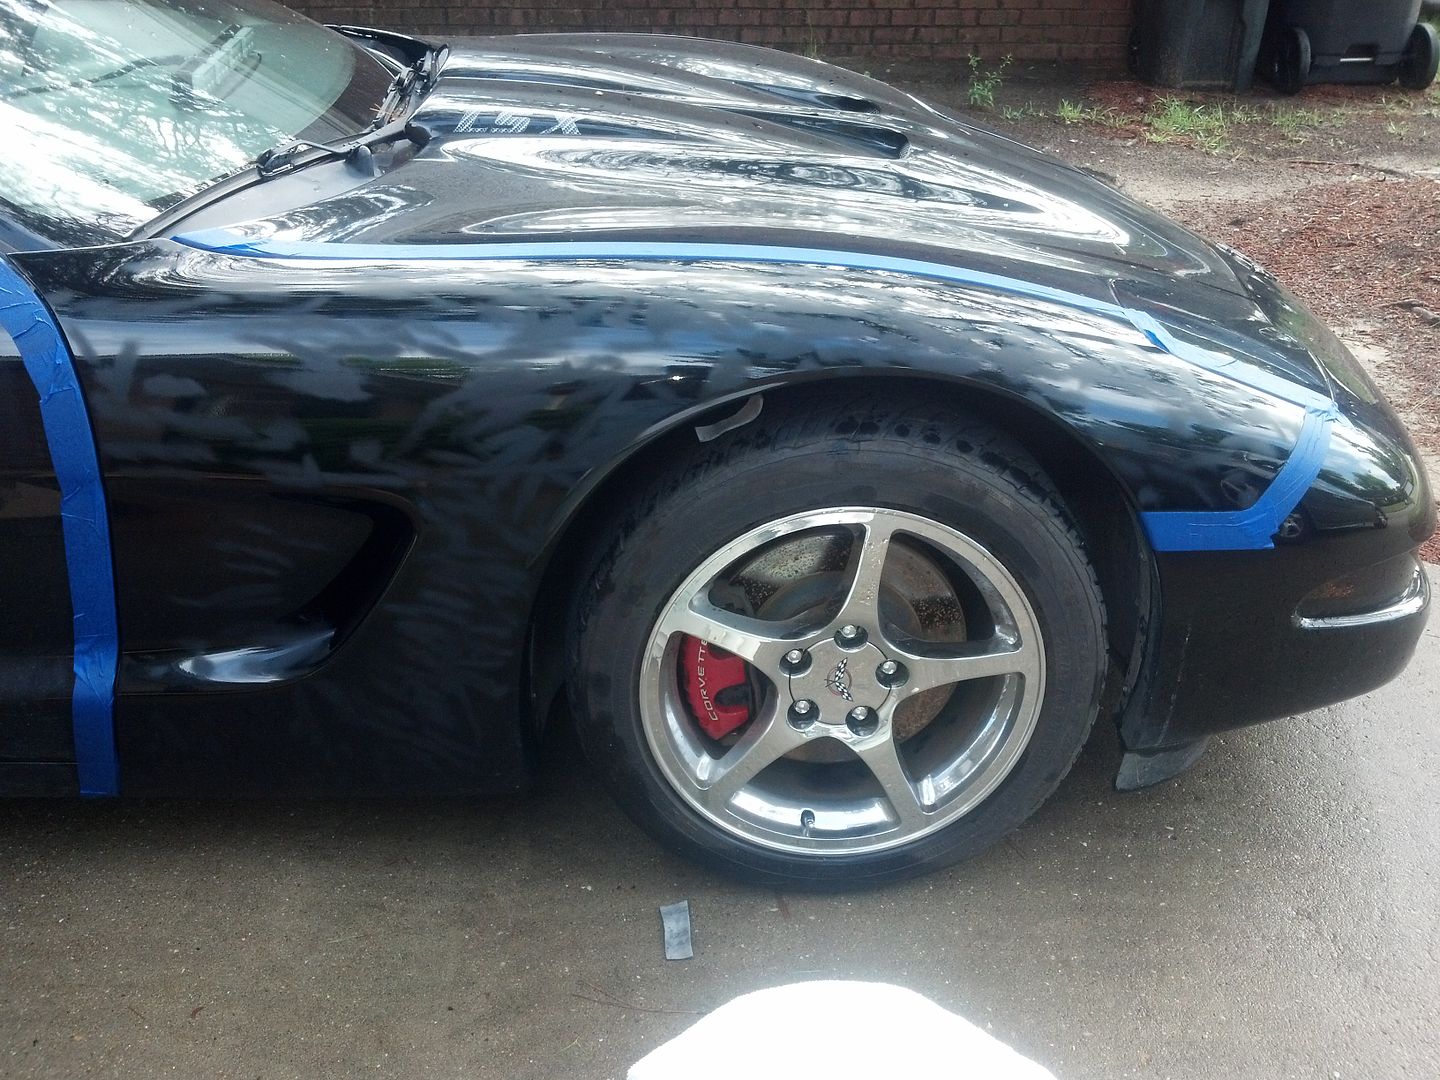
Here is the driver back fender all taped up and prepped.
And finished-
Here is the driver door prepped. I forgot to take a picture before I started doing the first set of section passes of M105.
finished.
All there is left now is the passenger front fender, and the hood. I'm sure that the mirrors and rocker panels will need a little attention too. I don't plan to spend much time on the rockers, because they take a beating from stuff coming off of the front wheel. Never have been able to keep those things clean from day one. One of the bad points of having this particular car, in black, as a daily driver.
42 hours in now.
06-15-2013, 11:15 AM
#32
Race Director
Thread Starter
Well, I'm a little late, but better late than never right? Sorry..I have been terribly busy.
I got the front fender done last weekend, and that about wraps it up. This is the front passenger fender after the first compounding step and sanding with the 3000 grit trizact pad.
And here it is completed. That towel put off a crazy reflection in the picture for some reason..sorry about that.
In all, I have 46 hours in this correction. I did not do the hood for the reasons stated previously, so that would easily push it over 50. It takes time to do it right, but I feel confident saying the results speak for themselves.
 06-24-2013, 03:04 PM
#34
Pro

Member Since: Jun 2013
Location: Knox TN
Posts: 700
Likes: 0
Received 0 Likes
on
0 Posts
lots of work...I am actually doing pretty much the same thing on mine...but I just started wet sanding last night...and am not going at it as in depth as you with every spot and taping everything off....havent had the car but a few days and dont wanna take that long and not be able to drive it.
02-11-2019, 04:56 PM
#35
Safety Car

Here is the back fender finished. It's like night and day-
You can also see just how bad the rest of the paint is on the car by looking at that door..
Here's another shot of that side. The afternoon sun shows alot.
I started sanding the RIDS on the door, and got that done. Here are some shots of that process finished.
Took on that door next. Here's a shot of it taped off and ready
I didn't take any pictures along the way other than a few. This pic shows the necessary hand compounding that is needs to get in behind this mirror. I did that with every step. No big deal.
Here is a shot of the white pad before glaze. I'm pretty sure Blackfire pad conditioner is some sort of radioactive solution..or antifreeze
Here are finished shots
The stuff on the ground is just stuff I set up in an attempt to show reflection. Check out my microfiber magnetic ground covering. Most people know it as pine straw.
34 hours in now.
02-11-2019, 08:46 PM
#36
Le Mans Master
I think he sold that car years ago.
02-13-2019, 10:53 AM
#37
Burning Brakes

Member Since: Jan 2019
Location: Park City, TN
Posts: 1,082
Received 519 Likes
on
290 Posts
2023 C6 of the Year Finalist - Unmodified
2022 C4 of the Year Finalist - Unmodified
2021 C4 of the Year - Unmodified Finalist
2020 C4 of the Year Finalist - Unmodified
2019 C4 of Year Finalist (stock)
02-13-2019, 01:03 PM
#38
Safety Car

