Saturday Morning Project--HPDE brake pads
 01-28-2017, 03:32 PM
#1
Burning Brakes


Thread Starter

As I shift my way along the HPDE continuum from novice to expert, I am learning more about brakes, brake pads, rotors, and brake fluid. After reading through the insights and collective understanding on the CF, brakes were more important than horsepower for tracking my Z-51.
Prior to this post, I switched brake pads to Carbotech 1521s on all four corners. The significant reduction in brake pad dust production, compared to the OEM pads was worth the swap. The 1521s are designed for the street. After my last HPDE, I reduced the amount of front brake pad wear by one half. Since my rotors were bedded with Carbotech compounds, I chose the Carbotech XP 12s for the front and XP 10s for the rear.
The rest of the post shows how easy it is to change out the pads. I bled the brakes prior to installation, and left the brake fluid in the reservoir about half full before staring the swap.
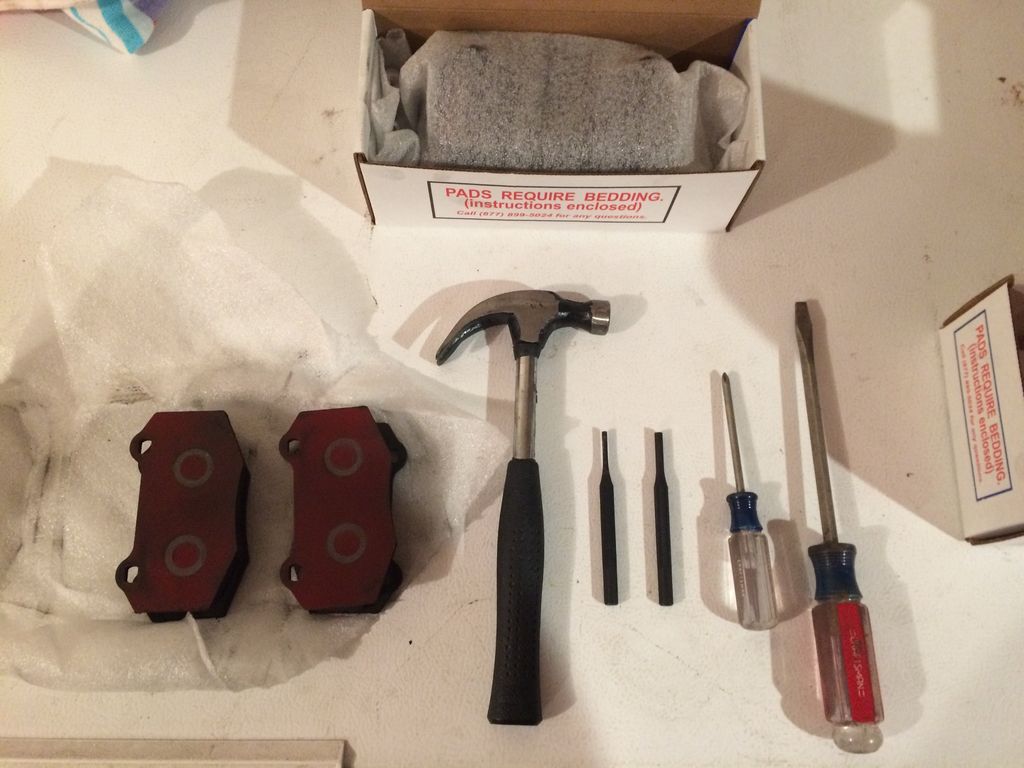
Tools: 1/8" and 3/16" punches, small hammer, screwdriver.
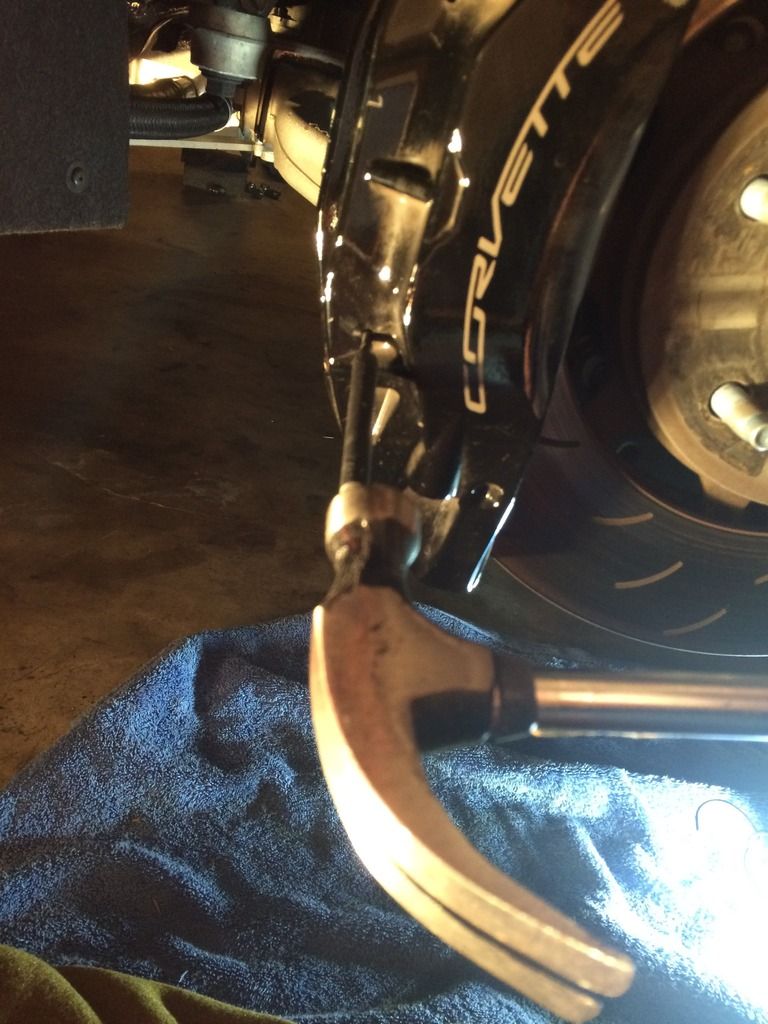
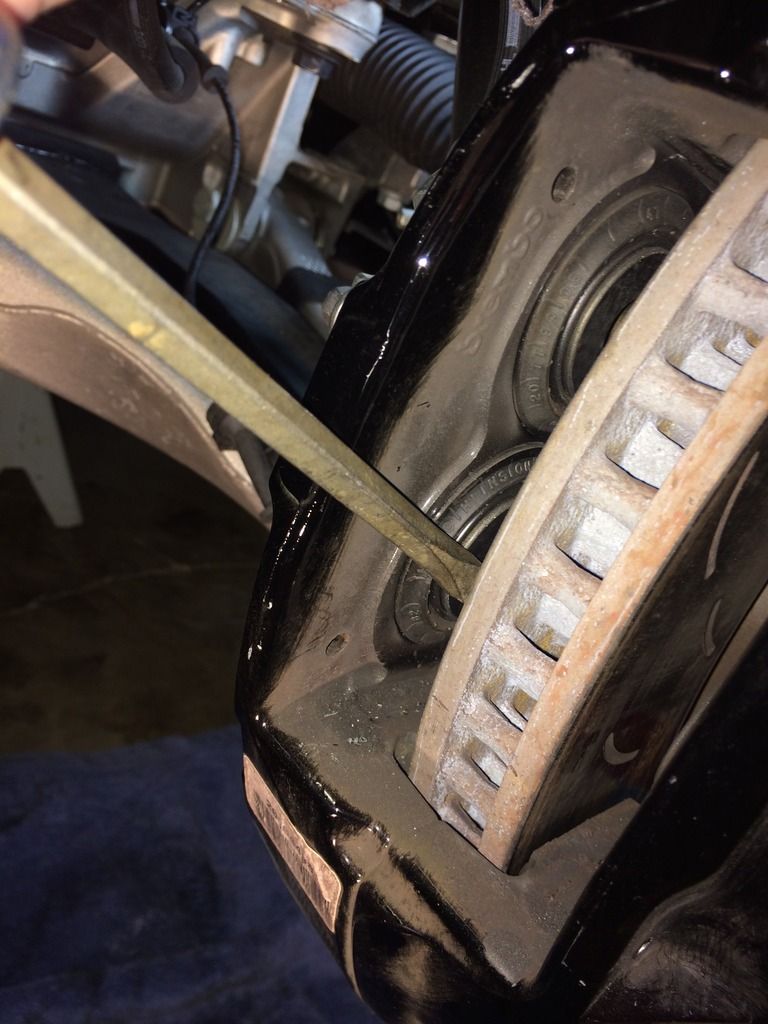
Step 1: Use the 1/8" punch to remove the two pins from the caliper. With a little effort, the two pins are easily pulled out from the other side of the caliper. The retainer can be removed after the second pin clears the midway point.
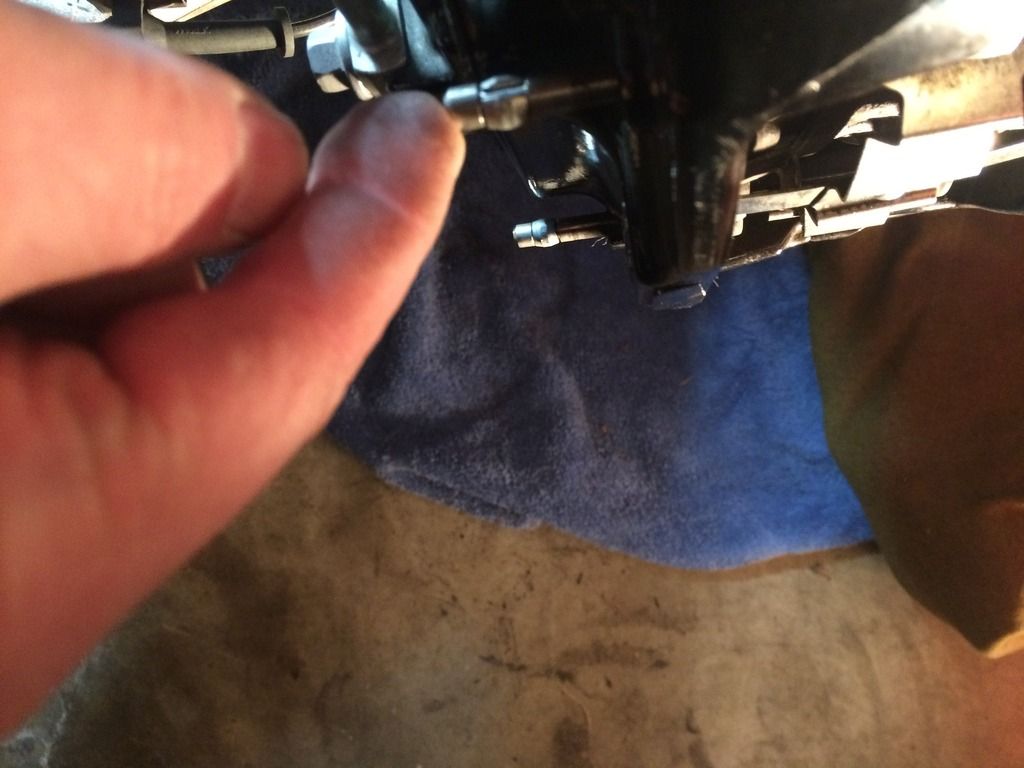

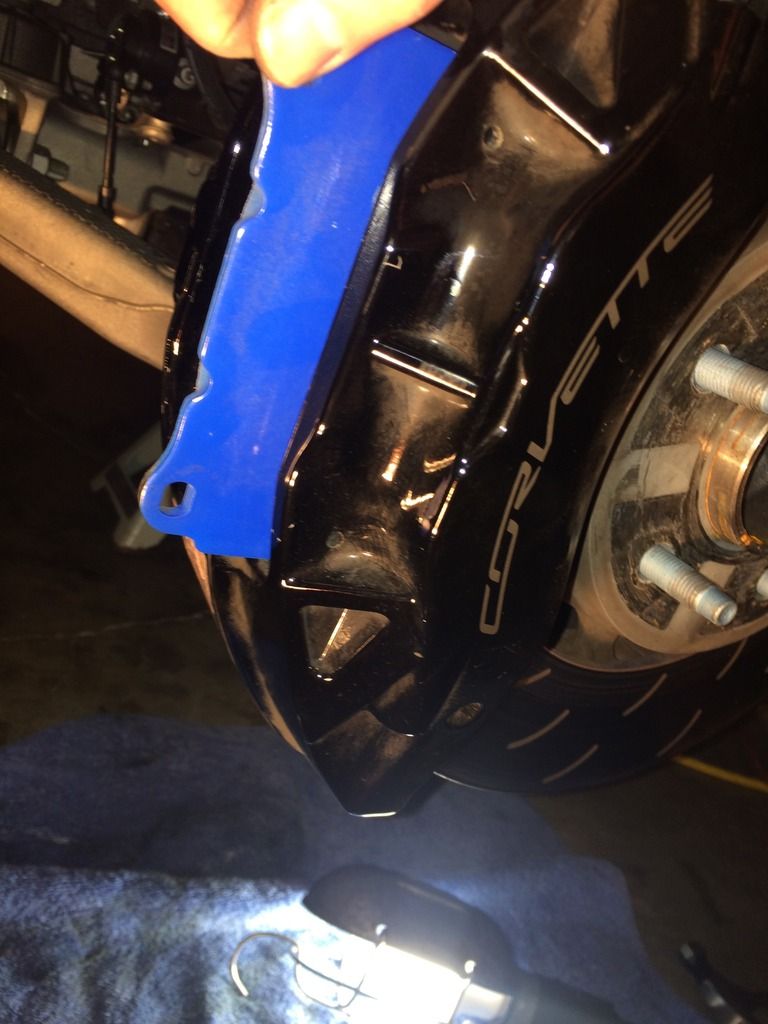
Step 2: The pads may slide out by hand, or some leverage may be needed to remove them.
Step 3: The new pads are much thicker, and will not slide back into the caliper unless the pistons are pushed back in to flush with the inside edge of the caliper. I exercised caution to not touch or poke the rubber seal surrounding the piston.
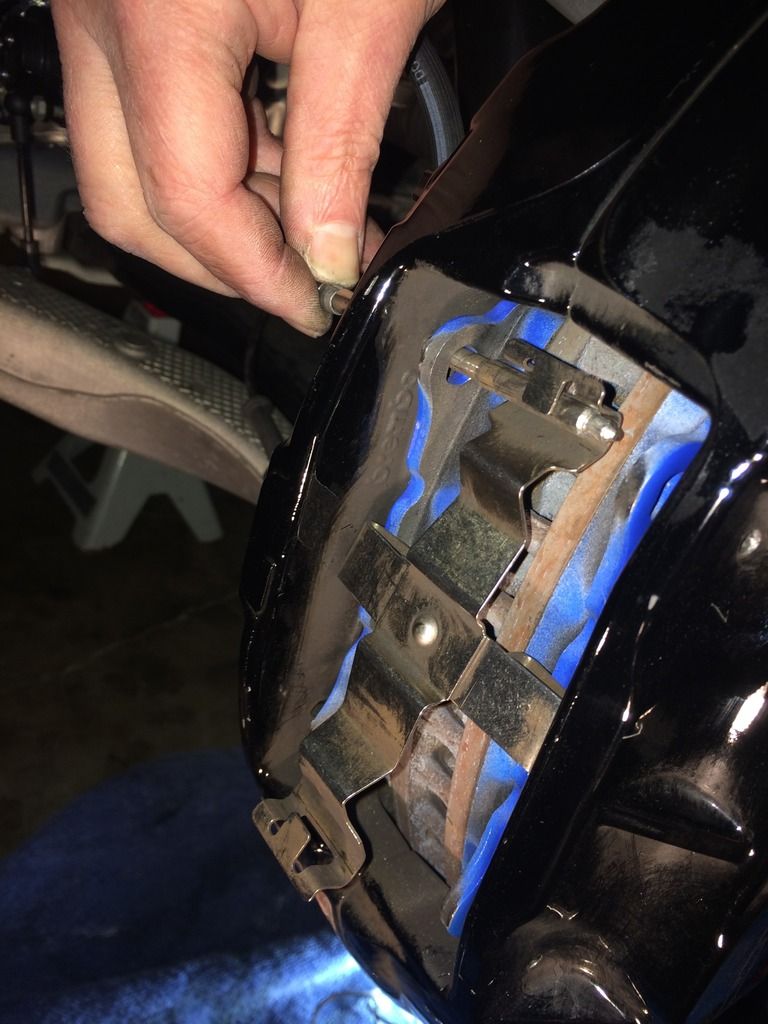
Step 4: Slide the new pads into position. On a couple of occasions, I had to lightly tap them into position--nothing was forced.
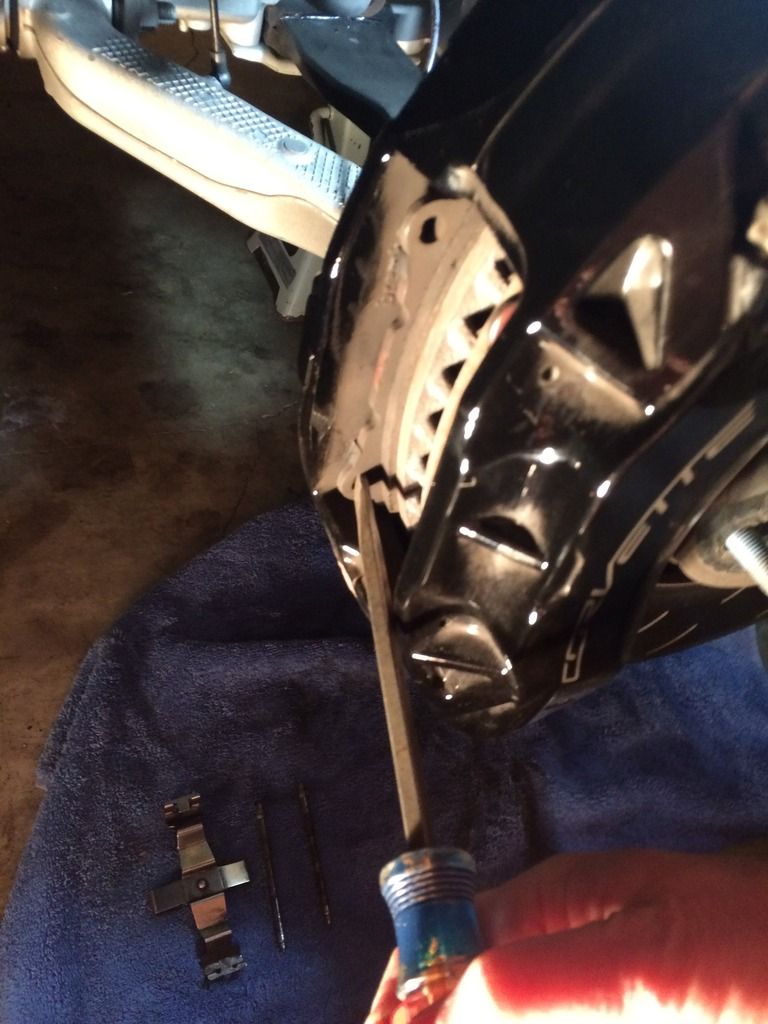
Step 5: Reinstall the pins and retainer. Because of the retainer's spring like quality, there is some futzing needed to line up the upper and lower hooks on the retainer and the holes in the caliper.
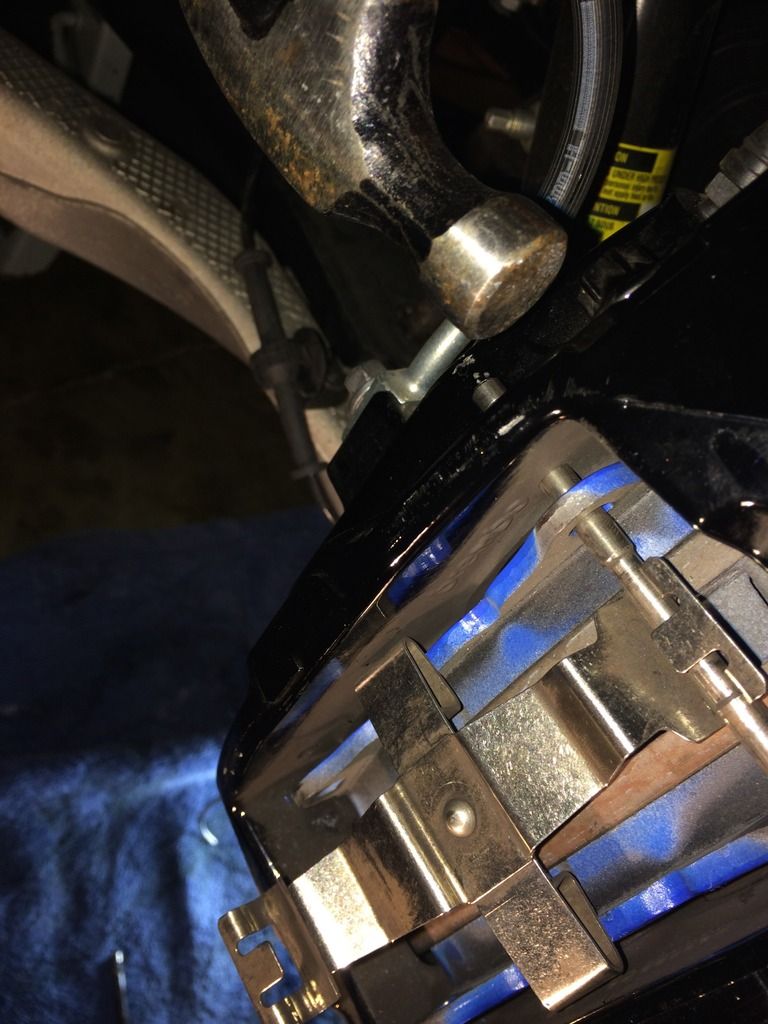
Step 6: Tap the pins back through the other side of the caliper. The front pins are longer than the rears, and a hammer helped to tap them all the way back in. Use the 3/16" punch for the rears to avoid dinging the caliper. The rear brake ducts on the Z-51 limited the working area, and I turned the hammer sideways to tap the rear pins into place.
I am now ready to pre-bed the pads, and have inflated expectations that the brakes will bite much better while scuffing off the speeds prior to corner entry.
Prior to this post, I switched brake pads to Carbotech 1521s on all four corners. The significant reduction in brake pad dust production, compared to the OEM pads was worth the swap. The 1521s are designed for the street. After my last HPDE, I reduced the amount of front brake pad wear by one half. Since my rotors were bedded with Carbotech compounds, I chose the Carbotech XP 12s for the front and XP 10s for the rear.
The rest of the post shows how easy it is to change out the pads. I bled the brakes prior to installation, and left the brake fluid in the reservoir about half full before staring the swap.
Tools: 1/8" and 3/16" punches, small hammer, screwdriver.

Step 1: Use the 1/8" punch to remove the two pins from the caliper. With a little effort, the two pins are easily pulled out from the other side of the caliper. The retainer can be removed after the second pin clears the midway point.


Step 2: The pads may slide out by hand, or some leverage may be needed to remove them.

Step 3: The new pads are much thicker, and will not slide back into the caliper unless the pistons are pushed back in to flush with the inside edge of the caliper. I exercised caution to not touch or poke the rubber seal surrounding the piston.

Step 4: Slide the new pads into position. On a couple of occasions, I had to lightly tap them into position--nothing was forced.

Step 5: Reinstall the pins and retainer. Because of the retainer's spring like quality, there is some futzing needed to line up the upper and lower hooks on the retainer and the holes in the caliper.

Step 6: Tap the pins back through the other side of the caliper. The front pins are longer than the rears, and a hammer helped to tap them all the way back in. Use the 3/16" punch for the rears to avoid dinging the caliper. The rear brake ducts on the Z-51 limited the working area, and I turned the hammer sideways to tap the rear pins into place.

I am now ready to pre-bed the pads, and have inflated expectations that the brakes will bite much better while scuffing off the speeds prior to corner entry.
Last edited by bhk2; 01-29-2017 at 03:57 PM.

The following 2 users liked this post by bhk2:
Adam@Amp'dAutosport.com (01-29-2017),
JETninja (01-28-2017)
01-29-2017, 11:15 AM
#2
Pro


Thanks for the post.
I find it interesting you can swap the pads without removing the calipers. Looks like it makes it a pretty easy job. It's on my list as well (due to the dust) but this may move up my decision sooner.
I find it interesting you can swap the pads without removing the calipers. Looks like it makes it a pretty easy job. It's on my list as well (due to the dust) but this may move up my decision sooner.

