When you click on links to various merchants on this site and make a purchase, this can result in this site earning a commission. Affiliate programs and affiliations include, but are not limited to, the eBay Partner Network.
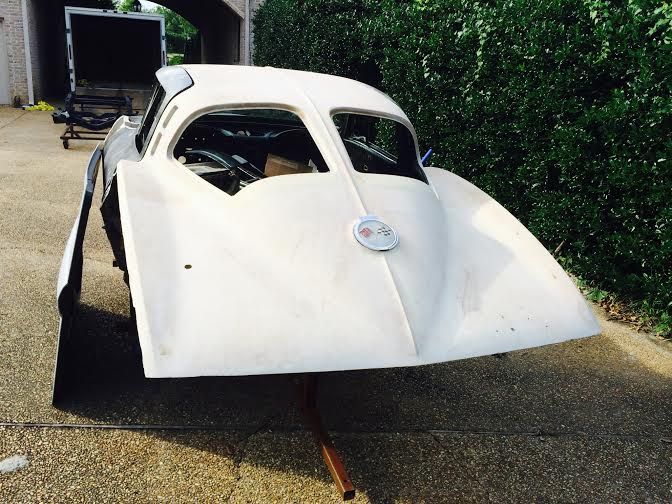
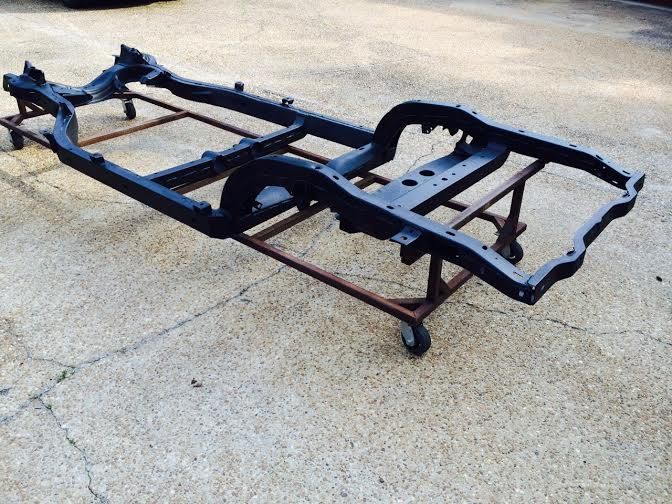
Here is the latest project, which is very slowly being worked on. This is going to be a long restoration which will probably take around 2 years.
-This is a numbers matching 340hp car with Daytona Blue exterior and Daytona Blue Interior. A previous owner started the restoration of the car many years ago, but did not get very far.
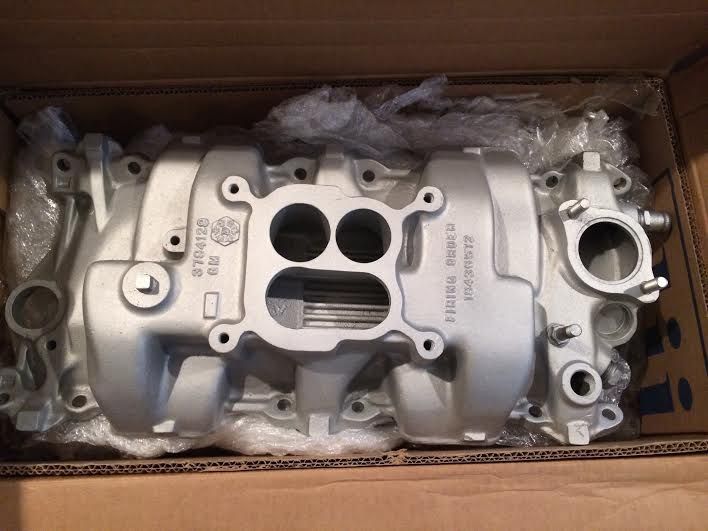
-The engine is currently at the machine shop being inspected and rebuilt. Fortunately, it does not look to have ever been molested, although the original intake and carb were throw away, sold, or lost at some point.
-I have a new press molded jib assembled front clip, quarters, taillamp panel, and the needed bonding strips on order from Sermersheim.
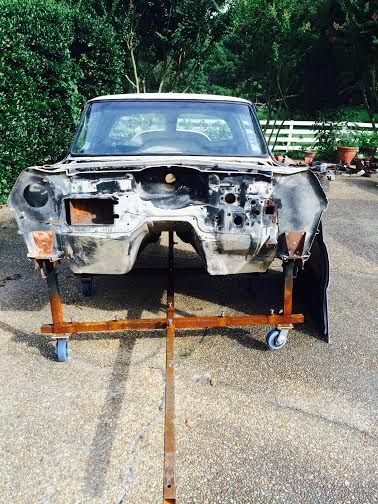
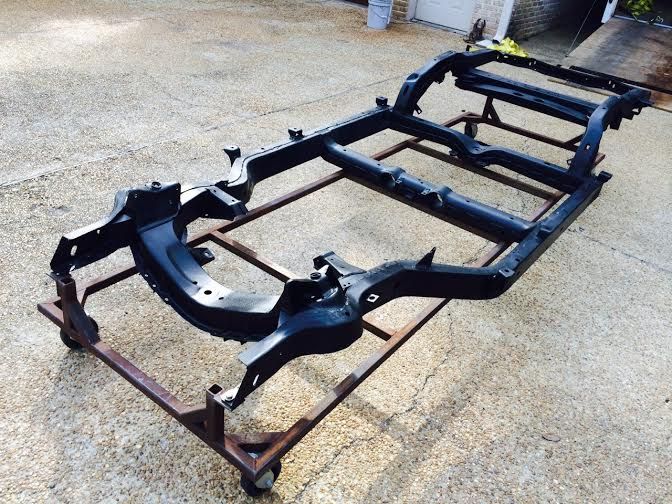
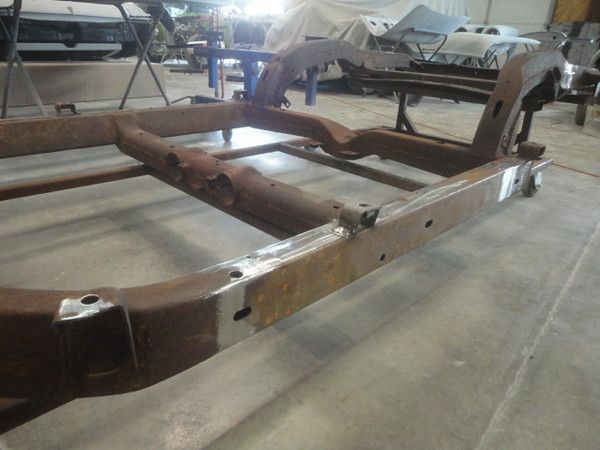
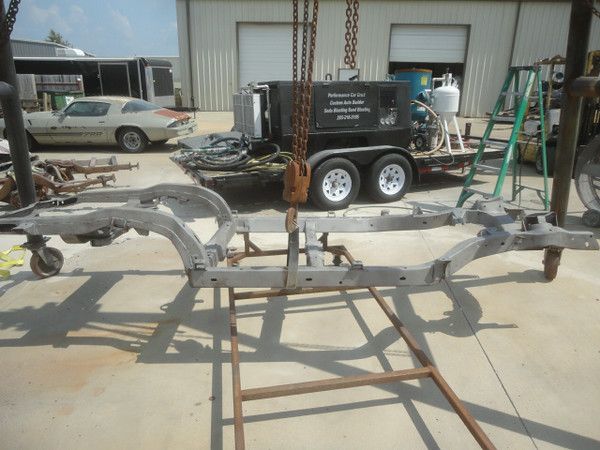
The first order of business was getting the frame repaired. The car must have been in an accident at some point because the frame had large ugly welds on the main driver's side rail along with some odd looking areas.
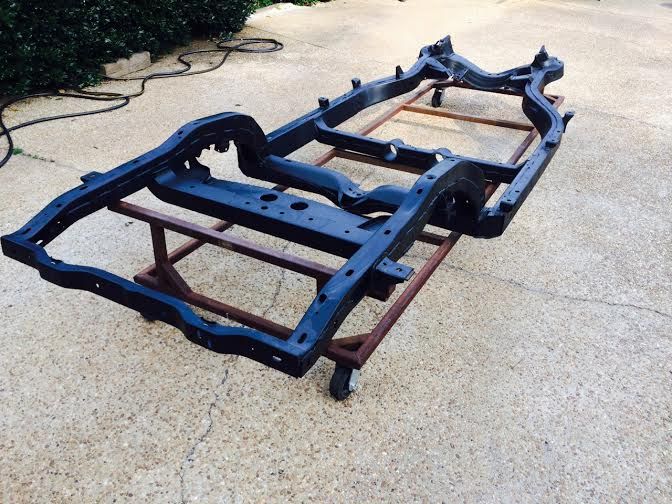
I had the driver's rail replaced and the frame blasted and epoxy coated. The frame has some pitting, but no rot. I plan to fill in the pits with a light layer of filler then spray 3 more coats of SPI epoxy.
If only that were possible, rich. No, this car just popped up and even though it is a mess, everything lined up and the matching numbers engine and transmission were still with the car. I almost wish they hadn't been, as it would be less expensive to build it into a restomod. However, it's a worthy project since it's a 340hp car.
65silververt the best way is just what you are doing, slow and easy and tae your time. I am building the 54 Motorama Car and it has been a few years in the works but when it is done it is going to look just like the 2 that GM built and destroyed back in the 50's. Keep track and take pic of what you do to the car and when, don't worry about how much $$$$$ you spend on the restoration, you always spend more then you think you will . Keep a photo book of your progress and keep us on the Forum all posted with information and pic. Good luck in your journey of restoration.
This won't be a cheap one, but time is on my side to look for parts. By the time the body is fixed, the engine is rebuilt, missing parts are located, and the car is painted, every bit of 65 grand will be gone(including the purchase price).
But, actual matching numbers 340hp cars aren't that abundant, so again, it's worth the trouble.
Forgot to mention other options for the car: Power Windows, AM/FM Radio, 3.70 Posi-traction rear(my favorite), and a muncie 4 speed.
This is going to be one sweet build to follow...please keep all of us updated as you go along. The thought of a sticky thread comes to mind.
-I have a new press molded jib assembled front clip, quarters, taillamp panel, and the needed bonding strips on order from Sermersheim.
Is "jib assembled" a typo (meant jig assembled) or some term or company initials which which I'm not familiar. Honestly curious, not trying to be Mr. Picky.
Looks like quite a project, but I suspect the results will be worth it.
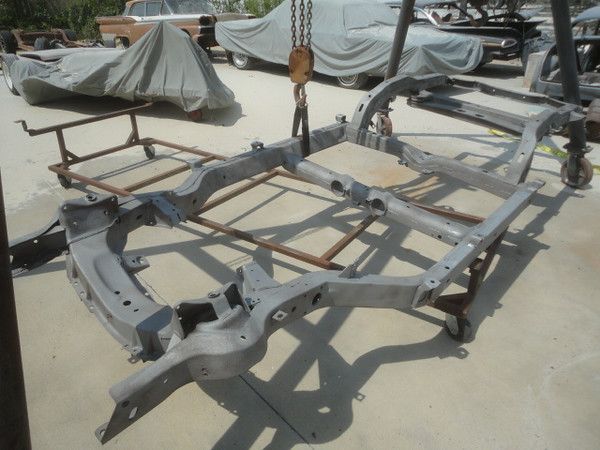
No real progress, but I did put my new gantry crane to use and reinstalled the body back on the frame today. The hoist straps from Corvette Central were way too long, so ended up using two tie down straps instead. Not sure why CC cant figure out an appropriate length for their body lift straps.
If only that were possible, rich. No, this car just popped up and even though it is a mess, everything lined up and the matching numbers engine and transmission were still with the car. I almost wish they hadn't been, as it would be less expensive to build it into a restomod. However, it's a worthy project since it's a 340hp car.
The restomods of today with a good roadster shop frame, LS3 and all the parts will cost me twice the restored cost of a 63 Cp. I know first hand we are doing both at the same time. It is easy to restore one someone else engineered it for you
Well, for this particular car the cost will be the same. Finding original one year only parts adds up quick, not to mention replacing 80 percent of the fiberglass. The door stainless alone cost $850.00, the center console, extensions, and horse shoe molding another 1300.00 and that's just a drop in the bucket...bloop
Initially i was going to keep the car all original, but i think i will add the wilwood front disc brake upgrade and van steel semi-coil overs. Ill keep the original components boxed up just in case someone wants to put them on later.
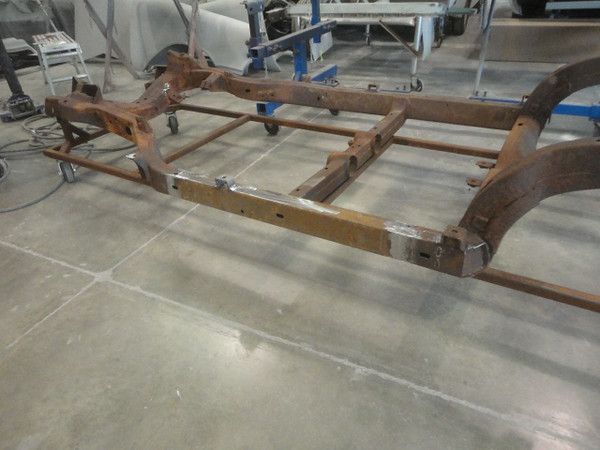
Finally got a few pictures of the frame rail repair. everything seems to have been repaired correctly as the body fits on the frame very well.
New Quarters, bonding strips, taillamp panel, and splash shields showed up last week. I won't have time to mess with it until after September, but I hope to have at least the rear of the body completely assembled by 2015.
Well, the cage is a bit worse than i thought, but still no real major issues or concerns. I removed the body mount/splash panels from the rear wheel wells and the latch pillar fiberglass so the metal shop can have access to the cage. I am not the worlds greatest welder, so i am passing this task off. The driver's side latch pillar is the worst. The rest of the cage is solid, so i assume salt settled in the lower portion of the cage and caused it to rot. The rocker channels are fine and still sport their nice original green zinc paint.
Somebody glassed in the holes in the original exhaust panel.
Making a 65-66 door into a 63 door. It's not pretty yet!!! The door handle sections are sold by sermersheim...just FYI in case anybody wants to do this instead of paying 1500-2000 for a 63 door! It took me about 3 hours to start the conversion. It will probably take about 8 hours per door to complete the conversion.
Last edited by 65silververt; 10-17-2014 at 09:04 AM.
Here is the latest project, which is very slowly being worked on. This is going to be a long restoration which will probably take around 2 years.
-This is a numbers matching 340hp car with Daytona Blue exterior and Daytona Blue Interior. A previous owner started the restoration of the car many years ago, but did not get very far.
-The engine is currently at the machine shop being inspected and rebuilt. Fortunately, it does not look to have ever been molested, although the original intake and carb were throw away, sold, or lost at some point.
-I have a new press molded jib assembled front clip, quarters, taillamp panel, and the needed bonding strips on order from Sermersheim.
The first order of business was getting the frame repaired. The car must have been in an accident at some point because the frame had large ugly welds on the main driver's side rail along with some odd looking areas.
I had the driver's rail replaced and the frame blasted and epoxy coated. The frame has some pitting, but no rot. I plan to fill in the pits with a light layer of filler then spray 3 more coats of SPI epoxy.
Cant wait to follow this one! You have lots of talent.
I get tired just vacuuming my 63 out! morly1963
Thanks Morly!
3 hours
I spent this time filling and blocking the door and repairing the radiator shroud. The door looks much better now! I think once the door is in primer and blocked I will spray base and clear around the pad area to see if the seams show. I used 3m panel bond to fill the screw holes and the seam, so it should be ok...i havent had problems when i have used this in the past, but have had issues with evercoat vette bond/filler swelling in the hot sun.
The radiator shroud spot welds let loose on one side. I drilled 3 holes then plug welded them and ground them smooth. This only took about 30 minutes and was well worth the effort.
Not much of an update, but I did acquire a lot of the missing parts. I also found two original 63 doors for $600.00, but shipping was $500.00 since UPS had to pack them. I plan to finish up the passenger door I converted, but i am going to leave the 65-66 driver's door alone. Both will be for sale soon and I will post an ad in the for sale section.
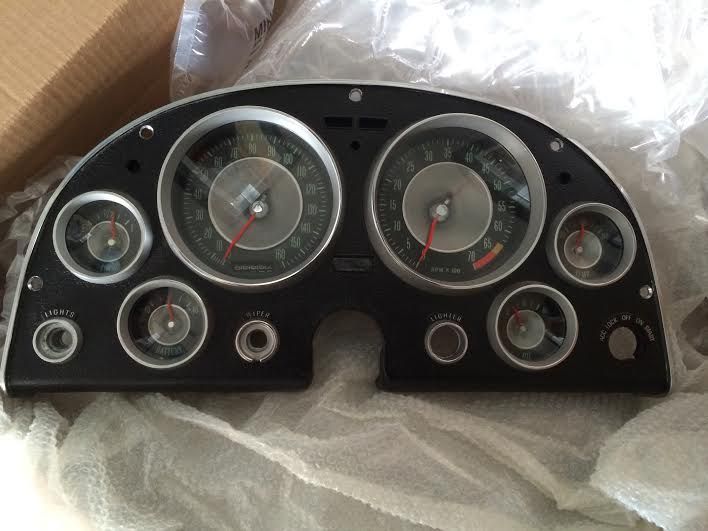
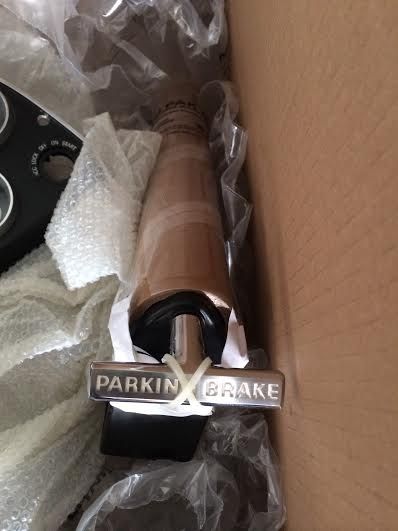
Anyway, thanks to Frankie, I now have gauges and the correct parking brake for the car. However, from what I understand, later 63 340hp cars had an 80lb oil pressure gauge and not a 60lb??? Is that correct. Again, the build date of this car is around July 11th.
Correct intake, but i plan on using a 461 intake from a 64-65 with a quickfuel 600cfm carburetor. This will go in a box and on a shelf to go with the car for when it is sold someday hopefully many years down the road.
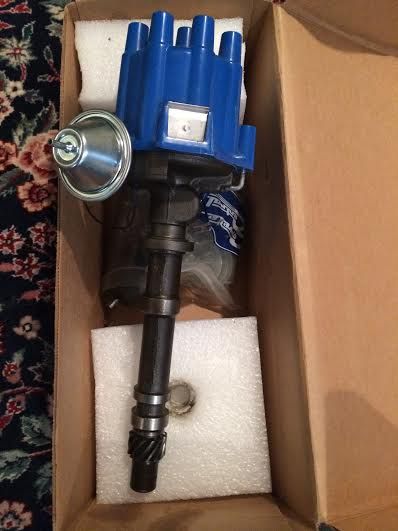
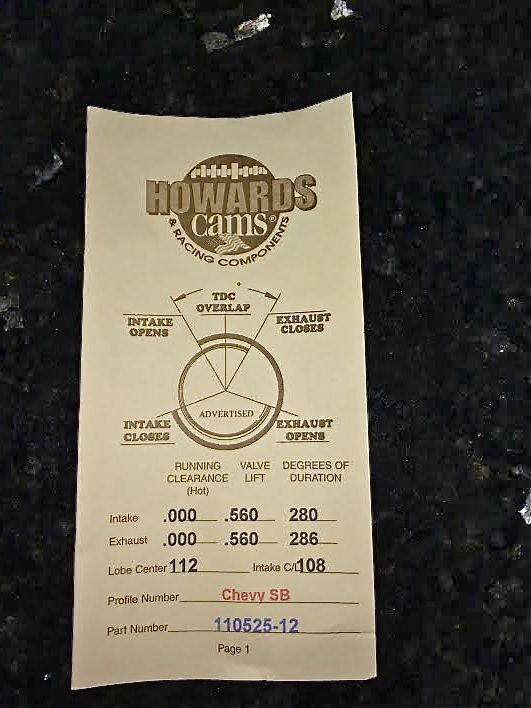
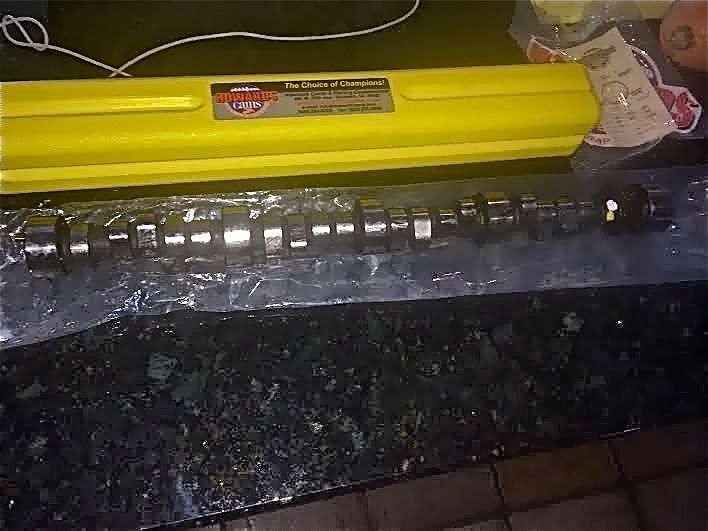
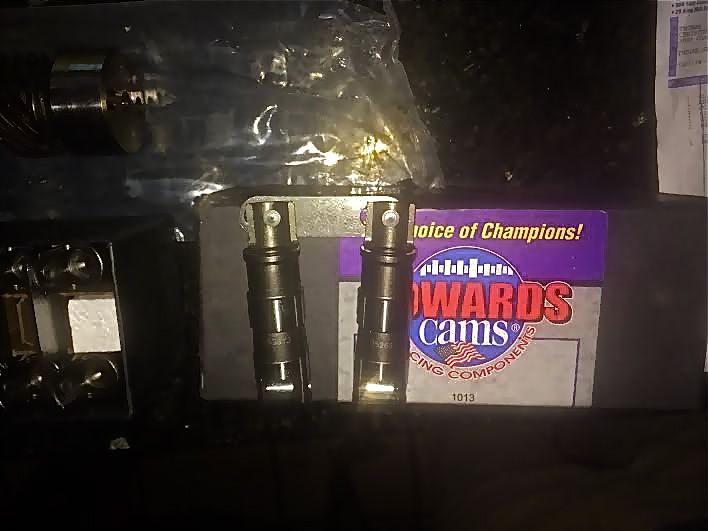
Distributor rebuilt by lars and set up for the new Howard's hydraulic roller camshaft.
The cam I picked. I think I already mentioned this previously, but I like Howard's retro-fit hydraulic roller cams because the gear is compatible with the stock cast iron distributor gear. My engine builder says this cam with clear the stock style pistons even with the heads upgraded to larger valves...we shall see. If not, then I will probably need to order custom pistons with a deeper dish. The block has it's standard deck and does not need attention, so that is a plus.
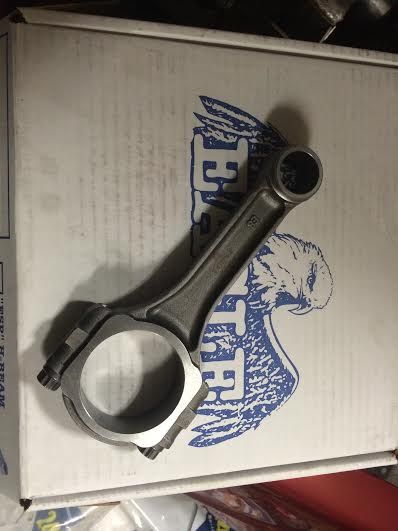
New Lightweight Eagle rods with ARP cap bolts
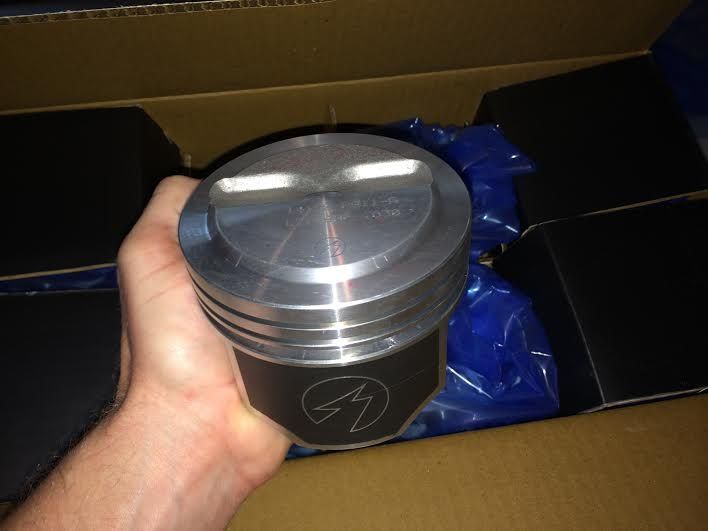
Speed Pro Forged Stock style replacement pistons 30 over.
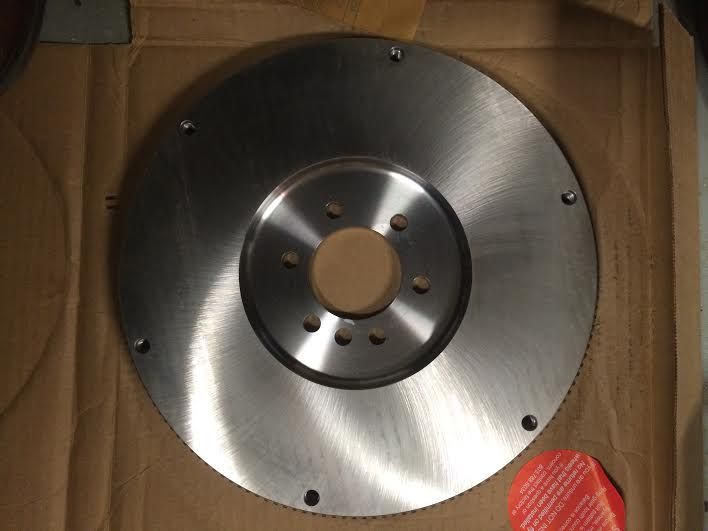
New Flywheel. This one is 27 pounds, which i think is 3 pounds lighter than stock?
I plan to drop all the parts of next week when I pick up another engine. I'm sure the engine will be finished long before the car is ready for it...maybe even before I have the chassis assembled.
Interesting project that I look forward to following. It's nice to know about Howard's compatibility with the tach gear. That could save some people some serious trouble. Dennis
 06-23-2014, 07:17 PM


 . Keep a photo book of your progress and keep us on the Forum all posted with information and pic.
  Good luck in your journey of restoration.


 Dennis