
Fixed! - Rear + Headliner Rattles
 09-28-2015, 01:44 AM
#1
Intermediate

Thread Starter
My 2016 Z06 was pretty quiet for the first 100 miles, but then started developing the dreaded "rear passenger area rattle" as others have noted. On top of this, it would also squeak continuously when going over rougher pavement when the suspension was in track mode.
It was easy to silence the rattles by pressing on the roof trim on the passenger side, or by having a passenger hold a hand on the interior panel on the right rear.
As I was planning to install a Sharkbar, I was pulling out all the rear interior panels anyway for access during the install, and discovered both an assembly issue and came up with a way to "dampen" the roof liner squeak.
NOTE: If you attempt this on your own too, buy a set of trim removal tools. You can use your hands, but some good plastic tools really save your fingers.
Problem #1 - Factory rear window rub strips are WEAK and tiny!
After removing the rear interior panels around the windows, there was an obvious wear area on the body around the passenger side window.
Looking at the interior panel, the factory put in tiny little rub strips and one had already slipped out of position. One strip was even missing on the driver side.
FIX: I cut strips of the "fuzzy" side of velcro to use as stronger rub strips and added some additional. Thanks to others on the forum for this suggestion when chasing other rattles - the velcro had much stronger adhesive than the tiny factory strips.
TIP: The rear clip on the interior trim seems to always separate on removal (all the rest just seem to pop out fine). Be sure to look for it and reattach before reinstalling the panel (and check others for good measure).
Problem #2 - The squeak from the upper roof trim
Since pressing on the interior trim seemed to silence the squeak, I decided to dampen/stabilize things a bit by adding some adhesive foam on existing "stand offs" on the roof bar. I just cut them to size from automotive grade weather stripping.
FIX: 1" pads on the stand offs, and strips on the "edges" of the panels that flex and come in close contact with the roof structure.
So far, so good! With the interior back together, not a single squeak or rattle.

The following 6 users liked this post by Desmo999:
JackTripper (11-05-2015),
John Micheal Henry (02-08-2018),
LT4CMG (05-30-2017),
petepd (08-30-2017),
ryryokeefe (01-27-2017),
and 1 others liked this post.
09-28-2015, 01:54 AM
#2
Intermediate
Thread Starter
Here's one extra shot of the rear window trim panel with some arrows showing where the rub strips are located on the bottom edge of the window surround.

The following users liked this post:
2019 ZR1 (11-04-2015)

 11-07-2015, 01:43 PM
#5
Melting Slicks


I had those panels on/off a dozen times trying to find a "buzz" that only occurred over 65 mph after 15 minutes.
Finally found it coming from the 1/4 " gap between the small side window glass and the body. I have no clue what was causing it because the window is glued in place. I stuff the gap with a strip of hard wood strip wrapped in fuzzy Velcro. Very strange.
I found the window trim was not fused to the back side of the large trim panel. I added a lot of silicone sealant where the 2 pieces meet.
I also added insulation on the back side of these trim panels and halo.
There a many places where plastic trim rubs against a hard surfaces that rattles and buzzes start. The fuzzy Velcro fixes most. Takes a lot of patients to find and solve them.
The following users liked this post:
tony abbski (02-04-2017)
01-21-2017, 11:42 PM
#7
7th Gear


 01-23-2017, 02:27 PM
#10
Melting Slicks
Thank you for this thread. I have had the annoying rattles/squeak for almost as long as I've owned the car. Dealer has replaced panels with varying success but still not perfect.
01-27-2017, 01:01 PM
#11
Mine has the very same rattles/buzzes and has been bothering me for months. Seeing this inspired me to go to war on mine as well.
One question for you; is the quarter window trim simply held with clips?
One question for you; is the quarter window trim simply held with clips?
01-27-2017, 01:49 PM
#12
7th Gear
If you happen to do it on your own can you please post a video? Also, i've the same question about the quarter window trim panel.
03-24-2017, 01:00 PM
#13
Le Mans Master

I'm getting a squeak noise from this area as well. Can anyone post a bit more info on how to get this panel off?
03-24-2017, 01:06 PM
#14
Intermediate
Thread Starter
As others noted too - the most likely cause is the fit around the small rear windows. The weak "rub strips" I pointed out in my original post were my primary cause of noise.
03-24-2017, 06:14 PM
#15
Le Mans Master
^^^
Much appreciated
Much appreciated
05-30-2017, 10:27 PM
#16
Melting Slicks
Member Since: May 2006
Location: Somewhere Carolina
Posts: 3,200
Received 187 Likes
on
123 Posts
St. Jude Donor '13

I'm resurrecting this thread. I have the overhead panel squeak and its driving me nuts. Question- how do you get the panel off? Does it just pull down from the clips? The rear clips seem pretty easy but the ones to the front are a bitch and I'm afraid of breaking something. Question posted in C7 general as well with no replies.
My 2016 Z06 was pretty quiet for the first 100 miles, but then started developing the dreaded "rear passenger area rattle" as others have noted. On top of this, it would also squeak continuously when going over rougher pavement when the suspension was in track mode.
It was easy to silence the rattles by pressing on the roof trim on the passenger side, or by having a passenger hold a hand on the interior panel on the right rear.
As I was planning to install a Sharkbar, I was pulling out all the rear interior panels anyway for access during the install, and discovered both an assembly issue and came up with a way to "dampen" the roof liner squeak.
NOTE: If you attempt this on your own too, buy a set of trim removal tools. You can use your hands, but some good plastic tools really save your fingers.
Problem #1 - Factory rear window rub strips are WEAK and tiny!
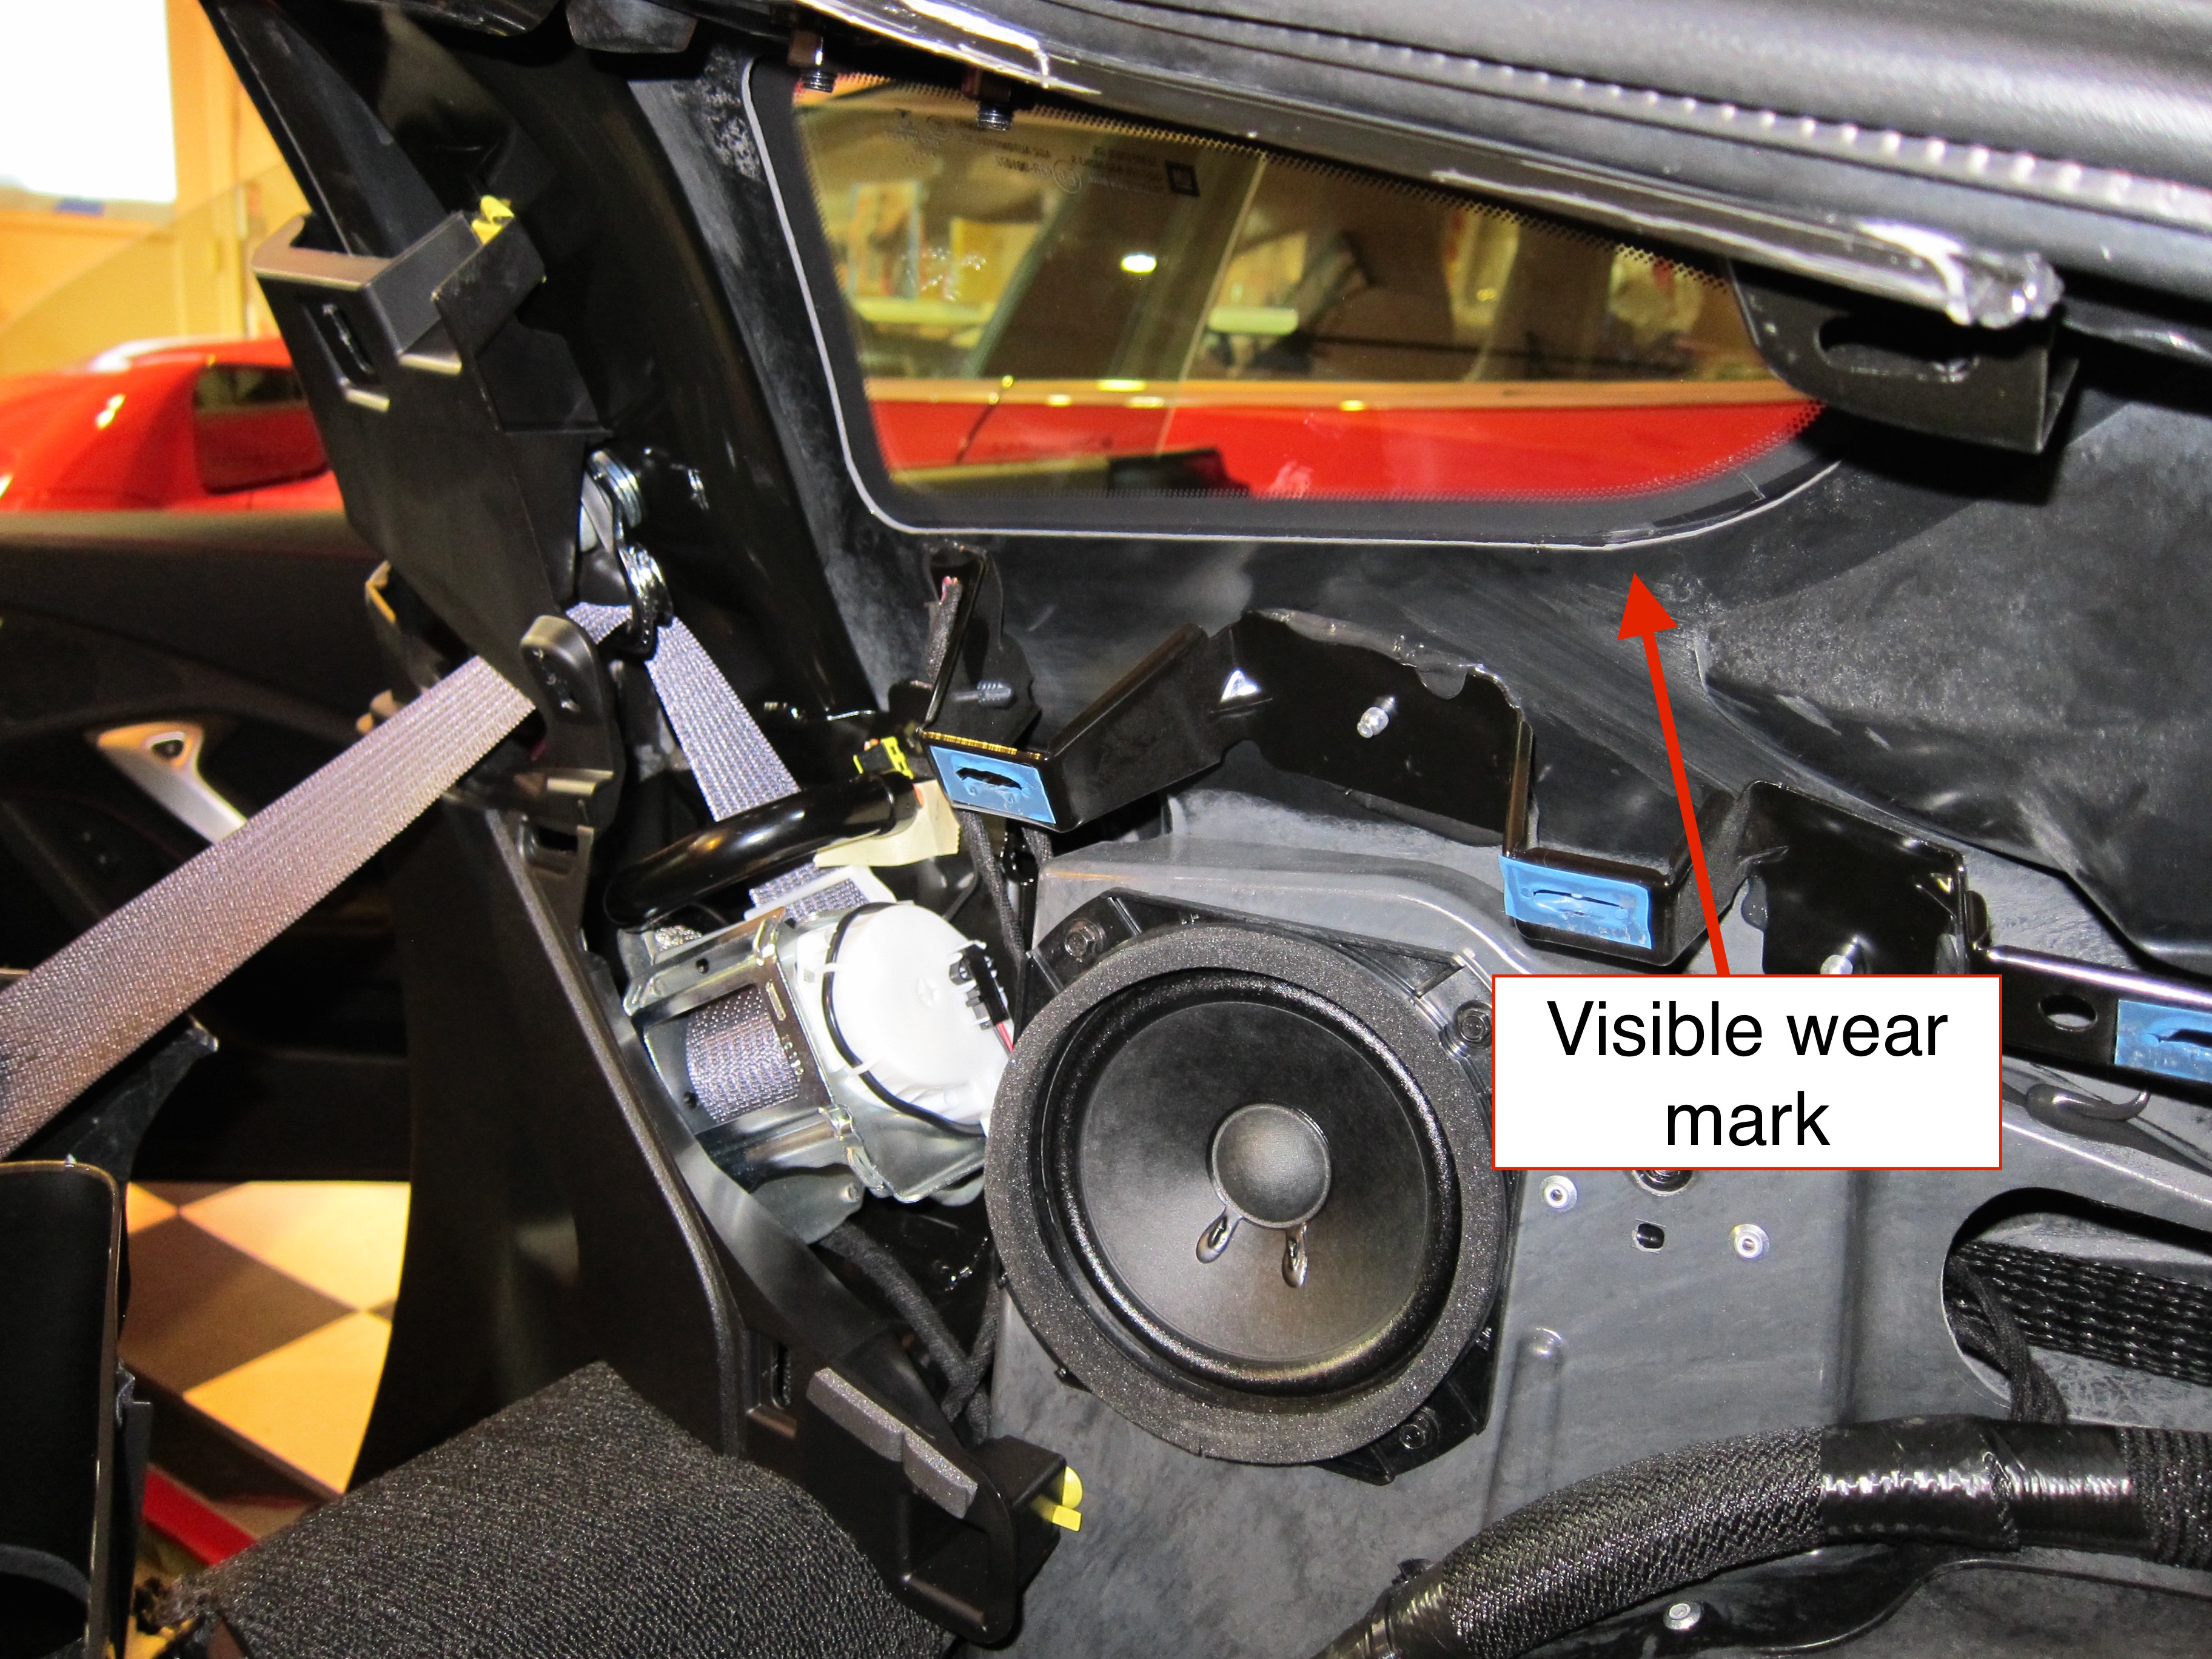
After removing the rear interior panels around the windows, there was an obvious wear area on the body around the passenger side window.
Attachment 47918968
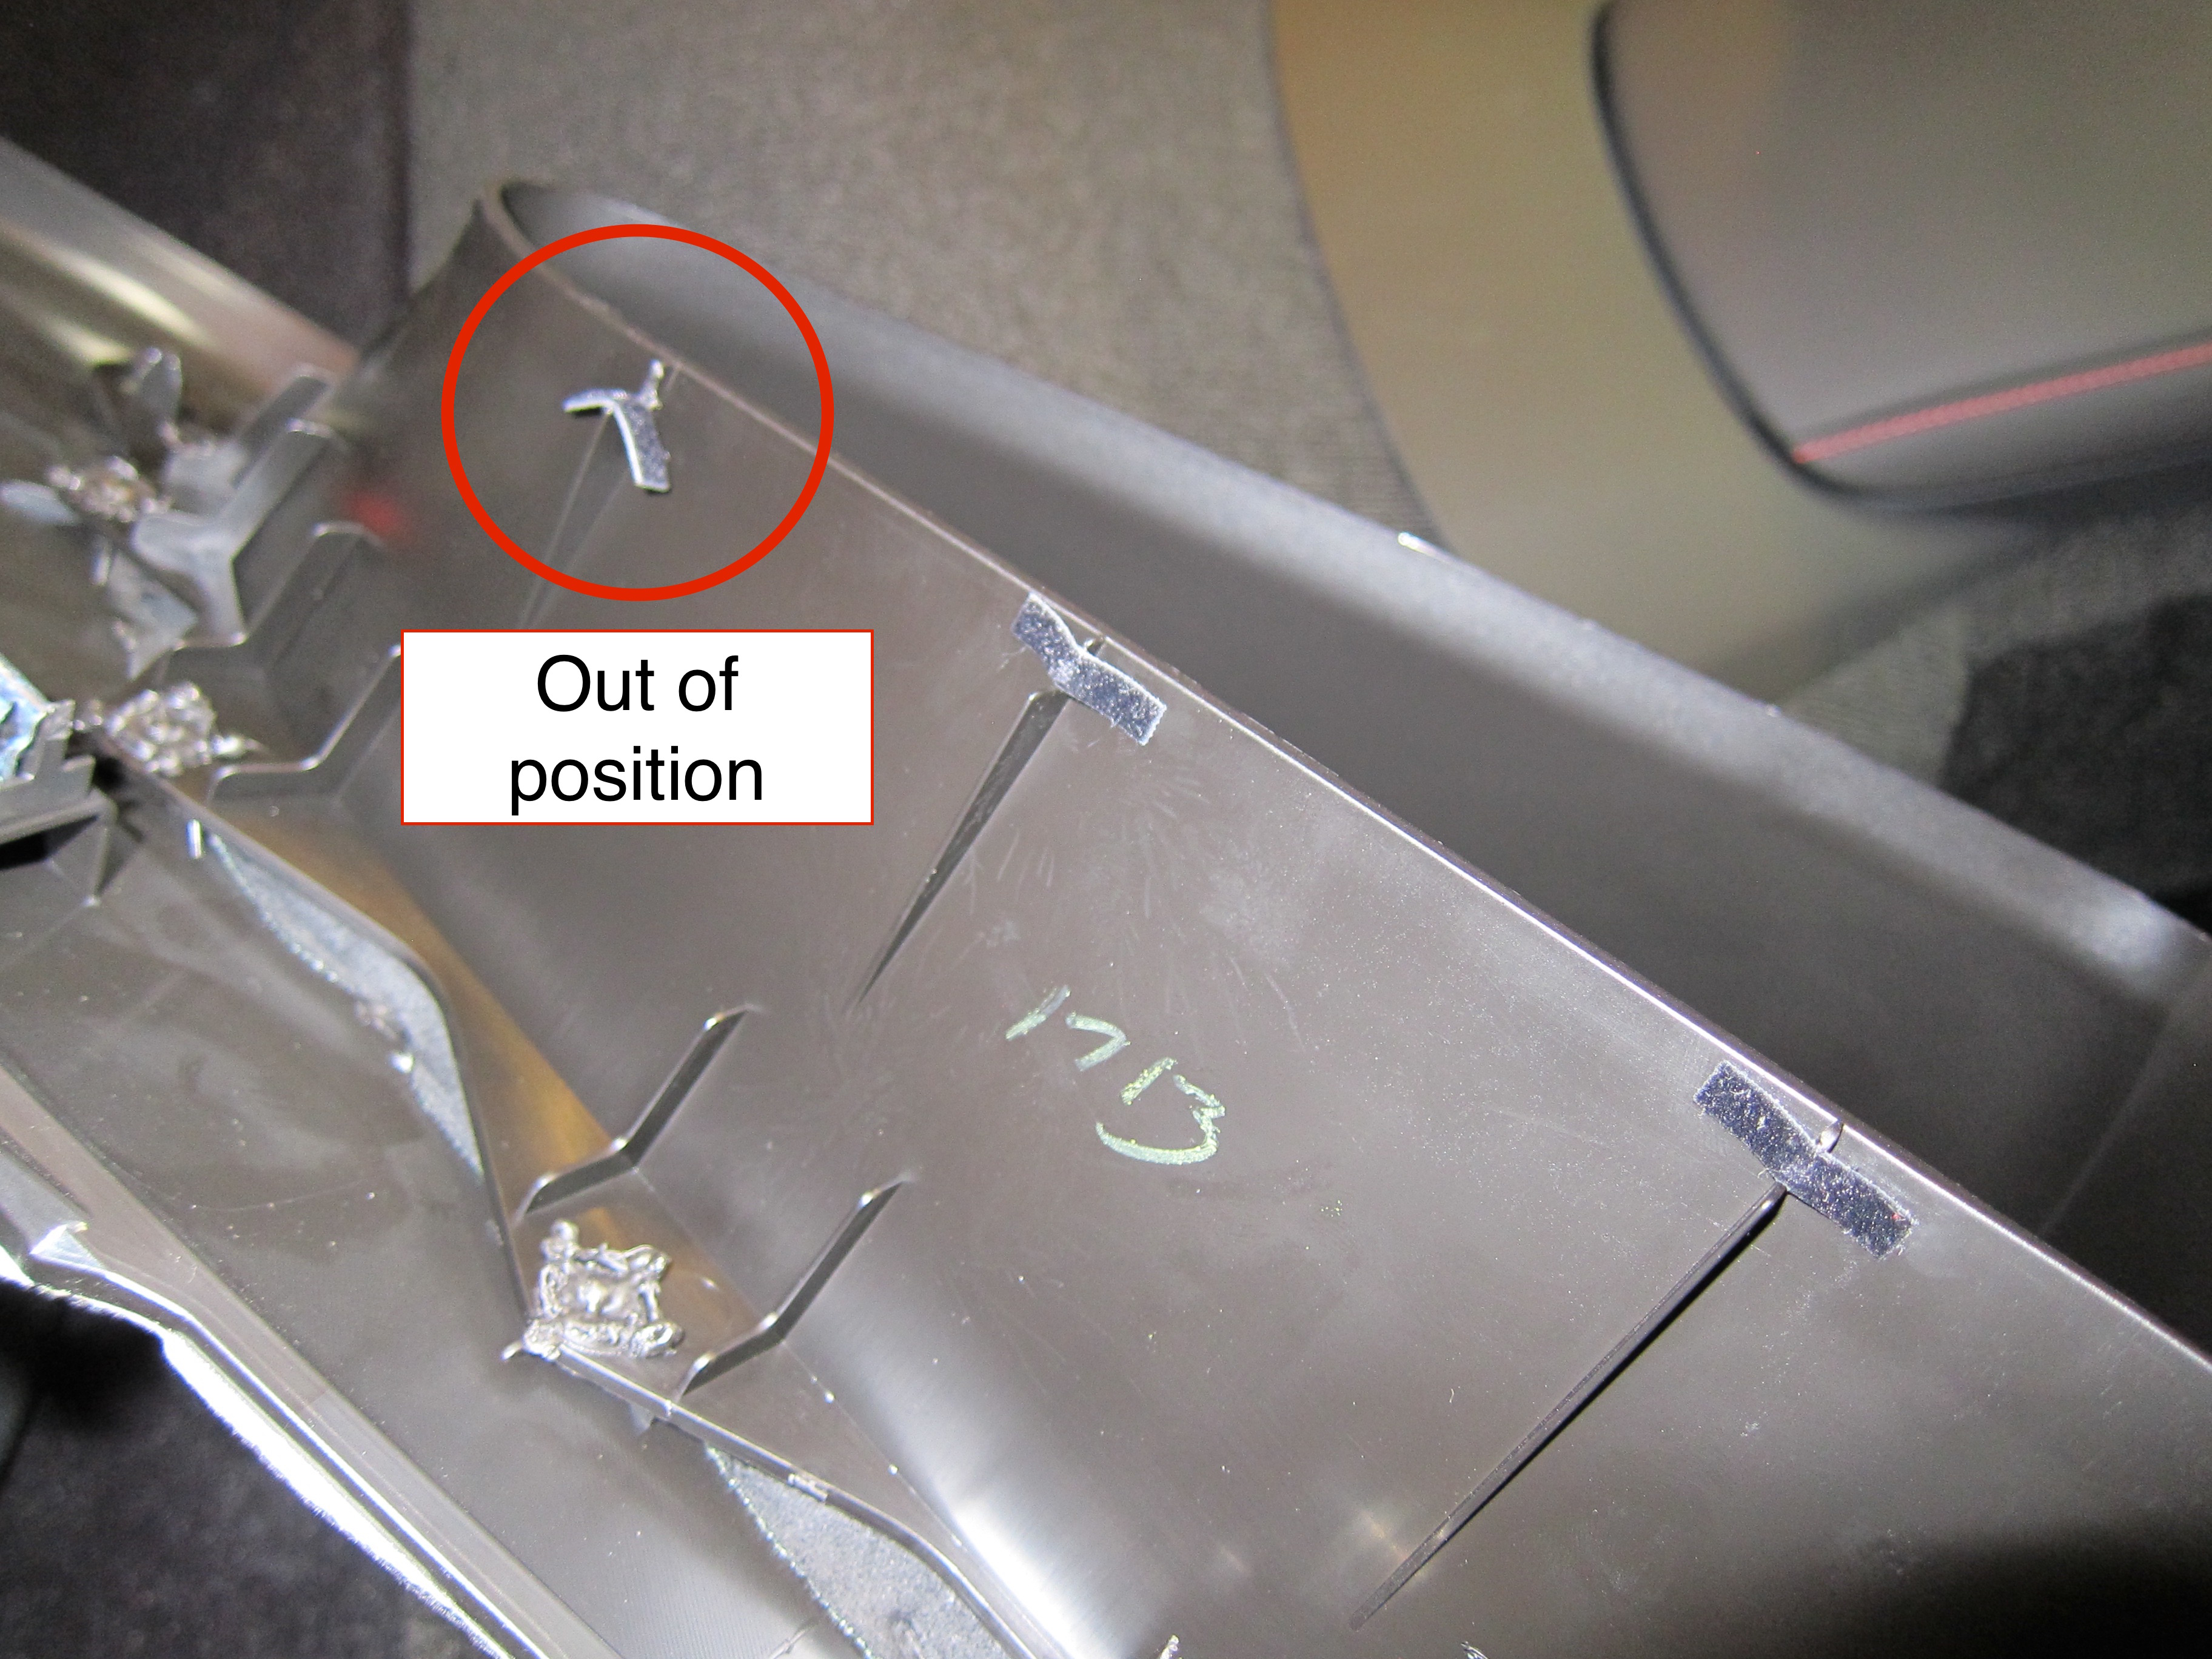
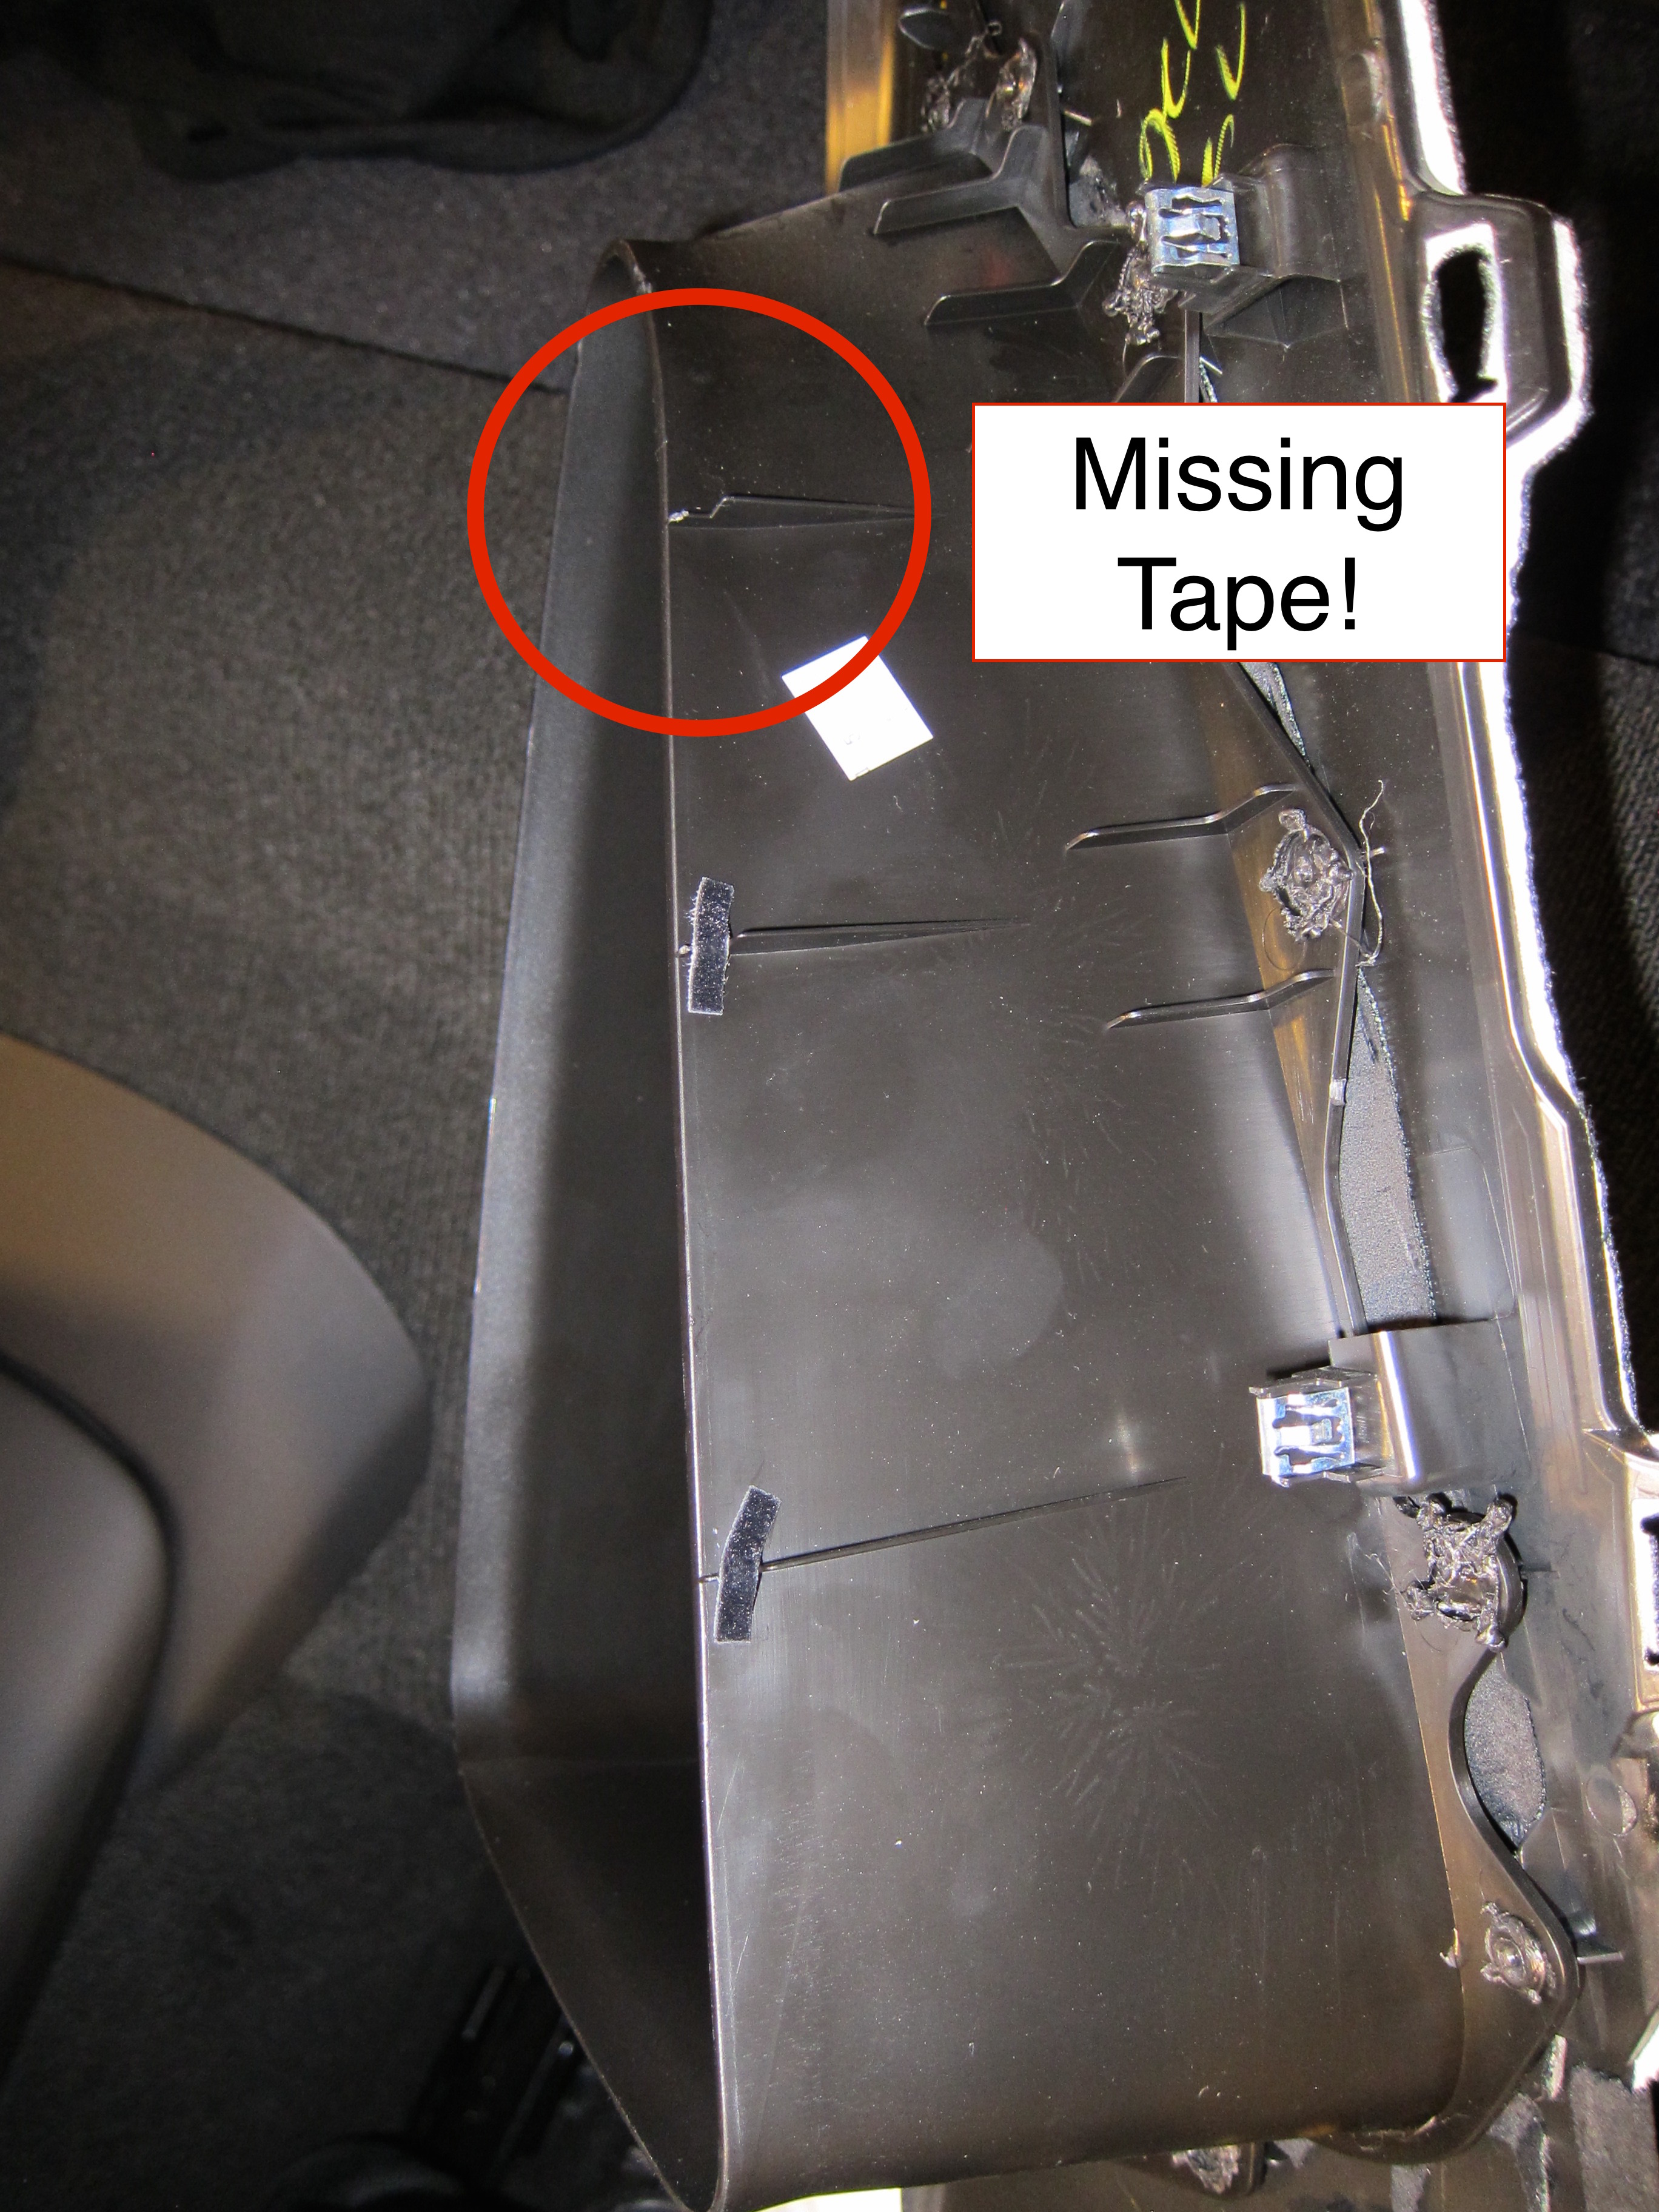
Looking at the interior panel, the factory put in tiny little rub strips and one had already slipped out of position. One strip was even missing on the driver side.
Attachment 47918969
Attachment 47918970
FIX: I cut strips of the "fuzzy" side of velcro to use as stronger rub strips and added some additional. Thanks to others on the forum for this suggestion when chasing other rattles - the velcro had much stronger adhesive than the tiny factory strips.
TIP: The rear clip on the interior trim seems to always separate on removal (all the rest just seem to pop out fine). Be sure to look for it and reattach before reinstalling the panel (and check others for good measure).
Problem #2 - The squeak from the upper roof trim
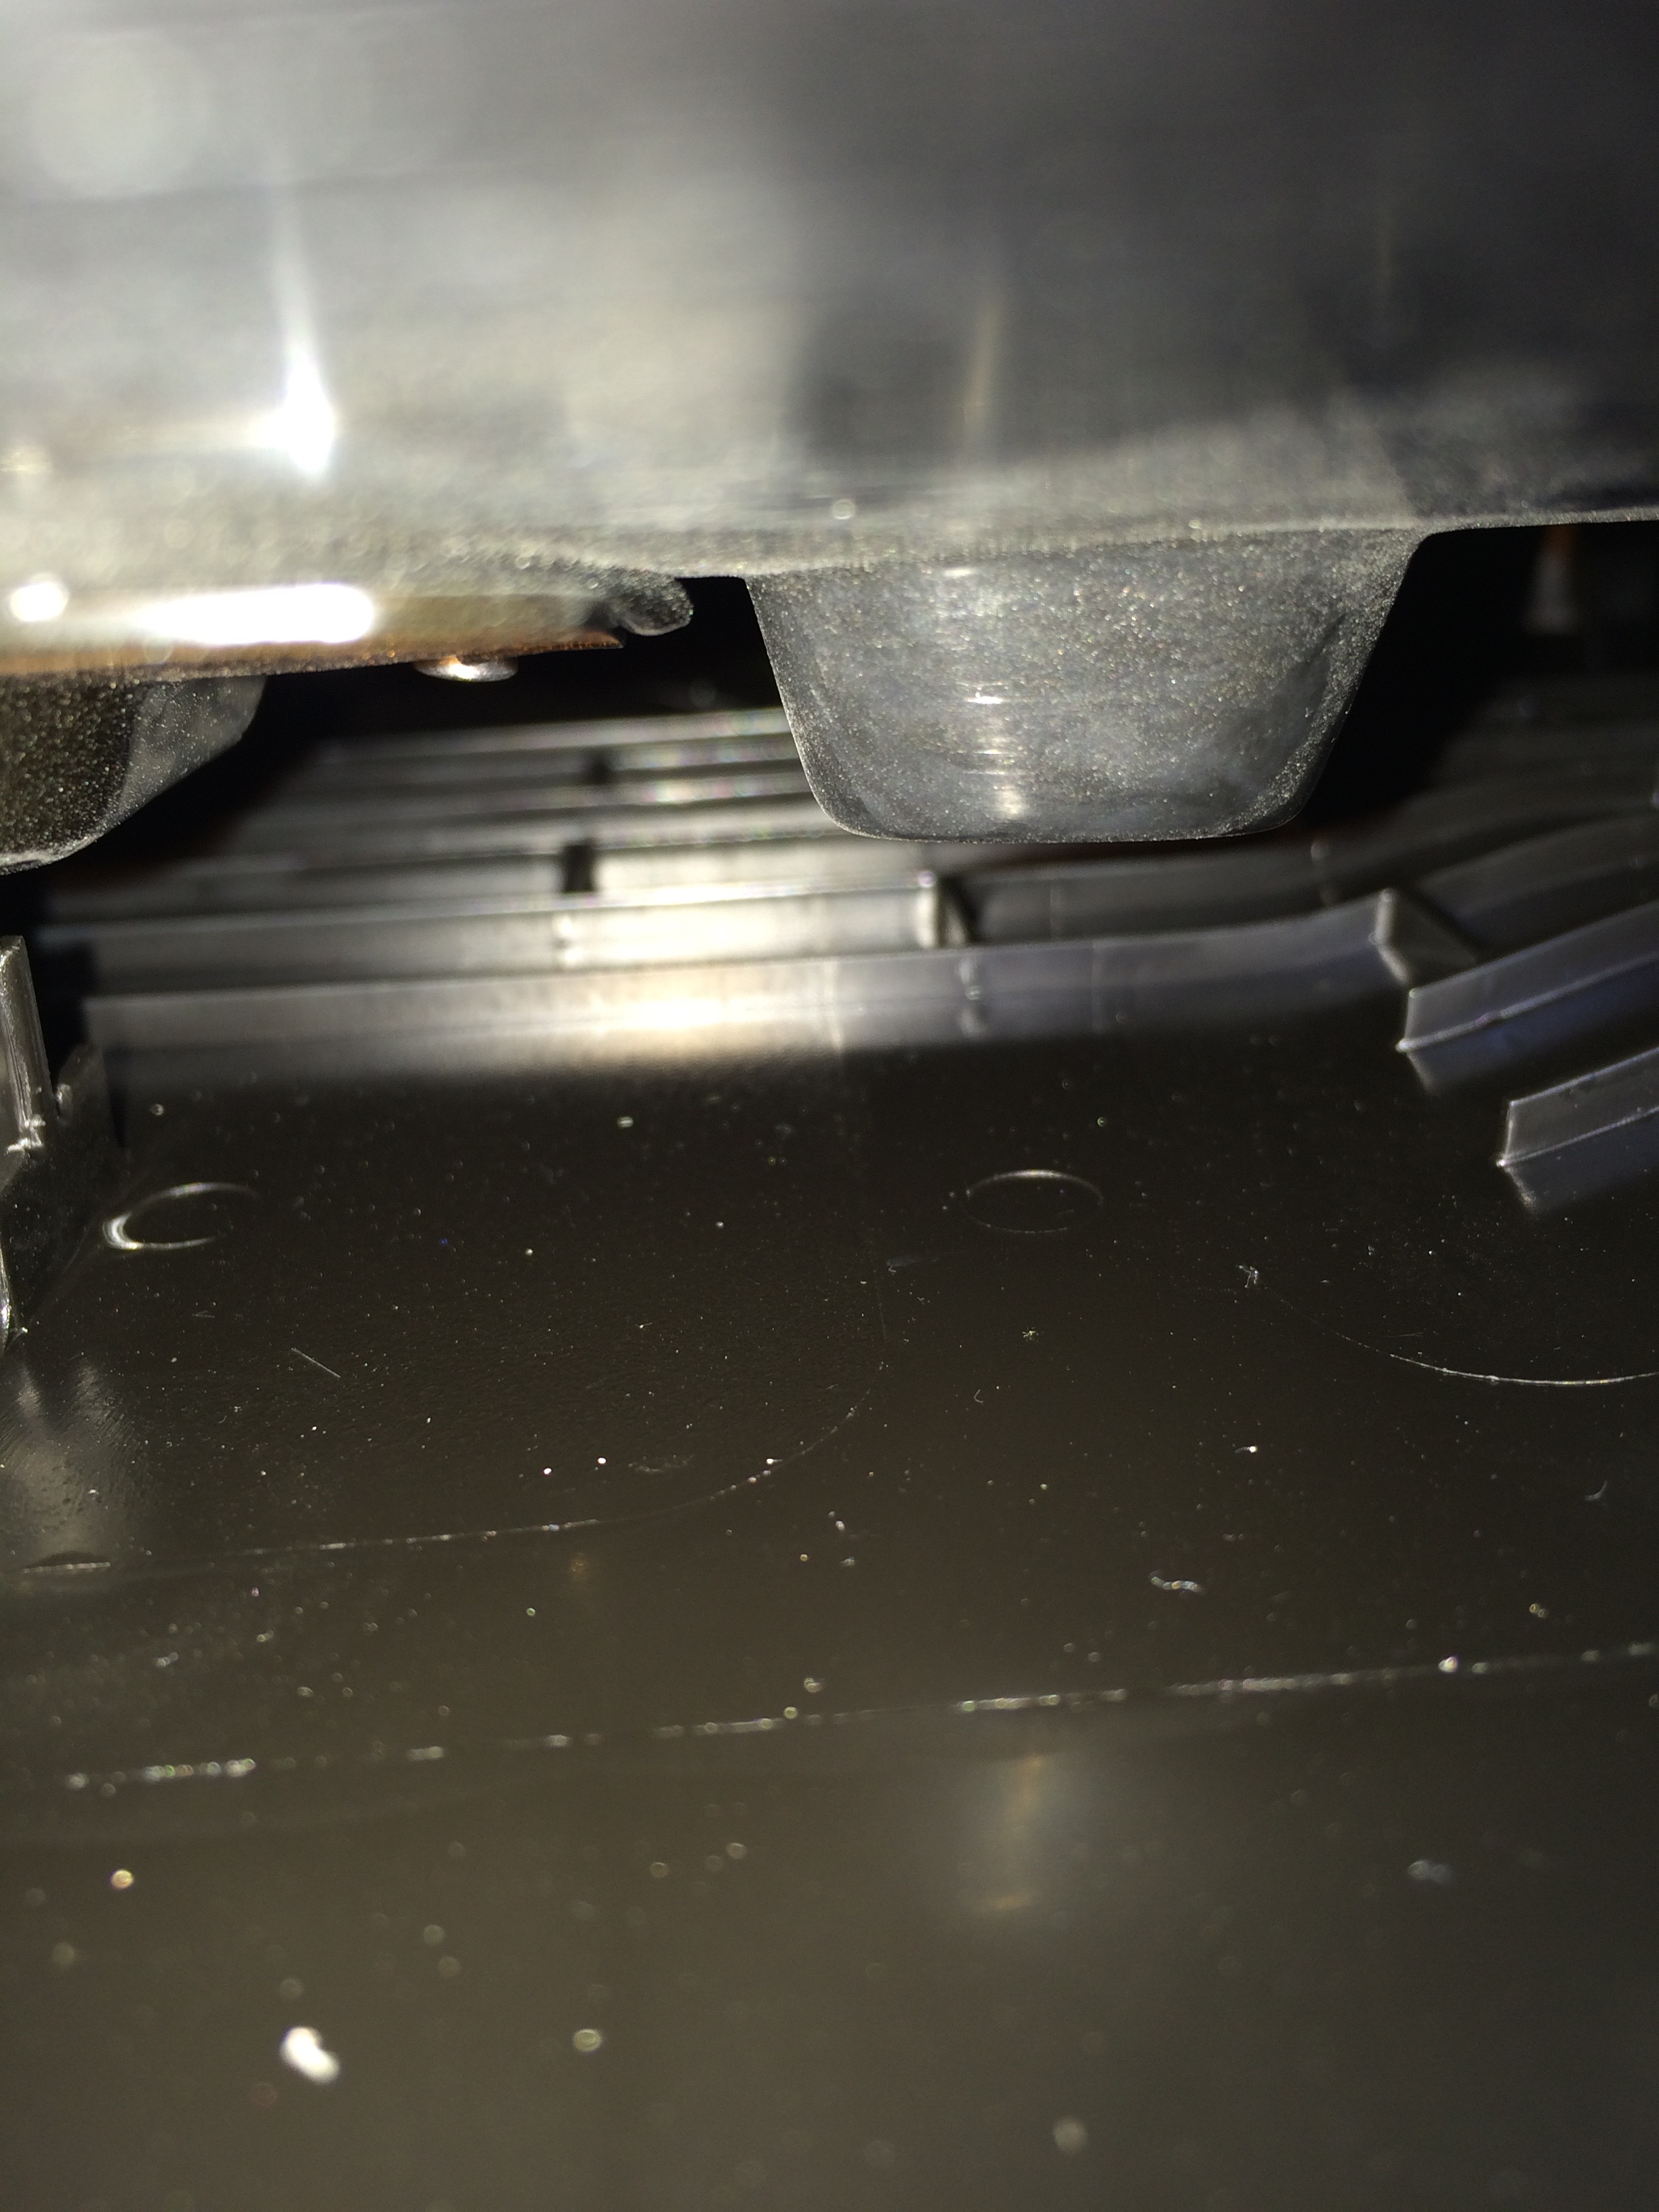
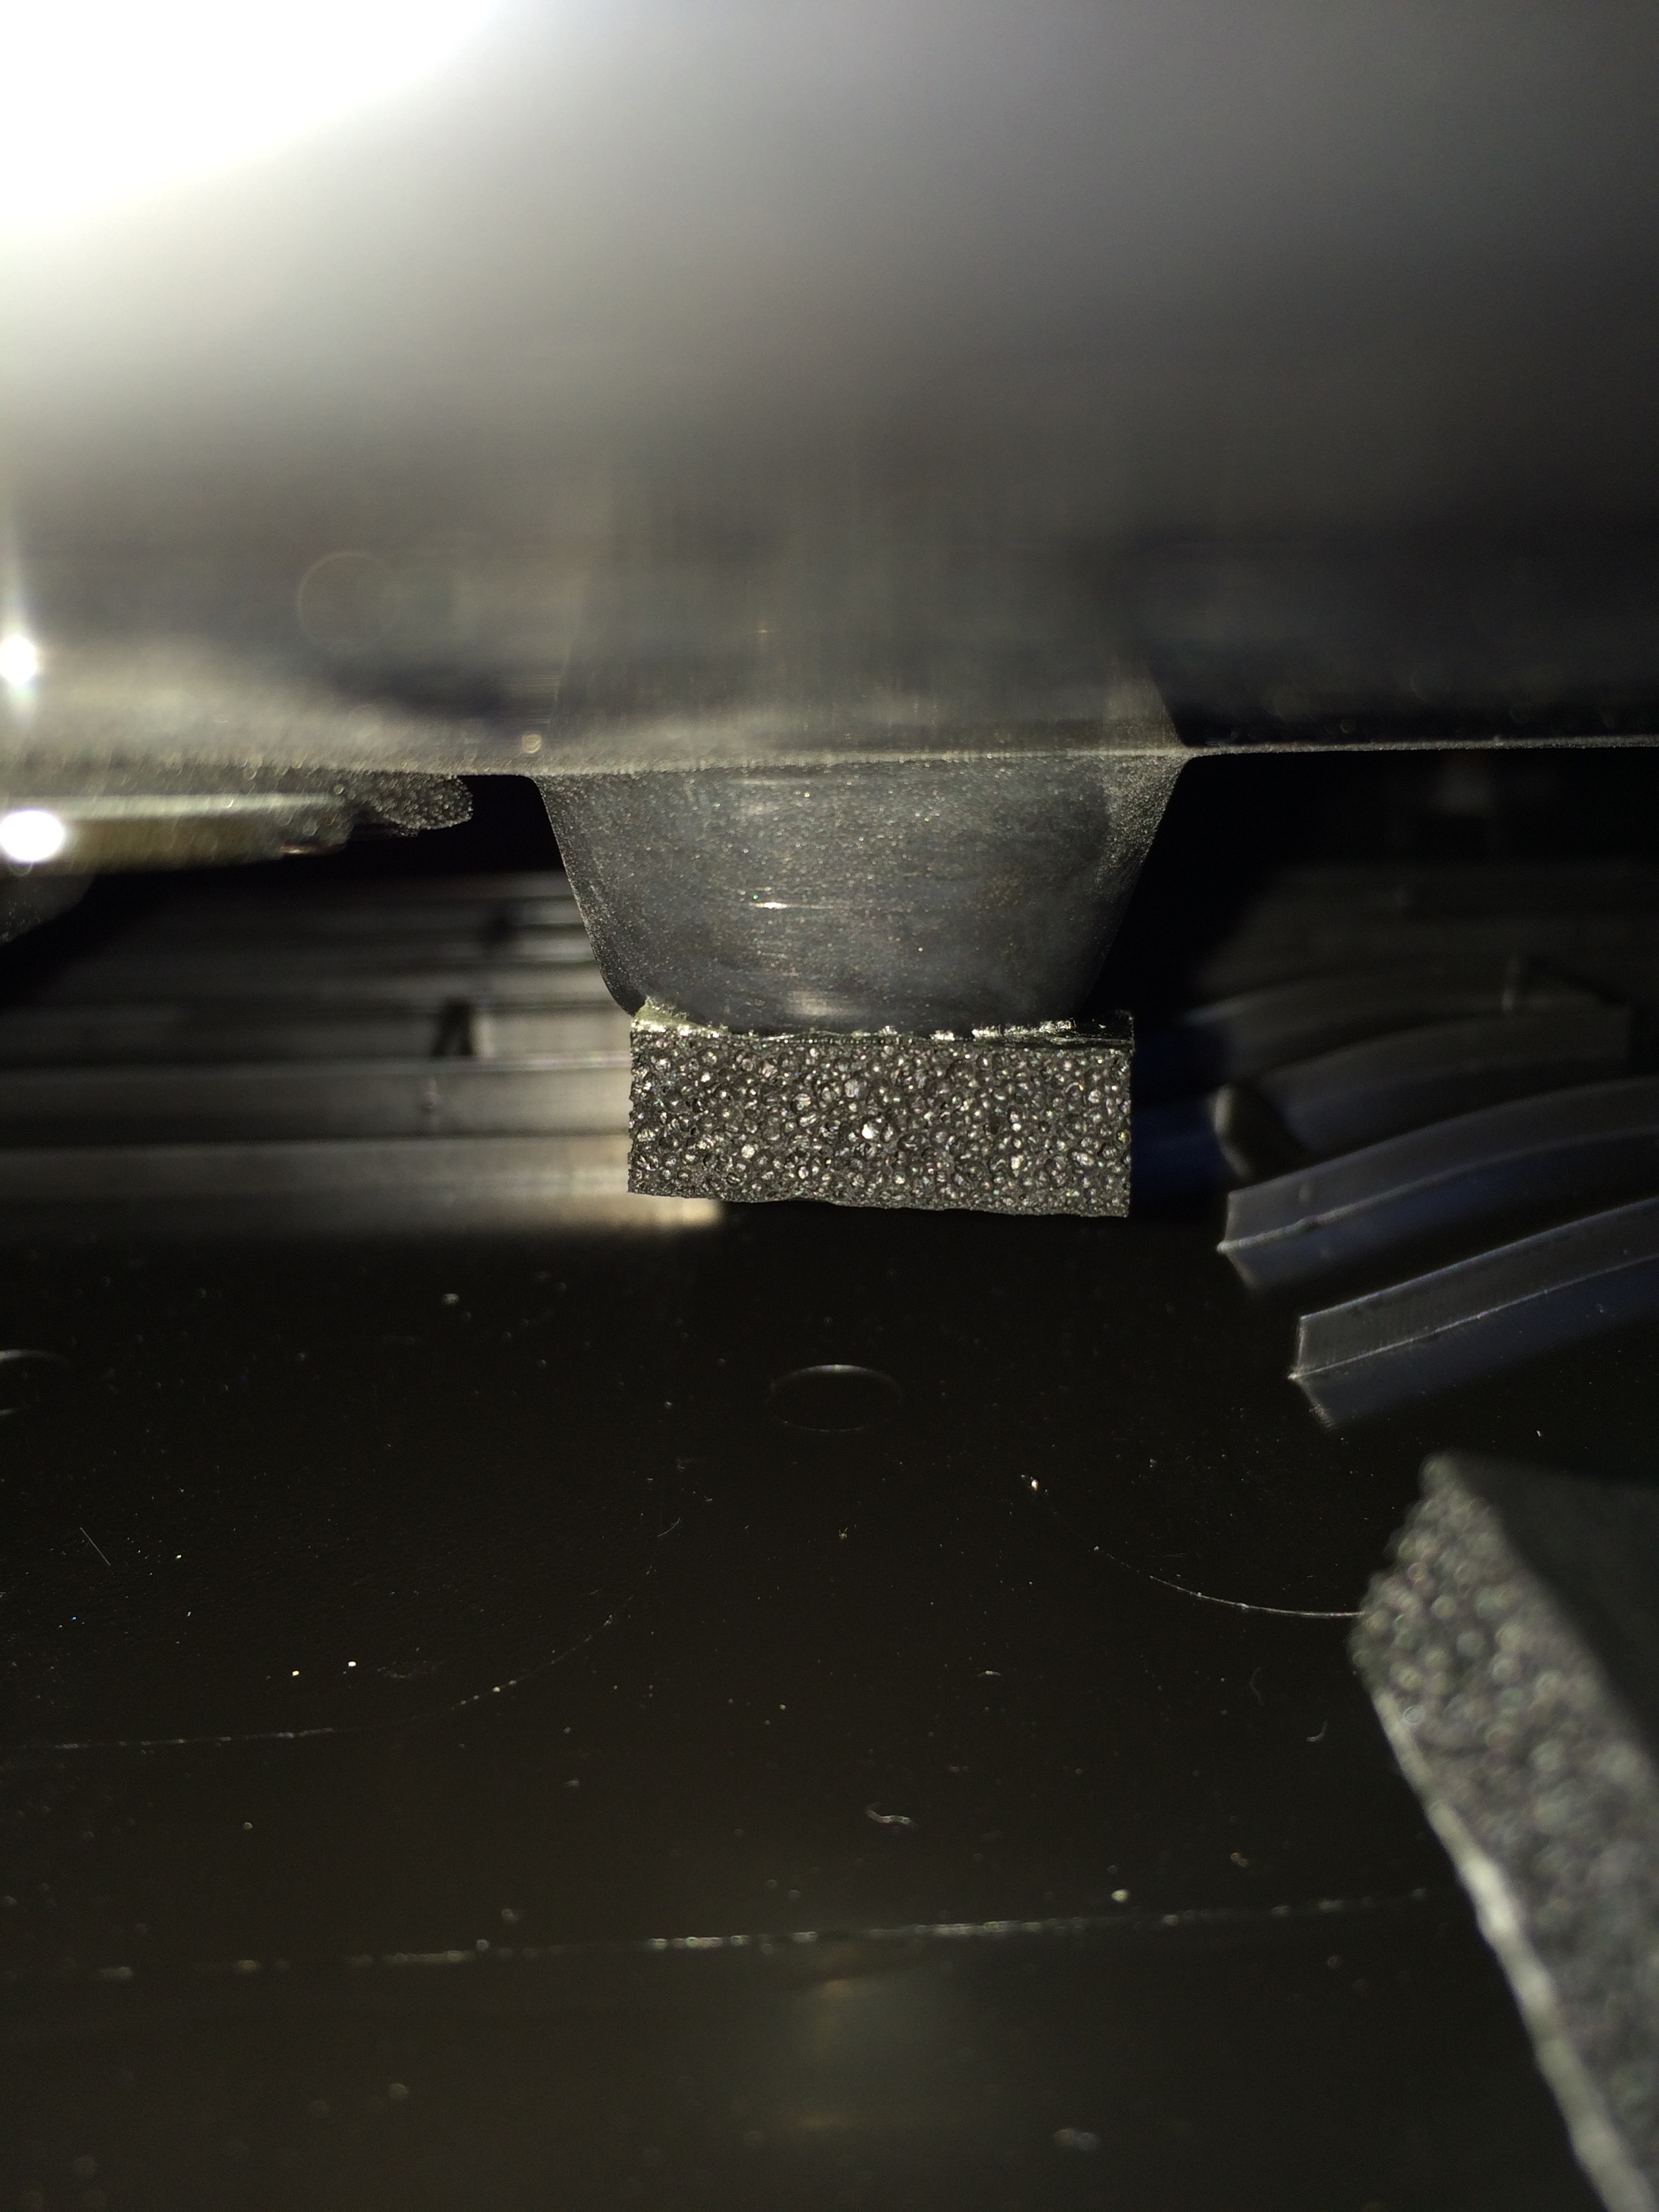
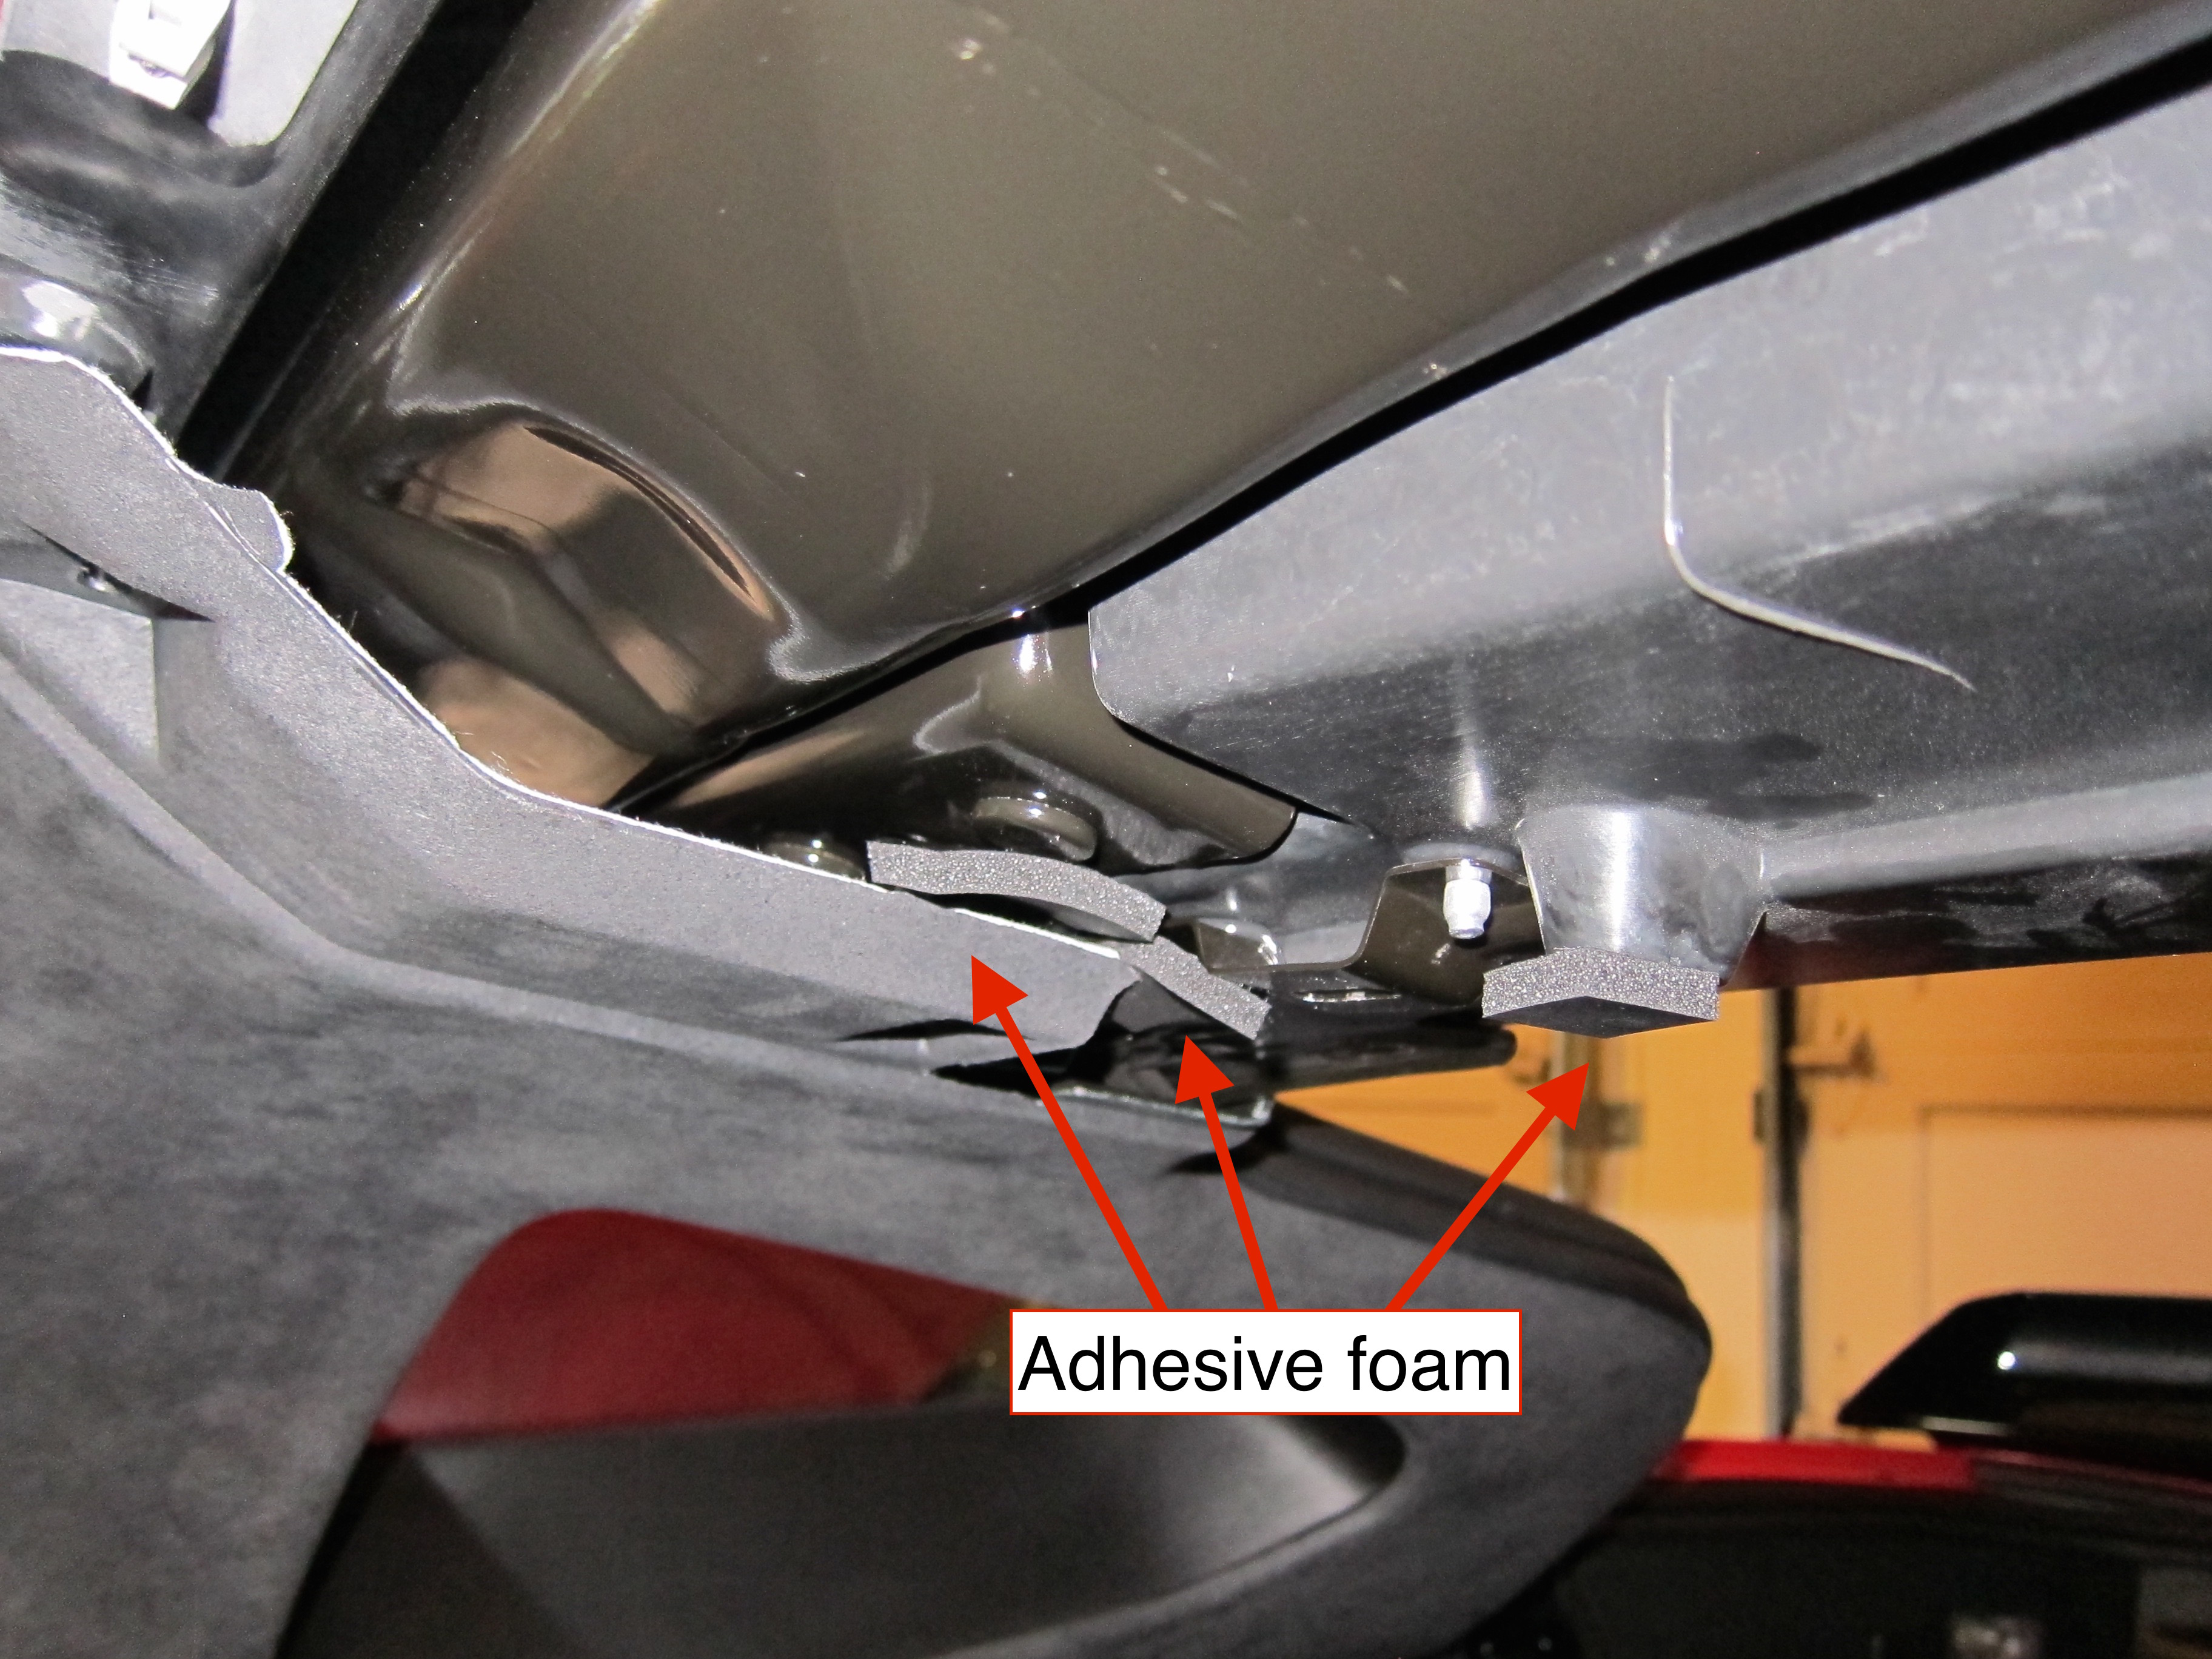
Since pressing on the interior trim seemed to silence the squeak, I decided to dampen/stabilize things a bit by adding some adhesive foam on existing "stand offs" on the roof bar. I just cut them to size from automotive grade weather stripping.
FIX: 1" pads on the stand offs, and strips on the "edges" of the panels that flex and come in close contact with the roof structure.
Attachment 47918971
Attachment 47918972
Attachment 47918973
So far, so good! With the interior back together, not a single squeak or rattle.
It was easy to silence the rattles by pressing on the roof trim on the passenger side, or by having a passenger hold a hand on the interior panel on the right rear.
As I was planning to install a Sharkbar, I was pulling out all the rear interior panels anyway for access during the install, and discovered both an assembly issue and came up with a way to "dampen" the roof liner squeak.
NOTE: If you attempt this on your own too, buy a set of trim removal tools. You can use your hands, but some good plastic tools really save your fingers.
Problem #1 - Factory rear window rub strips are WEAK and tiny!
After removing the rear interior panels around the windows, there was an obvious wear area on the body around the passenger side window.
Attachment 47918968
Looking at the interior panel, the factory put in tiny little rub strips and one had already slipped out of position. One strip was even missing on the driver side.
Attachment 47918969
Attachment 47918970
FIX: I cut strips of the "fuzzy" side of velcro to use as stronger rub strips and added some additional. Thanks to others on the forum for this suggestion when chasing other rattles - the velcro had much stronger adhesive than the tiny factory strips.
TIP: The rear clip on the interior trim seems to always separate on removal (all the rest just seem to pop out fine). Be sure to look for it and reattach before reinstalling the panel (and check others for good measure).
Problem #2 - The squeak from the upper roof trim
Since pressing on the interior trim seemed to silence the squeak, I decided to dampen/stabilize things a bit by adding some adhesive foam on existing "stand offs" on the roof bar. I just cut them to size from automotive grade weather stripping.
FIX: 1" pads on the stand offs, and strips on the "edges" of the panels that flex and come in close contact with the roof structure.
Attachment 47918971
Attachment 47918972
Attachment 47918973
So far, so good! With the interior back together, not a single squeak or rattle.
05-31-2017, 11:33 AM
#17
Racer

I'm resurrecting this thread. I have the overhead panel squeak and its driving me nuts. Question- how do you get the panel off? Does it just pull down from the clips? The rear clips seem pretty easy but the ones to the front are a bitch and I'm afraid of breaking something. Question posted in C7 general as well with no replies.
They are all push in clips, the ones on the front are just a little stronger. Mine were yellow colored and if I remember right there are 3-4. Use a long screwdriver or similar tool so you can gently pry down on the front while using the screwdriver to get next to these clips and wedge them out. I managed to do this to all of those without breaking them. If you try and force them they will probably snap. GL.
05-31-2017, 11:55 AM
#18
Intermediate
Thread Starter
I used a set of trim removal tools as well... They're plastic and won't mar surfaces as much and are easy to slide in to reach clips..


