Trailing Arm Bushing Install Party
 05-23-2018, 07:26 PM
#1
Melting Slicks

Thread Starter
Member Since: Apr 2002
Location: Ellicott City Maryland
Posts: 2,881
Received 1,962 Likes
on
664 Posts

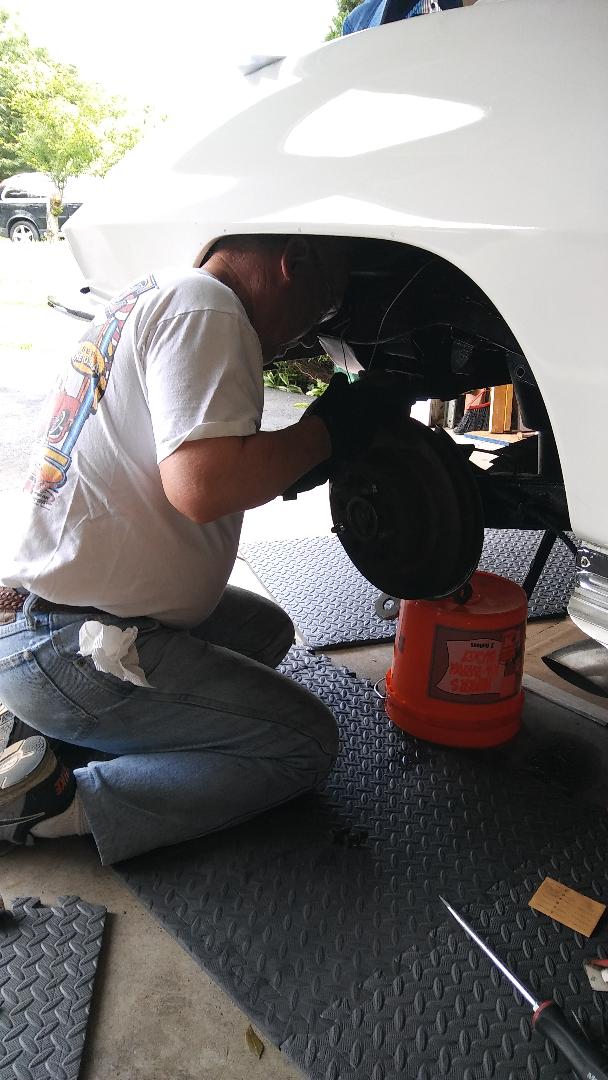
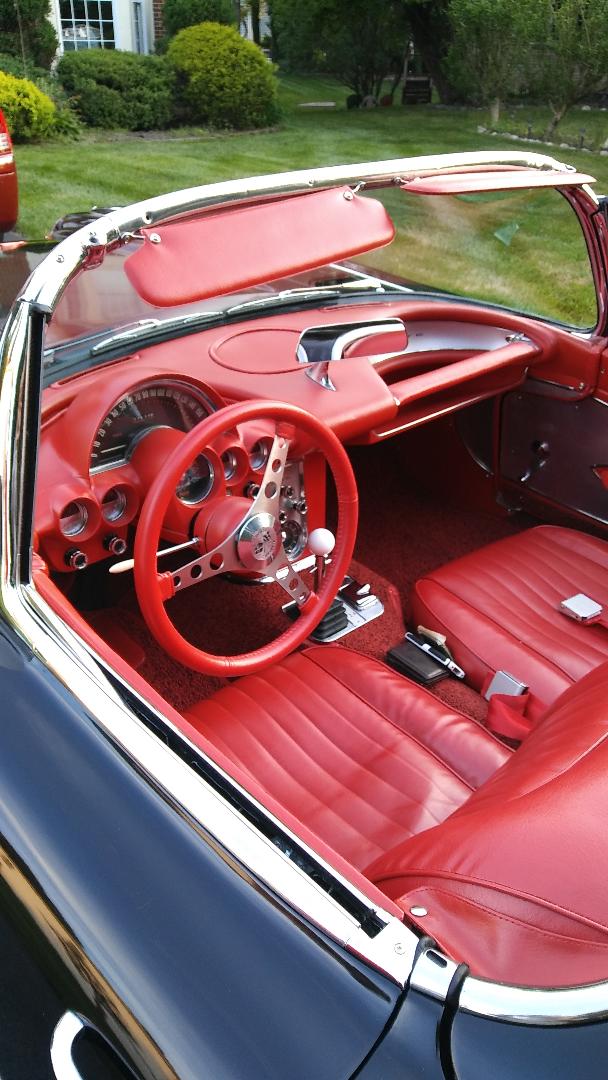
I decided a while ago that I wanted to swap out my poly rear trailing arm bushings for rubber. I spent the better part of last Sunday taking the rear suspension apart to get the trailing arms out. I figured the install would go much smoother with a bunch of help - so I called upon the best in the area - my buddies Sky65 (Tom Selby) and Bluestripe67 (Dennis King. A last minute invite included Paul Wilkinson who I met a few years ago from the Forum., and who just finished the restoration of his gorgeous 60 you'll see below.
With the new bushings in hand, and the install special tool on loan from "DAN70" (thanks again Dan - today was the day to get 'r done! Dennis & Tom showed up a little before 10 and we got after it and everything went smoothly. Paul showed up @ 11 and offered great supervision! The special tool worked great to not only compress the bushings in, but also to flare the one end of the inner tube.
Right about now Dennis said - "you better be taking some pictures"!!!

Dennis hard at work!
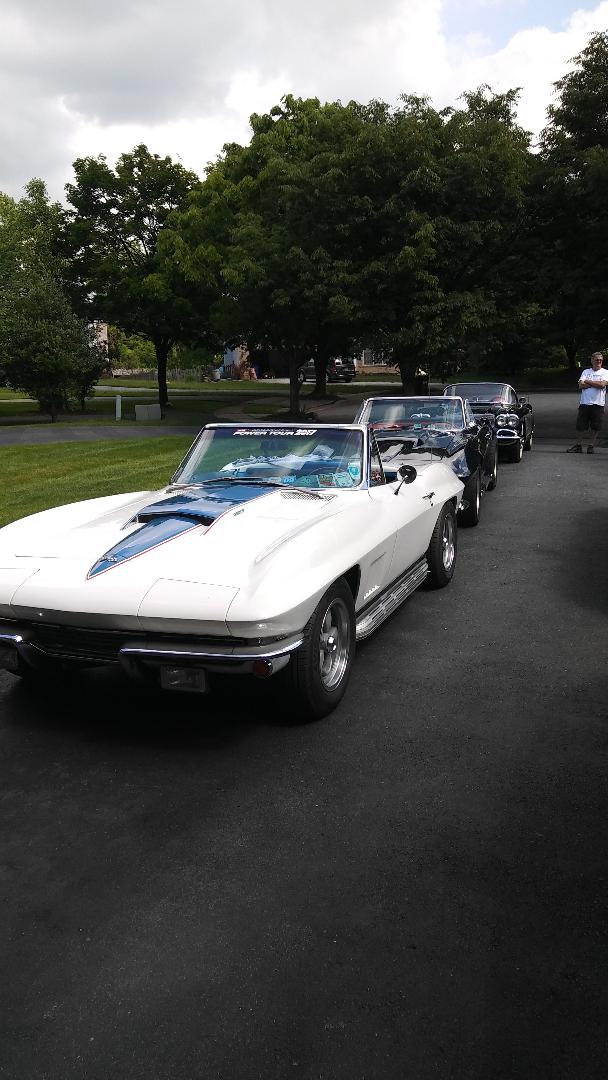
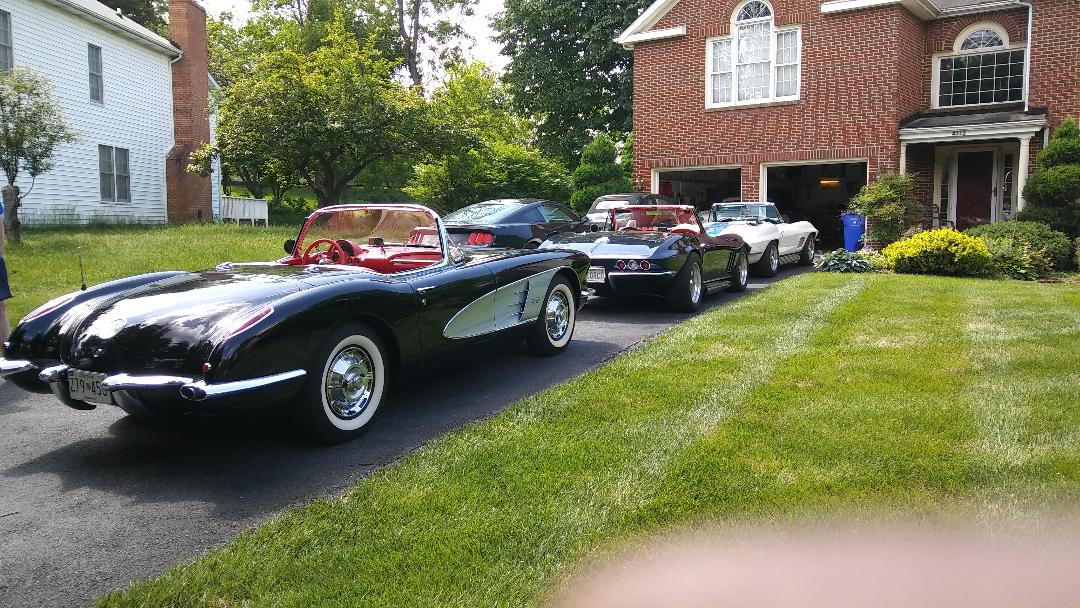
Of course we had a bit of a car show in the driveway (a cyclist even stopped to drool)
I just have to bleed the brakes and install the rear spring and I'll be done! Thanks again for the help today gents - couldn't have done it without you!
Tom
With the new bushings in hand, and the install special tool on loan from "DAN70" (thanks again Dan - today was the day to get 'r done! Dennis & Tom showed up a little before 10 and we got after it and everything went smoothly. Paul showed up @ 11 and offered great supervision! The special tool worked great to not only compress the bushings in, but also to flare the one end of the inner tube.
Right about now Dennis said - "you better be taking some pictures"!!!
Dennis hard at work!
Of course we had a bit of a car show in the driveway (a cyclist even stopped to drool)
I just have to bleed the brakes and install the rear spring and I'll be done! Thanks again for the help today gents - couldn't have done it without you!
Tom
Last edited by Tom Austin; 05-23-2018 at 08:42 PM.

The following 2 users liked this post by Tom Austin:
Critter1 (05-23-2018),
Frankie the Fink (05-24-2018)
05-23-2018, 08:19 PM
#2
Race Director


Member Since: Jan 2002
Location: Close to DC
Posts: 14,546
Received 2,127 Likes
on
1,466 Posts
C2 of the Year Finalist - Modified 2020
Glad to be able to help. We had a good time and acted as if we knew what we were doing. No one would know the difference anyhow. The special tool is easy to use and the results are easy to see. Paul's '60 was NICE 
 Dennis
Dennis
 05-23-2018, 09:41 PM
#4
Race Director
Member Since: Mar 2009
Location: Canada's capital
Posts: 19,777
Received 4,583 Likes
on
2,157 Posts
2020 Corvette of the Year Finalist (appearance mods)
C1 of Year Finalist (appearance mods) 2019

Sometimes it takes a village. 
You're lucky those gents are close by to give you a hand. well done.
You're lucky those gents are close by to give you a hand. well done.

 05-23-2018, 10:30 PM
#6
Le Mans Master


Member Since: Apr 2006
Location: Oklahoma City Oklahoma
Posts: 5,976
Received 979 Likes
on
491 Posts

Great idea ! I am sure that all of youse early Corvette loons are looking for an avenue to locally share your expertise and get yer old plastic cars out for a "community service" function. I wish that this would happen more often, start it up in your town, I can rarely repair anything but that won't stop me from showing up and participating. I mean, somebody's gotta' bring some decent beer to these gigs �
Ray
Ray
05-23-2018, 10:41 PM
#7
Le Mans Master

Member Since: Nov 2003
Location: Maryland
Posts: 5,657
Received 613 Likes
on
368 Posts
St. Jude Donor '05, '09, '15
It was a fun mob attack on your car.  The bushing tool worked well. Glad you had that! What's next?
Tom
The bushing tool worked well. Glad you had that! What's next?Tom
Last edited by Sky65; 05-26-2018 at 08:49 PM.
05-24-2018, 12:35 AM
#8
Safety Car

Good job guys. If y'all want to road trip, mine need changing as well as everything else.
 05-24-2018, 05:46 AM
#9
Team Owner


Good job indeed and glad to know the tool worked.
As I posted last week, some previous neer'-do-well put poly bushing in the front of my 63 trailing arms and they crumbled into small hard bits three weeks ago. So, a friend and I will be tackling this job mid-June.....car is undriveable until then.
So - you did the right thing getting rid of that crappy poly.....when they go - they REALLY go...you can see the chunks down in the frame pocket in the second picture.... Resulting in an azz-clenching, carnival ride, 3 mile drive home at about 20mph...
Just be real careful working with that spring on your own. I ratchet strap the front of the trailing arm around the lift's drive-on ramp.....use a "C" clamp and a wood spacer to hold the bottle jack saddle from sliding.....works great with no drama and I won't put enough tension on the jacked up spring to the point it will dislodge the car on the jack stand using the ratchet strap..
I'm sure there are similar methods if working without a lift to ensure safety.
Last edited by Frankie the Fink; 05-24-2018 at 07:07 AM.
The following users liked this post:
smacota1 (05-24-2018)
05-24-2018, 07:21 AM
#10
Le Mans Master

Pittsburgh coming up soon....amazing that you got the job done.....considering the help....lol...
Jack
Jack
05-24-2018, 11:38 AM
#11
Race Director
Member Since: Jan 2002
Location: Close to DC
Posts: 14,546
Received 2,127 Likes
on
1,466 Posts
C2 of the Year Finalist - Modified 2020
I want to add something to this story that we discovered that could have created a big problem down the road. With the rotors removed but not indexed, I forgot to do it and the results are below. The passenger side would not go back on flush on the hub. I tried a couple of orientations and found that a very small, almost not seen lip existed 1/16" from the hub face. I had to look very close to see it. The first attempt of mounting the rotor, and holding it to the hub with lug nuts resulted in a very slight wobbling rotor. Since the half shafts were out, spining the hub was easy, so the wobble was clearly seen. If the half shafts had been installed we would have missed the wobble and the result would have been areated brake fluid and deminishing braking ability. Head scratching would then start.
So, anytime anyone takes any rotor off, index it first. Some rotors will be stuck for various reasons, but don't beat on the breaking surface. Once removed, check for any interference. Sand or file any rough surfaces as necessary. We fixed the issue by lightly filing the center of the rotor resulting in a perfect fit and zero wobble. I hope this helps others. Dennis
So, anytime anyone takes any rotor off, index it first. Some rotors will be stuck for various reasons, but don't beat on the breaking surface. Once removed, check for any interference. Sand or file any rough surfaces as necessary. We fixed the issue by lightly filing the center of the rotor resulting in a perfect fit and zero wobble. I hope this helps others.
Dennis
Last edited by Bluestripe67; 05-24-2018 at 12:03 PM.
05-24-2018, 11:56 AM
#12
Safety Car
Good catch Dennis. Thanks for the heads up.
05-25-2018, 01:39 PM
#13
Safety Car

good write up gents and nice to see fellowship amongst the Vette fraternity ! As for the beautiful '60 ....... my fav combo, black, silver cove and red interior !
05-25-2018, 03:13 PM
#14
Team Owner
Member Since: Aug 2008
Location: Rochester NY
Posts: 31,358
Received 5,010 Likes
on
2,529 Posts
St. Jude Donor '09-'10-'11-'12-'13-'14-'15-'16-'17-'18-�19-'20-'21-'22-'23-'24
 05-25-2018, 05:42 PM
#15
Safety Car
05-25-2018, 09:05 PM
#16
Team Owner
Member Since: Aug 2008
Location: Rochester NY
Posts: 31,358
Received 5,010 Likes
on
2,529 Posts
St. Jude Donor '09-'10-'11-'12-'13-'14-'15-'16-'17-'18-�19-'20-'21-'22-'23-'24
