When you click on links to various merchants on this site and make a purchase, this can result in this site earning a commission. Affiliate programs and affiliations include, but are not limited to, the eBay Partner Network.
Here's where I am with my 72 Big Block rescue.
Inspection while assembled revealed two pencil sized w/s birdcage holes. All other areas of frame and birdcage appear solid.
Then I completely gutted the interior and windshield to expose birdcage.
Looks like rust holes in all 4 corners of the windshield. Much of the lower and vertical birdcage is solid, but not the corners, especially drivers side.
Three fingers wide hole on upper corner, 4 inch wide slit on lower corner.
I am shopping for an entire windshield birdcage for R & R.
By biggest question is the lower corners.
Can these be adequately repaired for a street car while leaving the front clip on?
Could I chop off the upper section with two cuts/welds and "patch" the lower corners?
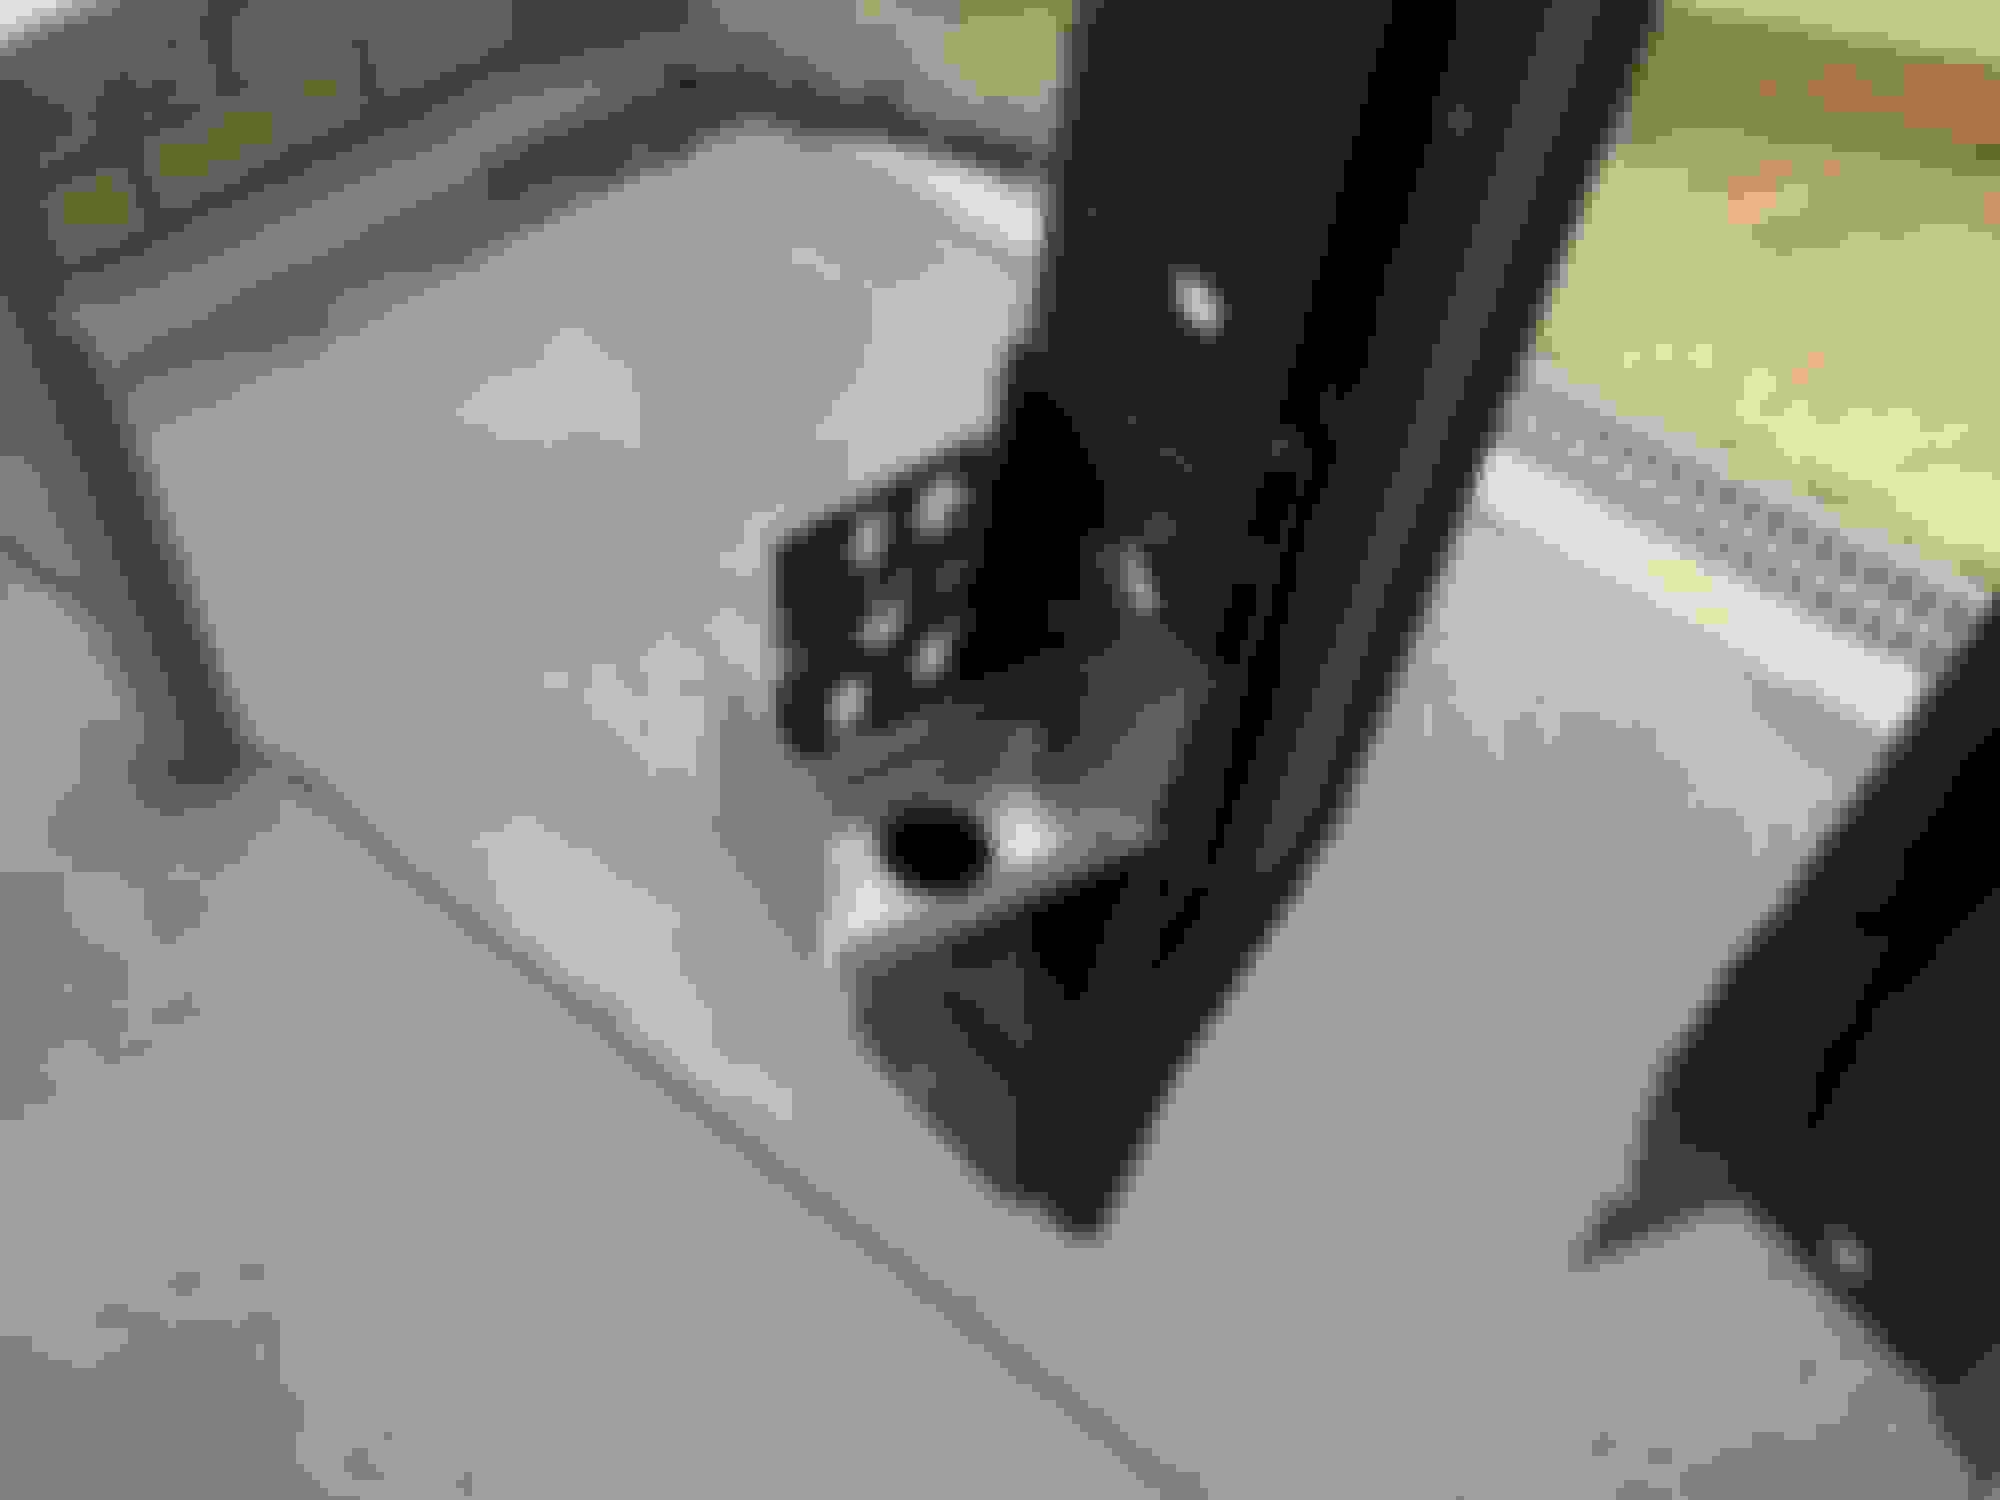
Drivers Lower corner
Pass Lower corner
drivers WS pillar from outside once WS removed
All rust was under the area where the windshield gasket should have attached. Original gasket/windshield. Gasket not attached to metal on three sides, top, left or right. Only bottom edge. Plus two inches of multiple kinds of sealant for attempted "fixes" over the years. Lower corners were actually bondo'd in flush to fender lip!
well you have to fit the repair pieces and keep the dimensions intact.....so maybe fit the pieces in and tack them in then when its all in place and tacked then remove the front clip to finish the repair and fully weld
Not a fun job but doable. Removing the windshield frame or parts of it require very good measurements. The center T Top support is under load and will spring back a little when removed. Unless a vert. To properly work the lower sections the clip should be removed. So it depends on your skill sets, the love of the car, etc.
[QUOTE=rvzio;1597638428]Not a fun job but doable. Removing the windshield frame or parts of it require very good measurements. The center T Top support is under load and will spring back a little when removed. Unless a vert. To properly work the lower sections the clip should be removed. So it depends on your skill sets, the love of the car, etc.
RVZIO
Rvzio;
Yours looks sooo... much worse than mine.
I am glad you were able to save it.
You have also given me hope that mine might turn out OK.
I didn't see any pics of your lower corners. They must have been bad.
Were you able to leave the front clip on to fix them?
Haa! I see you broke your windshield also getting it out! Not my first priority.
Hi Leigh, yea for some reason my lower corner pieces were okay, but I did have the clip off because I was going from an Eckler clip to an original. I hope my picture have inpired you to fix yours. Good Luck
My lower corners look solid on the inside. Since the whole birdcage is two layers.
My rust only affects the outer layer.
That's what I initially thought as well , but I had to remove the front panels to access the bottom of the windscreen surround ,here are some pics of what I found ,
water had been running down inside the windscreen housing and caused that area to thin right out
this was a piece from a 74 donor car that fit perfect . If you were thinking about accessing from the back ,to get enough room to work I think you would have to take this panel off as I did . I am not saying you should do it that way (I wouldn't ) but just so you can see
Rvzio
I just finished reading your 4 year odyssey on your 69!
Awesome job!
I knew this birdcage issue would be a big stumbling block.
But your build has given me a lot of inspiration.
bazza77
Thanks for the inside look.
I'll check mine out there.
With both an inspection camera and opening it up like you did.
Then it's off to an expert to get advice.
I'll be checking out a couple of used windshield frames over the next week to see if they offer a solid enough base to consider just replacing mine entirely, or just pirating sections from them
Question: Does that section drain or is it a dead-end?.
When I bought my '72 vert back in '95 I noted that the previous owner had painted the entire birdcage, had the WS out for the job....so I pulled off all the stainless trim. and having noted a leakage from the top of WS to over the edge and into the car with the top up in the rain....it was rolling over top of the stainless......
I decided to pull all of the trim, and clean out the channels around the glass, the bought two tubes of old fashioned RTV BLACK and filled the channels with it, then reinstalling the stainless, BUT having had experiences with two other GM verts from the 70's noting that my '73 Grandville vert leaked like mad over the stainelss, and the '70 Lemans/GTO vert did not.....I noted that the Goat was wrapped in black vinyl and no leaks at speed in the rain....
SO I wrapped the top stainless with black vinyl, gluing it down with spray glue, and tucking the front edge into the channel, and packed with RTV ......that vinyl gives the rubber top seal something to seal against, why the stainelss won't work, I dunno, but been since '95 and the few times I in the damn rain, my Vette does not leak over the WS.....I trimmed it off neatly around the clamps on the ends....obviously it wrapped the entire stainless to disappear under the inside header pad......
now around the fenders, I noted a small gap to the metal, guess what?? RTV......
mine is sealed up tighter than whale *****, and that's waterproof!!!!
bazza77
Thanks for the inside look.
I'll check mine out there.
With both an inspection camera and opening it up like you did.
Then it's off to an expert to get advice.
I'll be checking out a couple of used windshield frames over the next week to see if they offer a solid enough base to consider just replacing mine entirely, or just pirating sections from them
Question: Does that section drain or is it a dead-end?.
I recommend not to cut yet , its easy enough to get an inspection camera up and around that corner from either the bottom of the pillar or through the top door hinge holes.
Yes inside only , not the top where my sharpie writing was ! anything that comes down the windscreen side surround goes over the edge and lands on the body mount bolt area. You may have heard or read where people say to shut a C3 door hard and check for rust landing in that body mount area as part of a pre purchase inspection .
I'm guessing water/ice /snow took its toll on mine as I had medium/heavy pitting where your holes are under the clip glue on points . the top of my windscreen surround had already been replaced but they left the hard stuff for me both sill plates were rotted out and bottom section of all pillars needed patching.
Last edited by bazza77; 07-22-2018 at 07:30 AM.
Reason: added extra
In my opinion, you will have difficulty dissipating the heat generated by the repair of those lower corners enough to avoid damage to the paint and fiberglass.
My No 2 Body Mount bolts have a little surface rust on them, and the inside of the pillars looks solid actually with very little surface rust even.
But the driver body mount bolt had a 1/4 in of loose rust on it and so did the speaker magnet mounted there! It was all raining down from above. It almost all vacuumed up. Even the squirrel acorns!
No cracks. Must be a shadow in the picture you referring to?
cant see any cracks there as well , probably looking at the shadow behind the glass trim and the front of the pillar .
But at the bottom of the A pillar is an insert that sits inside of it , it is spot welded on but in most cars it was never sealed , so any water that ran down inside those pillars hit the overlap join and wicked in between and you can see that rust on yours. There's two short tabs bent up and two longer ones . Here's a pic of the replacement ones I made to fit (but luckily didn't need ) . The problem I had was it rotted on the outside of the pillar as well , I have pics of mine that look better than yours on the inside ,but when I removed the glass pieces away ,it was very bad .

 07-20-2018, 11:32 PM


 both sill plates were rotted out and bottom section of all pillars needed patching.