When you click on links to various merchants on this site and make a purchase, this can result in this site earning a commission. Affiliate programs and affiliations include, but are not limited to, the eBay Partner Network.
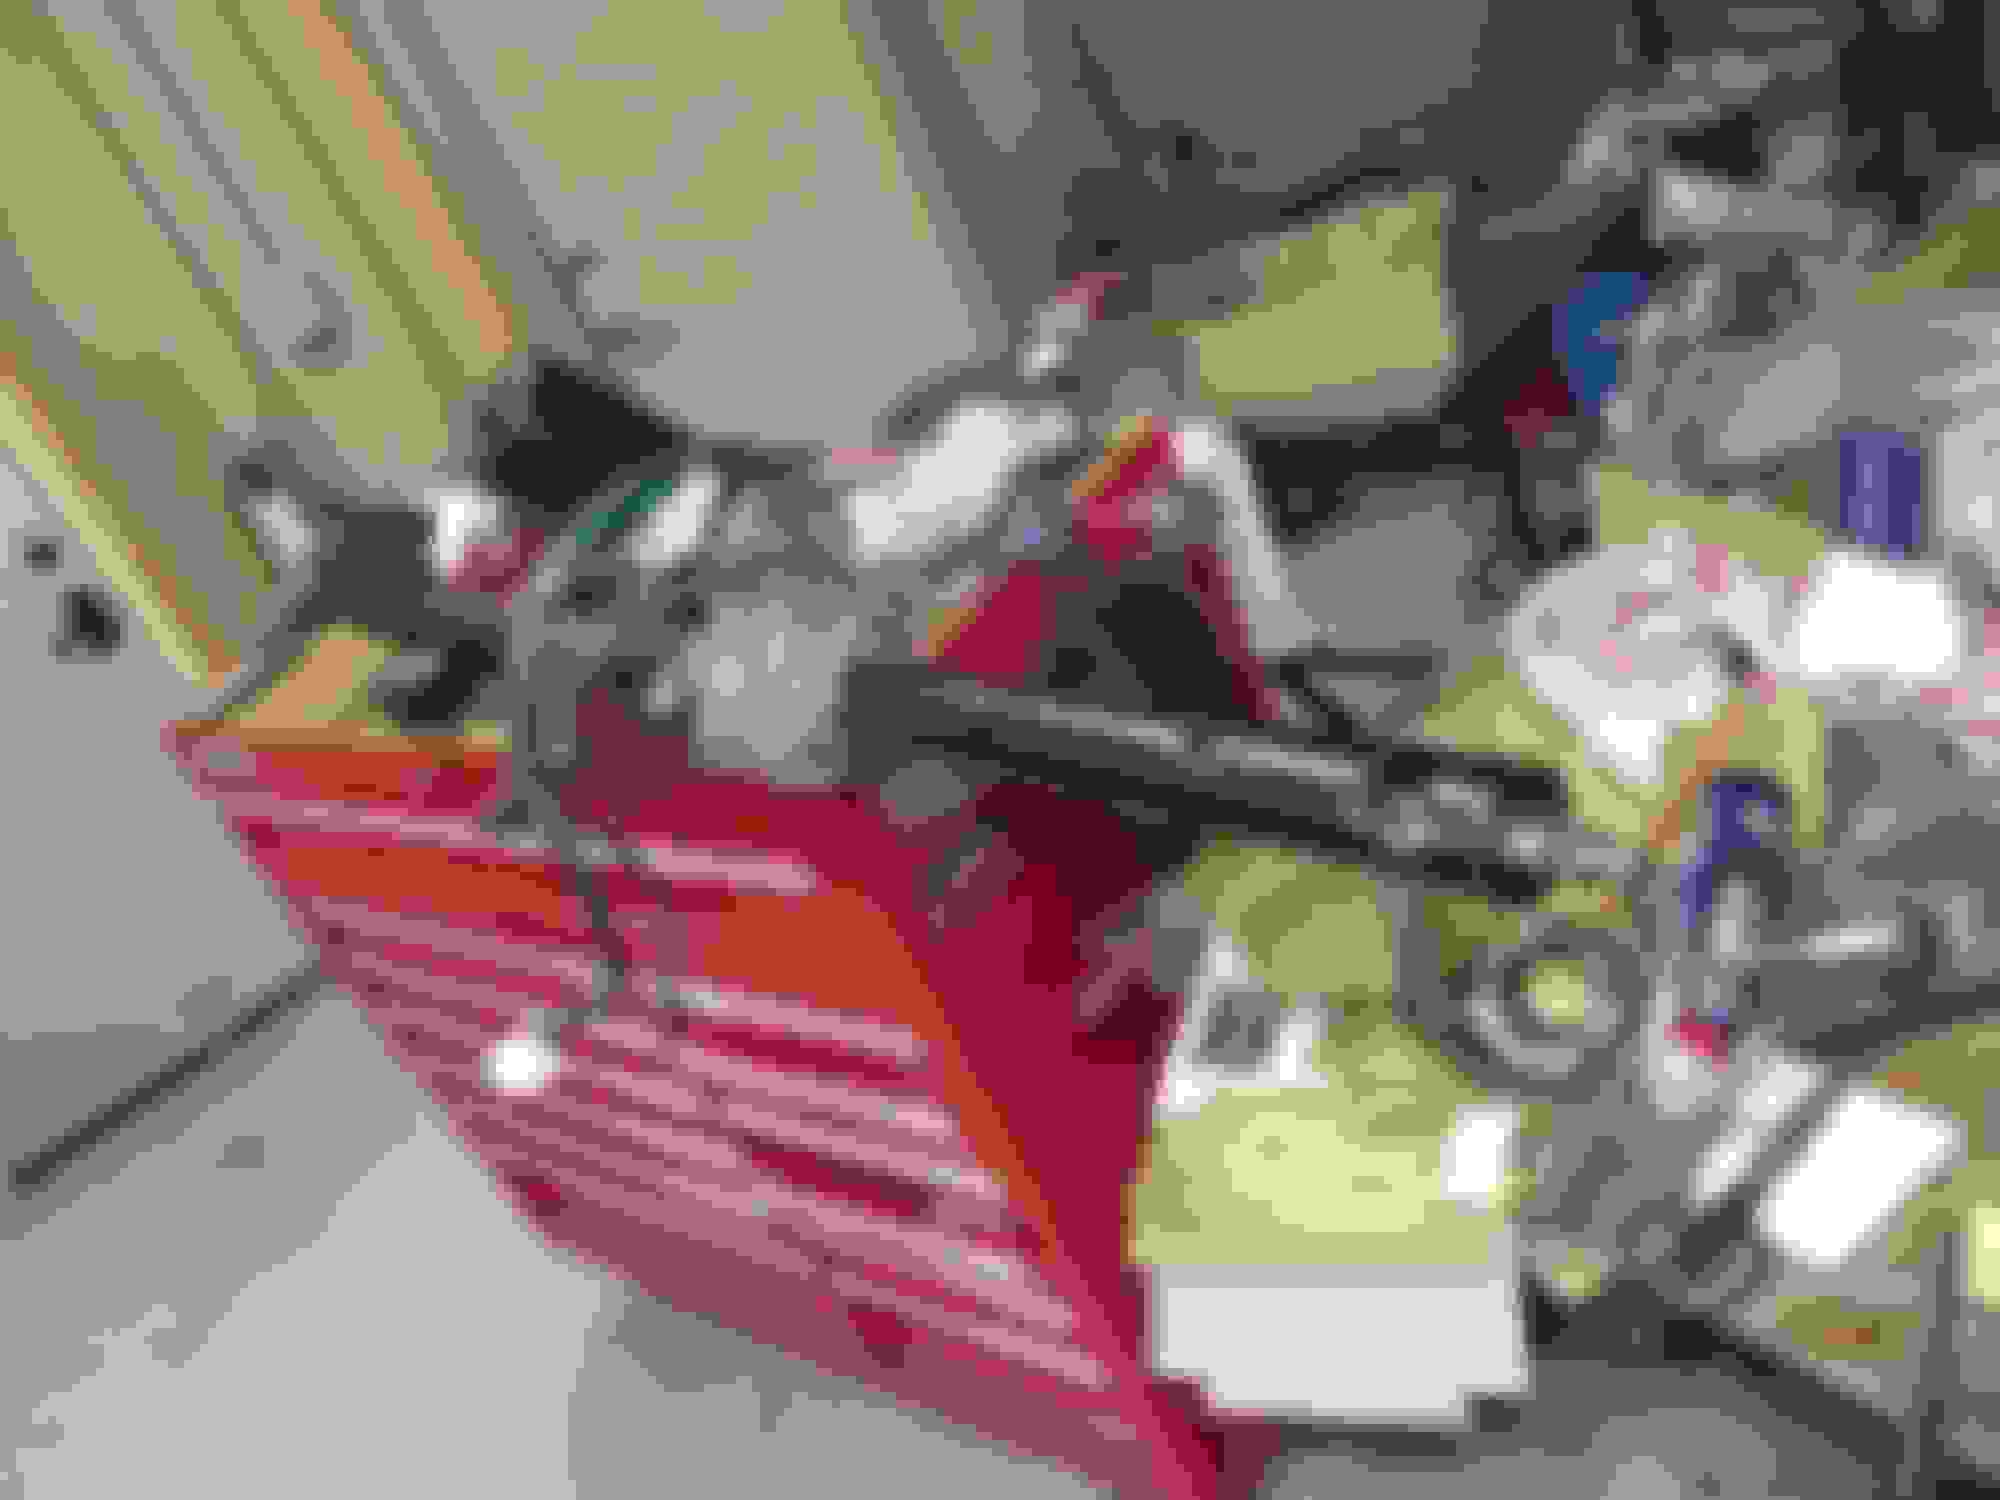
Finished my electric power steering conversion on my ’60 today. The motor/gear unit was $100 on Ebay and the controller was $30 same place. The “extras” were outrageous; 8 gauge wire, 60 amp in-line fuse and the special 3/8” female spade terminals to plug into the controller were $35 more. I had some ‘double D’ tube left over from a previous PS conversion on a 1949 Drott road grader and used it to make the steering shaft adapters. The lower part of the steering column that came with the Toyota PS unit also fit the gear so all I needed to do was weld the “DD” sleeve onto it.
After extensive research online I decided to go with a late model Corolla gear because it didn’t require a third party controller to “activate” the PS controller. It just waits about 6 seconds, after ignition on, and when it doesn’t detect a VSS it goes into a ‘fail safe’ mode and powers up.
The C1 steering shaft is the required ľ” diameter and, after cutting the flats on the mill, fit the DD sleeve perfectly. The entire PS unit was a tight fit where it is hidden under the dash. It has to be just the right distance up the shaft and rotated to just the right angle so as not to interfere with the brake pedal, cowl air lever arm and windshield wiper drive cables. There are smaller motor/gear units but they are not recommended for anything above sub-compact weight cars. The controller is located behind the center console.
Works sweet and can’t wait to get the engine back in to try it on the road. Will also be ordering the ‘fast steering’ adapter.
Also learned many new things along the way; Pulling apart an old C1 column/box is a disgusting sloppy gooey greasy job. Spending the day under the dash (half the time repairing decades old previous “repairs”) is not that easy when one is 9 years older than the car. I answered a question I had put forth on the forum some time back about my February 27th, 1960 car having the stainless VIN plate on the door post. Seems that at one time the steering was rebuilt/replaced using a factory new box/column. There were virgin raised dimples where the VIN plate was supposed to be to position it for spot welding. Also, rather than unplug the individual turn signal wires at the wire junction, “Bubba” cut them and later twisted and taped them back together and slid them inside the column. I repaired and repositioned the wires outside the column because the new PS adapters have too much chance of snagging and cutting them.
Base parts Double D and adapter Lower column adapter unit on column Input shaft Upper column half Column joints
your skills are awesome, you definitely think outside the box.... "I" would much rather have the assist on a R&P conversion than the antiquated C1 system; but CONGRATULATIONS
Bill
Very nice job. I put mine in the engine compartment, but it was a Saturn steering. It looks like the one you used is a little smaller. If I do it again, I think i would go the route you did.
Your going to like how it steers. (as long as the rest of the steering components are in good shape)
Very nice job. I put mine in the engine compartment, but it was a Saturn steering. It looks like the one you used is a little smaller. If I do it again, I think i would go the route you did.
Your going to like how it steers. (as long as the rest of the steering components are in good shape)
I have been following these threads regarding the electric PS and plan to do it at some point but REALLY would like it to be hidden under the dash. I have to have my mechanic look all of this info over to see if it will fit under the dash as I have a replacement wiper system installed that MAY interfere with it being installed under dash.
I did not know about the Toyota parts working. I wonder how many other newer cars that use electric PS have parts that would work that my be even smaller?
I have the original steering type parts in my 57 but had the box rebuilt about 5K miles ago.
Pay particular attention to the mount for the unit's powered end. I chose the one I found because the mount was removable (not cast in place) so that my own adapter could be easily attached.
After extensive research online I decided to go with a late model Corollagear because it didn’t require a third party controller to “activate” the PS controller. It just waits about 6 seconds, after ignition on, and when it doesn’t detect a VSS it goes into a ‘fail safe’ mode and powers up.
Do you know what particular years are the same as what you used?
Is the short shaft on the output side of the unit that you used to make the connection to the lower shaft also from the 09 Toyota? can you share the measurements you used when cutting the shaft and housing. Looks to fit well on your car and would save me a lot of time and guess work and maybe a few mistakes. Thanks
Billy
OK, the output part on my setup is, what I would call, unnecessarily complicated. As I said I had about over a foot of 'D' shaft housing left over from another PS conversion using a hydraulic Chevy S-10 steering box. The plastic coated output of the Corolla is cut off which still leaves a good section of shaft. I cut mine a lot shorter (in hindsight it was unnecessary) to make the set screw hole further up toward the unit. This required disassembly of the electric gear box and TIG welding the 'D' housing close to the plastic gear (wrapping it in wet rags to make sure it wouldn't melt) then grinding everything down enough to fit back through the output housing bearing mount hole. Once again; if I had to do it again I would leave the output shaft longer so I wouldn't have to do that. The extended shaft (2 'U' joints down) of the Corolla column has (as I banked on) the same splines as the power unit so cutting it to make an adapter was easy. Just note that you may have to grind down the corner of the 12mm bolt head a bit to fit into the C1 column housing. Since mine is already installed I don't have the exact measurements that I can pull off it however EPAS has a good video that should get you darn close.
The unit input housing outside diameter is a bit smaller than the inside diameter of the C1 column but you can make a bushing real easy using a piece of the discarded C1 column section. One caveat; when you cut the C1 column (usually needs to be done before disassembly to get measurements uniform) the inner shaft will sag, once cut through, and will pinch the saw blade in your metal band saw jamming and breaking the blade (don't ask me how I know this).
JF
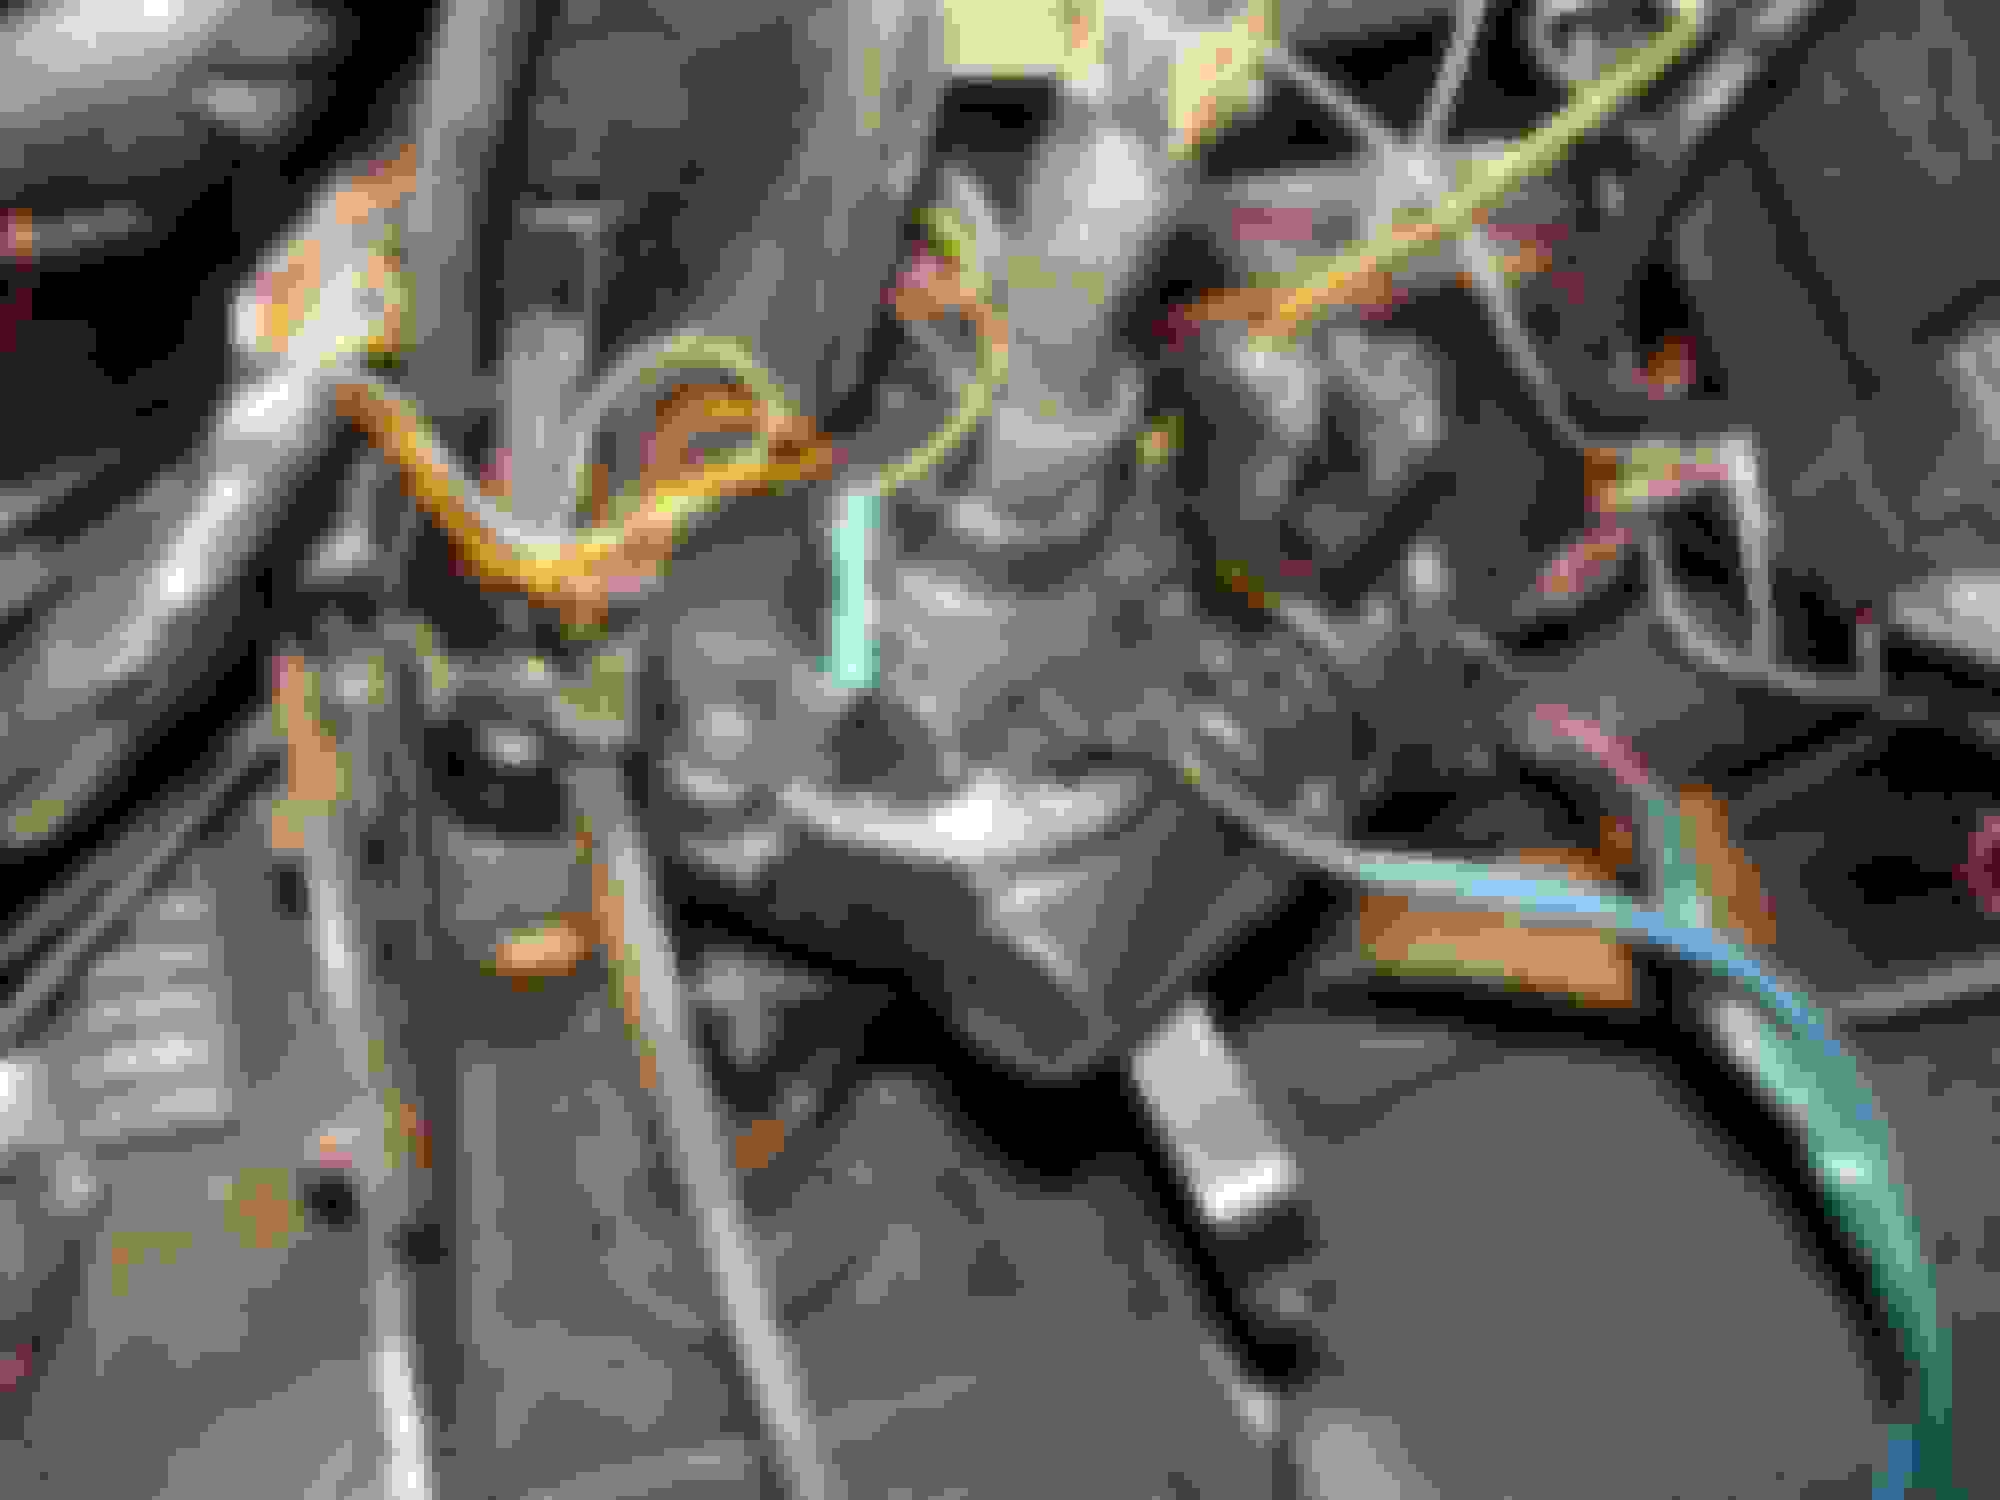
It looks like the red wire for the 12 volts from ignition to the controller module goes to the bottom left pin in the 12 pin opening in your photo. Is that correct? Doing the wiring and do not want to burn something up. thanks
Billy
JF
It looks like the red wire for the 12 volts from ignition to the controller module goes to the bottom left pin in the 12 pin opening in your photo. Is that correct? Doing the wiring and do not want to burn something up. thanks
Billy
This might help...Just remember; the 12v supply must be "beefcakes". Mine called for 60 amp fuse and 8 ga wire. The 3/8" spade connectors were a PIA to come up with. Don't forget to share pictures.
 10-15-2018, 08:04 PM