When you click on links to various merchants on this site and make a purchase, this can result in this site earning a commission. Affiliate programs and affiliations include, but are not limited to, the eBay Partner Network.
I need to replace a lower outer windshield corner panel on my '78. Most people seem to remove the front clip to do this, but I really don't want to extend my restoration time any further, so I'm going to try the method that Corvette Kingdom (one of the UK suppliers) use.
It involves removing the inner panel to get access to the outer panel, then removing that and finally replacing them both. Sounds easy if you say it quickly!
The photos show how my car looks with both panels in place, then only the outer and now neither. both panels in place inner panel removed outer panel removed as well
I've got some good advice from Corvette Kingdom about how to do this, but I'm keen to get any other help I can from anyone else who has tried it. I've had no luck on the UK forum and I've tried searching here, but can only find examples where people have either removed the whole front clip, or cut off part of the fender. Has anyone tried this method, or know of a thread that describes it?
Thanks in anticipation
John
Yes, I have done it, but u will spend the day with a small airtool grinder cutting piece by piece out and I went down to the door hinge and cut rite in the middle of the 4 bolts of the hinge, used a mig welder on low and
very messy welds, but it worked, used lots of epoxy glue to put in new metal to fiber, gut interior take off door remove window, would I recommend doing it that way 'no', u will have to buy a bird cage anyway and
I bet when window comes out that the rest is crap also, it is very messy very dusty work, wear a mask for 4 hours, your door has rust on it also, looks like you will be busy for a while, good winter project, have fun.
I don't think I explained what I've done very well, so here's a bit more detail.
I have removed the windshield and the only areas with any issues are the top right hand corner and the bottom left hand corner.
I've removed the bottom left hand corner inner panel by drilling out all the spot welds. This panel is fine so can be welded back in later.
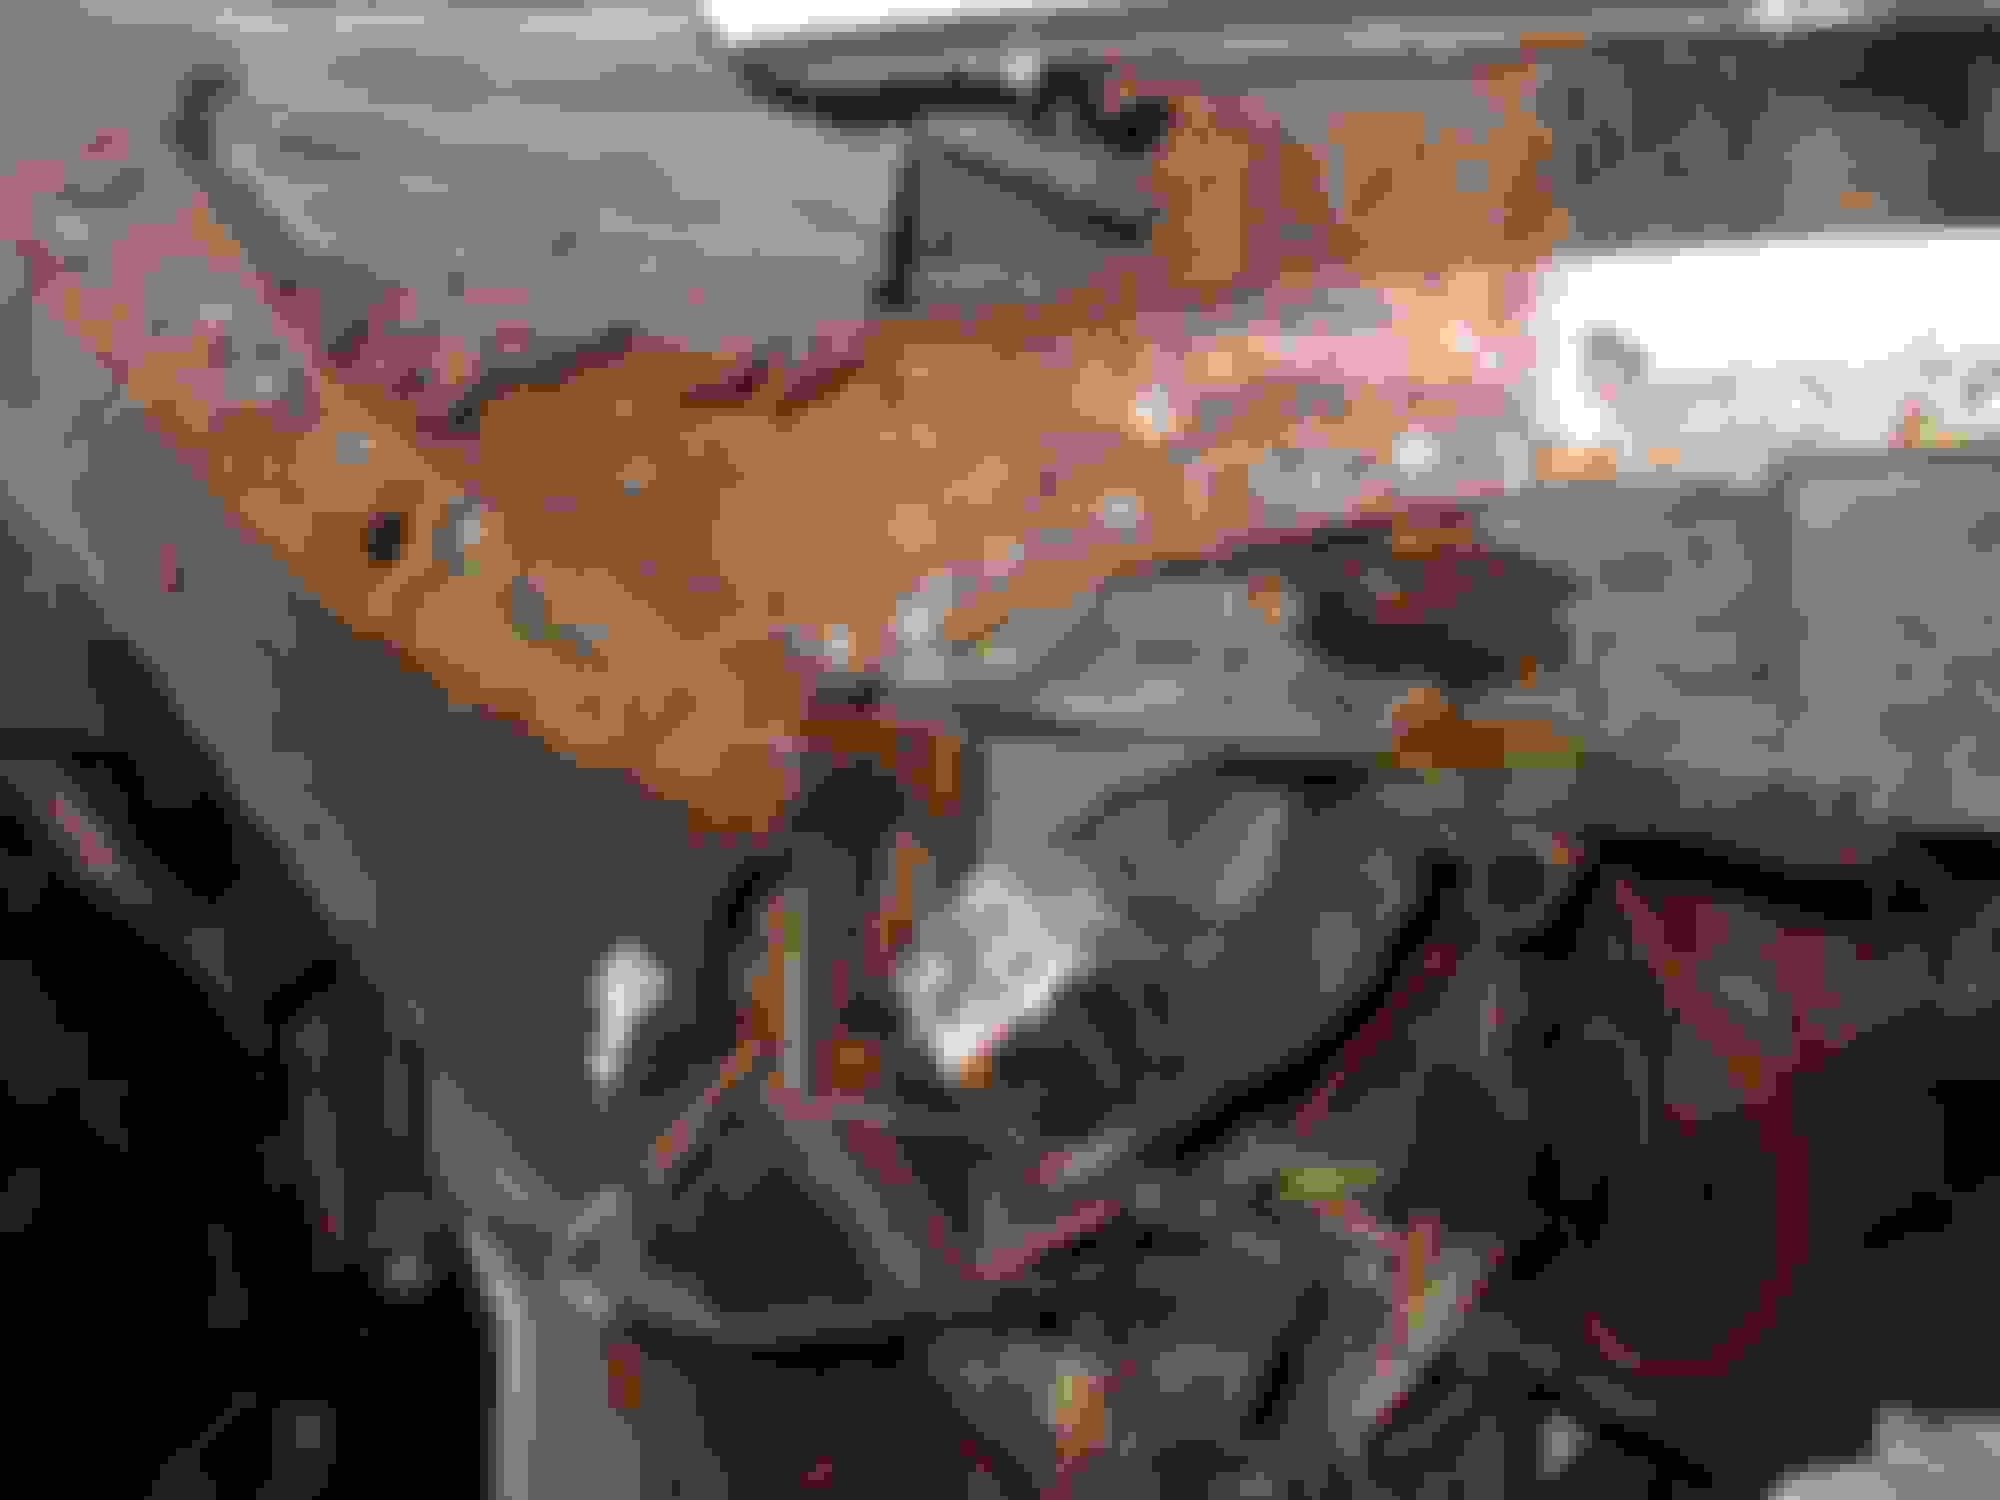
I also removed the bottom left hand corner outer panel. To do this I drilled out the rivets and cut away the bonding that fix it to the firewall and the fender panel. Then I drilled out all the spot welds except those with the red arrows on the picture below. The fender panel prevents you from getting at these from above. I then cut along the blue line to remove the outer panel. You can just see the remaining edge of he panel in the photo.
I'm not sure how I should fit the new panel that I've ordered, when it arrives. I could just trim off the outer section where the spot welds I can't get at are and then fit the panel over the top of the remaining bit that I cut off. I could seam weld this from the inside (ie along the blue line in the picture). Alternatively, I think that if I remove the fibreglass panel from the front of the door opening I could get at the inaccessible spot welds from below, drill them out, remove the remaining bit of panel and then fit the new panel.
Does this make any sense?
If you have done something similar, how did you do it?
John
Looks to me the best to do is wait until you get the new piece !
I assume you cut only as far as you HAD to , to get the rust. Looks like you left the overlap join where B8619 LO would have joined the centre section , that's helpful to line up the new piece . If you leave that small end of the original corner piece on its going to leave a gap at the firewall.
When I did my repair (inner panel was rusted ,outer was fine ) I left the join on as well as the amount of spotwelds was incredible , if I had drilled them out there would have been nothing left of that steel underneath , I but welded the pieces back ,but I had no firewall to worry about setting fire to !
Also looks like you damaged the f/glass anchor piece for the top left of hood surround (3rd rivet hole is busted open) , you have to come up with a way to anchor the new steel to that ,possibly before you weld the new steel back on . Doable but messy .
What I would do now is clean the steel that's left where you want to weld the new outer section on. test fit the new piece before cutting any glass off . Maybe you need to make a plate of steel with three (welded) bolts/studs sticking down that you can get up into that f/glass mount point and drill 3 holes to match in your new plate and just bolt the glass down ,maybe drill oversize holes and use washers to fill as getting that lined up perfect is going to be hard .
These are just my suggestions for you to consider and I hope they might help.
You're right, I probably can't decide which way to go until the new panel arrives, but I like to talk through the alternatives beforehand to get other peoples ideas, as I'm not always right!!
If the new panel doesn't have the rivet holes pre-drilled then it's going to be difficult to get them lined up, so I might just drill a new set of holes, which gets around the one that's broken anyway. Talking to the guys at Corvette Kingdom they recommended doing the welding first, then put in the sealant and rivets. That way you don't burn the sealant whilst welding, so that sounds like the right order.
yes that's the best way , but the rivets will be in backwards which means the rivet end will spread and only have f/glass to grip onto . You should at least get a tight fitting washer over the end of the pop rivet to give it some steel to grip down on. I suppose if you use a Sikaflex sealer/ adhesive in there all the rivets will need to do is hold it steady until it dries . I would make that join as strong as possible so there's no chance of it letting go later on .
Hi again, just a thought, the epoxy sold by auto shops to glue roof and 1/4 panels on really works,it is very strong(and expensive, If I were you I would just glue the new part in, just make
real sure all the rust is off of the glue area. Mike..
The rivets will have to go in backwards as you say, good point about about reinforcing the fibreglass, thanks. I've had a look and I could get a small sheet of steel in behind the fibreglass panel and I could drill through that as well, which might be easier than trying to get washers onto the end of the rivet. Sikaflex sealer/adhesive was my plan but good to get a second vote for it
I did think about glueing it in (especially as my welding is definitely not up to this job), but I'd also have to glue the inner panel and I just don't know if it would be strong enough. I know that Jaguar glue a lot of structural joints on their aluminium bodied vehicles, but they spent years perfecting the joints and glue to do this.
Thats why I say messy , with trying to rivet and having glue in and around that join its going to end up all over the place.
Obviously a few dry practice runs first to make sure it' going to work. For example trying to drill 3 holes in that piece of metal will be a nightmare in situ.
there should be enough room to get washers in after you have your three holes ready to use. Unless the factory put their glue everywhere up in that pocket, that stuff would be so tough to get out of that area if you need it gone.
I would try both methods dry and see which one is doable first . Then allow for a totally sticky mess being everywhere and then decide which one is easier
As for just using some epoxy glue , up to you but the instructions would call for totally clean metal to bond to . Might be awkward getting what' left of that original metal clean enough for a long holding bond.
It's certainly going to be fun. The good news is there is no glue at all in the pocket at the moment, but I can see me getting some sticky fingers when I finally go for it!
I use those disposable "examination" type gloves , they sell them in paint shops and hardware stores around here, tight fitting and when I do glassing or paint work I wear them . Just peel the mess off and toss em in the bin .
No glue anywhere yet I'm afraid. I've got the new panel, cut it about a little bit to make it fit and it's all ready to be welded in. I'm stuck at the moment though waiting to see if a friend can do the welding for me (I'm certainly not up to it myself). I'll post some pictures when it does eventually get done though. In the meantime I've got the whole of the rest of the car to get on with.
Well it's only been 6 months, but I have now finally got this job done (it's a long story that involves a lot of bad luck for the friend I thought would be able to the welding for me).
The bottom line is that if you have the same problem as me, then you don't need to remove the front clip to fix it.
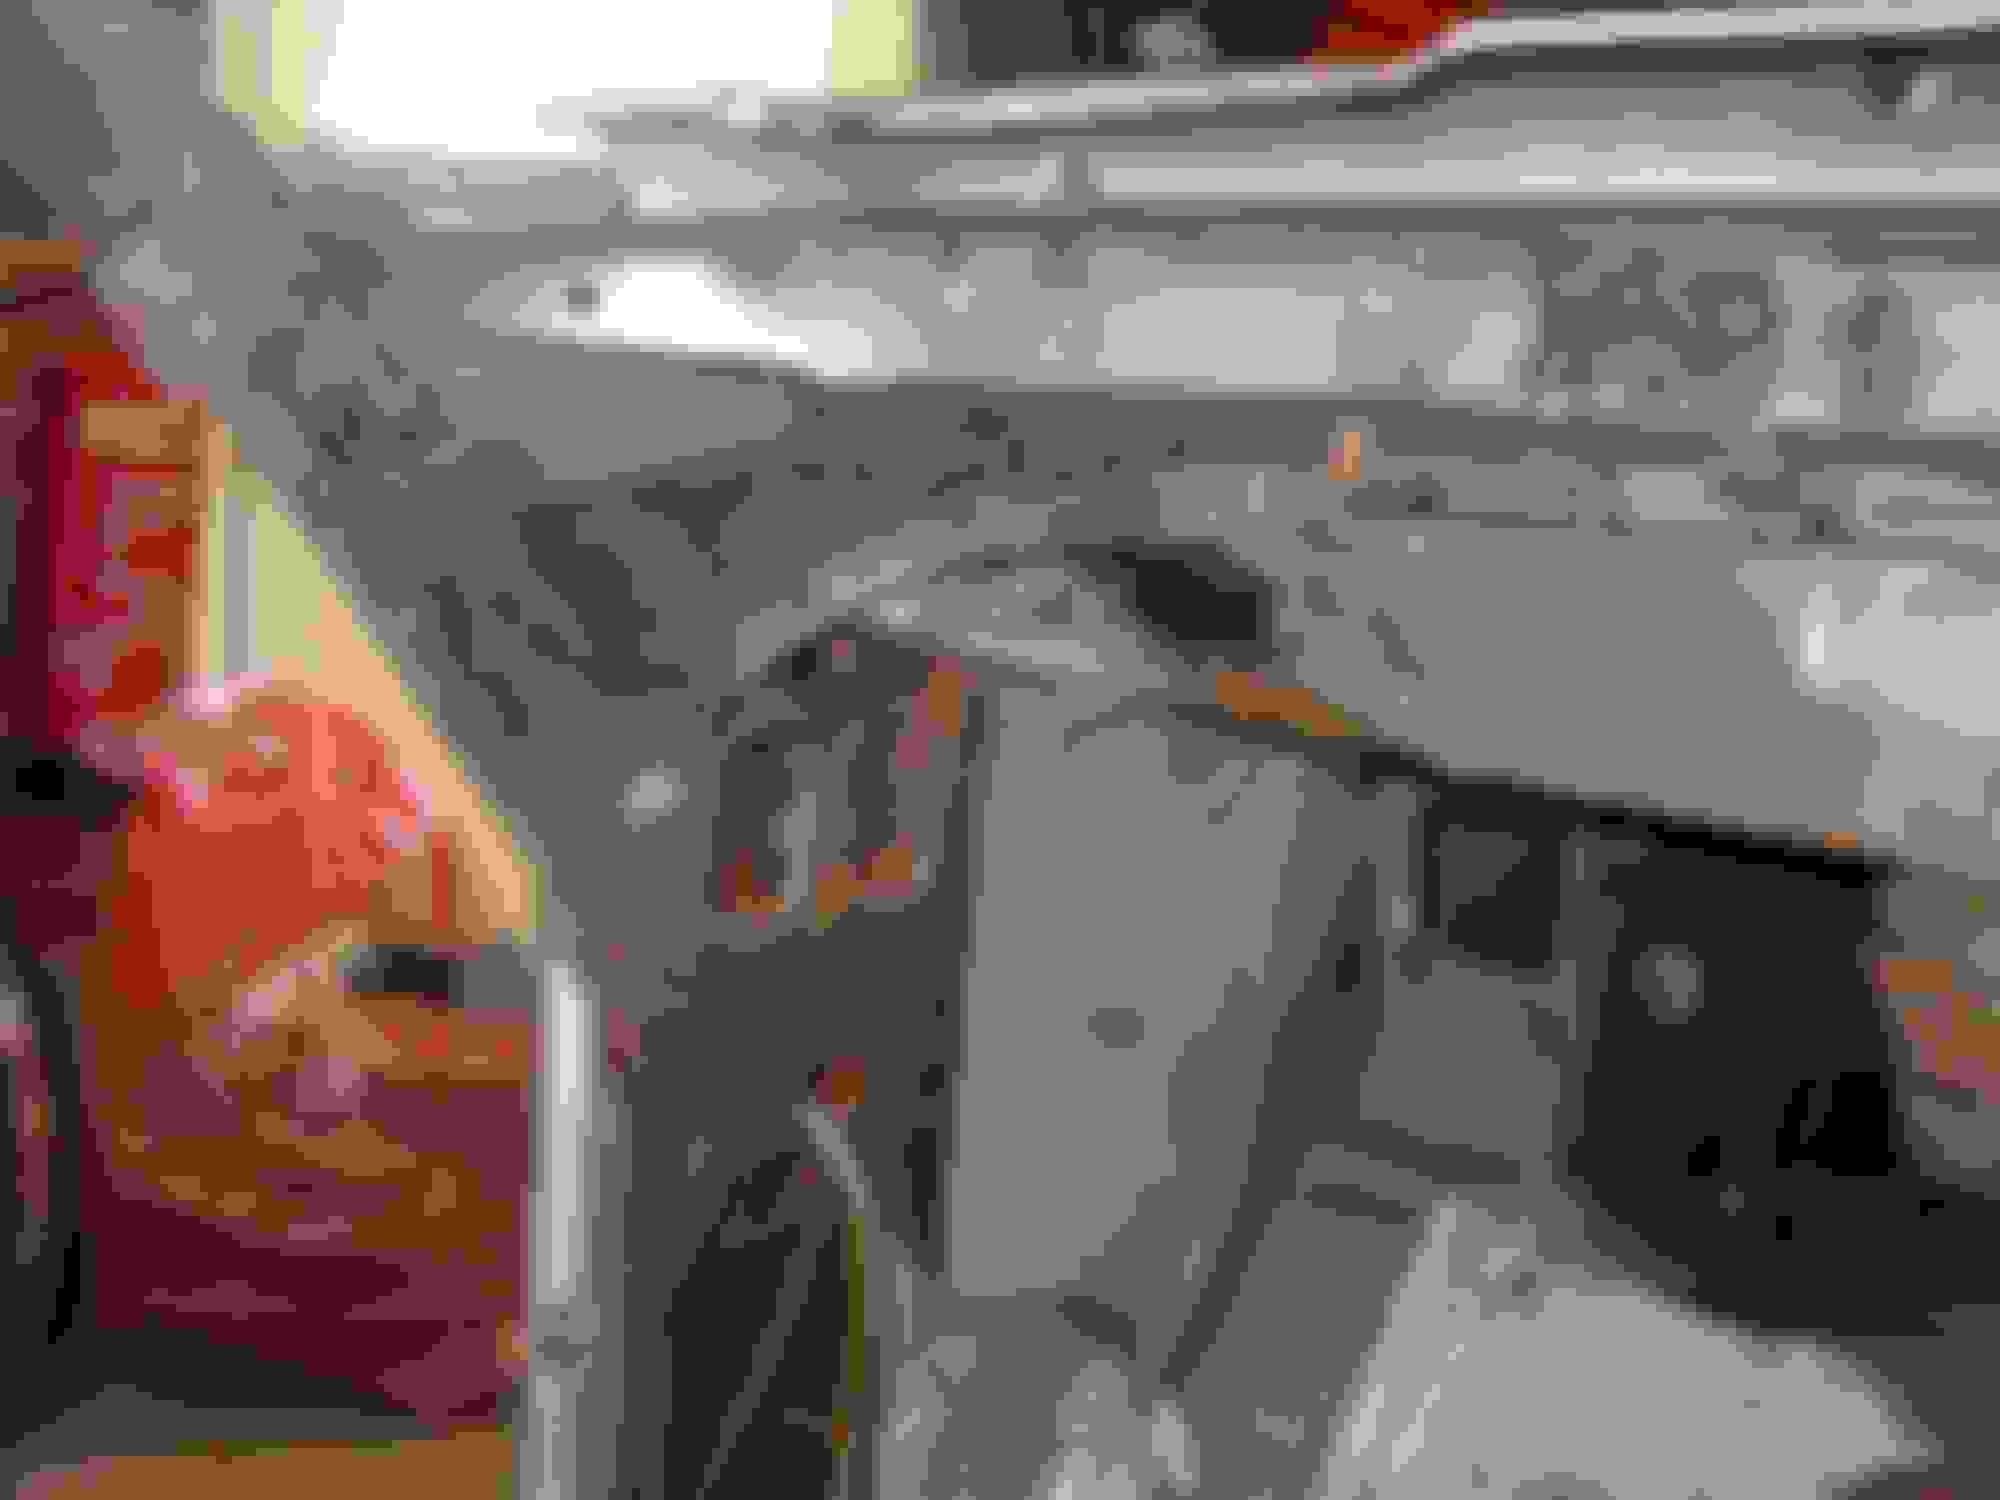
For those that are interested, I trimmed the edge of the new outer panel so that it could be slipped into place.
Trimmed panel
trimmed outer panel in place
The outer panel was then welded in place and rivetted to the fibreglass panel on the inside of the fender. Happily we didn't have any obvious issues with overheating the firewall, although we did take the welding slowly to allow the heat to dissipate. The inner panel was then welded back in (we couldn't refill all the spot welds as I'd removed too much metal from the panel behind it when drilling some of them out!).
I then sealed up the gaps between the outer panel and the firewall and also the fibreglass panel inside the fender with some Sikaflex, had a good clean up, painted it and it's " as good as new". Or at least an awful lot better than when I started
Nice job , always nice to see the results .A lot of people who attack this job have to remove the front clip or cut the rear corners off the front fender to access .

 10-19-2018, 12:16 PM