C5 C6 Corvette: How to Remove Door Panel
Perhaps you need to remove your car's door panel to fix a faulty speaker or a glitch in the window, or you want to replace your existing panel with a newer, better one. Either way, the process is relatively simple and straightforward.
This article applies to the C5 and C6 Corvette (1997-2013).
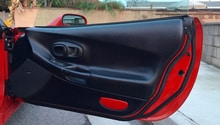
Removing the door panel is the first step towards fixing a broken window, a blown speaker, a damaged door switch, or basically anything else hidden behind it. Removing the panel is pretty simple. There are only two screws and several (noisy) plastic clips that need to be removed. It may be helpful to order extra panel replacement pins in case a few get lost or break during this job.

Materials Needed
- T30 Torx/Allen wrench
- Flashlight
- Phillips head screwdriver
- Small flat blade screwdriver
- Pry tool
- Shop rag
- Spare replacement pins or clips (optional)
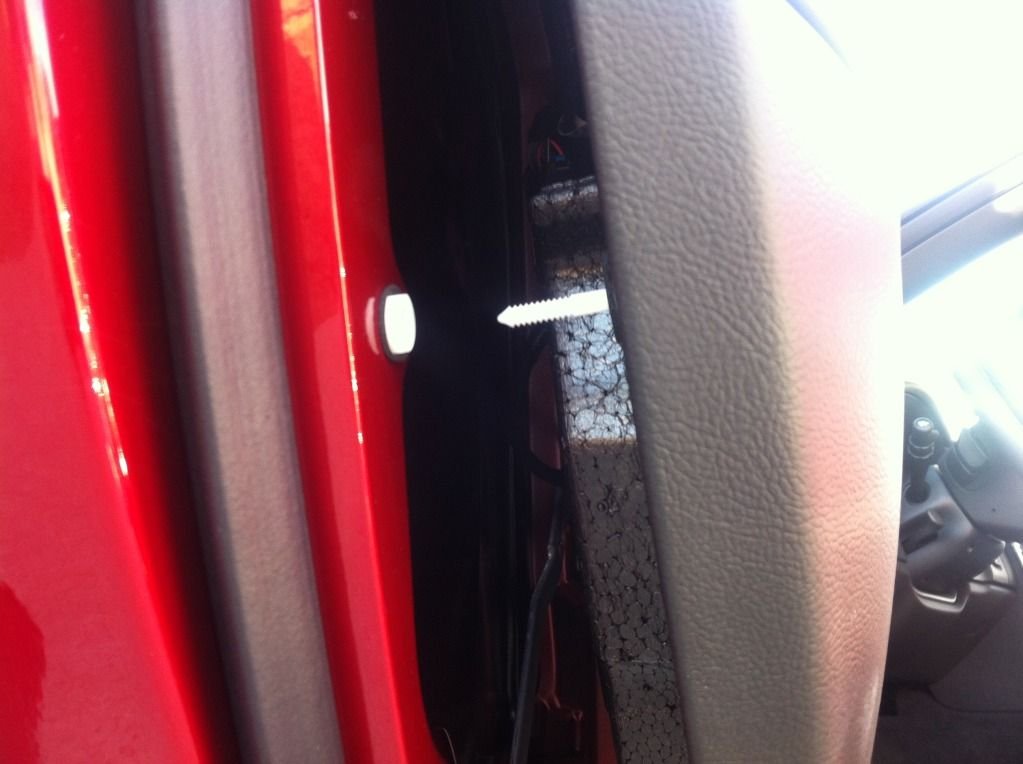
Step 1 – Locate and remove the cover
Locate the screw cover just underneath the door-pull handle. Pry off one side of the cover first until you can remove it by hand. Once the cover is off, remove the two screws in the hole with a Torx bit or an Allen wrench.

Figure 1. Door screw cover location. 
Figure 2. Remove the door's cover and screws.
Step 2 – Remove the door panel clips
You'll need to separate the door panel from the clips holding it in place. Start by finding the indentation towards the bottom center portion of the door panel material. After locating the indentation, pull the door panel back away from the frame. Don't be afraid to use a fair amount of force to get the panel off. You may need a tool to pry off the more stubborn spots.
Pro Tip
You'll hear lots of noise as the panel separates from its plastic holders. This is normal.
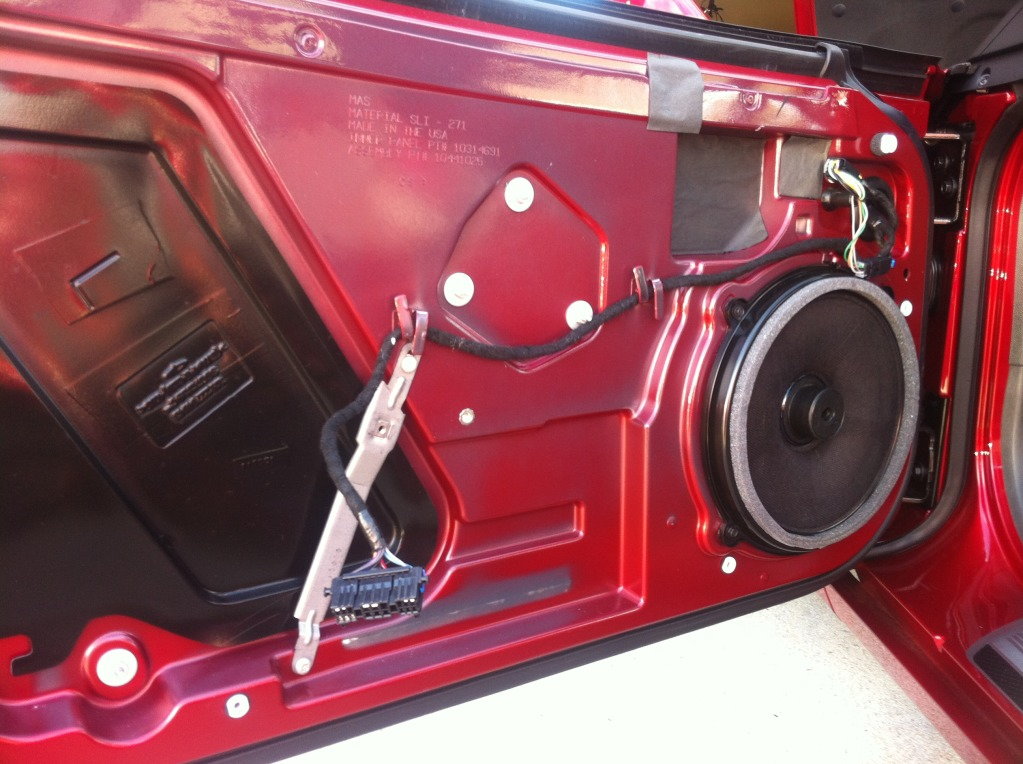
Step 3 – Disconnect the door trim panel from the frame
For the best results begin at the left side, then move towards the bottom and up the right side to dislodge the clips. There are eight clips in total around the perimeter that need to be removed. After the clips are out, separate the door trim panel by pulling it from the bottom, up and away from the top of the door.

Step 4 – Disconnect the main wire harness
The main wire harness needs to be disconnected to completely remove the door panel. First, squeeze the two release levers on the base of the black connector, which is located close to the blue plug. Then, rotate the purple latch downwards to disconnect the panel and completely remove it from the door.
Related Discussions and Site
- How to Take C6 Door Panels Off? - CorvetteForum.com
- Driver Door Handle Installation - Theredlion.us
- Removal of Driver's Side Interior Door Panel - CorvetteForum.com