C6 C7 Corvette: How to Replace Your Timing Chain
A stock timing chain can suffer from stretching over time. It may suffer sooner if the car is used for performance driving, and later if it's not. Learn how to replace your timing chain here.
This article applies to the C6 (2005-2013) and C7 Corvette (2014-current).
The crankshaft snout has a gear that engages the timing chain to operate the camshaft and also runs the oil pump. The timing chain also dampens vibrations by absorbing some of the shock generated by the crankshaft before it gets transmitted to the camshaft. However, the long-term effect of this vibration shortens the life of a timing chain.

Materials Needed
- Complete metric socket set, including 12-point sockets
- 1/2" socket set and a smaller set
- Gear-pulling tool, 3-jaw gear puller or harmonic balancer puller
- Torque wrench providing up to 250 ft.-lbs. of torque
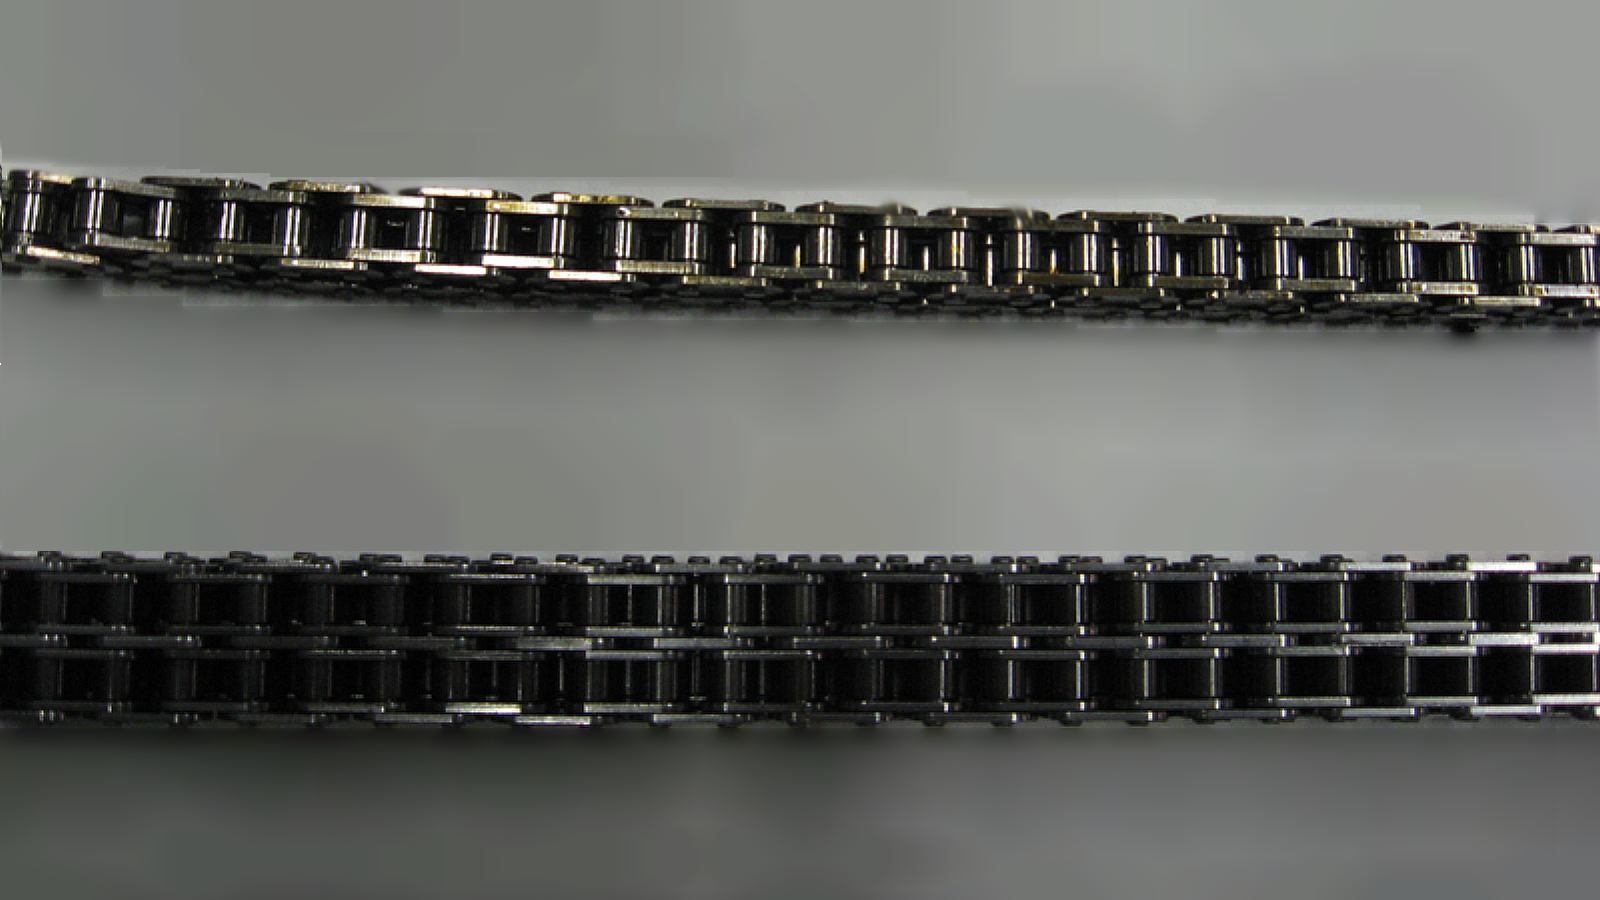
Aftermarket timing chains are available in OEM configurations and with larger pins to better engage the sprocket teeth. These chains are stronger, lighter and last longer than the standard chain.
The so-called “roller” timing chains incorporate a tube covering the chain links that allow them to “roll over” the gear teeth, reducing friction and stretch. A single roller chain may look much like a bicycle chain, and a double roller chain incorporates a dual set of links to engage a corresponding dual set of teeth, which minimizes backlash. An enhanced type of roller chain is known as a “true roller” because it has precision-machined pins and rollers designed to always spin when they engage the gear teeth. These chains are also available in single or double roller versions.
A stretched timing chain will have too much play that will build over time as the crankshaft is started, stopped, sped up and slowed down. Eventually, it starts to bounce against the damper (typically made of plastic), creating excessive noise. Unless the timing chain is replaced before this occurs, it will break.
The C6 Corvette has an “interference-type” engine, sometimes referred to as a “non-freewheeling” type. This means that if the timing chain breaks, the valves in the cylinder head can strike the piston tops, causing potentially serious (that is, time consuming and expensive) engine repair issues, and possibly even an engine replacement.

Aside from the timing chain's condition, another sign of excessive wear may be caused by the cam and crankshaft gears. If the teeth on either of these gears seem to be excessively pointed, both gears, as well as the chain, should be replaced with either OEM parts or an aftermarket kit.
If you’re doing major work on your engine, such as replacing the oil pump, and your engine has 50,000+ miles on it, you might want to consider installing a new OEM timing chain or moving to a beefier aftermarket timing gear and chain set.
Pro Tip
Aftermarket kits are available with double-roller timing chains, balanced and heat-treated cam gears, as well as multiple keyways in the crank gear that allow you to advance or delay the camshaft (usually by four degrees).
Step 1 – Remove engine components
Accessing a Corvette's timing chain requires removing everything in front of the engine (air intake assembly, fan assembly, front air-direction shroud, radiator, A/C condenser and steering rack), lifting the engine partially, or pulling the engine completely out of the car.
Once you have access to the timing chain, remove the serpentine belt by first “tightening” its tensioner. Then, remove front accessories like the water pump belt and its attached hoses. Swing the alternator out of the way by removing its bottom bolts. You may also want to clean the front engine with degreaser.
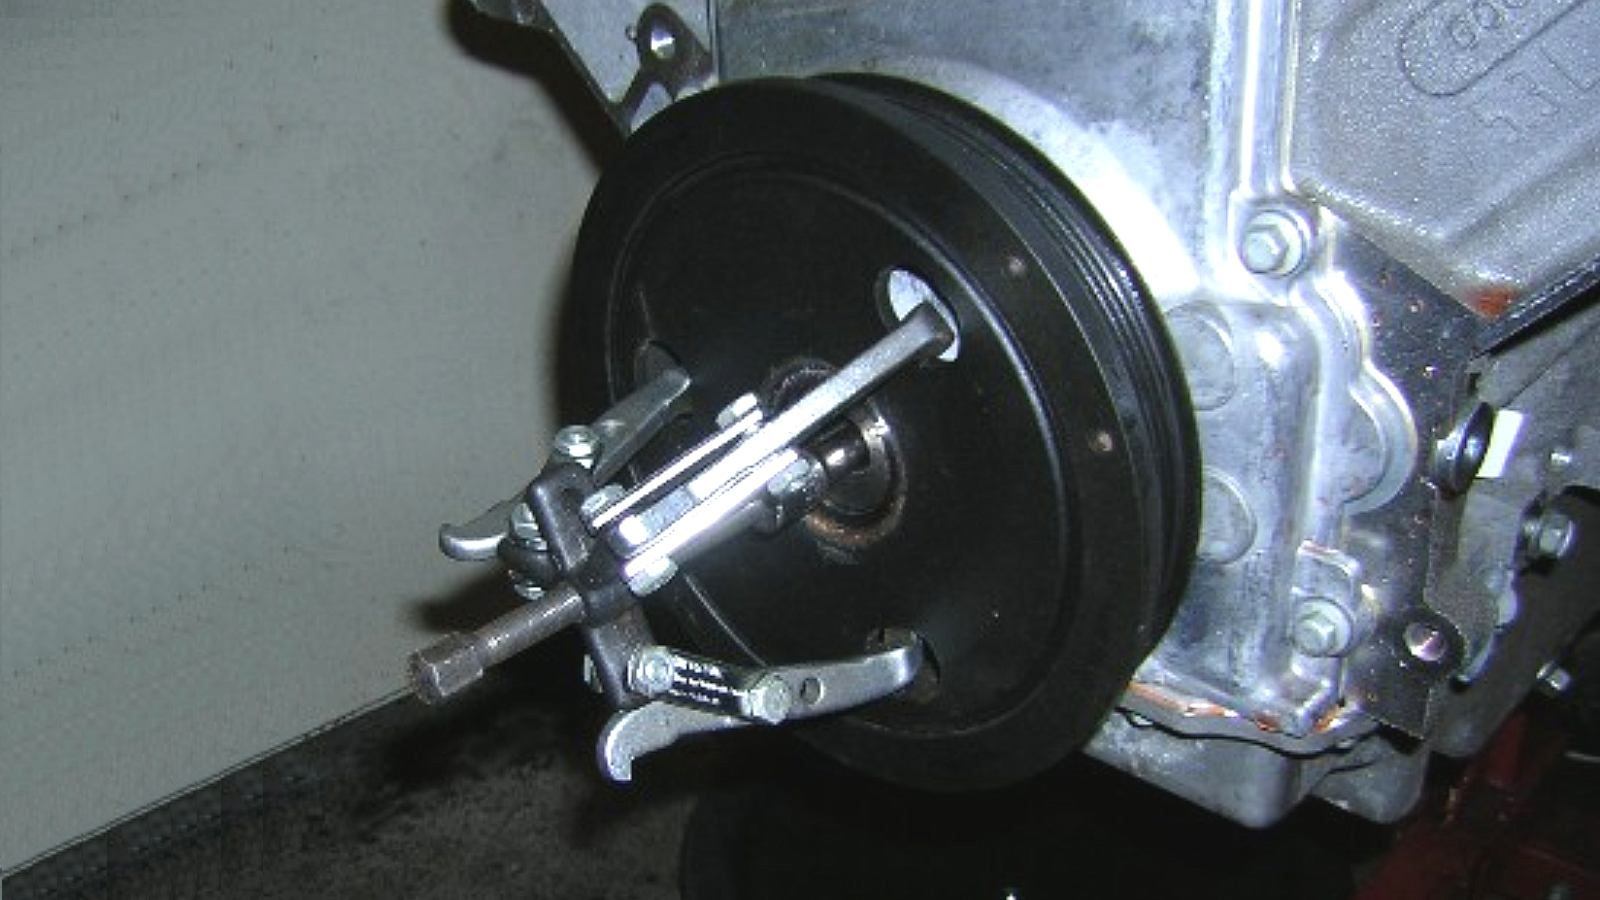
Step 2 – Remove the harmonic balancer pulley
With a three-jaw puller, remove the balancer pulley (also called a damper pulley) off of the crank snout.
Step 3 – Remove the timing chain cover
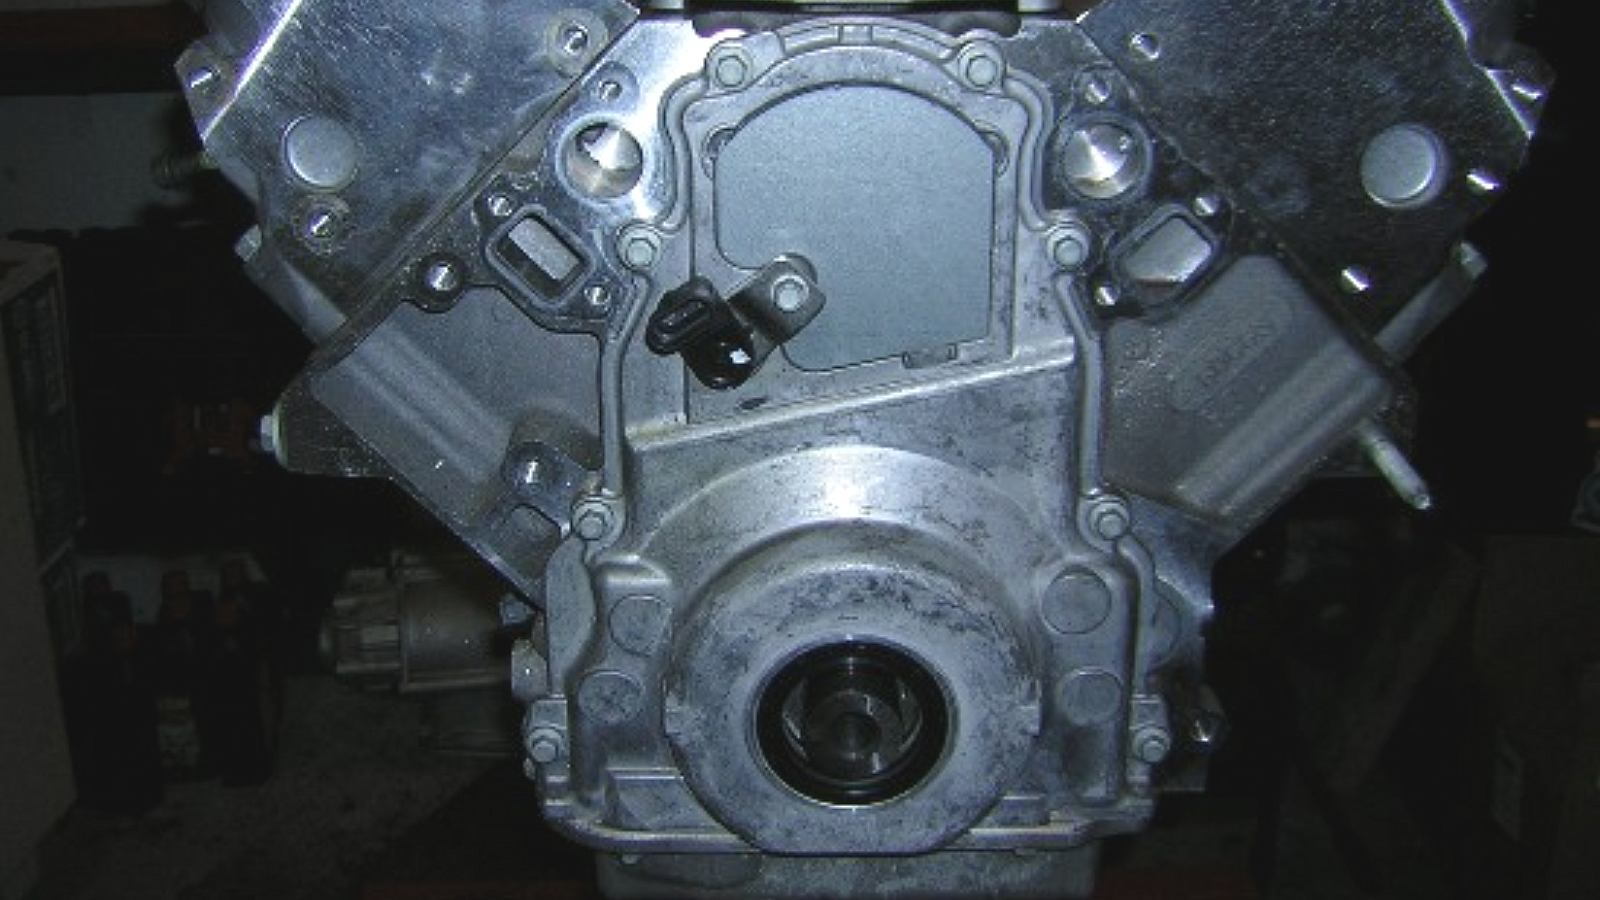
Remove the two 10 mm bolts holding the cam sensor in place, then unplug the cam sensor and remove it. Remove the eight 10 mm bolts, unplug the camshaft position sensor, and take the front cover (timing chain cover) off. Save the bolts to re-install the front cover in the final steps.
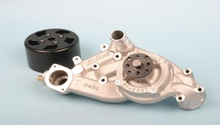
Step 4 – Remove the Gerotor oil pump
Remove the four 10 mm bolts holding the Gerotor oil pump in place. On other model Corvette engines, the oil pump pick-up tube must be removed before the oil pump can be taken off. Do so by loosening the oil pan bolts and two of the bell-housing bolts to lower the pan about 1/2". Stuff clean rags along the gap to prevent dirt (and fasteners) from dropping into the pan.

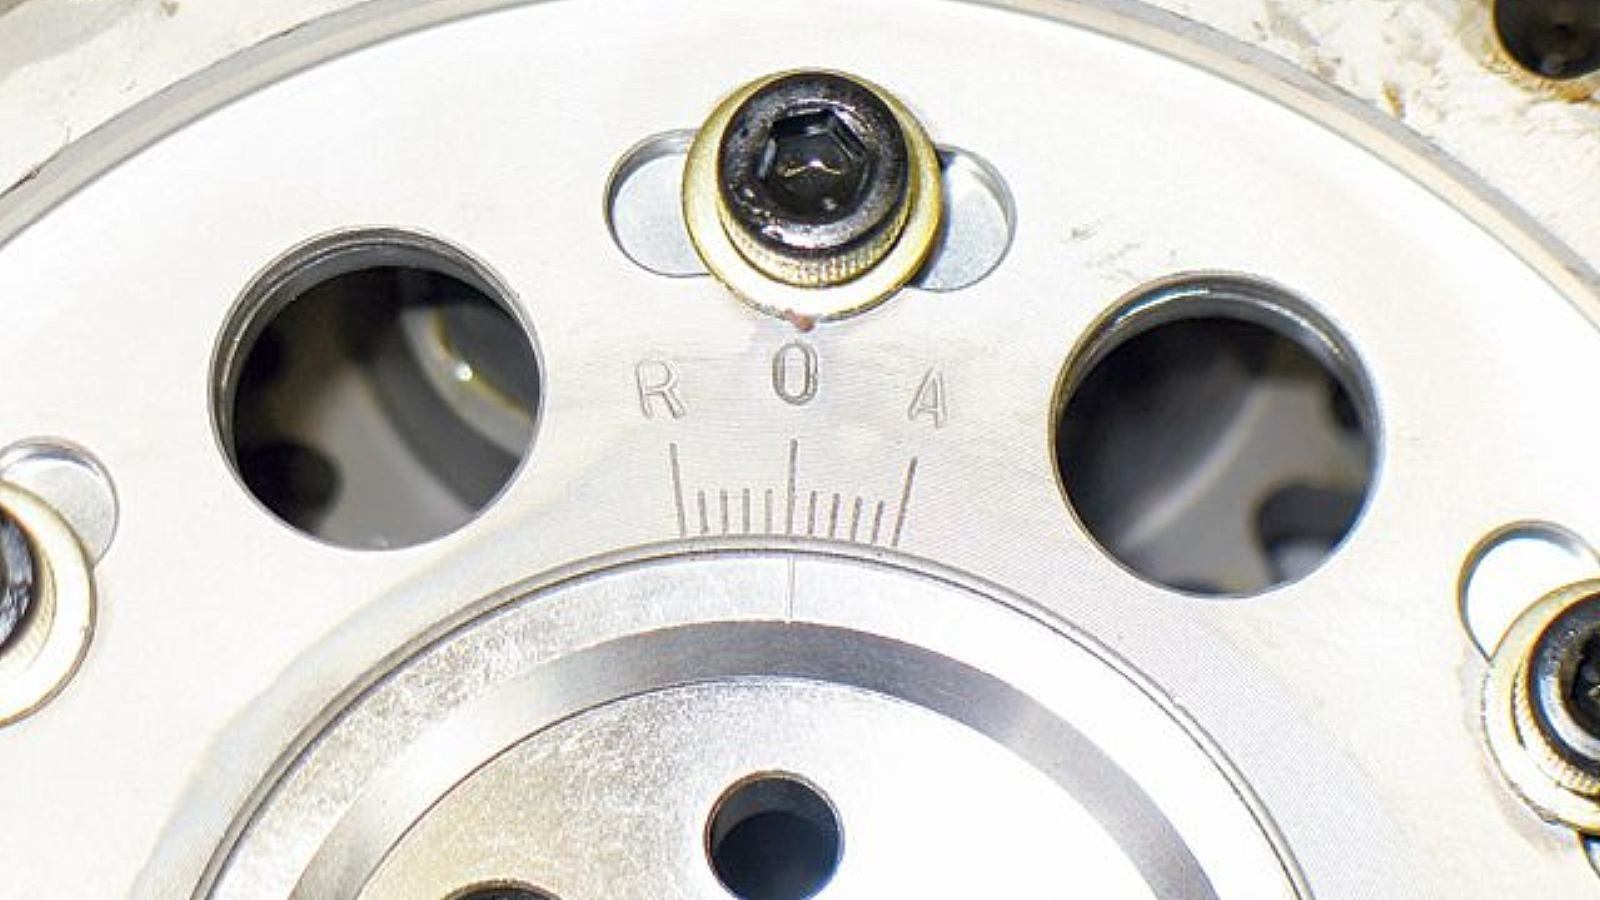
Step 5 – Align the camshaft and crankshaft gears
Remove all of the spark plugs to release cylinder pressure, and put the car in neutral. With the large wrench, align the mark on the cam gear with the mark on the crankshaft gear. The cam gear should be in the six-o’clock position, and the crankshaft gear in twelve o’clock position. When they are aligned, put the vehicle in 4th gear. The cam shaft pin that sticks through the cam gear should also be located in the three o’clock position.

Step 6 – Remove the camshaft gear
Remove the large cam gear, which is usually secured by three bolts. Lower the cam gear, and remove the timing chain from the drive gear connected to the crankshaft.
Pro Tip
The LS3 has both one-bolt and three-bolt configurations.

Step 7 – Remove the crankshaft drive gear
Using a gear puller, remove the crankshaft drive gear that drives the oil pump from the crankshaft. It's held in position by a Woodruff key; save the key for when you re-install the crankshaft drive gear.

The new timing chain should have some play; typically, a 3/8" to 1/2" (9 mm to 12 mm) slack is normal. Above the crankshaft is a damper which helps to minimize excessive outward or inward “whipping” movement (“chordal action”) of the chain during normal engine use. The 2005 LS2 timing chain damper is black in color.

A new timing chain damper design was introduced in the 2007 LS2 engine that fits the same narrow LS2 bolt centers; however, rather than set in-between the chain runs, its long support arm sits outside of the chain, and its short support arm sits from the inside to reduce chordal action. This design is commonly called a cam chain tensioner. Before removing it, squeeze together the timing chain and tensioner arm on the left side with large adjustable pliers. Then, hold the tensioner arm in place by inserting a small nail or pin into the retaining hole.

Step 8 – Replace the cam and crankshaft gears
Drive and tighten the new crankshaft sprocket into place with the saved crankshaft bolts. Either oil the new chain with gear oil, or give it a light coating of grease. Put the belt in place over both gears and hoist the cam gear back into place, securing it with the three bolts (or single bolt). Use thread sealer and tighten both gears to the proper torque (typically 26 ft./lbs., but refer to the owner's manual). Remember, the cam and crankshaft gears must be aligned; each has a marking that should be set as close to each other as possible.

Figure 12. Replaced timing chain, cam gear and crank gear.
Step 9 – Begin re-assembly
Re-assemble the timing chain damper (or tensioner) with its two 10 mm bolts. If re-assembling the tensioner, pull the pin out after it's in place.
Step 10 – Replace the Gerotor oil pump
Secure the oil pump with the four 10 mm bolts (typically 18 ft./lbs. for aluminum block attachments, but refer to the owner's manual).
If you are replacing a single roller chain with a double roller chain, this will require the use of spacers to push the oil pump out so it can clear the wider chain. Most chain sets come with the proper “shims” to accomplish this; however, these might create clearance issues for re-installing the front cover. Some minor grinding on the cover’s inside will be required to accommodate the re-positioned pump housing.
Pro Tip
Use feeler gauges to make sure the oil pump is centered over the crank gear before tightening the oil pump down.
Step 11 – Replace the timing chain cover, balancer pulley and crank bolt
If undamaged, replace the old front crankshaft seal and make sure the seal is centered over the crankshaft. Install a new seal if the old one is damaged; use an OEM unit made specifically for your engine configuration. Re-install the timing-gear cover.
Replace the crank bolt washer and torque the balancer pulley with the original crank bolt to 250 ft. lbs of torque. Then, replace the front crank bolt with a new bolt since it is a torque-to-yield bolt and has been stretched beyond its usable state. This time, tighten the new bolt to 37 ft./lbs. and use a non-torque wrench to tighten it an additional 140 degrees.
Pro Tip
Many Corvette owners will replace the balancer pulley with a new one. Once the old one has been stretched to fit onto the crankshaft, it can have the tendency to come loose.
Step 12 – Put the engine back together
Assemble the rest of the engine in the reverse order you took it apart.
Related Discussions
- Timing Chain Slack Discussion - CorvetteForum.com
- Chain Failure Causes - CorvetteForum.com
- Timing Chain Issues - CorvetteForum.com
- Timing Chain Break - CorvetteForum.com
- Balancer Torque Information - CorvetteForum.com