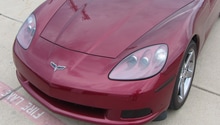
C6 Corvette: How to Install Halo Angel Eyes
Halo LED lights can give your Corvette a lean and ferocious look. This how-to walks through the installation.
This article applies to the C6 Corvette (2005-2013).
Adding Halo LEDs to the face of your C6 Corvette is a cool way to modernize the front end. The installation might seem intimidating if you've never opened a headlight housing before, but it's a breeze when following these instructions. Take the right precautions, read the steps closely, and your C6 will look livelier in no time.

Materials Needed
- Halo LEDs
- Positive and ground wires
- Polyurethane premium constructive adhesive
- Epoxy or silicone adhesive
- An oven
- Heat-resistant gloves
- Electrical tape
- Flathead screwdriver
- Pliers
- Socket wrench
Warning
Wear a pair of heat-resistant gloves when working around an oven. Also, touching the headlights with your bare fingers will drastically shorten the bulb's life.
Step 1 – Remove the front bumper and headlight housing
Separate the front bumper from the fender liner. Then, open the hood and undo the screws there. Once all the plugs have been removed, slide the bumper off.
Pull out the headlight housing, and undo the nuts underneath and the screws at the top. Then, gently lift it out.
Related Articles
- How to Remove Bumper - CorvetteForum.com
- How to Remove Headlight Assembly - CorvetteForum.com

Step 2 – Remove the lens from the headlight housing
Warm up an oven to 225 degrees and bake the housing for ten minutes. Take it out and pry the lens off using a large flathead screwdriver. This will take some work, and the headlight might cool during the process. If it cools too much, put it back in the oven to warm up as needed. Once the lens is removed, clean out the leftover sealant from the housing.

Figure 2. Let the headlight sit in an oven. 
Figure 3. Remove lens from housing.
Pro Tip
Another way to remove the lens is to cut it off using a rotary saw. If you do this, clean the debris out of the housing and lens before you start working on it.
(Related Article: How to Remove Headlight Lens and Bezel - CorvetteForum.com)
Step 3 – Install the Halos
Fit the Halos around your headlights. Pull the wires through the back of the housing. If you can't find an opening to route the wires through, drill a small hole in the housing, then fit the wires through it and seal it with epoxy. Most Halo kits come with an adhesive already applied to the rings. If your kit did not come with adhesive, evenly apply four dabs of epoxy around the Halo and place it over the headlights. Hold it tight and wait for the epoxy to set.

Step 4 – Reseal the headlight
Test the lights before you start resealing. When you're ready, pour the polyurethane adhesive where the old sealant was. Then, put the lens back on the housing. Use either clamps or wire to hold it together as it dries.

Step 5 – Wire it to the under hood fuse box
Splice the positive wires together and do the same for the ground wires. Wrap the ground wire around a screw and hook the positive wire to an available nut on the fuse box, so the Halos turn on whenever the car is on. After you have everything wired, turn on the ignition and check if everything is working.

Featured Video: Corvette Angel Eyes in Action
Related Discussions
- Installed Angel Eyes "DIY" - CorvetteForum.com
- LED Halo Install Question - CorvetteForum.com