Corvette: How to Replace Catalytic Converter
Read on to see how to change your catalytic converters and restore lost power and gas mileage to your Corvette.
This article applies to the C5, C6, and C7 Corvette (1997-current).
Catalytic converters are one of those necessary evils required on your vehicle to help "clean-up" exhaust gases and keep the environment clean. Like most other parts on your Corvette, they are prone to wear and over time can clog up, robbing you of performance and fuel economy. Although a bit pricey to replace simply due to the high cost of the part itself, they must remain on the vehicle to ensure that you are emissions-legal and able to pass state inspections. Assuming that you're only interested in replacing the bad catalytic converter(s), and not the entire mid-pipe assembly, it may be necessary to take your pipes and new converters to a muffler shop to have some welding done, unless you're able to do this at home.

Materials Needed
- Low-profile jack, jack stands
- Metric wrenches and sockets
- Spray penetrant like Loctite
Step 1 – Raise the car and support with jack stands
Using the factory jacking points, raise the car and secure with jack stands. Be sure to raise it high enough to allow ample room to work underneath and double check that all four jack stands are secure before venturing under.
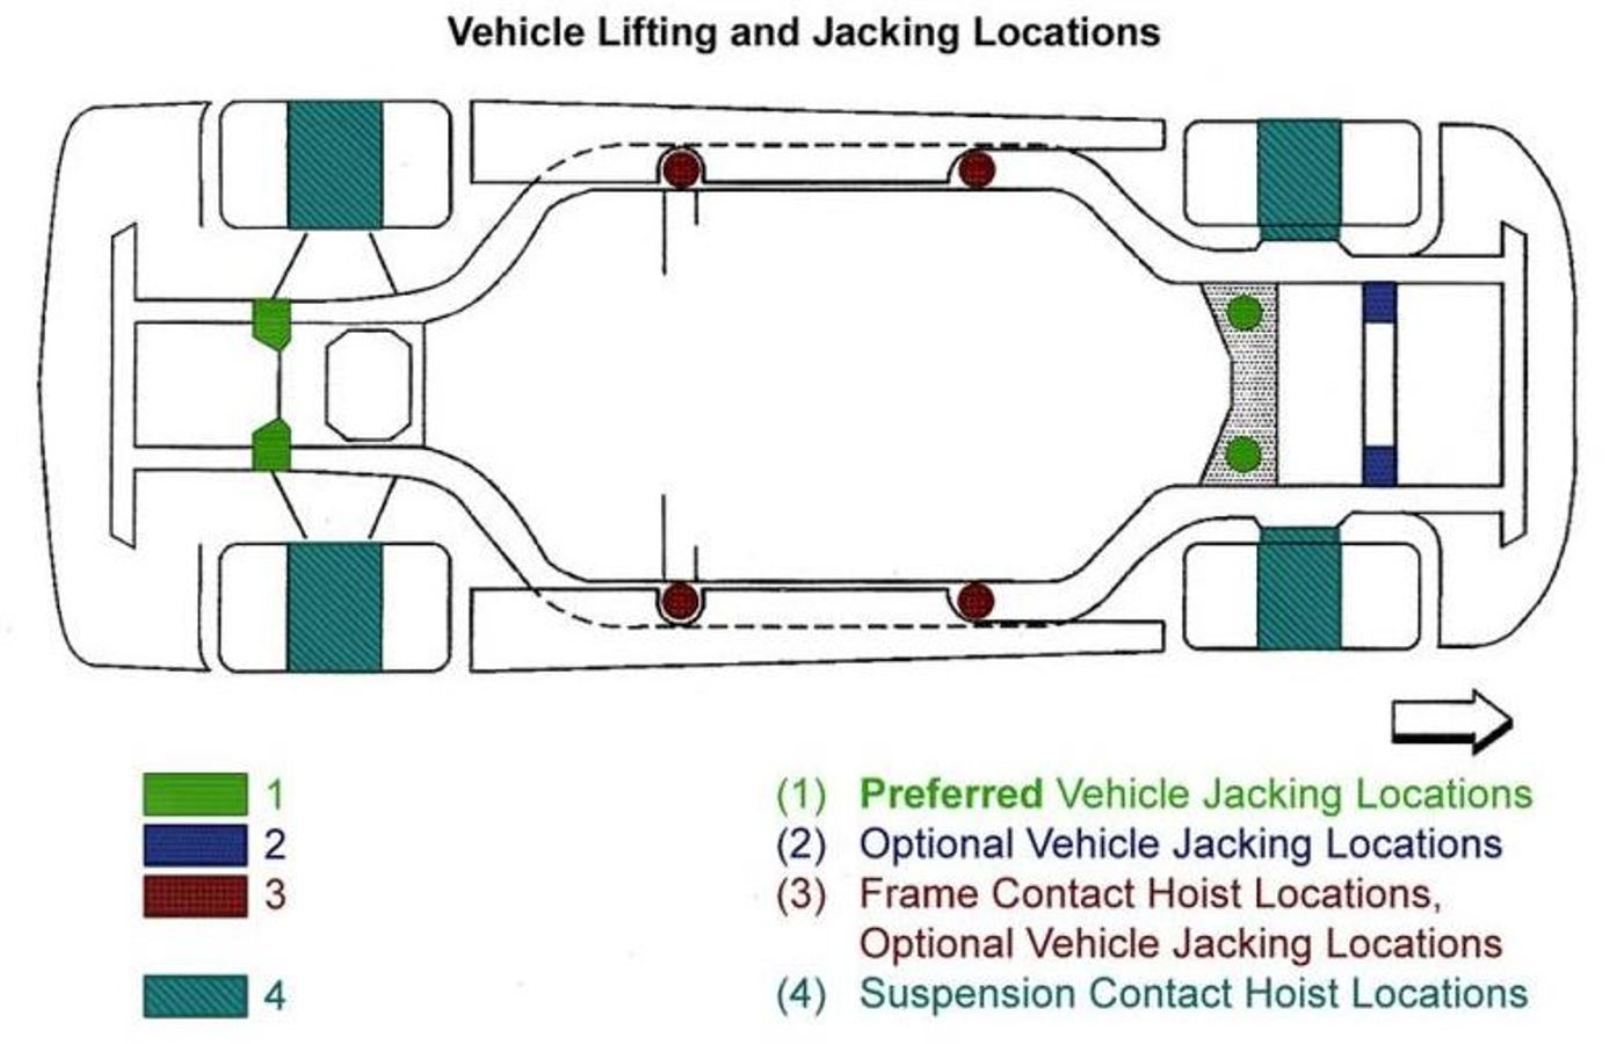
(Related Article: How to Jack Up Your Vette - CorvetteForum.com)
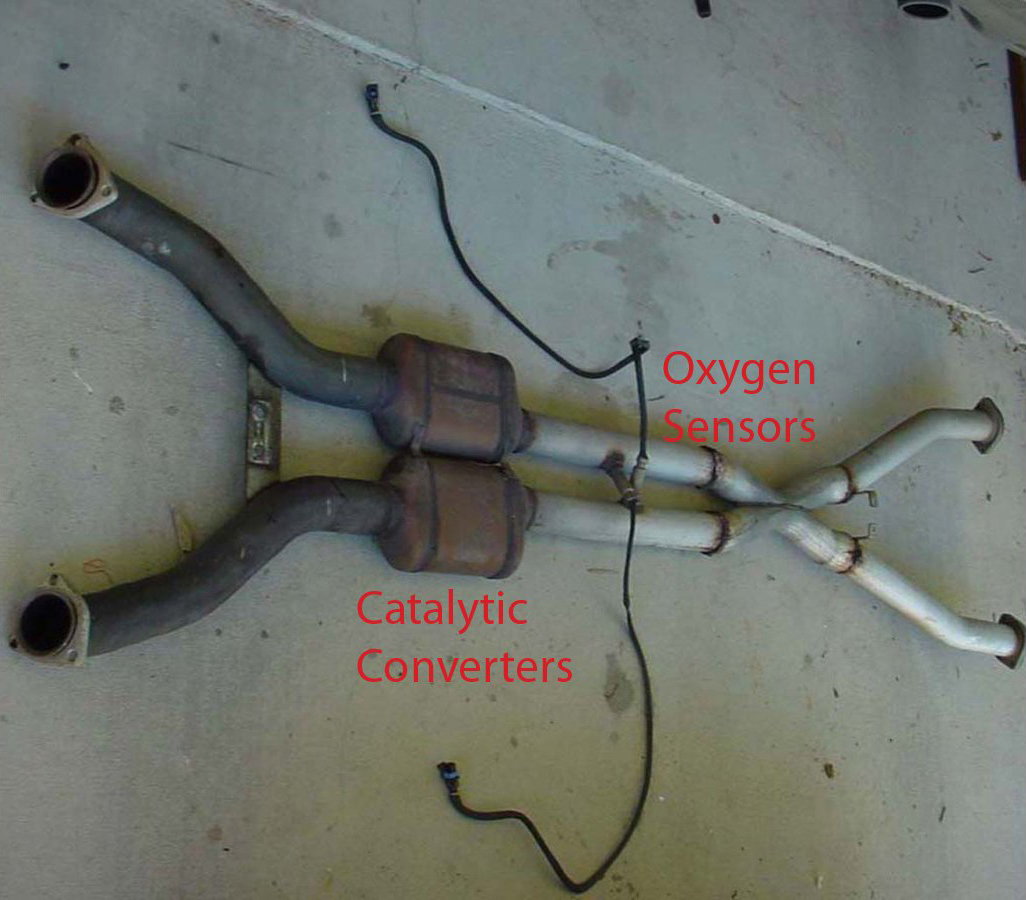
Step 2 – Loosen oxygen sensors
Using an open-ended wrench, remove the oxygen sensors from the mid-pipe and hang out of the way.
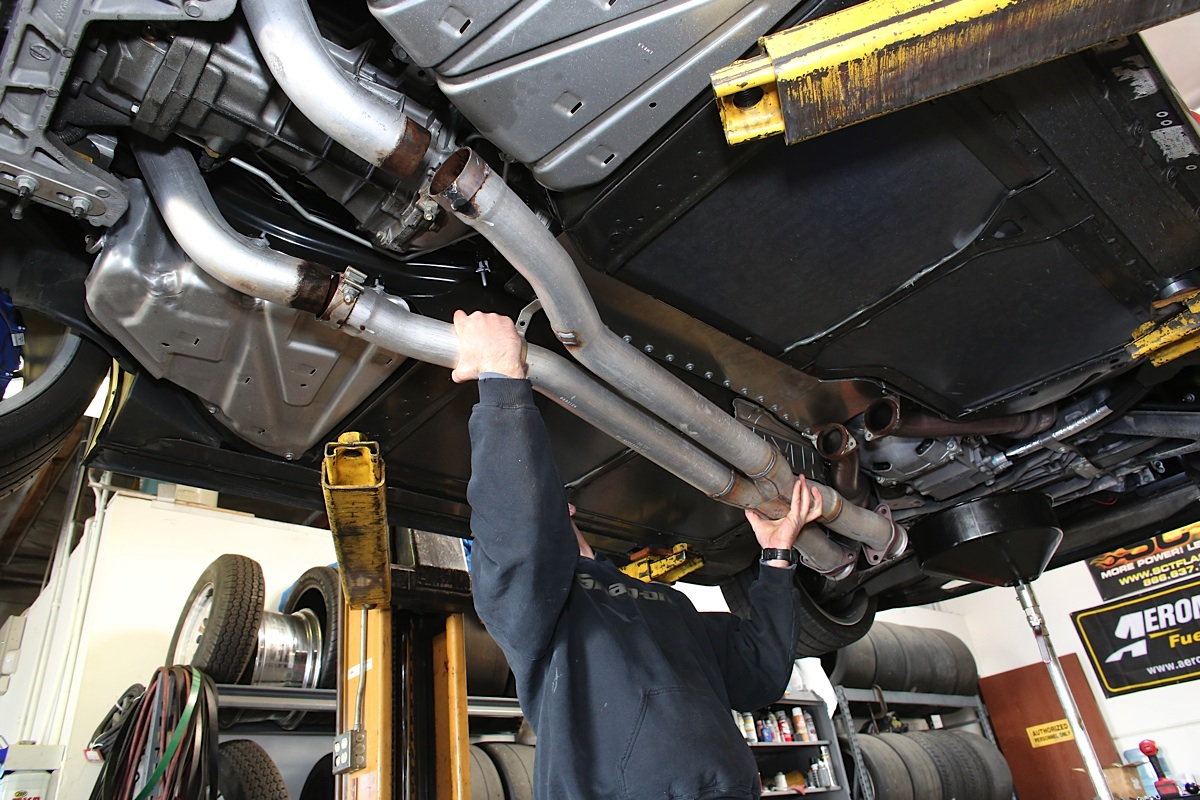
Step 3 – Remove the mid-pipe
It may be necessary to spray penetrating lubricant on all of the exhaust bolts/nuts that require removal ahead of time, and allow to soak as they may be stubborn when trying to remove. Once you feel they will cooperate, loosen and remove the four bolts and nuts on the front of the mid-pipe connecting the exhaust manifolds; then, loosen and remove the four bolts and nuts on the rear of the mid-pipe attaching to the muffler pipes. At this point the entire mid-pipe section should fall freely and can be removed from the car.
Step 4 – Replace catalytic converters
You now need to decide if you'd like to cut out the old catalytic converters and install the new ones using band clamps or have them professionally welded back in. The correct method to ensure that you have a leak-free seal would be take the entire mid-pipe assembly to a muffler shop and have the old catalytic converters cut out and new ones welded in. Be sure to watch that the length (front to back) of the mid-pipe does not change as it will not fit back in the car if the length is altered.

Step 5 – Re-install mid-pipe
Once your new catalytic converters are in the pipes, you can re-install the entire assembly using the reverse process as outlined above. It is recommended that you use Loctite on all bolts. When re-installing the oxygen sensors, DO NOT use Loctite on these, and make sure that the wires attached to the sensors aren't twisted or making contact with the exhaust.
Once everything is re-installed, you can safely remove the jack stands and lower the vehicle back to the ground. If your car happened to have trouble codes associated with the converters being plugged, you may need to have the codes reset at your local dealership or auto supply store.
Related Discussion
- Catalytic Converter Replacement - CorvetteForum.com