C6 Corvette: How to Replace Front Headlamp HID Bulb
You'll need a bit of time and patience, but most car owners can replace the front HID bulb without too much trouble. Learn how to here.
This article applies to the C6 Corvette (2005-2013).
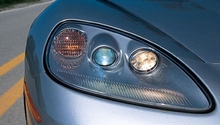
High Intensity Discharge lights are quite bright, making them a desirable headlight choice for many car owners. Although they output a generous amount of light and generally last for quite awhile, HID lights do burn out over time. Replacing them on a C6 isn't the fastest process, but it will likely become easier the next time around. You'll also save a considerable amount of money by replacing the bulb yourself rather than taking the car to a dealership. The costs indicated below are per bulb.

Materials Needed
- Replacement HID bulb(s)
- Trim removing tool (optional)
- Large soft cloth
- Partner to help with the nose cover removal (optional)
Step 1 – Remove wheel well fasteners and fender covers
Remove the three wheel well fasteners along the right edge next to each front wheel well side light. Then, remove the two black covers in the engine bay towards the front of the fenders. Remove the fasteners along the top part of the nose.

Step 2 – Remove the nose cover fasteners and deflector bolts
You'll need to crawl underneath the car to remove the 7mm fasteners under the nose cover as well as the four 10mm bolts towards the rear of the air deflector. Remove the air deflector once the bolts are out, then examine the area that the deflector has exposed. There should be five to six additional 7mm bolts, all of which need to be removed as well.

Step 3 – Access the side light connection
Separate the nose in the wheel liner underneath the light pod to reach the side light connection. You may need to bend the fender liner to view the connection. Slide the small lock away from the connector, then squeeze and pull. Repeat for both sides.
Step 4 – Remove the front bumper
This is the trickiest step. Lay out the large, soft cloth under the front of the car. Start by lifting up the last edge of the exposed nose cover in the engine bay. Find the two tabs on the edge of the nose stretching from the side fender directly to the headlight pod; this is generally a short piece touching the front quarter panel. Pop the tabs out of the retaining clamp. You may need to use a trim removing tool for this step. Repeat for both ends of the nose.
At this point, your helper can support the end portions of the nose piece when the cover starts to come off. The cover will begin to come off after the tabs are out of the retaining clamps.

Step 5 – Remove the headlight pod bolts and note the black clip location
Remove the bolts that hold the headlight pods in place. There should be three per pod.
Then, note the location of the black clip that was held in place by the two 7mm screws. The clip needs to go back in exactly the same location it started, otherwise the nose and the fender will be misaligned.

Step 6 – Disconnect the light pod and light
Disconnect the light pod's electrical connection then slowly and carefully pull the pod off the car.
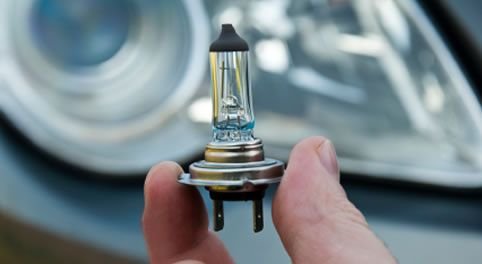
Next, turn the large, round, plastic pod cover slightly clockwise to remove it. Disconnect the light from the wire plug. Then, turn the two black tabs to unlock the light bulb. Once you've turned the tabs, pull the bulb straight out of its base. Reverse these steps to install the new light.
Pro Tip
Be very careful to avoid touching the light bulb glass with your fingers as the oil on your fingers could cause it to burn out.
Related Discussion
- How-To: Replace Front Headlamp HID Bulb - CorvetteForum.com