C6 Corvette: How to Replace Water Pump
You can save a lot of money by replacing your Corvette's water pump. This article outlines the steps involved, as well as additional tips and tricks to get you through the install.
This article applies to the C6 Corvette (2005-2013).
If your coolant has overheated under normal driving conditions, you will need to stop the vehicle and take care of the problem right away. The DIC display area in the instrument panel cluster also has warnings that may be triggered by a faulty water pump, including: “ENGINE OVERHEATED - STOP ENGINE,” “COOLANT OVER TEMPERATURE,” “ENGINE PROTECTION REDUCE ENGINE RPM,” and “HOT ENGINE AIR CONDITIONING OFF.” While most of these warnings can be explained if you happen to be driving your car long and hard, if that isn’t the case you could be looking at replacing your water pump.
The first sign of water pump failure can be the temperature light coming on, or a “low coolant” signal. If your engine coolant temperature gauge is consistently running in the shaded area, your engine is too hot. Besides overheating, there are some other ways to tell if your water pump needs to be replaced. When a water pump bearing starts to fail from a leaky seal or bad bearing, the pump typically starts to “weep” coolant under its overnight location. Also, hearing a rubbing or grinding noise coming from the area of the pump could be a sign that its inside bearings are failing.

Materials Needed
- Water pump
- Coolant
- Quarter-inch socket set with SAE and metric sockets and extension(s)
- Hose clamp pliers - needle nose vice grips
- Razor blade
- Large, shallow pan
- Hose removal tool (optional)
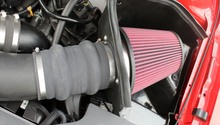
Step 1 – Remove the air filter assembly
First, remove the hose going into the side of the MAF bellows. Use the 5/16" nut driver.

Next, remove the plug attached to the MAF sensor (this requires that a safety lock be pulled out first).

Unscrew the worm-screw clamp holding the MAF bellows onto the throttle assembly. Don't remove the clamp completely from the bellows opening.

Then pull the entire air filter, intake, and MAF bellows assembly out completely, and set it aside.

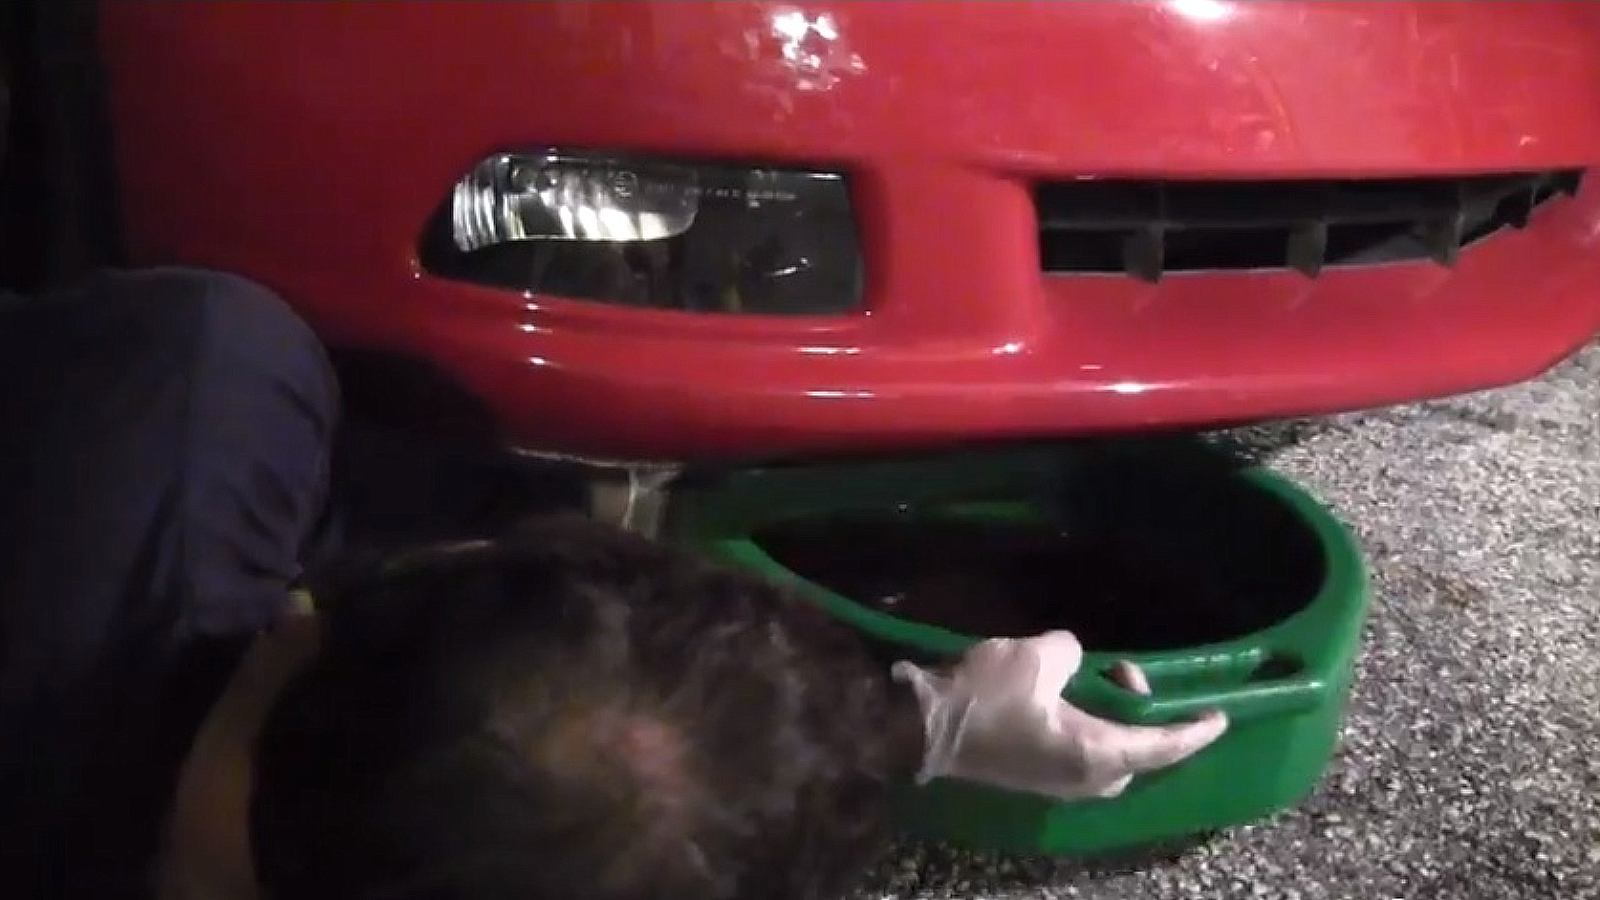
Step 2 – Put a large, shallow pan under the car
The radiator can be emptied at this point by opening the coolant reservoir (also called a recovery tank or surge tank) lid and the petcock valve on the bottom of the radiator’s passenger side.
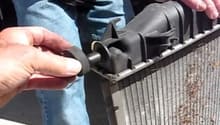
Step 3 – Remove the upper radiator hose
A special hose removal tool (5/16" nut driver) can be used to separate the hose and nozzle connection, then moved around the nozzle to separate the rubber and metal surfaces. Pull the upper radiator hose off of the water pump nozzle.
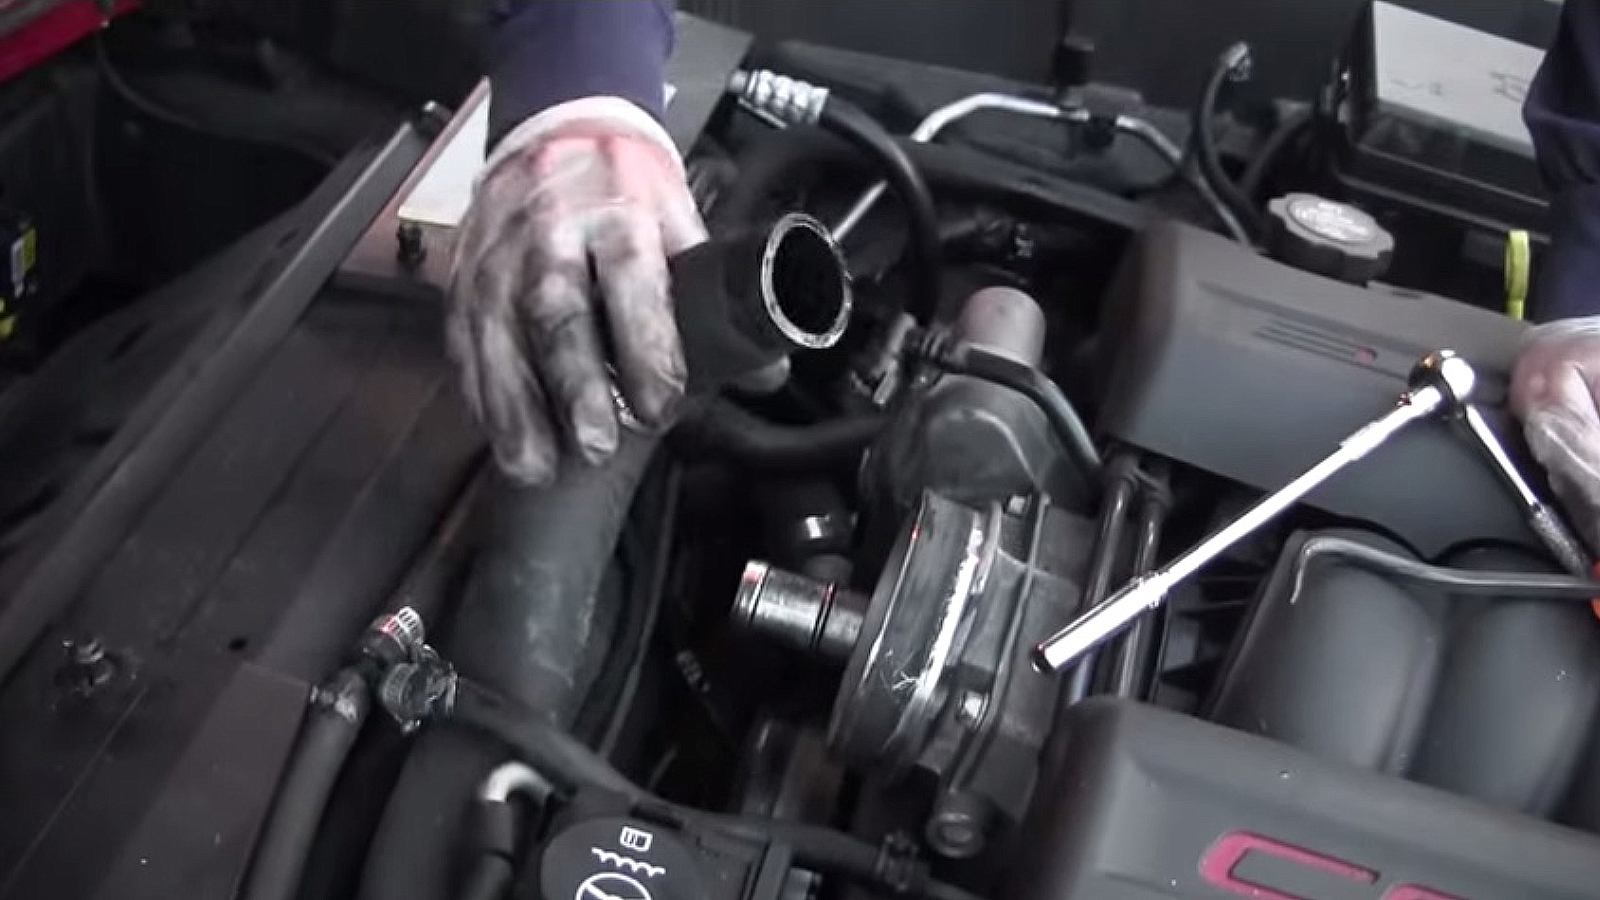
Step 4 – Remove the belt from the tensioner
Using the socket wrench for leverage, turn the 15mm bolt head, which will compress the tensioner so the water pump belt can be moved off the tensioner pulley. Remember where this belt goes so you put it on the new water pump correctly. It might be a good idea to hold the belt out of the way with tape during the water pump removal, which will make it easier to re-install after the new water pump is in place.
Step 5 – Remove the lower radiator hose
Use the 5/16" nut driver. With the bottom radiator hose disconnected from the radiator, coolant will pour out into the pan below it.

Step 6 – Remove the water pump belt tensioner
Using the 15mm socket, take out the two bolts holding in the tensioner, and remove it. Set it and its bolts aside for reuse.

Step 7 – Remove the two heater hoses
The two hoses attached to the water pump that feed into the HVAC system can be difficult to remove. Hose clamp pliers, or even a tool such as needle nose vice grips, can be useful for this step.

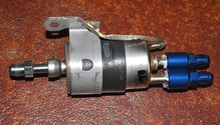
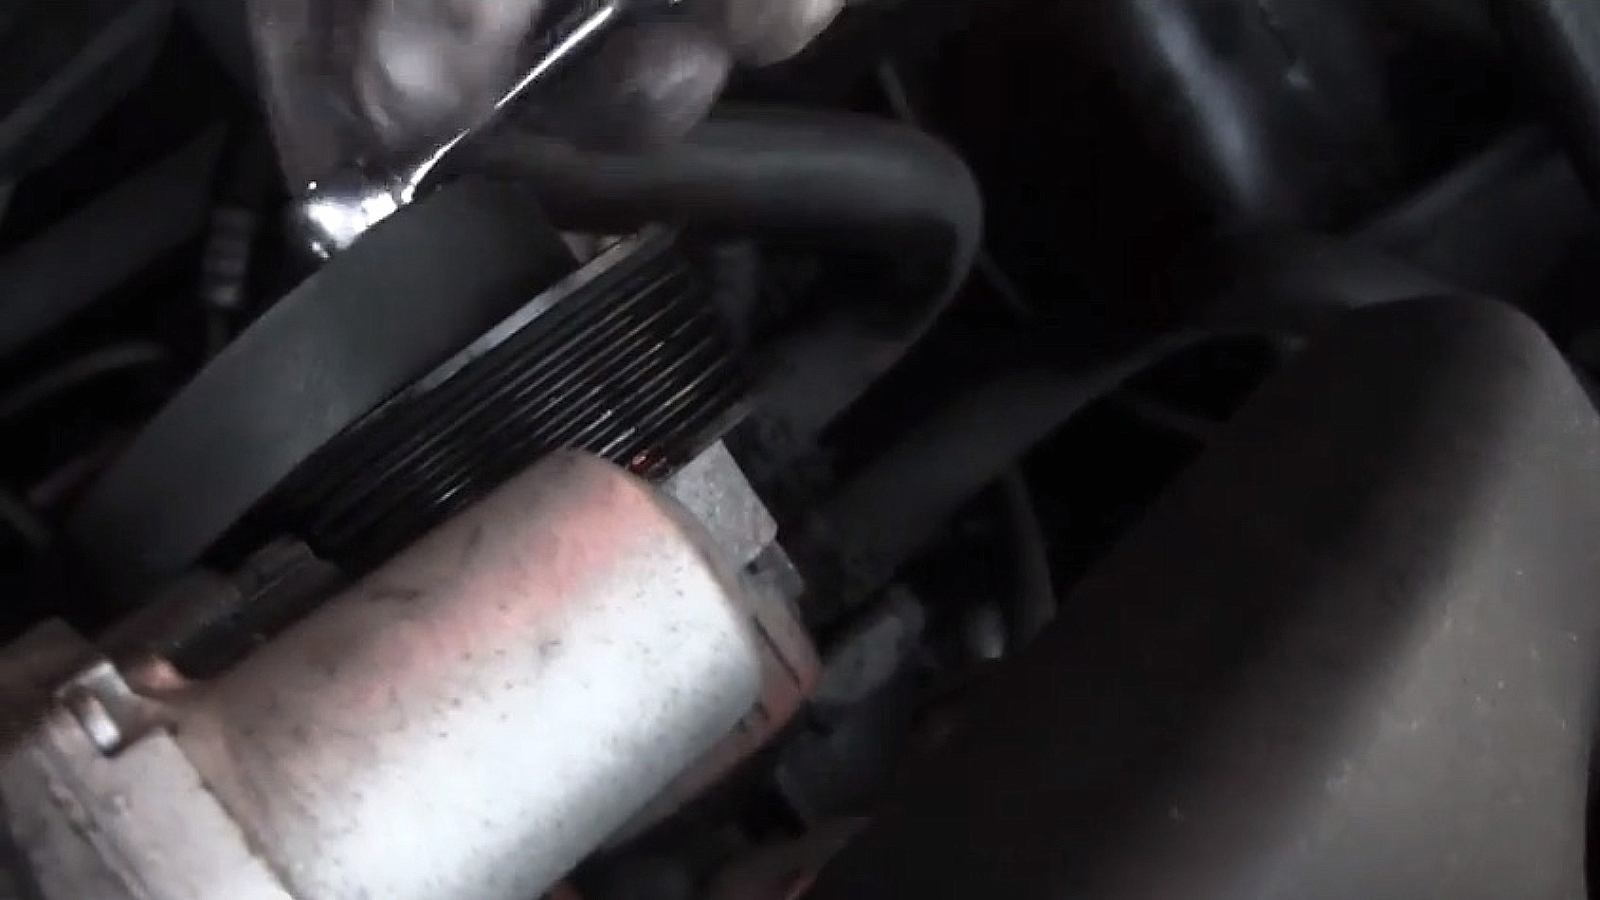
Step 8 – Unbolt the water pump six attachment bolts
These bolts are tightened to 22 lb-ft, and can be removed with a quarter-inch socket wrench, which helps in this very tight space.

Once all of the bolts have been removed, pull the water pump out of the engine compartment and set it aside. Save the six bolts.

Step 9 – Clean the contact surface on the engine block
Cleaning off the area where the old gasket sealed the water pump is important in order to establish an ideal seal between the metal surfaces of the new water pump and the engine block. Use a razor blade and rag.

Step 10 – Prepare the water pump for installation
The new water pump has both gaskets located and held in place by the inserted bolt threads. Three bolts hold each gasket in place.

Step 11 – Finger tighten the bolts to seat the pump down on the gaskets
Put the new water pump in place and finger tighten the bolts.

Step 12 – Tighten the bolts to 11 lb-ft, then 22 lb-ft
Alternate bolt tightening using an even and odd pattern. Because a torque wrench wouldn’t fit into this tight space, the bolts are tightened in two stages: the first stage gets all the bolts equally tight, and the second stage is to finish tightening them to what is perceived to be how tight the bolts were when removed.

Pro Tip
While the bolts attaching the water pump should be replaced with a torque wrench to the proper setting, there isn’t enough room to get at these bolt heads with a typical torque wrench without removing the fan shroud assembly, at the very least.
Step 13 – Reattach the two heater hoses
Reattach the two heater hoses to the water pump, reusing the spring clamps taken off the original pump. Hose clamp pliers, or even a tool such as needle nose vice grips, can be useful for this step.

Step 14 – Reattach the lower radiator hose
Reattach the lower radiator hose to the nozzle on the water pump using the worm-screw clamp you removed from the original pump. You will need an extension on your socket wrench.

Step 15 – Re-install the tensioner
If you kept the belt in place, then re-installing the tensioner is very straightforward. Alternate tightening the two bolts with the 15mm socket, returning them to the same condition as you found them.

Use the socket wrench to push the spring-fed tensioner down, and slip the belt back over the pulley to its original position.

Step 16 – Reattach the upper radiator hose
Replace the upper radiator hose to the water pump with the worm-screw clamp used previously. Check that all hoses have been properly reattached.

Step 17 – Re-install the air box assembly
Reattach the worm-screw clamp that holds the MAF bellows to the throttle. Make sure nothing is obstructing the bottom of the bellows from seating properly.

Plug in the small hose connected to the MAF bellows, then the MAF sensor plug, making sure to replace the safety lock device.

Replace the slip-in retainer over the air cleaner.

Step 18 – Replace the coolant
Refill the coolant reservoir (also known as a recovery tank or surge tank). If the coolant that you drained out of the radiator appears to be rusty or dirty, do not reuse it. Refill the cooling system with a 50/50 mixture of new antifreeze and clean, distilled water. Turning the gallon container on its side makes it easier to get coolant in the tank and reduces the length of travel for the coolant, thus minimizing the creation of bubbles.

Get rid of your old coolant properly (it can be recycled, plus many reclamation centers will accept it). Do not dump it down a storm sewer as many municipalities forbid it being poured or flushed down a sanitary sewer.
Pro Tip
For coolant to be recycled, it must be transported in non-contaminated containers without other chemical substances, such as motor oil.
Step 19 – Temperature check
Run the car and turn the heater on high (about 90 degrees).

The windows should steam up. The coolant moving through the heater core ensures that the whole system is flowing. Doing this helps to eliminates any air bubbles. If you don’t feel hot air coming out of the HVAC vents, then your coolant system isn’t full.

In the following video, the car’s temperature goes down to 205 degrees during the test drive, and ultimately goes down and stays at around 203 degrees.
Featured Video: How to Replace a Water Pump on a 2005 Corvette
Related Discussion
- Water Pump Replacement - CorvetteForum.com