C6 Corvette: The 72-Cent Modification
Use this 72 cents modification to change up the ambient lighting in your C6 Corvette. It's just as simple as changing a light bulb, literally.
This article applies to the C6 Corvette (2005-2013).
While driving at night, you may have noticed an orange LED light just bright enough to light up your center console. It's very dull and barely noticeable. While some people don't like the color, others wish it was brighter. For anyone who wants to change it, this a how-to guide for you. It is one of the simplest and cheapest modifications you can do.

Materials Needed
- 5mm through-hole LED light bulb
- Replacement resistor (optional)
- T15 Torx screwdriver
- Flat head screwdriver
- Wire cutters
Step 1 – Select an LED bulb
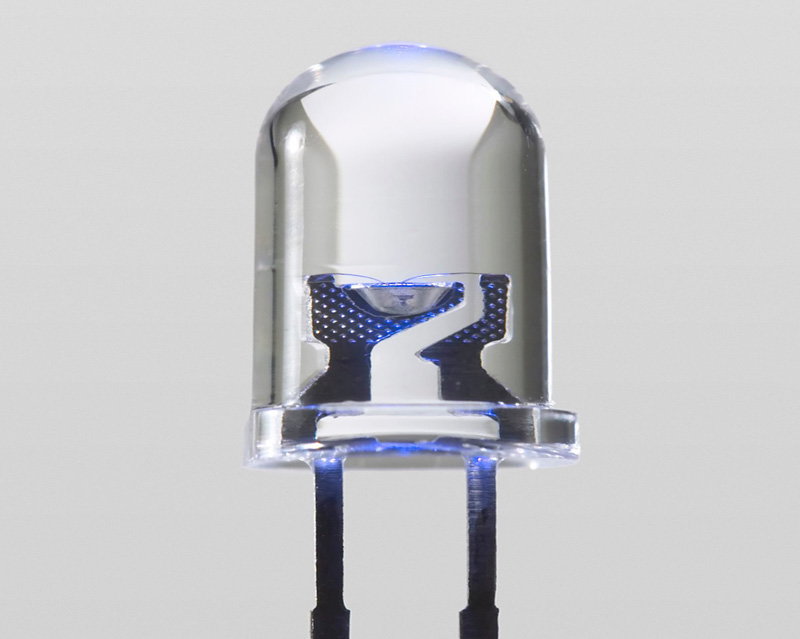
Since you are modifying your car, you'll want to take the time to pick out the right LED for the job. You'll want a small 5mm through-hole LED bulb. They are inexpensive and you can purchase them online or at a store. Pick any color that you believe will look good.

Step 2 – Remove the passenger side visor bracket
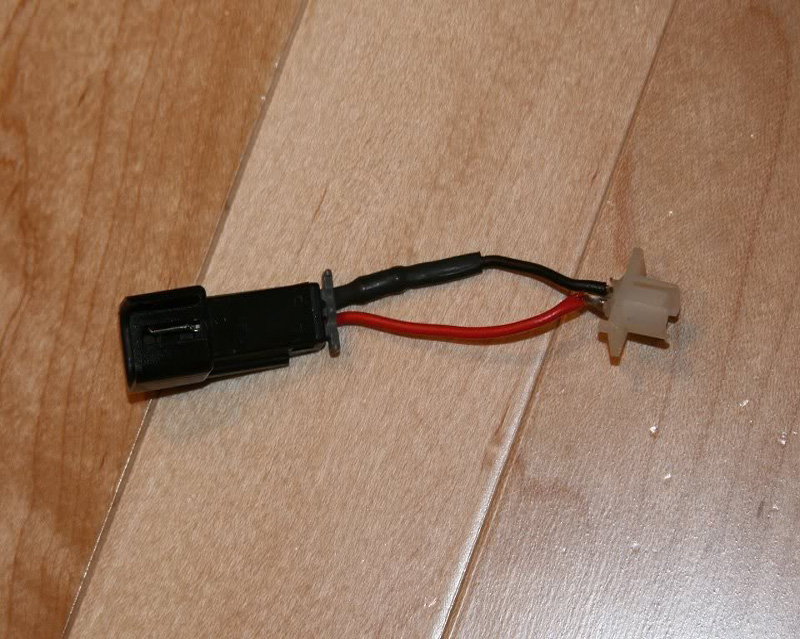
Move the passenger's side visor out of the way and use your T15 Torx screwdriver to remove the single screw on the bracket. Set the screw aside. Pull out the bracket, but don't yank on it. Let it hang on the wires. Unless you want to work on the wiring, you don't need to remove the black connector inside the car.
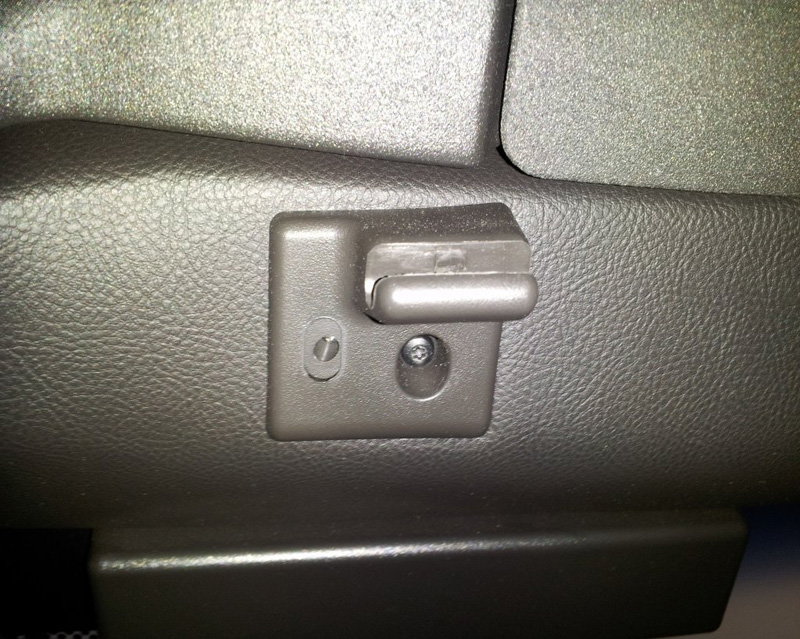
Step 3 – Pull out the LED socket from the bracket
You'll see a white socket on the inside of the bracket, which is connected to all the wires. You can pull the socket out from the bracket by pulling on the tabs that hold it in place. Be careful to not damage the socket or the wires.
Step 4 – Put in the new LED bulb
Pull out the old LED bulb using your thumb and forefinger. Then, use your wire cutters to cut the leads of the new LED bulb, so they are the same length as the old LED bulb. To put the new LED bulb in the socket correctly, connect the anode to the connector with the red wire. To identify the anode, look closely at the LED bulb and look for an arrow-like shape. The lead connected to the arrow is the anode.
Step 5 – Test the light and re-install
Turn on your car's headlights to make sure that the new LED bulb is working. If not, you may have put it in wrong and just need to reverse the leads you plugged in. If that is not the case, then try a different LED bulb. Once you've made certain it's all working, put the LED socket back into the visor bracket and screw it back in.
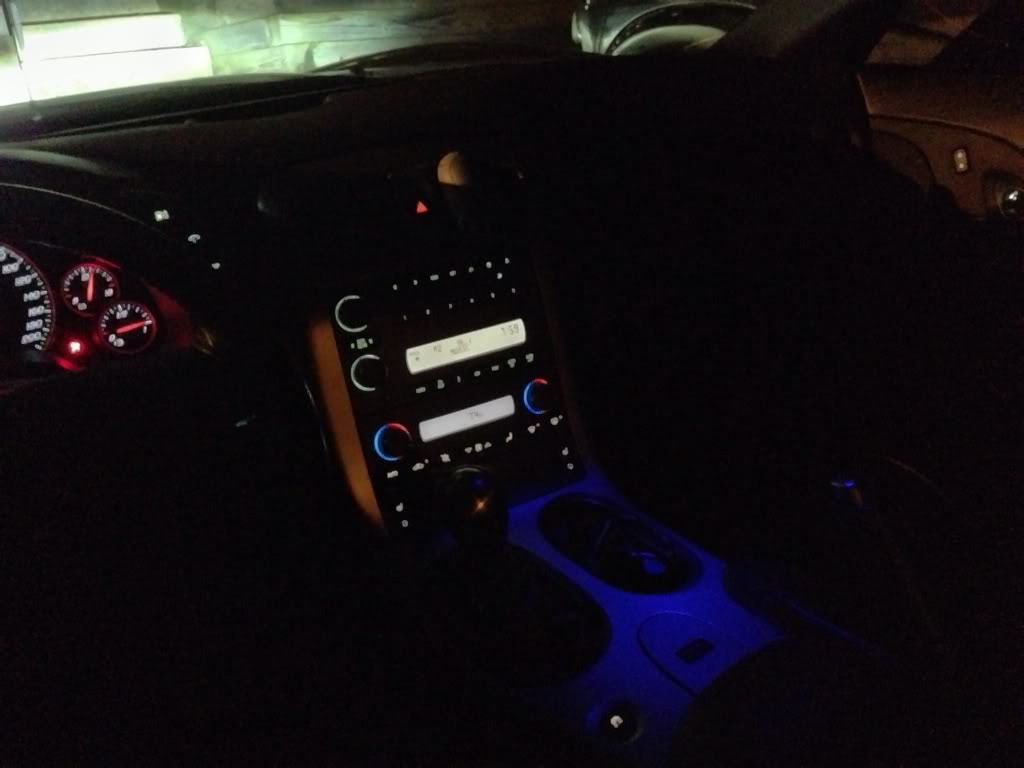
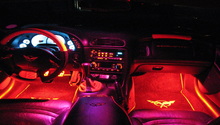
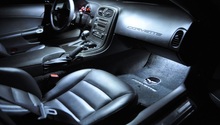
Figure 5. Center console lit by blue LED bulb. 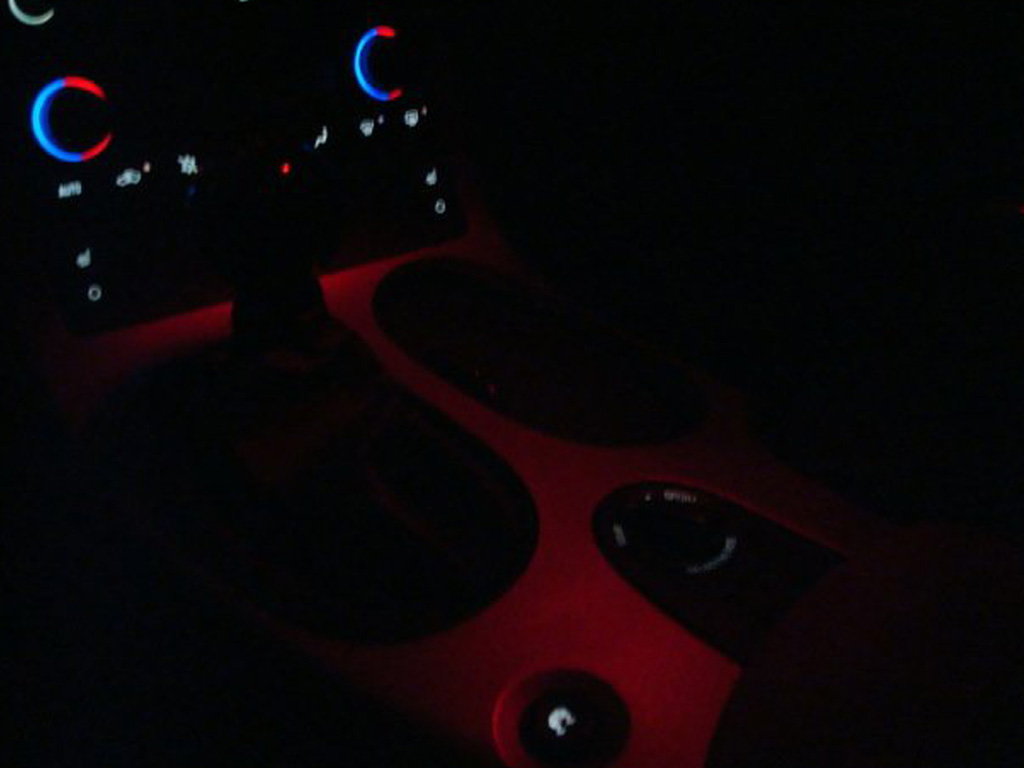
Figure 6. Center console lit by red LED bulb.
Pro Tip
If you find that the LED bulb you've installed is too dim, you can exchange the resistor for one with a lower OHM rating. You can identify the resistor as that little black bulging wire. This will require you to remove the black connector from the car using a flat head screwdriver. Then, you will have to cut out the old resistor and solder on the new one.
Related Discussions and Site
- Pretty Cool 72-Cent Mod - CorvetteForum.com
- Replacing Ambience Light With Brighter LED - CorvetteForum.com
- How to Change the Color of the Accent LED in the C6 Corvette - 101CorvetteProjects.com