Corvette: How to Black Out Your Headlight
Here is how to use a blackout kit to black out your headlights and give it a whole new look.
This article applies to the C5 Corvette (1997-2004), C6 Corvette (2005-2013), and C7 Corvette (2014-current).
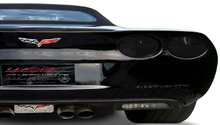
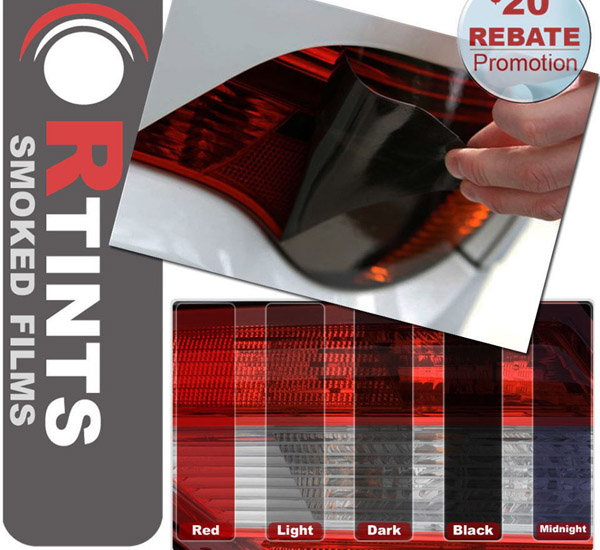
The Corvette by its stealth, streamlined look is manufactured to stand out. So, it's only natural that some owners love to black out the headlights to raise the appeal of their Corvette while cruising around with it, especially at night. The various options of blacking out headlights include covering or spray painting. But in some states, there are legal restrictions against spray painting due to safety. Also, in some states it is illegal to black out your headlights, tail lights, or reflectors, so do some research before continuing. This procedural breakdown outlines how to black out the C6 Corvette headlights, with detachable blackout kits, plus costs and level of skill needed. Depending on the blackout kit, this could go between $40 to $1,800.

Materials Needed
- Hair dryer
- Microfiber towel
- Razor blade
- Squeegee
- Blackout kit
- Spray bottle with water
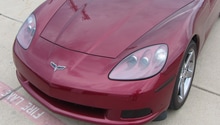
Step 1 – Clean the headlight
Clean the headlight with soapy water. After it dries, spray with clean water. Spraying makes the blackout kit easier to stick to the headlights. Most blackout kits are made of premium molded acrylic and are easy to manipulate with your hands. The most popular blackout kits for Corvette owners are Lamin-X and Headlight Armor. Each of those kits come in different colors.
Step 2 – Set the kit on the headlight
Place your blackout kit on the moist surface of the sprayed headlight. Most brands of blackout kits have adhesive and will stick to the Corvette's headlight, but others (like RPI Designs) use velcro.
Warning
If you are using a RPI Designs blackout kit, don't install with the lights on. Intense headlight heat can cause the plastic lights to crack.
Step 3 – Squeeze out the water
With the tiny squeegee, squeeze the water trapped under the blackout kit by moving it around the headlight. Move the squeegee from one end of the headlight to another until the water trapped is removed. While gliding the squeegee around the headlight, you can use a hair dryer to dry the trapped moisture. Lastly, wrap the squeegee with a microfiber towel to press the blackout kit to the headlight edges, while passing the hair dryer over those edges.
Related Discussion and Article
- Blackout Kits - CorvetteForum.com
- How to Install Acrylic Rear Blackout Kit - CorvetteForum.com