Corvette: How to Black Out Your Tail Lights
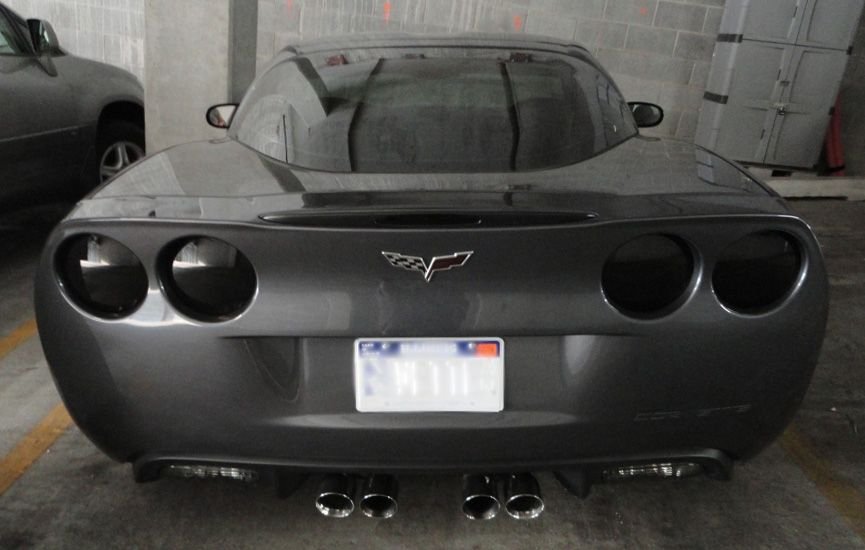
Black outs are a popular option to turn up the menacing looks of the Corvette.
This article applies to the C5, C6 and C7 Corvette (1997-current).
Blacked-out tail lights can help you create a distinctive look that makes your 'Vette stand out. There are several ways to black out your tail lights, including spray on tint, film and covers. But which one is right for you particular needs? Here's how you can create that look with minimal cost and effort.
Much like window tint, the legality of tinted taillights varies a lot depending on where you live. In many states, darkened taillights are illegal altogether and will net you a pretty nice ticket if you decide to ignore the law. Be sure and check the laws in your area before you start sanding or swapping out parts.

Materials Needed
- VHT Night-Shades
- Wax and grease remover
- Clear coat
- 800/1000/2000 grit sandpaper
- LINT free towel or microfiber towel
- T15 torque bit
- Orbital polisher (optional but strongly recommend)
- Rubbing compound/polish/wax
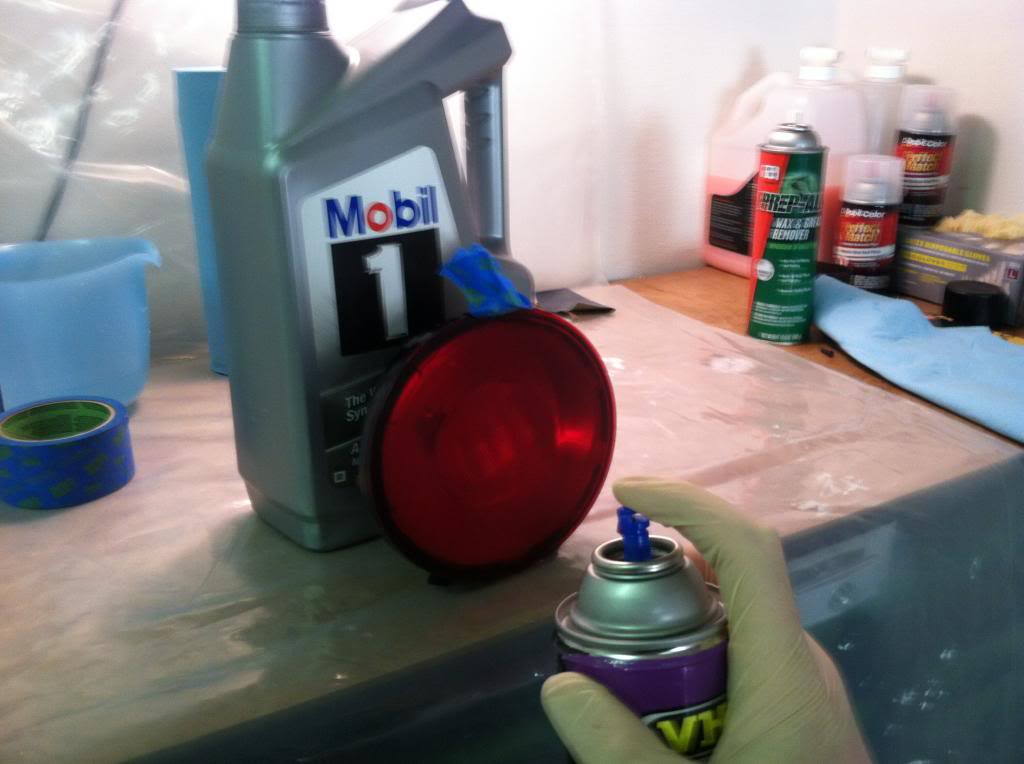
Step 1 – Remove tail lights and prep surface
By far the most popular method of blacking out tail lights is to use spray on tint to darken the existing lenses. The advantage here is the ability to go as dark or light as you like. To get started, use a T15 bit to remove the rear tail lights and twist the bulb to free them from the housings. Refer to the related article below for help removing your tail lights.
Once removed, begin light sanding the tail lights with 800 grit sandpaper and water. Gradually move up to 1000 grit, then 2000 grit, and be sure and use plenty of water while sanding. Once finished, clean the surface well with wax/grease remover.

(Related Article: How to Replace Tail Lights and Side Lights - CorvetteForum.com)
Step 2 – Apply Night-Shade and clear coat
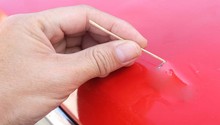
Apply the first coat of VHT Night-Shade, moving across the lens at a medium speed. Let it dry for 30 minutes. Apply subsequent coats a little faster, as applying them slowly will make the lens darker. Repeat the steps until you achieve the desired level of darkness, and let dry for 30 minutes. Once dry, sand with 2000 grit sandpaper. Clean the lens well, then spray with 7-12 coats of clear, letting it dry for 15 minutes in between coats. Once the last coat is applied, let it sit for at least an hour in the sun.
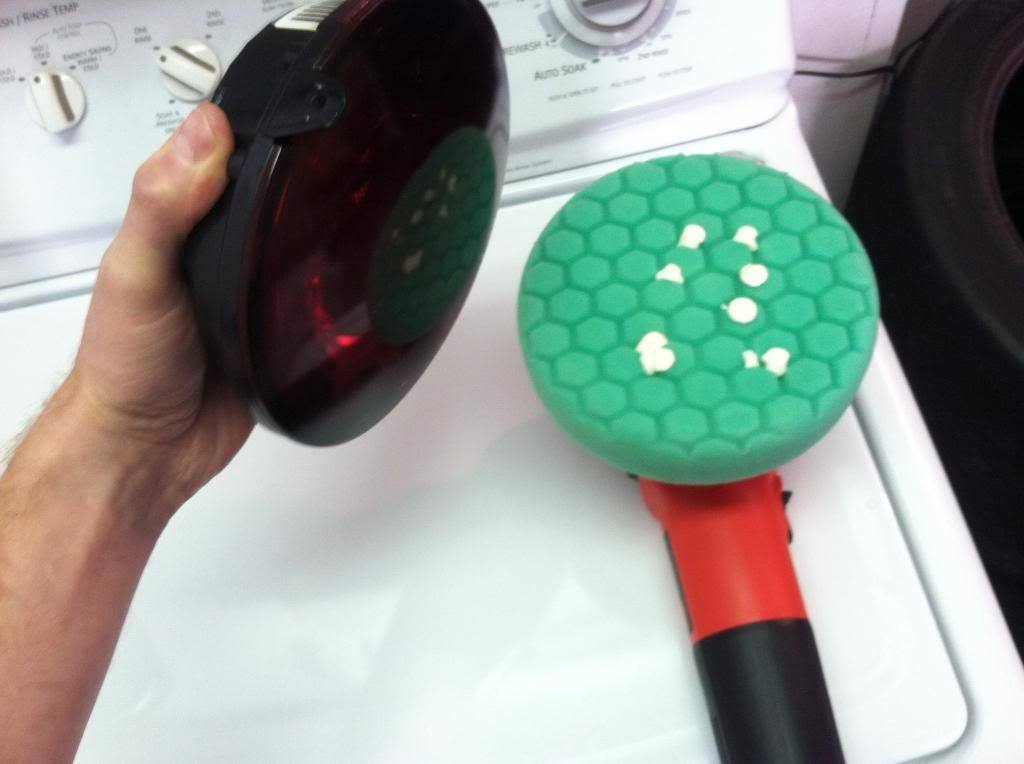
Step 3 – Polish tail lights
Once the lights are dry, it's time for some more sanding. This time, repeat the 800/1000/2000 sanding using lighter and smaller strokes. Once finished, apply a liberal amount of rubbing compound to your polisher. Work it in on the low setting, then move up to a 5 or 6. Then, move on to waxing the lenses to get the finer scratches out.
Other Options: Tinted Lenses and Covers
If you don't want to go to the trouble of spraying your lenses, there are other options available. The simplest is to purchase a set of tail light covers, which are removable and relatively inexpensive. Or, you could have your lenses tinted or purchase a set that are already tinted. Just beware of those you may find on auction sites, as they have been known to be of poor quality. Tint film such as Lamin-X is also a pretty inexpensive option to consider.
Related Discussions
- My DIY Smoked Tail Lights - CorvetteForum.com
- Tail Light Cover Reviews - CorvetteForum.com
- Tail Light Tint: Legal or Not - CorvetteForum.com