Corvette: How to Install Carbon Fiber Wheel Center Caps
There's really no need to pay someone else to install wheel center caps. You'll likely pay twice as much as you would doing it yourself. It's simple and easy, and even the most novice of car owners can do the job.
This article applies to the C5, C6 and C7 Corvette (1997-current).
Installing carbon fiber wheel center caps adds some style to stock wheels and spruces them up quite a bit. Making your own is one of the easiest DIY projects to undertake. If you're willing to spend a little extra money, you can buy pre-wrapped carbon fiber vinyl wheel caps to replace your current ones. However, making your own vinyl wheel caps will give you the opportunity to customize your ride and help distinguish your 'Vette from the pack.

Materials Needed
- Replacement wheel center caps
- Sheet of carbon fiber vinyl
- Flathead screwdriver
- Pliers
- Velcro
- Hairdryer
- Scissors
- Rubbing alcohol
Step 1 – Remove current wheel center caps
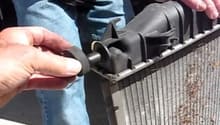
Wipe the center cap with rubbing alcohol and let it dry. Place two small pieces of Velcro on the center cap, connecting them to form a small tab that extends out from the cap. Use pliers to pull on the tab and remove the cap. Repeat for each of the caps you plan on replacing.
Pro Tip
This is the safest way to remove the center caps without damaging your wheel, but removing them with screwdrivers will also work.

Figure 1. Create a Velcro tab to pull out the wheel center cap. 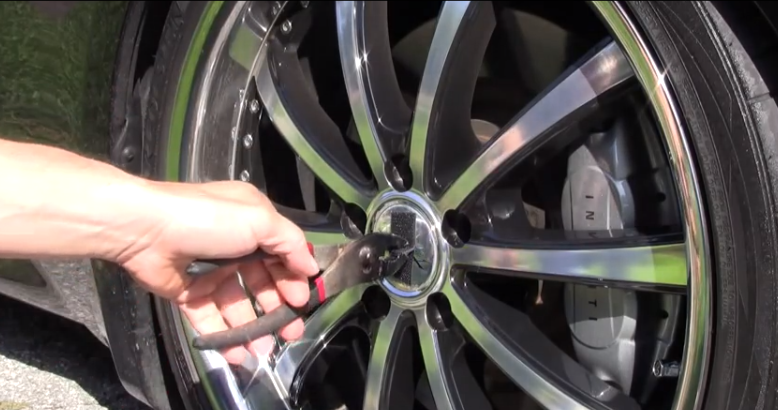
Figure 2. Use pliers to pull on the Velcro tab.
Featured Video: Wheel Center Cap Removal
Step 2 – Wrap the cap with carbon fiber vinyl
Cut out a piece of carbon fiber vinyl large enough to fully cover the new center cap. Wrap the center cap with the carbon fiber vinyl and press down along the edges of the cap. Use a hairdryer on low heat to help the carbon fiber vinyl attach more firmly.
Pro Tip
You can find a deal on carbon fiber vinyl online, but you may end up with more than you'll ever use. Make sure that the vinyl is weatherproof or water-resistant.
Step 3 – Punch slots along edges of cap
Use a flathead screwdriver to punch the vinyl into the slots along the edge of the cap. These slots should align with the new logos or emblems.

Step 4 – Press the emblem or logo into place
Snap the emblem or logo into place and make sure it aligns with the slots. If you are not putting anything on top of the carbon fiber, skip this step.

Figure 4. Buy emblems or logos that fit. 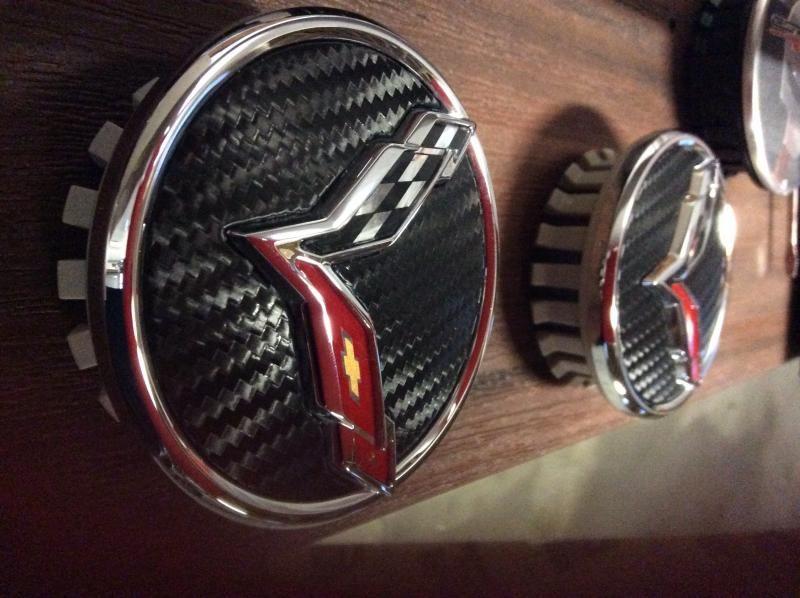
Figure 5. The logos should snap right into place.
Step 5 – Replace the center caps
Push the center cap back into place. You may need to wiggle it until its lip catches. Start with one side of the cap and push it into place, then move to the other side. Take your time so as not to damage your wheel.

Related Discussions
- Installing Carbon Fiber Wheel Center Caps - CorvetteForum.com
- Wheel Center Cap Removal Question - CorvetteForum.com