Corvette: How to Jack Up Your Vette
There are many jack points on your Corvette. Here's a guide for raising your car on the correct jacking locations.
This article applies to the Corvette C5 (1997-2004), C6 (2005-2013), and C7 (2014-2015).
Choosing the best procedure and support locations to lift your Corvette depends entirely on the project at hand. Of course, you will need to consider work space and safety for you as well as your car. Anytime your are jacking up your car, safety is of utmost importance. This guide will help you to safely jack up your Corvette on the correct jacking locations. Always use a flat hard surface. Put your vehicle in Park (automatic) or First/Reverse (manual) and set the parking brake.

Materials Needed
- 2-ton floor jack(s) with a 2.5" saddle/pad
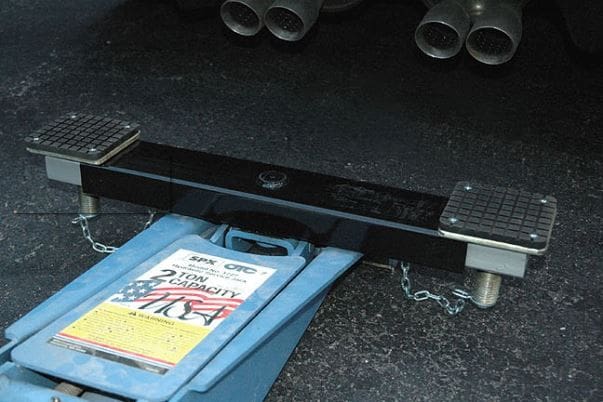
- Cross beam adapter(s)
- 2-ton jack stands (2-4)
- Jack/lift pucks (2-4)
Step 1 – Chock the front wheels
Before lifting the vehicle, it's important to "chock" the wheels on the opposite end. Basically, this means slipping some kind of blockage behind the tires to prevent the vehicle from rolling. People frequently use whatever they can get their hands on: cinder blocks, chunks of wood, or bricks are all fair game. If you don't have access to any of these, chocks can be bought from any auto parts store.
Step 2 – Prepare the floor jack
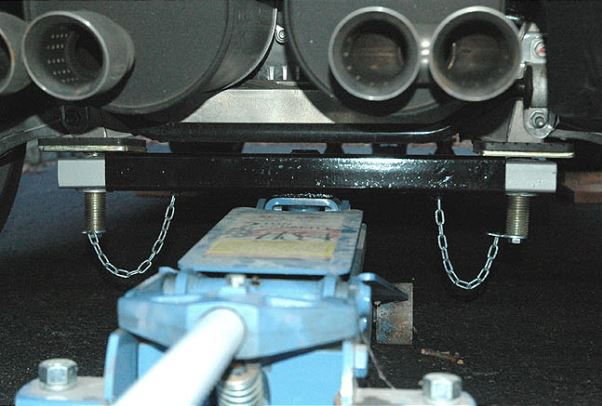
Attach a cross beam adapter to your floor jack. A cross beam adapter allows you to jack up the vehicle at the exact support locations. Using a floor jack alone or using another material is dangerous. It may also cause damage to other vehicle components because the load is being applied to areas other than the proper support locations. Never directly jack your vehicle from the center of this cross beam adapter.
Step 3 – Position the floor jack under the cross beam adaptor
Make sure that the pads of the adapter will be contacting the support locations as you raise the jack.
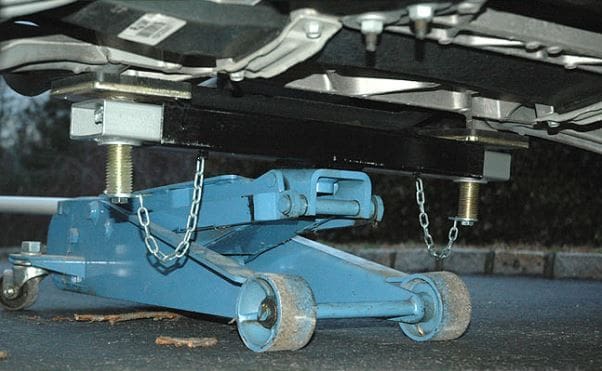
Step 4 – Jack up the car
Pay attention as you slowly and carefully raise the vehicle. Make sure that the pads are contacting the correct support areas and that no other components are being compromised. Stop when you have reached a height that allows for the introduction of jack stands.
Step 5 – Place jack stands
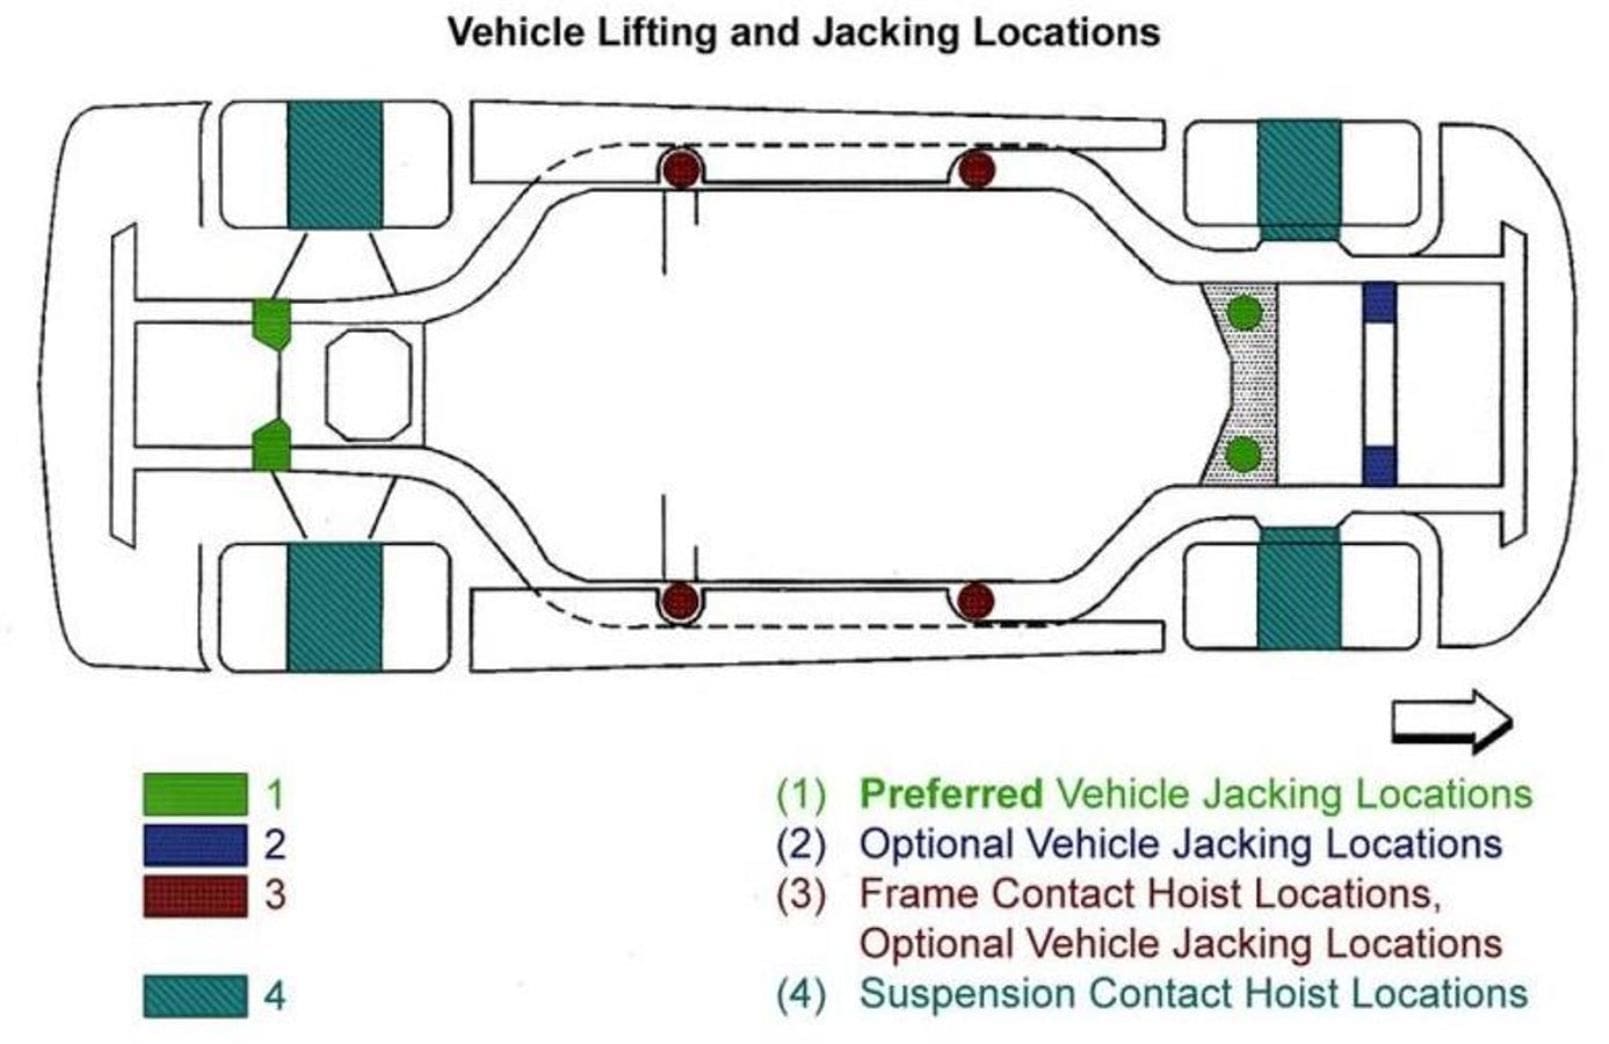
Jack stand locations, which are under the cross beam adapter, should directly correspond with the preferred support locations currently aligned with the adapter pads.
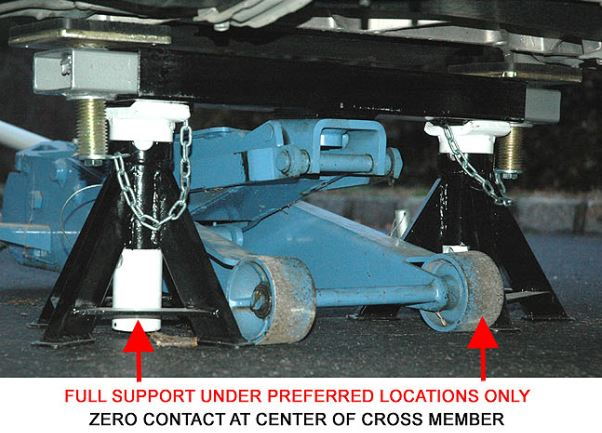
Pro Tip
At this time you can also place jack stands on the two frame contact locations, which are slightly forward of the rear wheels. If you use these locations, be sure to use lift/jack pucks at each location.
Step 6 – Rest the vehicle on the stands
Carefully and slowly lower the floor jack just enough, so that the jack stands bear the weight of the vehicle.
Pro Tip
Keep the floor jack attached, in place and in contact with the adapter assembly for added safety.
Related Discussion
- Floor Jack Locations - CorvetteForum.com