This article applies to the C5, C6, and C7 Corvette (1997-current).
Bringing some color into the intake manifold of your Corvette is simple (even a novice could do the job in about an hour). Follow this easy-to-complete instructions and you won't need to bother with an expensive mechanic. While it is suggested opting for a dynamic color (such as red or black), any color that complements the sleek, muscular form of your Corvette will suffice. This guide will also teach you how to properly prepare the intake manifold beforehand to avoid pesky blemishes in the finished result.
Materials Needed
Lacquer thinner
Steel wool or wire brush
Electric grinder (optional)
Rust-Oleum paint, primer and clear coat spray paint
Sandpaper
Step 1 – Remove the intake manifold cover
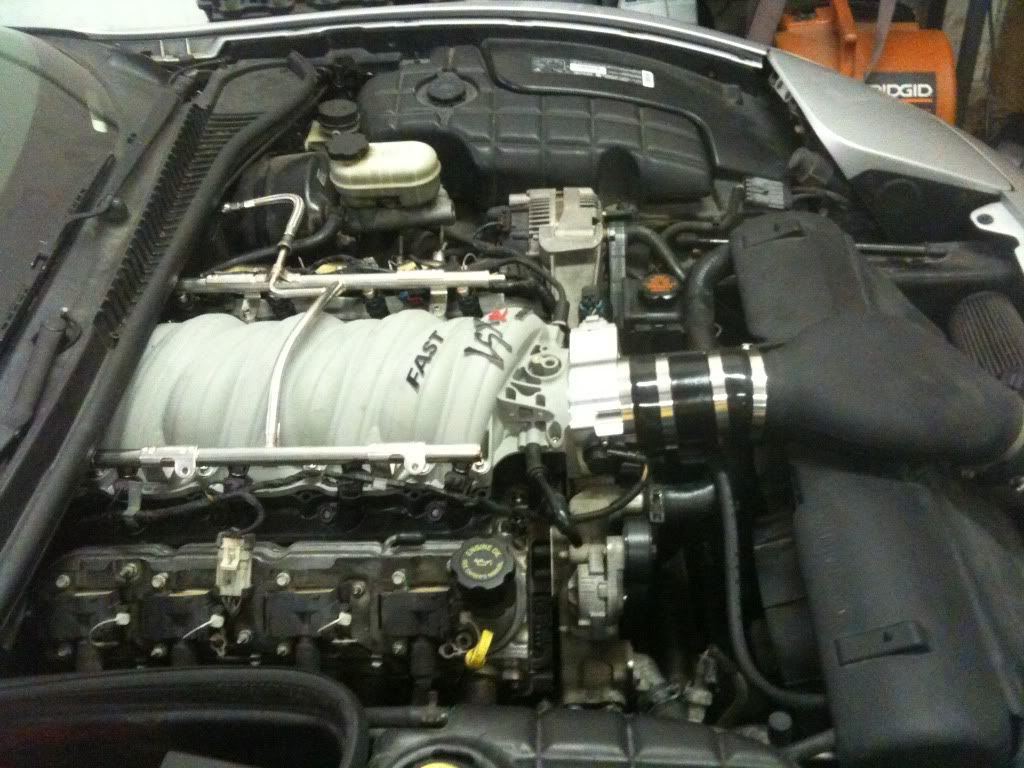
Grab the manifold cover by hand and lift it up, taking special care to disengage the grommets from the studs. Undo the manifold's absolute pressure sensor electrical connector and remove the engine wiring harness by detaching it from the top of the cover. Go through and disengage all fasteners, cables, connectors, tubes and bolts one by one (see owner's manual). Follow each moving part from end to end, detaching each end as you go. Be sure to remove the air cleaner outlet duct located at the top of the manifold (it is hard to miss).
After removing the intake manifold, set it on a flat surface such as a workman's table. The cement floor of your garage will also work; however, you may want to protect the cement from paint using a towel or large work cloth.
Figure 1. Remove the intake manifold.
Step 2 – Degrease and clean the intake manifold
Scrub the intake manifold's entire design using a wire brush or steel wool. Apply pressure as needed to remove coated areas. Move from one side of the intake manifold to the next using an even, circular motion. Apply lacquer thinner if necessary.
Pro Tip
An electric grinder can also help to remove debris.
Step 3 – Prepare the intake manifold
Sand the intake manifold using a 400 grit or 600 grit generic scratch pad, taking special care to reach between small crevasses and hard-to-reach areas.
Step 4 – Apply Rust-Oleum spray primer
Apply Rust-Oleum as directed, which should involve doing a little more than sweeping an even coat of primer over the entire intake manifold. Then, allow the surface to dry for up to one hour. Next, apply a second coat and again allow the intake manifold to completely dry before proceeding to the next step.
Step 5 – Apply Rust-Oleum spray paint
Apply as directed. Again, cover the complete surface of the intake manifold and allow the paint to dry for one hour (or as directed). Apply two to three coats for a rich, professional quality finish.
Figure 2. Rust-Oleum paint colors.
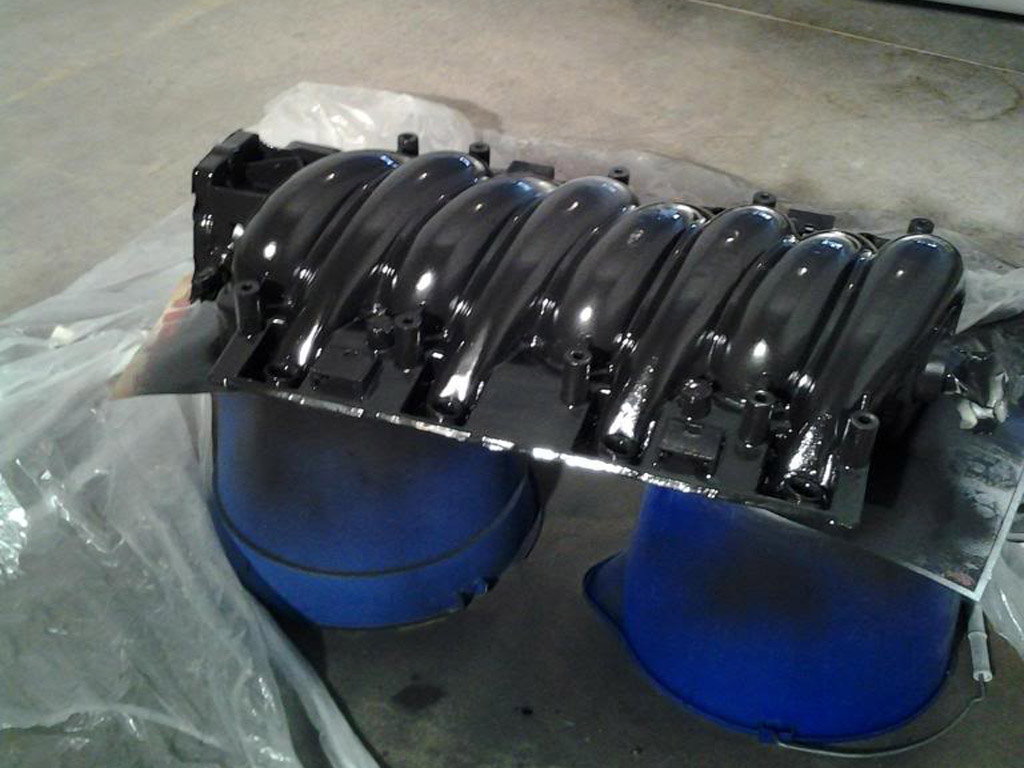
Step 6 – Finish with a clear coat spray paint
Apply about four coats of clear coat spray paint (as directed) to achieve a smooth, even finish. Allow each coat to dry completely before applying the next coat.
Figure 3. This is a fully refreshed intake manifold ready to be re-installed.
How to Install Intake Manifold
Wanna add about 30 horses under your hood?
This article applies to the C5 Corvette (1997-2004), C6 Corvette (2005-2013), and C7 Corvette (2014-2015).
No matter how screaming your ...
How to Remove Your Throttle Body
Toque (CorvetteForum user)
Whether you are replacing your intake manifold or in a hurry to have your throttle body ported, read how to remove the throttle body here.
This article ...
How to Replace Oil Pressure Sensor
The oil pressure sensor is prone to failing; save a lot of money by replacing it yourself.
This article applies to the C5, C6, and C7 Corvette (1997-current).
The oil pressure ...
How to Install Throttle Body Spacer
Want some cheap thrills with an easy install?
This article applies to the C6 Corvette (2005-2013).
Throttle body spacers are a simple modification aimed at optimizing air flow ...
How to Paint Fuel Rail Covers and Fluid Tanks
An easy DIY job for most, you can paint the fuel rail covers and fluid tanks in your Corvette using just a few simple tools.
This article applies to the C5, C6 and C7 ...
How to Install Headers and Exhaust
Add a little thunder and horsepower in less time than you think.
This article applies to the C5, C6, and C7 Corvette (2005-2013).
Many Corvette owners may think that they have to ...