Corvette: How to Replace Door Sill Trim
One of the most popular interior upgrades in the Corvette is replacing the door sill trim. It is an easy modification, yet it adds a lot to the look of the interior.
This article applies to the C5, C6 and C7 Corvette (1997-current).
Removing and replacing your factory door sill trim can help you spruce up and customize the interior of your car. For example, if your interior is black but your sill trim is silver, you may want to install black sill trim. You also may want to replace your door sill trim if you're installing a door sill plate that is larger than the one that came with your ride. A larger plate may not go with your factory door sill trim. Door sill trim is a finishing touch that can add a lot without costing much.

Materials Needed
- Flathead screwdriver
- Separator (optional)
- Painter's tape
Cost of the new door trim varies depending on its size and material. It can be found for as little as $50 a pair, or you can spend more than $300. How much you'll spend depends on your preference and taste. In terms of professional cost, this includes the estimated cost of parts plus labor.
Step 1 – Prepare to remove door sill trim
Open the door on the side you're starting on. Cover the metal part of car near the door sill trim with painter's tape. This will help protect your car while you're removing and replacing the door sill trim. You can remove and replace door sill trim without using painter's tape, but you run the risk of accidentally scratching or otherwise damaging your car.
Step 2 – Release the spring clips
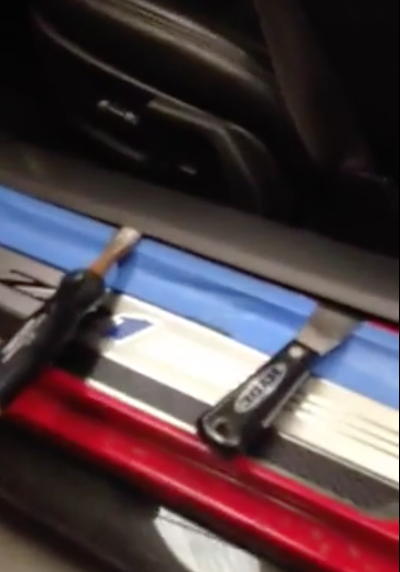
Use a flathead screwdriver or other type of separator to remove the existing door trim. Start at the righthand bottom side of the trim. Insert the flathead screwdriver or separator between the trim and your car and gently pry up. Do this along the bottom edge of the trim, lifting up as you move your screwdriver or separator along the bottom edge from right to left.

Figure 2. Begin at the right hand side of the trim and work your way to the left. 
Figure 3. Pressing the tool against the spring and lifting up will cause the spring to release.
Step 3 – Remove the door sill trim
Lift the trim up once you've released the spring clips. Set it aside.
Step 4 – Replace the door sill trim
Position the new door sill trim and begin pressing it into place at the left-hand side of the trim. You should hear the springs click into place. Make sure one clip is in place before moving to the next clip. End at the right-hand side of the trim.
Step 5 – Press firmly on new sill trim
Use the palm of your hands to press firmly on the new sill trim. This just helps make sure it and the spring clips are in place.

Step 6 – Repeat on other side of your car
Follow Steps 1-5 on the other side of your car to replace trim there.
Related Discussions and Videos
- How to Remove or Replace Door Sill Trim Plates - CorvetteForum.com
- How Do You Remove Driver Side Door Latch/Locking Mechanism - CorvetteForum.com
- How to Install 2014 Corvette Stingray Door Sill Overlays - YouTube.com
- Corvette C6 Door Sill Trim Removal - YouTube.com