Corvette: How to Wire Your Audio Amp
Installation of an amplifier in your Corvette isn't impossible. Take a glance at this general overview for amp wiring.
This article applies to the C5, C6 and C7 Corvette (1997-current).
One key component to most aftermarket set-ups is an amplifier. Installation of an aftermarket stereo in any car can be a daunting task. Depending on how far you want to take the installation and what you want to do, the process can take several hours. Below is a general breakdown of things to consider when getting ready to complete this installation.

Materials Needed
- Panel tool/Retaining clip remover
- Phillips and flat blade screwdriver
- Utility knife
- Electric drill and bits
- Wire stripper
- Socket and ratchet set
- Pliers
- Heat gun
- Heat shrink tubing
- Electrical tape
- Amplifier wiring kit
The tools listed above may not all be utilized; however, having them on hand just in case is a good idea. Also, don't forget that most amp kits will not come with stereo wiring, provided you are installing new speakers as well as the amp. You may also need power and ground wiring, RCA cables, and a remote turn-on lead.
Step 1 – Plan the amplifier location
Here are a few guidelines when you are planning the final location for your amplifier. The amp should be at least three feet from the receiver in order to avoid feedback noise from the electrical system. An amp can also interfere with AM/FM reception. Wherever you decide to mount it, do your best to give it a few inches of clearance so it can radiate heat. Make certain you leave enough space for the wiring connections and in order to adjust controls; this seems like an obvious comment, but it's easy to forget.
The biggest challenge with the Corvette is hiding the amp. Convertible owners have a built-in advantage, but coupe owners face an obvious challenge. The other thing to remember is being able to access a ground location. The Corvette is limited on ground locations, so keep that in mind as you plan out your installation.

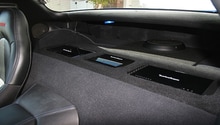
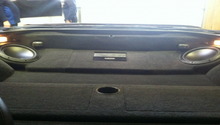
Figure 1a. A popular amplifier location. 
Figure 1b. Ampifier located behind driver's seat. 
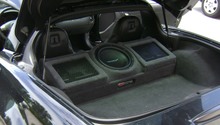
Figure 1c. Amplifier placed towards the back of the trunk.
Pro Tip
Whatever location you choose, make sure it is secure. The last thing you want is for it to come loose in the event of an accident and fly through the cabin and hit someone.
Step 2 – Power the amp
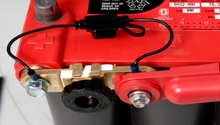
Getting power to your amp is job one after you have come to a decision on where you want it to be mounted. As many articles will explain, you should not simply "tap" the nearest power source. The amount of power necessary for the amp is too large, and the tapped wire will not provide what you need for proper functioning. That means you'll need to map out a path from your amp to the car battery. The most direct route would be best, but that may not be an option. Hopefully, the solution to mapping the power supply to the amp will not send you back to the drawing board on the location.

Step 3 – Ground the amp
Once you have the location and power figured out, you are going to need a suitable ground for your amp. Most people say that with the best spot is the factory ground on the B-pillar because it is easily accessible. Some people have been known to drill through the trunk and attach to the frame. Ideally, you want the ground wire to be as short as possible. Still, others have secured their ground to seat rail bolts. Making sure the ground is completely secure and not coming undone is job one with any location you choose.

Step 4 – Troubleshoot the amp
If your positive and your ground are properly connected, your amp should be ready to go. Turn it on, turn on the stereo, and test it out. Don't forget to enjoy your accomplishment!
Pro Tip
If you hear an alternator whine sound, you may need to put the ground loop isolator in line to kill it.
Related Discussions
- C6 Audio FAQ - CorvetteForum.com
- What Do I Need to Install an Amplifier? - CorvetteForum.com