When you click on links to various merchants on this site and make a purchase, this can result in this site earning a commission. Affiliate programs and affiliations include, but are not limited to, the eBay Partner Network.
Dan, I'm working at this with and with out the lock latch in an attempt to find a happy medium. I do not have any shims or a bolt at #2 because it's not an issue with gaps front to rear, more like just getting East and West edges to line up. With the pillar cover totally off the door bottom hits the sill before the top gets close to the inner edge of the lid. I have to lean on the door to twist it before those edges match. With the cover on the top holes that match the metal pillar are way off and the lid gap is pushed closed. If I push the metal toward center I can get those holes closer but they are still over 5/16" away from original. Right now I have the metal pillars parallel with each other so if I put a slight angle on the drivers side I get better results but I need to make sure the rag top brackets will not have a problem.
I'm looking at DUB and Steve's comments about modifying the pillar cover to get the outer match but the toughest match is that inside edge where the door and lid match. The closest I can get is a 1/4" difference and even at that the door is slammed shut and actually twisted! The lower edge of the door with the weather strip is hitting the sill and when I slam it shut the top will come in a little but will not line up with the lid. The inner curve of the lid seems to be a no-no to modify.
Pat
Pat,
UNLESS I AM MISTAKEN.....This is the first time I read that you have to force the door due to it having a twist in it..to get it to work....and if this door is thicker..as your wrote..WHERE is it thicker..BECAUSE some BOZO could have done bodywork on your door from the last accident and did not get it right...and you have a tweaked door due to their negligence.
If and when you start to shim out the door....I apply a layer of masking tape on the door and the jamb so I can close the door with my modeling clay that I have kneaded well ...and placed on the taped area...so when I close and open the door...I can see what kinda of gap I have to make sure the door weatherstripping will work...or if I need to apply some tricks to it to get it to seal.
ARE YOU ABSOLUTELY SURE that the rivets that hold the fiberglass to your doors steel inner structure and SOLID and CAN NOT MOVE or wiggle???? ESPECIALLY the solid rivets that are located on the FLAT surface of the doors structure where your door hinges go into the door itself. THIS IS REALLY IMPORTANT!!!!!!!!!!!!!!!!!!!!!!!!
This is not my time. I just typed a reply and added photos for the past 20 min and when I hit submit I was logged out, I logged in and the reply was gone.
While I was moving snow for hours on Tuesday I had time to wonder about the days when Corvettes were every day cars for some drivers and they actually plowed through this mess. I also wondered why I�m up here paying hi taxes and putting up with cold and snowy weather.
DUB, I see no signs of repair on the door and all rivets and fixtures are solid and appear to be factory originals. I�ve mentioned that the passenger side is fine so I removed the lock striker and pillar cover so that both sides are the same. Here are photos of each side with the doors lightly pushed against the sill without weather strip. I know the answer is somewhere, I just need to find it.
I know the answer is somewhere, I just need to find it.
You already have the answer. It is in post 177. Making it happen to achieve the 'given' is what you need to do to make that happen....which you replied on in a later post...I believe. The 'B' pillar area.
But I do not believe you answered one of my questions. Read you POST #174 ( fourth paragraph...and then answer my question in POST #177 third paragraph. IS it 'thicker' or 'wider'. Thicker can make a difference if it is that much....and I mean that 1/4" is a lot when you are talking about panel thickness.
If you are certain that the solid aluminum rivets DO NOT MOVE when you extend the door open or try to pick up on it slightly...then all is good....BUT I can tell you that I encounter MANY 1963-1967 doors whose rivets are working loose.
Number 1 body mount is tight. Correct???? I know you wrote that the Number 2 is loose.
You are aware that the hinge post area can move...thus changing its angle in regard to the bottom of the door being IN or OUT....even though the hinge post is straight. This is not a common practice I employ...but it has a lot to do with what has happened with the car in the past. Some cars required being forced to a position due to previous damage....because the cowl/plenum area is actually weakened due to a previous impact.
I will check those other other areas on the door but something you said about the hinge pillar has me wondering if I ever checked to see if it may have suffered from being hit.
The A pillar cover had no damage but it does not mean it's not bent. Even with the heat on the shop is cool so I couldn't get my helper to assist taking measurements. I will get that info soon.
Question to DUB and everyone else who might be following. Have you ever experienced a warped door? I'm looking for DUBs answers today but just wanted to throw that question out.
This body sat off the chassis draped over wooden pallets for years experiencing all 4 seasons!
YES I have.....and it is possible that it is warped....but in my mind....I can believe that the steel portion of the door where the hinges bolt to...can be off a bit due to an impact at the rear of the door.
The doors are fairly light....and depending on how it was stored....there is not a lot of weight that can cause for the entire door to get a twist in it....I think it may be located at the hinge mounting area...which is why I mentioned checking all the rivets. Also depends on how HOT the door got while being stored.
I wrote in POST # 181 ( second paragraph) which can be a process that you might need to employ and NOT overlook.
'Thinking' that the shims that were used from the factory are going to work in the same manner after an accident is a foolish thought.
Knowing that you have a bonding flange right by the door so the fender can be bonded at the door gap area...you can easily check to see what happens if you do some shimming....and that is ALSO taking into account what the passenger door look like. ESPECIALLY at the lower front corner in relation to the rocker panel area.
AND...If I read what you wrote in the last post..IF the BODY was set on pallets and covered for years.....YES...you can have an issue....to some degree. And as you are finding out...an 1/8" here and there can change how things fit.
Pat - if after some further study you decide the Driver door is a little warped you may be able to deal with that by mounting it and solidly blocking it against the sill at the lower - rear edge. Then run a tie down strap all the way around the rear of it, across to the door sill on the other side and under the body. Crank it down until the top rear is pulled in just a bit past where it needs to be at the top of the rear fender and then start applying moderate heat to both inside and outside skins. Do a few heat cycles and then just let it sit for a week or so with the strap around it. As you found out, fiberglass does respond to heat.
You might be able to lay the doors down, interior side down on a flat table and comparing one to the other, see if it looks a bit warped from corner to corner. Probably hard to pick up something conclusively.
Even if you can't conclusively determine the door is warped, tweaking it with a strap and heat may be necessary to get everything to fit togehter and line up.
I had my daughter help and here�s the evidence so far but the jury is still out.
All these measurements were taken in a criss crossed pattern. Windshield frame is perfect. A pillars themselves are perfect. Top and bottom hinge bolts are off by 3/16� showing that the top of the drivers A pillar is leaning out but that contradicts the perfect A pillar taken from the upper and lower punch outs on the inside. Lower passenger hinge bolt to top of drivers W/S frame also indicates that side could be leaning out by 1/4� , also a contradiction but at the risk of changing the more important W/S frame I may avoid any changes.
The rear clip is perfect so I know it is not that. The doors show that the driver�s top rear is outbound by 3/4�. We put the hard top on the car and that is useless. It is so twisted out of shape that there is a 3� gap between the top and the deck lid on the pass side but I was able to get it to pin and lock onto the W/S frame.
Dan, I will take your suggestion to remove the doors and set them up for comparison. If I see signs of warping I�ll go ahead and strap the bad one into position and heat it up to see what happens because at this point that is the most obvious problem I can see.
DUB, the lower hinge plate in the driver�s door is loose but I�ll need to remove everything to see if it�s the rivets or other damage. As far as the 1/4� thickness difference, it is only at the very top of the door where it matches the rear clip. The skin thickness is the same on both doors and both doors measure the same from 2� below the top edge all the way to the sill so door thickness is not a problem.
Thanks for all of your suggestions and experienced findings. After I see what shows up tomorrow there is a good chance that this could be on it�s way to become a car again. Pat
'DansYellow66' is correct about using heat and putting pressure on the door...as you have already found out.
IF you have an issue in the lower hinge are on the drivers door. The rivets you need to check...not knowing if I have described them correctly or not. ARE the rivets that are NOT covered up by the door panel....BUT the rivets you can feel under the door by the weatherstrip and those on the vertical surface where your hinges go into the door.
I do not think that a heat gun is going to heat up enough are to make a difference and allow movement. I would use a heat source that can blow a lot of heat on the door to get a larger area heated up. I use a kerosene 'salamander' heater and my infra-red heat lamps when doing large areas. BUT...this also depends on the loose area you found on the drivers door.
I found the rivets for the door hinge and I do have a large heater and lamps. I checked both doors and they don't match but what I find weird is that the drivers measurement does not make sense so strapping and heating and forgetting the measurement is in order. I am not doing anything yet. I took other measurements and they are not close yet others are right on. Trying to understand this plastic car has. me buffaloed so I'll fix the door rivets and shovel more snow before making a chart to compare the X Y and Z's and share my findings.
Pat - those rivets are a real pain to replace. I think a few have been able to do so with aluminum rivets but I'm not sure I understand how. There are a couple options. Back in my pre-internet day I bought some I believe 1/4 inch short carriage bolts and ground down the rounded head to look like the flat head of the rivet. The outside diameter was the same as the original rivets. I also carefully filed or ground the corners of the square section right under the head. After removing the loose rivets I found I had to slightly oversize the holes through the metal reinforcement with a drill and then I installed my bolt-rivets and double nutted them on the inside (probably unnecessary).
Later I came across some posts from JohnZ and 1/4 inch projection studs that work without any grinding. See this thread. Pretty slick.
I used to have a construction inspector who worked for me and one of his most often used phrases was "I guess we will have to hammer it to fit, grind to match and paint it" which sort of caused us engineers to cringe. However, in the reality of some of these old plastic cars that have been through hell it's about what you will have to do to get it all back together.
Last edited by DansYellow66; 01-31-2015 at 07:40 AM.
Dan. Thanks for that info. I'm experiencing an entirely new concept in creativity with this project. As a Pattern Maker/Engineer I've built prototypes to tolerances of the thickness of a sheet of paper. This car is no way close so my own tolerance is being re taught to think differently. I'm now searching the forums for wisdshield help. X dims from the WS frame to the deck lid is 1 1/2" off. That's a lot of paper thicknesses. Pat
SO if I read your past post correctly....you can actually FEEL the rivets MOVE....CORRECT???
I and AGREE...re-installing the correct factory aluminum rivets ..>WITH the outer door skin still on the door shell...is NO PICNIC. I have done it...but it is not easy.
I will wait on your chart because I am curious WHERE are you measuring the windshield frame to the deck lid to get his measurement difference.
If I can give you any advice...and you seem to be heading in the right direction. IF you think for one second that you can get this car to be measured out and perfect...to the thousandth.....guess again.....and if you do.....I will come see you in the mental institution....and watch the drool that will be coming out of your mouth when you just sit there staring a a dot on the wall.. IT will drive you crazy. DO NOT ask me how I know this. I go by what looks good to the EYE....and NOT get so caught up in numbers. I have been forced to alter so many 'things' that people just can not pick up on. And I TRY to get it right...but just think about it....for all the time you have spent on the car trying to get this area right...if you count the hours and you had to pay someone for that time....how much would you have spent.
All I am saying is that when you feel that you have got it as close as possible...and it will take a bit of re-working to get it perfect....that is when I stop and start bonding. If I have to split dimensions and do some bodywork to get the car looking perfect...that is what I do and you could not tell what was done when completed....versus spending additional hours on trying to get that last 1/8". For me there is a point of diminishing return....because my time is not free....obviously....except for the time I spend here on your post to help you out...if at all.
Before I start the post let me wipe the drool and remove the straight jacket.
I found those welding studs...or at least on line. Cool!
("I used to have a construction inspector who worked for me and one of his most often used phrases was "I guess we will have to hammer it to fit, grind to match and paint it" which sort of caused us engineers to cringe." Dan) So I guess that is what it takes. I looked at the AM and if it is true to scale I could do some math and come up with a dim for the WS but using your quote from above, I could use the warped hard top and calculate a dim or try to get it to sit on the body and hammer it into position! Without a go-by I'm cautious about "making it fit" with the worry that "For every action there is an equal and opposite reaction"(Newton's Third Law) that might bite me later.
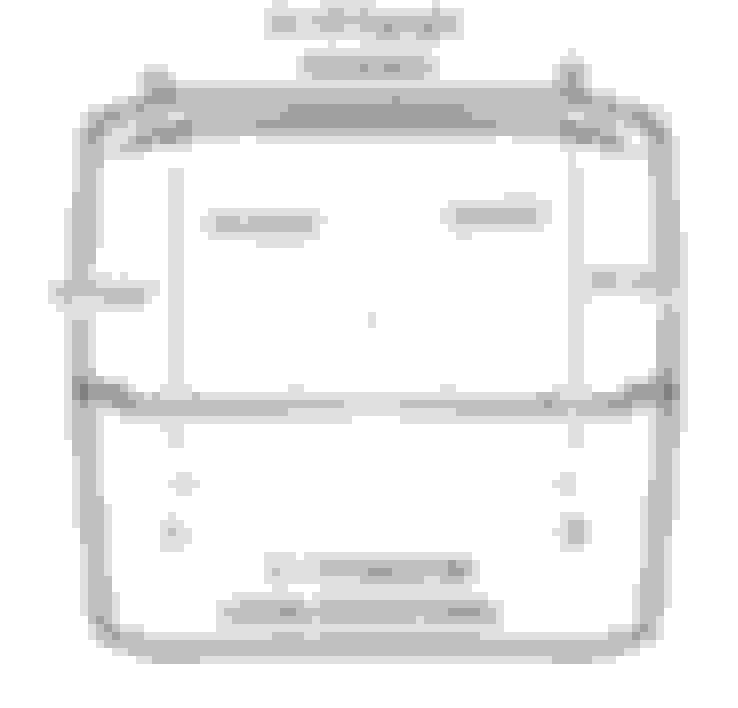
Pardon the artistic drawing but it�s the only graphics program I have available. This is what I measured between the deck lid and WS frame. Straight line is identical and X is off. The rear clip measures fine from the B pillars to the rear in both straight and X lines. The similar X dim�s are also A to B pillars. What does this possibly indicate? The WS frame X side to side is identical and both ends are pitched at 45 deg.
To get a feeling of accomplishment I welded a "U" channel to the baggage divider for extra strength. I also set up the metal B pillars to a vertical 90 deg position but would like to know if that is how they should be welded in?
Snow coming again tonight and some one wants to buy the front end ASAP. I have a feeling he's only a fender kicker
More measurement today and I'm looking forward to hearing from you guys. I see that the passenger side needs to come forward but with this car who knows. Maybe it's a combo of two or more fixes?
Those welds are for a tip I got from another thread. Several of the Vette roadsters that I have seen show signs of weakness at that area with bent and unsightly dividers. The other thread showed that a piece of U channel was added to reinforce and stiffen it. My local home disimprovement store had a wall bracket the exact size to fit under the curl at it cost $4 so I went for it. Those welds are placed 6" apart and now finished over with primer. They will not be visible under the carpet.
Did I answer your question?
Smart move, I welded a bar in that channel to achieve the same result.
Those welds are for a tip I got from another thread. Several of the Vette roadsters that I have seen show signs of weakness at that area with bent and unsightly dividers. The other thread showed that a piece of U channel was added to reinforce and stiffen it. My local home disimprovement store had a wall bracket the exact size to fit under the curl at it cost $4 so I went for it. Those welds are placed 6" apart and now finished over with primer. They will not be visible under the carpet.
Did I answer your question?
Yep, with mine I went down to the local sheet metal shop and had them make a panel out of a heavier gauge of steel for 40 bucks.
 01-26-2015, 06:09 PM