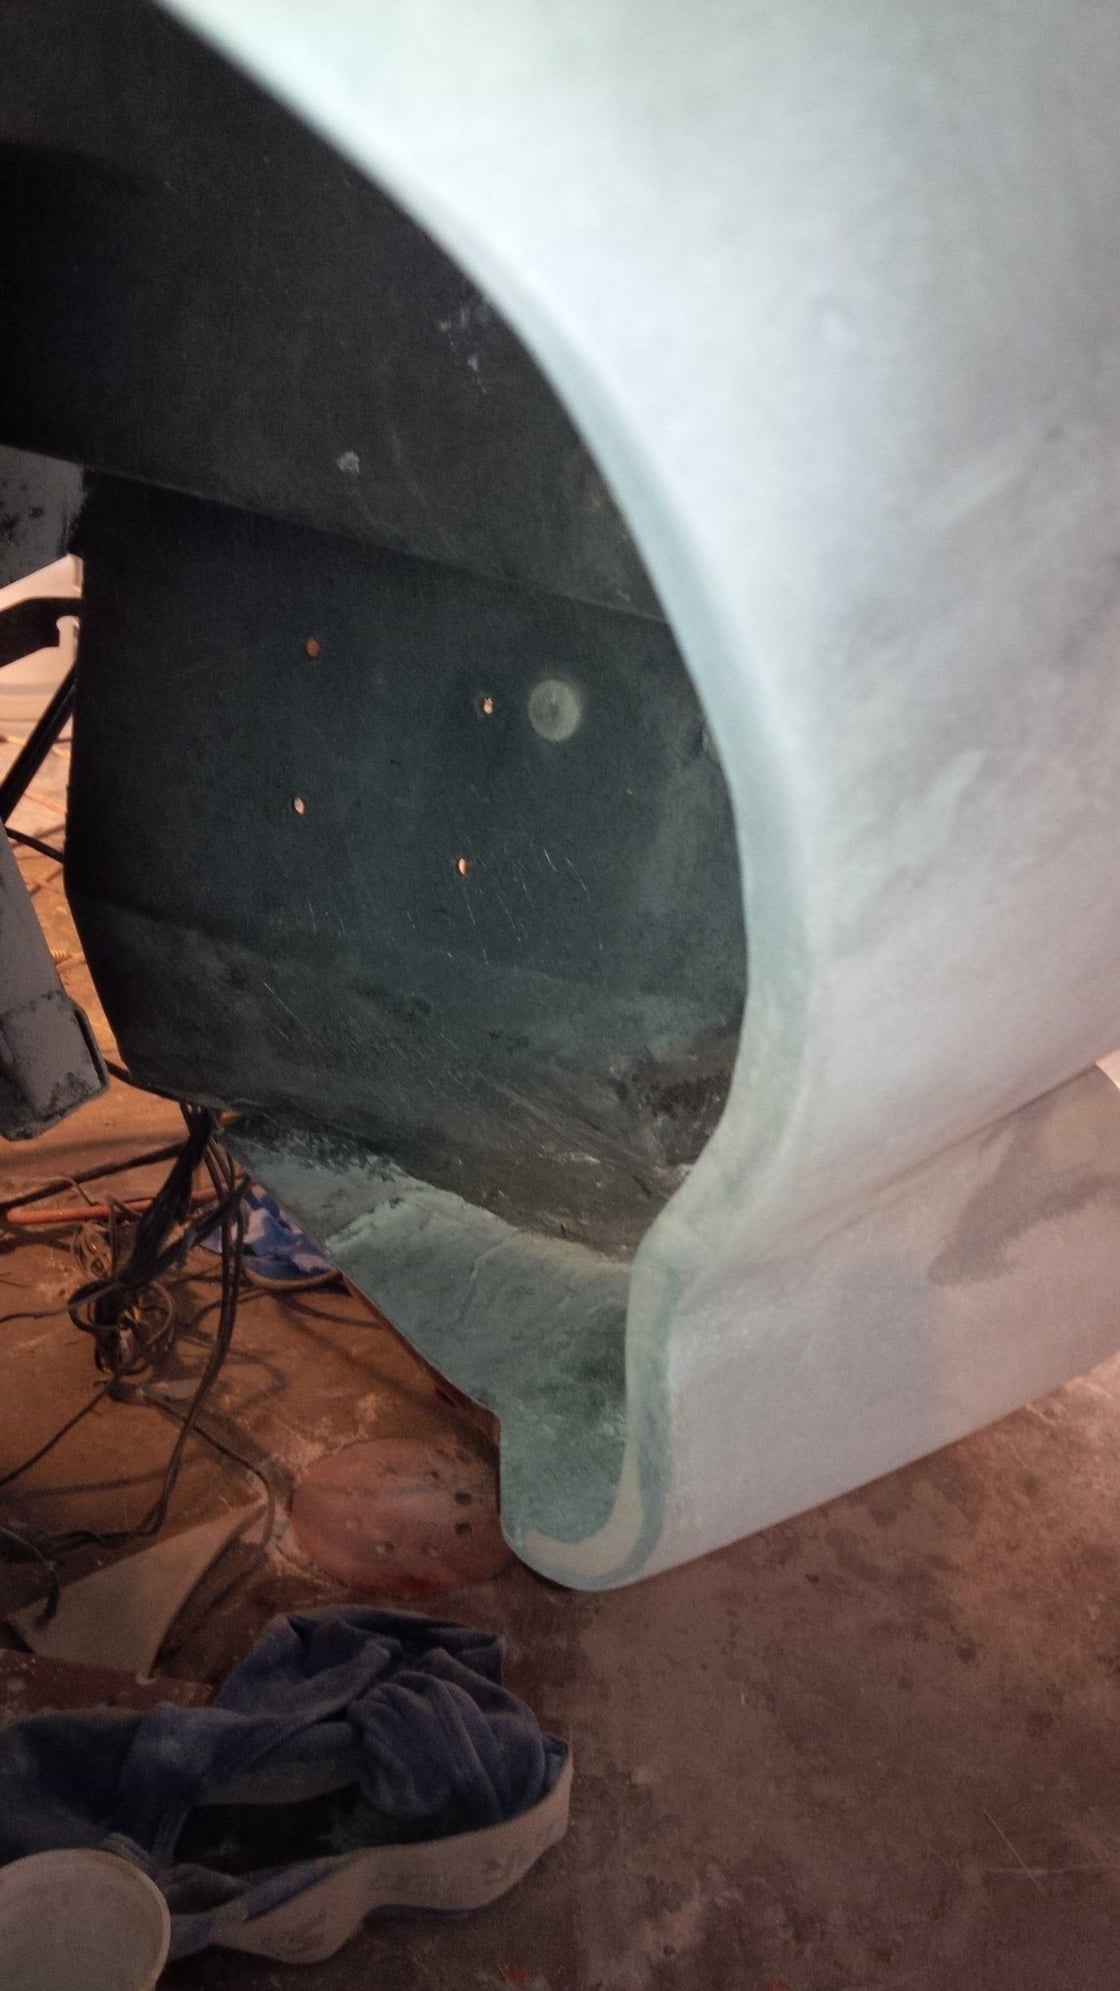
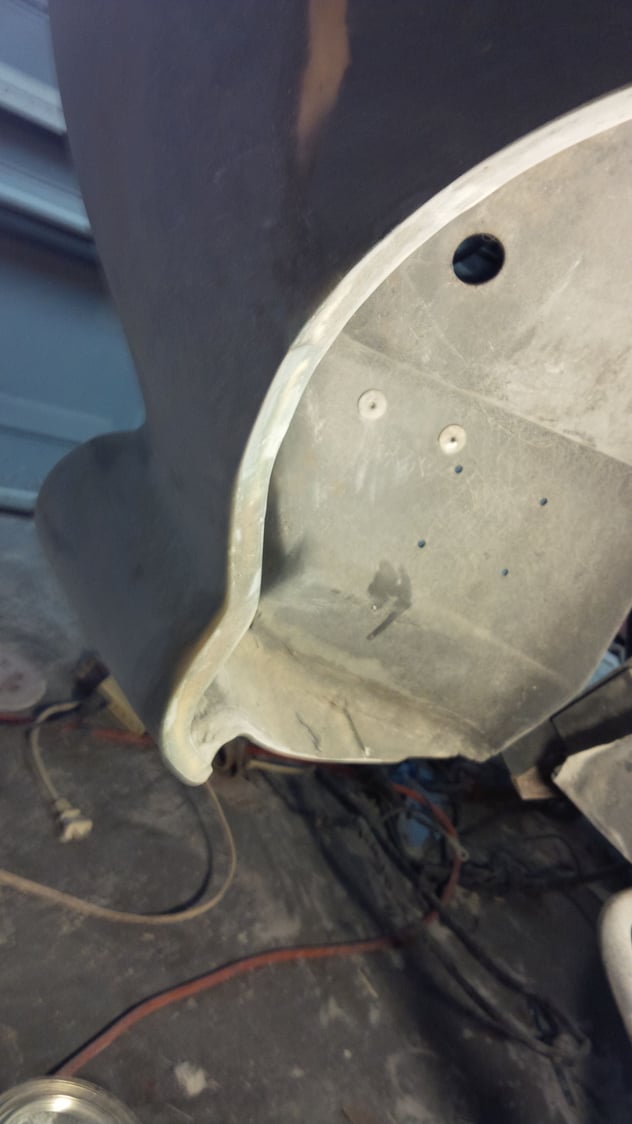
how does C2 front fender cutout lip look
#21
Instructor


Thread Starter
the measurements are very close but I wonder why the lip/bonding strips are so far off. it seems like some body needs cut off but that shouldn't be. I need to inspect a car. Are there any members close to me in Anderson, SC.
#25
Race Director


Member Since: Apr 1999
Location: Beverly Hills/Pine Ridge Florida
Posts: 10,733
Received 561 Likes
on
349 Posts

That's the way it goes.  The tip of that bonding strip is at the bottom, about 6 o'clock in the parking light housing.
Have you removed and ground out all of the old bonding strip and associated adhesive from the inside of the parking light panel and fender?
 The tip of that bonding strip is at the bottom, about 6 o'clock in the parking light housing.
Have you removed and ground out all of the old bonding strip and associated adhesive from the inside of the parking light panel and fender?
#26
Instructor


Thread Starter
I installed a new bonding strip up there not realizing this one fits underneath. I will cut the top off the lip/bonding strips.
I am completely confused in what you explained. Isn't the lip area of the bbonding strip supposed to follow the contour of the edge of the parking light panel? you can see it isnt even close. I don't know whether I need to build out the bottom of the panel to meet the strip or cut away the middle of the panel because it is past the strip. I need to examine another car and take many exact measurements.
I am completely confused in what you explained. Isn't the lip area of the bbonding strip supposed to follow the contour of the edge of the parking light panel? you can see it isnt even close. I don't know whether I need to build out the bottom of the panel to meet the strip or cut away the middle of the panel because it is past the strip. I need to examine another car and take many exact measurements.
#27
Race Director


Member Since: Apr 1999
Location: Beverly Hills/Pine Ridge Florida
Posts: 10,733
Received 561 Likes
on
349 Posts

Poppy, I'm not sure what you have going on there.
Before you cut anything else, or start grinding on anything, I'd get somebody who knows Corvette bodies out there to look at what you're dealing with.
Step back and go look at a couple of original cars and see what things are supposed to look like.
Something is seriously wrong and/or way out of whack in that front end.
#28
Instructor


Thread Starter
yes.. I agree
I've been trying to find a local car to inspect. I have attempted to find a car to inspect through the local corvette club but nobody is responding..
I don't think a body expert is required.. just a car to inspect. I hate putting the car on hold, I have even considered buying new parking light panels just to inspect and copy, and then returning them if i can reproduce its shape
#29
Race Director


I agree...but this car has had some previous damage which can be clearly seen. And as like I wrote above due to the radius...it can not be expected to fit correctly.
You might measure out a dozen cars and see that there may be differences in this area.
And any advice I can give you being bodyman. If your car were in my shop....I would use the point where the facotry fiberglass is the furthest away as my stopping point and then laminate up any area of the panel were it was ground back by someone. Put the wheel on it and check it and so on. I can tell you that just because you have a new bonding strip DOES NOT mean that it is 100% correct. I get press-molded parts in from time tot time that do require some modification from time to time. They are not like 'Lego's'
go with what looks good....becasue if you buy a new park light panel...it may be off and you are now dealing with that. Do not let this get to you...which it seems like it is doing. I have been right where you are at and learned a LONG time ago...what needs to be done...even though if I let my 'head' get in the way...it throws me off track and I get nothing done.
DUB.
#30
Instructor


Thread Starter
yes Dub, I am spinning my wheels. I may have to make some compromises but I want to completely be aware of how these cars are. I do believe something was added but suspect something was removed below. I need to inspect another car. The pres of the local corvette club did return my email, he has a 64. lets see if he can find time for me real soon. if not maybe I can come to you Dub.
this car had flairs up front. it also was lightly hit on the drivers side at one time which likely accounts for the pop rivets. while in storage the owner broke the center nose area. I may or may not replace the rivets but it is important that the body looks right. its a original FI car with matching numbers. it was a very rough car but rust free.
this car had flairs up front. it also was lightly hit on the drivers side at one time which likely accounts for the pop rivets. while in storage the owner broke the center nose area. I may or may not replace the rivets but it is important that the body looks right. its a original FI car with matching numbers. it was a very rough car but rust free.
#31
Race Director


yes Dub, I am spinning my wheels. I may have to make some compromises but I want to completely be aware of how these cars are. I do believe something was added but suspect something was removed below. I need to inspect another car. The pres of the local corvette club did return my email, he has a 64. lets see if he can find time for me real soon. if not maybe I can come to you Dub.
this car had flairs up front. it also was lightly hit on the drivers side at one time which likely accounts for the pop rivets. while in storage the owner broke the center nose area. I may or may not replace the rivets but it is important that the body looks right. its a original FI car with matching numbers. it was a very rough car but rust free.
this car had flairs up front. it also was lightly hit on the drivers side at one time which likely accounts for the pop rivets. while in storage the owner broke the center nose area. I may or may not replace the rivets but it is important that the body looks right. its a original FI car with matching numbers. it was a very rough car but rust free.

Hopefully you can inspect a car locally.
DUB
#32
Race Director


Member Since: Apr 1999
Location: Beverly Hills/Pine Ridge Florida
Posts: 10,733
Received 561 Likes
on
349 Posts

Poppy.
Here's a pic of a midyear front wheelwell. This is a 66, but they're all the same.
Notice the contour in the front.
I can see in your photo... the one holding the parking light "bonding" strip, that much of the front of that wheelwell has been ground away. You can see the jagged/ragged edges.
Not sure how much is missing. Dub gave you great advice.
He knows his stuff.
Last edited by Chuck Gongloff; 12-19-2016 at 07:46 AM.
#33
Race Director


Member Since: Jun 2006
Location: Inverness FL
Posts: 17,891
Received 727 Likes
on
621 Posts
St. Jude Donor '07

[QUOTE=Chuck Gongloff;1593690927]Poppy.
Here's a pic of a midyear front wheelwell. This is a 65 or 66, but they're all the same.
/QUOTE]
Chuck
 ... if it is really a 427, then it must be a 66...

Bill
Here's a pic of a midyear front wheelwell. This is a 65 or 66, but they're all the same.
/QUOTE]
Chuck
 ... if it is really a 427, then it must be a 66...
Bill
#35
Instructor


Thread Starter
I resolved this by laying a piece of cardboard against another car then tracing the opening onto it. It was exact and the bonding strip fit perfectly when I replicated it on my car. Did one side and it looks great. thanks everyone for your help... especially Greg, my local club president.
#36
Team Owner


I resolved this by laying a piece of cardboard against another car then tracing the opening onto it. It was exact and the bonding strip fit perfectly when I replicated it on my car. Did one side and it looks great. thanks everyone for your help... especially Greg, my local club president.

Post some pics so we can pick it apart...


#38
Team Owner


#39
Instructor


Thread Starter
its right..
the lower area on my car was unmolested. the problem was 3" below the lips end and up. the body was removed at the bottom of the bonding strip. it was obvious to me when I looked at the other car.
the lower area on my car was unmolested. the problem was 3" below the lips end and up. the body was removed at the bottom of the bonding strip. it was obvious to me when I looked at the other car.


