When you click on links to various merchants on this site and make a purchase, this can result in this site earning a commission. Affiliate programs and affiliations include, but are not limited to, the eBay Partner Network.
I have a bit of a restomod 1970 (suspension, engine build etc) but mostly stock-looking in appearance. I opted to make some modifications for great tunes. And I did. I just finished making some adjustments on the HU and it's just awesomeness. Here's what I did:
Subwoofer and integrated Amp Rack � 1970 Corvette convertible
External measurements:
35� Width x 16.25� Depth x 6� Height
Subwoofer grille will add 1� to total height; 7� total height allows convertible top storage without interference.
Allow for carpeting etc when taking final measurements. I�m using 80/20 Loop to match the interior, so this is a bit thicker than some other items.
Internal measurements:
The subwoofer requires .8 cubic feet in a sealed enclosure. As this is net internal volume, you must take into consideration speaker displacement (.052 cubic feet in this case) and bracing. At this moment, bracing factors as follows:
Quantity (2) 31.5� x 1� x .75� / 1728 = .0137 each = total .0274 cubic feet
Quantity (3) 12.5� x 1� x .75� / 1728 = .0054 each = total .0163 cubic feet
Quantity (1) 12.5� x 2.25� x .75� / 1728 = .0122 cubic feet
Quantity (2) 18� x 1� x .75� / 1728 = .0078 each = total .0156 cubic feet
All bracing: Total .0715 cubic feet
I adjusted the bracing width and the size of the internal amp rack to get me to the proper internal box net volume of .8 cubic feet.
The integrated amp rack is measured as follows:
13.5� width x 14.5� depth x 2.25� height / 1728 = .255 cubic feet
Cut amp rack boards as follows:
Quantity (1) 13.5 x 14.5 base
Quantity (2) 1.5� x 14.5 sides
Cut board to seal right side of amp rack for proper enclosure space:
Quantity (1) 14.5� x 4.5�
With amp rack made, remaining space under the amp rack needs to be measured to determine net internal volume. This is measured as follows:
13.5� width x 14.5� depth x 2.25� height / 1728 = .255 cubic feet
The space housing the subwoofer to the amp rack is calculated as follows:
18� width x 14.5� depth x 4.5� height / 1728 = .68 cubic feet
Now we can complete net internal volume:
Space housing subwoofer = .68 + area under amp rack .255 = .935 cubic feet.
.935 cubic feet � subwoofer displacement .052 = .883 cubic feet.
.883 cubic feet � bracing displacement .0715 = .8115 cubic feet. Close enough? All signs point to YES.
The remaining system:
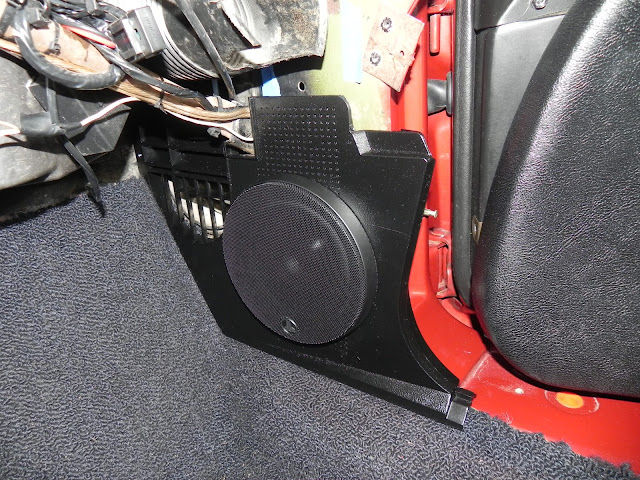
JL Audio C5 525 component speakers (woofer in kick panels, tweeter in dash)
Kenwood eXcelon KDC-X996 single-DIN head unit with Bluetooth, Pandora, iPod/iPhone integration etc.
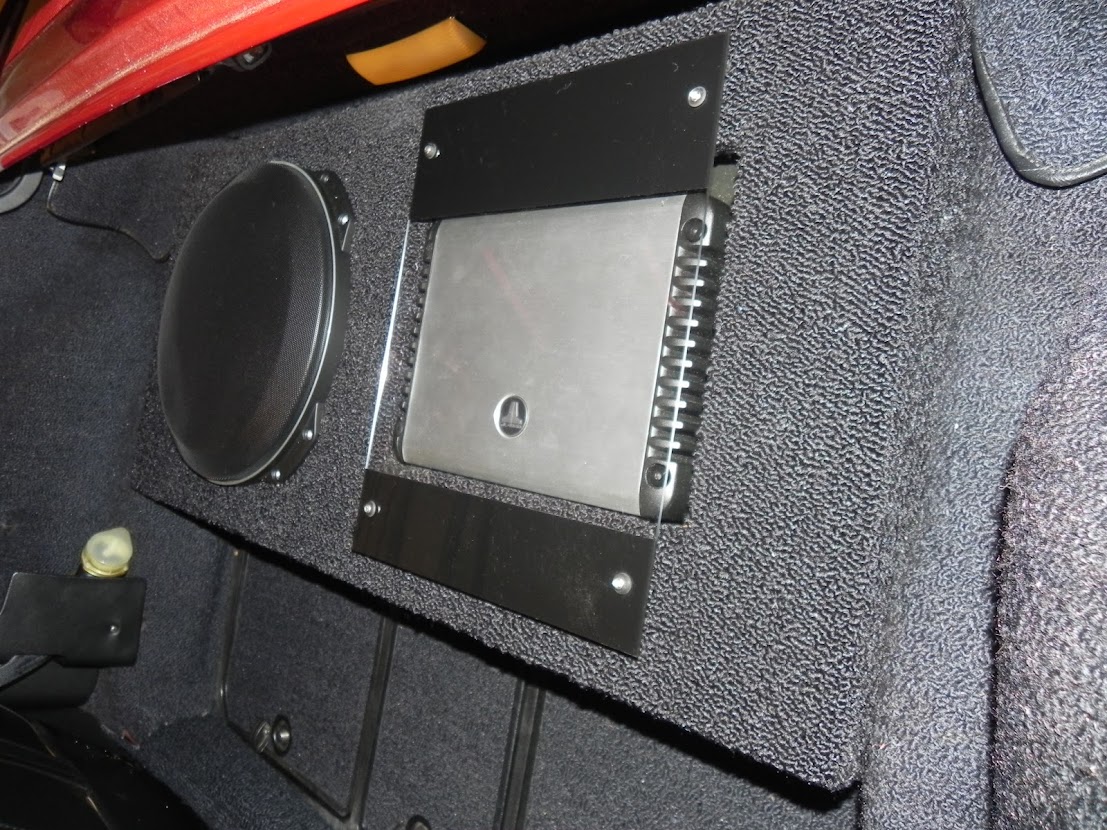
There is enough remaining room to mount the crossovers to the rear of the speaker box. Speaker and amp power, ground etc. wires are run behind the subwoofer box and through the rear of the integrated amp rack via (3) 1.5� holes. Wire the amp, slide it in the amp rack and secure amp to the amp rack.
FYI there are (2) 3/8� bolts with large washers securing the enclosure to the floor. These are accessed from the vehicle chassis-side.
After the amp is secured to the amp rack, a glass panel will be installed to protect the amp and provide an additional aesthetic appearance. This will be raised .75� over the amp rack to provide adequate air flow, and will extend .75� in all four directions past the amp rack enclosure.
Finally the small details have been addressed. Pics tell the story of course:
The LEDs turned out well. I planned on a nice cut glass panel, but the glass shop was prohibitively expensive. I got a $4 piece of plexiglass, drilled a few holes and painted the underside of two edges black to trim the amp out as best as possible.
It's a 10 year old thread and he hasn't been on the forum since 2016 so he might be awhile getting back to you.
I think most people use a hacksaw and then finish up with a dremel / files to open the bezel for a DIN radio
M
I actually used a pneumatic cutting tool. I was going to use the dremel, but holy cow, that is quite a substantial piece. After cutting the hole I filed it down smooth and cleaned up the edges. And here is a link that shows the cheap stereo I slapped in pending getting a "good" one. It has worked so well that I haven't done a dang thing with it (then again in no audiophile-fan-boi) ..... and it amazingly has no depth! Easy to install... https://www.corvetteforum.com/forums...post1600827980
You can kinda get an idea from the view from the back side when I installed the first stereo with a deeper cage:
Originally Posted by blackvette16
What did you use to cut the bezel around the head unit?

 08-23-2012, 07:34 PM