When you click on links to various merchants on this site and make a purchase, this can result in this site earning a commission. Affiliate programs and affiliations include, but are not limited to, the eBay Partner Network.
I am in the process of redoing the interior of my 1973 corvette. I have pull the seats, carpet etc and I have two questions:
1) I am planning to lay Dynamat, but wanted to lay a base first to prevent rust on the birdcage, and just to have a good clean base.
Do you just paint the interior black with Krylon, use POR, or Bed liner?
2) what do you use to freshen trim and console components. the trim is plastic buy the console pieces feel like vinyl or leather (they might just be plastic as well). do you die this, paint these, polish, stain?
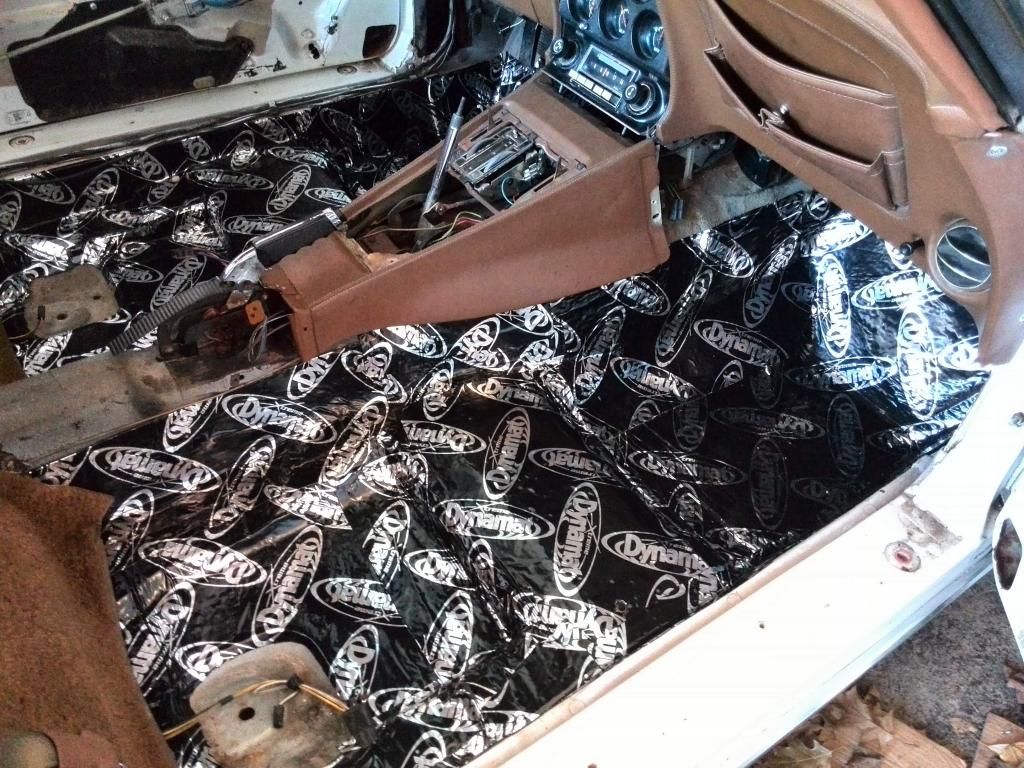
I just used a good coat of a high solids semi flat paint after scraping the loose paint and undercoating. Then installed the Dynomat directly to that.
I have read that the SEM interior dyes can also be used to paint the metal parts for the best match. I haven't tried it yet, but, that seems to be the the most common recommended product on this site.
I used an undercoating paint on the few areas that needed it. It looked like that's what was sprayed original so that's what I used. As far as the trim pieces SEM makes a lot of colors and their prices is much better then the online Corvette shops. Just find a local dealer who sells SEM and you're set.
After the original carpet came up I had a little scraping do then I laid the hush mat down. No need to paint for me.You'll want to pull the console and cover the trans tunnel.Interior dye that comes in a spray can works great and is available thru most vendors. I got mine,Buckskin thru Corvette America.
EASY MIKE, what would cause the bulkhead behind the seats to discolor like that? Surface rust? I don't have a pic of mine (a '78), but when I had the seat out I recall it being painted steel, not fiberglass.
If I was redoing any carpeting I'd jut remove any loose flakes of undercoating, rust paint around any floor holes for mounts (seat tracks etc) and try to make it as level as possible so the unevenness doesn't transfer to the matting and possibly the carpet surface.
My issue has always been keeping the console side skirts from warping and bending. Mine looks like crap. Might get some 1/4 plywood and wrap that in carpet.
Still at the body and paint until I put the interior back together; and this is a restomod with LS3, hence the custom shifter plate. I can't say as to the quiet/heat factor of the reflectix yet. Carpet kit from Wilcox going in when ready. SEM on the other parts.
Last edited by DEEPSEA70; 01-13-2015 at 01:49 PM.
Reason: year
POR would be a good choice for preventing any rust from forming. Bed liner would add some additional sound deadening. Why not both?
I wrecommend using ColorBond for the console trim and plastic. I used in on my girlfriend's 77 and it turned out great. I used the clear on the dash pad and it really looks good. I wish I had also done the door panels with the clear.
Thanks for all the information. I have not scrubbed the current surface, I just rubbed off any lose pieces and vacuumed. Based on what I have seen above, I think im going to apply a roll on Bed Liner such as Herculiner then lay the Dynamat. I wanted to use roll on as I don't want to have to tape everything off and im not planning to replace all the wiring.
I was also going to use SEM spray on for the trim. I see they make trim paint for that, but I didn't see a die for the console. Is there something different I should use for the console?
I will post picks as I make progress this weekend.
btw - I test laid the new carpet and it looks awesome, but the pieces that go over the rear wheels have me a little buffutled
I used SEM Trim Black # 39143 on the metal parts, and SEM Landau Black # 15013 on the console parts. I used Bull Dog adhesive promoter prior to spraying. Also, as others have said, clean, clean, and then clean again, and clean one more time to get the old stuff( Amor All) off before doing anything. Also, read the directions carefully.
OK - I looked again and there is some fuzz from the old carpet and as you can see some old glue (I think). what would you use to clean? Thanks again for everyone help.
For rusted areas on the steel, a Phosphate rust converter (liquid bottle) from a hardware store will be enough for the entire car project and it's probably $5 or so. Will chemically alter the rust and dry as an adhesion promoter for follow-on paint/undercoating. I prefer to brush it on, even if it comes in a spray bottle.
If paint, a brush on or spray on epoxy is best for protection. You don't need anything special or high-end.
That dark 'stuff' on the rear bulkhead (and on other areas) is the sprayed-on glue for retaining the carpet (on vertical panel) which has darkened with time. There is no need to put paint or other coating on the carpeted surfaces in an early C3 car, as they are fiberglass. Later cars had a metal floor pan; they should be sealed.
chstitans42 - That Video was great. Thanks for the post. The carpet for the 73 came in 6 pieces plus the pieces for the three doors. I have not been able to put down the bed liner or prep touch much as it has been very cold here in the east and my Garage is not heated.
I decided to test fit the pieces and while it looks great, the ones that go over the rear wheel bumps are the ones that don't fit great and will need the most trimming. I am running it as high as I can on the sides and I assume I would just cut a hole for the Astro vent hose to exit, but this is one im going to have to spend some time on. I have attached some pictures to show the issue.
Also - I don't know if anyone saw, but I completely re-did the seatbelts. I had to put new plates under the body and in the tunnel and I got new retractor belts. I could show pics of that work.
going to bring it as high as possible. you can see the astro vent tube to the hole right above the wheel hub.
Very Rough fit.
I assume this is driver side and passenger side rear wheel cover. Maybe I have that reversed?
One more question - As im starting to disassemble the interior, I took off the center console shift (auto) plate. Is there supposed to be something that indicates what position its in (Park, Drive, Reverse, etc). Mine has no indicator and doesn't have anything that attaches the shift to the letters. Thanks

 01-12-2015, 03:12 PM