When you click on links to various merchants on this site and make a purchase, this can result in this site earning a commission. Affiliate programs and affiliations include, but are not limited to, the eBay Partner Network.
This is my first post, i have a 1969 corvette with factory side pipes that are in need of attention. I am wondering, after some searching, if they are worth re-finishing or just buying reproductions? My gut reaction is the originals are more desirable and worth getting re-done. Any help is much appreciated.
This is my first post, i have a 1969 corvette with factory side pipes that are in need of attention. I am wondering, after some searching, if they are worth re-finishing or just buying reproductions? My gut reaction is the originals are more desirable and worth getting re-done. Any help is much appreciated.
Dave
How original is your car? Big block or small block? Could make a difference in answers.....
How original is your car? Big block or small block? Could make a difference in answers.....
Big block and to the best of my knowledge the pipes are original as well as the rest of the car. Matching #'s un-restored and re-sprayed at least once. I'm going to be doing some research on the originality soon to make sure whats on there was as it was from the factory.
Big block and to the best of my knowledge the pipes are original as well as the rest of the car. Matching #'s un-restored and re-sprayed at least once. I'm going to be doing some research on the originality soon to make sure whats on there was as it was from the factory.
Hey I am no expert by any means. I am very new to this also. But I ask a few questions on this forum about my 69 big block that needed work and was advised to seek expert advise from either someone local that I know with knowledge of old vettes or join NCRS and have some of the local NCRS guys come take a look. And that's what I am doing before I do to much to it. I have joined the local chapter and have asked for assistance and they say it may take a couple of weeks but would be glad to check it and give me their opinion as to the proper direction as for as they are concerned. Now with that being said it doesn't mean that you will agree with their opinion. But I think it would be wise to hear what they have to say.....In the end it's your car and you can make the final say as to what works for you....Big blocks are awesome... Congrats....r
Hi Dave,
Welcome!
I'm glad you're here!
Whether you try to have you existing shields re-chrome plated (it can be done, but the results depend on their condition) or buy new shields depends a bit if you're car actually had the side-exhaust option and just how your existing shields are configured.
Here are 2 pictures…. the first I'll call 'early' and the second 'later'. What do you have? It's the area just forward of the turn-out.
Regards,
Alan
Early (Right side shield)
Later… 2 small holes for screws to mounting bracket. (Left side shield)
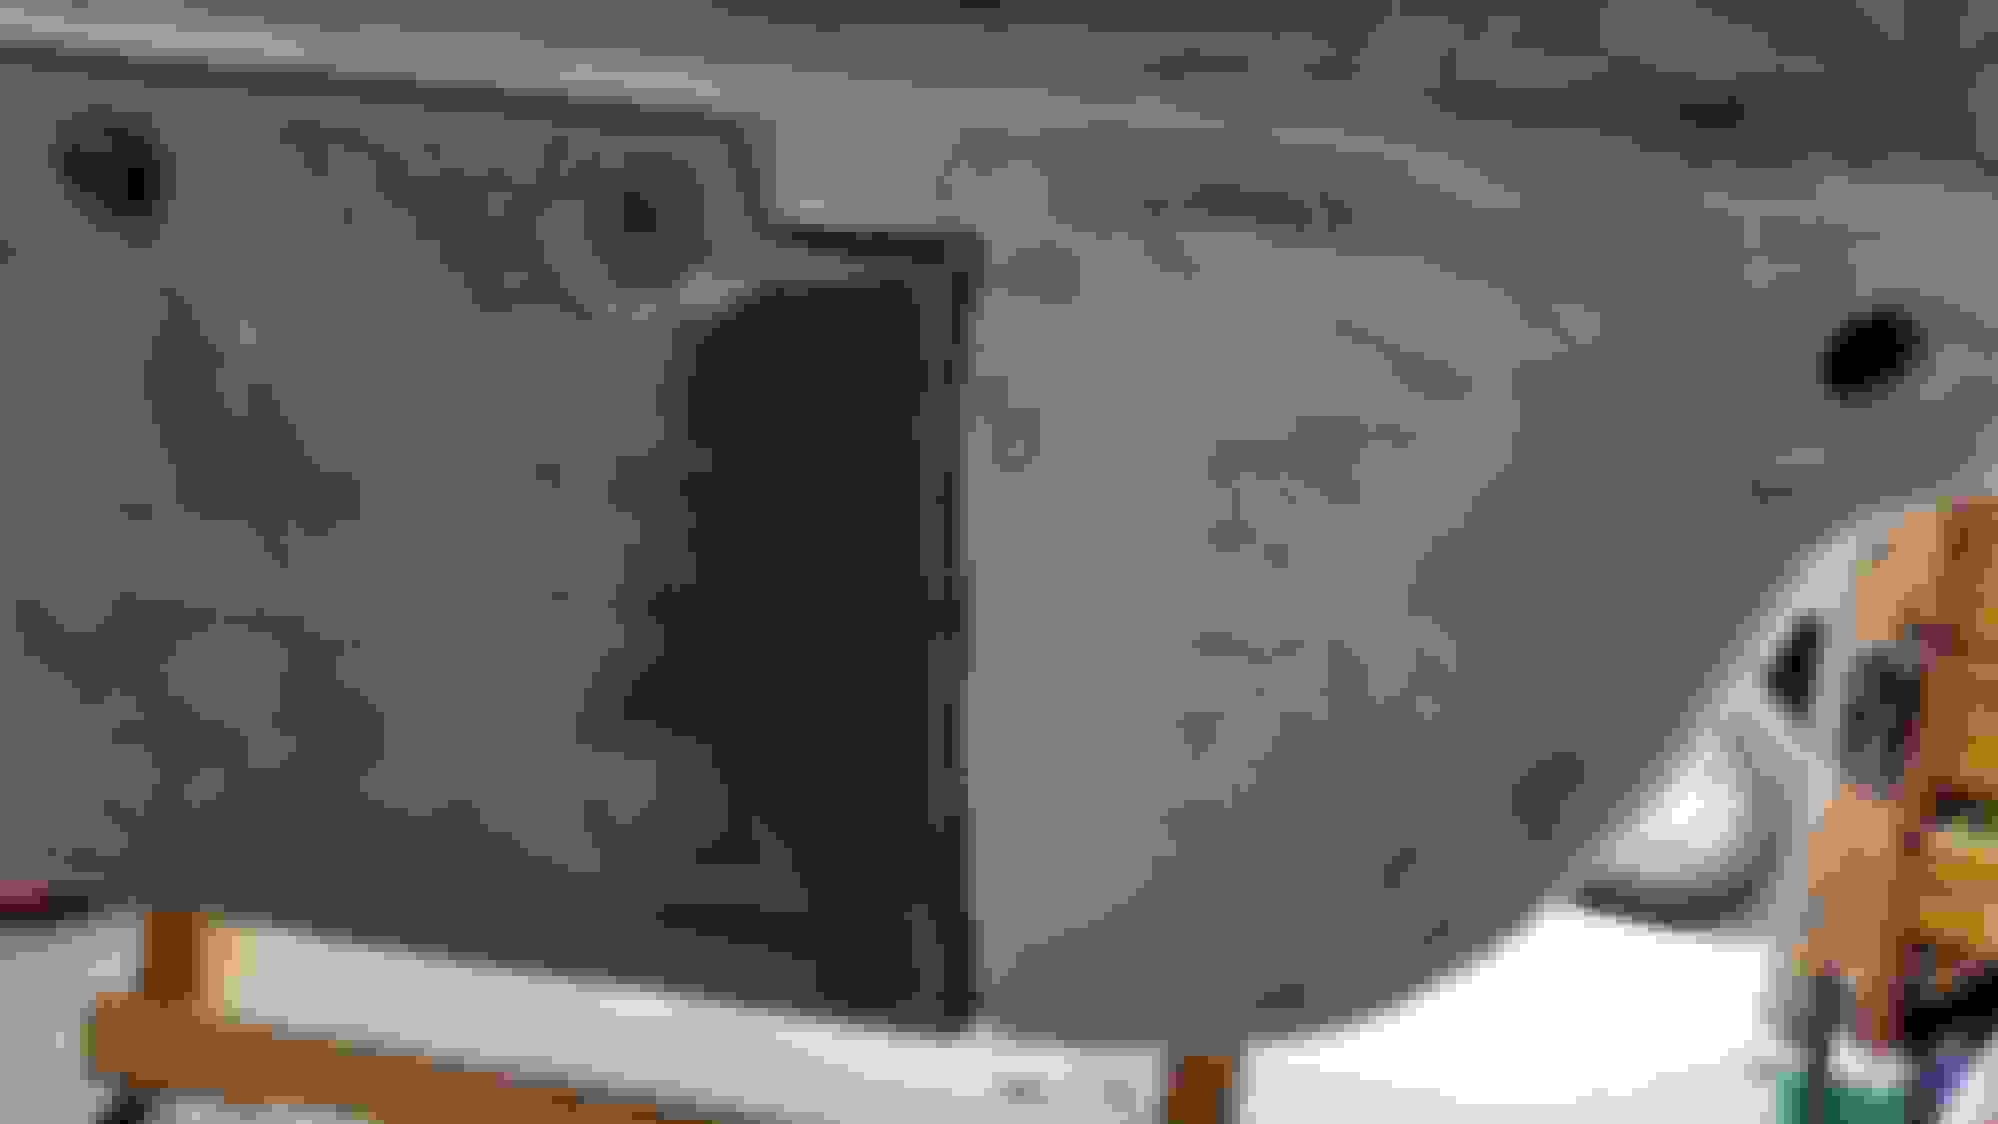
Show us a picture of your rear valance...which might indicate whether or not they are factory original. This is a picture of the inside valance of my documented factory original sidepipe car. If yours does not look like this...you might as well buy the reproductions because fixing the insulators, repairing the pot metal surface and re-chroming may well cost more...and not look near as good. I am still struggling with the decision myself. It may well be the last thing I ever do to the car, because there are still far more important things to be done.
Hey I am no expert by any means. I am very new to this also. But I ask a few questions on this forum about my 69 big block that needed work and was advised to seek expert advise from either someone local that I know with knowledge of old vettes or join NCRS and have some of the local NCRS guys come take a look. And that's what I am doing before I do to much to it. I have joined the local chapter and have asked for assistance and they say it may take a couple of weeks but would be glad to check it and give me their opinion as to the proper direction as for as they are concerned. Now with that being said it doesn't mean that you will agree with their opinion. But I think it would be wise to hear what they have to say.....In the end it's your car and you can make the final say as to what works for you....Big blocks are awesome... Congrats....r
Noted, sounds like something to consider. I have joined the NCRS as well, I'm sure there is a wealth of knowledge on those forums.
Hi Dave,
Welcome!
I'm glad you're here!
Whether you try to have you existing shields re-chrome plated (it can be done, but the results depend on their condition) or buy new shields depends a bit if you're car actually had the side-exhaust option and just how your existing shields are configured.
Here are 2 pictures�. the first I'll call 'early' and the second 'later'. What do you have? It's the area just forward of the turn-out.
Regards,
Alan
Early (Right side shield)
Later� 2 small holes for screws to mounting bracket. (Left side shield)
Alan,
It appears I have 2 different side pipe covers, the drivers side has the 2 holes (later) and the passenger side is not like either of the pictures you have shown. Possibly this one was replaced as it has a different 'feel' to it compared to the drivers side. I will have to pull them off when time permits and investigate further. Thanks for your wonderful pictures!
Show us a picture of your rear valance...which might indicate whether or not they are factory original. This is a picture of the inside valance of my documented factory original sidepipe car. If yours does not look like this...you might as well buy the reproductions because fixing the insulators, repairing the pot metal surface and re-chroming may well cost more...and not look near as good. I am still struggling with the decision myself. It may well be the last thing I ever do to the car, because there are still far more important things to be done.
FR,
Here are some pics, not as clear as yours. I don't see any glaring differences but you might pick something out.
Yours is looking good. Can't see the two bolts on your outside pic, but the two rusted plate nuts on the inside are a good sign. I was trying to show you the inside factory fiberglass seam that joins the quarter panel to the valance. From what I understand, the more-believable aftermarket valance does not quite look that way.
Another few things to look for:
The front fenders were hacksawed to provide clearance for the exhaust pipes. The AIM details how to do this.
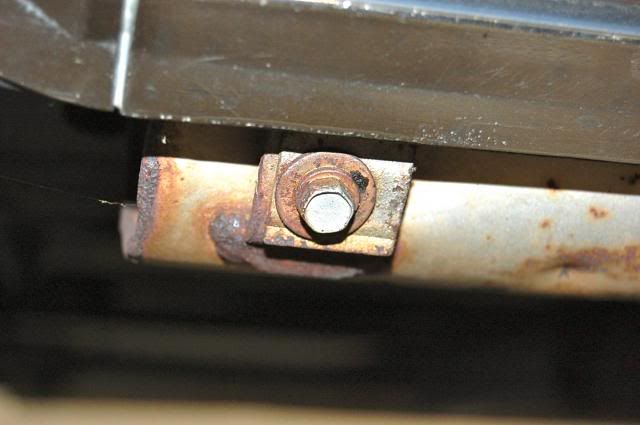
There should be a spacer between the tranny mount and the frame...to take the place of the hanger for undercar exhaust. There would also be a non-threaded hole nearby in the cross member...that was only tapped for a bolt attaching a ground strap to the exhaust hanger during assembly. Most people adding side exhaust do not remove the threads in this hole, only the hardware. If they did, the hole would be larger than necessary. Sneaky stuff.
There should be foil-backed insulation between the top of the side frame rails and the bottom of the body.
Yours is looking good. Can't see the two bolts on your outside pic, but the two rusted plate nuts on the inside are a good sign. I was trying to show you the inside factory fiberglass seam that joins the quarter panel to the valance. From what I understand, the more-believable aftermarket valance does not quite look that way.
Another few things to look for:
The front fenders were hacksawed to provide clearance for the exhaust pipes. The AIM details how to do this.
There should be a spacer between the tranny mount and the frame...to take the place of the hanger for undercar exhaust. There would also be a non-threaded hole nearby in the cross member...that was only tapped for a bolt attaching a ground strap to the exhaust hanger during assembly. Most people adding side exhaust do not remove the threads in this hole, only the hardware. If they did, the hole would be larger than necessary. Sneaky stuff.
There should be foil-backed insulation between the top of the side frame rails and the bottom of the body.
Between other more pressing things (re-building the trailing arms, new tires etc) and work taking me away from home I finally dug into the side pipes. What I found is not what I wanted to see. Before digging into it I was sure they were original and I'm still sure about that. Found the insulation between body and frame, front fenders appear chopped, rear valance looks correct, missing transmission spacer but I have receipts from a clutch change approx. 85-86 and this item could have easily been overlooked. Both side pipes had been dug into at some point, the drivers side is much worse and appears to have been hit at some point. The cover was not attached to the insulator as all the bolts had torn through the fiberglass and it has a different muffler that does not look stock, I think that side is a total loss as the cover is very corroded on both sides and I don't think its economical to fix.(also the insulator portion was siliconed to the body, anyone seen that?) The passenger side is much better and came out in one piece, although the cover is corroded I think its a much better candidate for restoration although I'm not sure if I'm willing to take this on. I'm thinking of dropping the $$ and getting the side pipe package with metal covers and new exhaust. Not what I want to be spending money on but the side pipes really do give the car the character I like and I hate to cheap out with the fiberglass covers since I'm 99% sure the car is an original side pipe car. I'm thinking I would sell the ones I have to someone more ambitious and willing than me to save them from their current state, kind of on the fence but thats the direction I'm heading.
Sometimes discretion is the better part of valor. I went to Allens for the aluminized steel pipes and went oversize to help my now improved BB breathe better. Bought them in pieces for better fitment, marking and subsequent welding while off the car.
Hi,
Back (pun) to the rear valance.
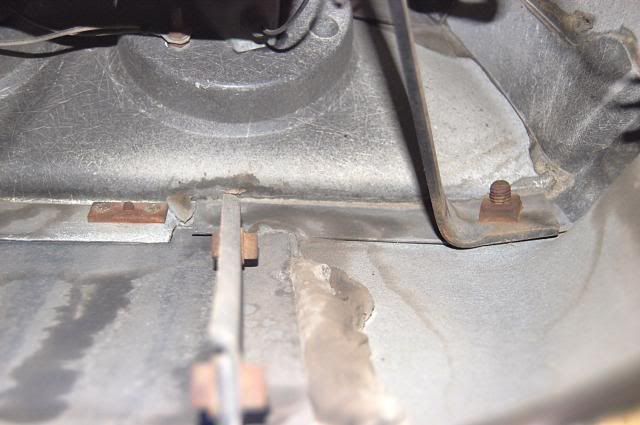
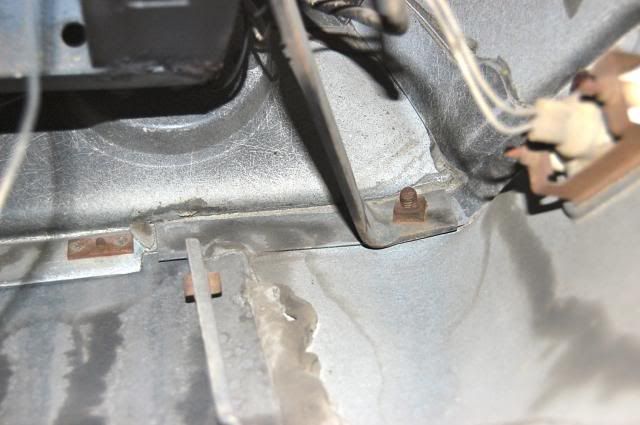
A side exhaust car had a different quarter panel on it than a car with under car exhaust.
Obviously it had no cut out for the exhaust bezel and an additional fiberglass 'flange' bonded to the inside of the quarter panel.
This 'flange' met the 'flange' on the side exhaust car rear valance and the joint was secured with 2 bolts.
Here's a couple of pictures.
Regards,
Alan
On cars that have been changed often the little 'lip' on the quarter panel flange is often missing and the fiberglass repair of the bezel cut out is too thick compared to the rest of the quarter. So someone familiar with original side exhaust car traits will look for that 'lip'.
Note the 'smear' of bond material to the side of the quarter panel flange. Someone familiar with original side exhaust car traits will be looking for that 'smear'.
With a little prep work you can take the side pipe valance and make a mold of the attaching flanges. Once completed they go on opposite sides. this process allows for you to retain a very close original fabrication and avoid the goup look shown in Alan's pictures.
RVZIO
These are older pictures but you get the idea and it is very rewarding when you complete it.
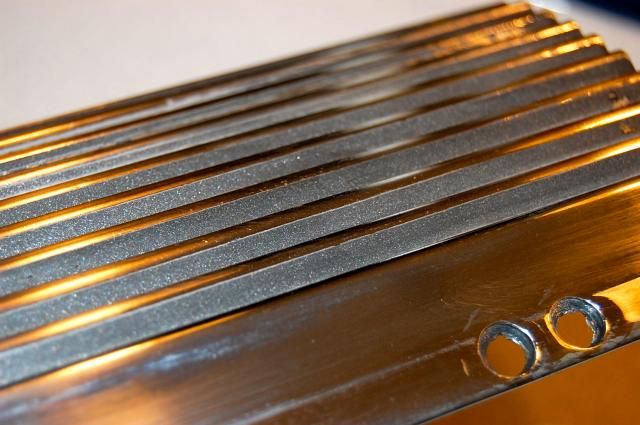
Back in the long ago days I was in the vacuum processing business (think semiconductors and the like), and the purists looked down their nose at what they called 'Junk coaters'. Said operations typically used an 'evap'(oration) process to put aluminum on substrate to make mirrors, as in big, expensive, mirrors for optical telescopes. That coating was mighty chrome like... I've often wondered how the exhaust shields were done. Are they chrome?
Hi,
Back (pun) to the rear valance.
A side exhaust car had a different quarter panel on it than a car with under car exhaust.
Obviously it had no cut out for the exhaust bezel and an additional fiberglass 'flange' bonded to the inside of the quarter panel.
This 'flange' met the 'flange' on the side exhaust car rear valance and the joint was secured with 2 bolts.
Here's a couple of pictures.
Regards,
Alan
On cars that have been changed often the little 'lip' on the quarter panel flange is often missing and the fiberglass repair of the bezel cut out is too thick compared to the rest of the quarter. So someone familiar with original side exhaust car traits will look for that 'lip'.
Note the 'smear' of bond material to the side of the quarter panel flange. Someone familiar with original side exhaust car traits will be looking for that 'smear'.
Alan,
Thanks for the informative pictures. I took a close look as well as some pictures and it looks clean and original in my eyes although I don't see any 'goop' oozing on either side. I'll let the pictures say more. I also found a PN and Spec # on the bottom lip under the license plate on the inside, don't know if it means anything but I threw those in as well
I thought it through and will order new exhaust for both sides and try and repair the insulators and covers since I have nothing to lose in their current condition (at least with the drivers side). I will then try and and prep the covers and try some of the auto parts store spray chrome in a can. They won't look any worse than they are now and if they come out horrible I've lost nothing and will just get new covers and insulators. I have heard about a 'chosmichrome' process ( I don't know if that is a brand-name or a generic term) that I wouldn't mind having done if the price is reasonable. If anyone knows of this service in the Seattle-Tacoma area let me know.

 05-22-2015, 03:29 AM