Weather strip replacement on a 1995 with photos
 08-12-2013, 09:27 PM
#1
Instructor

Thread Starter

Hi guy's I figured I would post this up for anyone else to see. I am replacing all of the weatherstrips on my 1995, and fixing anything I come across. I purchased all of the seals from Wilcox and so far they have been a good fit. So far I have gotten the driver side door done, I replaced both window inner and outer guide felts and the outer door seal that wraps around the door.
I encountered a couple of problems, one the little pins that push into the door to help align or hold the door weatherstrip would not push in no matter what I did, I finally got just the next size up drill bit and hit all the holes with it, this was not much of a change in hole size but then the pins pushed in with some force.
I had to do the aluminum rib fix on the inner door panel hopefully now the door panel will stay on the door and fit tighter.
I have cleaned all of the electrical connections because I was encountering problems with the radio not turning off when exiting the car and the back hatch would not open with the switch. I checked all of the connections out with the meter and they all check good.
The biggest problem is now that the door gasket is changed the door sticks out about a 1/2 ". When I get done with the rest of the weather strips around the door I will check and adjust the fit for all of it. I think I read somewhere that the door takes awhile to settle in and will line up on it's own after time. I bought the car used and it appears someone may have adjusted a few things to help with fit as the other weatherstrips deteriorated.
I will keep you posted on the progress but so far I have burned up one weekend and today I stripped the passenger side down in 1/2 hour once I knew the procedure. Any input or advice is welcome as always.
Art
 08-12-2013, 09:33 PM
#2
Instructor
Thread Starter
I forgot to add the pictures

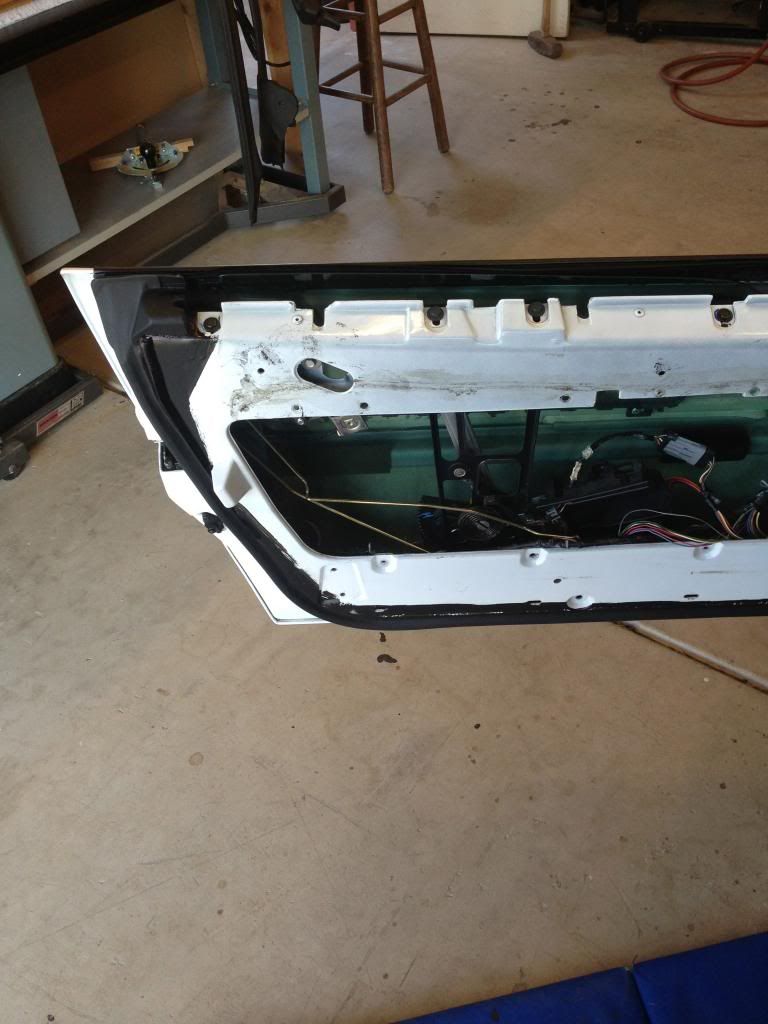
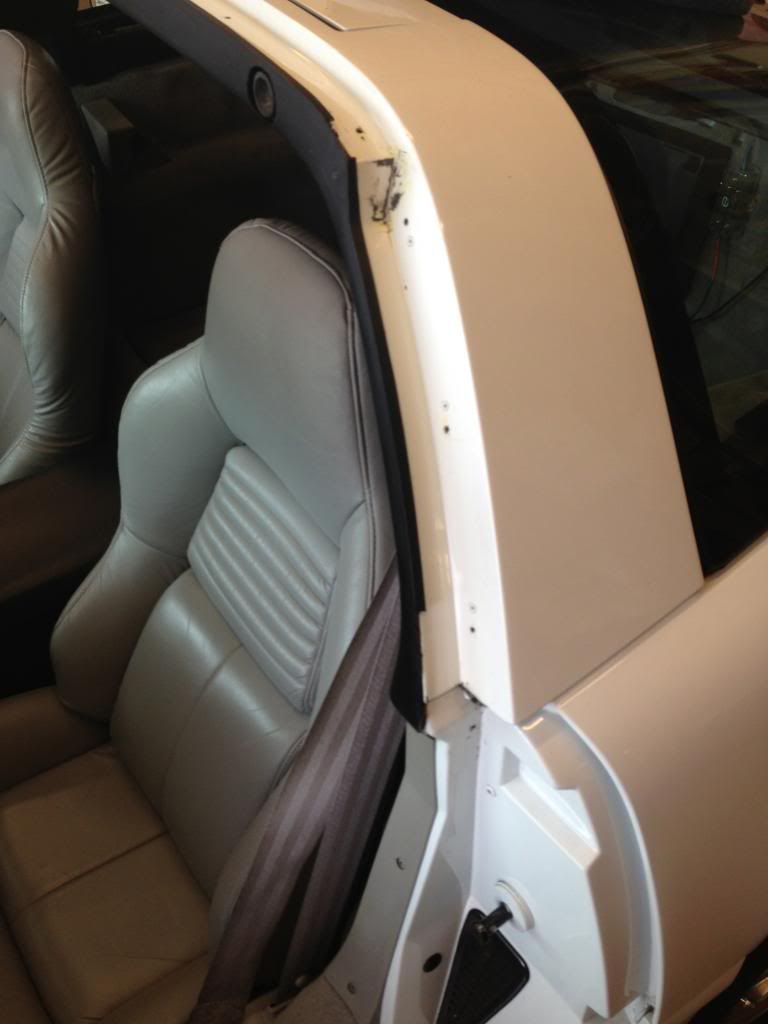
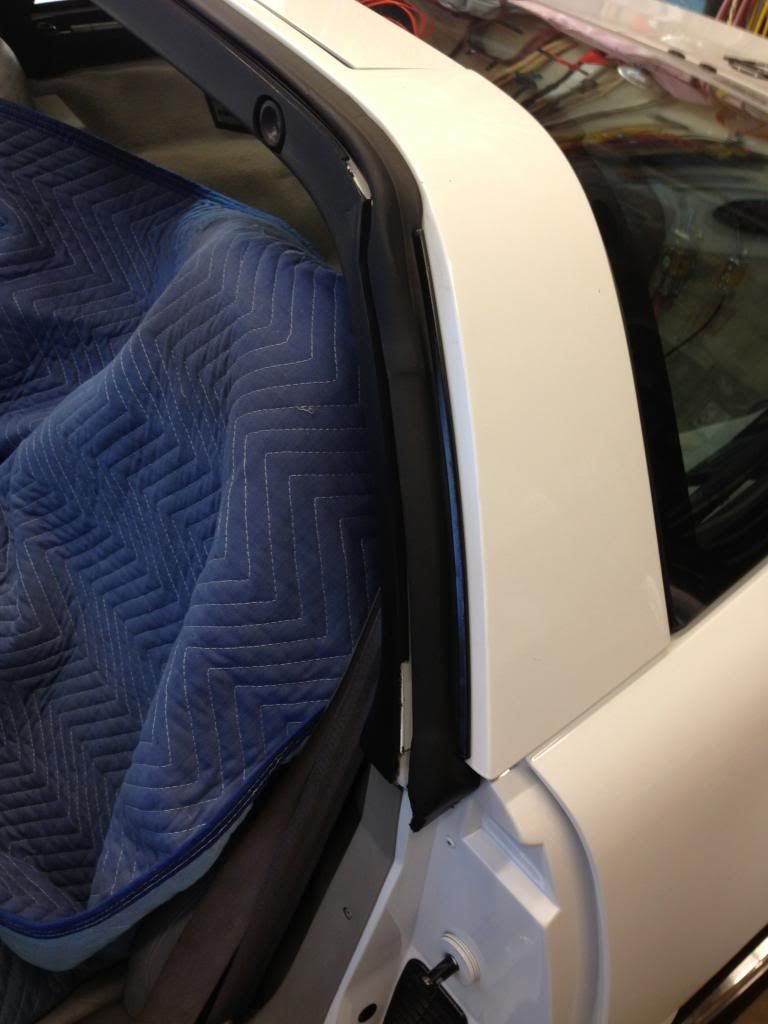
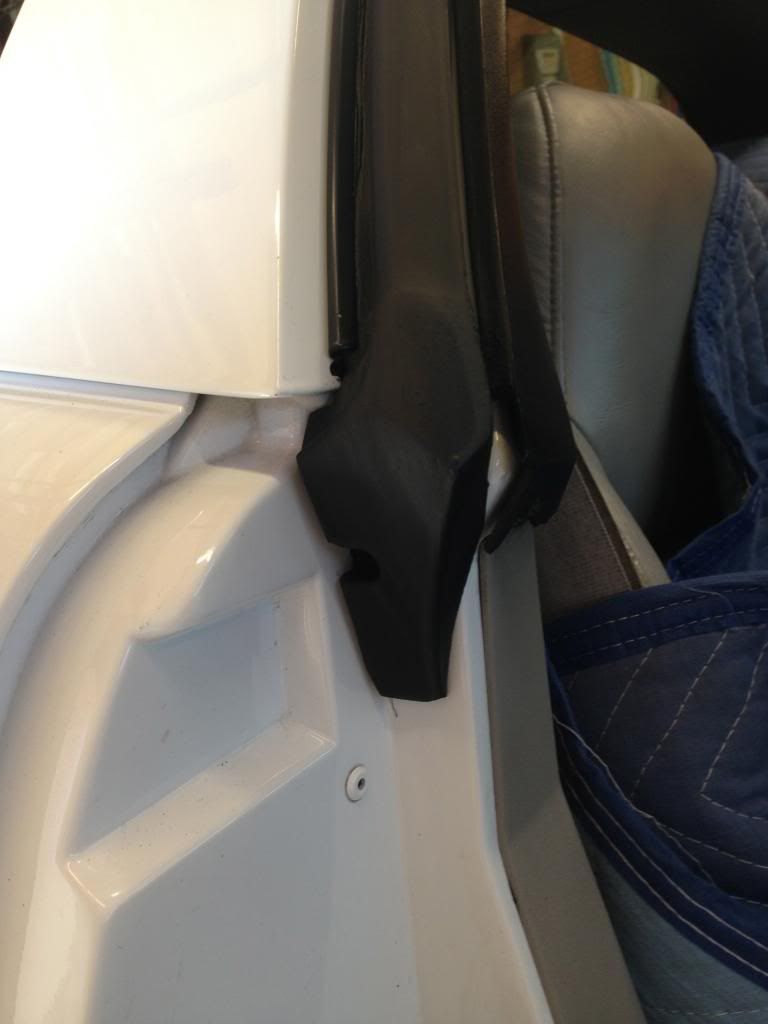
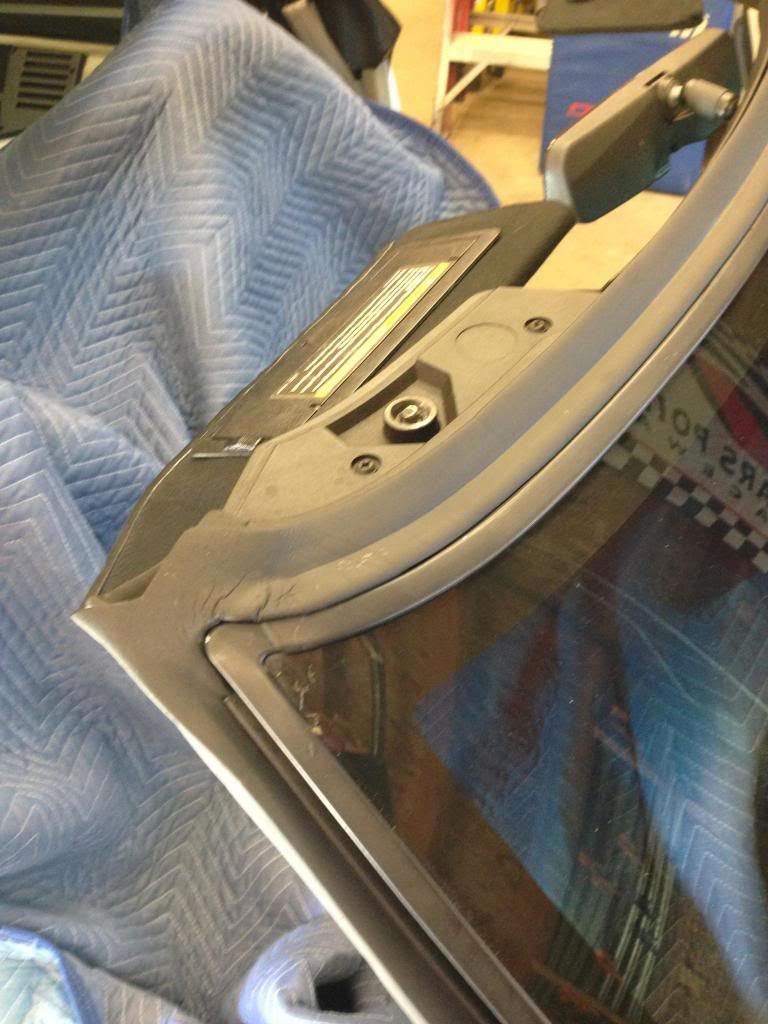
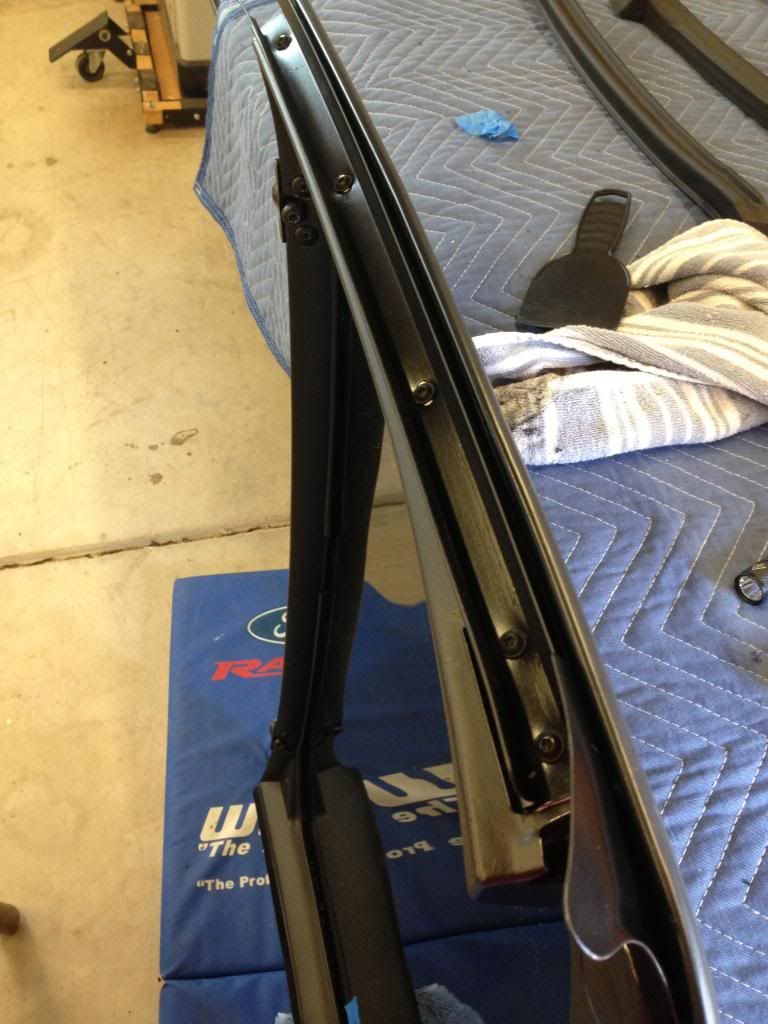
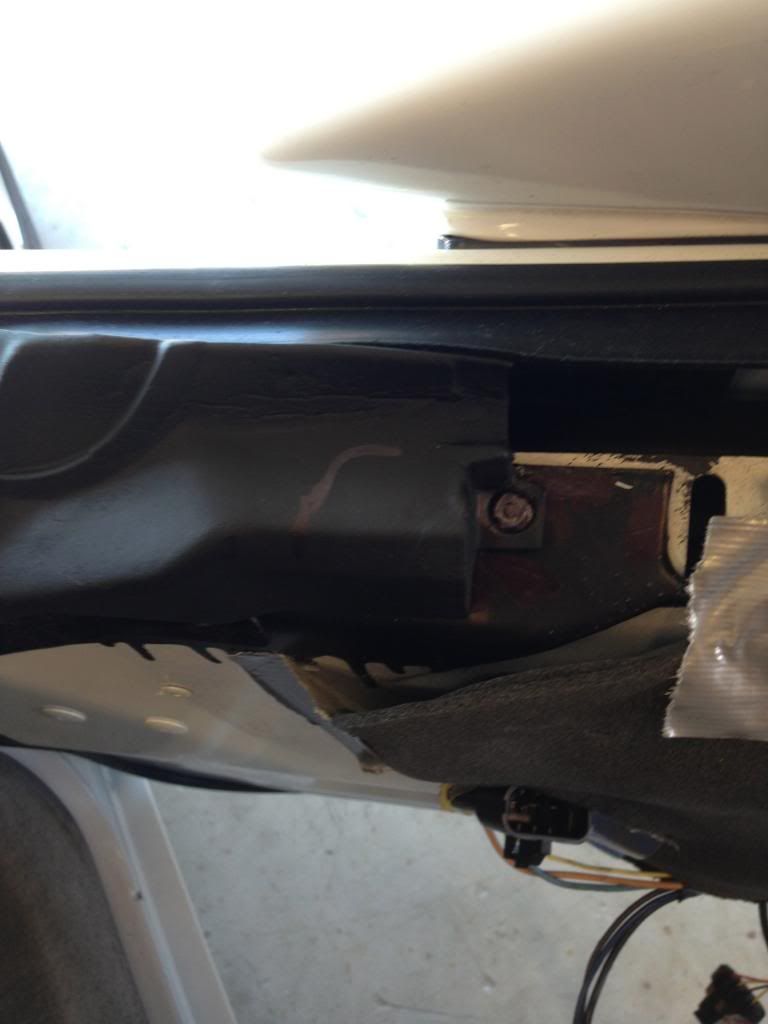
Shots of the gasket installed
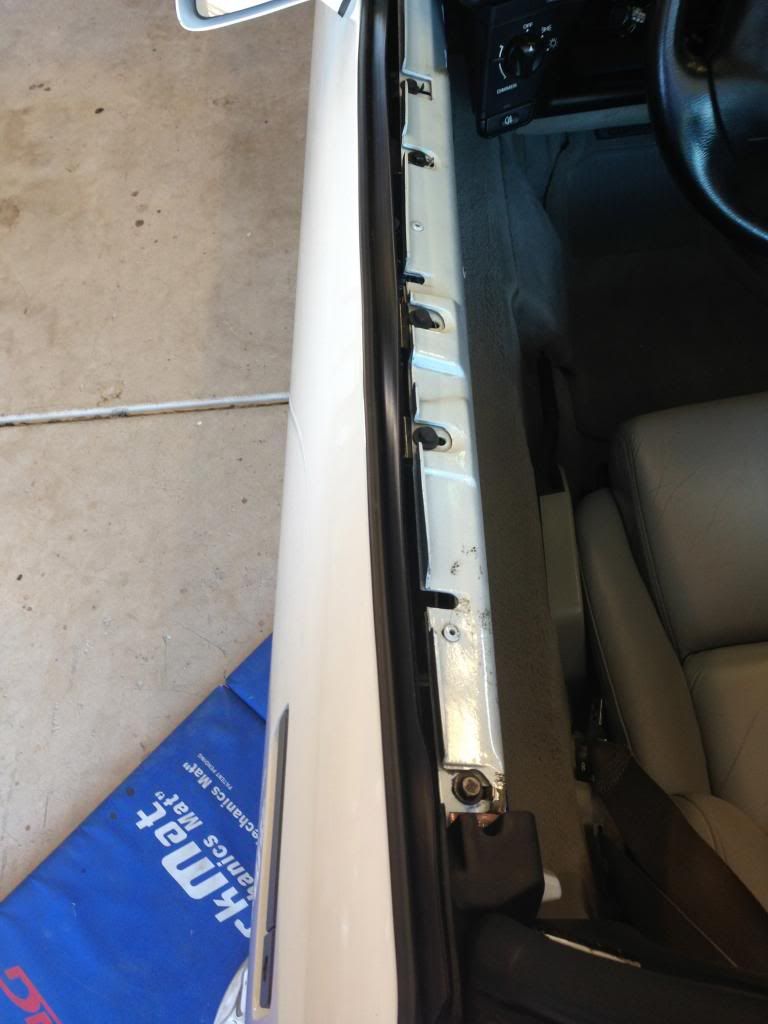
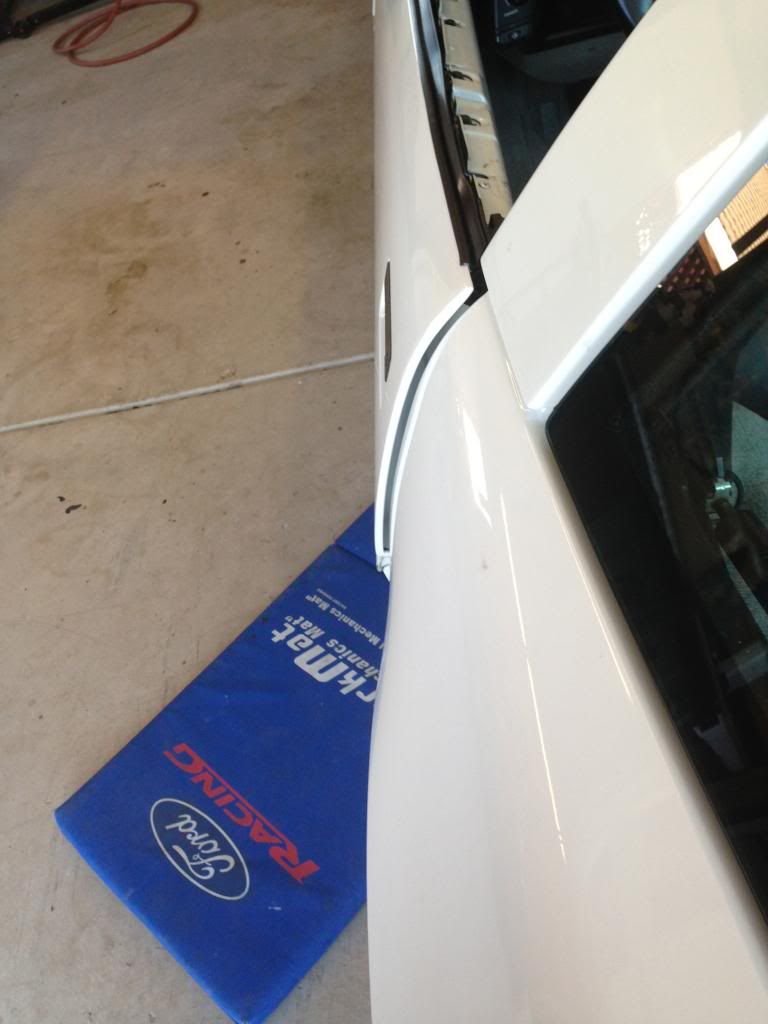
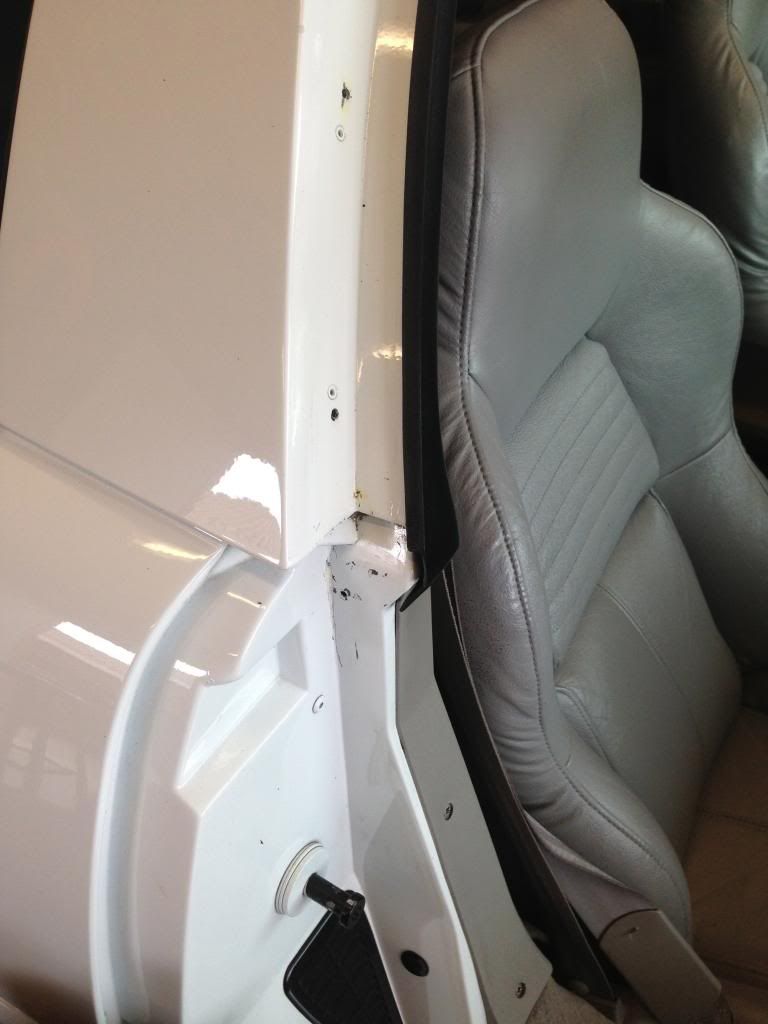
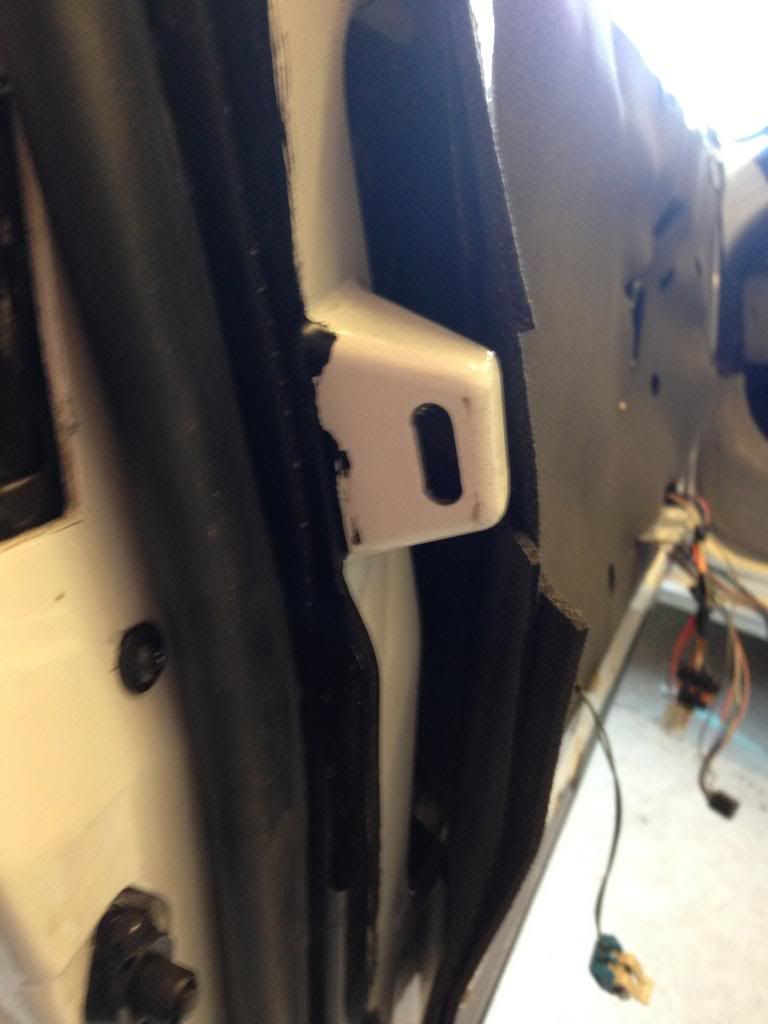
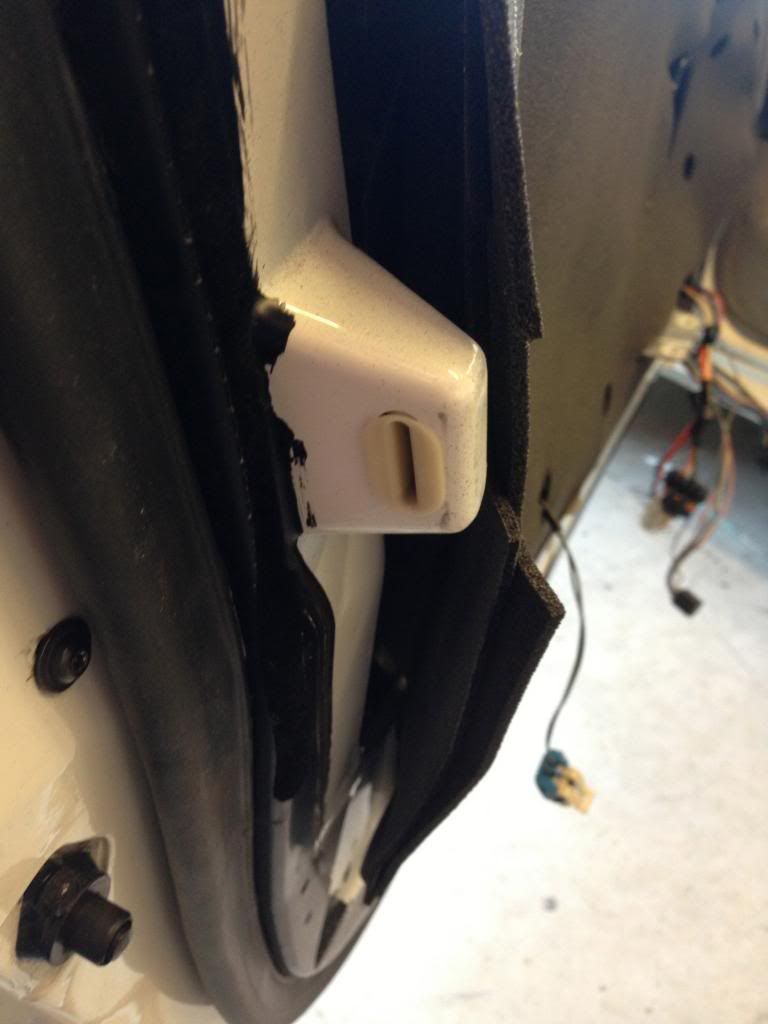
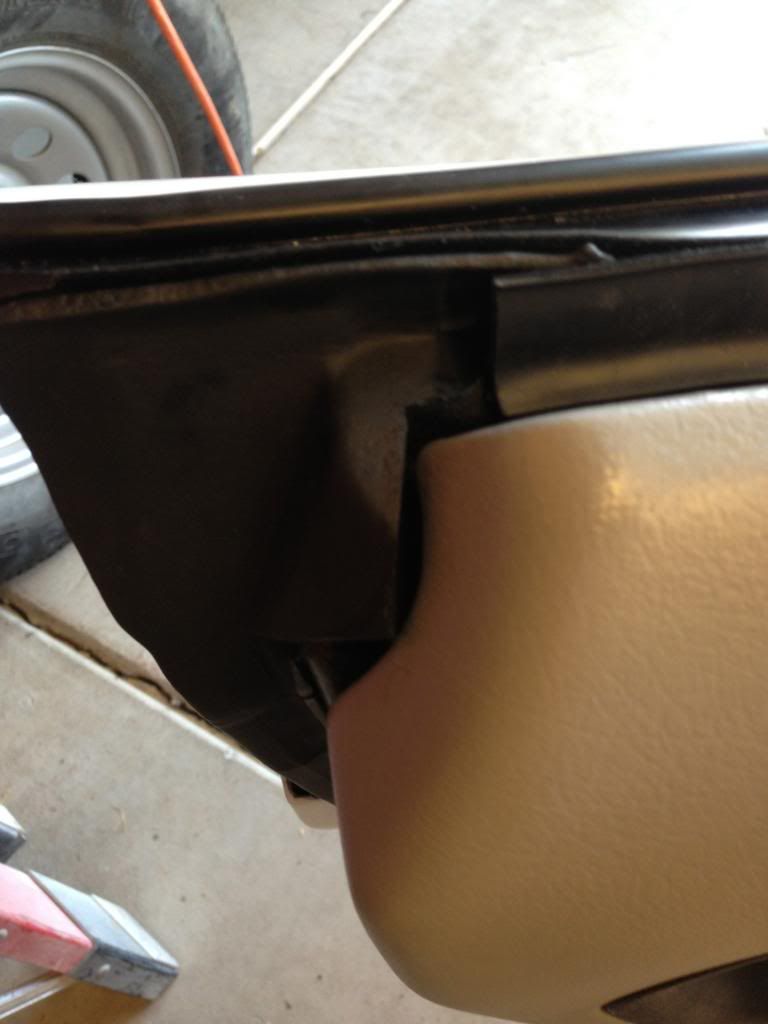
Gap at the door
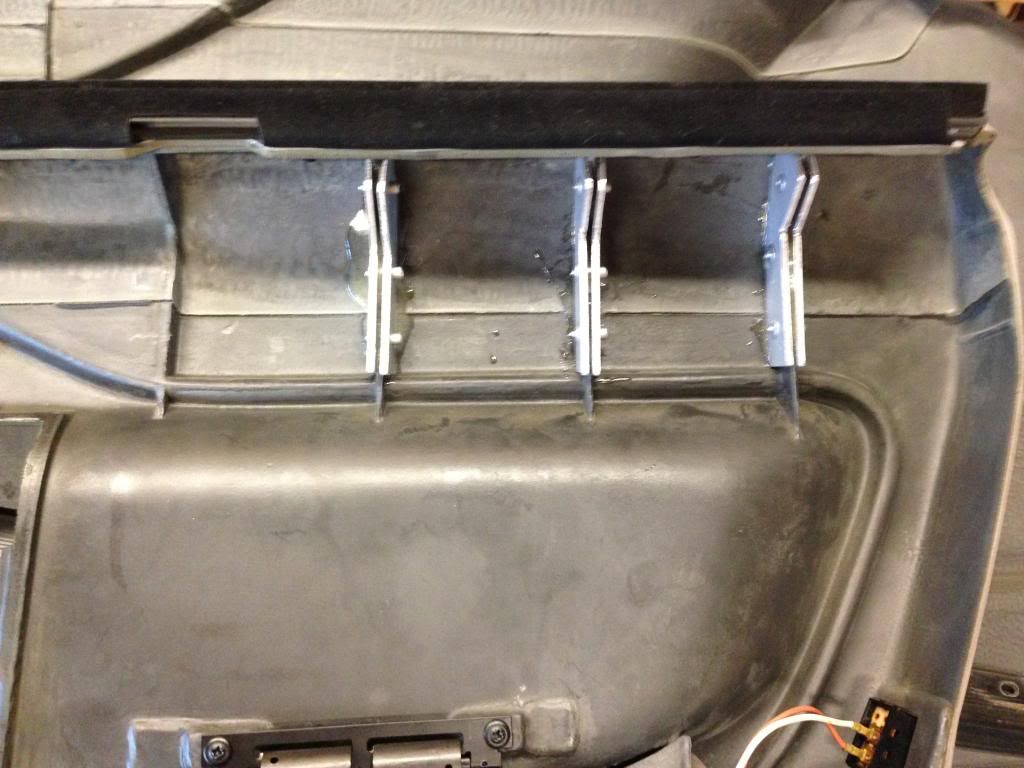
Driver side door with ribs installed
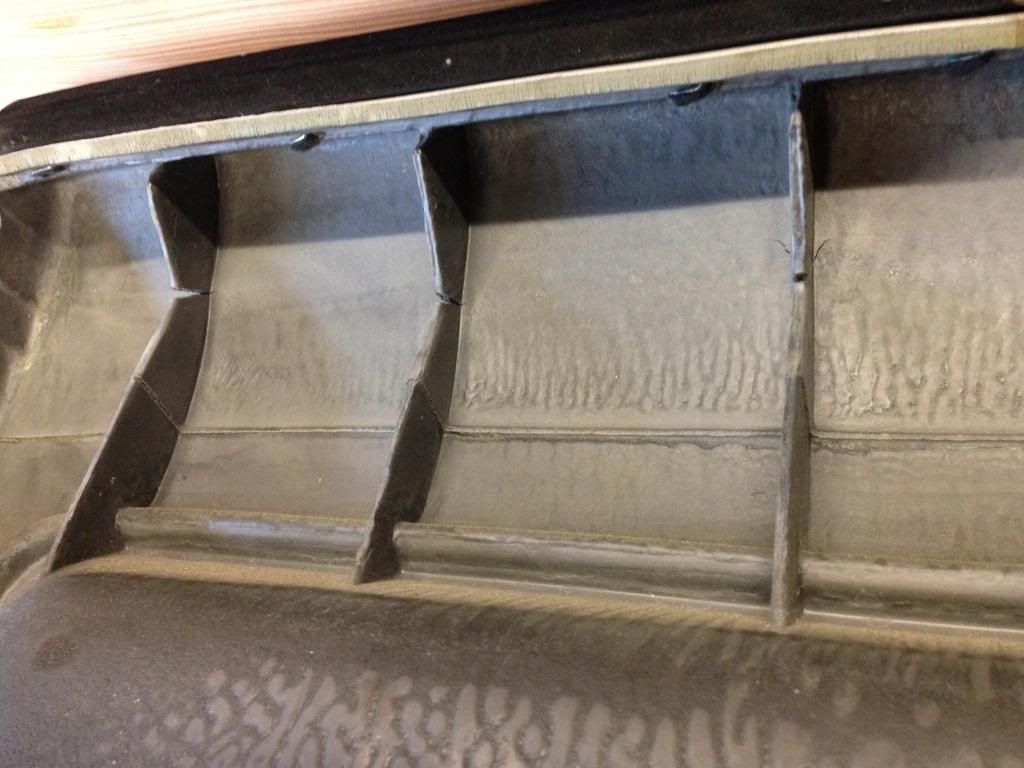
Passenger side door before ribs installed
Shots of the gasket installed
Gap at the door
Driver side door with ribs installed
Passenger side door before ribs installed
The following users liked this post:
CorvetteSwe (08-20-2016)
08-17-2013, 10:53 PM
#3
Instructor
Thread Starter
I got the front header and rear roof panel in today all went good with that, they fit good and besides all the cleaning were a quick install. The right hand door outer seal was a problem, when I opened it something didn't look right, upon closer inspection it had a slight bend in it like it had been dropped or something. I went ahead and tried to install but 1/2 way across the clips and the holes were out of alignment. I carefully go it back off and slid it down some to help line it up. This time it was out of alignment at the last hole by enough that the clip wouldn't go in. I tried to slip it a little and the darn thing just bent bad. Now it was no good, so I called the nearest dealer and ordered one from them it was here in 2 days but double the cost of both sides from Wilcox. Both sides match close enough but if you find this problem with your's from Wilcox return it before you do what I did.
I hope to finish the targa top and check the alignment of the windows tomorrow. I have been reading up on Window alignment and it looks like that might be a pain in the !$#. I will post up some more pics tomorrow.
Art
I hope to finish the targa top and check the alignment of the windows tomorrow. I have been reading up on Window alignment and it looks like that might be a pain in the !$#. I will post up some more pics tomorrow.
Art
08-18-2013, 01:33 AM
#4
Instructor

I will be doing this in a couple of weeks. Keep us posted on your progress.
Does anyone know which supplier has the best door seals?
I am not looking forward to lots of door adjustments. I believe that someone mentioned there are different grades ( softer material etc.) of door seals available, I haven't been able to locate the thread.
Does anyone know which supplier has the best door seals?
I am not looking forward to lots of door adjustments. I believe that someone mentioned there are different grades ( softer material etc.) of door seals available, I haven't been able to locate the thread.
08-18-2013, 08:45 AM
#5
Life Starts at 120 mph


Member Since: Jun 2012
Location: Upstate New York
Posts: 1,535
Received 185 Likes
on
118 Posts
NCM Lifetime Member
NCM Sinkhole Donor

Thank you Sir for the post. 
I to have miss aligned/not tight door panels. I just learned allot, from your post. Where did you get the aluminum ribs?
Any good pointers or lessons learned on that aspect?
Boxcar
I to have miss aligned/not tight door panels. I just learned allot, from your post. Where did you get the aluminum ribs?
Any good pointers or lessons learned on that aspect?
Boxcar
08-18-2013, 10:58 AM
#6
Instructor
Thread Starter
Box car,
I picked up 1/8" aluminum at the local hardware store and fab them myself. This wasn't hard at all I made a cardboard template and cut them on my bandsaw. I don't think they needed to be 1/8" but that is all they had. It would have been easier if I had another set of hands to hold the door panel bent to the right spot while I drilled. There is another fix in the tech section with tie wraps. I think I will need to grind down the aluminum ribs to fit the door panel but I haven't gotten to that step yet. Here's the link to where I got the how to from:
http://forums.corvetteforum.com/c4-g...panel-fix.html
Jerry,
I feel the stuff I got from Wilcox has been good just pointing out the problems I encountered with there stuff for others to be prepared to look at. My 2 cents is that like anything else working on your car is not exact science with this stuff so be prepared to make whatever you get work out. As far as there quality comparing the outer window seals to each other there was no difference in look or material that I could tell, but the factory one went right on easily, both Wilcox seals were tough to put on and I messed up the passenger side one. I feel this could have been my fault had I just re drilled the hole it probably would have gone on. Also as I stated before I had do drill all of the holes for the door seals to get the pins to go in, I am not sure if that was because of the seals being aftermarket or what but it was an easy fix.
Art
08-19-2013, 02:05 PM
#7
Life Starts at 120 mph
Member Since: Jun 2012
Location: Upstate New York
Posts: 1,535
Received 185 Likes
on
118 Posts
NCM Lifetime Member
NCM Sinkhole Donor
Jerry,
UDAMAN,
Thanks, looks like a great weekend project. I love the making of my own parts, fitting them, installing them, and oh the beer when its done and works.
Cheers
I'll keep you posted.
Thanks Again
Boxcar
UDAMAN,
Thanks, looks like a great weekend project. I love the making of my own parts, fitting them, installing them, and oh the beer when its done and works.
Cheers
I'll keep you posted.
Thanks Again
Boxcar
08-21-2013, 11:21 PM
#8
Instructor
Thread Starter
latest update:
I got everything swapped out except for the rear hatch now. Here are a couple of things I have run into:
This is a little more than a one weekend job, I am into it 2 full weekends a a couple of hours each day after work for 2 weeks. I may be a little slow but this is probably more like a 2- 3 weekend project without help and doing it your first time.
The Targa top is a PITA the weather strips are all glued on and don't come off easy and are a lot of work to clean up. Also pay close attention to where the alignment piece (the manual calls this the weatherstrip protector it is the curved pieces at the front of the targa top) on the top goes before you take it apart. The manual says to finesse it to fit but there is no way to figure out where it really needs to go until it is all back together and you put the top on. When it was all said and done mine is now a little more forward than I would like it.
Be prepared for things not to be perfect when you are done there is a bit of finesse to this. I started adjusting the windows and that was a lot easier than I read it would be. What I am not happy with is that my passenger window fits everywhere good and tite except from 1/4 to 3/4 of the way along the front windshield. Nothing I could do would help this and if I moved the window too far forward which buried it into the weatherstrip tight the whole way it would not seal good along the back edge. I think this is a fit problem with either how the weatherstrip is constructed in this area or something with the how I got it pushed into the alignment channel, although I don't see any difference in the install along the whole way.
The aluminum I installed along the door panels needs to be cut exactly to the size of the ribs, ( My ribs almost looked as if they had been custom adjusted at the factory but it was clear that the mold just was really rough) If you don't make them exact you will have to do what I did and grind them down.
When I installed the door panels the holes at the bottom that the push pins went in did not line up. The door panel holes were lower than where they were punched in the frame. Maybe my door panel was a replacement but it had a date of 1994 written on it, more than likely something I did made it sit lower, so I drilled holes in the door panel and pushed the pins in. I am going to get new door panels next I think. I also installed a screw into the piece that sticks out at the rear of your door, the door panel is nice and tight now. Also since I purchased this car the door panel never fit good and was always falling off.
A word on glue, I used glue everywhere that I found it when I removed the factory weatherstrips. This may have been overkill but I figure if they put it on then I should. It was clear where they had put it on. Also in the manual they talk about thumb grade sealer, this is a black sticky putty. I didn't know I needed this and didn't have any. Mostly this was used to fill in a gap where two pieces of metal met, I just put a little extra bead of glue in these areas. I have found no leaks in these areas when I hose tested it today.
I have attached pictures showing the progress, I will probably get to the rear hatch tomorrow and then the car needs a good wash and wax. Then back to driving it.
This is the cleaned up channel with the weatherstrip holder removed use double sided stick tape to put the channel back after you clean it up and paint it.
Another view of the same as above
Weather strip installed
Windshield weather strip removed and cleaned.

Same thing as above
Weather strip installed
Driver side installed
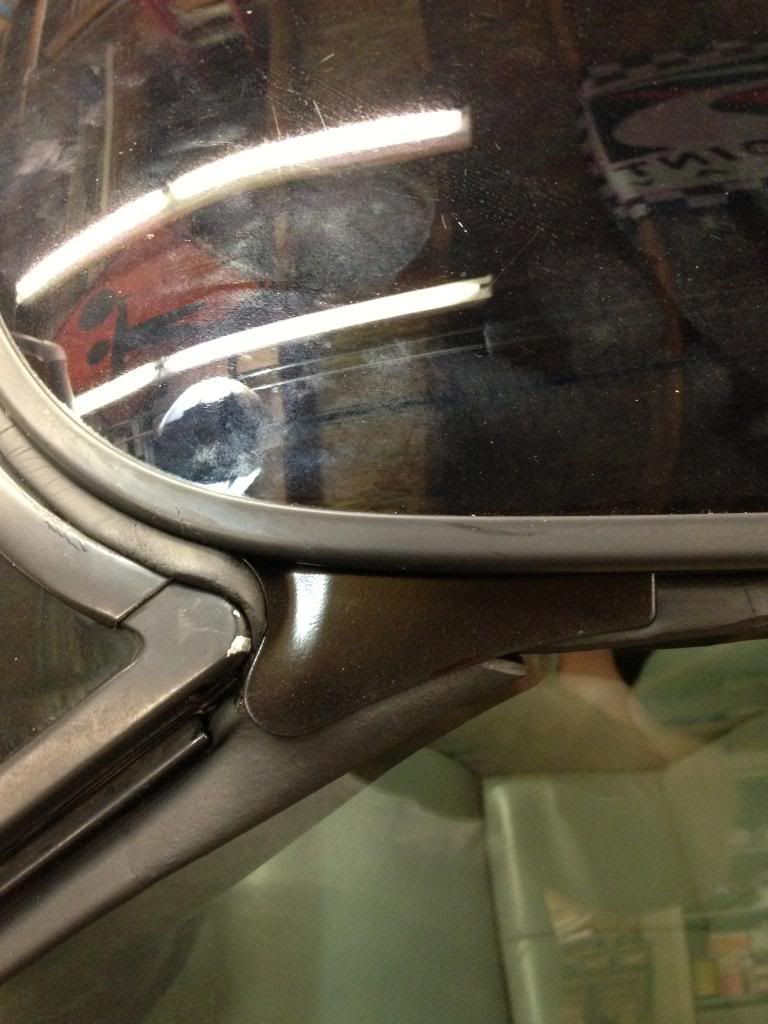
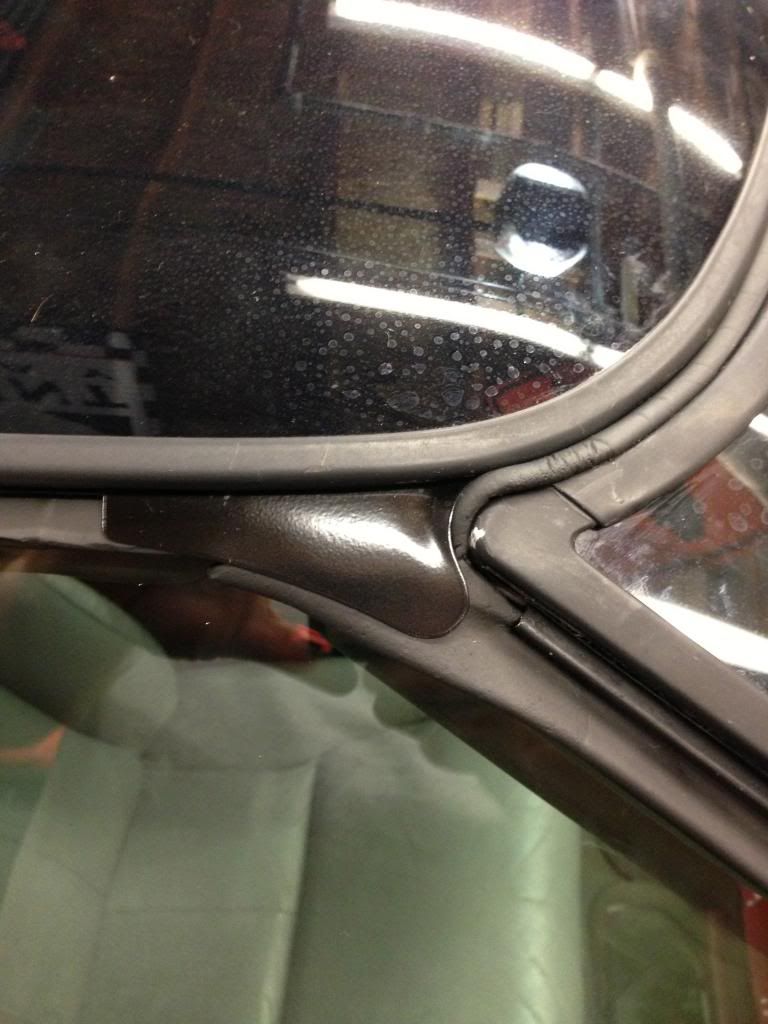
Passenger side installed, I was unhappy with how the corner on this came together. I think that the strip stretched on this side or something just a little. Also you can see the area where my window isn't sealing up but it fit's good in that area.
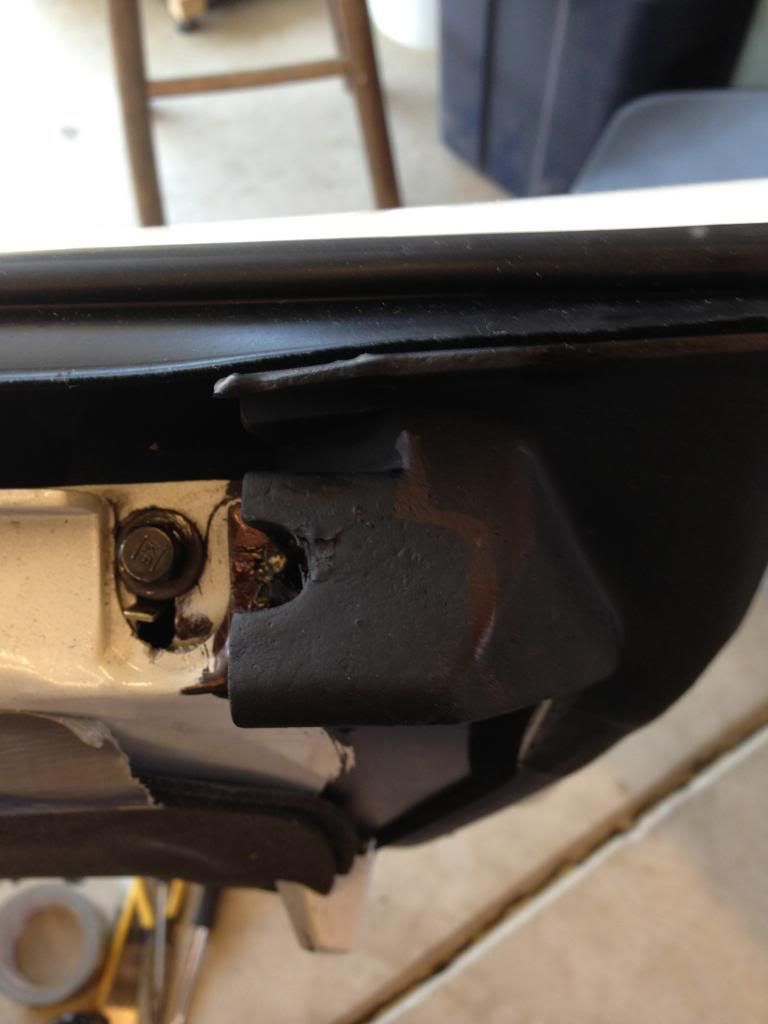
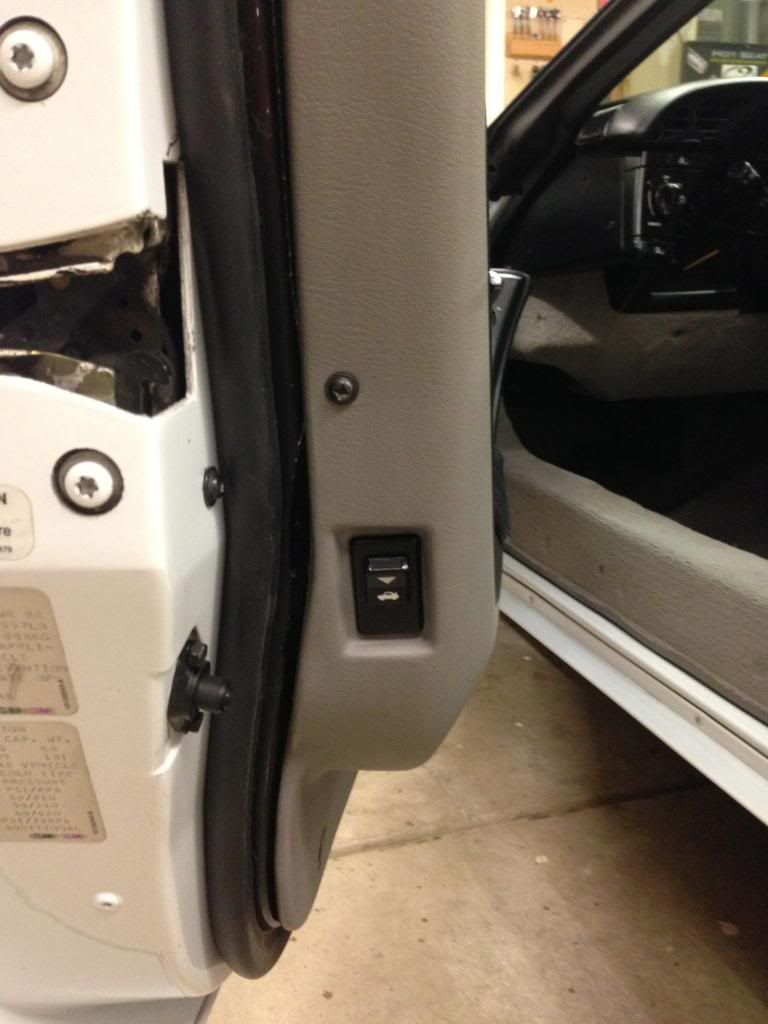
This is where I added the screw through the door panel to help hold it on. I put one of the door panel plastic push pieces in here.
here you can see the door panel plastic push in piece that you can screw to.
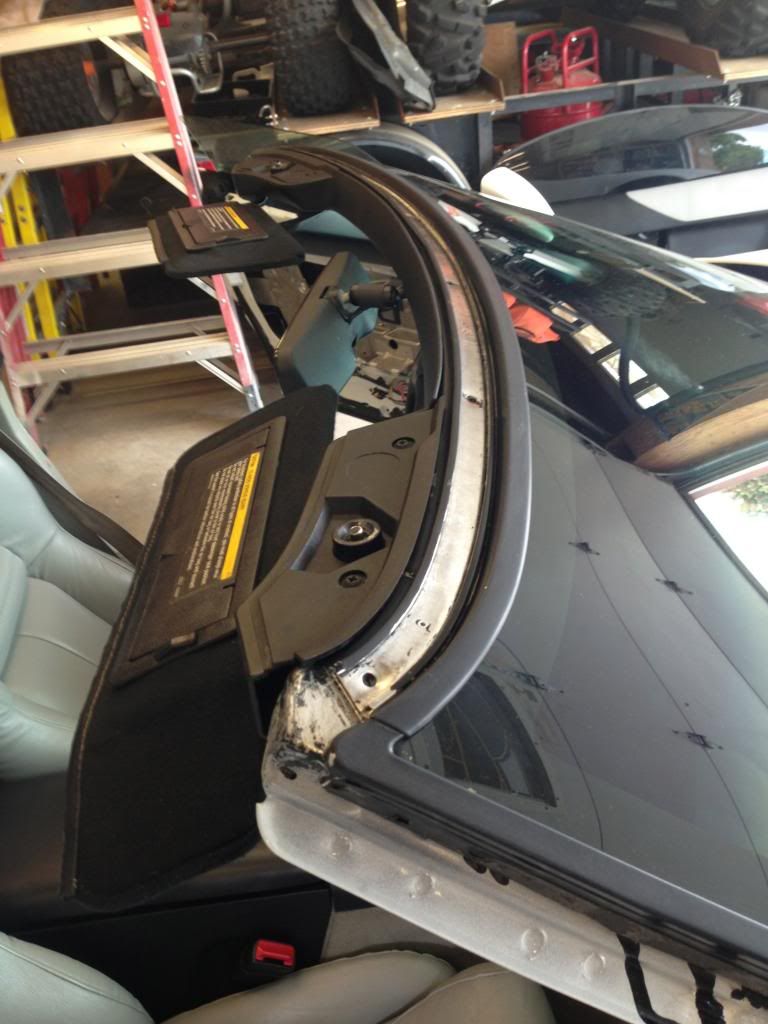
Targa top before weather strip install, you can see the protector that I was talking about in the lower right corner. Make sure you put this in the right spot before you stick it down and install the weatherstrip.
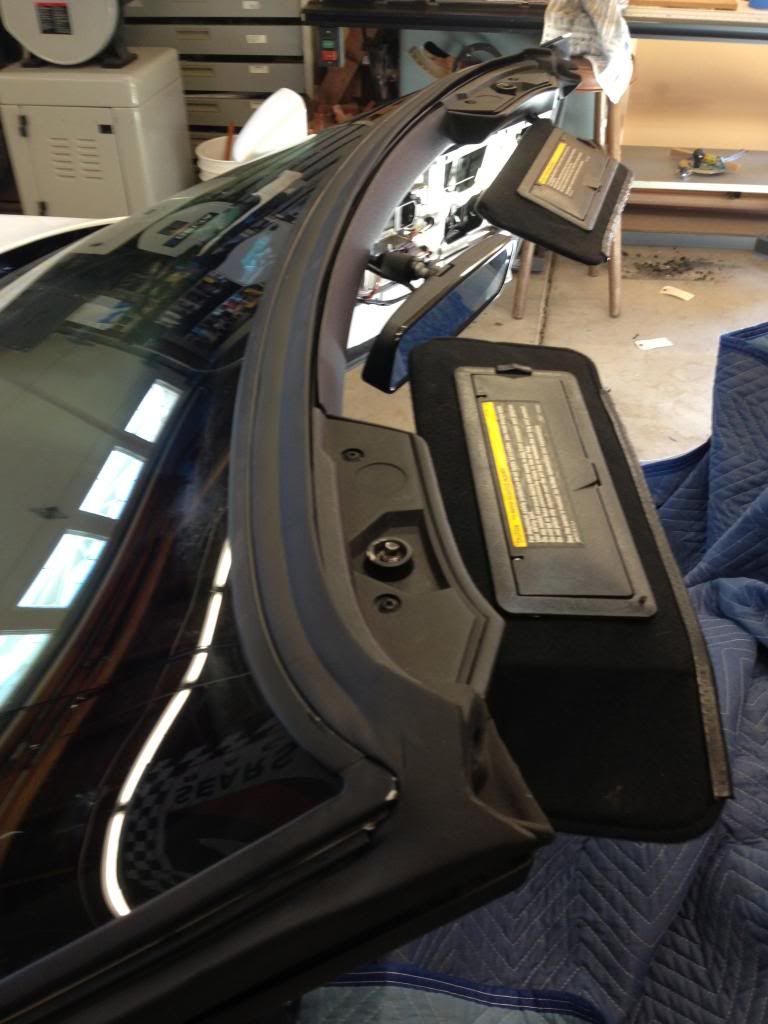
This is a close up of where my protector ended up now, It is not touching the windshield now but I think it should have been back about a 1/4" or so. You can kinda see a groove in the weatherstrip that is closer to where it could have moved back to but that is more like 1/2" back.
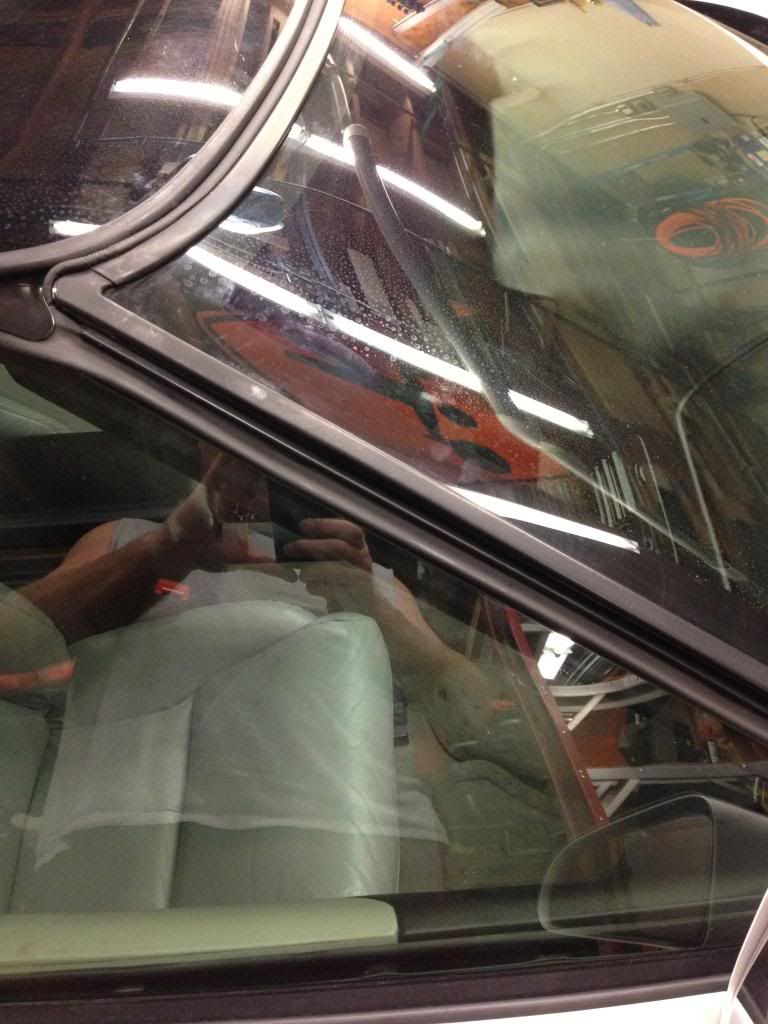
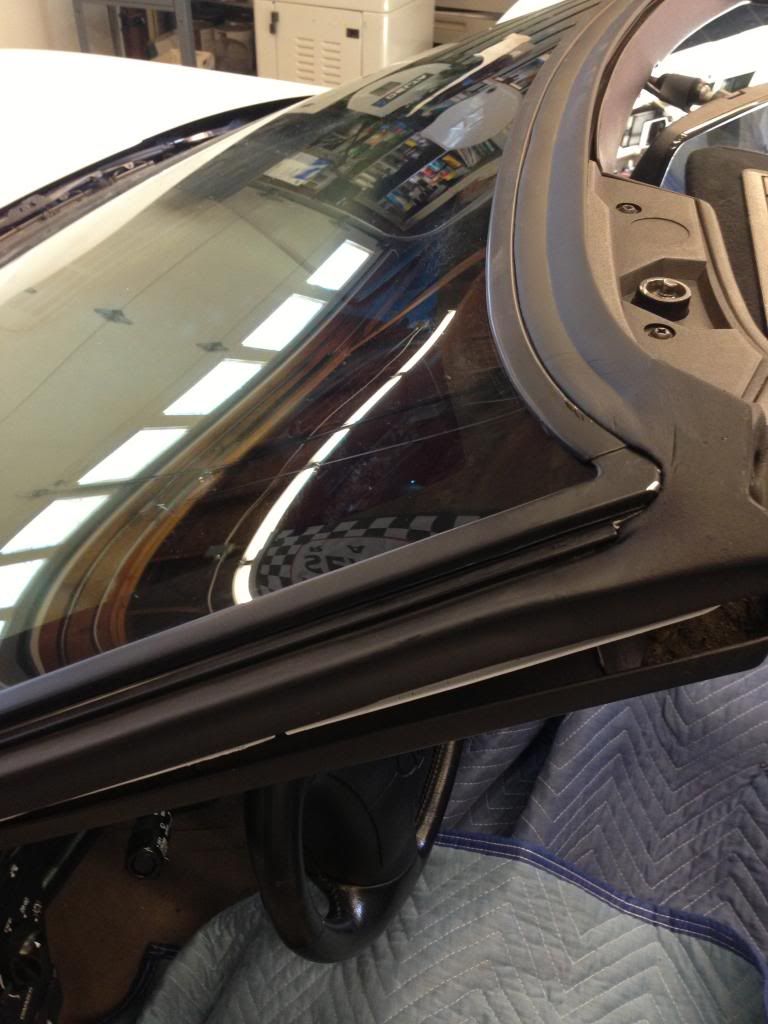
This is the area where the window doesn't seat properly. I am not sure what I could have done better here or what exactly caused this alignment issue.
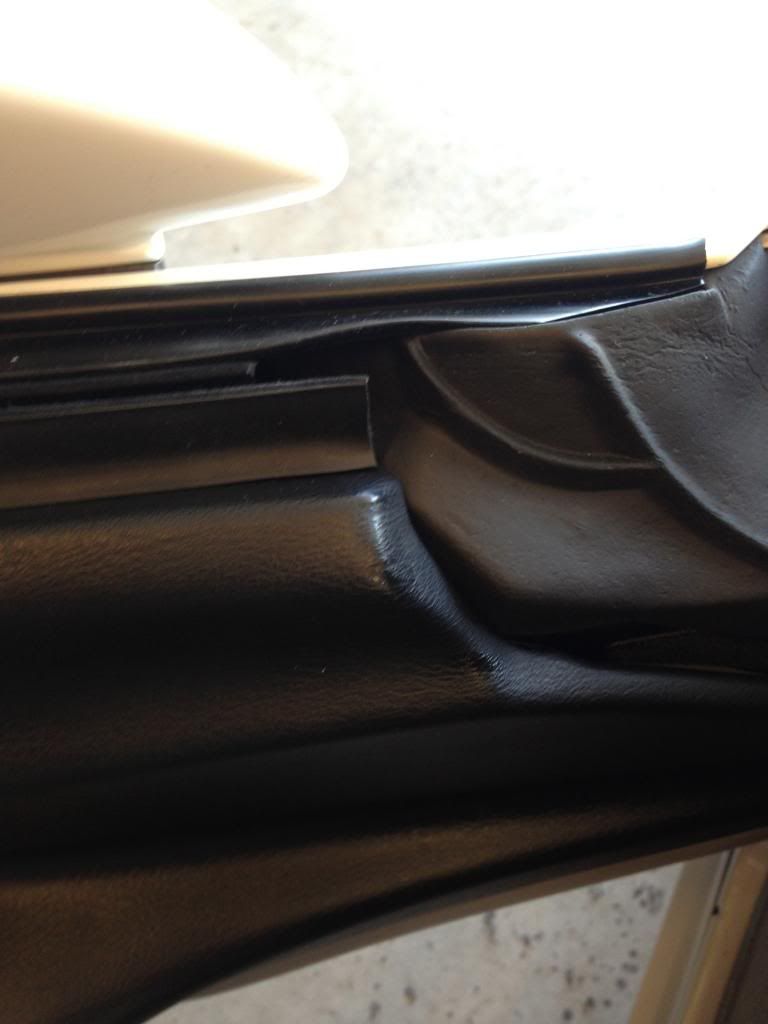
If you look close at the weather strip at the edge of the door you can see where I marked it with a sharpy to cut it out. This allows the door panel to go down nice and tight on that lip at the edge. Someone else posted this on the forum and it works good.
Here is the front edge of the same door marked where I cut it. This is a crap design on GM they should have done something entirely different here, the weatherstrip puts pressure on the panel pushing it up off of the lip that is the only thing holding it in at this area.
Door panel installed
Door panel installed
New screw installed on the outside.
I hope all of this posting will help someone else with this or inspire them to do this work for themselves. I have gotten a lot from reading this forum and this is my attempt to give back as best I can.
Art
I got everything swapped out except for the rear hatch now. Here are a couple of things I have run into:
This is a little more than a one weekend job, I am into it 2 full weekends a a couple of hours each day after work for 2 weeks. I may be a little slow but this is probably more like a 2- 3 weekend project without help and doing it your first time.
The Targa top is a PITA the weather strips are all glued on and don't come off easy and are a lot of work to clean up. Also pay close attention to where the alignment piece (the manual calls this the weatherstrip protector it is the curved pieces at the front of the targa top) on the top goes before you take it apart. The manual says to finesse it to fit but there is no way to figure out where it really needs to go until it is all back together and you put the top on. When it was all said and done mine is now a little more forward than I would like it.
Be prepared for things not to be perfect when you are done there is a bit of finesse to this. I started adjusting the windows and that was a lot easier than I read it would be. What I am not happy with is that my passenger window fits everywhere good and tite except from 1/4 to 3/4 of the way along the front windshield. Nothing I could do would help this and if I moved the window too far forward which buried it into the weatherstrip tight the whole way it would not seal good along the back edge. I think this is a fit problem with either how the weatherstrip is constructed in this area or something with the how I got it pushed into the alignment channel, although I don't see any difference in the install along the whole way.
The aluminum I installed along the door panels needs to be cut exactly to the size of the ribs, ( My ribs almost looked as if they had been custom adjusted at the factory but it was clear that the mold just was really rough) If you don't make them exact you will have to do what I did and grind them down.
When I installed the door panels the holes at the bottom that the push pins went in did not line up. The door panel holes were lower than where they were punched in the frame. Maybe my door panel was a replacement but it had a date of 1994 written on it, more than likely something I did made it sit lower, so I drilled holes in the door panel and pushed the pins in. I am going to get new door panels next I think. I also installed a screw into the piece that sticks out at the rear of your door, the door panel is nice and tight now. Also since I purchased this car the door panel never fit good and was always falling off.
A word on glue, I used glue everywhere that I found it when I removed the factory weatherstrips. This may have been overkill but I figure if they put it on then I should. It was clear where they had put it on. Also in the manual they talk about thumb grade sealer, this is a black sticky putty. I didn't know I needed this and didn't have any. Mostly this was used to fill in a gap where two pieces of metal met, I just put a little extra bead of glue in these areas. I have found no leaks in these areas when I hose tested it today.
I have attached pictures showing the progress, I will probably get to the rear hatch tomorrow and then the car needs a good wash and wax. Then back to driving it.
This is the cleaned up channel with the weatherstrip holder removed use double sided stick tape to put the channel back after you clean it up and paint it.
Another view of the same as above
Weather strip installed
Windshield weather strip removed and cleaned.
Same thing as above
Weather strip installed
Driver side installed
Passenger side installed, I was unhappy with how the corner on this came together. I think that the strip stretched on this side or something just a little. Also you can see the area where my window isn't sealing up but it fit's good in that area.
This is where I added the screw through the door panel to help hold it on. I put one of the door panel plastic push pieces in here.
here you can see the door panel plastic push in piece that you can screw to.
Targa top before weather strip install, you can see the protector that I was talking about in the lower right corner. Make sure you put this in the right spot before you stick it down and install the weatherstrip.
This is a close up of where my protector ended up now, It is not touching the windshield now but I think it should have been back about a 1/4" or so. You can kinda see a groove in the weatherstrip that is closer to where it could have moved back to but that is more like 1/2" back.
This is the area where the window doesn't seat properly. I am not sure what I could have done better here or what exactly caused this alignment issue.
If you look close at the weather strip at the edge of the door you can see where I marked it with a sharpy to cut it out. This allows the door panel to go down nice and tight on that lip at the edge. Someone else posted this on the forum and it works good.
Here is the front edge of the same door marked where I cut it. This is a crap design on GM they should have done something entirely different here, the weatherstrip puts pressure on the panel pushing it up off of the lip that is the only thing holding it in at this area.
Door panel installed
Door panel installed
New screw installed on the outside.
I hope all of this posting will help someone else with this or inspire them to do this work for themselves. I have gotten a lot from reading this forum and this is my attempt to give back as best I can.
Art
The following users liked this post:
CorvetteSwe (08-20-2016)
 08-22-2013, 08:56 AM
#11
Instructor

Member Since: Feb 2013
Location: Port Saint Lucie Florida
Posts: 155
Likes: 0
Received 1 Like
on
1 Post
I just lived the same dream. I had to re-order a second windshield gasket and the second one fits better, but not consistent on both sides of the car. I had to re-order a door gasket that wasn't extruded to the proper length. The targa top was fine along with the pillar and the hatchback. I had to adjust the windows several times to get everything closed up tight. Great post.
08-22-2013, 05:52 PM
#12
Instructor
Thread Starter
Ms206,
Were your weatherstrips form Wilcox? I have been a little less than real happy with there product. Everyone swears by them on the forum and with lack of any other products to compare to I don't Know if anything else is better. I am not bashing them but the rear hatch weatherstrip is really less than ideal and there explanation to me has been to glue it with super glue.
Art
08-22-2013, 07:31 PM
#13
Instructor
Member Since: Feb 2013
Location: Port Saint Lucie Florida
Posts: 155
Likes: 0
Received 1 Like
on
1 Post
Art,
I didn't start off with Wilcox I ordered the Targa seals on eBay and they worked perfect and were manufactured by CRC. The Pillar seal over the roof was from Wilcox and that fit perfect with no issues. My hatchback was a reinforced gasket made in India and bought on eBay. It fit perfect looks great and was half what everyone else was charging. lol The two items that I had the problem with was the right door seal was cut about a 1/2 inch too short. I contacted the seller from eBay and 2 months later I gave up and ordered the seal from Ecklers. The Ecklers part was more expensive but it fit properly the first time. The windshield had to be replaced and the original gasket was not from Wilcox. After waiting two months I requested the glass shop replace the gasket with one that fit better because my car was letting in so much air it sounded like a wind tunnel. The new gasket that I have now is from Wilcox. This one all though is airtight it does not have consistent fitment from the drivers door when compared to the passenger door. Because of this the passenger side I had to adjust the window in and gained proper fitment and seals. The drivers door on the same setting the gasket is almost flush against the window. Its getting better as the seal relaxes and is expanding; but tomorrow I am having my mechanic adjust the window out a bit and we may even try to lower how it sits in the track to see if the seal will look better when compared to the passenger door. It almost looks like it is being pinched. This is the third adjustment and the final one. The glass guys that did my work reworked the window seal and installed the Wilcox at my request but I must say I was disappointed at the fitment and the fact that I am spending another $80.00 -$100.00 trying to adjust the windows to get the proper fitment. The drivers door did close hard at first but now 2 months after the doors have been replaced they are almost closing perfectly every time. I am going to have the car repainted in the spring so I may have the body shop adjust the doors a tad while they are working on it. The weather stripping turned out to be a hug pain in the rear but 2 out of the three Wilcox pieces did fit well with no adjustments. I like the ecklers weather-stripping better but you will pay more for it. I guess when its critical I will go to ecklers from now on. BTW the door seal company based in Florida said they would give me a full refund but a month after hearing from them the check still hasn't arrived. Oh well guess I wont be doing business with them ever again.
mike
08-20-2016, 02:18 AM
#14

Art,
I didn't start off with Wilcox I ordered the Targa seals on eBay and they worked perfect and were manufactured by CRC. The Pillar seal over the roof was from Wilcox and that fit perfect with no issues. My hatchback was a reinforced gasket made in India and bought on eBay. It fit perfect looks great and was half what everyone else was charging. lol The two items that I had the problem with was the right door seal was cut about a 1/2 inch too short. I contacted the seller from eBay and 2 months later I gave up and ordered the seal from Ecklers. The Ecklers part was more expensive but it fit properly the first time. The windshield had to be replaced and the original gasket was not from Wilcox. After waiting two months I requested the glass shop replace the gasket with one that fit better because my car was letting in so much air it sounded like a wind tunnel. The new gasket that I have now is from Wilcox. This one all though is airtight it does not have consistent fitment from the drivers door when compared to the passenger door. Because of this the passenger side I had to adjust the window in and gained proper fitment and seals. The drivers door on the same setting the gasket is almost flush against the window. Its getting better as the seal relaxes and is expanding; but tomorrow I am having my mechanic adjust the window out a bit and we may even try to lower how it sits in the track to see if the seal will look better when compared to the passenger door. It almost looks like it is being pinched. This is the third adjustment and the final one. The glass guys that did my work reworked the window seal and installed the Wilcox at my request but I must say I was disappointed at the fitment and the fact that I am spending another $80.00 -$100.00 trying to adjust the windows to get the proper fitment. The drivers door did close hard at first but now 2 months after the doors have been replaced they are almost closing perfectly every time. I am going to have the car repainted in the spring so I may have the body shop adjust the doors a tad while they are working on it. The weather stripping turned out to be a hug pain in the rear but 2 out of the three Wilcox pieces did fit well with no adjustments. I like the ecklers weather-stripping better but you will pay more for it. I guess when its critical I will go to ecklers from now on. BTW the door seal company based in Florida said they would give me a full refund but a month after hearing from them the check still hasn't arrived. Oh well guess I wont be doing business with them ever again.
mike
I didn't start off with Wilcox I ordered the Targa seals on eBay and they worked perfect and were manufactured by CRC. The Pillar seal over the roof was from Wilcox and that fit perfect with no issues. My hatchback was a reinforced gasket made in India and bought on eBay. It fit perfect looks great and was half what everyone else was charging. lol The two items that I had the problem with was the right door seal was cut about a 1/2 inch too short. I contacted the seller from eBay and 2 months later I gave up and ordered the seal from Ecklers. The Ecklers part was more expensive but it fit properly the first time. The windshield had to be replaced and the original gasket was not from Wilcox. After waiting two months I requested the glass shop replace the gasket with one that fit better because my car was letting in so much air it sounded like a wind tunnel. The new gasket that I have now is from Wilcox. This one all though is airtight it does not have consistent fitment from the drivers door when compared to the passenger door. Because of this the passenger side I had to adjust the window in and gained proper fitment and seals. The drivers door on the same setting the gasket is almost flush against the window. Its getting better as the seal relaxes and is expanding; but tomorrow I am having my mechanic adjust the window out a bit and we may even try to lower how it sits in the track to see if the seal will look better when compared to the passenger door. It almost looks like it is being pinched. This is the third adjustment and the final one. The glass guys that did my work reworked the window seal and installed the Wilcox at my request but I must say I was disappointed at the fitment and the fact that I am spending another $80.00 -$100.00 trying to adjust the windows to get the proper fitment. The drivers door did close hard at first but now 2 months after the doors have been replaced they are almost closing perfectly every time. I am going to have the car repainted in the spring so I may have the body shop adjust the doors a tad while they are working on it. The weather stripping turned out to be a hug pain in the rear but 2 out of the three Wilcox pieces did fit well with no adjustments. I like the ecklers weather-stripping better but you will pay more for it. I guess when its critical I will go to ecklers from now on. BTW the door seal company based in Florida said they would give me a full refund but a month after hearing from them the check still hasn't arrived. Oh well guess I wont be doing business with them ever again.
mike

 08-23-2016, 04:04 AM
#16
08-25-2016, 04:06 AM
#17