
C6 Headlight Lens Restoration / Polishing
 04-20-2014, 12:12 PM
#1
Advanced

Thread Starter

Hey all,
I am sure some of this info is in other places, but I decided to write another thread as a how to article. I could not find a complete solution and wanted to go a step beyond "In my Opinion" or "I would". I wanted a real world solution. As the C6 ages, more and more people will need an option of restoring their headlight lenses. I don't care if you keep your car in the garage. If you drive it, it will have exposure to the elements. 60K of miles is 60K of sun, sand, and environmental exposure.. Time will take its toll on your headlight lenses. Anyway, after much research, this is the option I chose. There are three other options: Store bought kit (about $30), New lenses ($600), New Assemblies (+$1200). I spent about $40.
You can see the album with the pics at:http://forums.corvetteforum.com/memb...ing-40874.html
I have a 2005 C6 Z51 with 60,000 miles on it. My headlamp lenses were beginning to look hazy with some coating delamination, and spidering due to sun exposure and mileage. I garage my car, so the sun is exposure from driving and parking mostly. I researched high and low about polishing them, and the main problem is they are coated with a protective coating.
The truth is that almost all headlights are coated with a special coating to protect the plastic from the sun's UV rays. When you sand and polish, yellowing or pitted lenses, you are sanding down to new material and bringing it back to a polish. When this is done, you no longer have the protective coating and the sun will yellow the plastic quickly. This will require yearly maintenance.
My approach is to remove the coating, correct the imperfections, restore the finish to a 600 grit finish, and clear coat with a 2 part UV protecting clear coat. NOTE: DO NOT USE ACETONE IN THIS PROCESS!
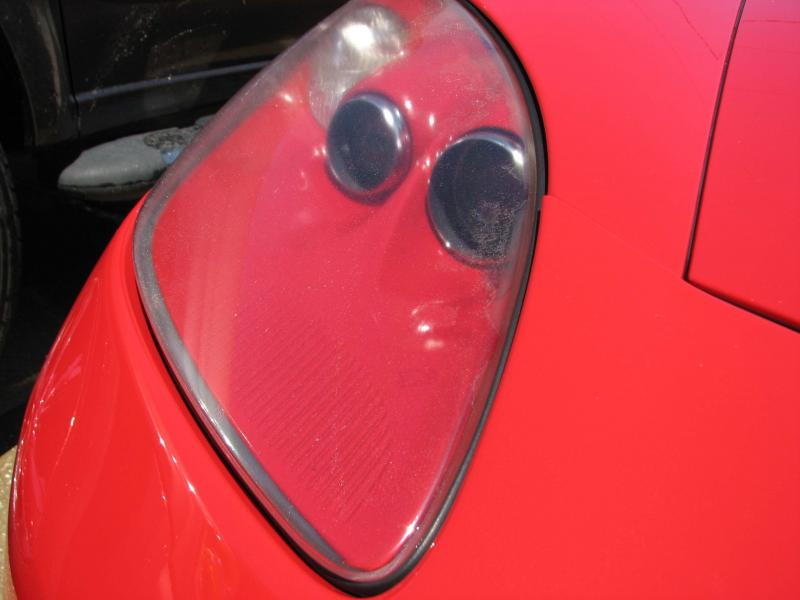
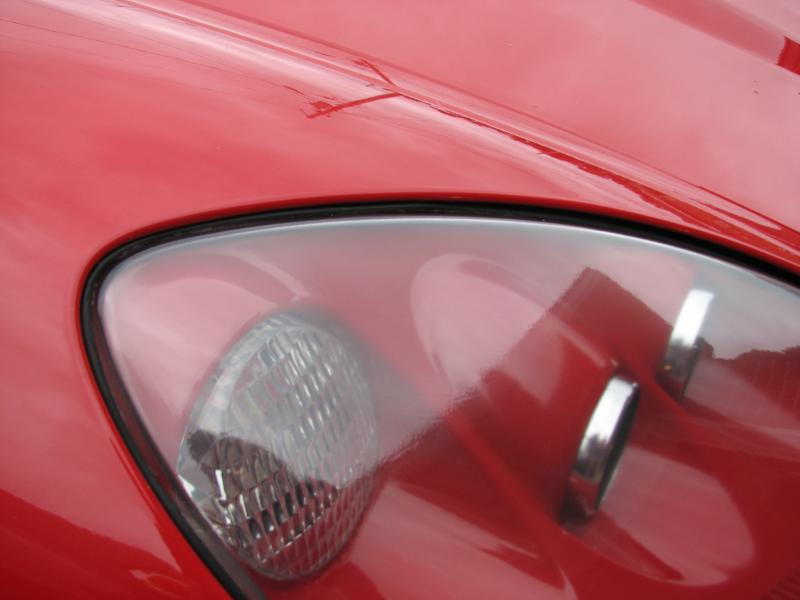
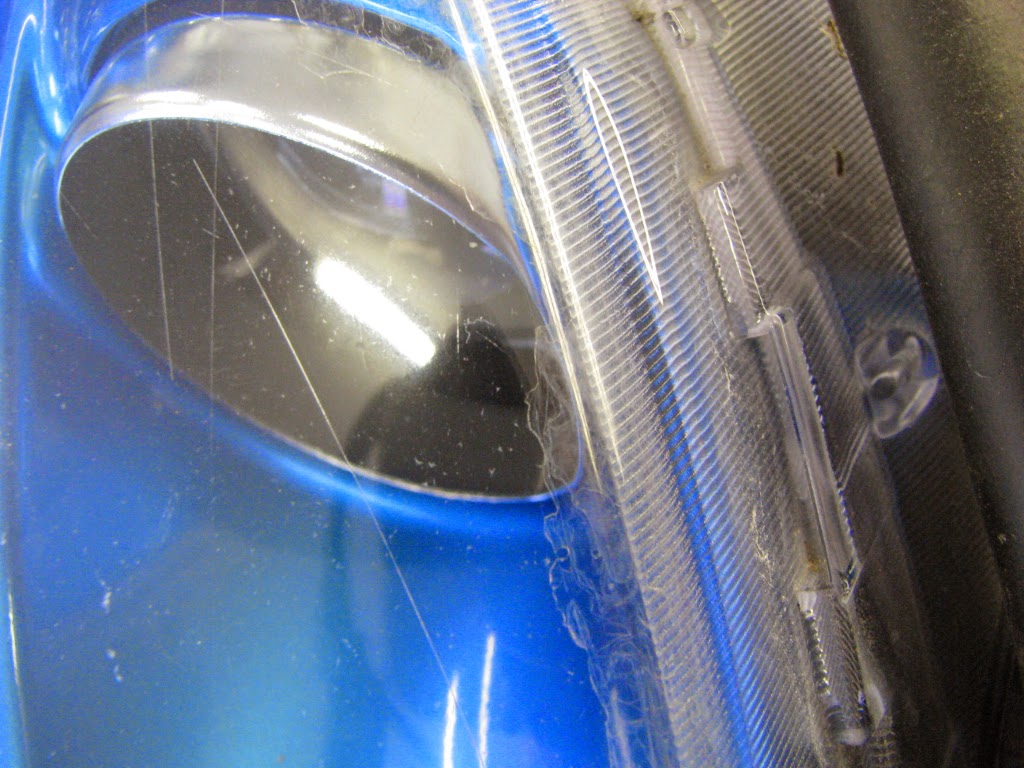
Before Images:
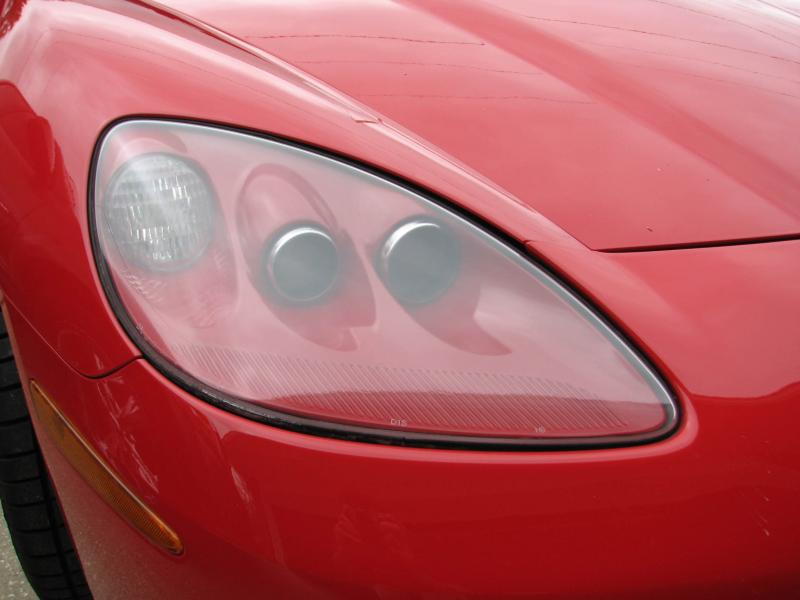
Right Side Headlight lens
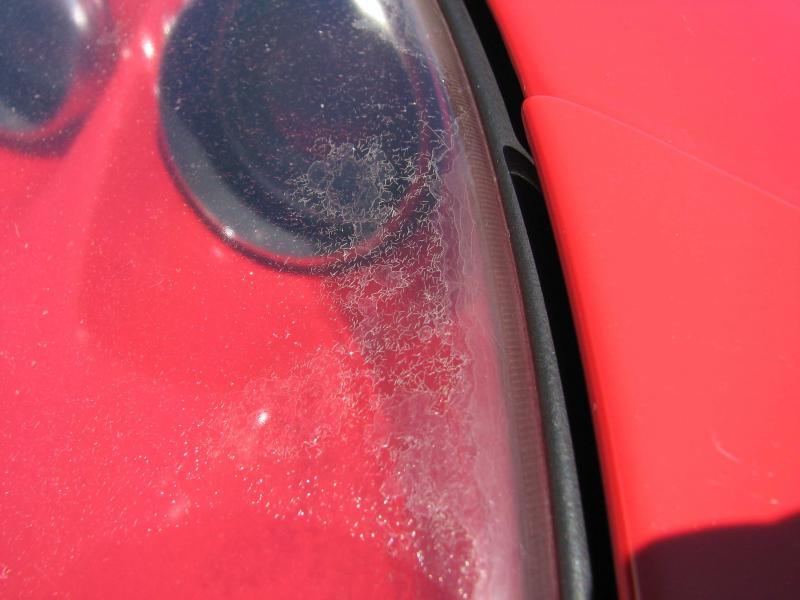
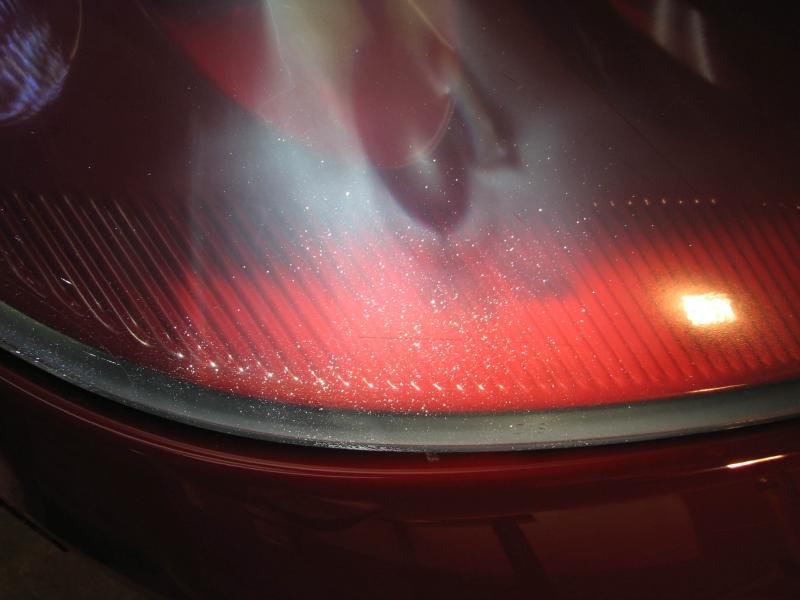
Close up of delamination
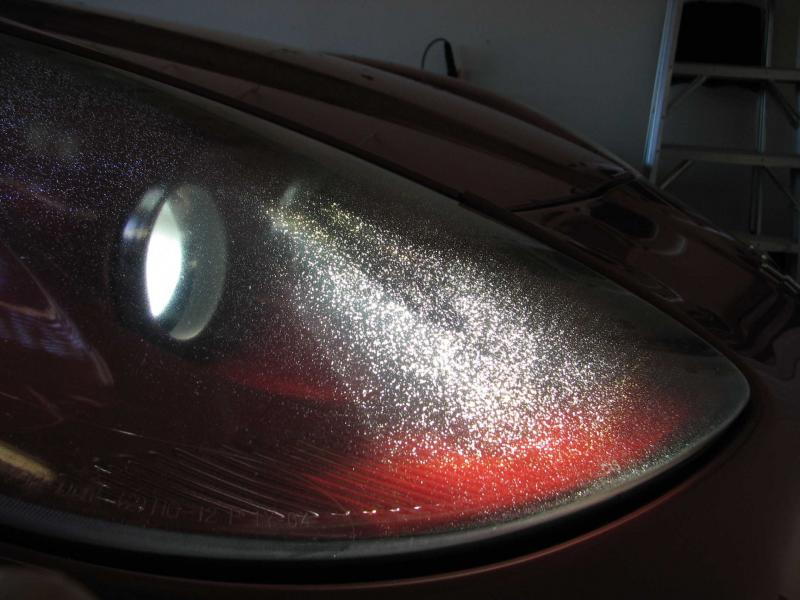
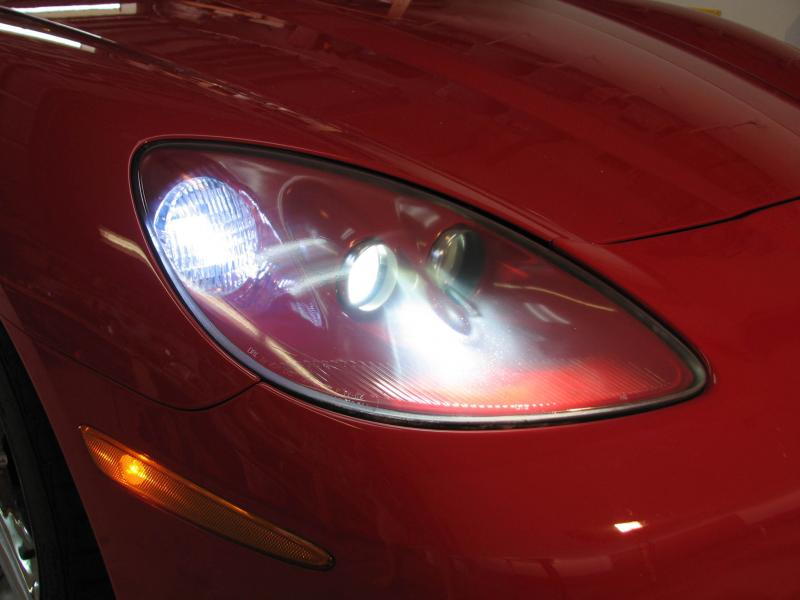
Diffraction of headlamps through spidering and delamination
MATERIALS:
Foam automotive sanding block
Wet Sandpapers:
180
320
600
1" Painters tape
MicroFiber Towel
2 each .7mil 9x12 plastic (Drop cloth)
Tack Cloth
Spray Max 2K Clear Coat, 2part (about $30)
5 hours
STEP 1) Wash the headlamps and front end. You want a clean work area. let dry.
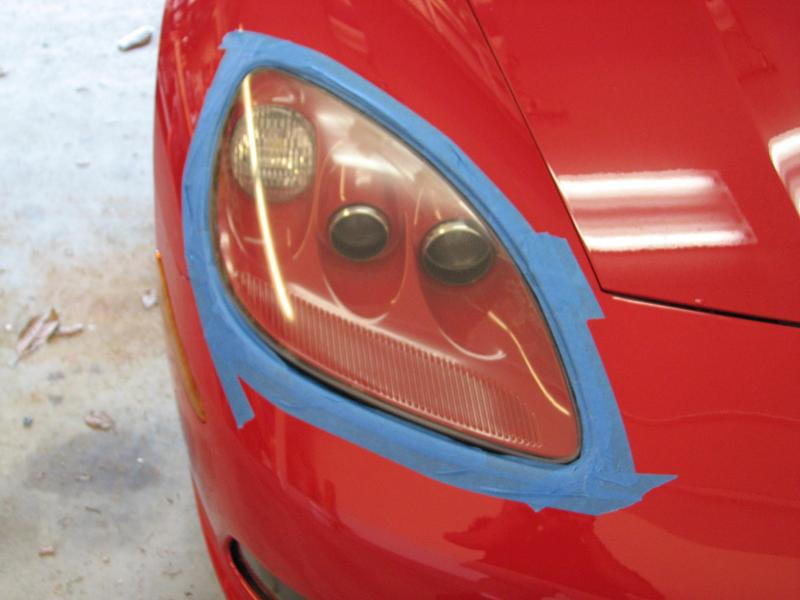
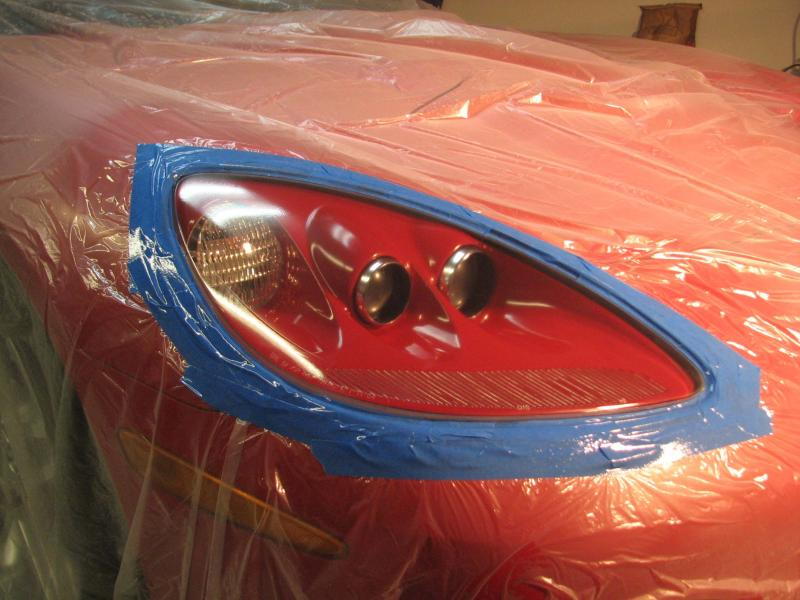
Step 2) Mask the headlight openings to protect the paint from the sanding you are about to do. This will be removed after sanding, it is for protection..
STEP 3) Wet Sand the headlamp lens with 320 sandpaper. I used 180 as well. The Coating on the Headlamps is very hard, and I found 180 was best for removal of the coating.
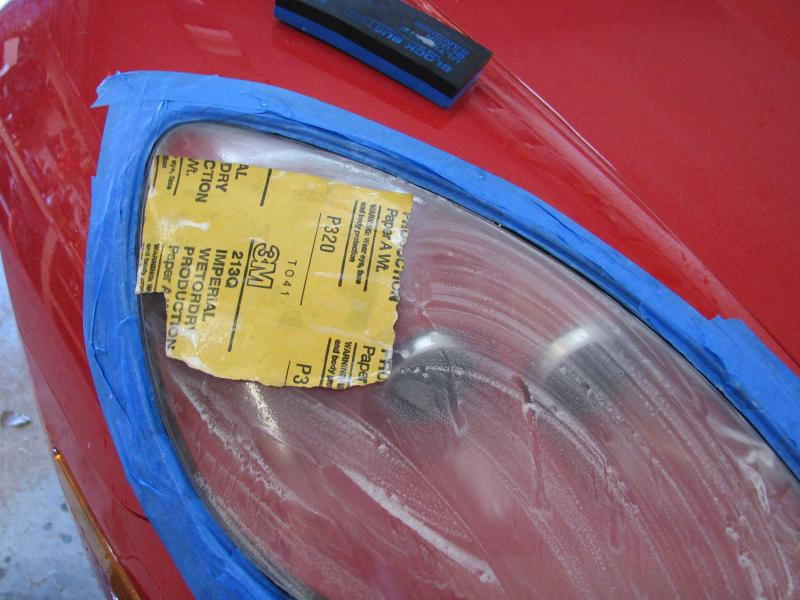
Make sure all the coating is removed, you can see the difference in the plastic surface and the coated surface in this image.
STEP 4) Wet sand the 180 strokes out with the 320 paper, and then sand the 320 strokes out with the 600. I use alternating methods. horizontal strokes for 180, circular strokes for 320, and vertical strokes for 600. This allows me to see removal of the previous strokes directions. This process insures the following: When you finish with 320, you should not see a single horizontal scratch, When you finish with 600 all circular strokes should be gone. Take Your time, this will take a few hours. Keep the paper wet, use the foam block, and change the paper often. Dry occasionally with the micro towel to look at your progress. Why Stop at 600? There is no reason to sand to a finer finish if recoating with clear. The paint needs the finish to have scratches for bonding. Also, the coat of clear is thicker than the 600 scratches and will fill. You will most likely see no difference in going to a 1000 or 1200 grit finish. These are polishing grits.
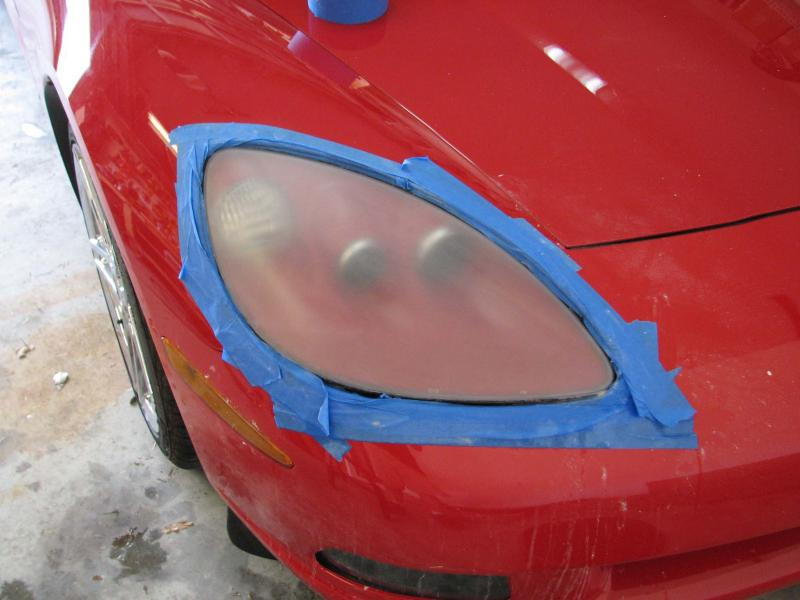
STEP 5) Remove Tape, Wash Headlamps and front end again. Let Dry, use compressed air to blow out headlight gasket areas. The area must be dry.
STEP 6) Mask Area Around Headlamp. You should mask to include the headlight lens gasket. You do not want to paint the rubber as this will harden it. Take your time once again. Cover the Entire vehicle with plastic to protect from overspray.
STEP 7)
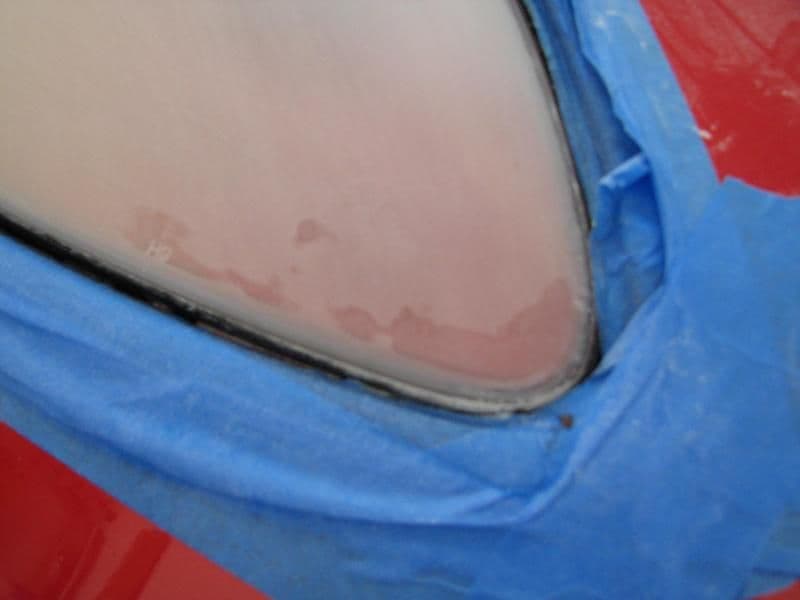
SOLVENT ALERT..... This is where I accidentally cleaned the headlamp with acetone. I grabbed the wrong solvent and when I wiped down, the acetone crazed the plastic in one place. I caught my mistake, but it was too late. Use a plastic safe cleaner. I recommend 99% Isopropyl, or a cleaner from an automotive paint supply.
Clean and Tack cloth paint area
STEP 8)
Apply two coats of Spray Max 2K Clear coat. Mix paint per instructions and apply within product use requirements. You may see a little clouding when each coat goes down, this will go back to transparent. I apply a light "Tack" coat that just goes clear but does not fully flow. I then wait 15 minutes for the coat to "Flash Off" Then I apply my Flow Coat. Apply in even strokes. Follow the wet line. The goal is to achieve flow but not get sags from too much.
STEP 9) Let Dry!!!
STEP10) Remove masking and Enjoy!

I am going to color sand and buff in a few weeks to take out the small amount of Orange peel. If you do this, be careful and use 1000 and 1500 grit papers, finish with a polish. Do not go through your clear coat.
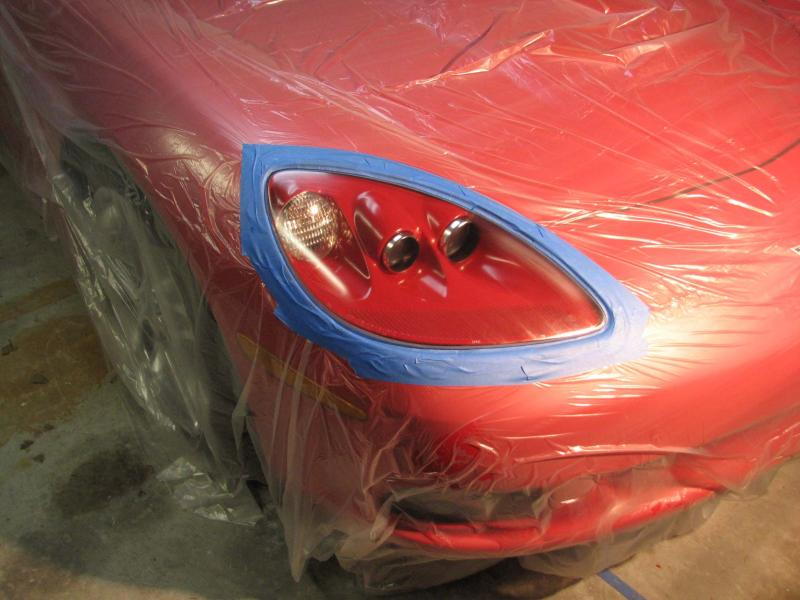
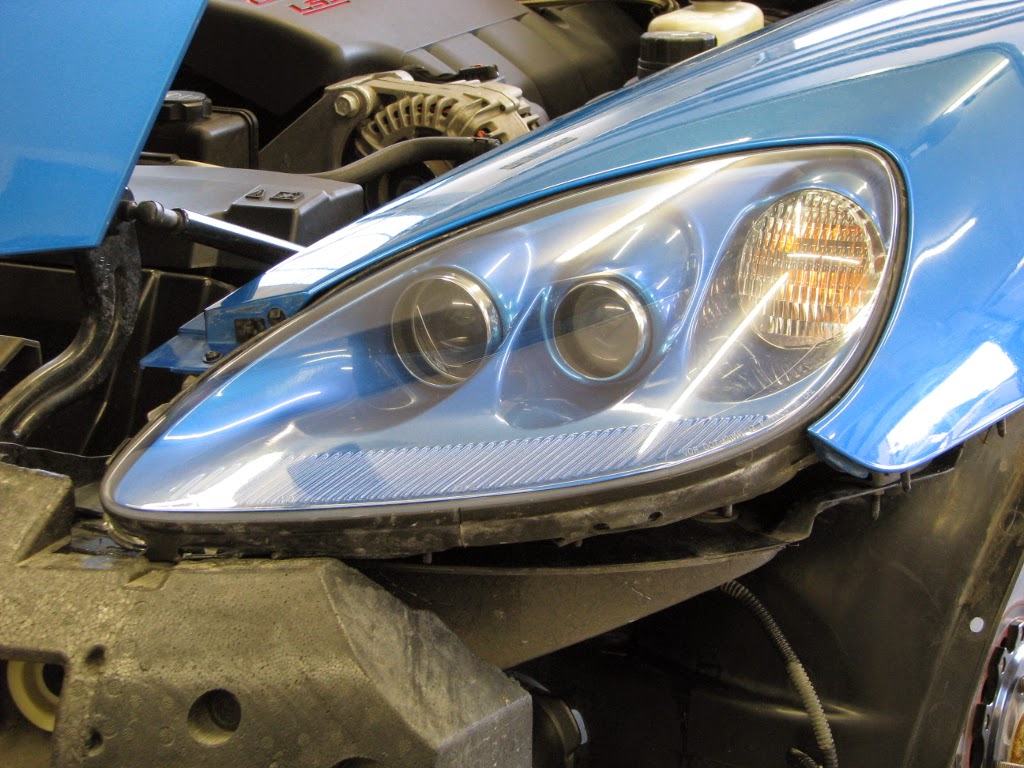
After Photos:
Decreased Dispersion, and Spidering
Clear In the sun, no finish delamination.
I am sure some of this info is in other places, but I decided to write another thread as a how to article. I could not find a complete solution and wanted to go a step beyond "In my Opinion" or "I would". I wanted a real world solution. As the C6 ages, more and more people will need an option of restoring their headlight lenses. I don't care if you keep your car in the garage. If you drive it, it will have exposure to the elements. 60K of miles is 60K of sun, sand, and environmental exposure.. Time will take its toll on your headlight lenses. Anyway, after much research, this is the option I chose. There are three other options: Store bought kit (about $30), New lenses ($600), New Assemblies (+$1200). I spent about $40.
You can see the album with the pics at:http://forums.corvetteforum.com/memb...ing-40874.html
I have a 2005 C6 Z51 with 60,000 miles on it. My headlamp lenses were beginning to look hazy with some coating delamination, and spidering due to sun exposure and mileage. I garage my car, so the sun is exposure from driving and parking mostly. I researched high and low about polishing them, and the main problem is they are coated with a protective coating.
The truth is that almost all headlights are coated with a special coating to protect the plastic from the sun's UV rays. When you sand and polish, yellowing or pitted lenses, you are sanding down to new material and bringing it back to a polish. When this is done, you no longer have the protective coating and the sun will yellow the plastic quickly. This will require yearly maintenance.
My approach is to remove the coating, correct the imperfections, restore the finish to a 600 grit finish, and clear coat with a 2 part UV protecting clear coat. NOTE: DO NOT USE ACETONE IN THIS PROCESS!
Before Images:
Right Side Headlight lens
Close up of delamination
Diffraction of headlamps through spidering and delamination
MATERIALS:
Foam automotive sanding block
Wet Sandpapers:
180
320
600
1" Painters tape
MicroFiber Towel
2 each .7mil 9x12 plastic (Drop cloth)
Tack Cloth
Spray Max 2K Clear Coat, 2part (about $30)
5 hours
STEP 1) Wash the headlamps and front end. You want a clean work area. let dry.
Step 2) Mask the headlight openings to protect the paint from the sanding you are about to do. This will be removed after sanding, it is for protection..
STEP 3) Wet Sand the headlamp lens with 320 sandpaper. I used 180 as well. The Coating on the Headlamps is very hard, and I found 180 was best for removal of the coating.
Make sure all the coating is removed, you can see the difference in the plastic surface and the coated surface in this image.
STEP 4) Wet sand the 180 strokes out with the 320 paper, and then sand the 320 strokes out with the 600. I use alternating methods. horizontal strokes for 180, circular strokes for 320, and vertical strokes for 600. This allows me to see removal of the previous strokes directions. This process insures the following: When you finish with 320, you should not see a single horizontal scratch, When you finish with 600 all circular strokes should be gone. Take Your time, this will take a few hours. Keep the paper wet, use the foam block, and change the paper often. Dry occasionally with the micro towel to look at your progress. Why Stop at 600? There is no reason to sand to a finer finish if recoating with clear. The paint needs the finish to have scratches for bonding. Also, the coat of clear is thicker than the 600 scratches and will fill. You will most likely see no difference in going to a 1000 or 1200 grit finish. These are polishing grits.
STEP 5) Remove Tape, Wash Headlamps and front end again. Let Dry, use compressed air to blow out headlight gasket areas. The area must be dry.
STEP 6) Mask Area Around Headlamp. You should mask to include the headlight lens gasket. You do not want to paint the rubber as this will harden it. Take your time once again. Cover the Entire vehicle with plastic to protect from overspray.
STEP 7)
SOLVENT ALERT..... This is where I accidentally cleaned the headlamp with acetone. I grabbed the wrong solvent and when I wiped down, the acetone crazed the plastic in one place. I caught my mistake, but it was too late. Use a plastic safe cleaner. I recommend 99% Isopropyl, or a cleaner from an automotive paint supply.
Clean and Tack cloth paint area
STEP 8)
Apply two coats of Spray Max 2K Clear coat. Mix paint per instructions and apply within product use requirements. You may see a little clouding when each coat goes down, this will go back to transparent. I apply a light "Tack" coat that just goes clear but does not fully flow. I then wait 15 minutes for the coat to "Flash Off" Then I apply my Flow Coat. Apply in even strokes. Follow the wet line. The goal is to achieve flow but not get sags from too much.
STEP 9) Let Dry!!!
STEP10) Remove masking and Enjoy!
I am going to color sand and buff in a few weeks to take out the small amount of Orange peel. If you do this, be careful and use 1000 and 1500 grit papers, finish with a polish. Do not go through your clear coat.
After Photos:
Decreased Dispersion, and Spidering
Clear In the sun, no finish delamination.
Last edited by NavarreVette; 04-20-2014 at 12:47 PM.

The following 10 users liked this post by NavarreVette:
72greg (07-26-2020),
ButWhatDoIKnow (06-05-2021),
DesertRunner (10-06-2020),
DrGooch (08-29-2021),
FlyAndFight (04-26-2020),
and 5 others liked this post.
04-20-2014, 02:13 PM
#4
Instructor
Nice post.....I did this to my Impala and know how time consuming and difficult this job can be. You brought out some excellent ideas and points I plan to use on my next refinish job. Hopefully, the Corvette lenses are way off in the distant future!


 04-21-2014, 12:41 AM
#6
Instructor

Member Since: Oct 2013
Location: Pennsylvania
Posts: 135
Likes: 0
Received 0 Likes
on
0 Posts
 04-21-2014, 08:32 AM
#9
Team Owner


Member Since: May 2000
Location: Plantation Florida USAF(Retired) 1966-1990
Posts: 47,907
Received 4,505 Likes
on
3,590 Posts
U.S. Air Force
St. Jude Donor '05-'06-'07-'08-'09-'10-'11-'12-'13-'14-'15-'16-'17-'18-'19-'20-'21-'22-'23-'24
NCM Sinkhole Donor


 Nice job!

 05-28-2014, 10:33 AM
#12
Safety Car

Thanks, never knew you repair the lenses in this fashion. Thought they had to come off the car and the lenses had to be replaced. You saved me some money and time.
05-28-2014, 08:31 PM
#13
Safety Car
Good job, looks great
Question It appears that your clear is a two part mix, where did you get it and what did you use to apply it
Question It appears that your clear is a two part mix, where did you get it and what did you use to apply it
08-02-2014, 06:10 PM
#14
Burning Brakes

Looks great. I too have a 2005 precision red with one hundred and 30 thousand miles and the lens are looking bad. I was going to change the lens out but I will try this first. The stuff you spray after sanding where did you get it. Thanks 
08-02-2014, 08:23 PM
#16
Instructor
Good DYI NavarreVette, reading your post made me decide to go forward with polishing my lenses.
My lenses had the same level of deterioration and I went through a similar type of polishing process starting with 320 and finishing with 3000. I removed the lights only because it eliminated any chance I would sand through an edge.

The only difference being I coated the lenses with Minwax Helmsman Spar Urethane Clear mixed 50/50 with mineral spirits. You can buy both at any home improvement store, the components are around $20, provide UV protection and there are numerous threads around the internet showing the long term durability of this as a protective coating. It was also very easy to do, if you mess up you take a rag soaked in mineral spirits, wipe the lens off and re-apply the coating with a foam brush. After applying the mix and setting them in the sun they were dry to the touch in less than 30 minutes.

Thanks for the motivation to accomplish this NavarreVette.
My lenses had the same level of deterioration and I went through a similar type of polishing process starting with 320 and finishing with 3000. I removed the lights only because it eliminated any chance I would sand through an edge.
The only difference being I coated the lenses with Minwax Helmsman Spar Urethane Clear mixed 50/50 with mineral spirits. You can buy both at any home improvement store, the components are around $20, provide UV protection and there are numerous threads around the internet showing the long term durability of this as a protective coating. It was also very easy to do, if you mess up you take a rag soaked in mineral spirits, wipe the lens off and re-apply the coating with a foam brush. After applying the mix and setting them in the sun they were dry to the touch in less than 30 minutes.
Thanks for the motivation to accomplish this NavarreVette.
The following 2 users liked this post by Honch:
FlyAndFight (04-26-2020),
NBVette_Canada (10-04-2020)
08-03-2014, 03:01 AM
#17
Race Car Tech

both look great 
08-03-2014, 04:38 AM
#18
Race Director

I need to do this to another vehicle. The Corvette forum comes through again. I hope it is not too hard to remove the headlights.
Question: I have a good air compressor. Would it be a good idea to spray on the clear coat for UV protection?
Question: I have a good air compressor. Would it be a good idea to spray on the clear coat for UV protection?
08-03-2014, 04:59 AM
#19
Team Owner
Member Since: Jun 2005
Location: Northern, VA
Posts: 46,106
Received 2,481 Likes
on
1,944 Posts
St. Jude Donor '15
"In honor of jpee"

Excellent write up with pics! I have just a couple of questions:
Step 8
"Apply two coats of Spray Max 2K Clear coat. Mix paint per instructions and apply within product use requirements. You may see a little clouding when each coat goes down, this will go back to transparent. I apply a light "Tack" coat that just goes clear but does not fully flow. I then wait 15 minutes for the coat to "Flash Off" Then I apply my Flow Coat. Apply in even strokes. Follow the wet line. The goal is to achieve flow but not get sags from too much."
Without seeing or knowing what Spray Max 2K is, I don't know if it's in a spray can or not--so my question is, what gets mixed? And what did you use to apply it?
I'm also not sure what you mean "flow coat," or following the "wet line."
Assumptions: "flow coat" means the final or second coat that goes to the edges of the headlight lens.
Thanks, and thanks also to HOnch.