When you click on links to various merchants on this site and make a purchase, this can result in this site earning a commission. Affiliate programs and affiliations include, but are not limited to, the eBay Partner Network.
Paint Used.... Spray Max 2K Clear Coat, 2part (about $30)
For everyone who has asked, the paint I used is an automotive 2 part clear. I have a compressor and spray gun, but I went with Spray Max 2K Clear Coat, 2part. This prevented me from buying hardner reducer, and the paint. The Spray Max 2K Clear Coat, 2part is an Aerosol can with a hardener cylinder that has a plunger to release the hardener into the aerosol can. THis gives true 2 part performance without having to break the bank. It is awesome for small jobs like this. You cant get all of the paint supplies separately to do this with PPG or others for $30.
Great Job, it looks awesome. Keep us in the loop on how the paint holds up. I have a few friends who have now done their cars as well, and we are now tracking how long it lasts.
A few friends did the polish kit from 3M and their polish and coat kit lasted a year. However, those kits do not recoat with a true UV hard coat like the automotive paints. They just had yellowing.
Looks really great man. I am glad I could help people out.
Excellent write up with pics! I have just a couple of questions:
Step 8 "Apply two coats of Spray Max 2K Clear coat. Mix paint per instructions and apply within product use requirements. You may see a little clouding when each coat goes down, this will go back to transparent. I apply a light "Tack" coat that just goes clear but does not fully flow. I then wait 15 minutes for the coat to "Flash Off" Then I apply my Flow Coat. Apply in even strokes. Follow the wet line. The goal is to achieve flow but not get sags from too much."
Without seeing or knowing what Spray Max 2K is, I don't know if it's in a spray can or not--so my question is, what gets mixed? And what did you use to apply it?
I'm also not sure what you mean "flow coat," or following the "wet line."
Assumptions: "flow coat" means the final or second coat that goes to the edges of the headlight lens.
Thanks, and thanks also to HOnch.
HOnch,
The paint is in an Aerosol can with a plunger that you depress to release the hardner and mix prior to use. This gives you tru two part paint in an Aerosol. A tru two part paint will cure in the absence of air. It does not "Dry" it Hardens. The paint is listed in the instructions and you can buy it from Amazon.com
Flow Coat and Wet line are painting terms as I have been taught over the years.
When I paint, I put a tack coat down first. This is a light coat of paint that looks like overspray. It is intended for the tack coat to adhere and harden to the surface so when you apply a heavier coat, it will bind with the previous coat and not sag. This second coat is considered a flow coat. Think of it as applying a little more paint so it can flow out and be smooth. The wet line is the edge of the previous stroke. You only want to overlap the wet edge enough to get the edge spray to produce a similar thickness to the previous edge. You are in effect blending the two edges of the spray to produce a coating similar in thickness to the center of your spray.
All of this helps you get good results out of an aerosol or even a regular gun..
I recently did this on a car i bought for my little brother when he turned 16 years old.. car was $400 bucks so couldn't complain to much.. but i used clear coat for automotive wheels, was told its better because the bulbs make some normal auto clear coat yellow over time.. i used brake cleaner and sand paper to sand the surface down.. got the coating off very fast..
Hey all,
I am sure some of this info is in other places, but I decided to write another thread as a how to article. I could not find a complete solution and wanted to go a step beyond "In my Opinion" or "I would". I wanted a real world solution. As the C6 ages, more and more people will need an option of restoring their headlight lenses. I don't care if you keep your car in the garage. If you drive it, it will have exposure to the elements. 60K of miles is 60K of sun, sand, and environmental exposure.. Time will take its toll on your headlight lenses. Anyway, after much research, this is the option I chose. There are three other options: Store bought kit (about $30), New lenses ($600), New Assemblies (+$1200). I spent about $40.
I have a 2005 C6 Z51 with 60,000 miles on it. My headlamp lenses were beginning to look hazy with some coating delamination, and spidering due to sun exposure and mileage. I garage my car, so the sun is exposure from driving and parking mostly. I researched high and low about polishing them, and the main problem is they are coated with a protective coating.
The truth is that almost all headlights are coated with a special coating to protect the plastic from the sun's UV rays. When you sand and polish, yellowing or pitted lenses, you are sanding down to new material and bringing it back to a polish. When this is done, you no longer have the protective coating and the sun will yellow the plastic quickly. This will require yearly maintenance.
My approach is to remove the coating, correct the imperfections, restore the finish to a 600 grit finish, and clear coat with a 2 part UV protecting clear coat. NOTE: DO NOT USE ACETONE IN THIS PROCESS!
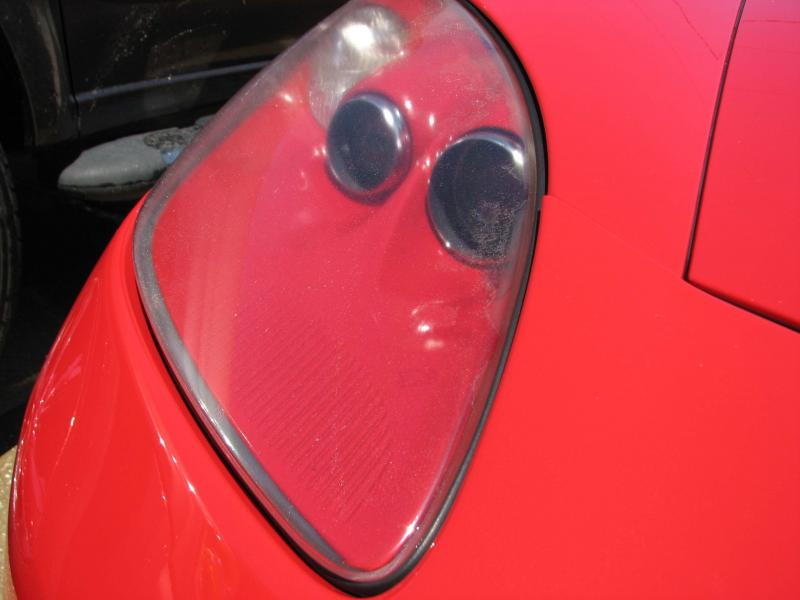
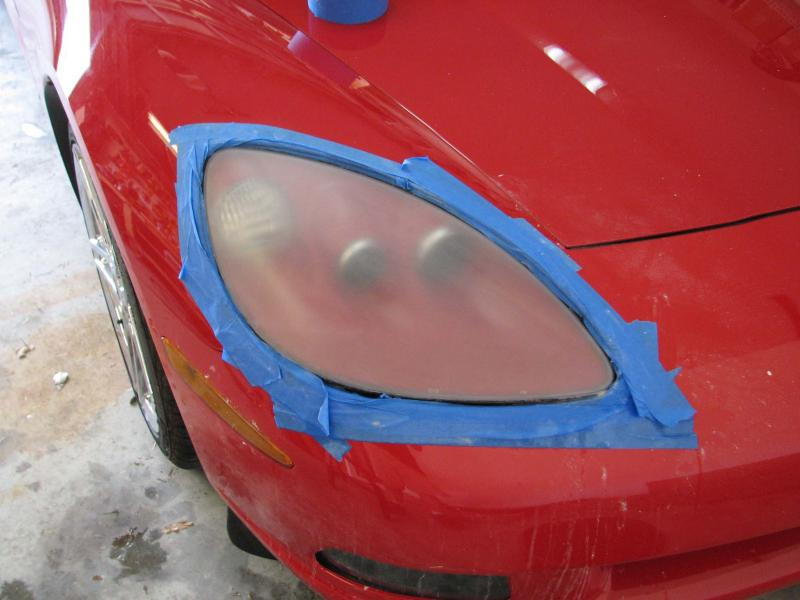
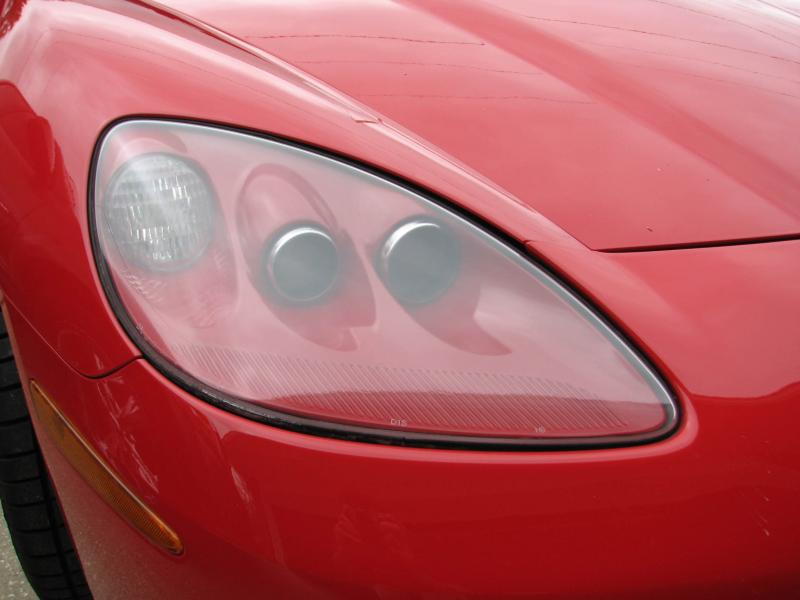
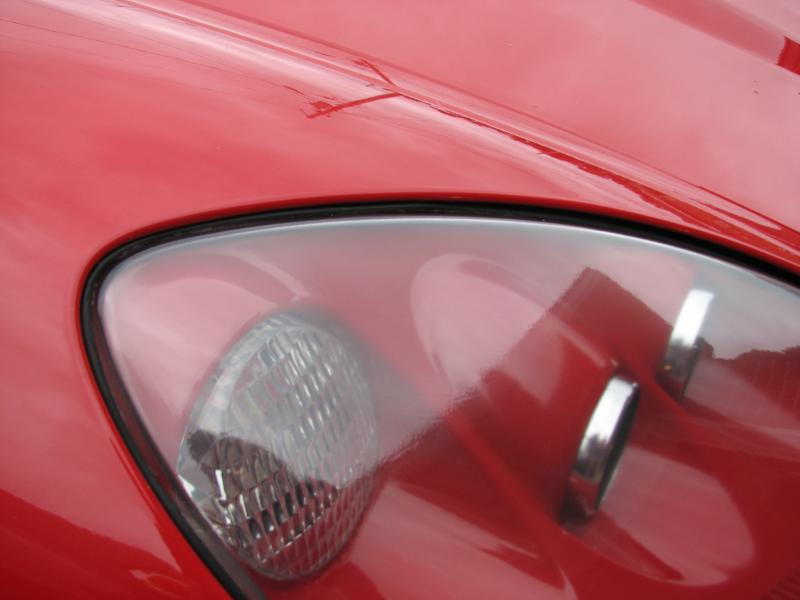
Before Images:
Right Side Headlight lens
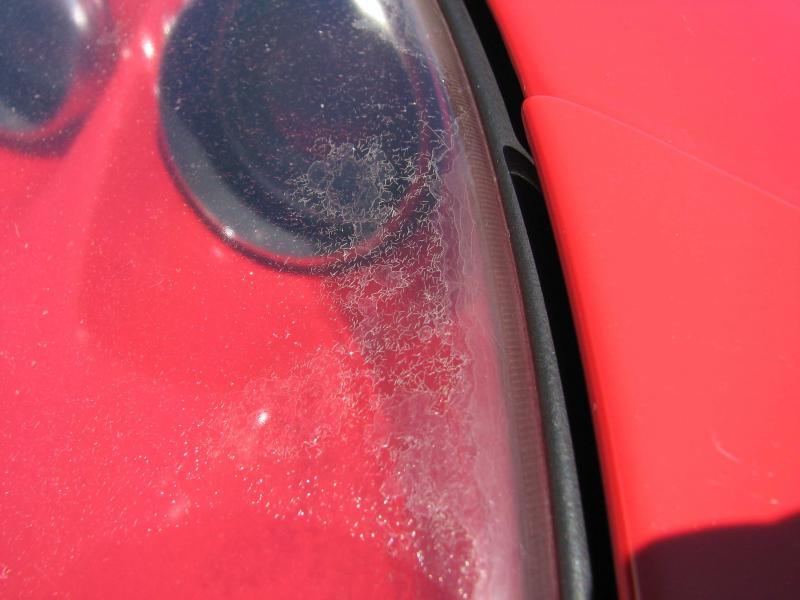
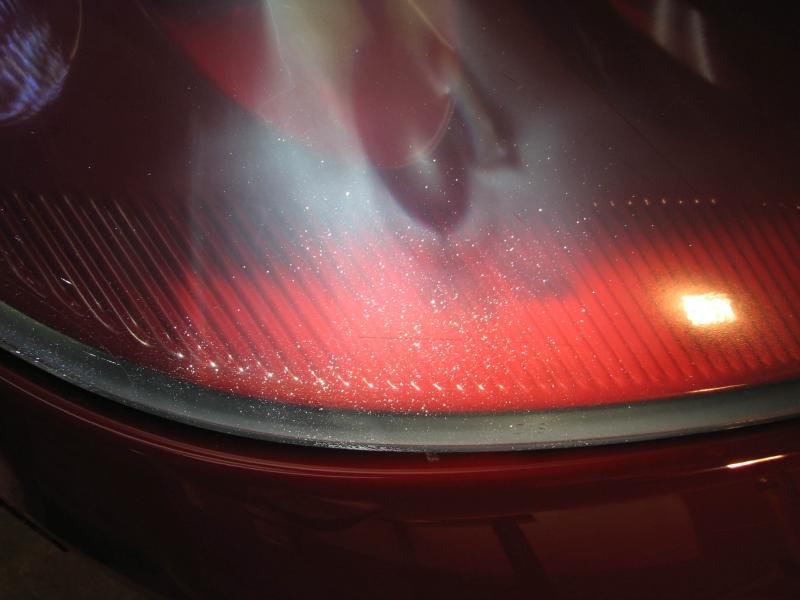
Close up of delamination
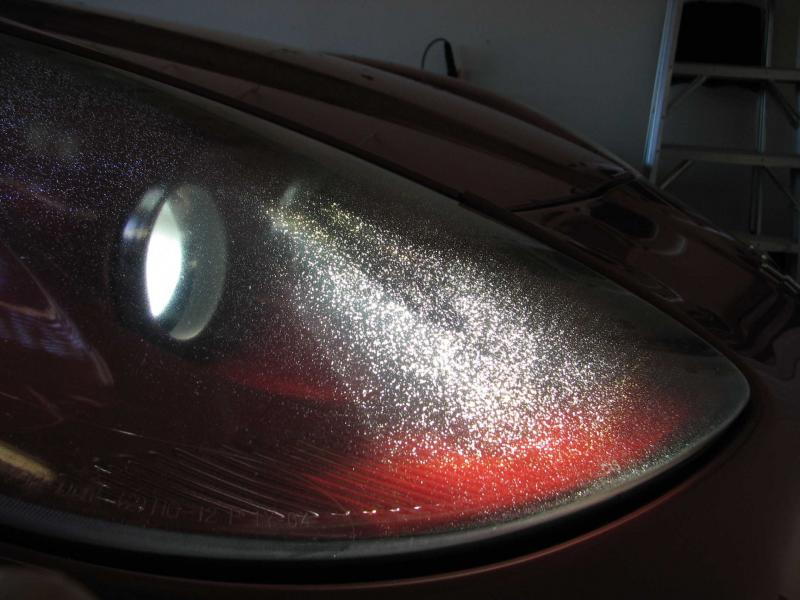
Diffraction of headlamps through spidering and delamination
STEP 1) Wash the headlamps and front end. You want a clean work area. let dry.
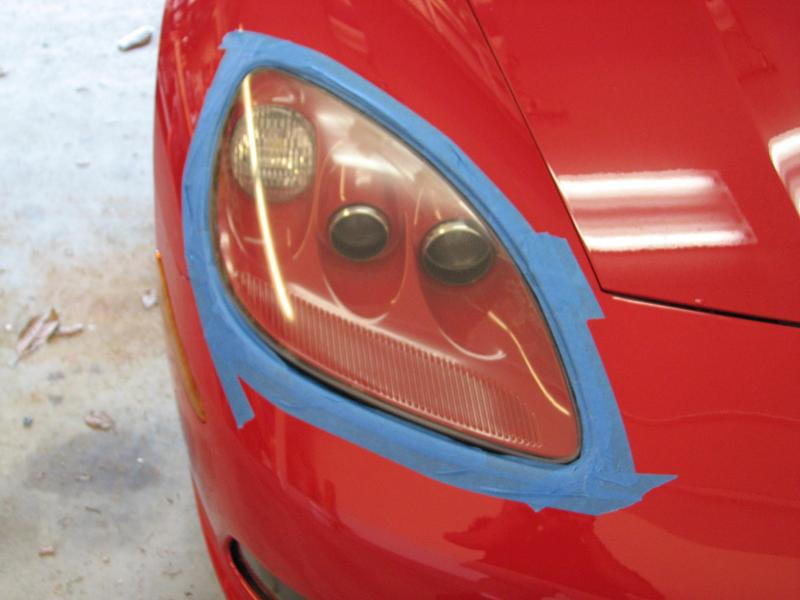
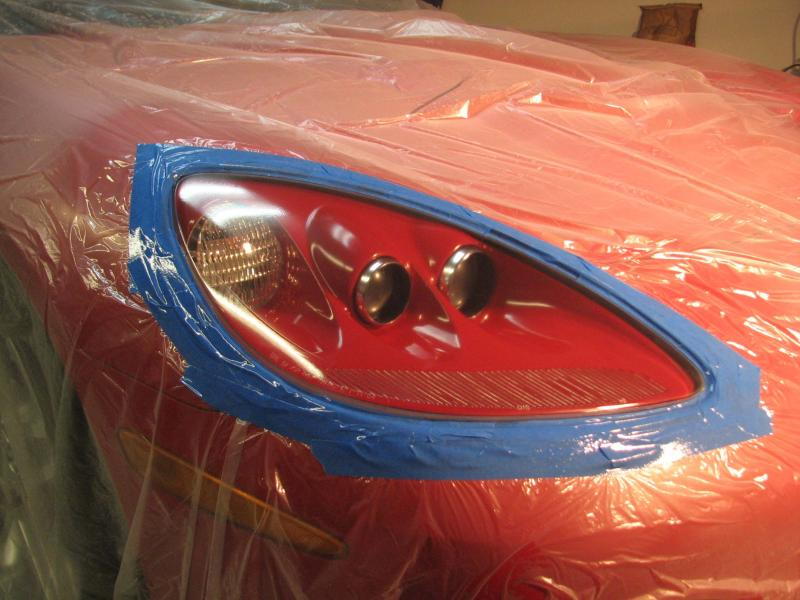
Step 2) Mask the headlight openings to protect the paint from the sanding you are about to do. This will be removed after sanding, it is for protection..
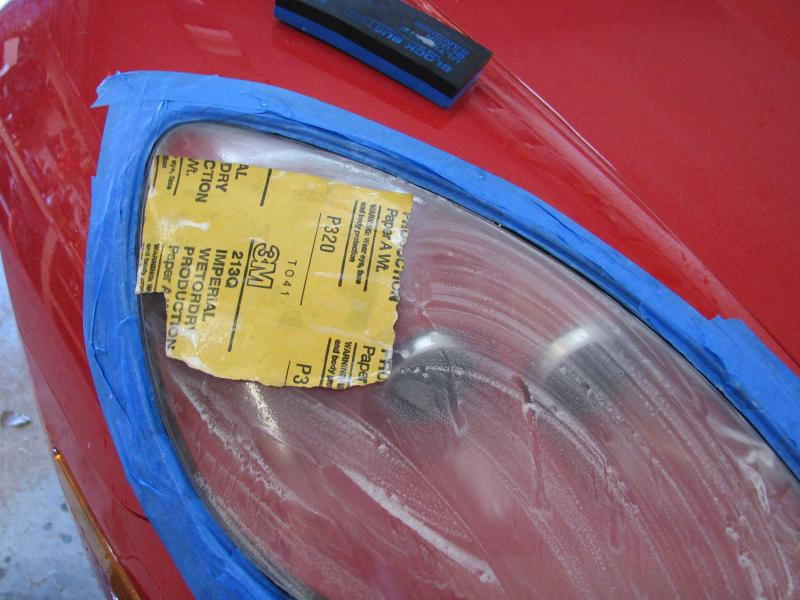
STEP 3) Wet Sand the headlamp lens with 320 sandpaper. I used 180 as well. The Coating on the Headlamps is very hard, and I found 180 was best for removal of the coating.
Make sure all the coating is removed, you can see the difference in the plastic surface and the coated surface in this image.
STEP 4) Wet sand the 180 strokes out with the 320 paper, and then sand the 320 strokes out with the 600. I use alternating methods. horizontal strokes for 180, circular strokes for 320, and vertical strokes for 600. This allows me to see removal of the previous strokes directions. This process insures the following: When you finish with 320, you should not see a single horizontal scratch, When you finish with 600 all circular strokes should be gone. Take Your time, this will take a few hours. Keep the paper wet, use the foam block, and change the paper often. Dry occasionally with the micro towel to look at your progress. Why Stop at 600? There is no reason to sand to a finer finish if recoating with clear. The paint needs the finish to have scratches for bonding. Also, the coat of clear is thicker than the 600 scratches and will fill. You will most likely see no difference in going to a 1000 or 1200 grit finish. These are polishing grits.
STEP 5) Remove Tape, Wash Headlamps and front end again. Let Dry, use compressed air to blow out headlight gasket areas. The area must be dry.
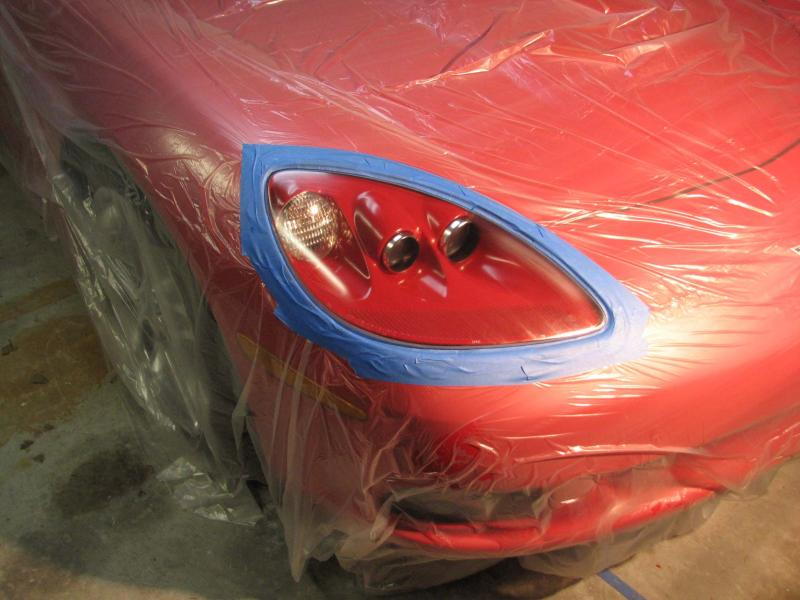
STEP 6) Mask Area Around Headlamp. You should mask to include the headlight lens gasket. You do not want to paint the rubber as this will harden it. Take your time once again. Cover the Entire vehicle with plastic to protect from overspray.
STEP 7)
SOLVENT ALERT..... This is where I accidentally cleaned the headlamp with acetone. I grabbed the wrong solvent and when I wiped down, the acetone crazed the plastic in one place. I caught my mistake, but it was too late. Use a plastic safe cleaner. I recommend 99% Isopropyl, or a cleaner from an automotive paint supply.
Clean and Tack cloth paint area
STEP 8)
Apply two coats of Spray Max 2K Clear coat. Mix paint per instructions and apply within product use requirements. You may see a little clouding when each coat goes down, this will go back to transparent. I apply a light "Tack" coat that just goes clear but does not fully flow. I then wait 15 minutes for the coat to "Flash Off" Then I apply my Flow Coat. Apply in even strokes. Follow the wet line. The goal is to achieve flow but not get sags from too much.
STEP 9) Let Dry!!!
STEP10) Remove masking and Enjoy!
I am going to color sand and buff in a few weeks to take out the small amount of Orange peel. If you do this, be careful and use 1000 and 1500 grit papers, finish with a polish. Do not go through your clear coat.
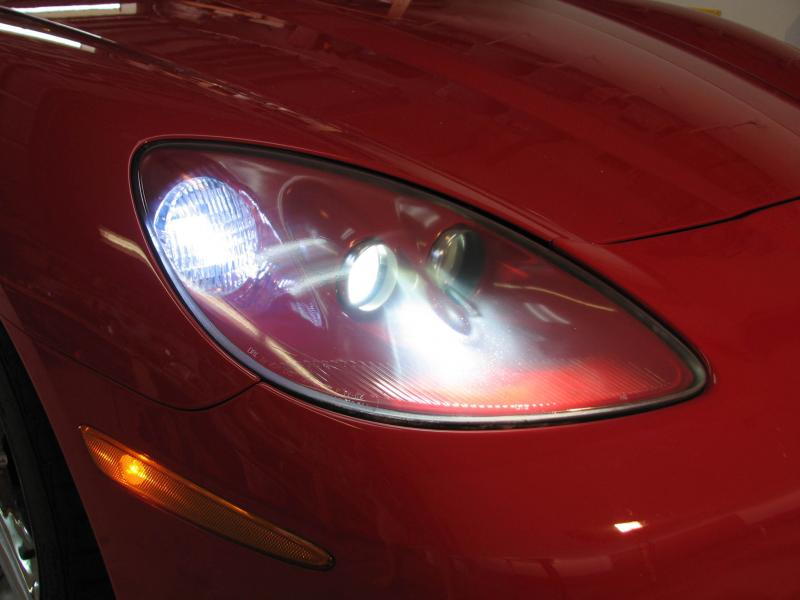
After Photos:
Decreased Dispersion, and Spidering
Clear In the sun, no finish delamination.
Excellent post... I am planning on doing mine this week...
Excellent write up. I believe C6 headlights poorly designed, cheap plastic, yellowing and peeling clear coat.
Difficult to remove. I am just weighing whether to replace the lens or restore. From what i have read restoring and clearcoating only last 1-2 years.
Last edited by ULOSECLOWN; 01-26-2019 at 03:57 PM.
From what i have read restoring and clearcoating only last 1-2 years.
I have never read that from anyone that actually used SprayMax 2K Clear. I used this same method on DD Accord four years ago and they still look like they did the day after I restored and cleared them. I will be using this process on my GS's fogs this spring.
My vette looks fine so far, but my tundra and baja were bad....really bad. I bought the 3M kit, followed directions and was truly amazed at the results, they both came out like new. I mean brand new. Before I even think about new lenses, I will try one day on vette. Very hard for me to believe that the lenses are different from any other car. Maybe i can find a junk or cracked headlight for a c6 and try it.
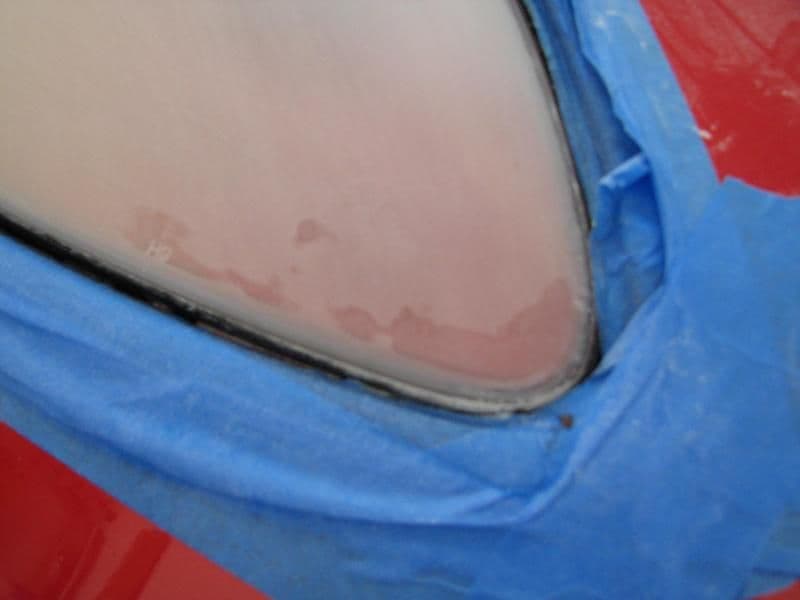
Great write up! Im trying this myself...So the first hurdle I ran into was that the top layer seemed to start wearing though. I decided its probably best to just remove it in its entirety so that the 2k clear goes on uniformly. So im sanded from 220/320/600. spent a couple hours on it and did the best I could. However when doing projects like this when you went the lens it looks pretty clear normally until it dries and turns cloudy again. At 600 now, even if I wet it it still looks pretty damn cloudy. Should I be concerned about the clear not fixing that? Thanks! After finished with 600 grit. Doesn't appear much clearer after pouring water on it.
Great job on the sanding. The second picture looks great. The clear will fill all those little scratches. In the first picture you sent you can see the areas where there is still factory clear and where you have just lexan. The factory clear is the UV protectant that flakes and scales and starts to look bad. I would say when they both look like your second pic, they are ready for clear. Awesome job !
Great job on the sanding. The second picture looks great. The clear will fill all those little scratches. In the first picture you sent you can see the areas where there is still factory clear and where you have just lexan. The factory clear is the UV protectant that flakes and scales and starts to look bad. I would say when they both look like your second pic, they are ready for clear. Awesome job !
Hey man thank you for the reply...wasn't sure what I'd get being 6 or so years since you posted that. But I'm glad I got replies and I'm especially glad it was you since your technique is what I'm modeling after. Ok thats great news though. I was worried about taking off that layer. You took yours off completely too? How did the job stand the test of time? and do you recommend a light wet sand/ polish afterwards or just leave it alone? Thanks again! Lookin forward to spraying tomorrow.
I only had the car about another 1.5 years. However, I have done several clear lenses with the same technique and they have lasted 4+ years and counting. The Max 2k is a clear coat with a UV inhibitor, so they stop the yellowing. I was very happy with it. I am sure you could wet sand and polish to take off the orange peel, but if you get a good finish, it is hardly noticeable. I had friends do the restore kits and they do work. They just don't last as long. Also, to get rid of the flaking, you have to get the original clear coat off of the lenses. I just wanted to look like new lenses without going through the work of a full lens replacement. The clear coat seals the lexan under a coat just like when they came from the factory.
My current Vette has Morimoto lights on it, otherwise I would have done this again if necessary. I had a gap for a few years and then bought an 07 vert. I miss the coupe, but I drive a lot with the top down.


 10-04-2014, 09:49 AM