
[Z06] How to Install Pdadt Coilovers (with pictures)
 11-04-2007, 01:25 PM
#1
Safety Car

Thread Starter

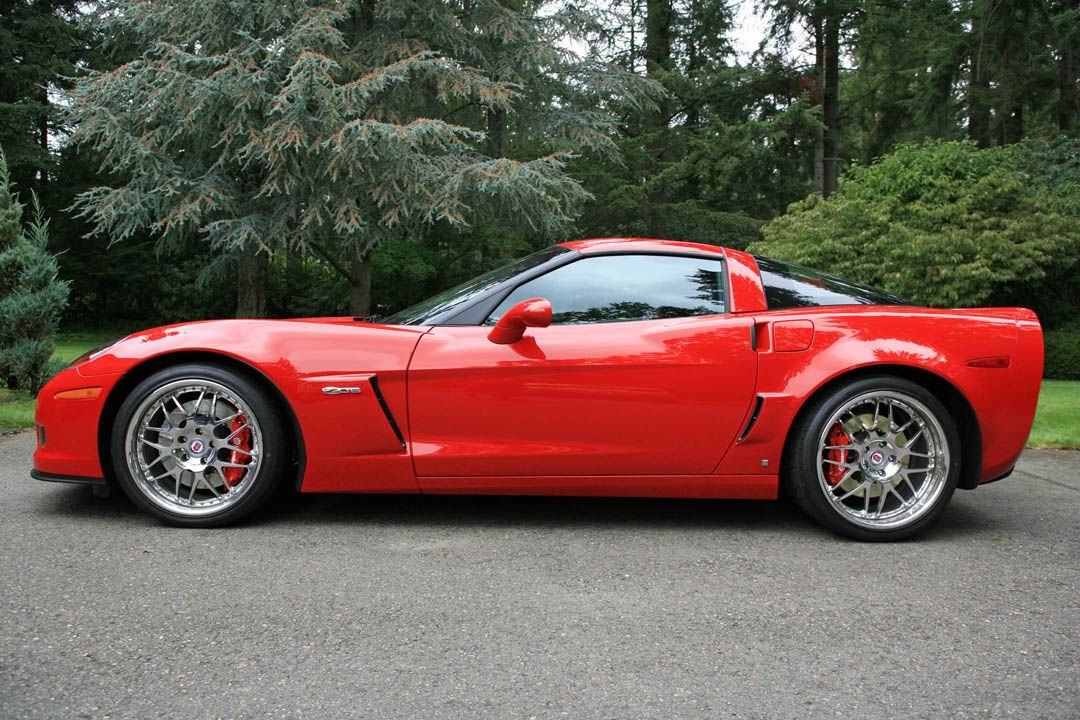
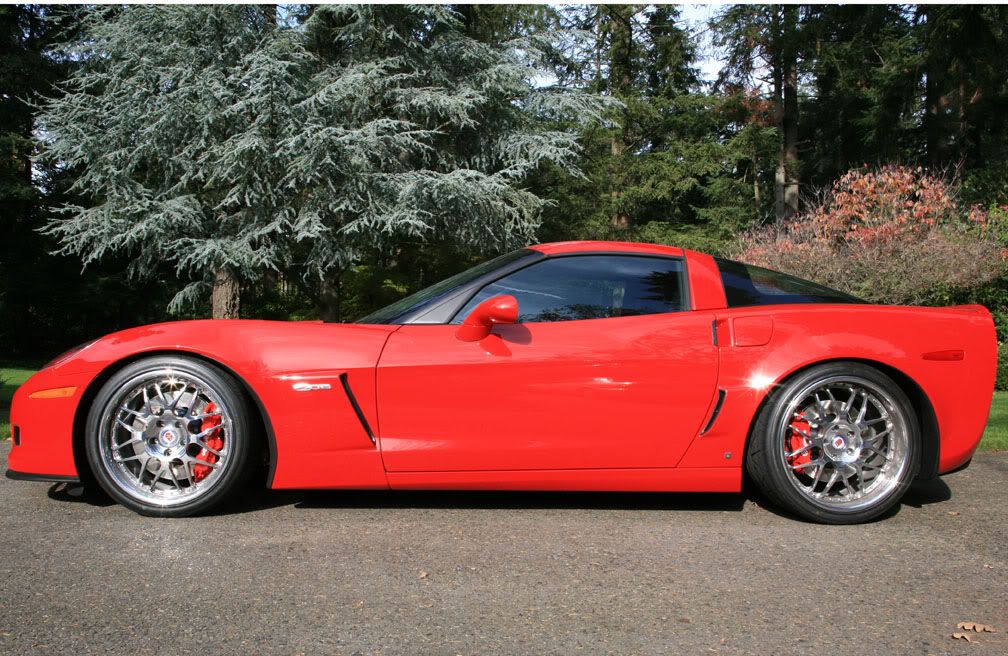
As promised, here is a step by step for installing Pfadt coilovers. If you are doing the job yourself (without a helper) and you have a lift, plan on about 5 to 6 hours of work. On jack stands it will probably take a few more hours. I did the job over two afternoons and I�m lucky enough to have a 4-post lift.
I�ve only driven the car about 10 miles since the install, but I must say I really like the coilovers over the stock suspension. The first thing I noticed was how level the car stayed on hard acceleration. No more nose lifting, which is something I found very annoying. It might be a good feature for drag racing, but not for the track or autox. The steering feels much more precise now and the car has almost no lean in the corners. Enough of that, here is how to install them.
Lets start with the front (Read the Pfadt instructions first):
Jack the front of the car up and remove both wheels.
On the drivers side remove the two small nuts (10mm) that hold the coolant reservoir tank in place. Pull the tank off its mount and rotate it out of the way to expose the top mounting bolt of the shock absorber.
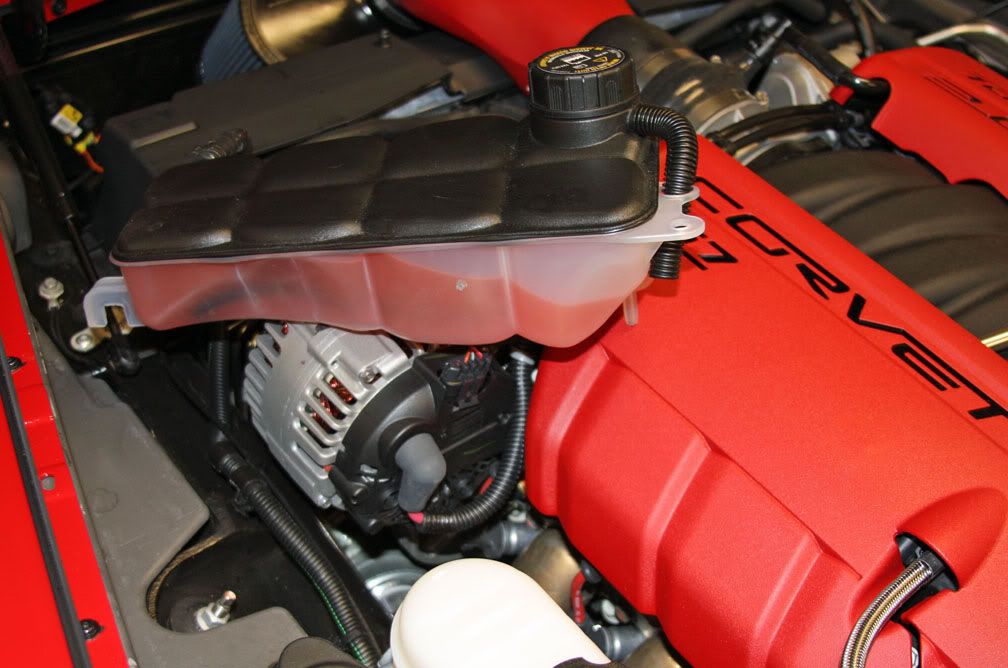
It is already exposed on the passenger�s side. Remove the 14mm nut, rubber mount and cap from the top of both shocks. Remove the two bottom bolts (13mm) of each shock absorber, which attach to the lower control arm.
The shock absorber will be loose now, but you won�t be able to remove it yet.
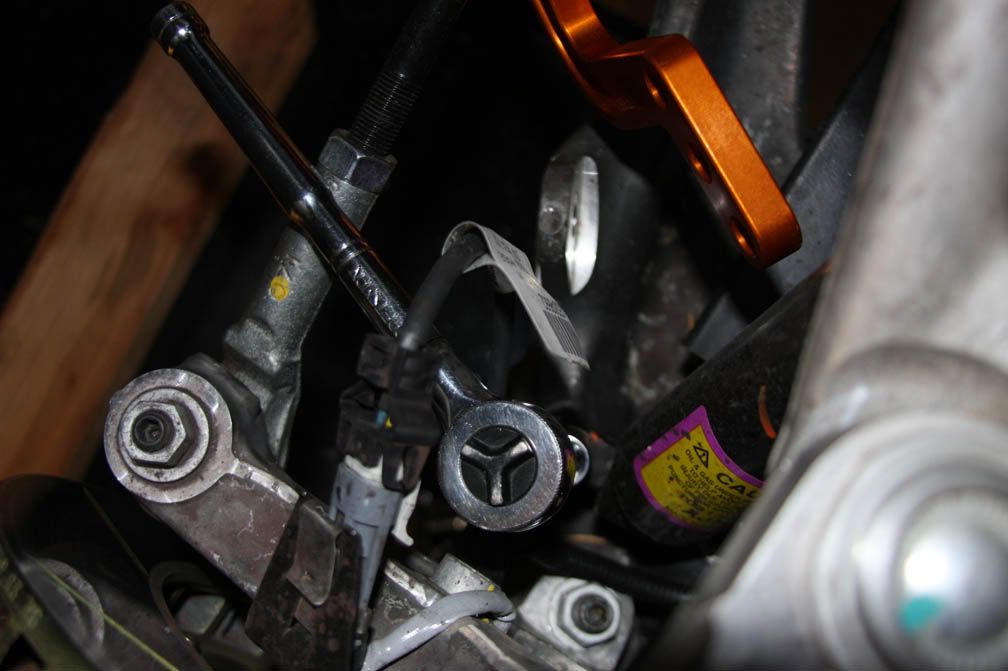
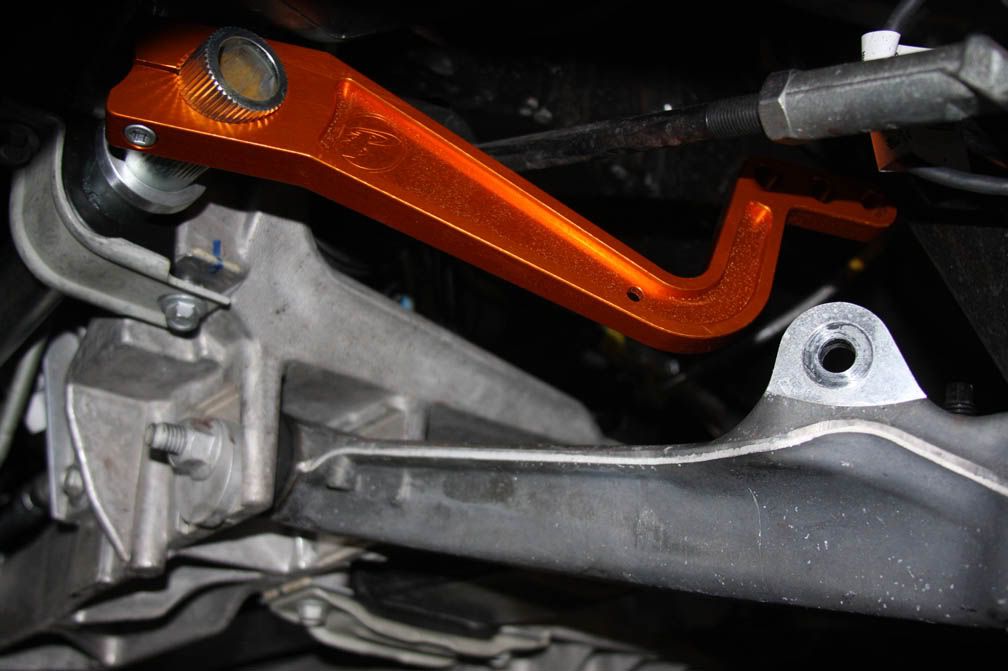
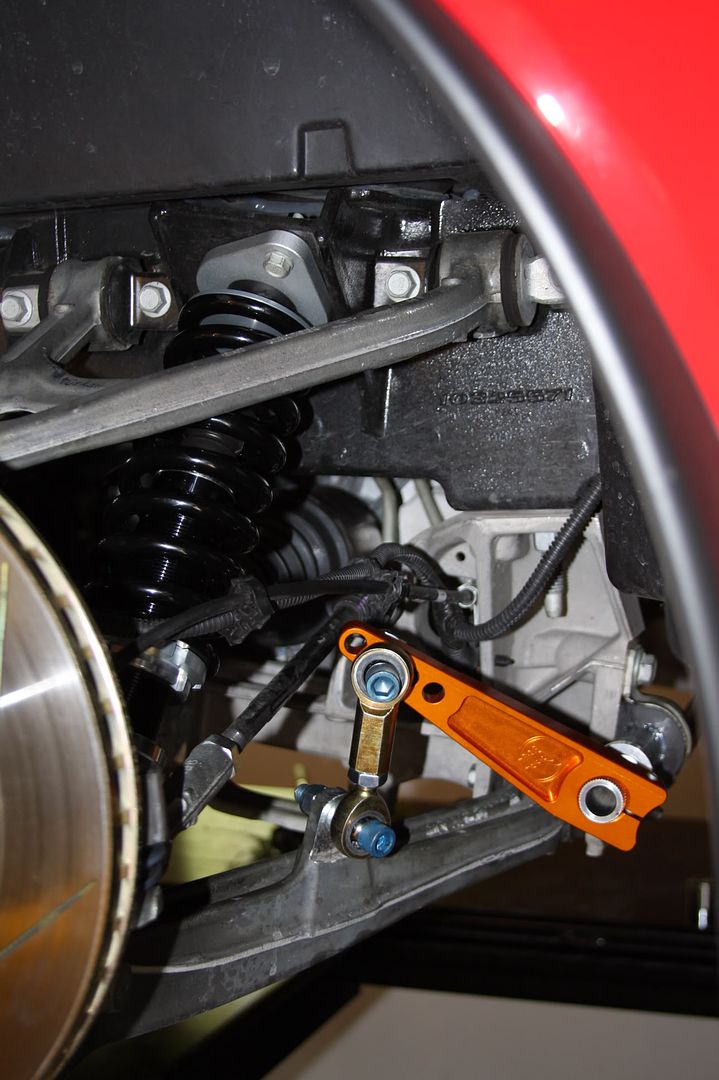
Remove the lower sway bar link from the control arm on both sides. You will need a #40 torx bit and 18mm wrench for this.
Now remove the four mounting bolts holding the sway bar in place and remove the sway bar (only if you are replacing the sway bar with Pfadt units).
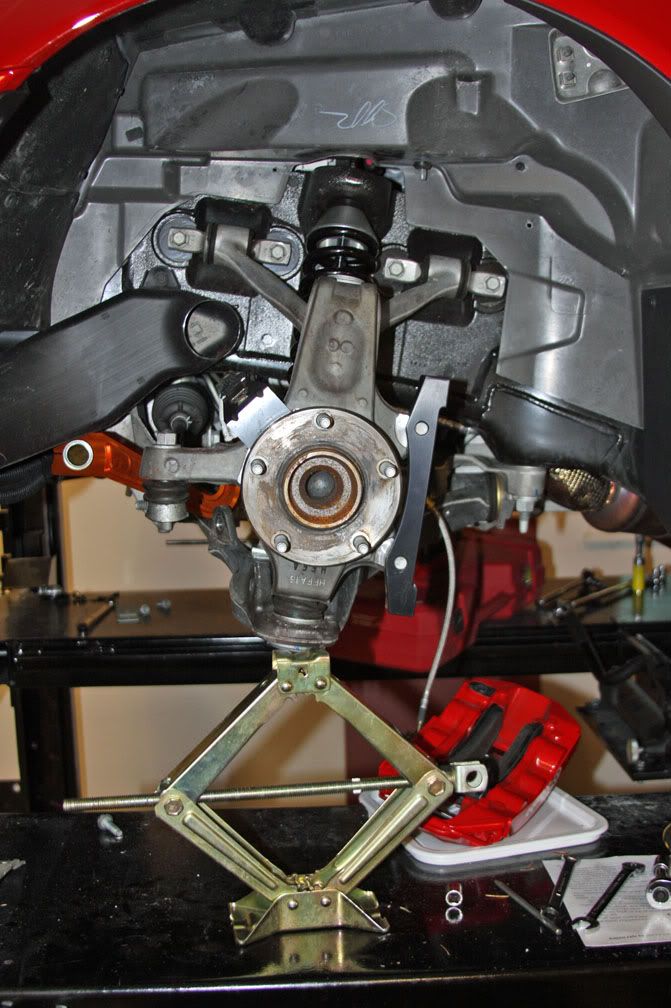
Remove the driver side brake caliper and set it aside. If you have aftermarket brake lines that are longer than stock you may be able to skip this step.
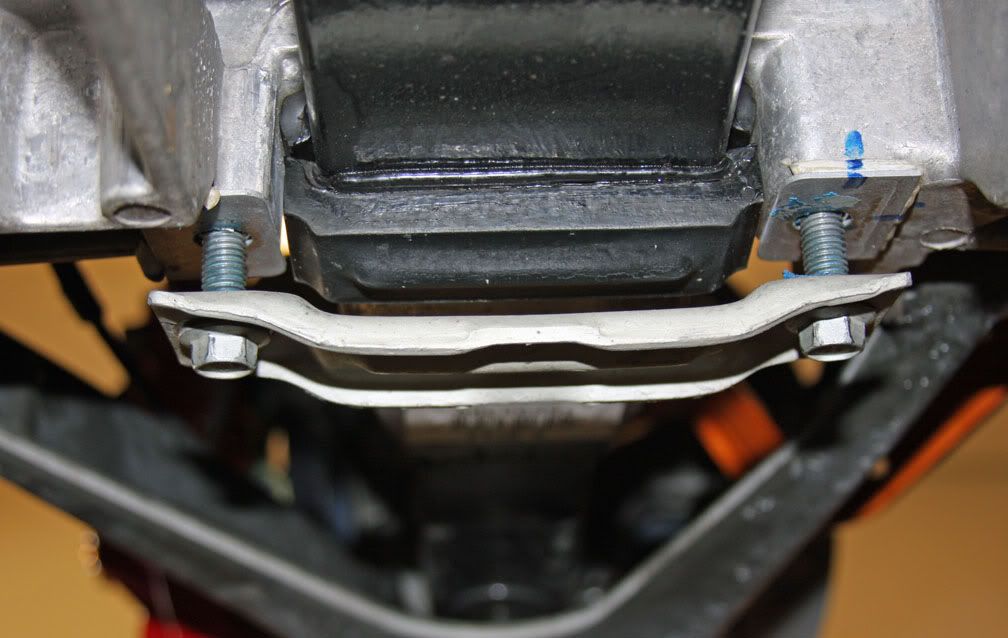
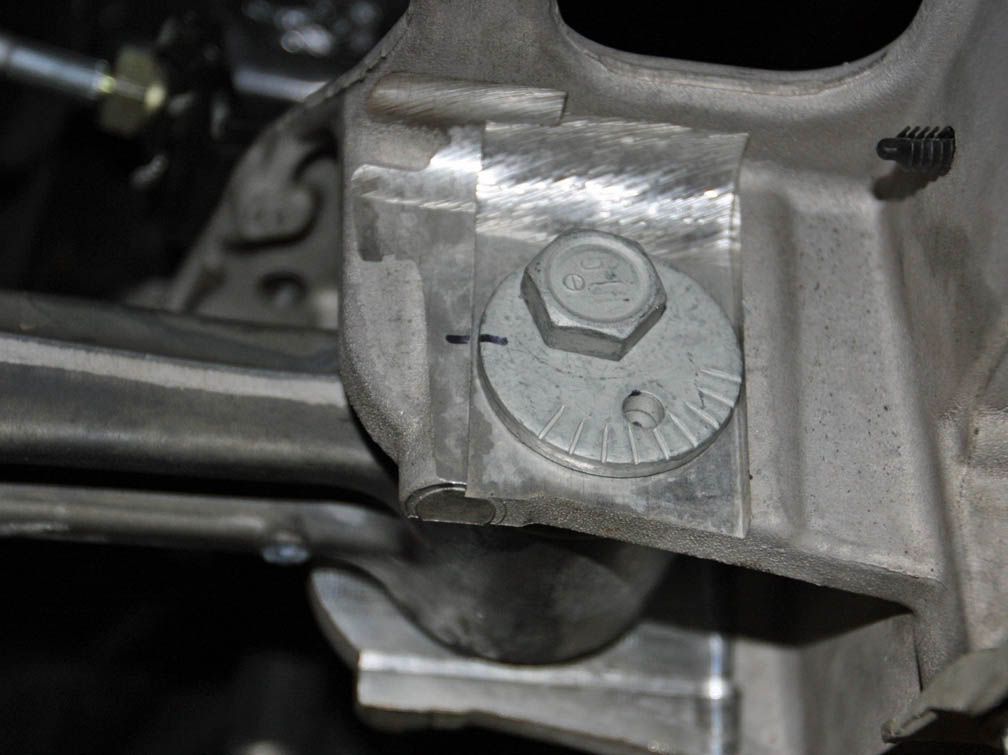
Remove the four bolts (13mm) to the two brackets that hold the leaf spring in place.
Remove the four bolts (15mm) that hold the upper control arm to the frame on both sides of the car.
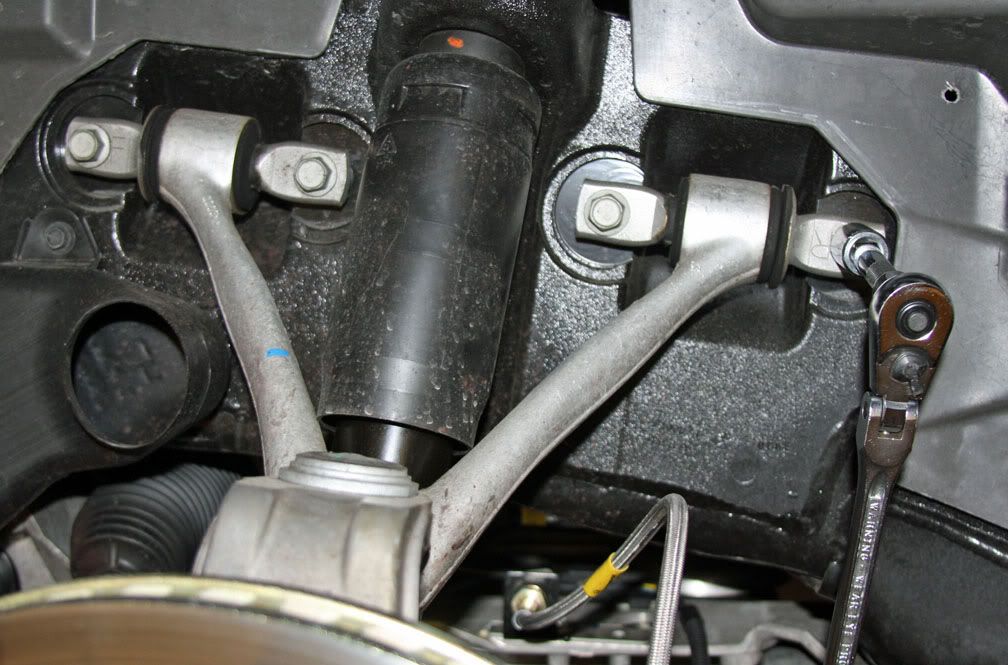
Be careful to note where shims exist and return them to the proper location.
Rotate the control arm on the drivers side out of the way as required, remove the shock absorber, and slide the leaf spring out.
Install the coilovers on both sides to the top shock absorber bracket with the 14mm nut that holds them in place from the hood side. Tighten the nut only enough to hang them in place.
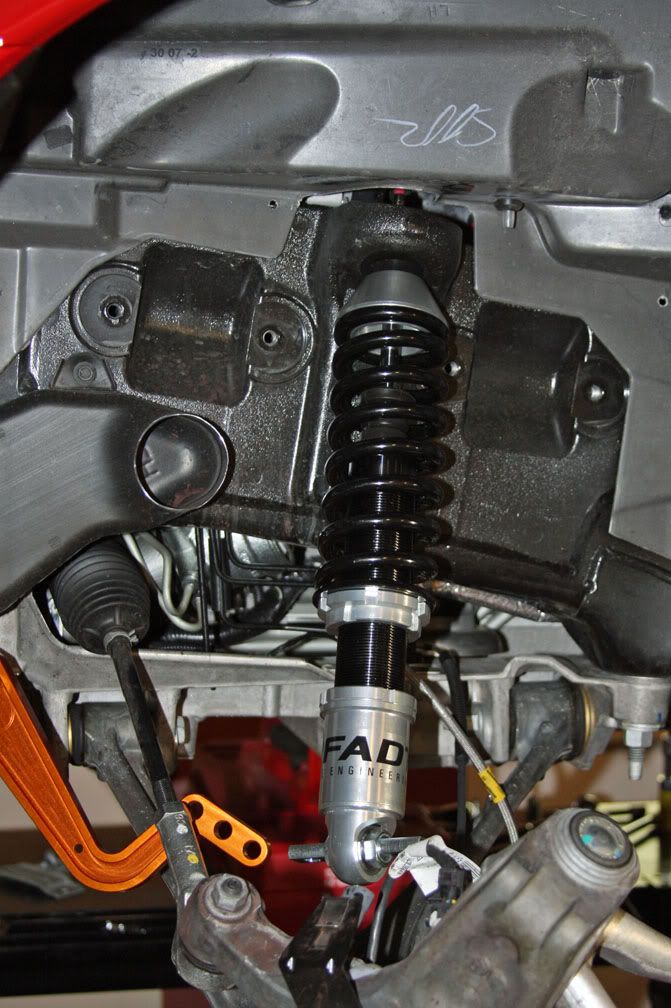
Now reattach the upper control arm to the frame ant torque the bolts to spec (48 ft-lb).
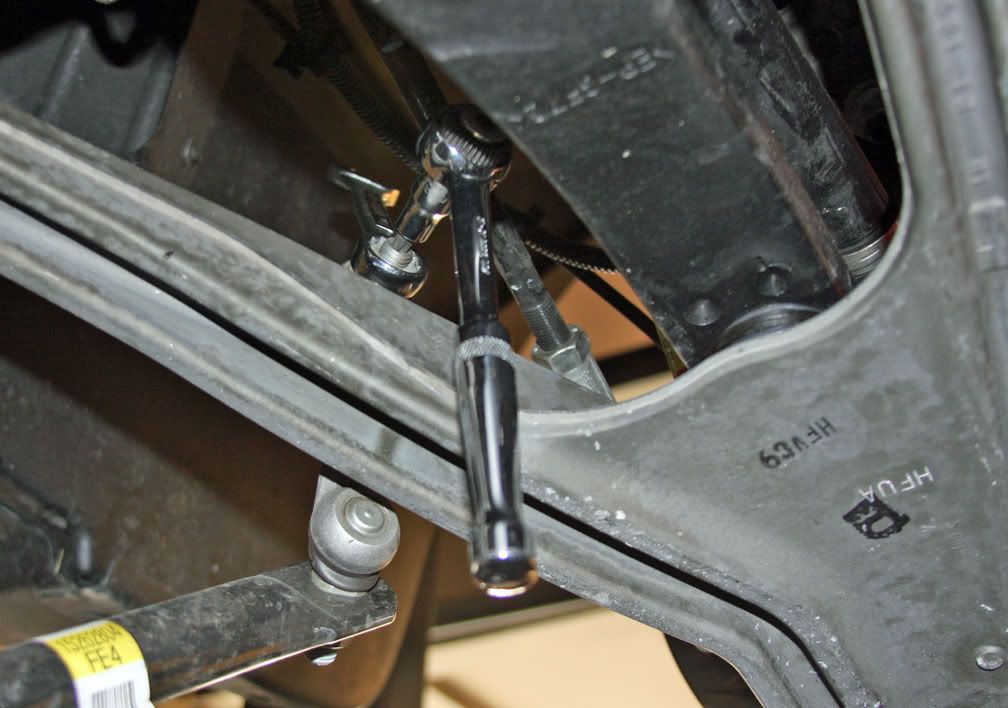
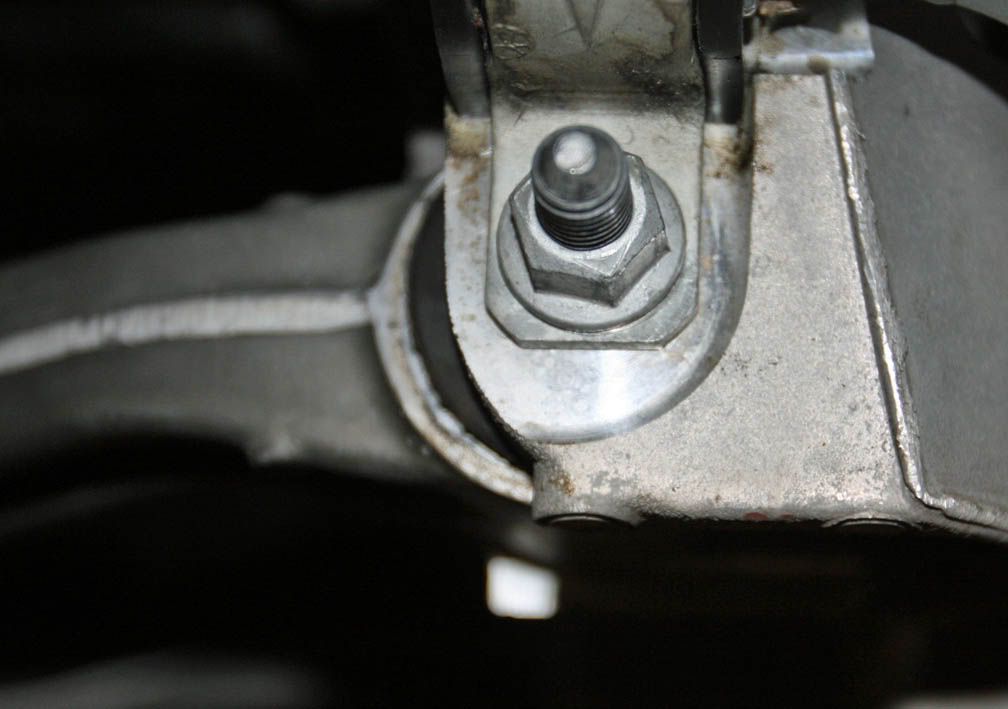
Place a scissors jack under the control arm and jack it up so the bottom mounting bracket of the coilovers aligns with the bolt holes. Install the coilover bottom bolts and torque to spec (21 ft-lb).
Now tighten the upper nut on the coilover to achieve maximum compression of the poly bushing. Install the adjuster **** on top of the shocks and remount the coolant reservoir onto its brackets and secure with the 10mm nuts.
If you removed your brake caliper, re-install it.
Install the Pfadt sway bar per the instructions that came with them. Here are some pictures:
Reinstall the wheels, lower the car and you are done with the front.
Moving on to the rear:
Jack the rear of the car up and remove both wheels.
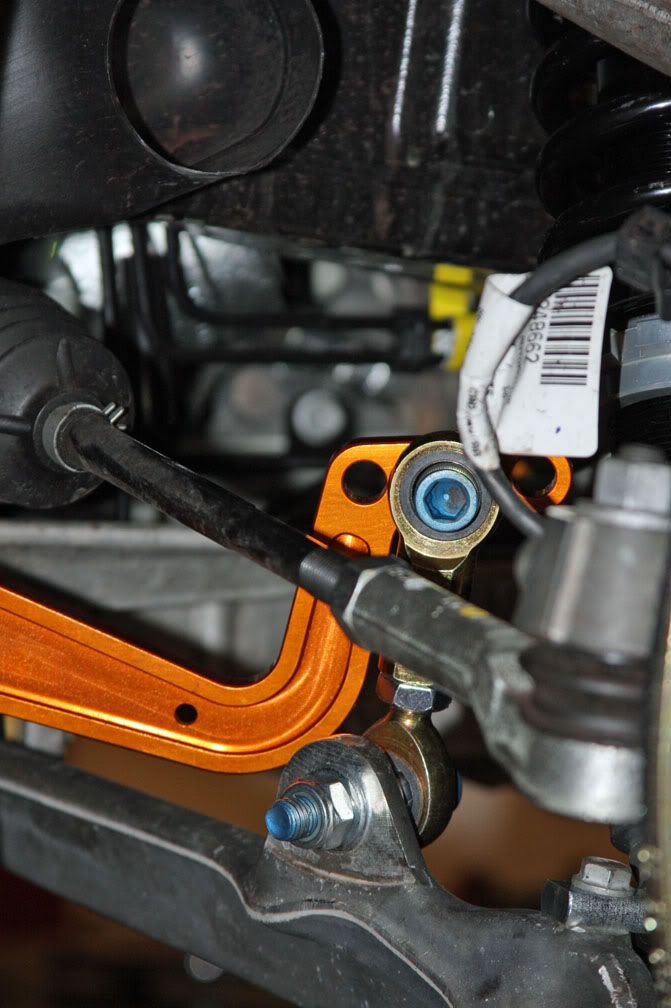
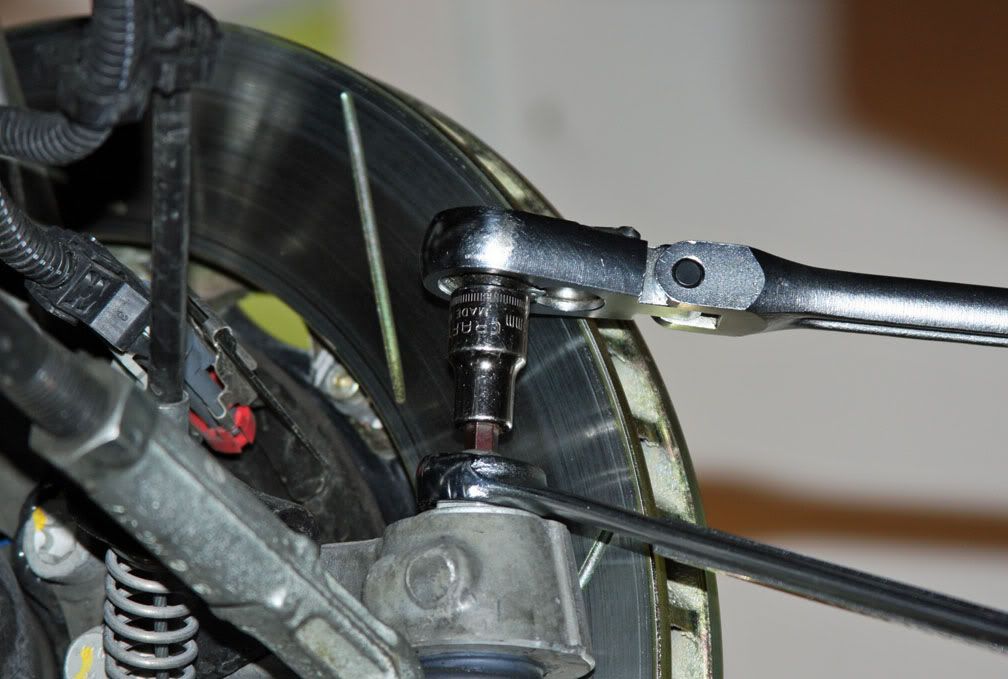
Disconnect the tie rod (toe link) from the rear of the spindle on both sides using an 18mm wrench and a 6mm Allen socket. You may need to use a ball joint separator tool to pop the tie rod from its socket. On my car, one side did and one side didn�t.
Mark the drivers and passengers side camber/castor settings with a marker.
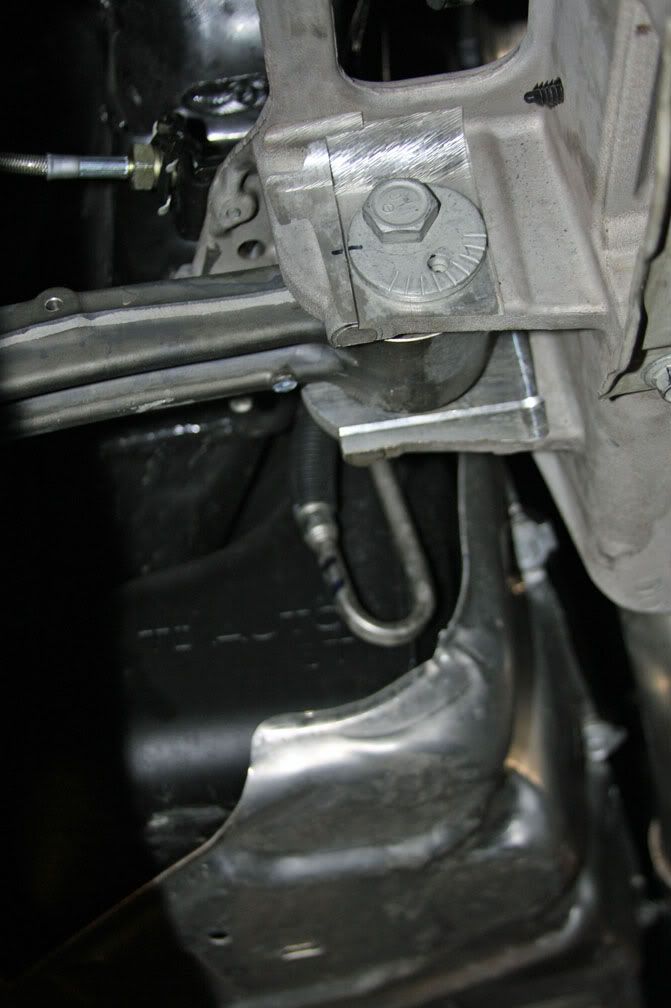
Remove the four bolts (13mm) and brackets that retain the leaf spring (same as front � see that picture).
Remove both lower control arm mounting bolts from the subframe and pivot the control arm out of the ray so you can slide the leafspring out.
Remove the shock absorber (2-13mm bolts on top and 24mm on bottom)
Install the rear coilovers: Attach the bottom coilover bolt (107 ft-lb) to the lower control arm and re-attach the control arm to the subframe, making sure you adjust the camber/castor to their original settings that were marked prior to removal. The torque settings are 107 ft-lb for the front and 70 ft-lb for the rear. Now place a jack under the control arm (see photo for front) and jack it up so you can attach the upper two 13mm bolts (18 ft-lb) to the coilover mounting perch. Reinstall the tie rod and you are done.
Hope this helps and I hope I didn't miss anything.
I�ve only driven the car about 10 miles since the install, but I must say I really like the coilovers over the stock suspension. The first thing I noticed was how level the car stayed on hard acceleration. No more nose lifting, which is something I found very annoying. It might be a good feature for drag racing, but not for the track or autox. The steering feels much more precise now and the car has almost no lean in the corners. Enough of that, here is how to install them.
Lets start with the front (Read the Pfadt instructions first):
Jack the front of the car up and remove both wheels.
On the drivers side remove the two small nuts (10mm) that hold the coolant reservoir tank in place. Pull the tank off its mount and rotate it out of the way to expose the top mounting bolt of the shock absorber.
It is already exposed on the passenger�s side. Remove the 14mm nut, rubber mount and cap from the top of both shocks. Remove the two bottom bolts (13mm) of each shock absorber, which attach to the lower control arm.
The shock absorber will be loose now, but you won�t be able to remove it yet.
Remove the lower sway bar link from the control arm on both sides. You will need a #40 torx bit and 18mm wrench for this.
Now remove the four mounting bolts holding the sway bar in place and remove the sway bar (only if you are replacing the sway bar with Pfadt units).
Remove the driver side brake caliper and set it aside. If you have aftermarket brake lines that are longer than stock you may be able to skip this step.
Remove the four bolts (13mm) to the two brackets that hold the leaf spring in place.
Remove the four bolts (15mm) that hold the upper control arm to the frame on both sides of the car.
Be careful to note where shims exist and return them to the proper location.
Rotate the control arm on the drivers side out of the way as required, remove the shock absorber, and slide the leaf spring out.
Install the coilovers on both sides to the top shock absorber bracket with the 14mm nut that holds them in place from the hood side. Tighten the nut only enough to hang them in place.
Now reattach the upper control arm to the frame ant torque the bolts to spec (48 ft-lb).
Place a scissors jack under the control arm and jack it up so the bottom mounting bracket of the coilovers aligns with the bolt holes. Install the coilover bottom bolts and torque to spec (21 ft-lb).
Now tighten the upper nut on the coilover to achieve maximum compression of the poly bushing. Install the adjuster **** on top of the shocks and remount the coolant reservoir onto its brackets and secure with the 10mm nuts.
If you removed your brake caliper, re-install it.
Install the Pfadt sway bar per the instructions that came with them. Here are some pictures:
Reinstall the wheels, lower the car and you are done with the front.
Moving on to the rear:
Jack the rear of the car up and remove both wheels.
Disconnect the tie rod (toe link) from the rear of the spindle on both sides using an 18mm wrench and a 6mm Allen socket. You may need to use a ball joint separator tool to pop the tie rod from its socket. On my car, one side did and one side didn�t.
Mark the drivers and passengers side camber/castor settings with a marker.
Remove the four bolts (13mm) and brackets that retain the leaf spring (same as front � see that picture).
Remove both lower control arm mounting bolts from the subframe and pivot the control arm out of the ray so you can slide the leafspring out.
Remove the shock absorber (2-13mm bolts on top and 24mm on bottom)
Install the rear coilovers: Attach the bottom coilover bolt (107 ft-lb) to the lower control arm and re-attach the control arm to the subframe, making sure you adjust the camber/castor to their original settings that were marked prior to removal. The torque settings are 107 ft-lb for the front and 70 ft-lb for the rear. Now place a jack under the control arm (see photo for front) and jack it up so you can attach the upper two 13mm bolts (18 ft-lb) to the coilover mounting perch. Reinstall the tie rod and you are done.
Hope this helps and I hope I didn't miss anything.


 11-04-2007, 02:43 PM
#4
Melting Slicks

Member Since: Jan 2007
Location: SOUTHERN CALI - Most of the time California
Posts: 2,749
Likes: 0
Received 2 Likes
on
2 Posts
These are the best threads, write ups
thanks,
Congrats
On the street- they will feel solid.....
You will feel the benefit and the true test on the track...

thanks,
Congrats
On the street- they will feel solid.....
You will feel the benefit and the true test on the track...


 It should of sported coilovers from the get go.
11-06-2007, 02:06 AM
It should of sported coilovers from the get go.
11-06-2007, 02:06 AM
#10
Team Owner

11-06-2007, 06:08 PM
#11
Nice write up. I have a couple of questions:
1) When and how did you adjust the ride height? Do you need to have the wheels on or off to adjust? How did you get the car balanced for height? Did you compensate for the car's height with the driver's weight?
2) Did you do an alignment after the installation?
3) What settings did you use for your sway bars front and rear?
Thanks,
Jeff
11-06-2007, 06:56 PM
#12
Safety Car
Thread Starter
Nice write up. I have a couple of questions:
1) When and how did you adjust the ride height? Do you need to have the wheels on or off to adjust? How did you get the car balanced for height? Did you compensate for the car's height with the driver's weight?
2) Did you do an alignment after the installation?
3) What settings did you use for your sway bars front and rear?
Thanks,
Jeff
1) When and how did you adjust the ride height? Do you need to have the wheels on or off to adjust? How did you get the car balanced for height? Did you compensate for the car's height with the driver's weight?
2) Did you do an alignment after the installation?
3) What settings did you use for your sway bars front and rear?
Thanks,
Jeff
1. They come adjusted from Pfadt for a drop of about 1.4". Thats how they went in and no further adjustments were made. I'll corner balance it next year before I do any HPDE's.
2. Yes, I had the car aligned after the install.
3. The sway bars are currently set at what Pfadt's recommended for the street. I may play with this setting to see how the ride is affected. Currently they are set to center position for the front and 2nd position from the end for the rear.
11-06-2007, 07:06 PM
#13
1. They come adjusted from Pfadt for a drop of about 1.4". Thats how they went in and no further adjustments were made. I'll corner balance it next year before I do any HPDE's.
2. Yes, I had the car aligned after the install.
3. The sway bars are currently set at what Pfadt's recommended for the street. I may play with this setting to see how the ride is affected. Currently they are set to center position for the front and 2nd position from the end for the rear.
2. Yes, I had the car aligned after the install.
3. The sway bars are currently set at what Pfadt's recommended for the street. I may play with this setting to see how the ride is affected. Currently they are set to center position for the front and 2nd position from the end for the rear.
Jeff
11-06-2007, 07:31 PM
#14
Safety Car
Thread Starter
11-09-2007, 10:22 PM
#15
Melting Slicks<br><img src="/forums/images/ranks/3k-4k.gif" border="0">

On the install of the rears, did you get new bolts with the coil-overs or did you reuse the stock upper mount bolts?


