

 03-25-2015, 06:57 PM
Last edit by: IB Advertising
See related guides and technical advice from our community experts:
Browse all: Interior How-Tos
- Corvette: How to Replace Stock Shifter
Step by step instructions for do-it-yourselfers...
Browse all: Interior How-Tos

How-To: Install Short Shifter / Replace Stock Shifter
04-05-2014, 03:41 AM
#21
Tech Contributor
Thread Starter
Member Since: Jan 2006
Location: Saint Louis MO
Posts: 4,761
Likes: 0
Received 219 Likes
on
110 Posts
St. Jude Donor '14-'15
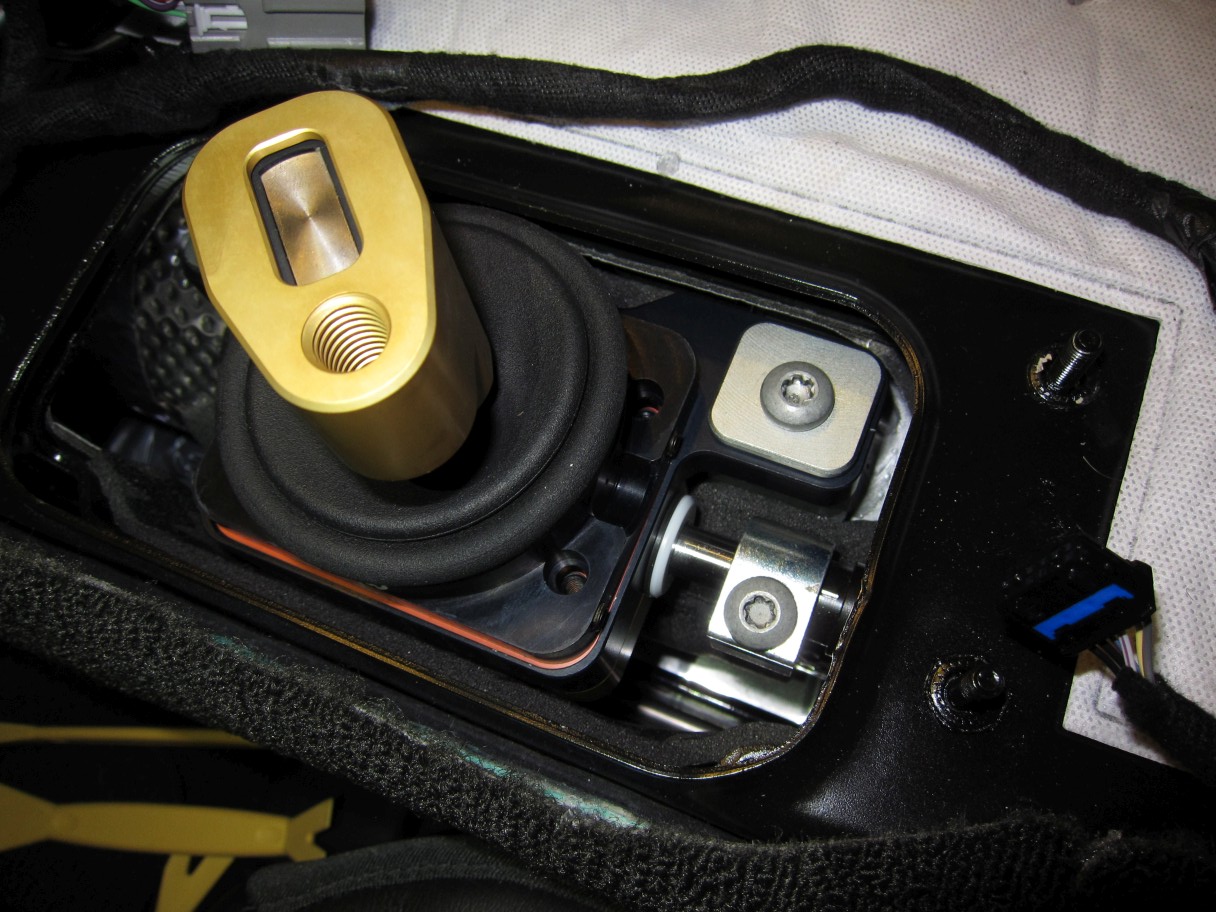
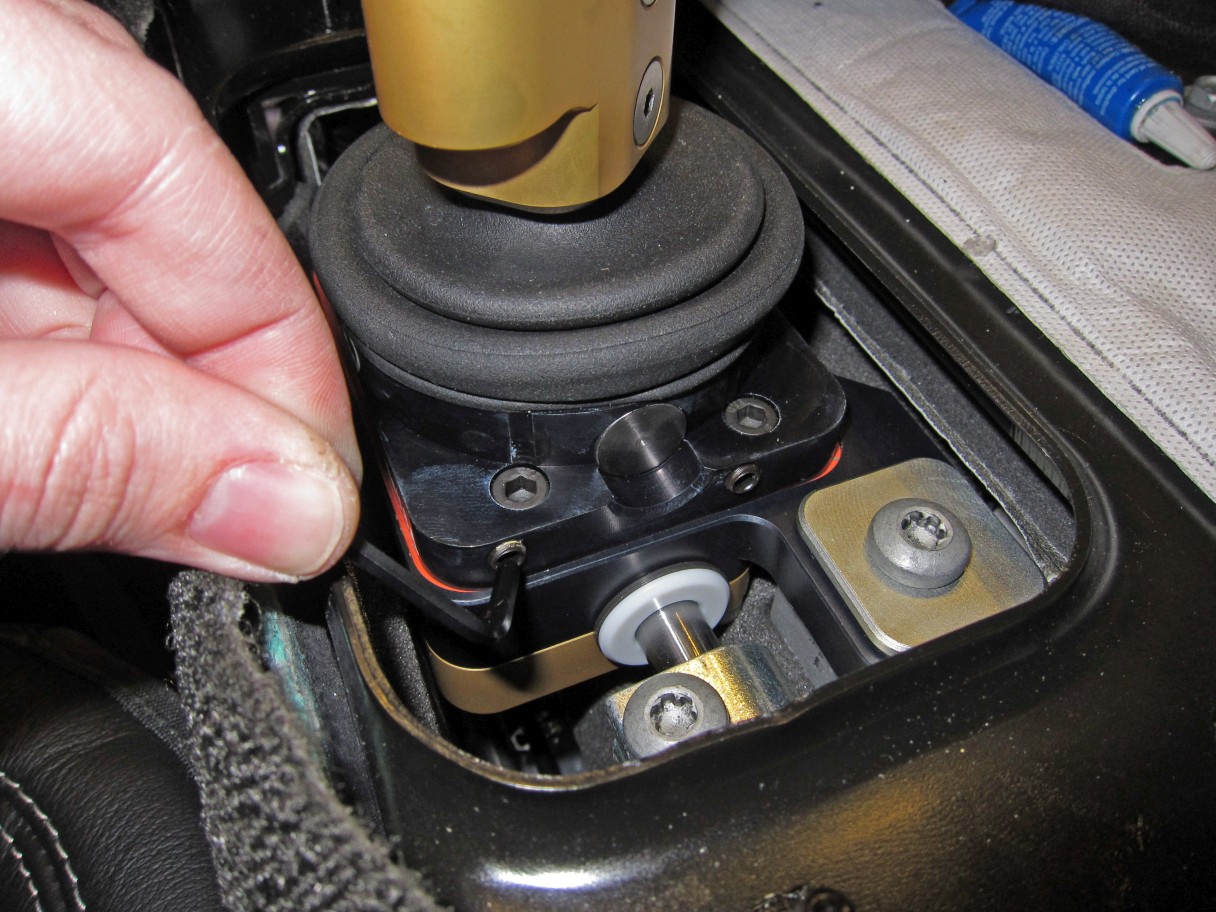
Prepare the lower box w/ grease (sparingly), and make sure to move the rod back and forth to work it in. Do not add so much that it becomes more difficult to move the rod!

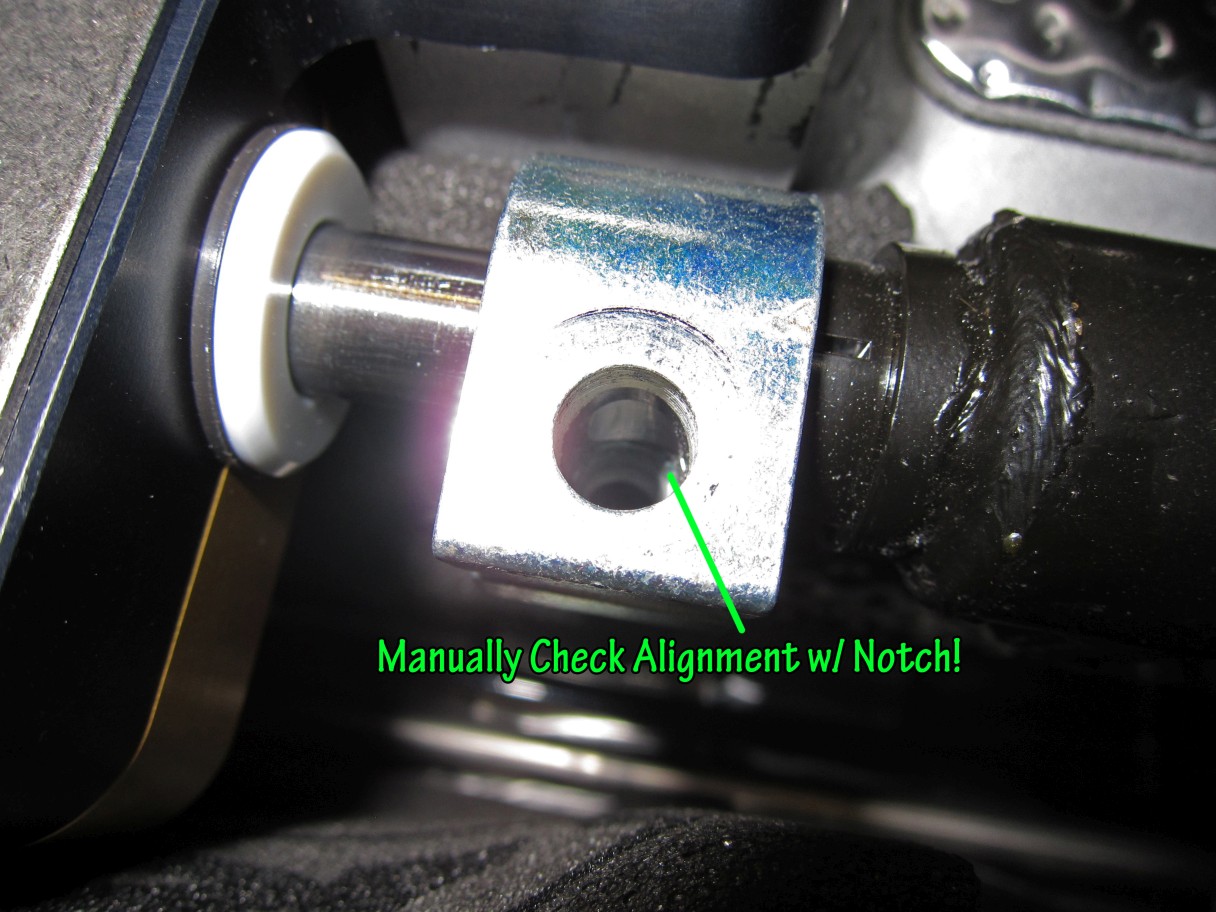
The alignment tool included works very well - leave the four screws loose until you eyeball the notch. Once it's dead on, crank those screws down.
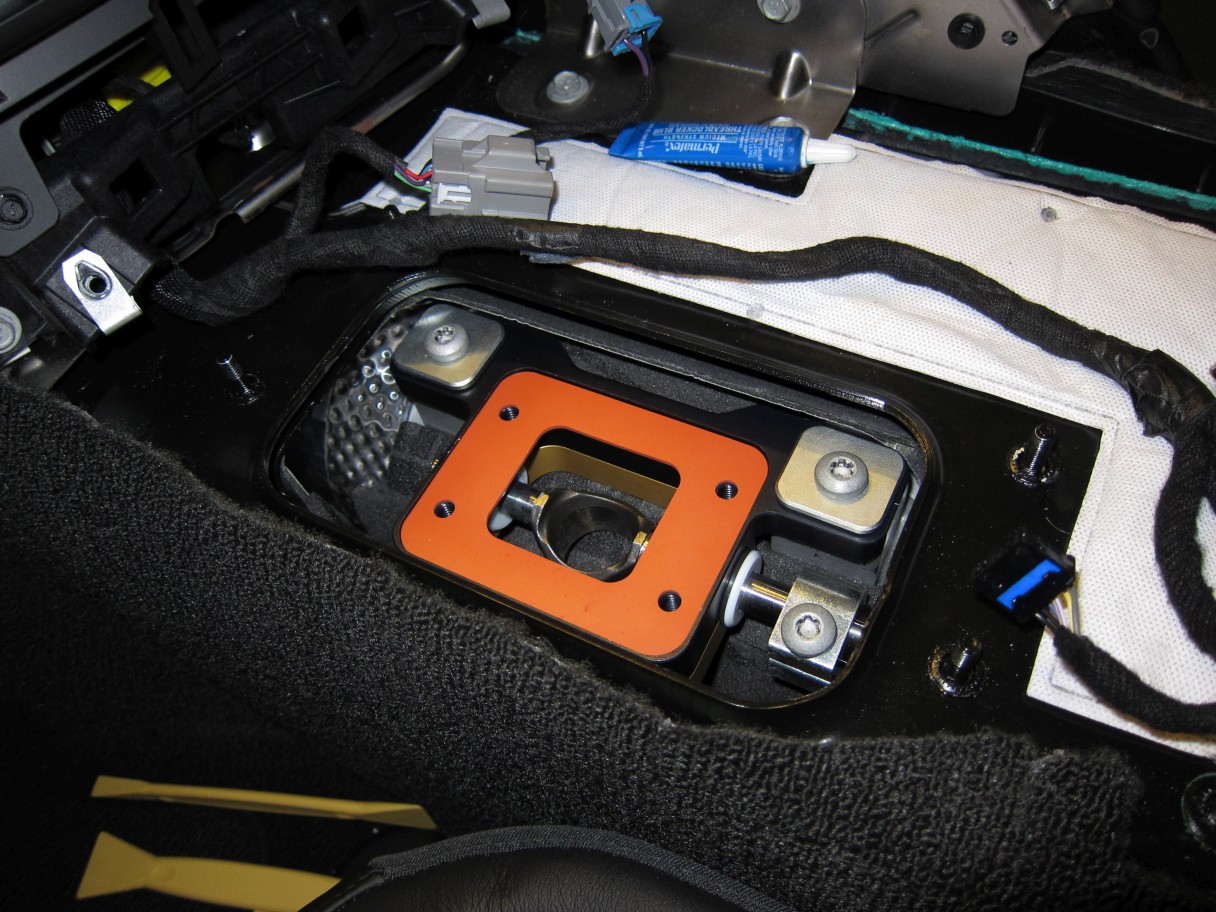
Add the included gasket:
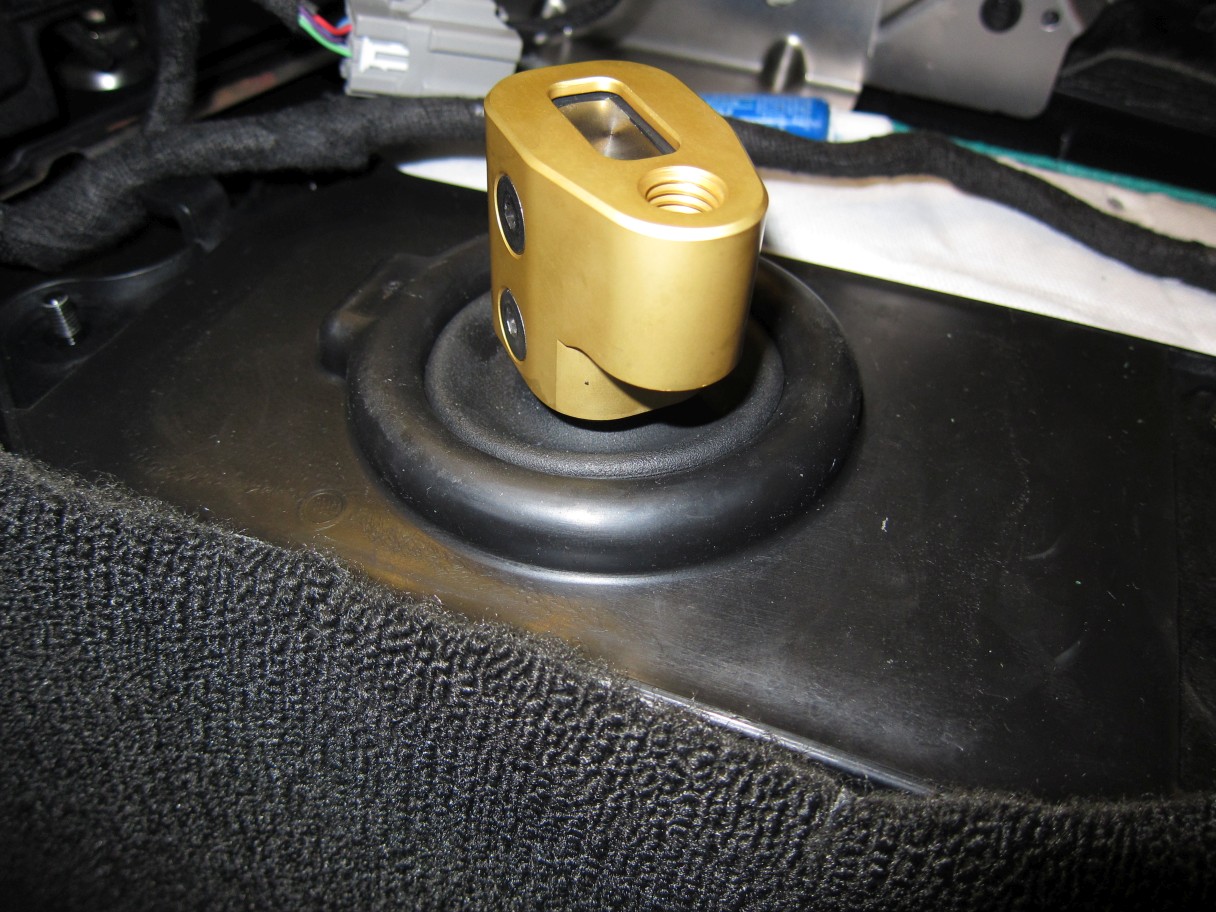
Install the shifter with the text facing the driver:
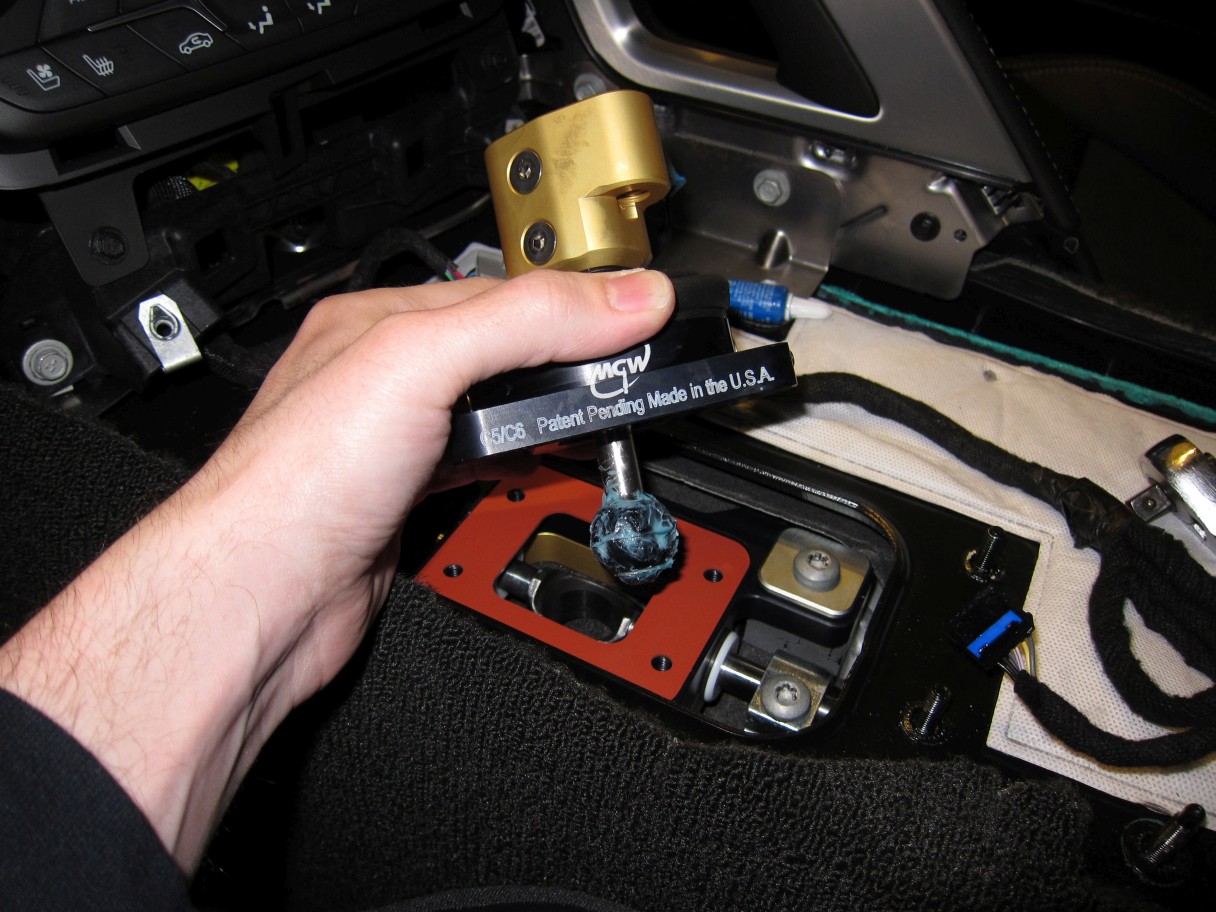
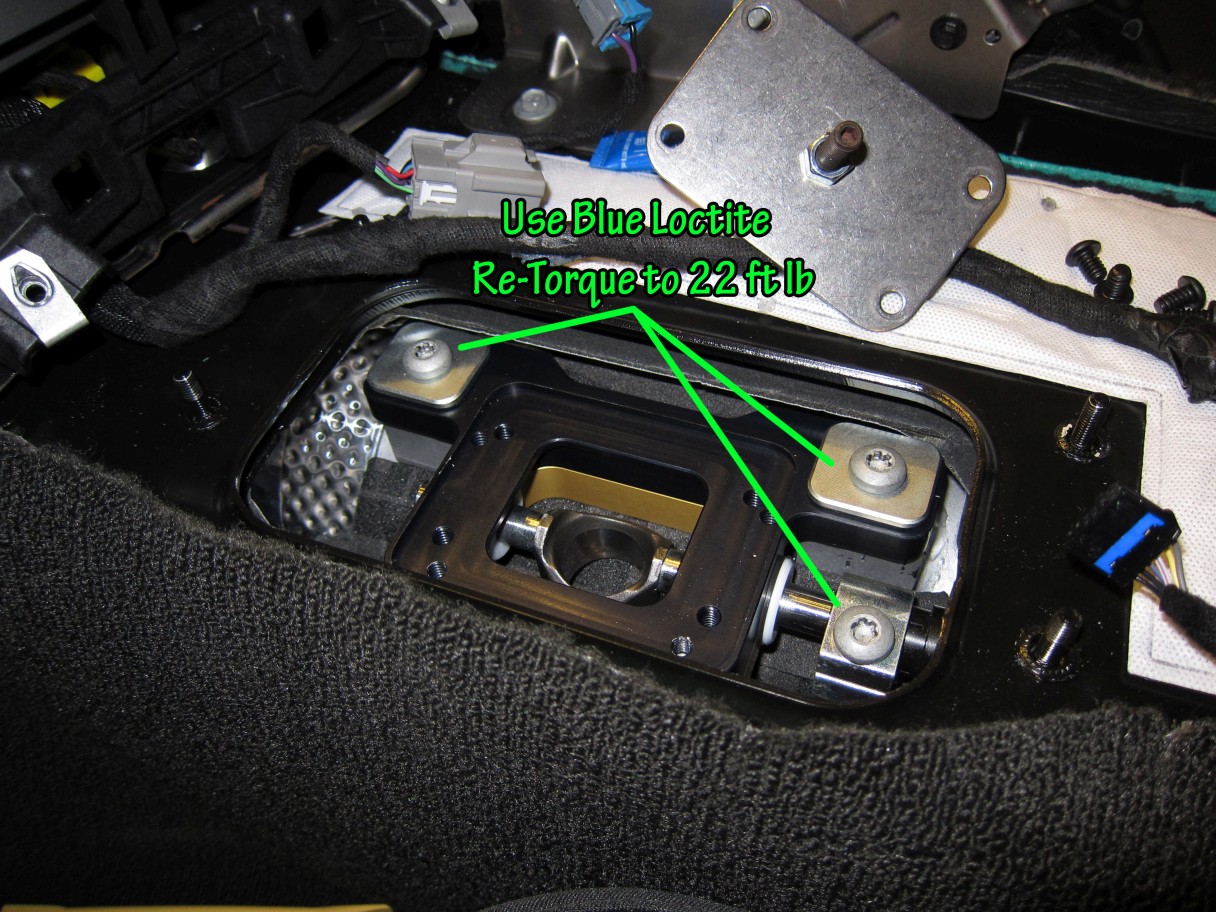
Cross-torque the bolts by hand only (per MGW):
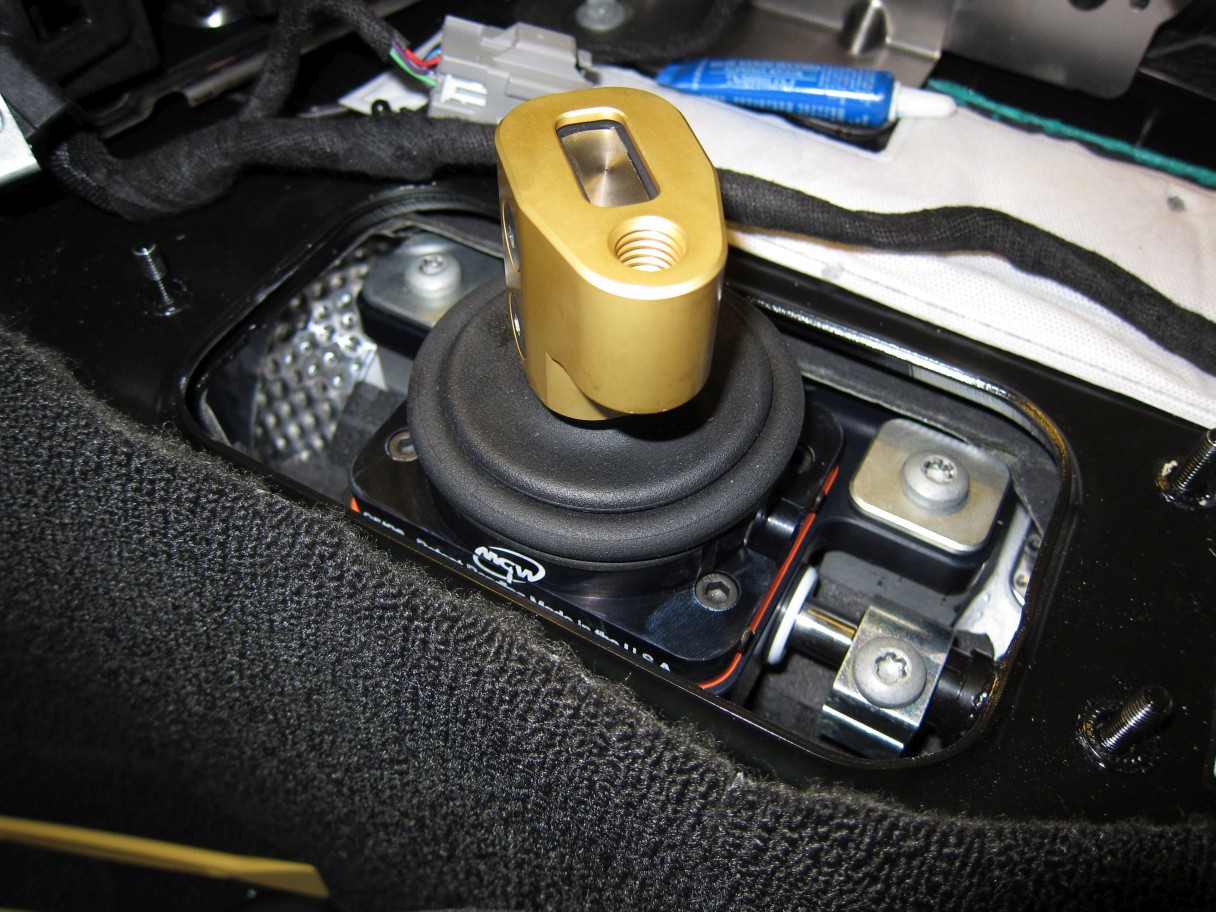
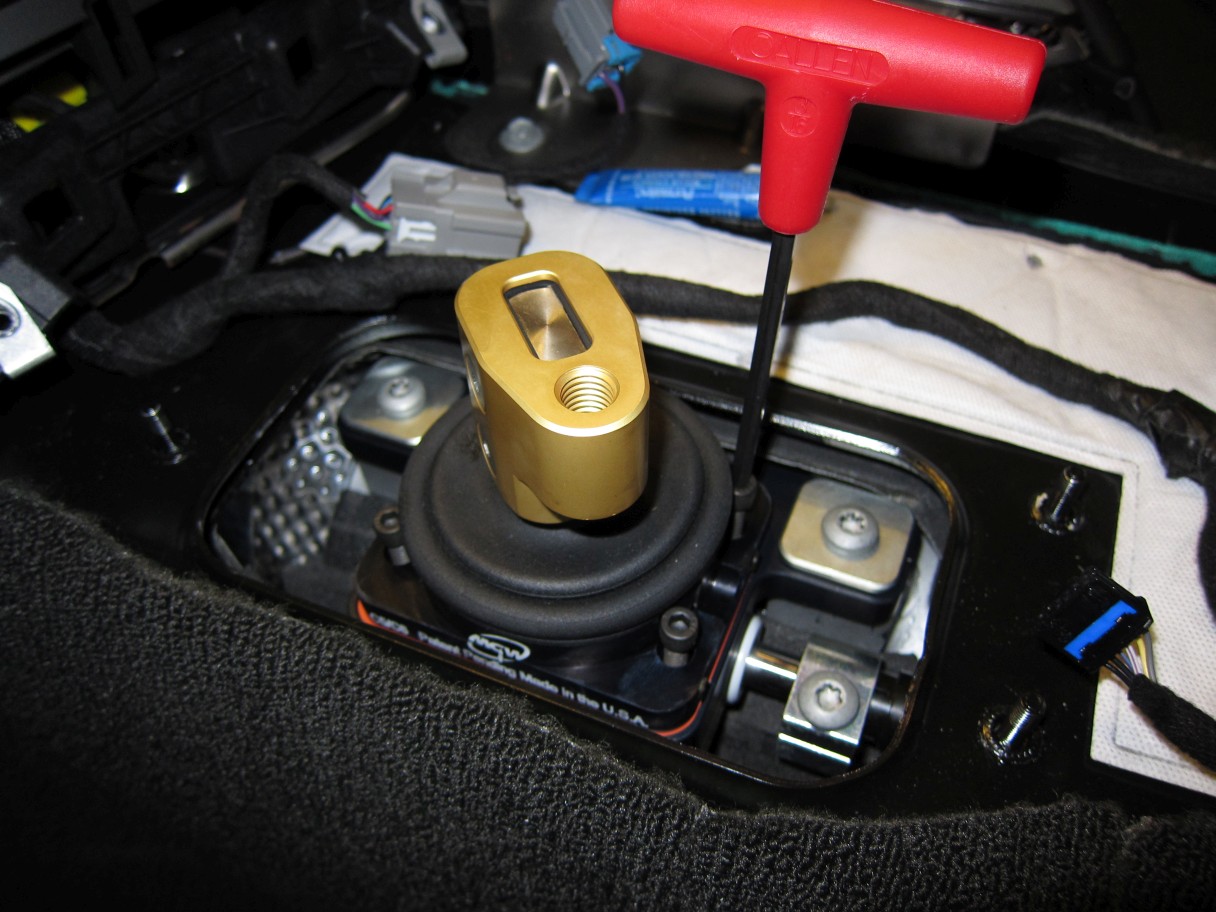
Use the included Allen wrench to tighten the locking set screws (4 in total). They will tighten with one full revolution.
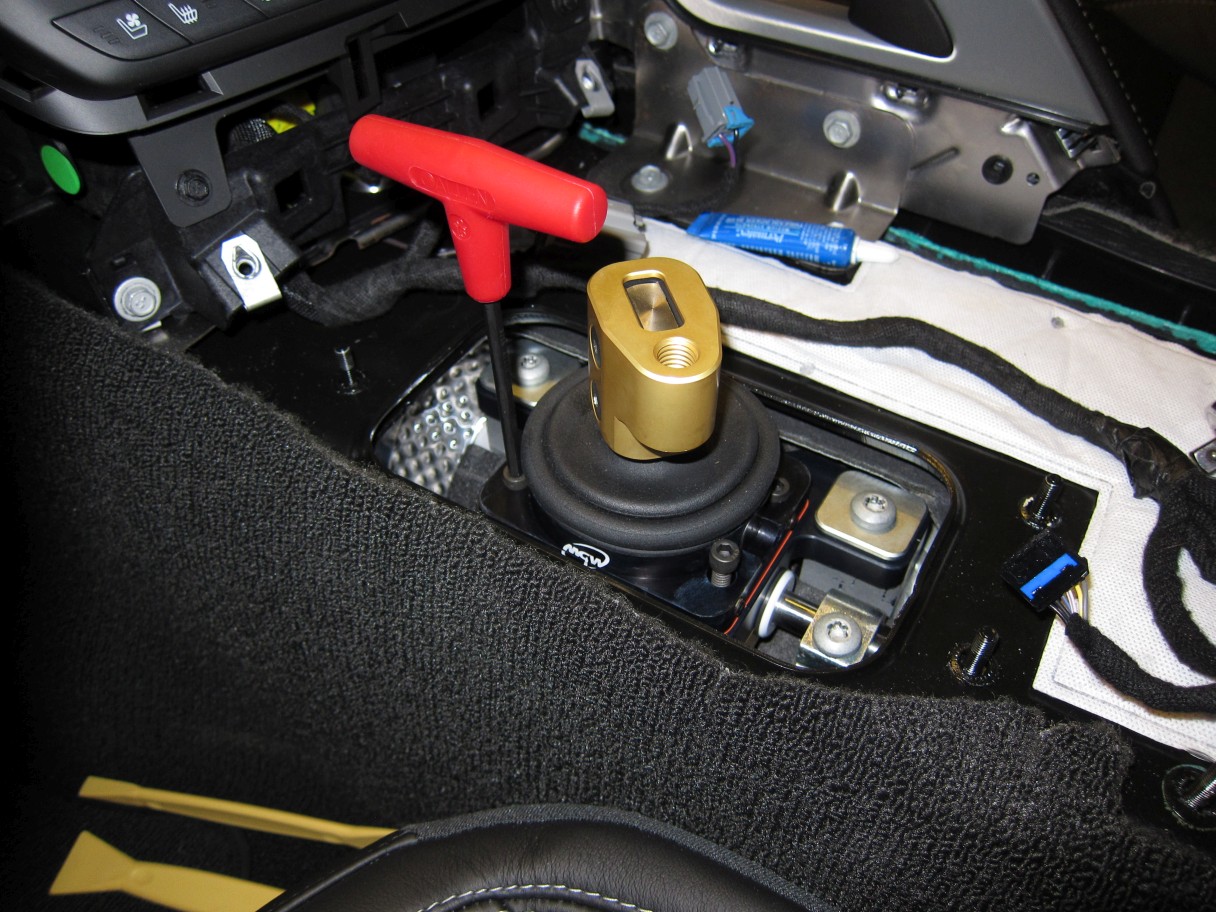
Now for some cutting. This is a little different from the C6, but essentially the same. You will make the exact same cut as seen here:

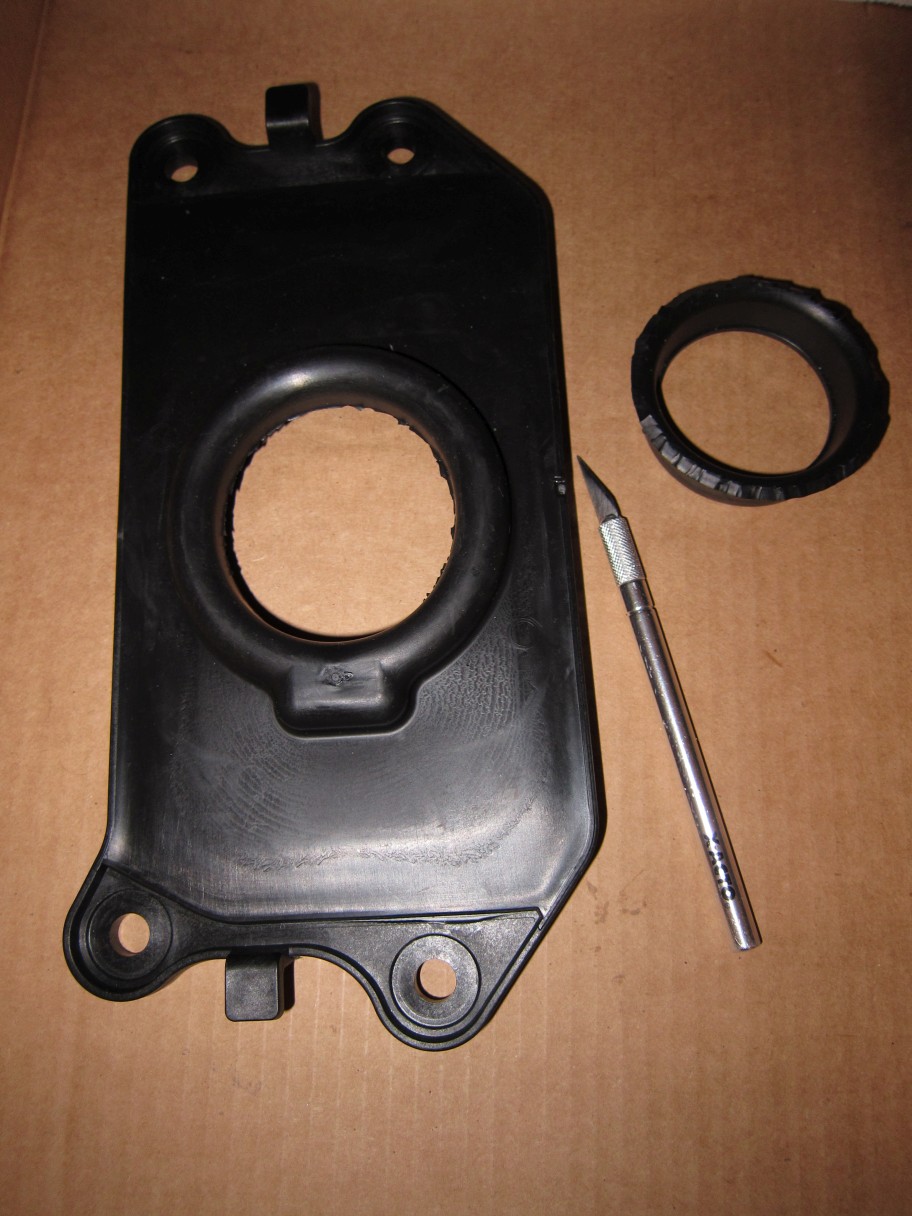
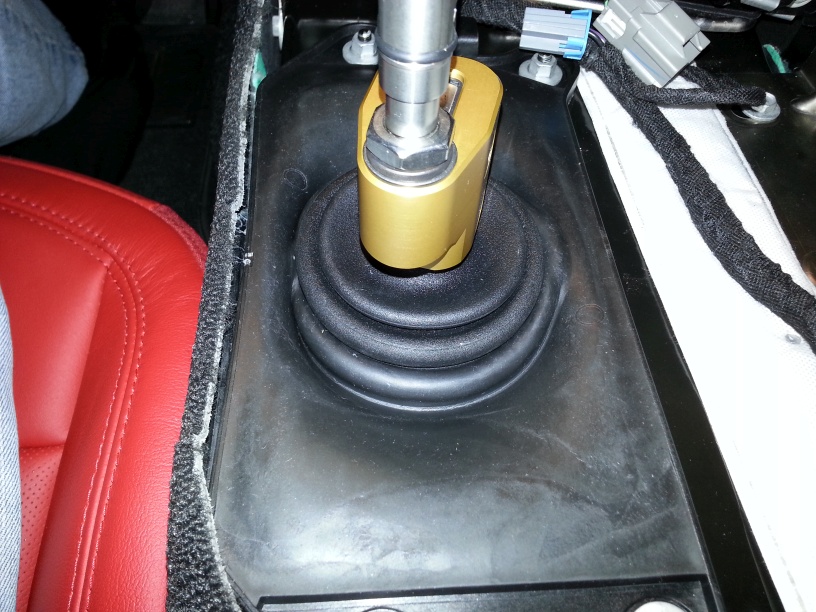
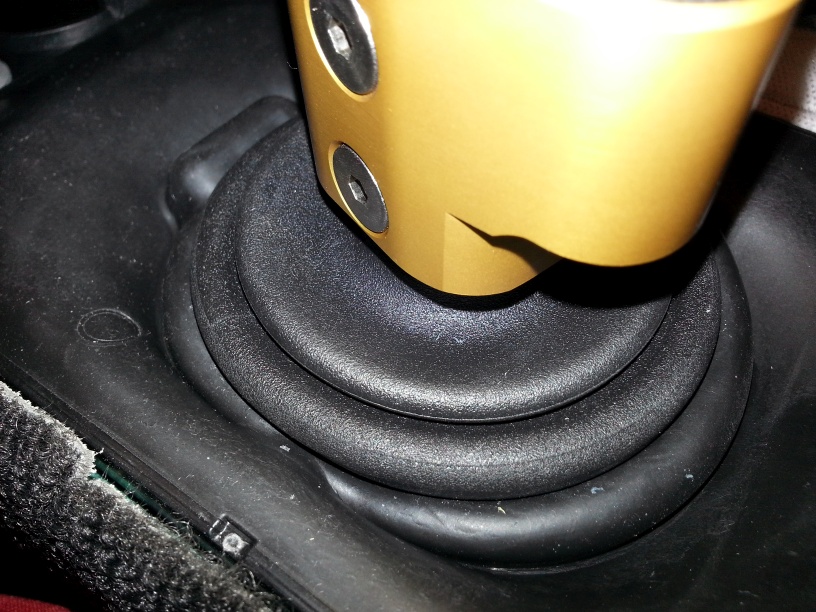
Unlike the C6, though, you will only be able to get one of the shifter's rubber 'boots' through:
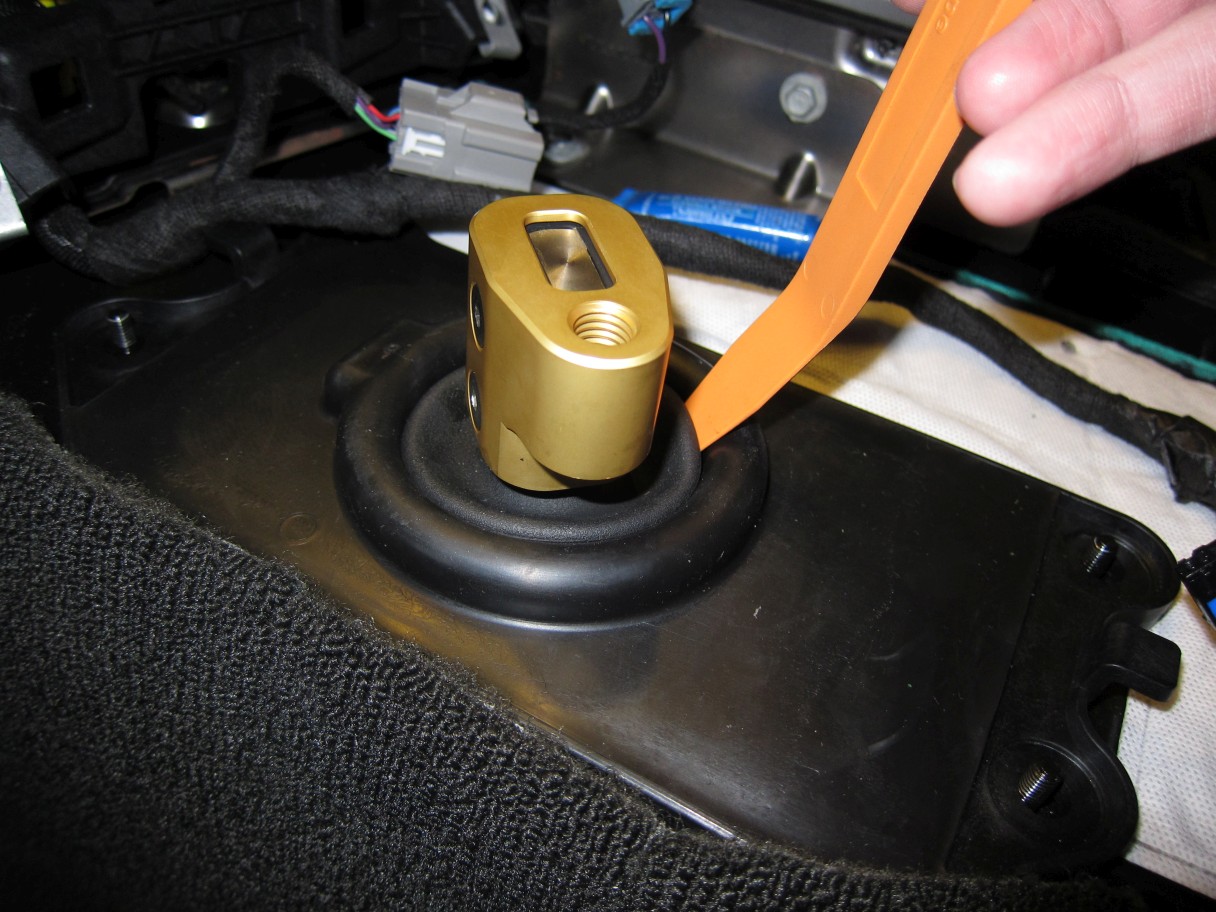
UPDATE: Thanks to use 'copjsd', we can see that it is actually possible to push the 'donut' down and get all the rings through as shown here!

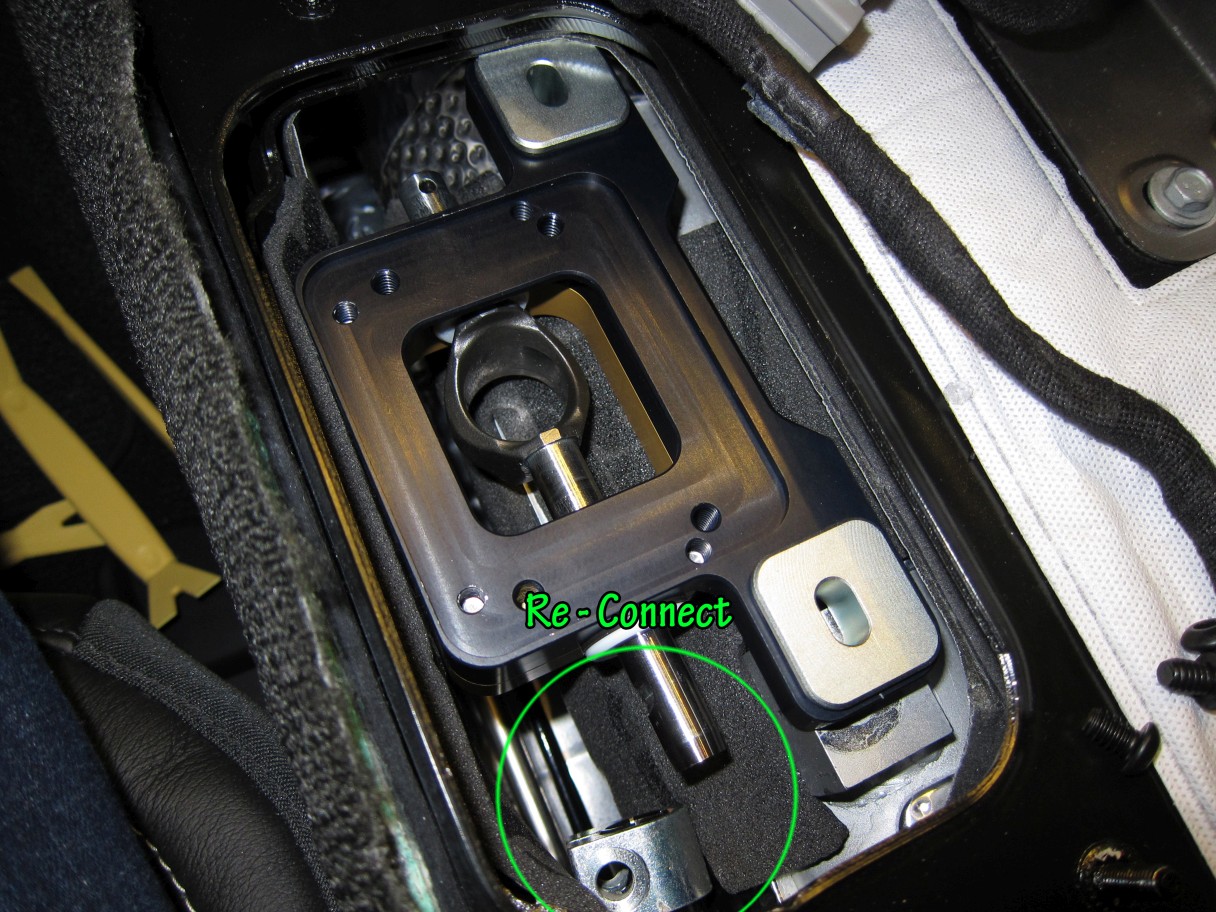
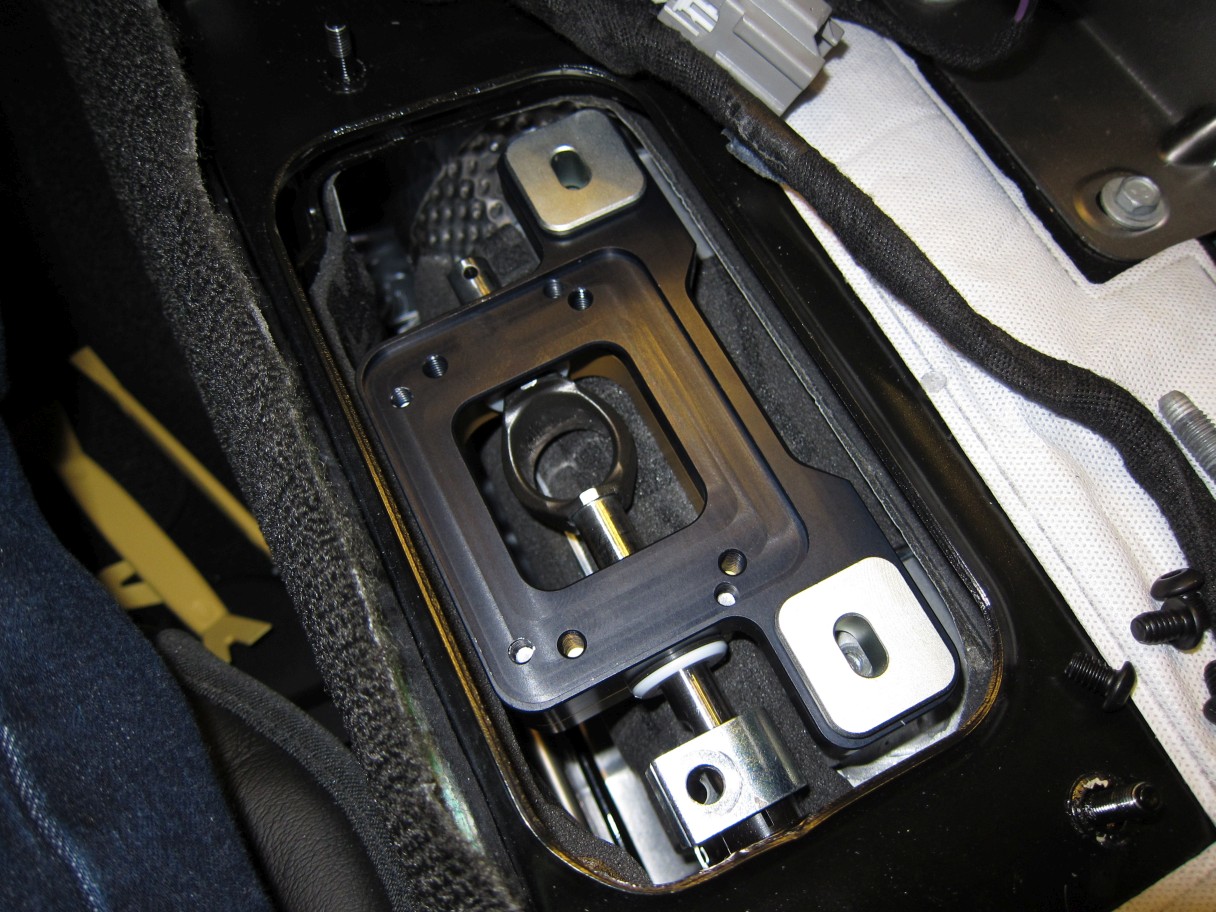
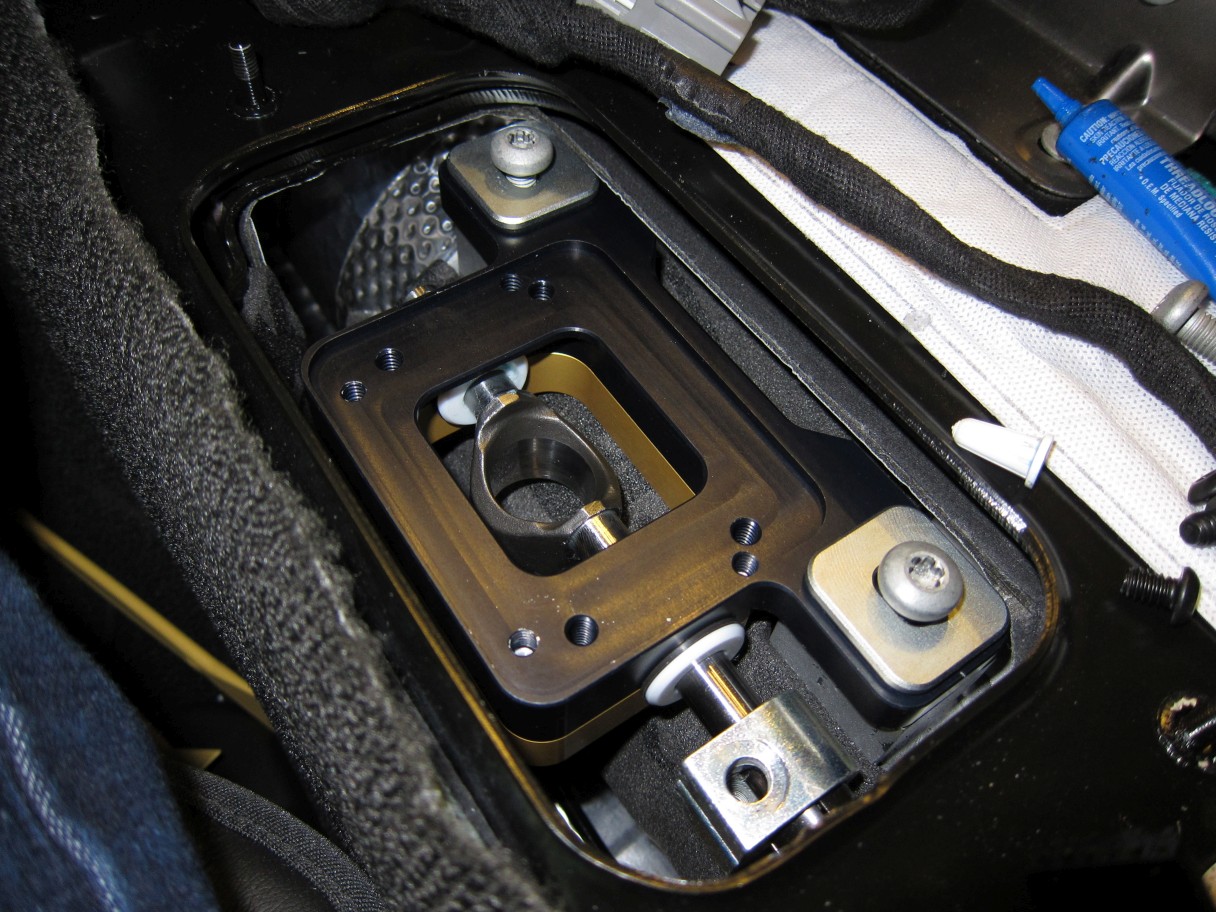
Re-install the 10mm nuts:
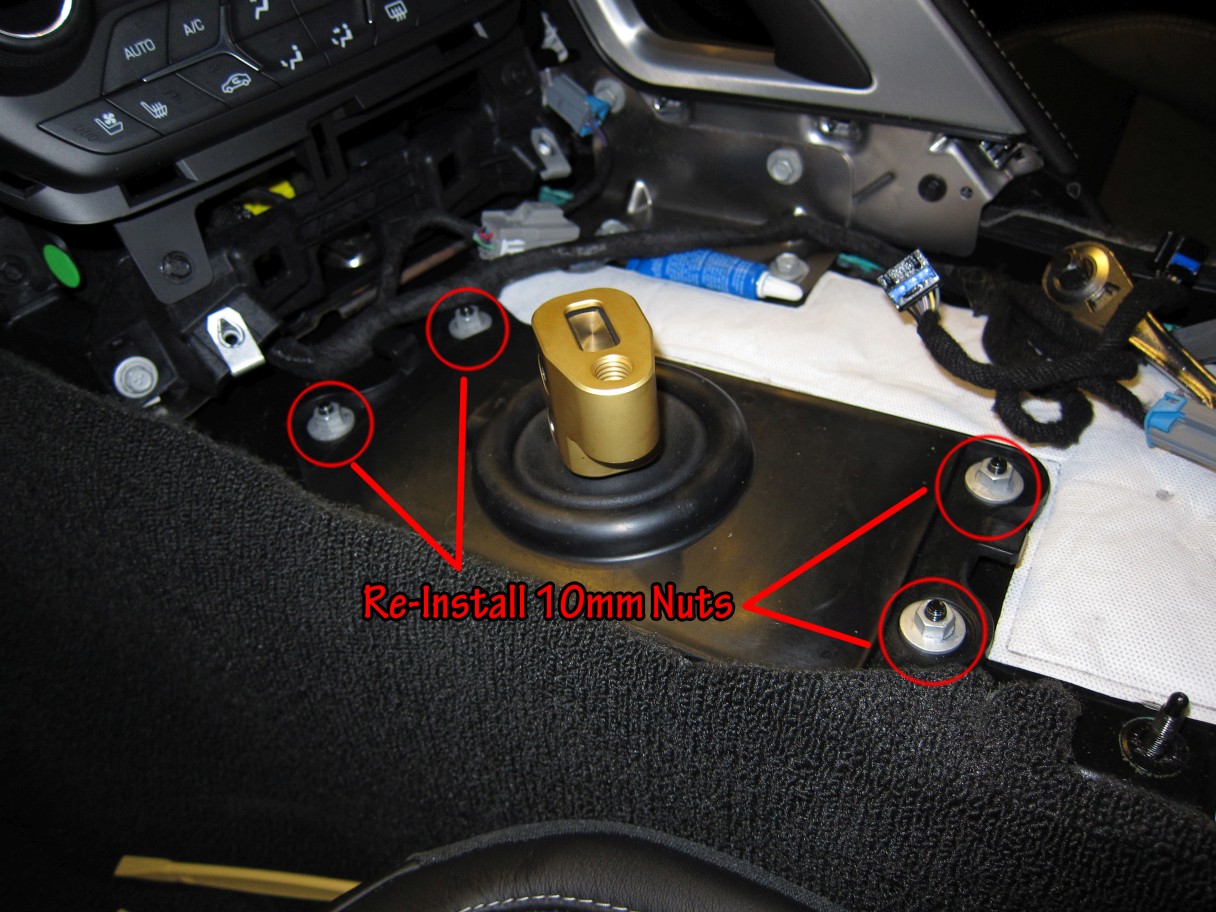
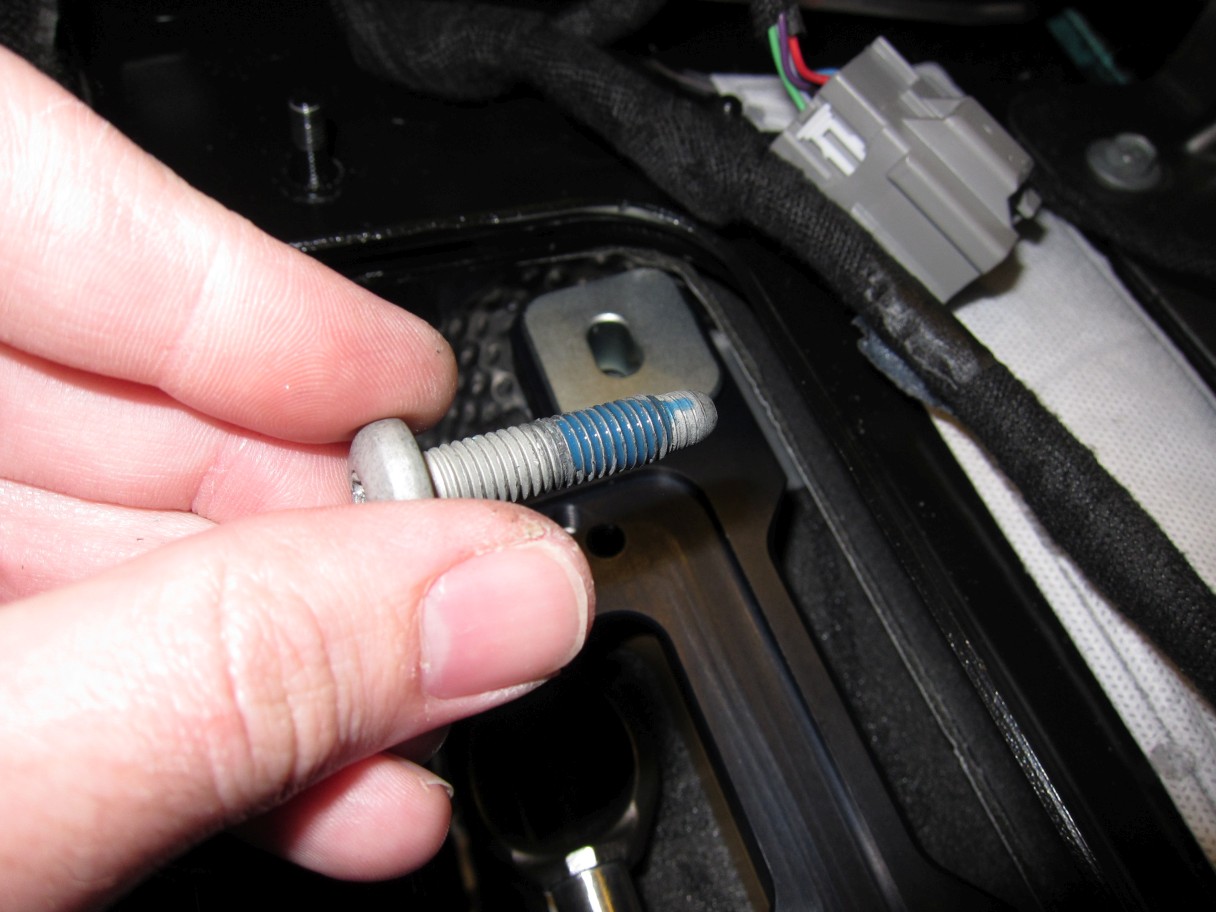
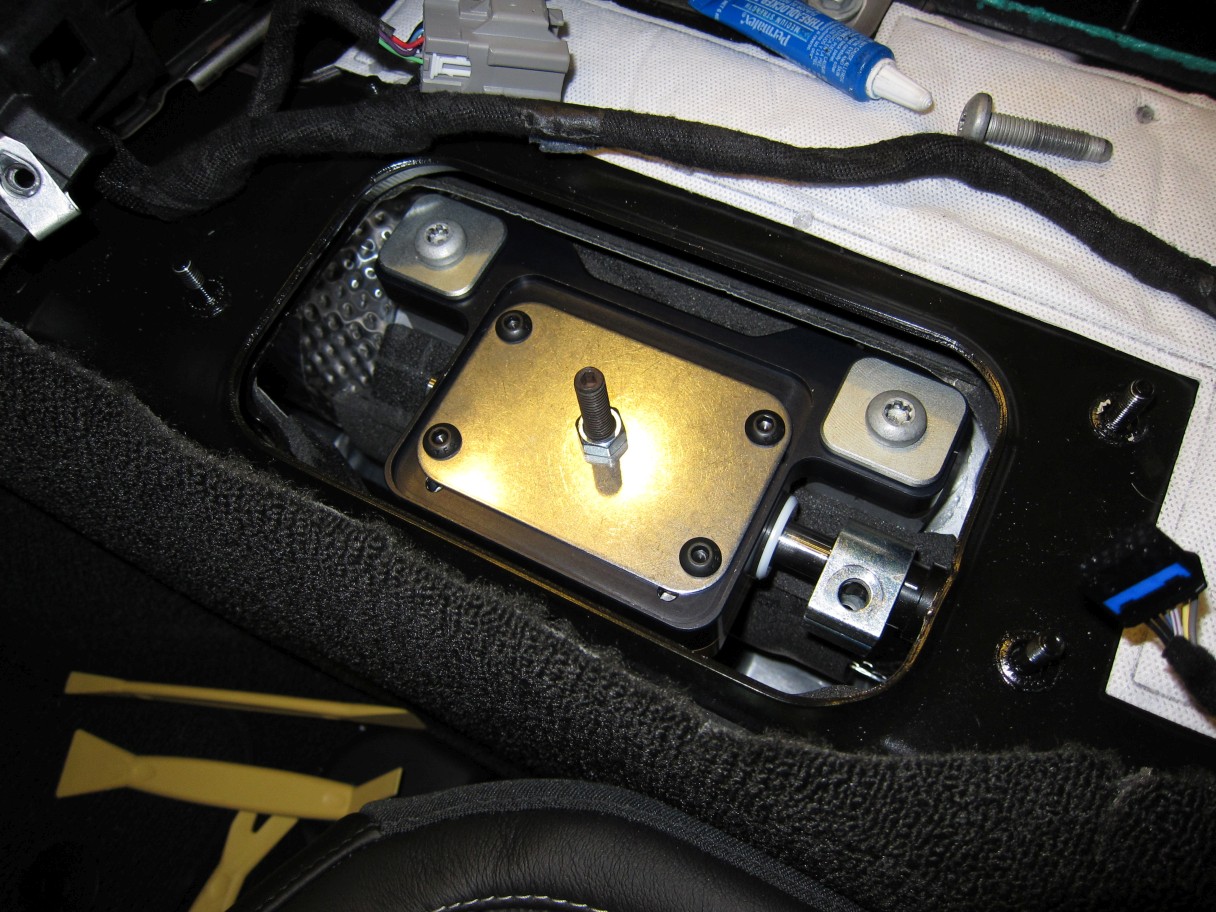
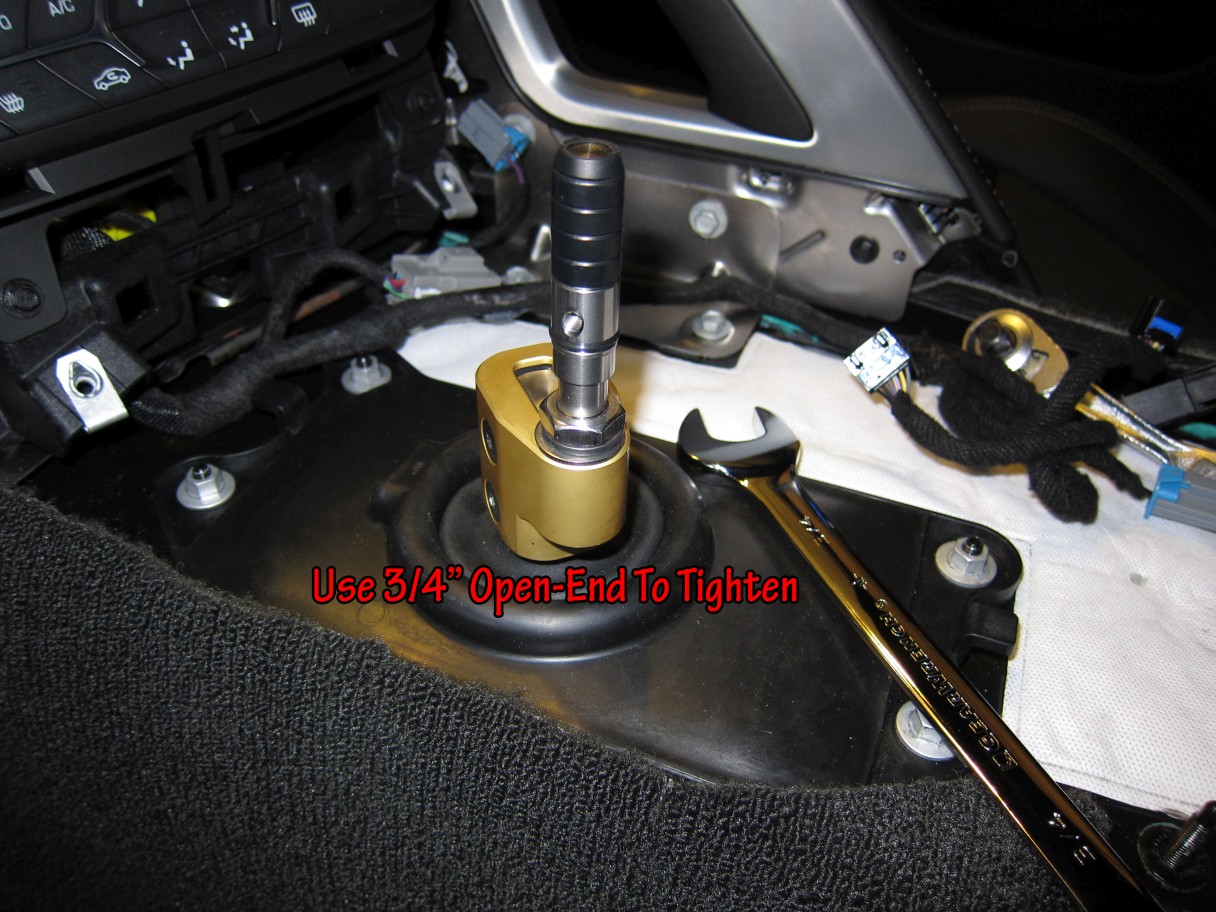
Align and tighten the shift **** shaft (with nut, locking nut, and washer as shown). Use the stock **** to eyeball/align the screw hole. For me, it was dead center left-to-right.

The alignment tool included works very well - leave the four screws loose until you eyeball the notch. Once it's dead on, crank those screws down.
Add the included gasket:
Install the shifter with the text facing the driver:
Cross-torque the bolts by hand only (per MGW):
Use the included Allen wrench to tighten the locking set screws (4 in total). They will tighten with one full revolution.
Now for some cutting. This is a little different from the C6, but essentially the same. You will make the exact same cut as seen here:
Unlike the C6, though, you will only be able to get one of the shifter's rubber 'boots' through:
UPDATE: Thanks to use 'copjsd', we can see that it is actually possible to push the 'donut' down and get all the rings through as shown here!
Re-install the 10mm nuts:
Align and tighten the shift **** shaft (with nut, locking nut, and washer as shown). Use the stock **** to eyeball/align the screw hole. For me, it was dead center left-to-right.
Last edited by Theta; 06-11-2014 at 01:52 AM.

The following 2 users liked this post by Theta:
Z06Aaron (04-20-2024),
ZedMaximus (03-01-2018)
04-05-2014, 03:47 AM
#22
Tech Contributor
Thread Starter
Member Since: Jan 2006
Location: Saint Louis MO
Posts: 4,761
Likes: 0
Received 219 Likes
on
110 Posts
St. Jude Donor '14-'15
Lastly, you'll just do everything in reverse to put Humpty Dumpty back together again.
I'm leaving my panels off for now to do some wiring, etc. so you'll just want to backtrack through the instructions. It's easier once you know where everything goes now!
I don't know if it's possible to like a shifter this much. This mod makes me want to go drive the car this instant - instead, I sat there playing with it for 10 minutes...
The shifts feel incredible - there's almost no way to accidentally money shift (hit 1st from 2nd) with the positive return. The shifts are very intuitive - no hunting for anything. My favorite thing about it so far is how solid it feels - I feel like it's a perfect extension of the car now.
Bottom line, I can say with certainty that this has been the best bang for the buck mod I've done yet.
04-05-2014, 03:49 AM
#23
Tech Contributor
Thread Starter
Member Since: Jan 2006
Location: Saint Louis MO
Posts: 4,761
Likes: 0
Received 219 Likes
on
110 Posts
St. Jude Donor '14-'15
Oh, and if you're not taking pictures and doing a write-up, this should take you anywhere from 1-2 hours start to finish. 


 04-05-2014, 11:59 AM
#25
Melting Slicks


Wow! This is so going to come in handy when my shifter arrives next week! Thank you so much for taking the time to put this together. I will add your latest additions to the PDF instructions I was putting together at my office and add them to this thread on Monday when I get back to work.
Thanks again Theta. Your contributions here have been huge between this and your super charger thread. Fort those of us that take these endeavors on ourselves, your contributions will be priceless.
Thanks again Theta. Your contributions here have been huge between this and your super charger thread. Fort those of us that take these endeavors on ourselves, your contributions will be priceless.
04-05-2014, 12:01 PM
#26
Melting Slicks
One question which is probably tough to answer since you have yet to drive the car with this shifter in place.. How does it feel compared to the stock one? It's almost a shame that you couldn't drive the car back to back with the old shifter and the new one. I know it's been a while since you drove your car.
04-05-2014, 05:38 PM
#28
Tech Contributor
Thread Starter
Member Since: Jan 2006
Location: Saint Louis MO
Posts: 4,761
Likes: 0
Received 219 Likes
on
110 Posts
St. Jude Donor '14-'15
One question which is probably tough to answer since you have yet to drive the car with this shifter in place.. How does it feel compared to the stock one? It's almost a shame that you couldn't drive the car back to back with the old shifter and the new one. I know it's been a while since you drove your car.
The best analogy I can give (and I think it's a fairly appropriate one) is to think of a deadbolt. A residential deadbolt is fairly sloppy in that it just flops over into the slot, but still can be wiggled, etc. A commercial deadbolt is usually made to strict tolerances, and feels extremely substantial when you turn the key and hear the definite "clunk".
Extending that example, this takes an already decent stock shifter and makes it into a seriously solid beast. It just has a certainty to it - no question at all that you're in a gear, and enough weight to make sure you don't have to struggle to shift. The positive return is exactly what I was looking for to avoid the dreaded 2-1 mis-shift. Only done that once in my life, and it was an expensive learning experience after taking a 1.8L to about 10,000rpm (7000 redline).
The following users liked this post:
Bvvet (06-22-2017)


 04-06-2014, 11:53 AM
#33
Tech Contributor
Member Since: Aug 1999
Location: Should this thoughtful, valuable contribution meet with no acknowledgement or 'thanks' this post----
Posts: 16,382
Received 399 Likes
on
257 Posts

Interesting, there is a ton of engineering into that product...I am impressed they got it to market so quickly.....says a lot for their business! Can't wait to see what they come up with next...we need a lot more mods for the C7...pickings are still quite thin.
04-06-2014, 04:48 PM
#34
Tech Contributor
Thread Starter
Member Since: Jan 2006
Location: Saint Louis MO
Posts: 4,761
Likes: 0
Received 219 Likes
on
110 Posts
St. Jude Donor '14-'15
I'm glad that such a high quality option exists, though to the contrary of the above, I'm rather impressed with how many aftermarket parts are already available compared to the C6 launch.
04-07-2014, 01:44 PM
#35
Tech Contributor
Thread Starter
Member Since: Jan 2006
Location: Saint Louis MO
Posts: 4,761
Likes: 0
Received 219 Likes
on
110 Posts
St. Jude Donor '14-'15
I just didn't want you to waste time if we were both doing one.
04-07-2014, 02:06 PM
#36
Melting Slicks
I've just about completed the document. Send me your email address via PM and I will email you the word document complete with your photos and instructions. It might save you some time as I already have everything formatted and scaled with 2 photos per page. I can upload it here if you would like.
04-07-2014, 02:25 PM
#38
Melting Slicks
04-07-2014, 02:38 PM
#39
Tech Contributor
Thread Starter
Member Since: Jan 2006
Location: Saint Louis MO
Posts: 4,761
Likes: 0
Received 219 Likes
on
110 Posts
St. Jude Donor '14-'15
Final document will be added to the top of the thread and credited to you.
We need to get that reduced from 57 pages somehow.
We need to get that reduced from 57 pages somehow.
04-07-2014, 02:42 PM
#40
Melting Slicks
I will play with the photo sizes and see if I can widdle it down by 30-50%.