In need of adult supervision for quarter panel repair on a 92
 02-11-2015, 11:36 PM
#1
Pro

Thread Starter


Decided to bite off more then I can chew with two car builds at once, and now I'm crying for help.
The problem is I'm a bit confused with the chemical selections for smc repair. From what I read from the guy that obviously knows more than everyone else highly recommends using West Systems Resin over and above everything else. Being its geared towards marine use is a positive in my book, but nowhere on the manufactures sight it specifically says it's compatible with smc; Evercoat does. And being evercoat makes fillers and bonding adhesive that specifically state that they're compatible with smc is a huge plus for me being that I'm a rookie.
So my questions are:
I really want to use the West Systems mainly because of the various options in hardeners and I haven't read anything negative about it. Can I mix products? For example can I use west for the actual repair of the fiberglass and use evercoat products for the fillers and adhesives?
If I can mix products, what evercoat products should I use? I was thinking of using fibertech as a filler and use to repair the halo.
Can use glazing compounds? Was thinking poly flex.
What should I use for a panel prep/cleaner?
And finally do I need to use an etching primer as if it were bare metal?
Or can I go straight to the high build primer?
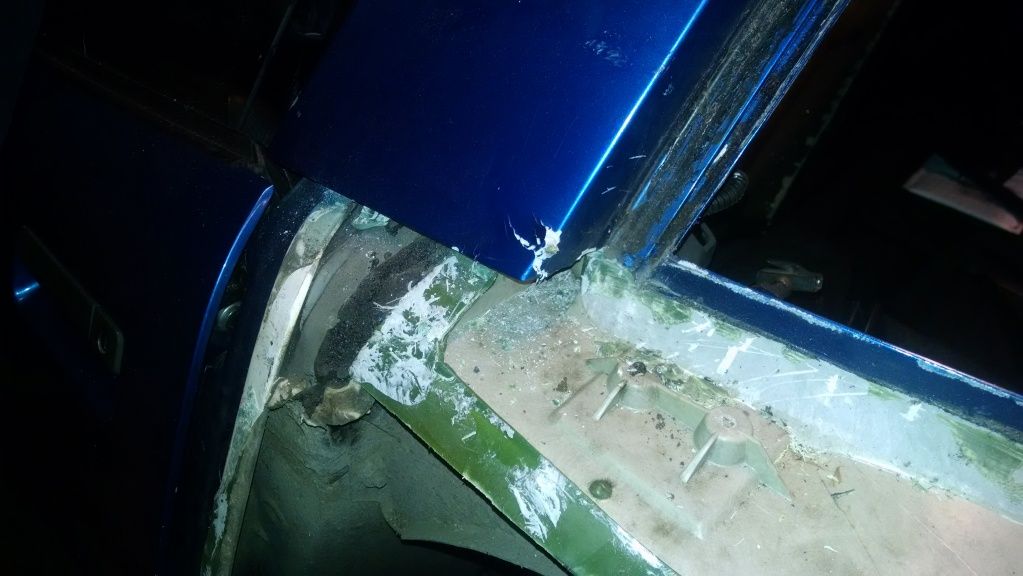
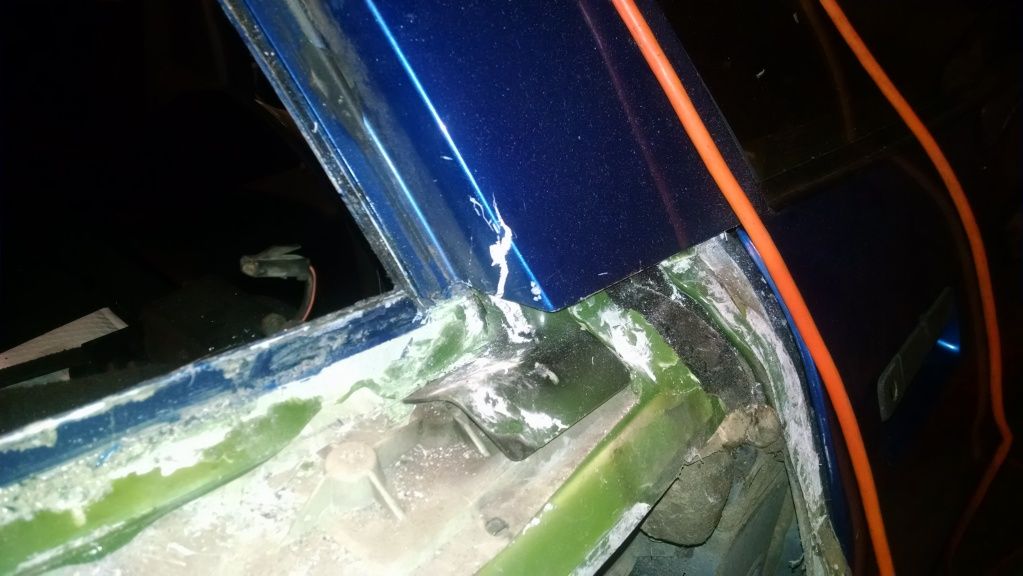
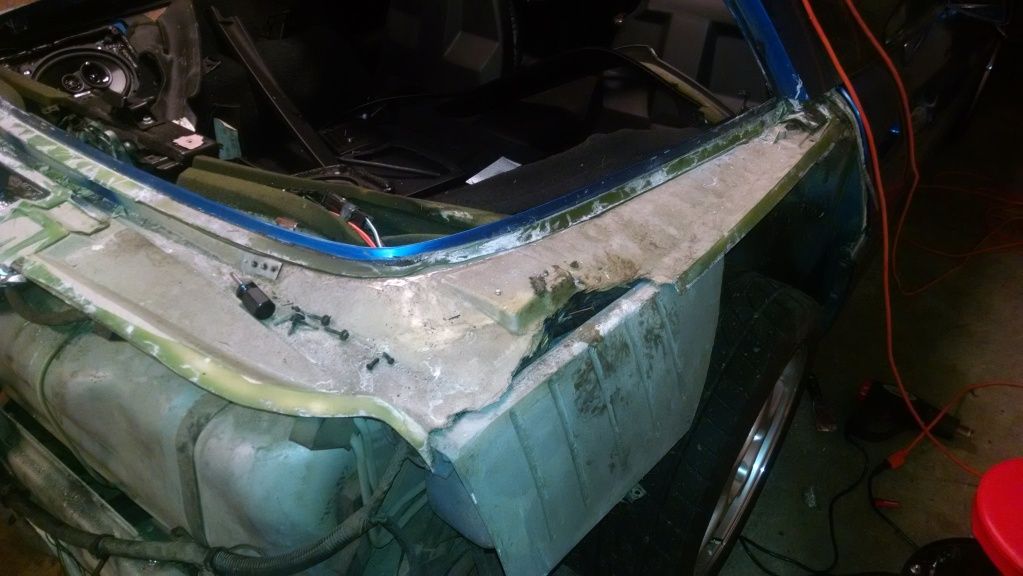
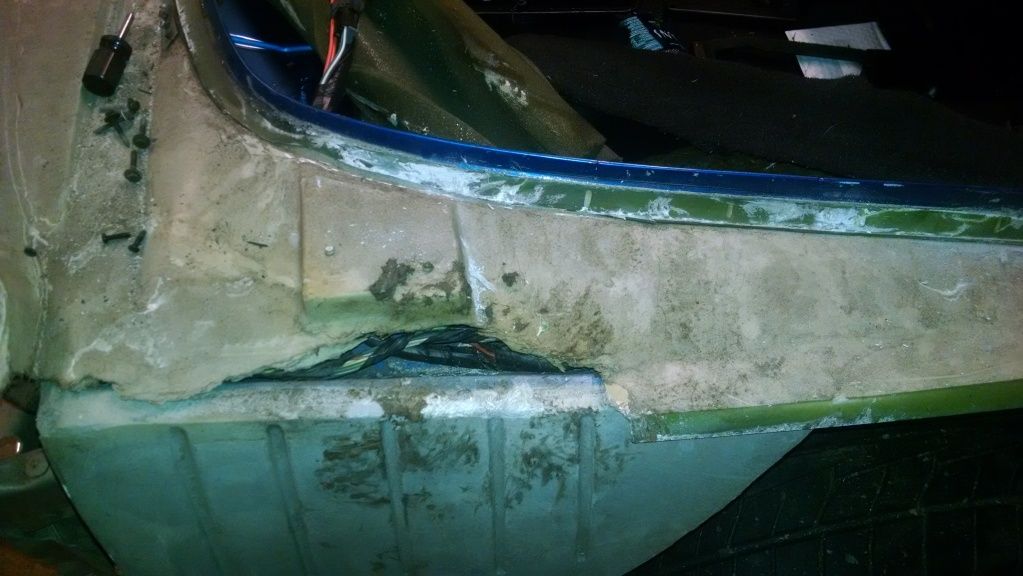
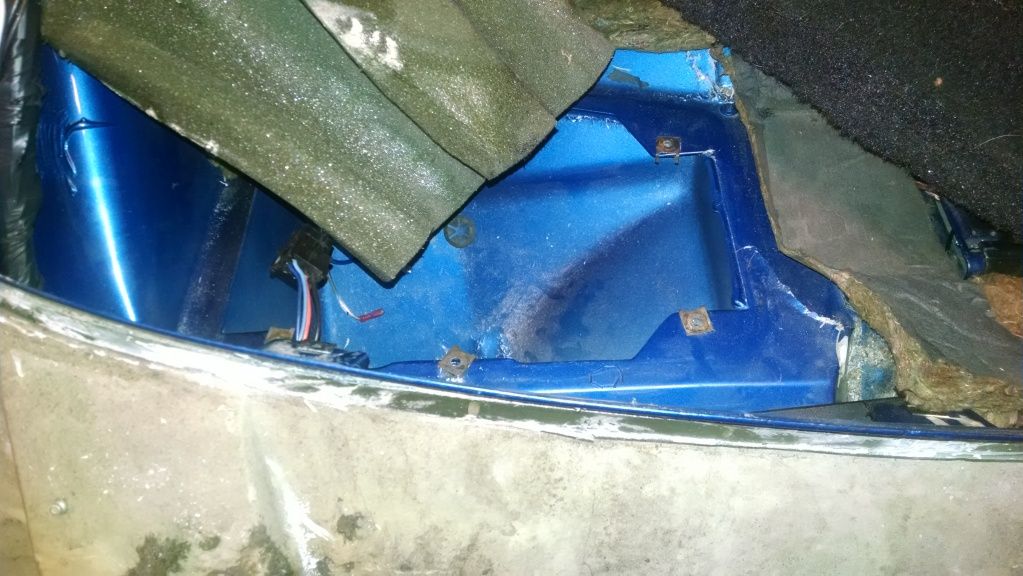
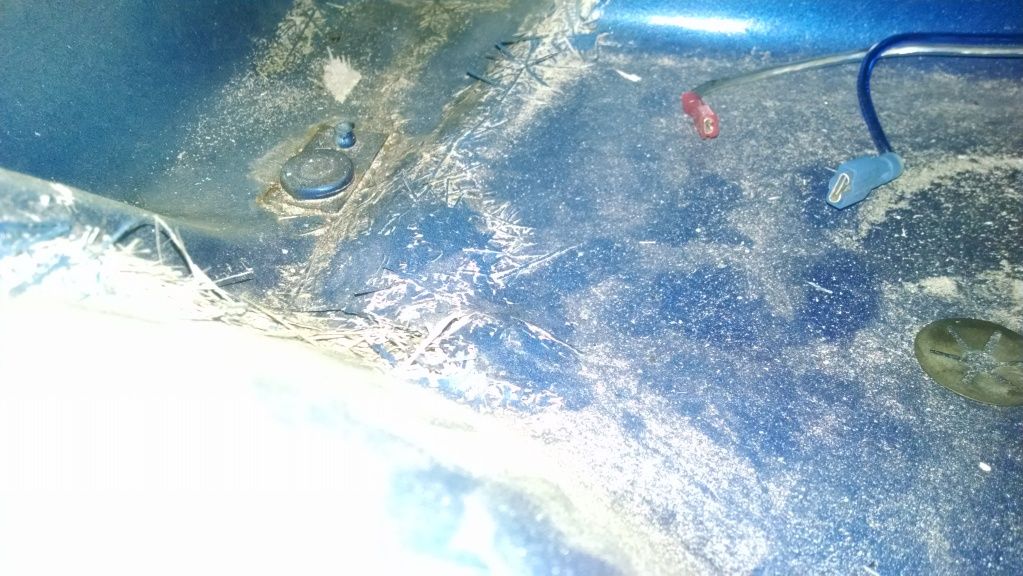
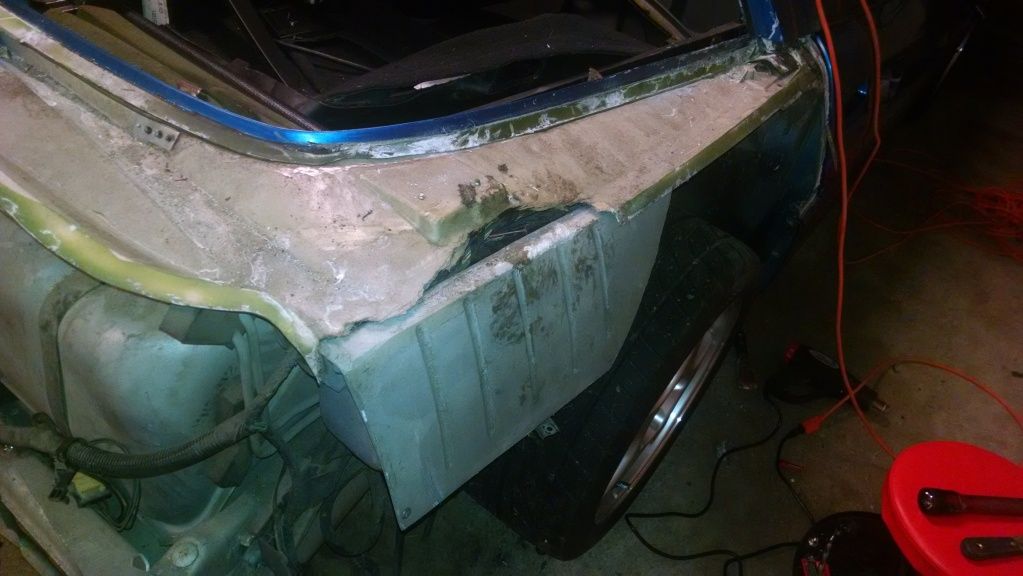
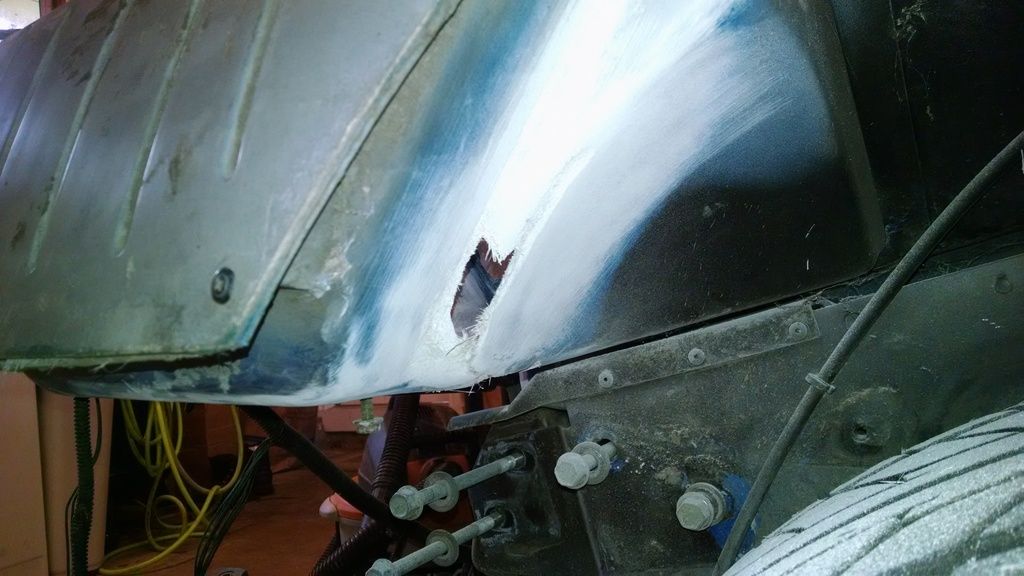
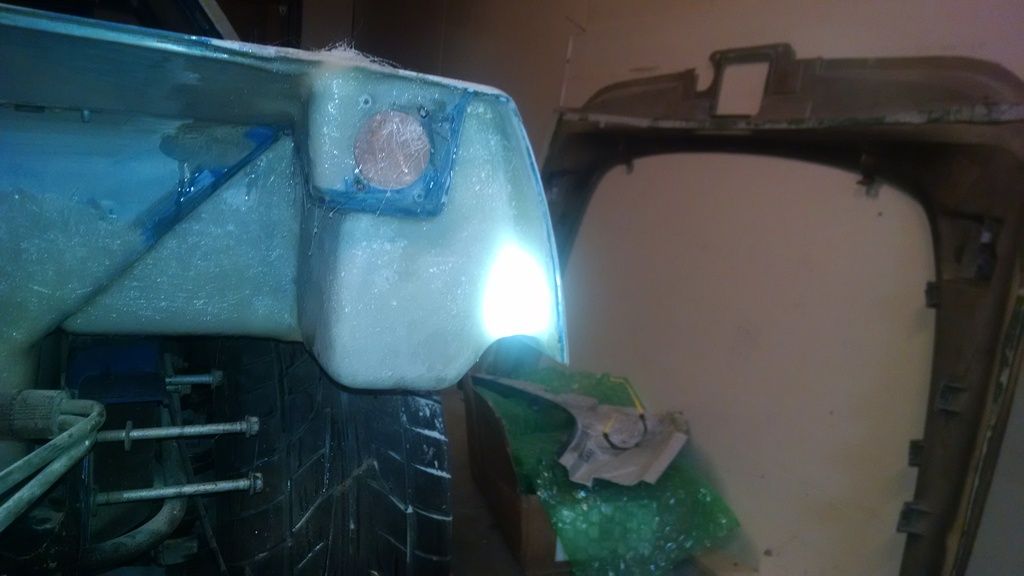
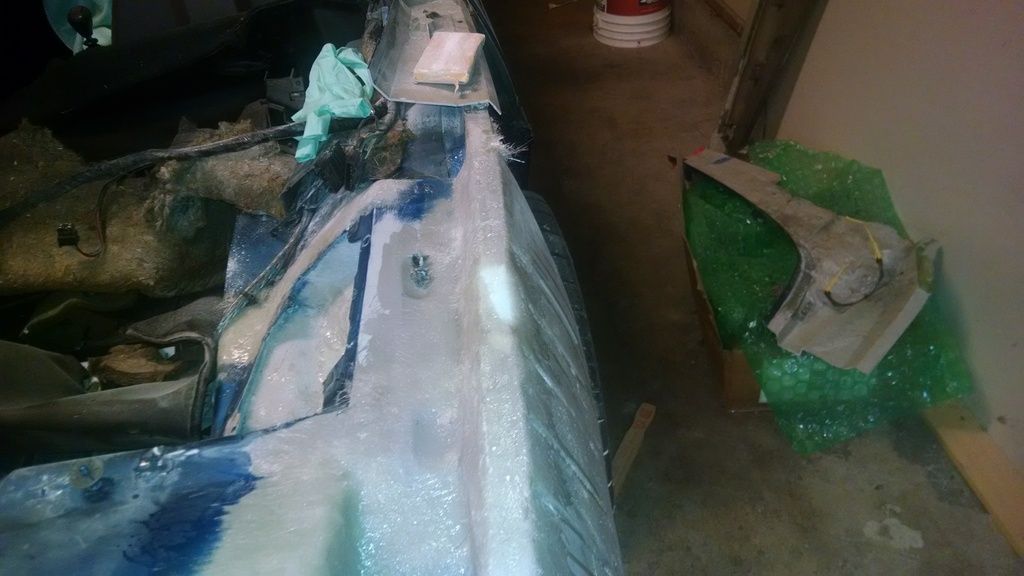
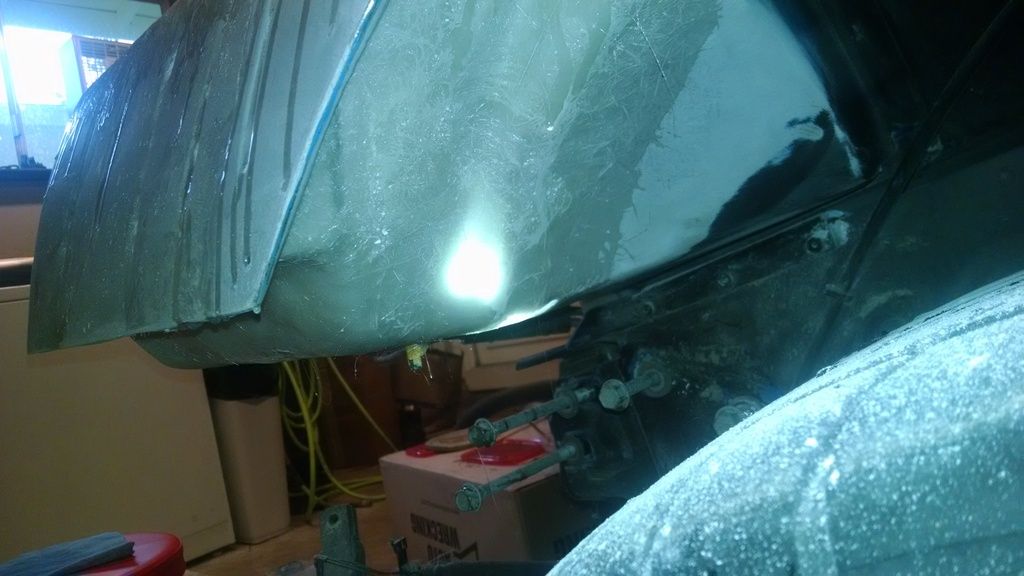
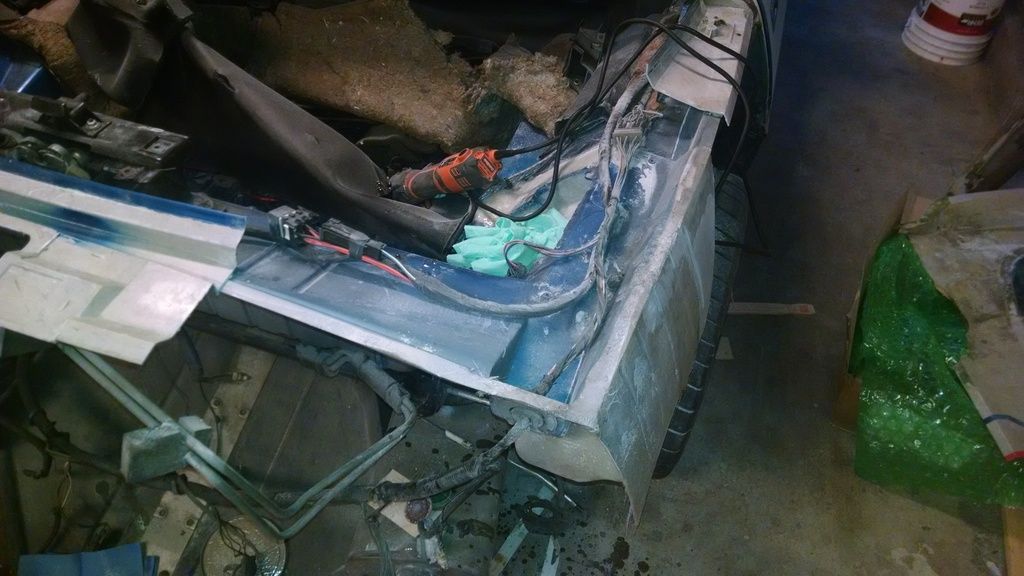
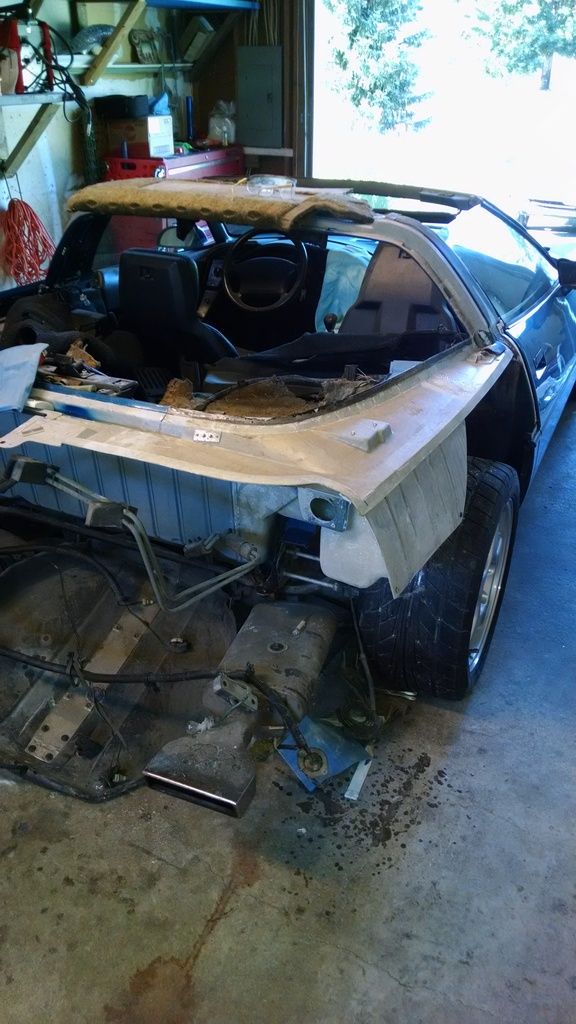
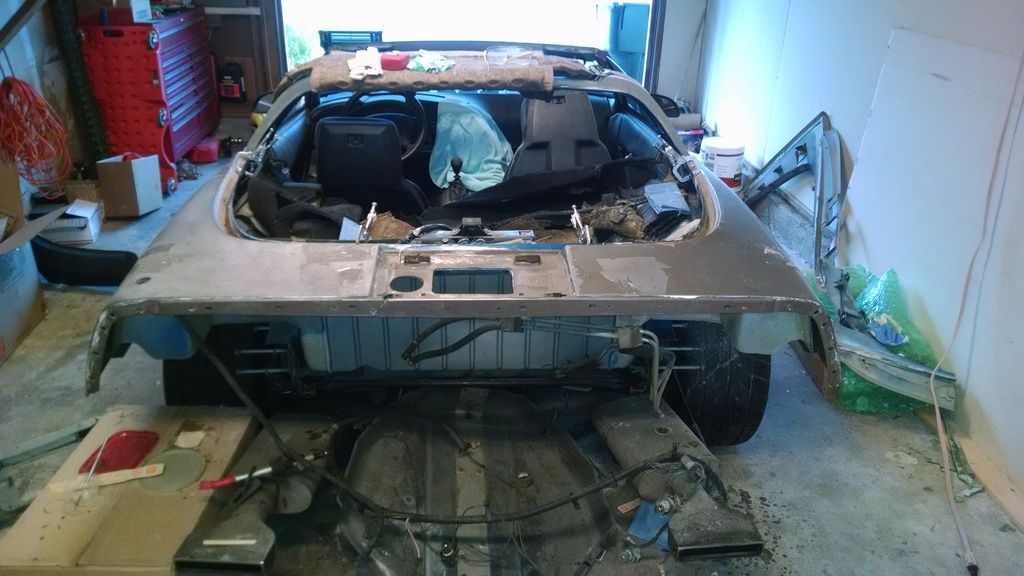
Anyways below are pics of the damage. Replacing the quarters... Thanks for any input. Pics below.
The problem is I'm a bit confused with the chemical selections for smc repair. From what I read from the guy that obviously knows more than everyone else highly recommends using West Systems Resin over and above everything else. Being its geared towards marine use is a positive in my book, but nowhere on the manufactures sight it specifically says it's compatible with smc; Evercoat does. And being evercoat makes fillers and bonding adhesive that specifically state that they're compatible with smc is a huge plus for me being that I'm a rookie.
So my questions are:
I really want to use the West Systems mainly because of the various options in hardeners and I haven't read anything negative about it. Can I mix products? For example can I use west for the actual repair of the fiberglass and use evercoat products for the fillers and adhesives?
If I can mix products, what evercoat products should I use? I was thinking of using fibertech as a filler and use to repair the halo.
Can use glazing compounds? Was thinking poly flex.
What should I use for a panel prep/cleaner?
And finally do I need to use an etching primer as if it were bare metal?
Or can I go straight to the high build primer?
Anyways below are pics of the damage. Replacing the quarters... Thanks for any input. Pics below.


 02-11-2015, 11:39 PM
#2
Pro
Thread Starter
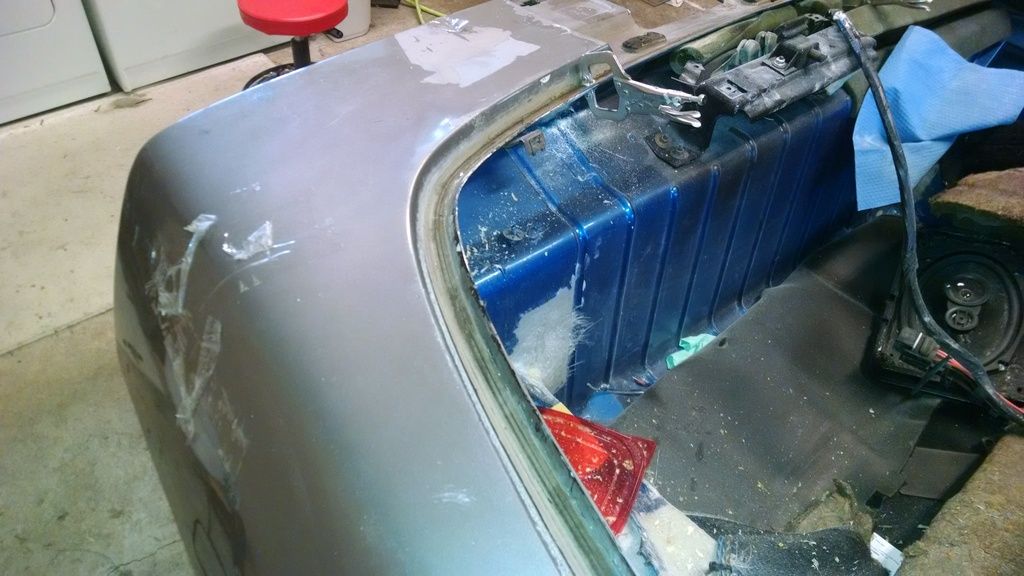
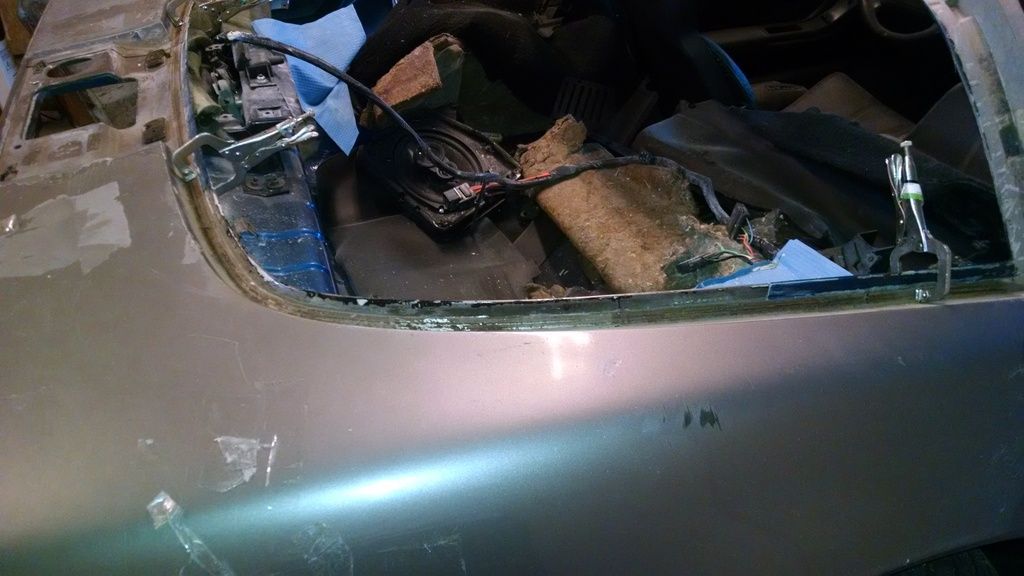
Forgot to mention the new/used quarters I got from a forum member came with the piece that has a chunk missing from it. So was planing using glued in tabs to splice in a new chuck and use cloth on the top side of the seam. Why I was asking about compatibility. Mucho Gracias!
Last edited by syco_cop; 02-12-2015 at 12:29 AM.
02-12-2015, 06:22 PM
#3
Race Director


I would have to agree...and you should have asked for assistance before you started doing this....which could have saved you a lot of grief and problems.
YES
It depends on what you are using it for....so this is hard to say until you get to that stage of the repair.
I use no glazing putties when I do my body work, But if you want to...you can. I can not tell you which is better than the other. It has been so many years since I have had a can of it around. I do not know what is out there. I prefer to use the filler I use.
You have to be very precise on what you mean. Your question is generalized. Are you talking what you would use on a primed surface...for example. It makes a difference
NO
yes...after proper prep
Also...I would use the West Systems resin and forget all about using the SMC resin from Evercoat. I can never get it to properly adhere.
DUB
So my questions are:
I really want to use the West Systems mainly because of the various options in hardeners and I haven't read anything negative about it. Can I mix products? For example can I use west for the actual repair of the fiberglass and use evercoat products for the fillers and adhesives?
I really want to use the West Systems mainly because of the various options in hardeners and I haven't read anything negative about it. Can I mix products? For example can I use west for the actual repair of the fiberglass and use evercoat products for the fillers and adhesives?
I use no glazing putties when I do my body work, But if you want to...you can. I can not tell you which is better than the other. It has been so many years since I have had a can of it around. I do not know what is out there. I prefer to use the filler I use.
You have to be very precise on what you mean. Your question is generalized. Are you talking what you would use on a primed surface...for example. It makes a difference
yes...after proper prep
Also...I would use the West Systems resin and forget all about using the SMC resin from Evercoat. I can never get it to properly adhere.
DUB
02-12-2015, 09:12 PM
#4
Pro
Thread Starter
Dub, seriously thank you for your input on my questions and everyone else's. You don't know how many hours of reading I have and found your posts very informative. I greatly appreciate it.
What should I use to clean the surfaces before bonding parts together and what should I use to clean before laying down the fiberglass and resin? And before primer too since we're on the subject. Was under the impression isopropyl alcohol would would work for all of the above.
Also what would you recommend using to bond the quarters back on. Something that could be used in a caulking gun would be great. I worked in a resto shop for a short time doing metal work and we used this stuff call tiger seal. We would use it for gluing the bottom portion of 1st gen mustang quarters on the section you really couldn't weld. Worked great. Would something like this work?
http://www.autobodytoolmart.com/u-po...t-p-16692.aspx
And how did you feel about splicing in the damaged section? Seems logical to me
Anyways I think this will take care of most of my questions. And again I can't thank you enough.
I will for sure continue posting pics and what chemicals I use so hopefully the next poor sap like me will have some good info.
[Dub]You have to be very precise on what you mean. Your question is generalized. Are you talking what you would use on a primed surface...for example. It makes a difference
Also what would you recommend using to bond the quarters back on. Something that could be used in a caulking gun would be great. I worked in a resto shop for a short time doing metal work and we used this stuff call tiger seal. We would use it for gluing the bottom portion of 1st gen mustang quarters on the section you really couldn't weld. Worked great. Would something like this work?
http://www.autobodytoolmart.com/u-po...t-p-16692.aspx
And how did you feel about splicing in the damaged section? Seems logical to me
Anyways I think this will take care of most of my questions. And again I can't thank you enough.
I will for sure continue posting pics and what chemicals I use so hopefully the next poor sap like me will have some good info.
02-13-2015, 05:48 PM
#5
Race Director
I prefer to use acetone. Isopropyl alcohol would work...but doing fiberglass laminating and applying gelcoat often. I keep acetone on hand all the time.
I looked at the Upol tiger seal product...and honestly...I COULD NOT use it due to it is not the same as the green adhesive that you see on your body currently (because of insurance stuff and liability). I HAVE to use the same or JUST LIKE product...and I use LORD FUSOR and their products are a two-component system where the adhesive is catalyzed and has a work-time. I will look due to being at home right now or you can contact LORD FUSOR and ask them...if you want to use their products....and....I believe they are changing over their product packaging so you do not need a special gun to dispense and mix the product.
Splicing in the damaged section is do-able...it depends on how it is done. I need to have a clear understanding on what you are thinking...in order to give any more advice in regards to the splicing of a panel in your damaged area.
I can say that if you did not take the time to release the 'sail panel'...I know you are going to have some FUN trying to get the new/used quarters in under the edge of the sail panel and bonded. It can turn into a 'cluster..-you know what' and a mess....FAST!. When I have to do these rear quarters...most of my time is making sure the sail panel comes off without a crack in it is where a vast majority of my time is spent. In my experiences...there is no short cut...and if one is taken... damage to the sail panel is highly likely.
DUB
02-14-2015, 11:12 PM
#6
Pro
Thread Starter
I looked at the Upol tiger seal product...and honestly...I COULD NOT use it due to it is not the same as the green adhesive that you see on your body currently (because of insurance stuff and liability). I HAVE to use the same or JUST LIKE product...and I use LORD FUSOR and their products are a two-component system where the adhesive is catalyzed and has a work-time. I will look due to being at home right now or you can contact LORD FUSOR and ask them...if you want to use their products....and....I believe they are changing over their product packaging so you do not need a special gun to dispense and mix the product.

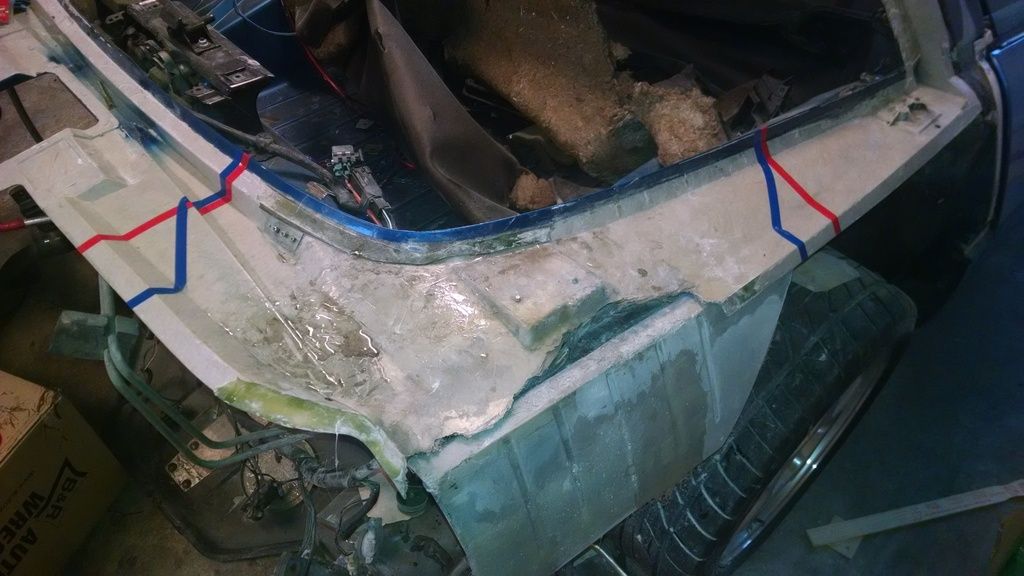
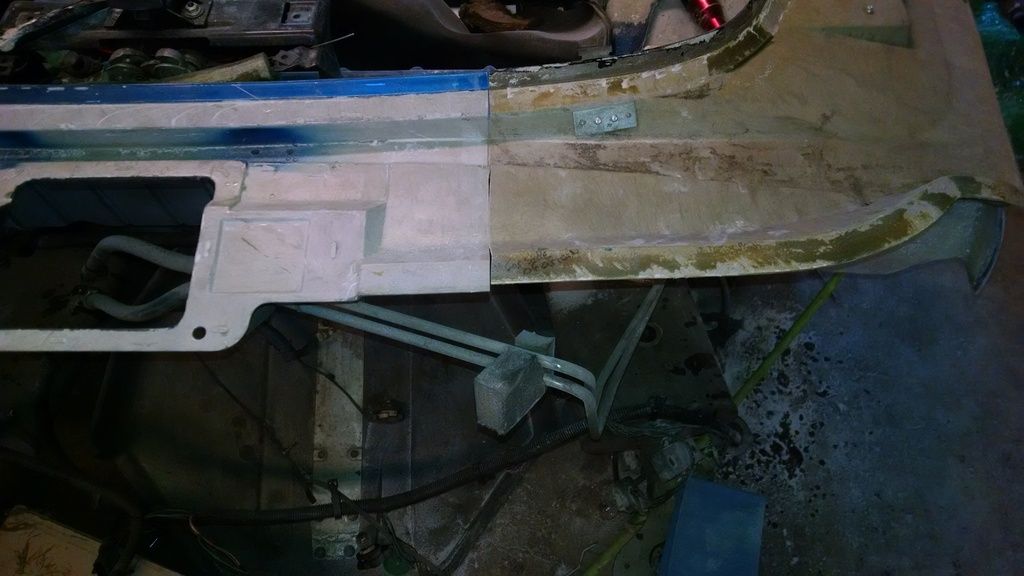
OK bare with me... The red line represents the area to be cut out of the car. The blue line indicates where the patch panel will be trimmed. The black is the area that will be trimmed off the new part and will be used as tabs to be bonded to the portion on the car currently. Once cured the patch panel will be boned in and allowed to cure. Then the seems, excluding where the body panel bonds to, will beveled and repaired with cloth on both sides as both sides are accessible from both sides excluding the bottom 2" or so. The lip facing down has about a half inch gap the extends past the backing panel. I'm thinking this gap will be filled in with an acceptable filler as a means of support for the portion of the seam that hasn't been repaired. The seam where the body panel is boned to on the top portion will have been repaired from the opposite side. I'm not worried about the looks of the woven cloth or the height of the repair as there is ample room in the cavity of the body to accept the added height of the repair.
After thought...would it be better to bond a thin long strip of metal directly across the patch panel section to be used as support from the bottom instead? And repair the top side as usual? Got my wheels turning as these bonding agents say they are compatible with metal and smc.
I can say that if you did not take the time to release the 'sail panel'...I know you are going to have some FUN trying to get the new/used quarters in under the edge of the sail panel and bonded. It can turn into a 'cluster..-you know what' and a mess....FAST!. When I have to do these rear quarters...most of my time is making sure the sail panel comes off without a crack in it is where a vast majority of my time is spent. In my experiences...there is no short cut...and if one is taken... damage to the sail panel is highly likely.
DUB
DUB
02-15-2015, 06:23 PM
#7
Race Director
OK bare with me... The red line represents the area to be cut out of the car. The blue line indicates where the patch panel will be trimmed. The black is the area that will be trimmed off the new part and will be used as tabs to be bonded to the portion on the car currently. Once cured the patch panel will be boned in and allowed to cure. Then the seems, excluding where the body panel bonds to, will beveled and repaired with cloth on both sides as both sides are accessible from both sides excluding the bottom 2" or so. The lip facing down has about a half inch gap the extends past the backing panel. I'm thinking this gap will be filled in with an acceptable filler as a means of support for the portion of the seam that hasn't been repaired. The seam where the body panel is boned to on the top portion will have been repaired from the opposite side. I'm not worried about the looks of the woven cloth or the height of the repair as there is ample room in the cavity of the body to accept the added height of the repair.
You are not cutting out any of the 'tub' of the car...correct. You are only cutting the top panel you have in your photo where the quarter was bonded to it.
KNOWING that EVERY splice can be different...procedures change...so there is NOT one set way that WORKS on EVERY splice.
When I make cuts and splicing panels in I just do not cut a straight line from one end to the other. I will cut it at an angle...but with this panel having flanges...the cut changes directions.....I cut the flange where your weatherstrip for the rear hatch attaches all the way through...STRAIGHT DOWN and EITHER STOP where the blue paint stops and the adhesive starts where the quarter WAS bonded...OR... keep cutting and then STOP when I get to the end where the adhesive is located......then cut at a 45 degree angle in whatever direction works for the repair...and when I get to the flange at the bottom where the quarter was bonded and the adhesive is still showing...I change directions again and I cut straight down. So the cut kinda looks like a stretched out 'Z'
This is a bit more involved...but taking careful measurements and using factory points that are generally the exact same due to being precisely made part. Cutting your new replacement panel but long and then carefully cutting it to get it to fit really nice and tight withe a minimal amount of air space at eh cut areas...I go for the least possible....and the 'least possible' is getting it to where I can slide a razor blade in the gap. If it is wider I do not FREAK OUT. But I want it tight so when I bond this section to the 'tub'. I then can come back and carefully bevel and laminate the areas needed and not have to worry that it will not be strong. You could use some of the old sections and bond it over your seam if you care to as long as they do not effect how the quarter fits and conflict with it being bonded in place....and laminate the seams where the weatherstrip gets installed and the quarter has to bond to it . No need to laminate the underside.
After thought...would it be better to bond a thin long strip of metal directly across the patch panel section to be used as support from the bottom instead? And repair the top side as usual? Got my wheels turning as these bonding agents say they are compatible with metal and smc.
DUB, you are exactly right. So the story goes... I asked the said supplier of the quarters if I needed to drill out the small rivets in the sail panel (thanks for correcting me) in order to debond the panel. Was told I didn't need to and it's easy enough. So I damaged them. So my plans were to de-bond the panel, re-bond after quarters are on, repair minor cracks with mat fiberglass. Or am I out in left field?
DUB
02-16-2015, 10:15 AM
#8
Pro
Thread Starter
Dub thank you so much, I now feel confident in tackling these repairs.
Your correct, the "tub" of the car won't be cut up, just have the cracks created from the impact repaired. I surely will cut the top panel in a long z pattern as recommended (pretty disappointed I didn't think of that honestly, obvious how that will make the repair stronger). I will take the time to de-laminate the sail panel, thought I really don't won't to. And finally I'm going to remove the impact bar and fuel tank before start of repairs. So I'll probably be quite on my end for a while.
Again thank you for correcting my numerous mistakes I surely would of made without your guidance.
02-16-2015, 04:56 PM
#9
Race Director
Dub thank you so much, I now feel confident in tackling these repairs.
Your correct, the "tub" of the car won't be cut up, just have the cracks created from the impact repaired. I surely will cut the top panel in a long z pattern as recommended (pretty disappointed I didn't think of that honestly, obvious how that will make the repair stronger). I will take the time to de-laminate the sail panel, thought I really don't won't to. And finally I'm going to remove the impact bar and fuel tank before start of repairs. So I'll probably be quite on my end for a while.
Again thank you for correcting my numerous mistakes I surely would of made without your guidance.
Your correct, the "tub" of the car won't be cut up, just have the cracks created from the impact repaired. I surely will cut the top panel in a long z pattern as recommended (pretty disappointed I didn't think of that honestly, obvious how that will make the repair stronger). I will take the time to de-laminate the sail panel, thought I really don't won't to. And finally I'm going to remove the impact bar and fuel tank before start of repairs. So I'll probably be quite on my end for a while.
Again thank you for correcting my numerous mistakes I surely would of made without your guidance.

And yes...the FUSOR 127 EZ will work.
DUB
 03-24-2015, 05:17 PM
#11
Race Director
Now the 'party' begins.
DUB
DUB
06-04-2015, 01:06 AM
#12
Pro
Thread Starter
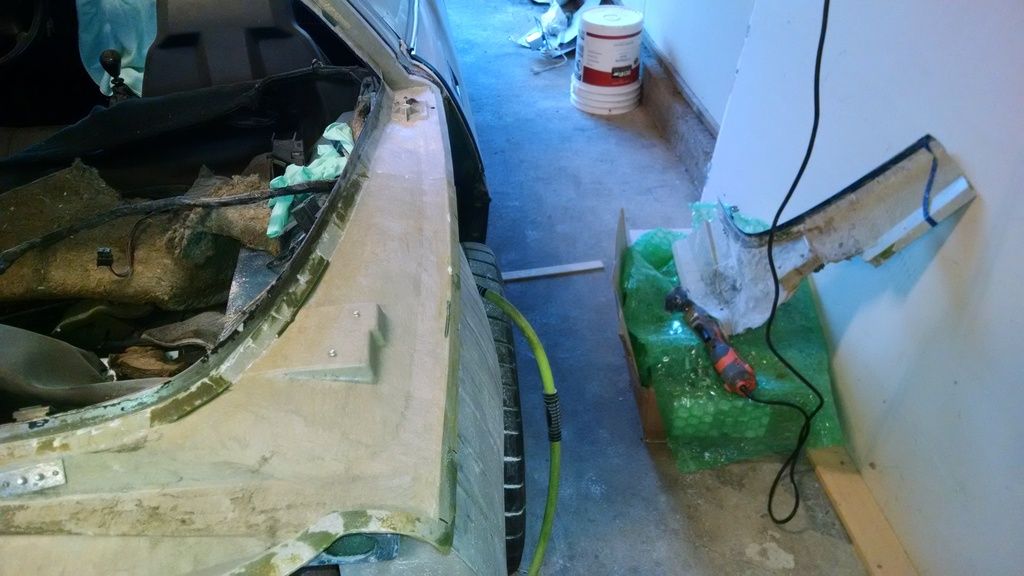
So been making progress. Some pics...
Some holes.
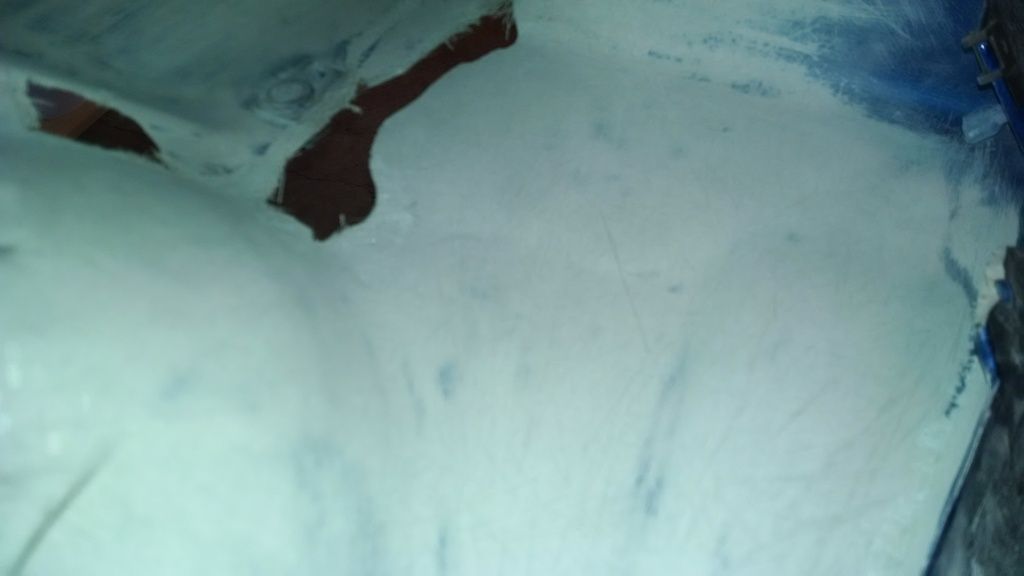
Then some holes got filled.
With the light you can see how big the holes grew even though the cracks were nothing close to that size. Goes to show how much damage can hide below the surface. I've learned that it's imperative to remove all of the damaged material.
After some rough sanding I can grab the repaired areas and shake the car and it can hold all of my 170lbs, it feels very solid. Which leads me to where to cut...
This is the disclaimer, DUB highly recommended that the splice section be cut at an angle to help with strength which is what I should have done. I cut it straight more because of an ease thing, figured there's less room for me to screw up. So DUB if your reading this please take no offense that I didn't take your advice on this one. More wanted to stay in my tiny box of ability.
Some holes.


Then some holes got filled.

With the light you can see how big the holes grew even though the cracks were nothing close to that size. Goes to show how much damage can hide below the surface. I've learned that it's imperative to remove all of the damaged material.


After some rough sanding I can grab the repaired areas and shake the car and it can hold all of my 170lbs, it feels very solid. Which leads me to where to cut...


This is the disclaimer, DUB highly recommended that the splice section be cut at an angle to help with strength which is what I should have done. I cut it straight more because of an ease thing, figured there's less room for me to screw up. So DUB if your reading this please take no offense that I didn't take your advice on this one. More wanted to stay in my tiny box of ability.
Last edited by syco_cop; 07-20-2015 at 11:13 PM.
 06-04-2015, 05:42 PM
#14
Race Director
This is the disclaimer, DUB highly recommended that the splice section be cut at an angle to help with strength which is what I should have done. I cut it straight more because of an ease thing, figured there's less room for me to screw up. So DUB if your reading this please take no offense that I didn't take your advice on this one. More wanted to stay in my tiny box of ability.
Just as a bit of advice to many guys I trained int eh past. What I would tell them is. "Don't cut yourself short....If I thought that you could not do it as I told you...I would have given the job to someone else. This is the time when you slow down and learn new things that will test you and actually make you better." SO...don't cut yourself short. Just 'saying'.
DUB
06-07-2015, 07:06 PM
#15
Pro
Thread Starter
DUB thanks for your advice, you don't know how much it has helped.
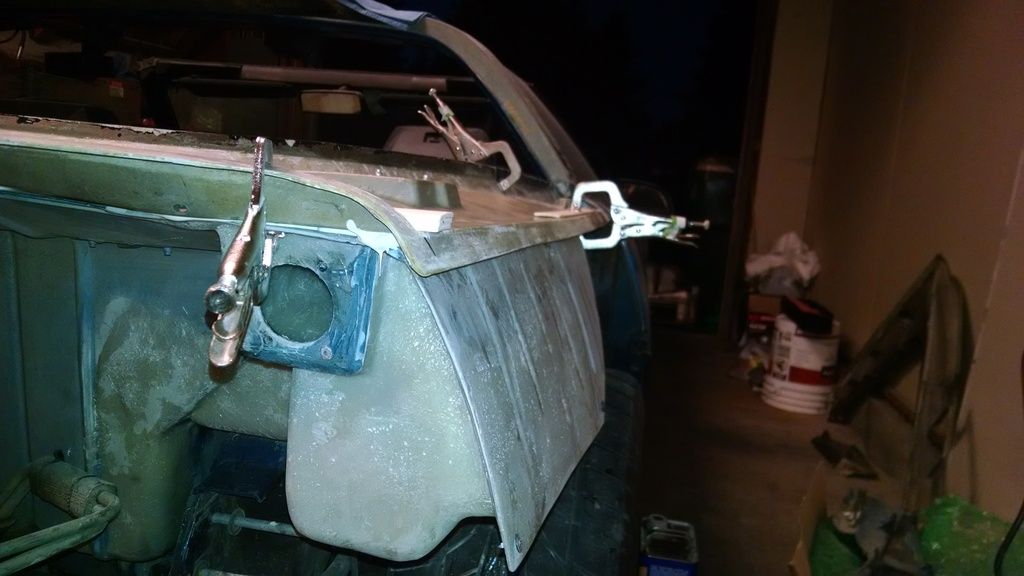
Anyways I really need to get this car finished. So after a late night or two I got the patch panel fitted.

Anyways I really need to get this car finished. So after a late night or two I got the patch panel fitted.


Last edited by syco_cop; 07-20-2015 at 11:15 PM.
06-09-2015, 09:01 PM
#16
Pro
Thread Starter
Patch panel is glued in. I removed all the clamps this morning before leaving for work and it's lined up perfect with all of the reference points I put on earlier. Promised the girlfriend I'd spend time with her tonight so I'm hoping by the end of the week it will be all glassed in and ready for the new quarters.

Last edited by syco_cop; 07-18-2015 at 10:50 PM.
06-10-2015, 05:52 PM
#17
Race Director
Looks good...I will wait and see what you do next.
DUB
DUB
06-19-2015, 08:45 PM
#18
Pro
Thread Starter
Patch panel is 95% done. Just two little areas need work where the seam is. Not worth mixing a batch of resin for. Will finish while touching up the quarters.
Quarters are cleaned up and ready to start fixing a couple little issues from removal. They line up perfectly on the car. So far I'm quite happy with the results. The real test will be gluing everything together.

Quarters are cleaned up and ready to start fixing a couple little issues from removal. They line up perfectly on the car. So far I'm quite happy with the results. The real test will be gluing everything together.


Last edited by syco_cop; 07-20-2015 at 11:17 PM.