When you click on links to various merchants on this site and make a purchase, this can result in this site earning a commission. Affiliate programs and affiliations include, but are not limited to, the eBay Partner Network.
Thought I might share a little bit of my lockdown project with everyone. Of course the stock Bose had nothing to be desired and after a couple years I had enough.
Essentially I wanted to build a simple SQ build for the Z. I usually go all out with big power amps, 10 channels etc. Because I still wanted to keep the car somewhat less complicated I opted for a Helix Psix Dsp mk2 to do the front stage and separate subwoofer amp.
Unfortunately, I didn't take a lot of pictures of the build, but here it goes:
Front stage
Tweeter: Brax ML1
Midrange: Audible Physics Nz3AlBe wideband
Midbass: Morel Admw 10
Subwoofers: 2 Audiomobile Evo 10s
Processing/amplification:
Clarion Nx807 Optical out to Helix, no rcas
Helix Dsp Psix Mk2 with Bluetooh direct
Taramps MD3000.1
I hadn't built a set of pillars in a couple years, so i was hoping I still had some skill left. Speakers were aimed to have the most linear response in their respective passbands. The aim was to have as large enclosure for the midrange to ensure playability down to 250hz. I can say i am very impressed with the Ap nz3s. They play the low end extremely well, and being on axis they are able to play fully to 20khz no problem. They required very little eqing which i was happy to see.
Building the pillars are straight forward. Flush mount mdf rings were made the aimed on the pillars. Grill cloth was then fiberglassed on after getting the initial shape. Then fiberglass mat was used to reinforce the shape. Evercoat fiberglass filler with microspheres and milled mat was used. The body filler was used to fill in any pinholes thereafter. A milkshake mixture was poured inside into the enclosure and the pillar hole for the vent was filled with fiberglass and remilkshaked.
Gm ebony vinyl was tailor fit to the panel. The nice thing about vinyl is it covers quite a lot, so a perfect finish isn't super necessary.
Soundskins deadner along with Noico was used to help panel resonance.
I then proceeded to gut the car to run all the wiring and put on the Soundskins and Noico deadner. I forgot to take any pictures of the process though.
Since I was going to utilize the doors for the mid bass, which I don't like to do, I wanted to make sure they were solid. The doors were deadned extensively. A custom wood birch panel was used for the service hole. A custom speaker ring was then made for the 10 inch Morels. I honestly have to say if you aren't doing bigger then an 8" you are wasting your time. These doors are excellent for a great midbass if you reinforce the doors correctly. I have very minimal resonance and rattle. The door panels inards where the speaker meets the panel was completely ground out to help clearance the woofer. Its amazing how much GM covered them for no real reason. Sorry no pics of the panels though
After that the front stage was wired up with separate wire colors for tweeter, midrange, and midbass. All wires were tesa taped to the hatch..
I don't have much pictures of the enclosure for the subs but they are .75ish ft3 each upfiring. If it wasn't for my airtank, the enclosure would have been there downfiring. The enclosure has separate chambers instead of sharing one. The box was built with .75 inch mdf all around.
In my experience, since there is no way to reinforce the hatch and to prevent rattling of the hatch lid, a loading board is a useful technique. Although its not the pretty solution, it pays dividends to prevent rattles and help response. The subs needed zero eq after time alignment and have perfect rising response matching my house curve from 50hz to 15hz thanks to cabin gain. It slightly falls off after that,, but thanks to the higher qtc, no subsonic filter is needed as the box helps quell the sub. The 4th order lr slope was perfect acoustically which is an important difference to check from your electrical crossover point. Of course about 1lb of fiber fill was used as well.
For the amp rack, I opted for something simple that I could later build beauty panels for. As of right now, I just built a simple cover, but plan to do a metal mesh window in a few weeks.
Oversized 0 gauge ofc wire was lugged, loomed, and heat shrinked to a circuit breaker by the top of the wheel well close to the battery. Same was done for the ground to the battery.
The amp rack was then neatly put together over the course of a few days. You'd be surprised how long stripping, heat shrinking, and looming wire takes.
And thats pretty much it. I'm still doing some minor tweaks to the tuning after doing the initial. If anyone knows there's always something to tweak, but overall I am very happy.
Tuning was done with an Audiofrog omnidirectional microphone. I especially like and respect the thought that goes into this kit over my Umik Minidsp mic. Definitely a great buy. Each speaker was individually tuned to the listening position using REW. Same goes for impulse and time alignment. Imo, this is pretty straightforward, not much to say.
I forgot to mention the Director controller that I installed on the center console seen above. I upholstered it to match my Alcantara steering wheel with anthracite 9002 $$$ ouch.
Here is how the trunk sits atm until I start the beauty panels. Will be redoing the trunk in Alcantara as well later on.
10" midbass FTW! Did that on my C6; planning on doing the same to my C7. Any other mod that was needed for that alternator?
Definitely, the c7 is a lot better/easier to throw a 10 in the door since its not impeded by the dash or door panel like in the c6.
For the alternator, I would recommend a "big 3" upgrade with 0 gauge ofc at the very least. Other then that, I don't see anything else.
That's a great looking build! I wish I had that level of craftsmanship in me! How does it sound?
Thank you! I am no expert in woodwork unfortunately and don't have the tools so hopefully someday I can redo the trunk to make it look nice.
The sound is excellent! It stages very nicely in the middle of the windshield. It sounds very smooth and fairly effortless. You can always adjust your house curve to tailor a softer or more sharp sound as well. I honestly can't complain since having the mids and tweeters on axis in enclosures really helped keep the response very linear and easy to tune.
Thank you! I am no expert in woodwork unfortunately and don't have the tools so hopefully someday I can redo the trunk to make it look nice.
The sound is excellent! It stages very nicely in the middle of the windshield. It sounds very smooth and fairly effortless. You can always adjust your house curve to tailor a softer or more sharp sound as well. I honestly can't complain since having the mids and tweeters on axis in enclosures really helped keep the response very linear and easy to tune.
Sweet! I love these Frankenstein builds and seeing the creativity that guys come up with. It gives me ideas for my system. You are not kidding about on axis with those pillars. Wow like in your face baby!
Your 3.5's play that low? 250 Hz is way down there. And yeah man...a screen shot of your curve would be cool to see. What RTA do you use? I went with True RTA (the $300 one, down to 1:24 IIRC) and couldn't really get it to work like I needed.
Your 3.5's play that low? 250 Hz is way down there. And yeah man...a screen shot of your curve would be cool to see. What RTA do you use? I went with True RTA (the $300 one, down to 1:24 IIRC) and couldn't really get it to work like I needed.
They can play down pretty low due to the enclosure size. They were originally intended for Focal 3w2s but I have no interest in using them as they can't play as low or as high. Those Audible Physics nz3albes are probably the best small format mid i have ever heard.
I just use REW, no reason for anything fancy.
I'll try to get the curve pic when I'm out with the car.







 Out of curiosity, what do you use the air tank for ?






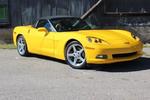
 C6 Z06 SQ Build











