
Hardbar Camber Kit Installation Issues
 05-14-2014, 07:39 AM
#41
Racer

Thread Starter


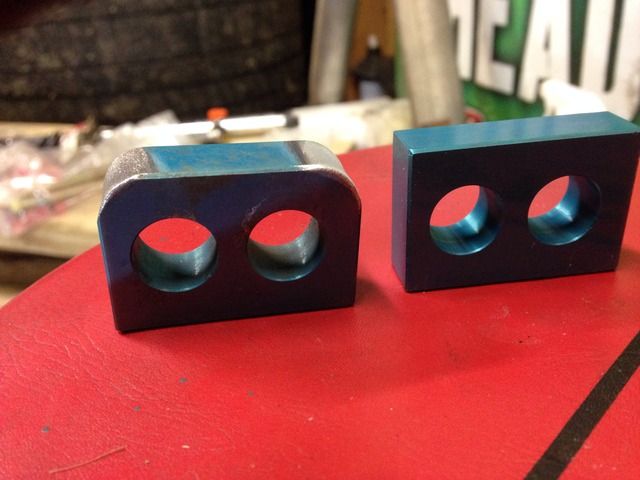
Now that's interesting and may explain the problem I had. My car is a 99 FRC. The plates I got (from LG but I believe they are the Van Steel) would not fit in the slots properly. They fit width wise but the tops of the slots on the cradle on my car are rounded and the radius is to small so that the plates would not sit high enough in the slots. To solve the problem I used a mill to chamfer the corners of the plates and allow them to sit high enough in the slots.


 04-10-2015, 10:07 PM
#43
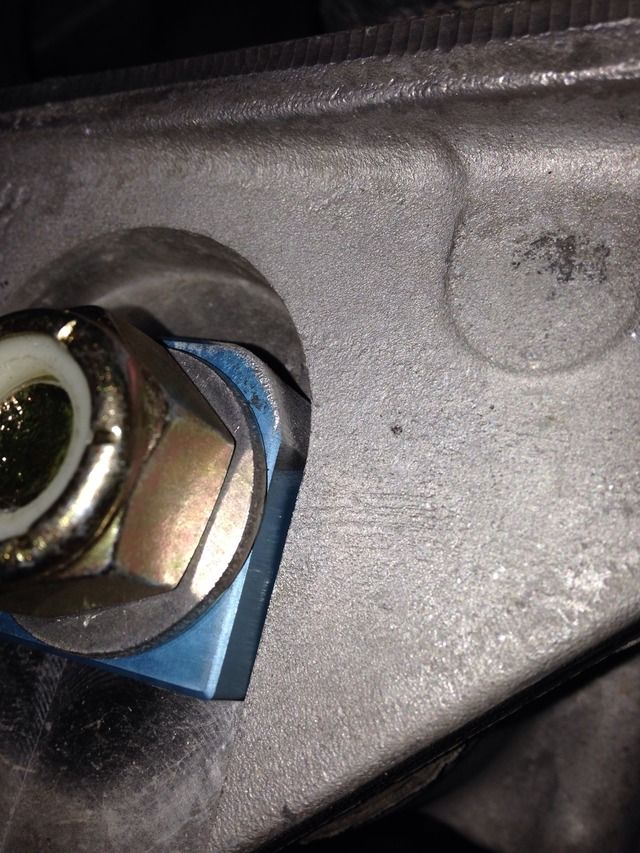
Hi all, i just installed this kit on the front of my c5z. I'll start by saying, there is no install direction for this kit because, well, they wont work as-is! I had to grind the corners of the blocks to clear the milled slots in my cradle, not happy w this side project, see below:

 04-10-2015, 10:23 PM
#44
I only installed the fronts on my c5z...Both fore and aft pivot lower control arm blocks were positioned with the "outer-most block hole" inboard toward the centerline of the car. I then installed the lower control arm bolt thru the hole that is .255" from edge. I guess you could say this is the "mild position". As expected, this did move the lower pivot of control arm outboard from stock, giving more neg. camber but i noticed this moved the fwd pivot outboard more than the aft position (again only front lower control arm) this would seemingly reduces caster. Which im pretty sure i confirmed by measurement tonight. I get around 3-4 deg caster. Are you guys staggering the front control arms blocks (fwd vs aft position) to maximize caster or are you placing them in identical position and just adjusting with upper control arm shims ?
04-10-2015, 10:45 PM
#45
I have a C5 Coupe. Bought the hardbar kit because Phat went out of business and had the same issues. I could not use the kit on the rear even when shaving the edges. The angles were all off. I ended up making some pieces from a Phat kit and they worked. I have a mild/aggressive set up because I do HPDE every month. If you are interested I have a copy of my setup sheet I can send you. I had Performance Speedtech do the balance and alignment on it. They have a race team and are very knowledgeable.
04-10-2015, 11:53 PM
#46
Race Director

Hi all, i just installed this kit on the front of my c5z. I'll start by saying, there is no install direction for this kit because, well, they wont work as-is! I had to grind the corners of the blocks to clear the milled slots in my cradle, not happy w this side project, see below:
 04-11-2015, 08:23 AM
#47
I originally purchased this kit through hardbarusa, nearly 1yr ago. When the shipment arrived, the package arrived with vansteel on it. So this is really a vansteel kit...through some hardbar partnership?...idk. Anyways, it looks like some folks now have chamfers on their blocks, maybe that works for c6??? Idk, i can tell you those chamfers still wouldnt be enough to clear the slot rad on front of my c5z cradle. No amount of prying wud change that. With block hardover in slot, the block hole center to cradle slot center was still nearly 1/4" misaligned. Hence overzealous grinding required lol
For fronts, Are you guys installing each the same offset or staggering them fore and aft position? ...all for more caster?
Im starting to look at caster now and i don't want to get too far into messing around and find i need to make a fundamental change w blocks to get an aggressive street/autocross setup. What is target range for caster?
Last edited by tungstenfoot; 04-11-2015 at 08:37 AM.
04-11-2015, 07:10 PM
#48


I have several of the old hardbar plates so I am not familiar with the newer ones. The really old, D-shaped ones for the rear, fit really well. The black anodized ones are just a bit narrow relative to the pockets in my front crossmember. Maybe 1/64" narrow. What I did to assure they don't move is rotate them until they locked out. I have no answer as to why the blue ones shown above don't fit.
As far as installation. The best way to do it in the front is to use the same plates on all four pivot points. Mixing plates up to adjust caster will bind up the lower control arm bushings. Although, with the stock rubber bushings it will work fine. The right way to adjust caster/camber is to install the lower arms parallel and adjust the upper arms. The same bind problem will happen with the uppers, but it is more commonly acceptable to do it that way. All that being said, if a car does not have spherical bearings at the pivots they will have some bind if not mounted straight as opposed to an angle. In addition, the alignment numbers will never be accurate with rubber bushings because of so much compliance and bind.
I could go on, but I don't want to steer too far off the plate fitment discussion
04-12-2015, 08:31 AM
#49
Thanks for the insight on the binding of upper vs lower pivots, i hadnt considered that. I'll have a go with the lower blocks poisitioned evenly. I have plenty of upper control arm shims in now (evenly stacked now) so i'll start removing shim from the aft upper control arm dog bone and see if i can get to around 7 deg caster.
04-16-2017, 08:42 PM
#50
Pro


So just to bring this thread forward again, how many shims difference can you use for the upper control arms to return some caster to the car? If we number the most anterior stud or bolt as number 1 and the most posterior as number 4, which studs or bolts do you add to? 1 and 2 or 1 and 3? Doesn't this put more stress on the UCA and cause some binding to occur?
04-17-2017, 11:10 AM
#51
Racer
Thread Starter
So just to bring this thread forward again, how many shims difference can you use for the upper control arms to return some caster to the car? If we number the most anterior stud or bolt as number 1 and the most posterior as number 4, which studs or bolts do you add to? 1 and 2 or 1 and 3? Doesn't this put more stress on the UCA and cause some binding to occur?
04-17-2017, 12:12 PM
#52
Race Director
So just to bring this thread forward again, how many shims difference can you use for the upper control arms to return some caster to the car? If we number the most anterior stud or bolt as number 1 and the most posterior as number 4, which studs or bolts do you add to? 1 and 2 or 1 and 3? Doesn't this put more stress on the UCA and cause some binding to occur?
 04-17-2017, 01:30 PM
#53
Pro
I remember reading elsewhere about the amount of change in camber that occurs with shims. Any idea of the change in caster with the addition of shims to just the front 2 mounting bolts/studs of the UCA?
04-17-2017, 01:39 PM
#54
Race Director
That is kind of what I thought. OTOH this effectively makes 1 side of the UCA longer and must rotate the arm a bit at the mounting points. Is this ok for the dogbones as it must call for some distortion of the rubber bushing? Given the deflection that occurs at the rubber bushings under load, I guess there is a fair amount of motion available but this must be a real problem for people using poly or delrin for the UCA bushings.
I remember reading elsewhere about the amount of change in camber that occurs with shims. Any idea of the change in caster with the addition of shims to just the front 2 mounting bolts/studs of the UCA?
I remember reading elsewhere about the amount of change in camber that occurs with shims. Any idea of the change in caster with the addition of shims to just the front 2 mounting bolts/studs of the UCA?