


door hinge

Team Owner

Joined: Aug 2007
Posts: 58,061
Likes: 7,145
Army

This is the article I followed - for a '63 but still applies. I also found that the Dorman 38400 hinge kits work a LOT better than the typical Corvette vendor kits, but you will have to take off some length on the pin with a Dremel cutting wheel - no biggee though:
http://www.jonesysautoclub.com/rebui...1963-corvette/
I didn't do the solder trick in the article - the Dorman hinges are nice and tight without that particular magic!
http://www.jonesysautoclub.com/rebui...1963-corvette/
I didn't do the solder trick in the article - the Dorman hinges are nice and tight without that particular magic!
Last edited by Frankie the Fink; Jan 21, 2014 at 09:33 AM.

Safety Car

Joined: Dec 2009
Posts: 4,171
Likes: 335
From: Homewood Alabama
that depends. If your hinge pin has locked up the bushings are rotating with the pin, then you are going to have issues with the hinge itself and you might be better off looking for a good used one. If not, then just replace the pin and bushings and you will be set to go.
Make sure you cut around the painted bolts with a razor blade before you remove them or you will take a large chunk of paint with the bolt when you break it loose. You probably know this, but there are two more bolts that hold each hinge which must be accessed from behind the kick panel.
Make sure you cut around the painted bolts with a razor blade before you remove them or you will take a large chunk of paint with the bolt when you break it loose. You probably know this, but there are two more bolts that hold each hinge which must be accessed from behind the kick panel.
Corvette Stories
The Best of Corvette for Corvette Enthusiasts

10 Reasons the C6 Z06 is Still A Performance Benchmark After 20 Years
Joe Kucinski
How Much Horsepower Every Corvette Engine "LOST" in 1972
Joe Kucinski
Top 10 DOs and DON'Ts for Protecting Your Convertible Top!
Michael S. Palmer
Top 10 Most Explosive Corvettes Ever Made: Power-to-Weight Ratio Ranked!
Joe Kucinski
150 hp to 1,250 hp: Every Corvette Generation Compared by the Specs That Matter
Joe Kucinski
8 Coolest Corvette Pace Cars (and Replicas) of All Time
Verdad Gallardo
Top 10 Corvette Engines RANKED by Peak Torque (70+ Years of Muscle!)
Joe Kucinski
Corvette ZR1X Will Be Pacing the Indy 500, And Could Probably Race, Too!
Verdad Gallardo
Top 10 Corvettes Coming to Mecum Indy 2026!
Brett Foote
Team Owner
Joined: Aug 2007
Posts: 58,061
Likes: 7,145
Army
Yes, and, do a web search.
Dorman is a company that produces auto parts...
O'Reilly's can get, or already has, the Dorman kit IIRC or its available online or at many "HELP" racks at your local auto parts store.
Dorman is a company that produces auto parts...
O'Reilly's can get, or already has, the Dorman kit IIRC or its available online or at many "HELP" racks at your local auto parts store.

Pro


Joined: May 2012
Posts: 707
Likes: 45
From: Portland Oregon
When I did my hinges I "double bushed" them for more bearing area on the pin.
After removing old bushings insert first bushing. File off the flanged top. Use old bushing to drive down first bushing. Before installing second bushing I used a punch to put 4 punch marks in the hinge bore. This keeps the bushing from rotating in the bore similar to the solder trick. Install second bushing. Repeat process for other end. You now have 4 bushings per hole. I also reused my old pins as they were not worn and slightly larger in diameter than the repo pins.
Randy
After removing old bushings insert first bushing. File off the flanged top. Use old bushing to drive down first bushing. Before installing second bushing I used a punch to put 4 punch marks in the hinge bore. This keeps the bushing from rotating in the bore similar to the solder trick. Install second bushing. Repeat process for other end. You now have 4 bushings per hole. I also reused my old pins as they were not worn and slightly larger in diameter than the repo pins.
Randy
Thread Starter
Racer

Joined: Jan 2008
Posts: 291
Likes: 17
From: Woodinville Wa
I looked at the site it shows the hinge out I was looking at a part online it looks likr there are two bolts on the inside of the hinge do you need to remove the door frist to get at the bolts? vince
Team Owner
Joined: Aug 2007
Posts: 58,061
Likes: 7,145
Army
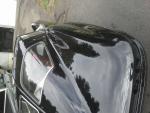
You REALLY want to remove the 6 bolts in each of the top and bottom hinges first before even touching the bolts that mount the hinge to the body at the birdcage. If you can scribe marks inside the door to note the hinge positions that will help re-aligning things later on. I drilled each hinge and made two holes in each for alignment pins and that helped but was a LOT more work. That hinge steel is tough. (They can be seen in the second picture.)
You can put a pump up floor jack with a 2x4 longways under the door bottom and take some drama out of lifting it off but you really need two people. When that is done you'll see two bolts on each of the upper and lower hinges inside the door jamb. The other two bolts for each hinge are through holes behind the kick panel. IF THERE ARE ANY SHIMS BEHIND ANY OF THE HINGES INSIDE THE DOOR NOTE THEIR NUMBER AND LOCATION CAREFULLY FOR RE-INSTALLATION.
One of those magnetic socket inserts from Harbor Freight inside a 9/16" shallow socket will make sure you don't drop those kick panel bolts - they are tricky to reach. I bought a whole new hinge bolt kit from Zip for $50 as some of my bolts were stripped.
You will have to **** the hinge arm at various angles as you maneuver the hinge main section out of the door - I actually had to dremel a few areas around the door jamb hinge hole very lightly and then the hinge pivoted right out. (See green arrows). Use painter's tape to protect things as needed.
You can put a pump up floor jack with a 2x4 longways under the door bottom and take some drama out of lifting it off but you really need two people. When that is done you'll see two bolts on each of the upper and lower hinges inside the door jamb. The other two bolts for each hinge are through holes behind the kick panel. IF THERE ARE ANY SHIMS BEHIND ANY OF THE HINGES INSIDE THE DOOR NOTE THEIR NUMBER AND LOCATION CAREFULLY FOR RE-INSTALLATION.
One of those magnetic socket inserts from Harbor Freight inside a 9/16" shallow socket will make sure you don't drop those kick panel bolts - they are tricky to reach. I bought a whole new hinge bolt kit from Zip for $50 as some of my bolts were stripped.
You will have to **** the hinge arm at various angles as you maneuver the hinge main section out of the door - I actually had to dremel a few areas around the door jamb hinge hole very lightly and then the hinge pivoted right out. (See green arrows). Use painter's tape to protect things as needed.
Last edited by Frankie the Fink; Jan 23, 2014 at 06:29 AM.