'63 Convertible RestoMod
 05-26-2017, 07:20 PM
#141
Melting Slicks


[QUOTE=sonksen_design;1593426719]Anyone want to sponsor this build? Man, the credit card use is mind boggling lately! In order to get everything plumbed and wired up, I've picked up the engine harness, vintage air unit, headers, radiator w/fans, condenser, power master cylinder and more. I've got a lot to work on now while my bank account recovers.
Could you tell me what steering column you used, the length and if you would have used one a little longer or shorter if you could have?
Jjackson,
Hereford AZ
Could you tell me what steering column you used, the length and if you would have used one a little longer or shorter if you could have?
Jjackson,
Hereford AZ
 05-27-2017, 09:18 AM
#142
Instructor


Thread Starter


Could you tell me what steering column you used, the length and if you would have used one a little longer or shorter if you could have?
Jjackson,
Hereford AZ
It's a standard Ididit C2 column. My custom dash means I'm not 100% on how much different mine is from the firewall to the driver compared to stock. But the steering knuckled shaft should be able to be longer or shorter. Also depends on what chassis/rack and engine/header combos you're running. How's that for an answer? -SS
05-29-2017, 07:31 PM
#143
Melting Slicks
Could you tell me what steering column you used, the length and if you would have used one a little longer or shorter if you could have?
Jjackson,
Hereford AZ
It's a standard Ididit C2 column. My custom dash means I'm not 100% on how much different mine is from the firewall to the driver compared to stock. But the steering knuckled shaft should be able to be longer or shorter. Also depends on what chassis/rack and engine/header combos you're running. How's that for an answer? -SS
Jjackson,
Hereford AZ
It's a standard Ididit C2 column. My custom dash means I'm not 100% on how much different mine is from the firewall to the driver compared to stock. But the steering knuckled shaft should be able to be longer or shorter. Also depends on what chassis/rack and engine/header combos you're running. How's that for an answer? -SS
 06-24-2017, 07:47 PM
#145
Instructor
Thread Starter
Simply perfect Saturday shop day weather! Not much I'd rather be doing than working on Rae on a day like this. Missouri is going to turn hot and humid soon.
Here's some progress pictures. Yes, I'm still wiring along with other stuff. Uggh!
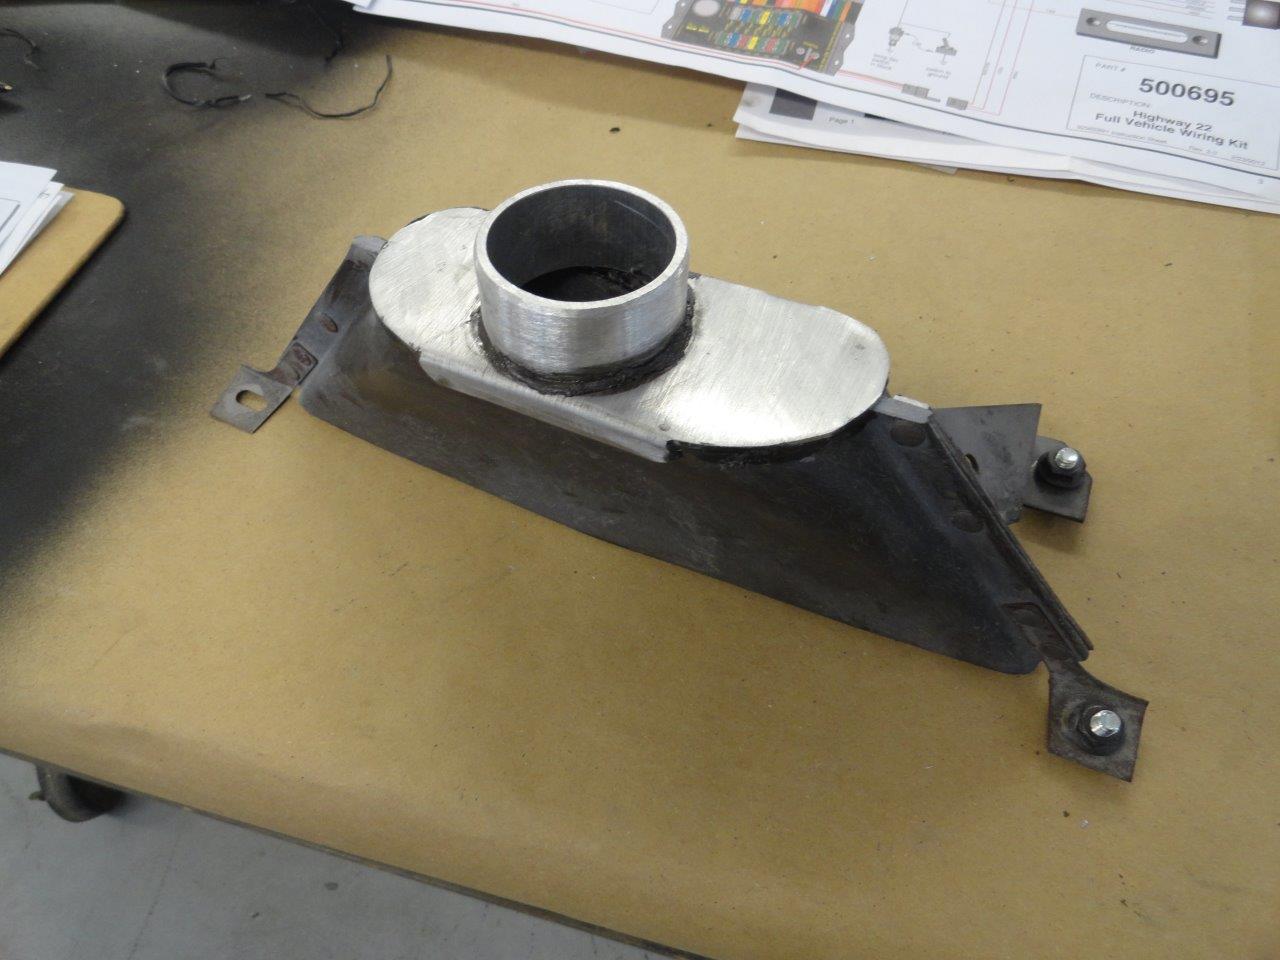
I cleaned and smoothed up the core support and got stuff off to the powder coater. No explanation required on most of these shots.
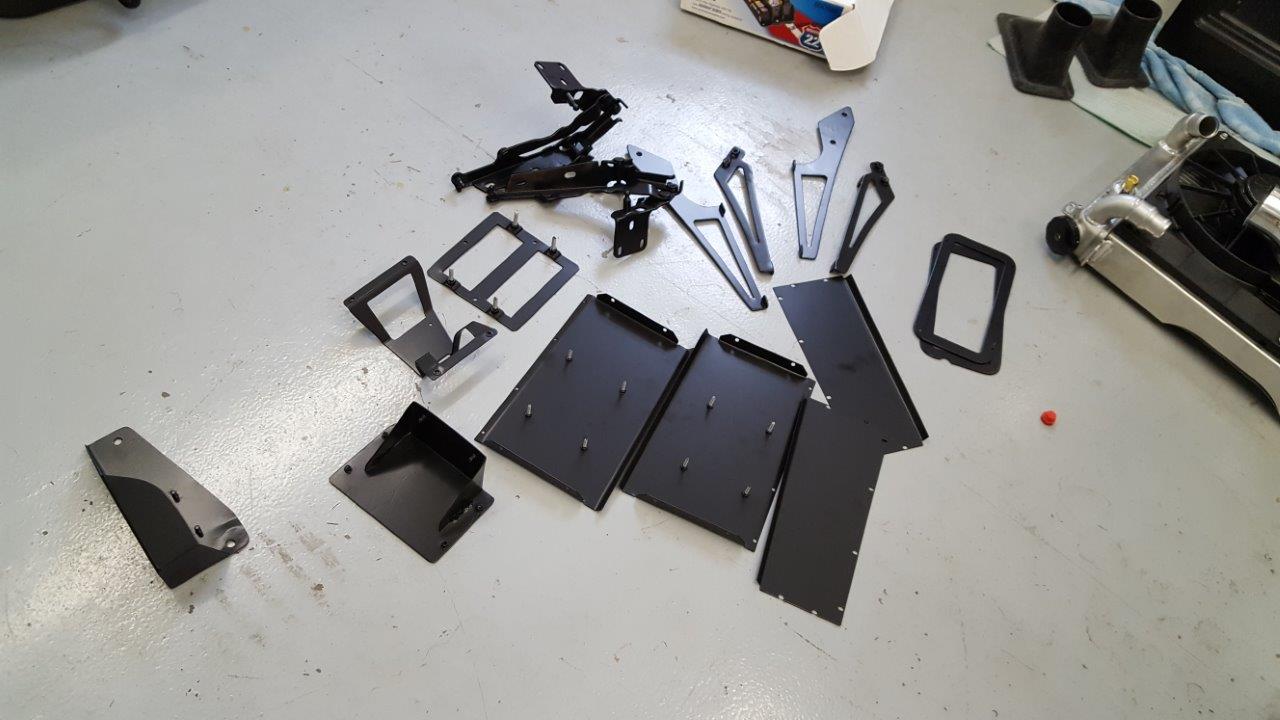
recognize any 'stock parts'?
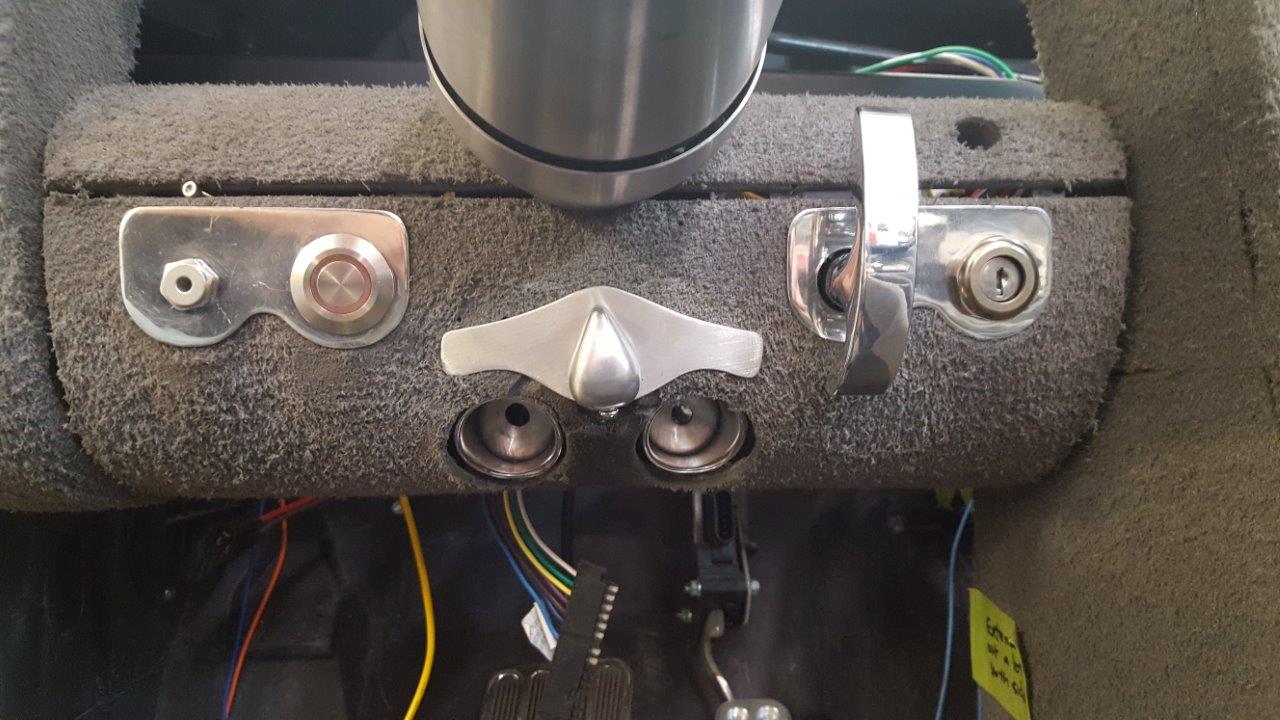
Wasn't happy with Ididt website. So the 'wiper switch' that you can buy and replace the tilt lever....well, it wasn't ANYTHING like I had hoped. So I needed to design and fab in a regular wiper switch. Whittled the tear drop **** out of a chunk of 6061.
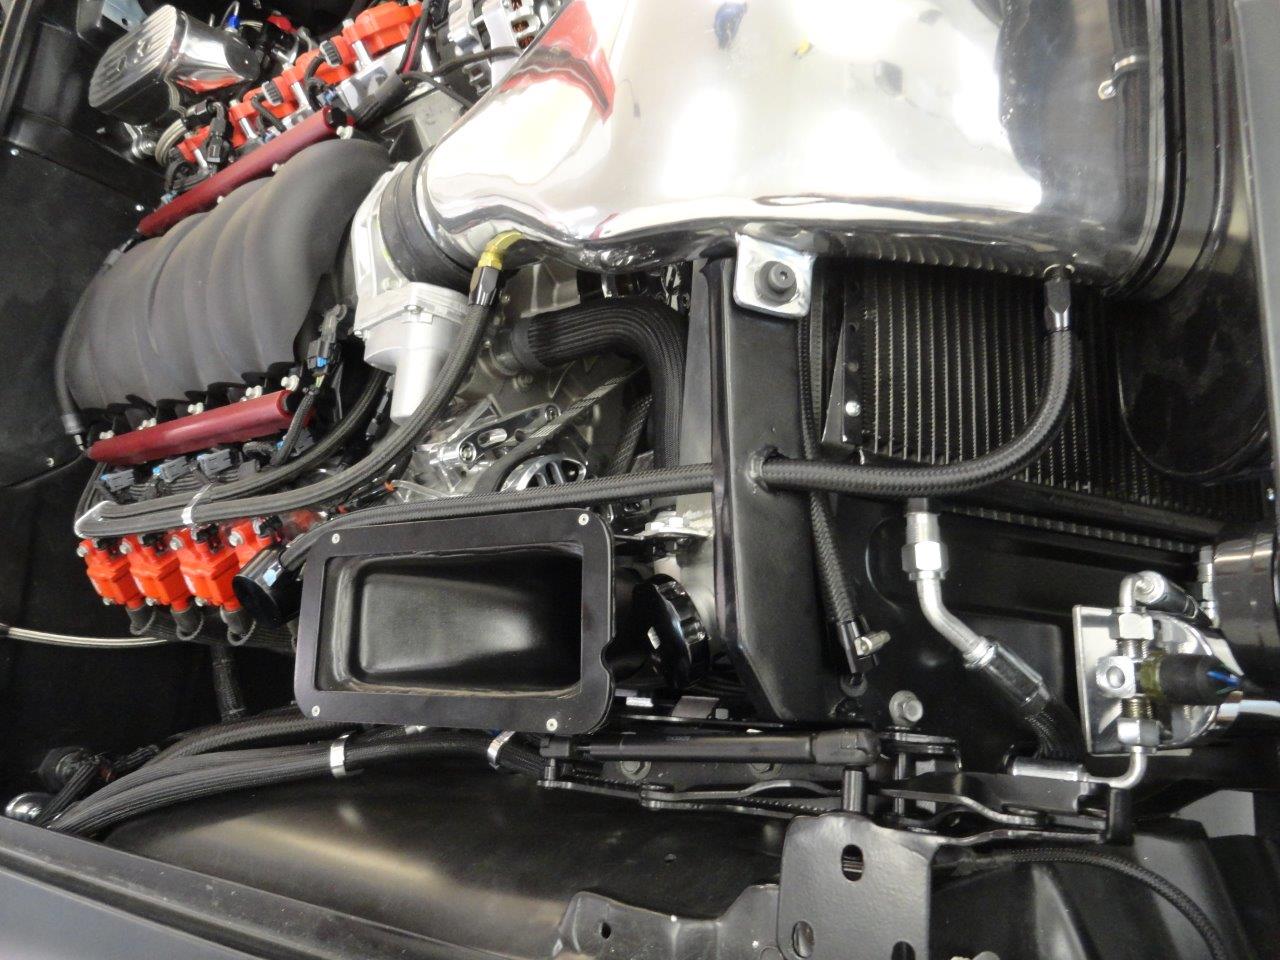
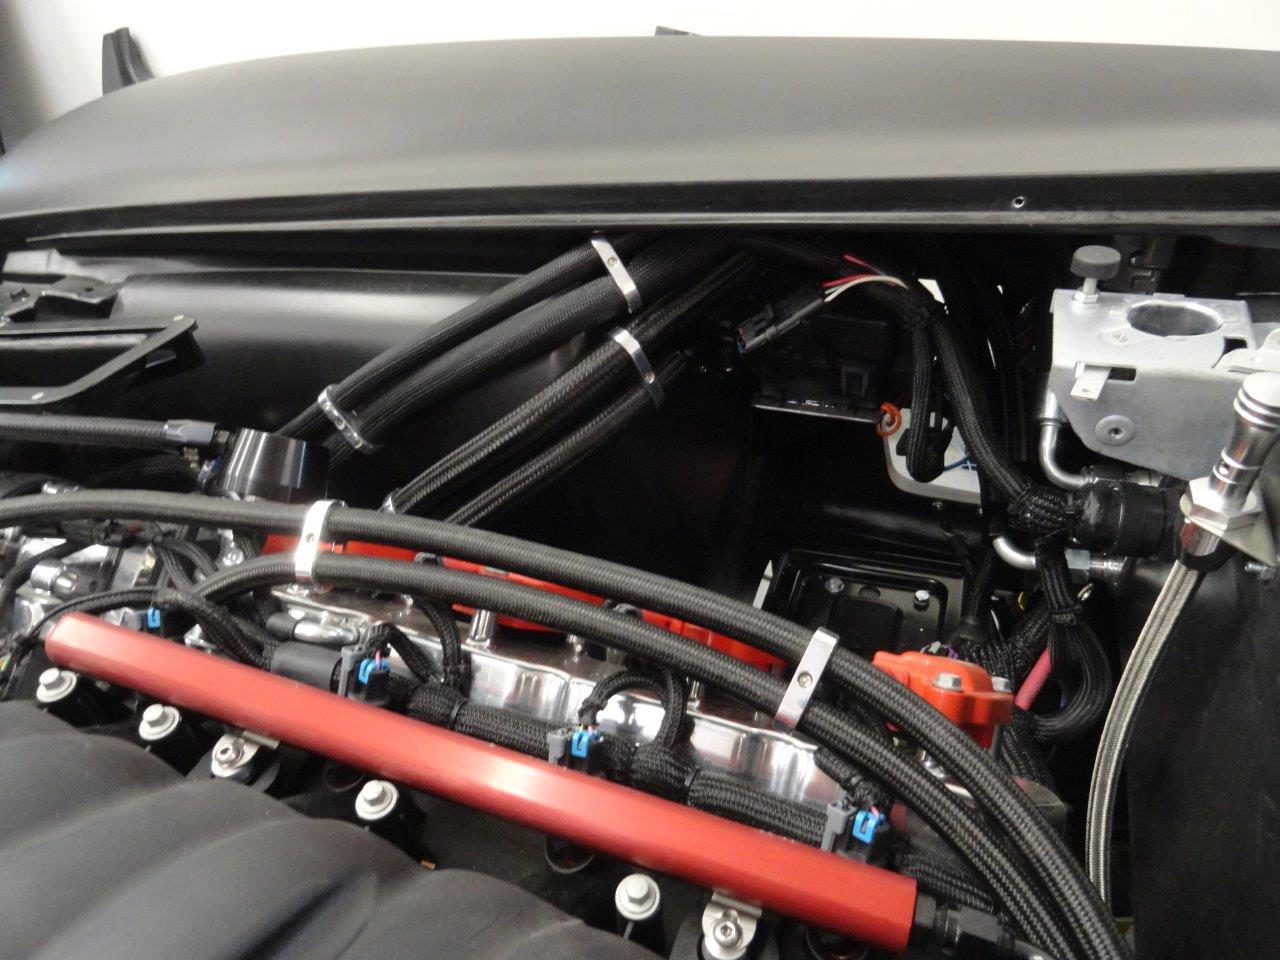
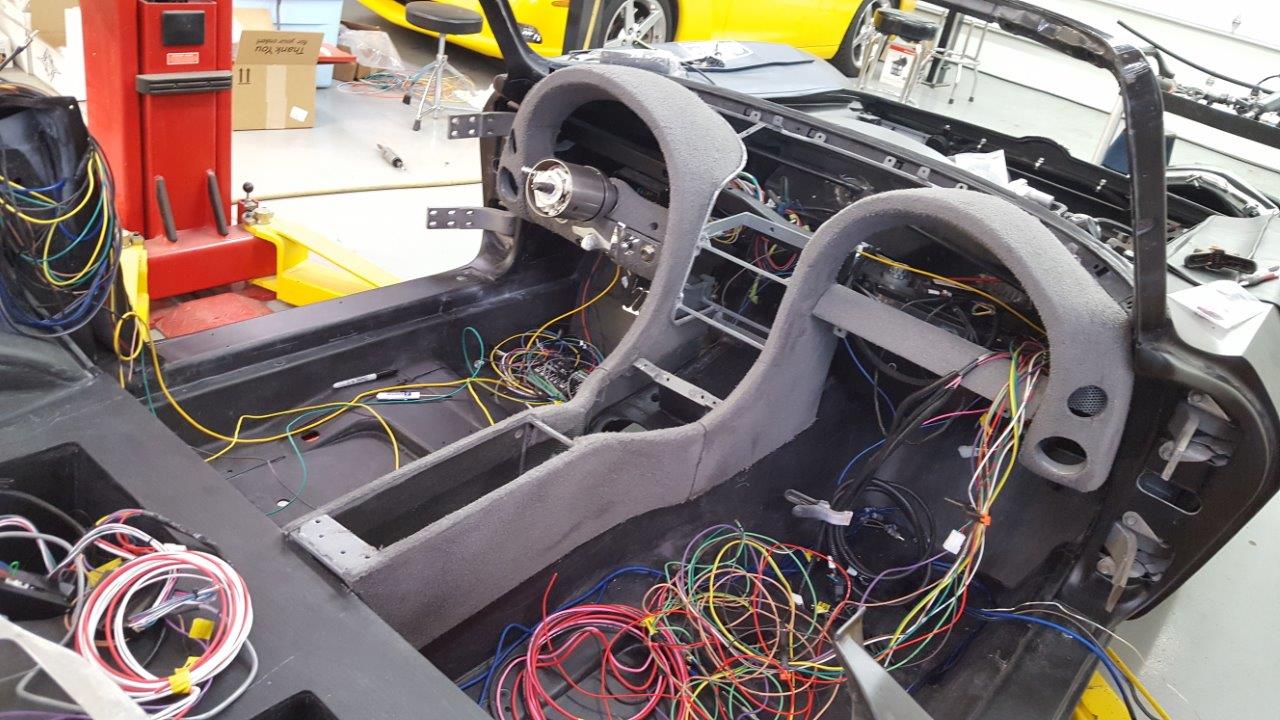
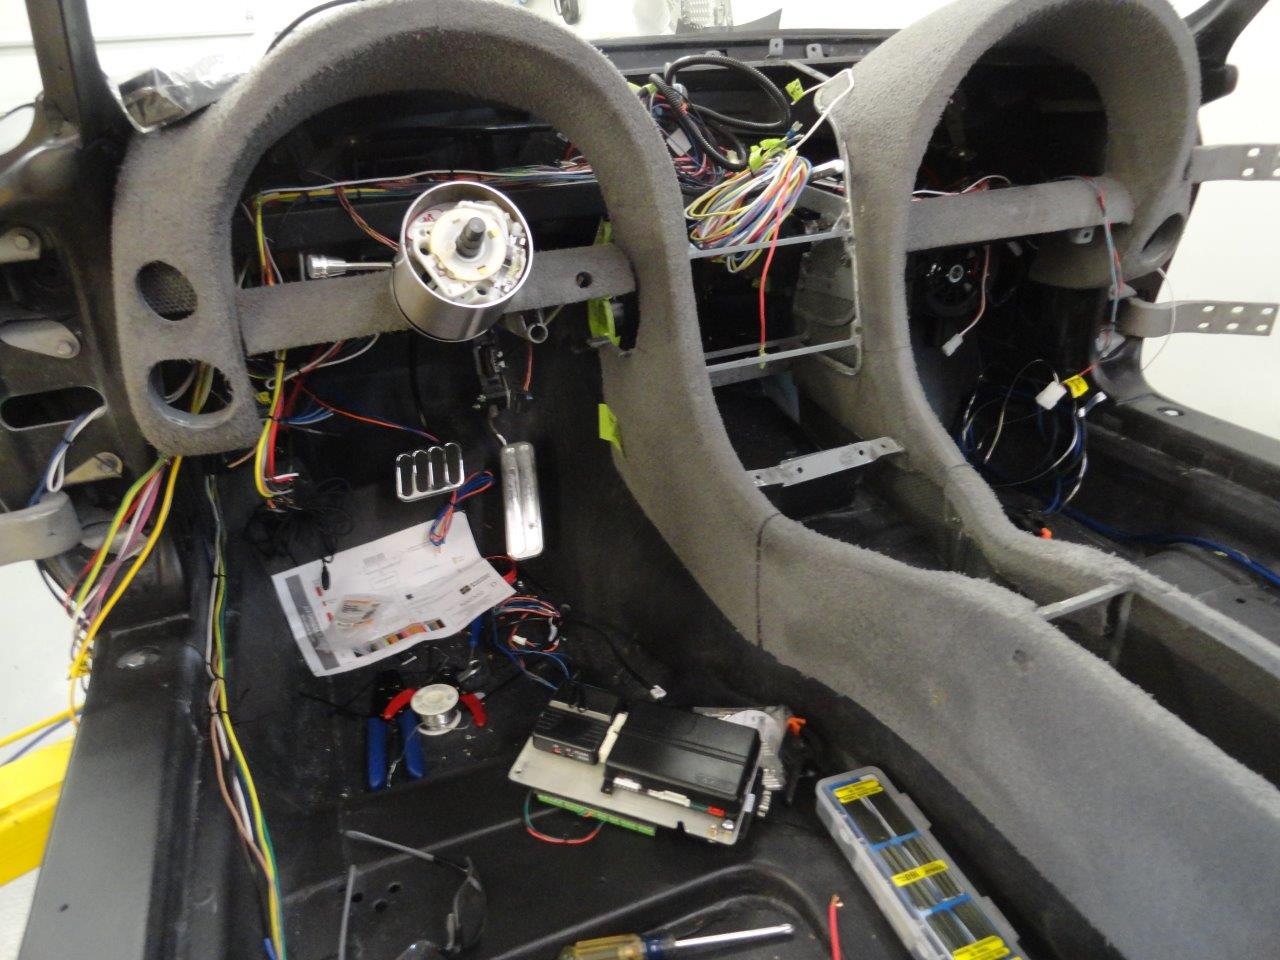
I can see the light at the end of the tunnel! Probably a train...
Here's some progress pictures. Yes, I'm still wiring along with other stuff. Uggh!
I cleaned and smoothed up the core support and got stuff off to the powder coater. No explanation required on most of these shots.
recognize any 'stock parts'?
Wasn't happy with Ididt website. So the 'wiper switch' that you can buy and replace the tilt lever....well, it wasn't ANYTHING like I had hoped. So I needed to design and fab in a regular wiper switch. Whittled the tear drop **** out of a chunk of 6061.
I can see the light at the end of the tunnel! Probably a train...
The following users liked this post:
RJ1 (06-25-2017)
06-25-2017, 07:22 AM
#146

Really nice like the hose set up on air flow good thinking well planed out .Nice Job
Last edited by rtruman; 06-25-2017 at 07:22 AM.
09-15-2017, 09:05 AM
#148
Very nice
01-03-2018, 02:57 PM
#149
Melting Slicks

Member Since: Dec 2017
Location: Michigan
Posts: 2,582
Received 439 Likes
on
311 Posts
2023 Restomod of the Year finalist
I’ve posted very little in the last 9 months or so. The bodywork took a long time at my rate, but I’m pleased with how it looks sealed in epoxy. I think everyone has seen the progressions of bodywork, so I wasn’t excited to share any of it. My shop is a mess and I’ve got another bodyman weekend coming up helping my cousin Nathan repair rear quarters on my uncle Carl’s ’57 vette. July will have my shop free of the body dust and then I’ll finally be able to detail out my ’67 SS Chevy II so I can get it sold. Sad, but sacrificial lambs are required when you're not rolling in money.
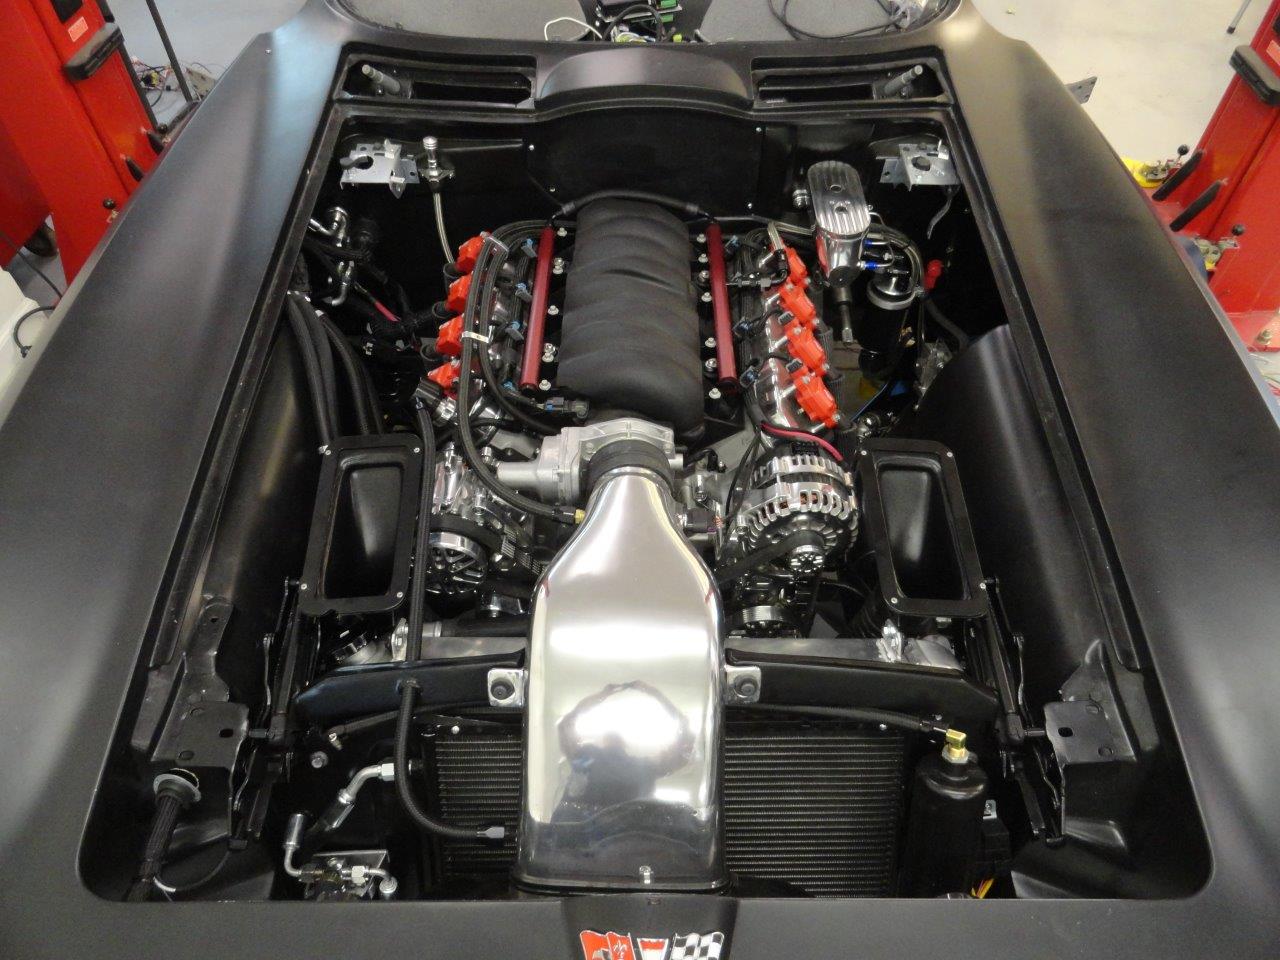
Anyway, here’s the prep’d body sitting there with a brand spanking new 525hp LS3 with the Phoenix Trans 4L60E. I have the Compushift / Twist paddle shifter stuff to boot. FYI- since I think I’m the only nut putting an auto in a restomod, you may be interested in knowing it fit without mods to the tunnel. And if anyone wants to talk smack with my choice, just pull up to me at a light and we’ll see how things go for you.
A ton of stuff to purchase and fit now. Front drive system, radiator, VA A/C, ECM and much, much, much more. I also am talking with upholsters about stitching up all of my custom interior and hope somehow to have that done by the end of ’16.
Attachment 47992330
Attachment 47992331
Attachment 47992332
Attachment 47992333
Attachment 47992334
Looks great! One quick question...where did you place your compmushift controller for your 4L60E 4-speed automatic transmission? Please provide picture of controller location if possible.
01-03-2018, 03:00 PM
#150
Instructor
Thread Starter
01-03-2018, 03:13 PM
#151
Melting Slicks
Member Since: Dec 2017
Location: Michigan
Posts: 2,582
Received 439 Likes
on
311 Posts
2023 Restomod of the Year finalist
Is that on the interior of the car?? I was reading to install controller under the dash or under the seat to keep away from the heat and the unit is not water proof, so do not install in engine bay. I could not tell by looking at your picture. You are highly talented and did a fantastic job.
01-03-2018, 03:16 PM
#152
Instructor
Thread Starter
Is that on the interior of the car?? I was reading to install controller under the dash or under the seat to keep away from the heat and the unit is not water proof, so do not install in engine bay. I could not tell by looking at your picture. You are highly talented and did a fantastic job.
01-03-2018, 03:26 PM
#153
Melting Slicks
Member Since: Dec 2017
Location: Michigan
Posts: 2,582
Received 439 Likes
on
311 Posts
2023 Restomod of the Year finalist
I have a C2 coupe, could the 4L60E controller go in the small floor trunk behind the seats or would it get too hot in there? It also says under the seat, is there room, too hot? Where in the interior on a C2 Coupe would you recommend?
01-11-2018, 08:20 PM
#154
Melting Slicks
Member Since: Dec 2017
Location: Michigan
Posts: 2,582
Received 439 Likes
on
311 Posts
2023 Restomod of the Year finalist
Thought I’d start a thread on this build since I now have some substantial progress. On May 2nd, my wife and I made a run from our home at the Lake of the Ozarks MO up to SRIII Motorsports to pick up the stage two chassis. Mike was as good to work with as all of you had sworn by. I’m sure that I’ll be doing more bragging on him and his crew as the build progresses. We then swung down to Lee Bumb to grab the front end, hood and misc pieces that I needed. You may be interested in reading more details about this project and how it’s been began almost 24 years ago, so check out my ‘profile album’ by the same title.
Since I made some major improvements to my shop in 2013 and starting tearing down the ’63 almost a year ago, I’ve made fairly steady progress. Having sat in a field in Minnesota for a decade after being totaled, this old vette was a mess. Quite obvious that she led a life of abuse and neglect even before the wreck. I’ve stripped it down and had it soda-blasted and jumped on repairing and re-finishing the parts that were worth a darn. I have a great start on the interior design as well as some other interesting twists. Nothing too radical on this girl. I am building this car to tour around in and enjoying scenic drives with my wife to hammering through the pylons at some car events. I’ll be keeping most of Shinoda, Mitchell & Dontov’s body design, other than slightly wider GTS rear quarters and tucking mostly-stock bumpers. Like my ’80 custom project from TWO decades ago (man, am I getting old), this one will be done by mostly my hands. Hopefully less than the 1980’s six thousand man hours… no joke. That’s why I’m going through all of this mess, I keep reminding myself since you all know not ever aspect is pure joy. That said, I am absolutely loving life right now and having a blast on this project. No hurry here and no agenda or plans to start up a rod shop. Just a simple tradesman who’s enjoying the fruits of his labor while being grateful for another challenging project. Can wait to get her done and then begin ‘updating’ the ’80 for its Round Two re-birth.
So now that I’ve over-spent 2014’s budget by ten-fold, I’ll get to work on getting the chassis under there so that I can accurately bond the nose on. Once that’s done, the dolly will go back under while the dirty work happens. Not trying to stick to a timeline, but it makes sense to get some interior progress done after the rough body work is done, in order to allow time for the upholsterers to do their stitching magic. On that note, I’m enjoying picking up some metal-shaping tools and equipment in order to: A) Master another craft…and B) fabricate my interior components. I’ll post more as that ‘shop stuff’ comes along. Maybe 2015 will be when I start picking up the LS3/4L60E drivetrain stuff, we will see.
Since I haven’t obsessed on these types of blogs before, maybe some ideas on what you would like to see me show on this thread. I do appreciate the ones that have gone before me and posted a ton of helpful stuff, but I’m not sure I can equal their time commitment for the cause
Attachment 48206401
Attachment 48206402
Attachment 48206403
Attachment 48206404
Attachment 48206405
The following users liked this post:
sonksen_design (02-12-2018)
The following users liked this post:
sonksen_design (02-12-2018)


The following users liked this post:
sonksen_design (02-12-2018)
02-11-2018, 04:29 PM
#157
Pro


I've seen many impressive builds but this is light years beyond impressive.
The following users liked this post:
sonksen_design (02-12-2018)
05-27-2018, 10:01 AM
#158
Instructor
Thread Starter
This weekend marks 5 years in progress. Mostly steady!
Back in the saddle after ‘taking a break’…. For like 8-9 months. Sometime a guy just needs to walk away. Let the finances heal up and find the passion again. I certainly didn’t sit around and watch TV. I still have more electrical work to do, but I switched over to fabricating to get the ball rolling again.
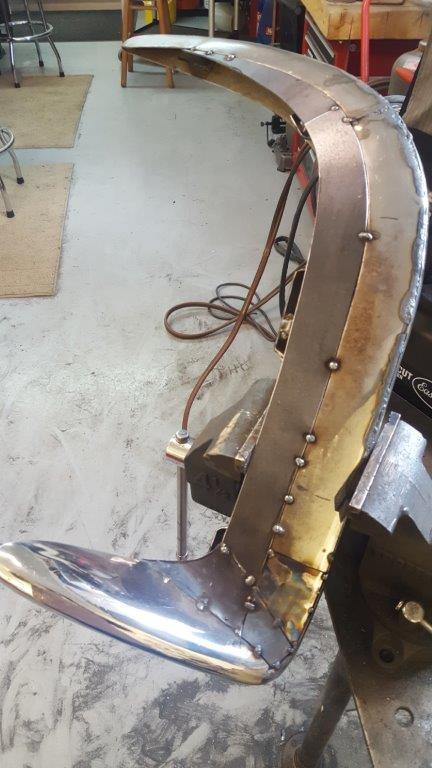
So I had picked up solid old bumpers, knowing that I planned on tucking and trimming them. I had been saving posts on how guys did the mods. As usual, I never know when to stop and took things just a bit further. At least as far as the many restomod C2s I’ve seen for years. Doesn’t matter, I’ve learned not to be in a race to compare. Just do what I want and enjoy the craft.

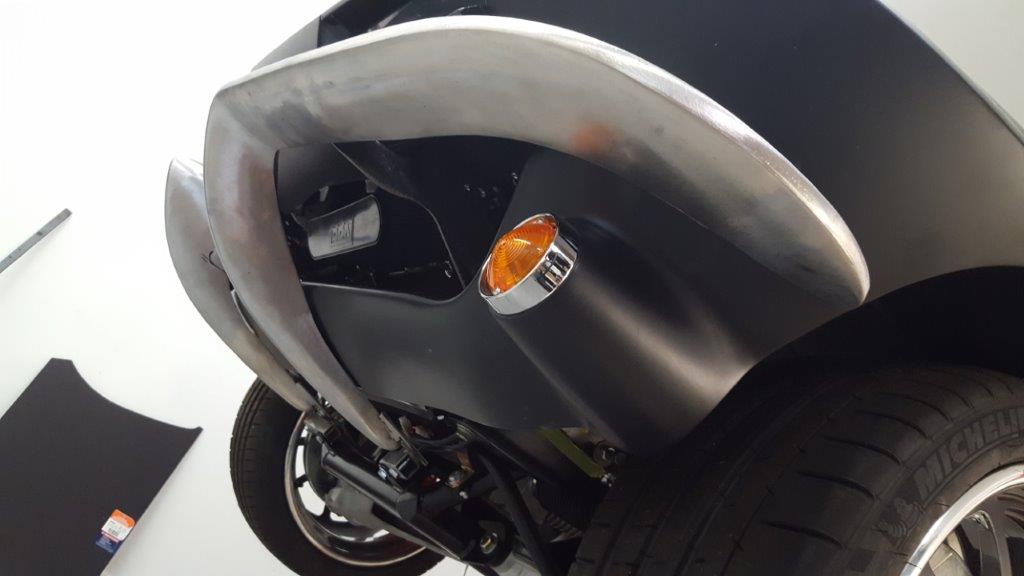
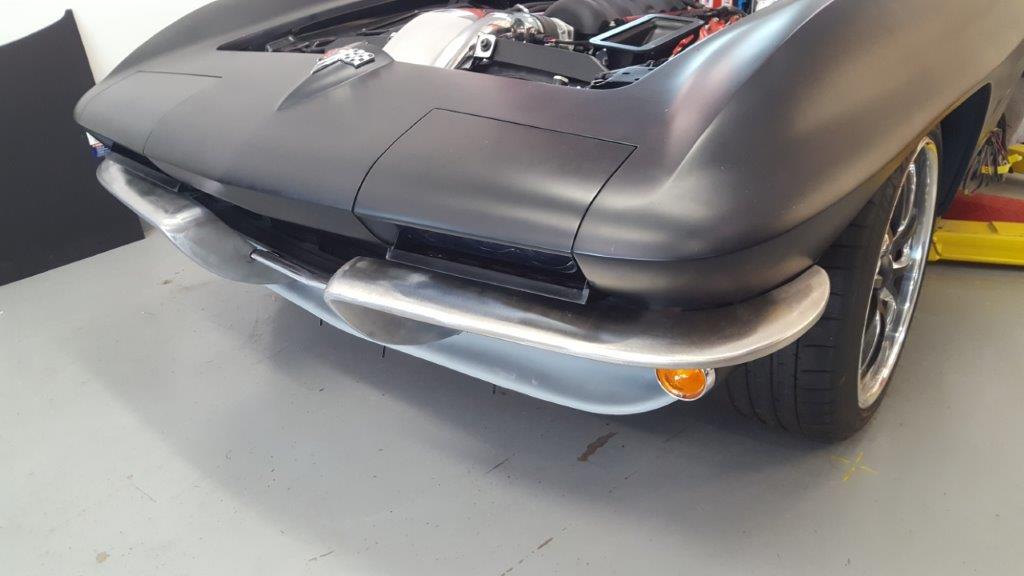
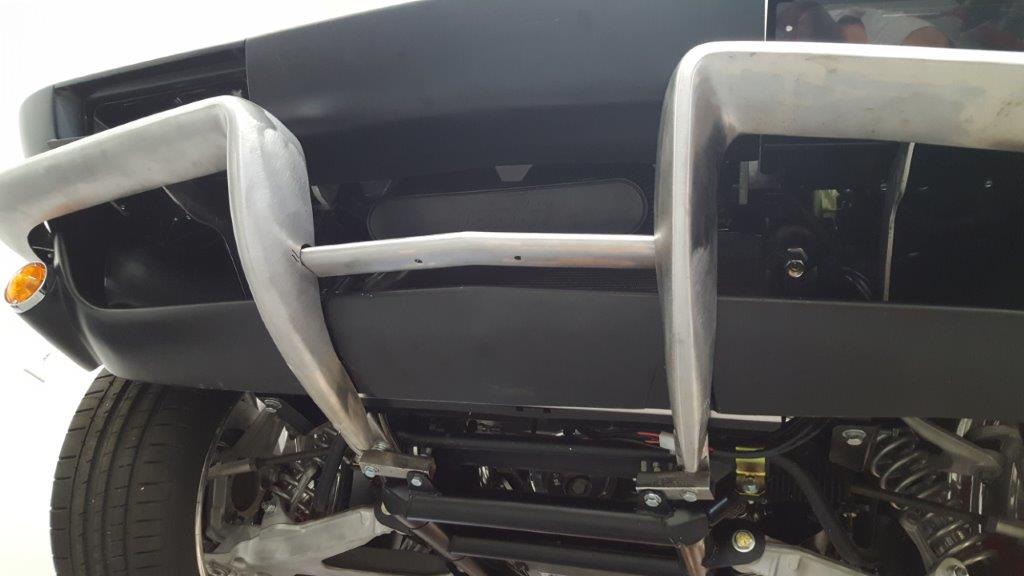
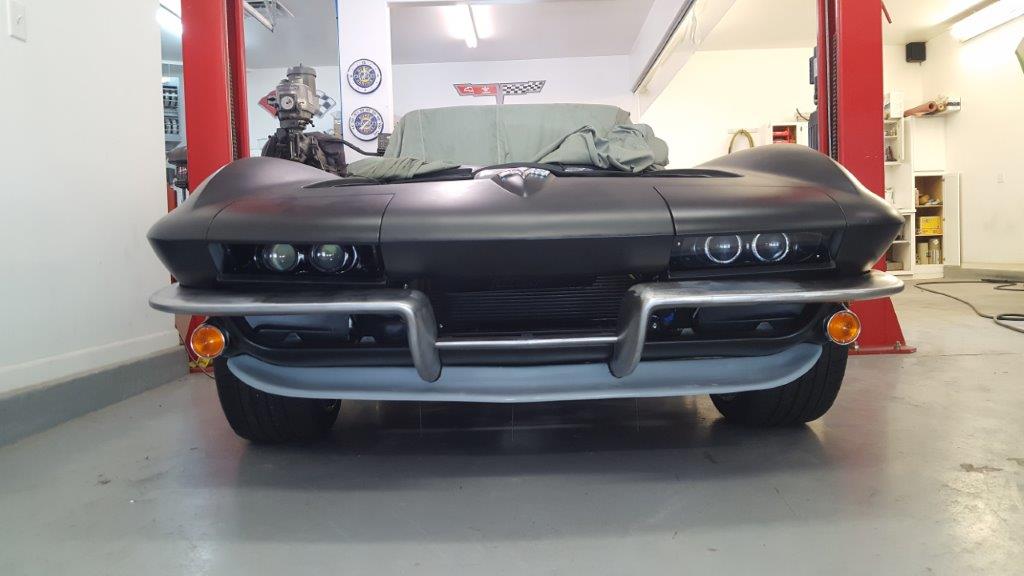
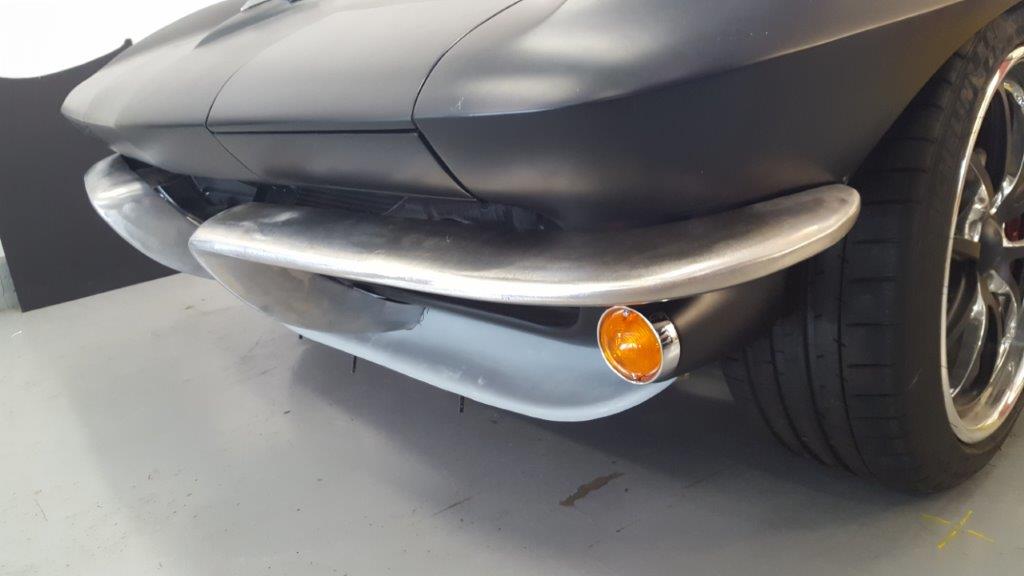
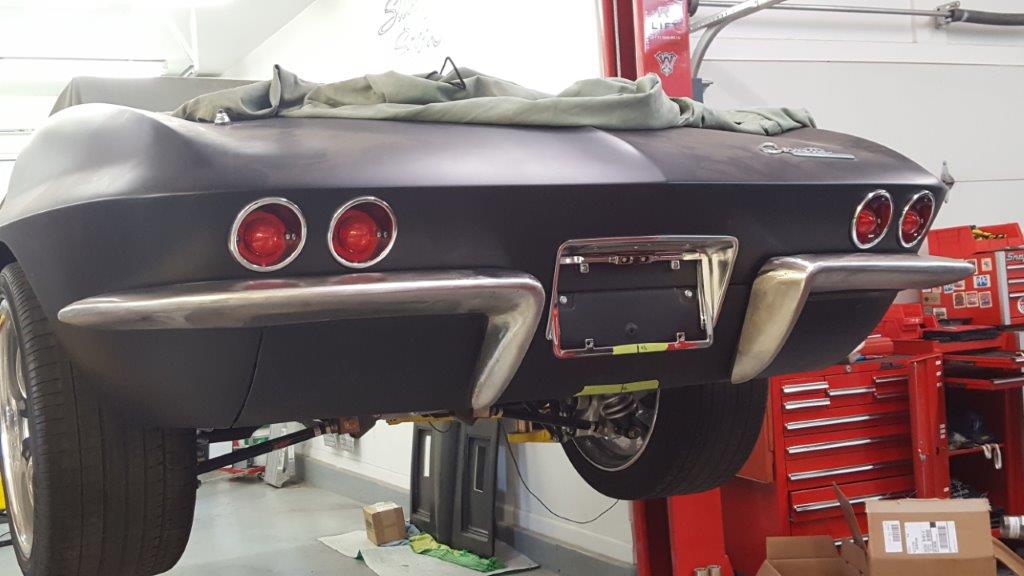
The front bumper lower mounting has always stood out as an eyesore for me forever. So with my ‘extra’ rear bumpers, I spliced in sections to smoothly bring the vertical ‘fangs’ down. With my custom headlights, I wanted to tuck in the bumper nice and tight to the lower doors. I also thought the license plate bar needed to have the V in it to match the rest of the body lines. Still waiting on Ecklers to send me my dang grill! #$#$% back orders. I’ve decided to go with an Eckler’s spoiler and it’ll need some massaging. The brackets mounting to the lower SRIII frame shown are temporary. I’ll fab up a solid steel piece with slots and powder coat it.
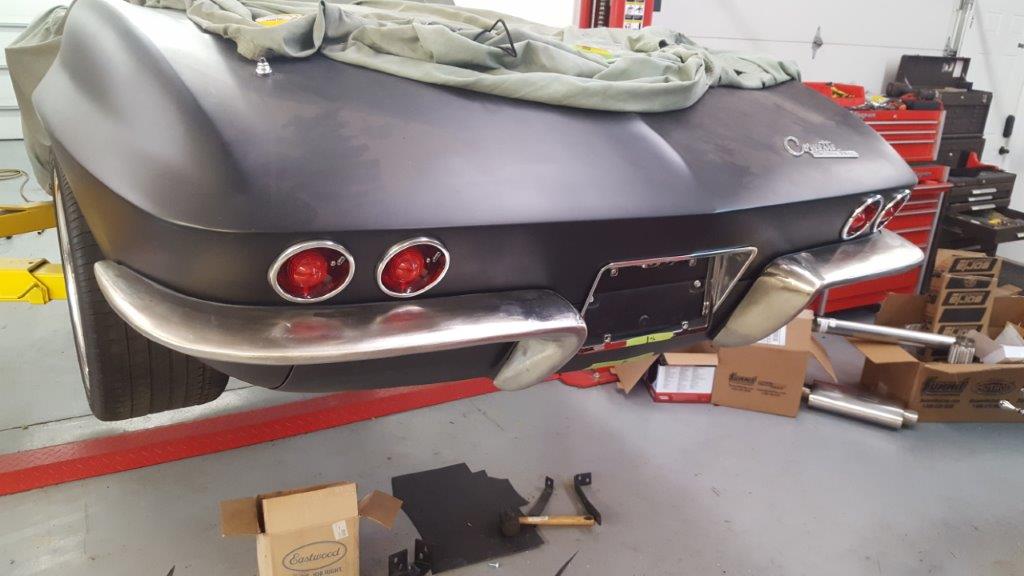
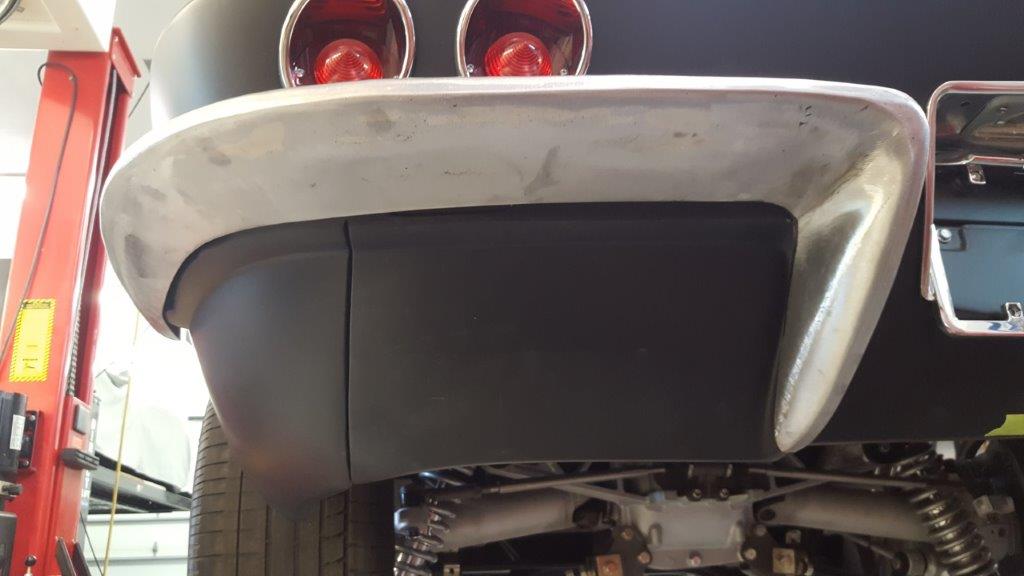
The rear bumpers ‘underneath side’ always looked unfinished to me. Sure, you have to be on the ground to see it, but even a straight on rear view reveals the ugly brackets and the exposed fiberglass body line. So I extended out the lip a lot and also dropped the vertical fangs down slightly lower.
I still have more welding, grinding and finishing to do, but they're mostly done.
Back in the saddle after ‘taking a break’…. For like 8-9 months. Sometime a guy just needs to walk away. Let the finances heal up and find the passion again. I certainly didn’t sit around and watch TV. I still have more electrical work to do, but I switched over to fabricating to get the ball rolling again.
So I had picked up solid old bumpers, knowing that I planned on tucking and trimming them. I had been saving posts on how guys did the mods. As usual, I never know when to stop and took things just a bit further. At least as far as the many restomod C2s I’ve seen for years. Doesn’t matter, I’ve learned not to be in a race to compare. Just do what I want and enjoy the craft.
The front bumper lower mounting has always stood out as an eyesore for me forever. So with my ‘extra’ rear bumpers, I spliced in sections to smoothly bring the vertical ‘fangs’ down. With my custom headlights, I wanted to tuck in the bumper nice and tight to the lower doors. I also thought the license plate bar needed to have the V in it to match the rest of the body lines. Still waiting on Ecklers to send me my dang grill! #$#$% back orders. I’ve decided to go with an Eckler’s spoiler and it’ll need some massaging. The brackets mounting to the lower SRIII frame shown are temporary. I’ll fab up a solid steel piece with slots and powder coat it.
The rear bumpers ‘underneath side’ always looked unfinished to me. Sure, you have to be on the ground to see it, but even a straight on rear view reveals the ugly brackets and the exposed fiberglass body line. So I extended out the lip a lot and also dropped the vertical fangs down slightly lower.
I still have more welding, grinding and finishing to do, but they're mostly done.
Last edited by sonksen_design; 05-27-2018 at 10:09 AM. Reason: spelling
05-27-2018, 10:07 AM
#159
Melting Slicks
Nice work!
05-27-2018, 10:33 AM
#160
Racer

Awesome work! Shaving my bumpers was easily the hardest thing I had to do!