When you click on links to various merchants on this site and make a purchase, this can result in this site earning a commission. Affiliate programs and affiliations include, but are not limited to, the eBay Partner Network.
After taking the cluster out to fix and replace the speedometer, we discovered a wiring mess around the ignition switch; mostly, it seems due to someone putting a kill switch under the dash, but having no clue on how to do wiring. Lots of electrical tape, wires with cuts in them ready to start a fire, etc. Cleaning up now.
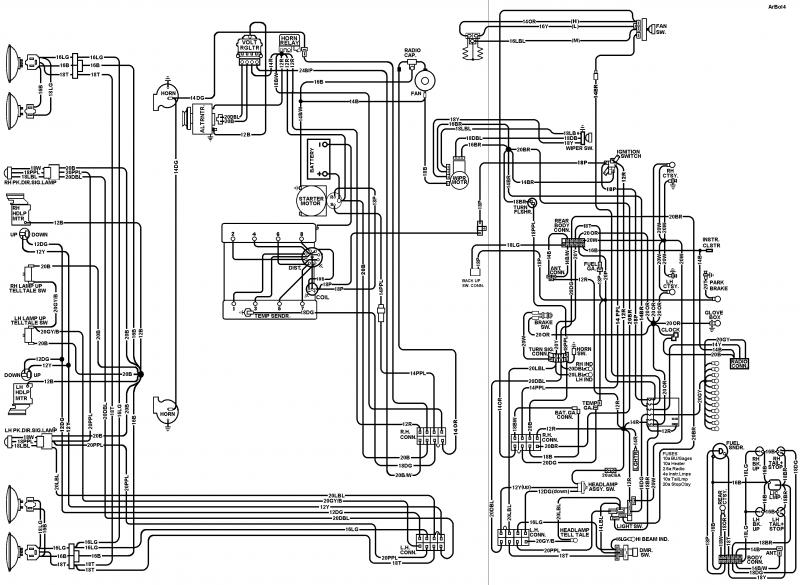
In the back of the white plastic wiring harness connector which connects to the ignition switch, there should be 5 wires, looks like there are only 4 connected to mine. Red power is ok. Purple to starter is ok. One black/pink to the coil is ok (but the ballast resister on the other side of the firewall also had various strange connections, so we need to follow the black/pink to and from the coil and wire that back up properly). The brown acc wire was connected to a blue wire -- barely. The blue is out. It was already falling out. I need to find the brown wire hanging somewhere towards the front to connect to, sigh...
Question: A second black/pink connection is for the fuel gauge, per the wiring chart. We have no second black pink wire. Maybe that's why the fuel gauge doesn't work. But does this wire come off the first black/pink wire somewhere in the harness? Or did someone snip the connection at the white plastic connector block -- meaning I need to add a wire? But then where would this wire go? (and why does the fuel gauge get its own special ignition wire??)
My diagram shows one of the pink wires going to the left side of fuse 1 then through the fuse up to the circuit that feeds the fuel gauge, temp gauge, park brake warning lite, etc. It shows no wire going directly to the fuel gauge.
The other pink wire goes directly to one side of the ballast resistor. This is a high resolution diagram. Save it to your computer, then you can zoom in to each section and see it clearly.
Thanks for your quick assistance, I appreciate it, as always. I found that the purple wire was the broken wire, but I found the other end, so no problem. The brown and red are fine. The one Black/Pink is going across the firewall to the resistor, this is fine. But I found a very badly cut off Black/Pink wire sitting up near the cluster harness with frayed and open wires. It is a miracle that this car did not have a fire. What were they thinking??? I believe that this is the wire which will go into the fuse box, we'll test it once we rewire it and connect it.
This really really helped me, thanks again. My experienced car-guy friend and I spent yesterday morning pulling out extra wire (put in for a kill switch), neatly putting the frayed and horrible wires back together, and testing. First the wipers and new blower motor worked, yay. Then we started the car up, it started and ran well, thanks to the wiring help above: My buddy got a little confused about where the wire to the ballast resistor went (it had been wired in with some green wire which fell apart once we opened up the cluster), but we wired it in correctly.
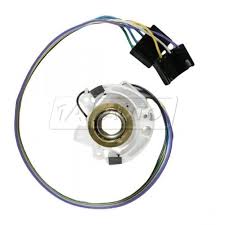
I have one more question (and one more picture): When we started the car, the rebuilt clock and some other stuff in the dash worked, but the lights in the dash (all of which I replaced when I cleaned up the mess) did not work. Here is a picture of two wiring 'clips' which go into the bottom of the cluster, do they have light connections? (I won't work on this until late next week, I'd like to know where to start).
That's the plug that goes to the turn signal switch. For your dash lights make sure your tail lights work. If the fuse for the tail lamps blows, you'll also lose dash lights. In order to get dash lights, both the two bottom fuses must be good.
That's the plug that goes to the turn signal switch. For your dash lights make sure your tail lights work. If the fuse for the tail lamps blows, you'll also lose dash lights. In order to get dash lights, both the two bottom fuses must be good.
Excellent, thanks. The tail lights did work. Note that there are two of these plugs in the picture, sorry it wasn't clearer. But I'll go out and check the fuses....
Excellent, thanks. The tail lights did work. Note that there are two of these plugs in the picture, sorry it wasn't clearer. But I'll go out and check the fuses....
Aha, I understand now. I wasn't able to check the two fuses, but I'll do it early this week. (There is one light in the middle of the instrument cluster blinking when we turned the lights on, I wonder if that has something to do with it??? Especially since the turn signal plugs are not pushed in yet)
Aha, I understand now. I wasn't able to check the two fuses, but I'll do it early this week. (There is one light in the middle of the instrument cluster blinking when we turned the lights on, I wonder if that has something to do with it??? Especially since the turn signal plugs are not pushed in yet)
Mark
The only lights in your cluster that blink are the red warning lights for the parking brake ("Brake") and the headlight buckets ("Lights"), and neither of those are on the same circuit as the illumination bulbs.
The only lights in your cluster that blink are the red warning lights for the parking brake ("Brake") and the headlight buckets ("Lights"), and neither of those are on the same circuit as the illumination bulbs.
We did turn on the lights without opening the buckets, that is probably why the blinking light was on. I am free a bit tomorrow, I'll check the fuses to see if a blown fuse is causing the illumination bulbs to not light.
We did turn on the lights without opening the buckets, that is probably why the blinking light was on. I am free a bit tomorrow, I'll check the fuses to see if a blown fuse is causing the illumination bulbs to not light.
thanks everyone,
Mark
The blinking light was the warning that the buckets were down. Good to know.
The 'panel fuse' did not look right, I got some fuses (4a and 10a), replaced that fuse, now when I turn on the lights, most of the dash lights work. The ones that do not are getting too little current, they glow a little but do not fully light; and interestingly, the light switch only works in the leftmost (and least bright) position. When I turn it, it is not smooth, it is kind of like metal on metal...so I guess the light switch needs replacing. Getting there, slowly, but getting there.
The dash lights which did not work were not plugged in -- so not grounded -- it looks like they all work right once plugged in. However, I did take out the headlight switch, it was in terrible shape, I bought a new one, should be here tomorrow, it will allow me to adjust the light intensity. I also finally tested the fuel gauge/fuel sender, the sender is bad, the gauge is good, I will be able to close up the cluster this week.
Just a guess here since you are new. The ignition switch on a C2 is not like new cars. From left to right the key positions are: ACC LOCK OFF ON START. If you remove the key in the far left position as on modern cars, you will leave it with the accessories powered. BTW, the key can be removed in many positions.
Just a guess here since you are new. The ignition switch on a C2 is not like new cars. From left to right the key positions are: ACC LOCK OFF ON START. If you remove the key in the far left position as on modern cars, you will leave it with the accessories powered. BTW, the key can be removed in many positions.
Thx...I guess I was wondering if anyone knew what circuits are active on "acc". The car is so basic, I'm guessing outside radio there might not be much on when in "acc" position
Just got the car so figuring out the basics
Thx...I guess I was wondering if anyone knew what circuits are active on "acc". The car is so basic, I'm guessing outside radio there might not be much on when in "acc" position
Just got the car so figuring out the basics
Well, for starters, the radio and the gauges.
If left in the ACC position, the battery will discharge in a matter of days.
The "trick" you can train yourself to do is to rotate the ignition all the way CCW and then rotate one position CW before removing the key. That will leave the switch in the LOCK position, where everything switchable is turned off.