When you click on links to various merchants on this site and make a purchase, this can result in this site earning a commission. Affiliate programs and affiliations include, but are not limited to, the eBay Partner Network.
Well, finally finished the interior, put on a few new weatherstrips (doors later...probably have to take them off to do it right...and a TON of other stuff, so time to put on the HARDTOP.
So, how do you do it? I know how WE did it and I will not do THAT again. Someone show me how and then I will tell how we finally got it done. Only change from stock was I used wingnuts instead of bolts on the rear.
Well, finally finished the interior, put on a few new weatherstrips (doors later...probably have to take them off to do it right...and a TON of other stuff, so time to put on the HARDTOP.
So, how do you do it? I know how WE did it and I will not do THAT again. Someone show me how and then I will tell how we finally got it done. Only change from stock was I used wingnuts instead of bolts on the rear.
Cheers,
Richard
There's probably no right way to install it as long as you're careful not to scratch the paint or stainless. The owner's manual just says to be sure all attaching parts are secure.
When I install mine alone (using my hoist), I like to drop the front header pins into place with the rear up about 4" so I can install the rear bow studs. Then lower it into place and attach the rest of the hardware. I leave everything loose assembled, then snap the header latches down, tighten the side mounting tab bolts, then the rear bow stud nuts (or wing nuts).
Last edited by Mike67nv; Sep 29, 2019 at 06:17 PM.
There's probably no right way to install it as long as you're careful not to scratch the paint or stainless. The owner's manual just says to be sure all attaching parts are secure.
When I install mine alone (using my hoist), I like to drop the front header pins into place with the rear up about 4" so I can install the rear bow studs. Then lower it into place and attach the rest of the hardware. I leave everything loose assembled, then snap the header latches down, tighten the mounting tab bolts, then the rear bow stud nuts (or wing nuts).
Super lift design...I have mine 1/2 way set-up and may copy some of yours and ask for some tips soon. I did kind of the same thing, but still have a huge issue that I will wait for a few more posts before I bring it forward.
Pretty straight forward. I have someone help me put my top in place, then put the side bolts in and snug, clamp to the windshield frame, tighten the nuts going through the rear deck and tighten the side bolts.
I have an electric hoist similar to Mike67nv’s set up. I think the only difference is that I don't use the rear deck bolts because I also have a soft top underneath and you cannot really get at them. So I use only the side bolts and front header latches.
I put a 4 inch piece of foam on the rear deck lid for protection and back the car under the lift. While still sitting in the drivers seat I use the electric hoist control to lower the top onto the front header bar and I put the pins in the holes. This is really easy to do with one hand while using the electric controller with the other hand. Then I continue to lower the top until the rear of the hardtop sits on the foam on the deck lid. I then get out of the car and remove the straps from the 2 eyelets under the rear window (I use the factory rear deck bolts for the eyelets but I have put wingnuts on them so that they can be easily tightened and loosened and now I use the bolts to simply to attach the rear straps of the hoist to the top). Then I remove the foam and by hand lower the rear of the hardtop onto the deck lid (making sure that the side mounting brackets dont scratch the paint on the deck lid). Once the hardtop is in place I put the two bolts into the side mounting brackets in the deck lid and and tighten them. Then I clamp the latches on the front header and we are done.
All in it takes me about 4 or 5 minutes to install or detach my hardtop by myself. It is very easy with the electric hoist and so I use the hardtop frequently, especially if I am going to drive the car some distance on the freeway and don't want to get beaten up with sun and wind with the top down. Also, frankly, I like the look of the hardtop on the roadster and so I drive it that way often just because I like the look. I am not really a fan of the convertible top and so it just remains folded for emergencies when I am driving around with the top off and I want to secure the car or it starts to rain (Nah! That never happens, I am just making that up, I live in Southern California)!
I have an electric hoist similar to Mike67nv’s set up. I think the only difference is that I don't use the rear deck bolts because I also have a soft top underneath and you cannot really get at them. So I use only the side bolts and front header latches.
I put a 4 inch piece of foam on the rear deck lid for protection and back the car under the lift. While still sitting in the drivers seat I use the electric hoist control to lower the top onto the front header bar and I put the pins in the holes. This is really easy to do with one hand while using the electric controller with the other hand. Then I continue to lower the top until the rear of the hardtop sits on the foam on the deck lid. I then get out of the car and remove the straps from the 2 eyelets under the rear window (I use the factory rear deck bolts for the eyelets but I have put wingnuts on them so that they can be easily tightened and loosened and now I use the bolts to simply to attach the rear straps of the hoist to the top). Then I remove the foam and by hand lower the rear of the hardtop onto the deck lid (making sure that the side mounting brackets dont scratch the paint on the deck lid). Once the hardtop is in place I put the two bolts into the side mounting brackets in the deck lid and and tighten them. Then I clamp the latches on the front header and we are done.
All in it takes me about 4 or 5 minutes to install or detach my hardtop by myself. It is very easy with the electric hoist and so I use the hardtop frequently, especially if I am going to drive the car some distance on the freeway and don't want to get beaten up with sun and wind with the top down. Also, frankly, I like the look of the hardtop on the roadster and so I drive it that way often just because I like the look. I am not really a fan of the convertible top and so it just remains folded for emergencies when I am driving around with the top off and I want to secure the car or it starts to rain (Nah! That never happens, I am just making that up, I live in Southern California)!
YOU GO IT!
How in the WORLD do you put in the rear bolts...in my case, wing nuts...if you have a convertible top? Some suggestions from other owners, please.
How did we do mine? Well, we lifted up the rear deck cover just far enough for me to get the wingnuts on and started, lowered it a bit, I tightened the wingnuts, and then we finished the job.
I have pretty small hands by normal standards...can't reach 7 frets on the bass...but BOY, you just cannot get to those nuts/wingnuts with the convertible top there.
SO, how do the rest of you do this? Do you take off the convertible top when you put on the hardtop and then re-install it when you take the hardtop off?
Do you get your female friends with usually smaller hands and forearms to help?
I cannot believe the factory thought a normal person could reach the rear bolts with the convertible top installed, but maybe they did.
I set the top in place with the rear bolts through the deck lid, install/secure the side (shoulder) bolts and then prop the top with a broom (wrapped in a t shirt to avoid narfing up the headliner. That allows me to get to the rear bolts with the soft top in place.
Once the rear bolts are snug, I then lower the top and lock down the front and go over everything again.
Another option when you have a soft top is to mount the hardtop with the side bolts only. (of course have the rear deck bolts in place) Then lift the rear deck along with the hardtop. In the elevated position you can more easily reach putting the nuts on the rear deck bolts. Lower the top and check tightness on all bolts/nuts. Remove top in same manner, unlatch header and lift hardtop with rear deck, remove deck nuts, lower top, remove side bolts.
Another option when you have a soft top is to mount the hardtop with the side bolts only. (of course have the rear deck bolts in place) Then lift the rear deck along with the hardtop. In the elevated position you can more easily reach putting the nuts on the rear deck bolts. Lower the top and check tightness on all bolts/nuts. Remove top in same manner, unlatch header and lift hardtop with rear deck, remove deck nuts, lower top, remove side bolts.
Thank-you.
This is exactly what we did, but REALLY??? This is how Chevy wanted this done?
This is exactly what we did, but REALLY??? This is how Chevy wanted this done?
Kind of hard to believe, but maybe so!
Cheers,
Richard
I can't answer if that's what Chevy wanted but it's the best way to reach the rear nuts when you have a soft top in place With the side bolts tight the hardtop can't 'go anywhere' when you lift the top along with the deck.
I set the top in place with the rear bolts through the deck lid, install/secure the side (shoulder) bolts and then prop the top with a broom (wrapped in a t shirt to avoid narfing up the headliner. That allows me to get to the rear bolts with the soft top in place.
Once the rear bolts are snug, I then lower the top and lock down the front and go over everything again.
Have fun!
I do the same thing as Matt, but made a "kickstand" out of 3/4" plywood to hold it up.



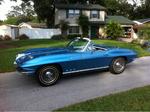


 Hardtop Install













 With the side bolts tight the hardtop can't 'go anywhere' when you lift the top along with the deck.


