When you click on links to various merchants on this site and make a purchase, this can result in this site earning a commission. Affiliate programs and affiliations include, but are not limited to, the eBay Partner Network.
Hey everyone, I was in this chats last fall when I bought my C2 and finally have it on the road, riding great however the line from my Rad to the overflow tank ended up running against the alternator and put a small hole in the line… I’ve had a very small leak and would like to top it up.
Again, I’m completely new to this and learning so please have patience with me lol.
to fill this, should I be filling through the overflow tank? When cold I’m assuming and I do not see any lines to fill too… I want to make sure I’m doing this right and it doesn’t need much, but I know it’s lost some.
If someone has a few minutes and couple help me out, I would truly appreciate it.
the side of the tank say fill half when cold or something like that, and yes you fill it though the cap. having the engine running will prevent getting air bubbles
You will be able to see the "Harrison" manufacturers stamping from the inside while adding coolant to the expansion (not an 'overflow') tank. This is pretty good way to eyeball "1/2 full"; that is, stop adding ~1/4 to 1/2" below the "Harrison" characters.
Maybe you should show us a photo of the hose from radiator to expansion tank. It should be no where near the alternator, and appears that you may have it connected to the tank overflow outlet. That would be a problem. And, that cap does not look like a proper 13# or 15# pressure cap. You fill the tank half full (or thereabouts) when cold, viewing through the fill hole.
Maybe you should show us a photo of the hose from radiator to expansion tank. It should be no where near the alternator, and appears that you may have it connected to the tank overflow outlet. That would be a problem. And, that cap does not look like a proper 13# or 15# pressure cap. You fill the tank half full (or thereabouts) when cold, viewing through the fill hole.
it was connected properly but the “electrician” who owned this prior thought it was a good idea to do it himself… I’ve taken it to a very reputable guy here in town who only works on this type of stuff and he has this running great.. the problem was it was left loose and just needed to be tie strapped down… all good now for sure….
when I look in the tank it appears to be at about that level now just below the name as mentioned…. But I’ve def lost some when there was that leak, not a ton but some… so I just wanted ti be safe than sorry and replace what I lost…
Yeah, halfway in the tank is fine. I'd check it cold a few times after you've run the car to the point it gets good and hot.
If everything is in good shape, you should be fine. No need to be exact. I don't find that my car is particularly sensitive in this area. I check it once every couple of months. I was out for a pretty long drive on Saturday in 100 degree heat. The car did a lot better than I did....
As Don mentioned, your return line from radiator to surge tank is connected at the wrong spot. Take a close look at Jeff's picture in post #6 to see correct attachment points. The location where you have your hose currently connected is for the overflow hose. See pic below for correct routing of the return line from radiator to surge tank.
These pics are great! Here are some pictures of mine and I’m sure there are a bunch of stuff that needs to be corrected but it’s running great so I’m assuming more cosmetic stuff… any suggestions are truly appreciated and I ask to please remember that I’m totally new to cars and repair so keep it simple for me lol… have a great day!
Originally Posted by Nowhere Man
Here is an example of a 65 with no AC and the Alt on the pass side
Not going to win any awards for correctness or elegance, but if it runs well without overheating, and you're happy, that's all that counts. I like the Molson Lager catch can for the catch can. Happy motoring.
Not going to win any awards for correctness or elegance, but if it runs well without overheating, and you're happy, that's all that counts. I like the Molson Lager catch can for the catch can. Happy motoring.
its a Canadian thing I guess lol…. Does it look like it would be a major job to bring it back to somewhat correct? Any major things you can start me off with?
Only since you asked, things that I would do include:
Install proper DeWitt Alum radiator, with no cap on it, and overflow outlet pointing to right fender, not left.
Install proper fan clutch and 5 blade fan.
Ditch the Diet Molson can, and run overflow to ground between inner fender and frame rail.
Replace the wrapped balance hose with plain rubber and run it outside the hood support, underneath the fender edge.
Route wire harnesses correctly under front edge of cowl, and underneath right inner fender edge. Install wire holders in the correct holes, point in the proper direction.
Replace the cheap plastic fuel filter with proper AC GF90 filter with correct fittings.
Pull out the rubber covers from the inner fender and lay them over, covering the upper A arms.
Move the Alternator upper bracket behind the mount lug (bend slightly if necessary to keep alignment)
Replace the blue spark plug wires with black, and install the vertical wire shielding, and eventually the spark plug heat and RF shielding
Run the heater hoses as per AIM, and replace all the worm clamps with correct Tower and Corbin clamps.
Replace the generic master cylinder with rebuilt sleeved OEM MC.
Since you say the car runs well, everything I list is discretionary.
Only since you asked, things that I would do include:
Install proper DeWitt Alum radiator, with no cap on it, and overflow outlet pointing to right fender, not left.
Install proper fan clutch and 5 blade fan.
Ditch the Diet Molson can, and run overflow to ground between inner fender and frame rail.
Replace the wrapped balance hose with plain rubber and run it outside the hood support, underneath the fender edge.
Route wire harnesses correctly under front edge of cowl, and underneath right inner fender edge. Install wire holders in the correct holes, point in the proper direction.
Replace the cheap plastic fuel filter with proper AC GF90 filter with correct fittings.
Pull out the rubber covers from the inner fender and lay them over, covering the upper A arms.
Move the Alternator upper bracket behind the mount lug (bend slightly if necessary to keep alignment)
Replace the blue spark plug wires with black, and install the vertical wire shielding, and eventually the spark plug heat and RF shielding
Run the heater hoses as per AIM, and replace all the worm clamps with correct Tower and Corbin clamps.
Replace the generic master cylinder with rebuilt sleeved OEM MC.
Since you say the car runs well, everything I list is discretionary.
this is amazing, thank you so much… any places in particular to buy this from? And I’m looking for carpet as well… I’m told Al Knoch is the best but they are out of stock and no idea if they will even be getting more in..
as well, if you have any better pictures of your car so I can see better and help me out, I would truly appreciate it….
That's the difference between answering a question with legitimate, helpful answers versus giving your unsolicited, personal opinion (which no one asked for).
Last edited by leif.anderson93; Jun 30, 2022 at 10:23 AM.



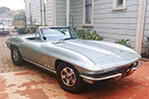



 Engine Coolant Levels


















 That's the difference between answering a question with legitimate, helpful answers versus giving your unsolicited, personal opinion (which no one asked for).